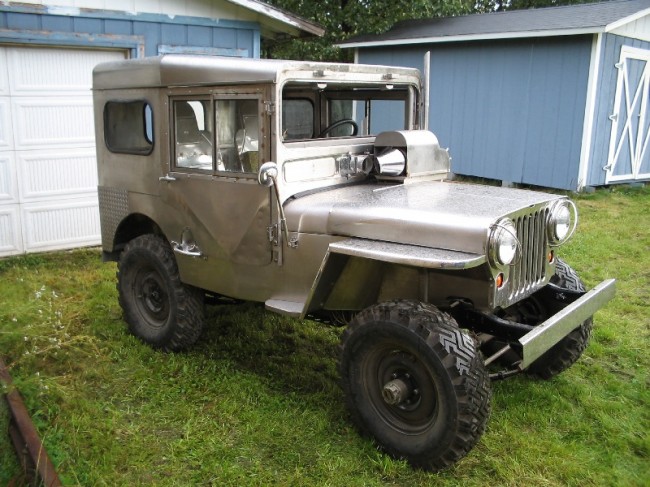
 With winter descending on Alaska, the time has come for Paul to direct his focus back on his beloved, shiny, stainless steel M-38. One exciting difference between this year and the previous 24 years is that he is almost done — But no pressure Paul! Click on the pic to see the original post and followups.
Last spring, Paul reported that after some investigation, he discovered a M-151 radiator would fit perfectly into his engine compartment. Recently, he took over an auto parts store (ok, maybe just a hose booklet in the store) to figure out a hose solution. With that problem solved (it took 2 different hoses and a tube to link them), he now must figure out a fan solution.
With that background, take it away Paul …..
The Fan and Shroud
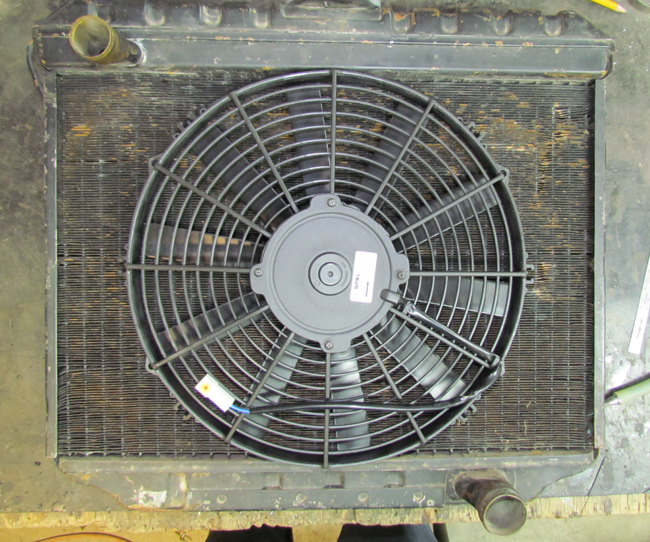
Paul writes, “After talking with the folks at Spal concerning their electric fans I ordered a 13 inch puller fan with straight blades along with a fan relay/installation kit. The crazy part about this deal is when the Spal people wouldn’t sell me a fan over the phone, I would have to hang up and order on the internet and best of all I would pay over $50 dollars more for the fan and temp sensor/wiring kit than a Spal dealer in California was charging for the exact same items. For some unknown reason The Fan Man (California dealer) sells lots of these fans at quite a discount and these are brand new fans. No factory seconds, returns, or rebuilt units.
Anyway, the fan arrived last night undamaged and it looks great. Thank you Fan Man! The total fan thickness is slightly under two and a half inches and I have a little over three inches between the aft side of the radiator and the waterpump shaft. Sweet!
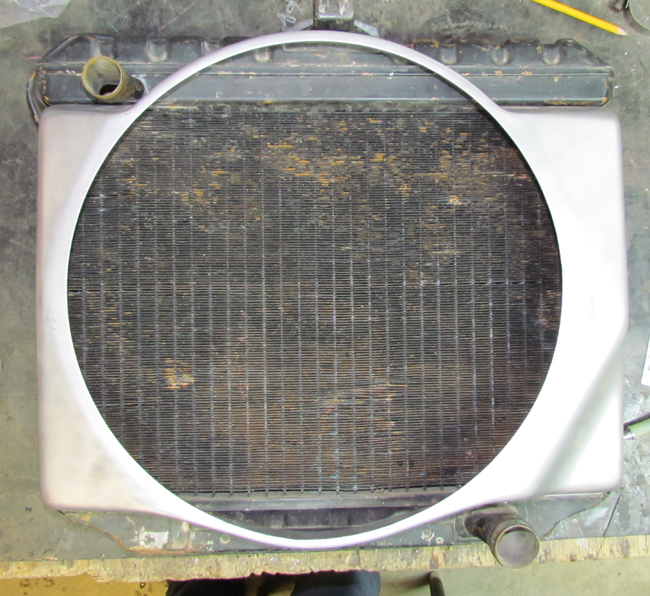
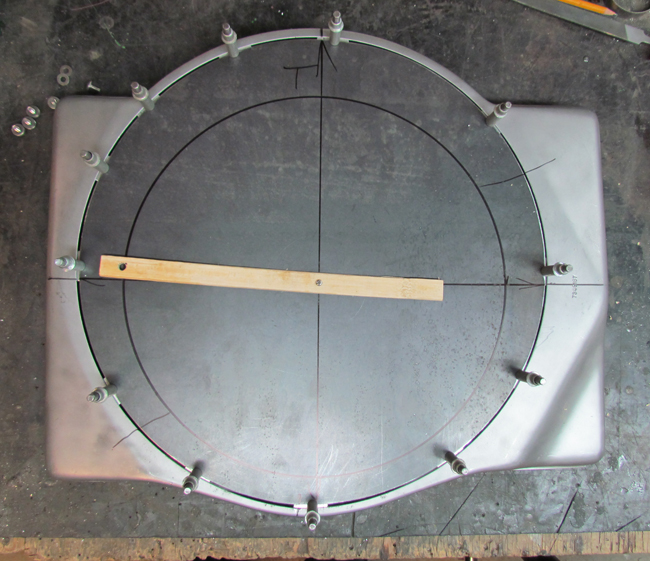
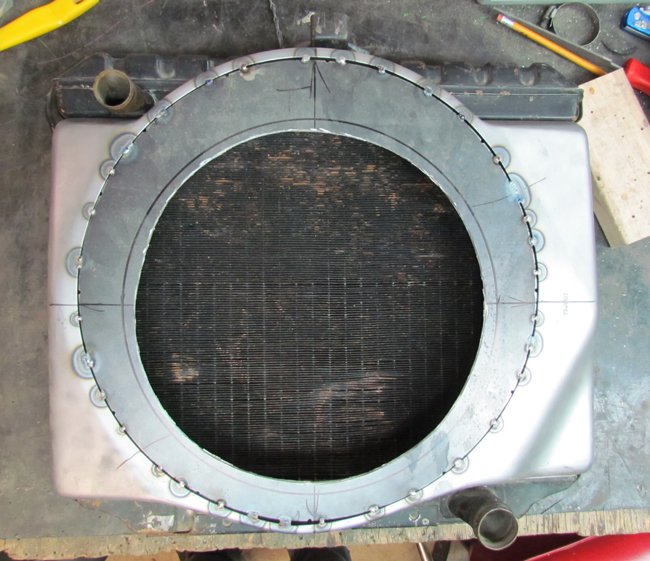
The shroud on the M151 radiator has a 16 inch diameter circle for the fan so I bought a ten dollar piece of thin sheet steel, cut out a 16 inch diameter circle and tack welded this piece to the shroud. After finishing with the tack welds I rough cut a 12 inch diameter slightly offset circle to allow for the correct placement of the new fan. I didn’t have a compass large enough to layout a 12 inch diameter circle so I used a stir stick for paint and drilled a pivot hole in one end and another hole 6 inches away and large enough to hold the tip of a sharpie marker. It worked slick. Tomorrow I’ll finish welding the insert to the shroud, clean up the welds and trim the inner circle for a more precise fit to the fan assembly before I attach the fan to the shroud.
Things are looking good. I really didn’t need the relay kit since I’d wired in a fan relay in the electrical box behind the passenger seat but it was cheaper to get the kit with the temp sensor and I could doublecheck the Willys wiring against the Spal wiring so I could identify any potential problems before mean old Mr. Electricity messes something up.
The Fuel Line
Today I received a 25 foot coil of copper/nickel 5/16th fuel line along with the needed fittings to attach the fuel line to the carb. This is the same tubing I used on the brake and clutch systems (just a different size) and it’s a pleasure to work with. The 3/16th tubing is flexible enough to be bent back to back 180 degree bends (with a one inch bend diameter so the tube now looks like the letter S) with no kinking, flattening or any defects at all. Jeeze, I really like working with this stuff. Check out the fedhillusa.com website, it’s amazing. This latest batch of tubing should be more than enough to do all the fuel delivery and return lines with enough left over to cover any mistakes I might make along the way.
Modifying the Skid Plates
The local metal fabrication shop cut and bent an eighth inch thick skidplate for the V6 oil pan. After drilling a one inch diameter hole for the drain plug (that’s the only size hole saw I have) I hand filed the hole to one and a half inch diameter before welding the skid plate to the pan.
I had to do a little work on the transmission/transfercase skid plate also. When I welded up the exhaust assembly I included a joint below the tranny so the right exhaust pipe could be removed without touching the left side or the rest of the exhaust system. What I forgot to figure in was the thickness of the clamp holding the exhaust pipes together at this joint so the skid plate had to be slotted to allow the clamp to protrude slightly. To prevent rock damage (like I’m going to go bashing this thing thru boulders) I welded up a small deflector from eighth inch steel and welded this to the skid plate over the slot. Just another little OOPSIE which needed to be worked around.


God this thing is SICK!!. You do awesome work Paul. I’m glad to be following this build via Ewillys.