
Paul’s made some additional progress over the last month on his stainless jeep.
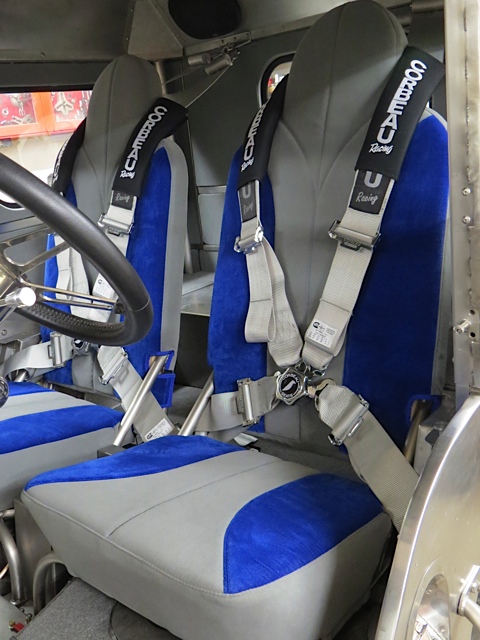
Paul writes, The upholstery is done, the driver’s seat has been installed and the seat belt/shoulder harness combos have been adjusted for length and bolted in place. The passenger seat will still need to be removed to allow access to the battery mount and cable connections in the electrical box but progress is being made.
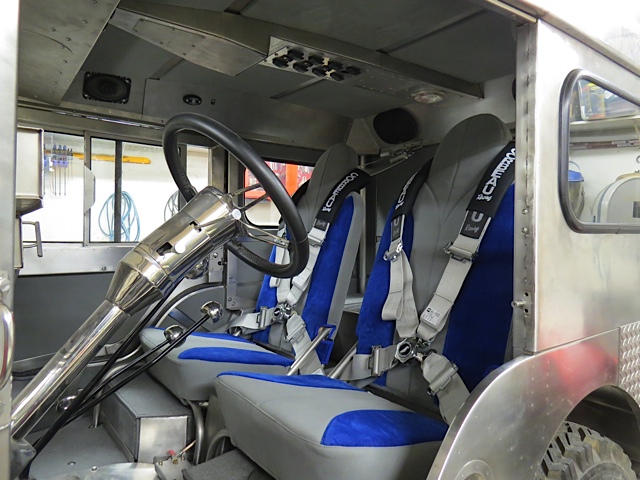
Corbeau three inch wide belts with a cam lock release and in a color that goes well with the upholstery and stainless steel.
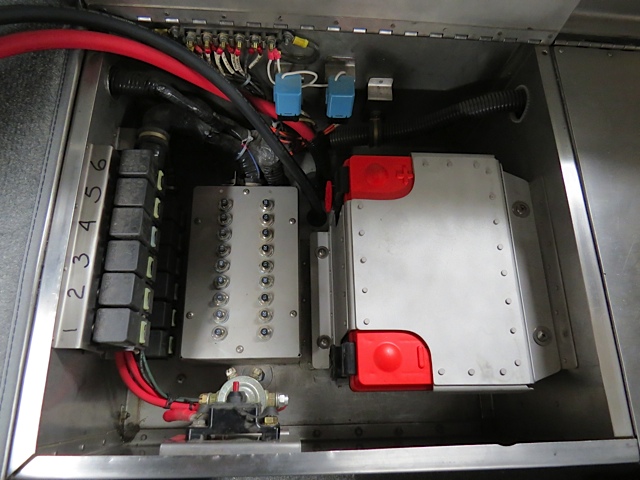
 Paul has also been working on the battery installation. He continues, The open space on the right side of the electrical junction box should be filled with a new Odyssey AGM side post battery

Here I’m comparing the size of the Odyssey battery to the mockup battery I taped together out of poster board. I used the mockup battery to locate the attach points for the battery hold down bracket in the electrical junction box.
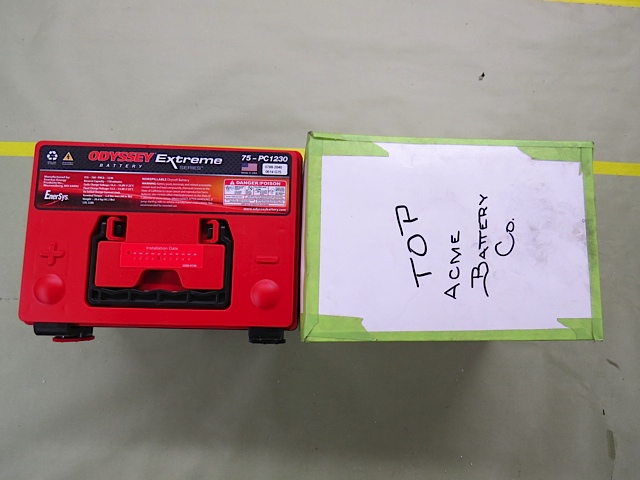
The battery fits and there’s even room for a longer battery. This small battery weighs 45 pounds so I don’t believe there’s any need to get a larger and heavier battery anytime in the future.
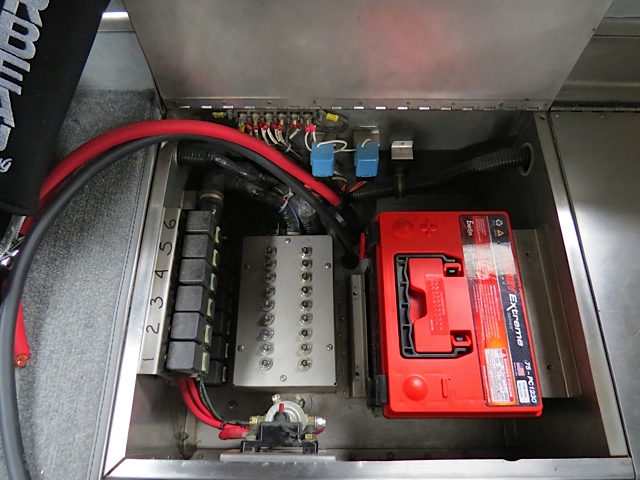
This hold down bracket is slightly bigger than the battery but the battery is firmly held when the attach hardware is tightened. The bracket consists of eight separate pieces of stainless held together by 40 rivets.
Now it’s time to start smoke testing the wiring and that might take a while.
Really neat work, a craftsman indeed.
What type of seats are those?
Beautiful!!!!
Wow… that’s aerospace-quality precision work! I think this jeep could fly… or maybe time travel: Is that a Flux Capacitor next to the battery? 😉
When we were in Anchorage I talked to Paul, but regretfully could not put a meeting together. Sure would have liked to see his amazing work.
yup, thats nice stuff he does.
WOW!!!
John
When I originally purchased the stainless seat frames they had no mounting legs, no bottom pan and the backs were so low they didn’t even reach my shoulder blades. I had some curved tubing I cut, welded and modified to form the attach legs and spliced into the seat to increase the height of the back along with providing the structure for a head rest. I felt the seat bottom to seat back tubing was weak so I welded in additional side support tubes and fabricated the seat pan from sheet stainless an stainless tubing. I used two types of upholstery foam, a high density foam cut at an angle for the bottom and a thinner and much softer foam for the back. The driver’s seat fits me and is very comfortable even with the safety harness cinched up tight. The upholstery wizards are responsible for the blue and silver design on the seats and I feel they did a beautiful job. I appreciate the interest and comments my never ending Willys rebuild generates. While I think it’s an interesting project it’s nice to know other people enjoy viewing my progress photos also.
THANKS!!GREAT JOB!!