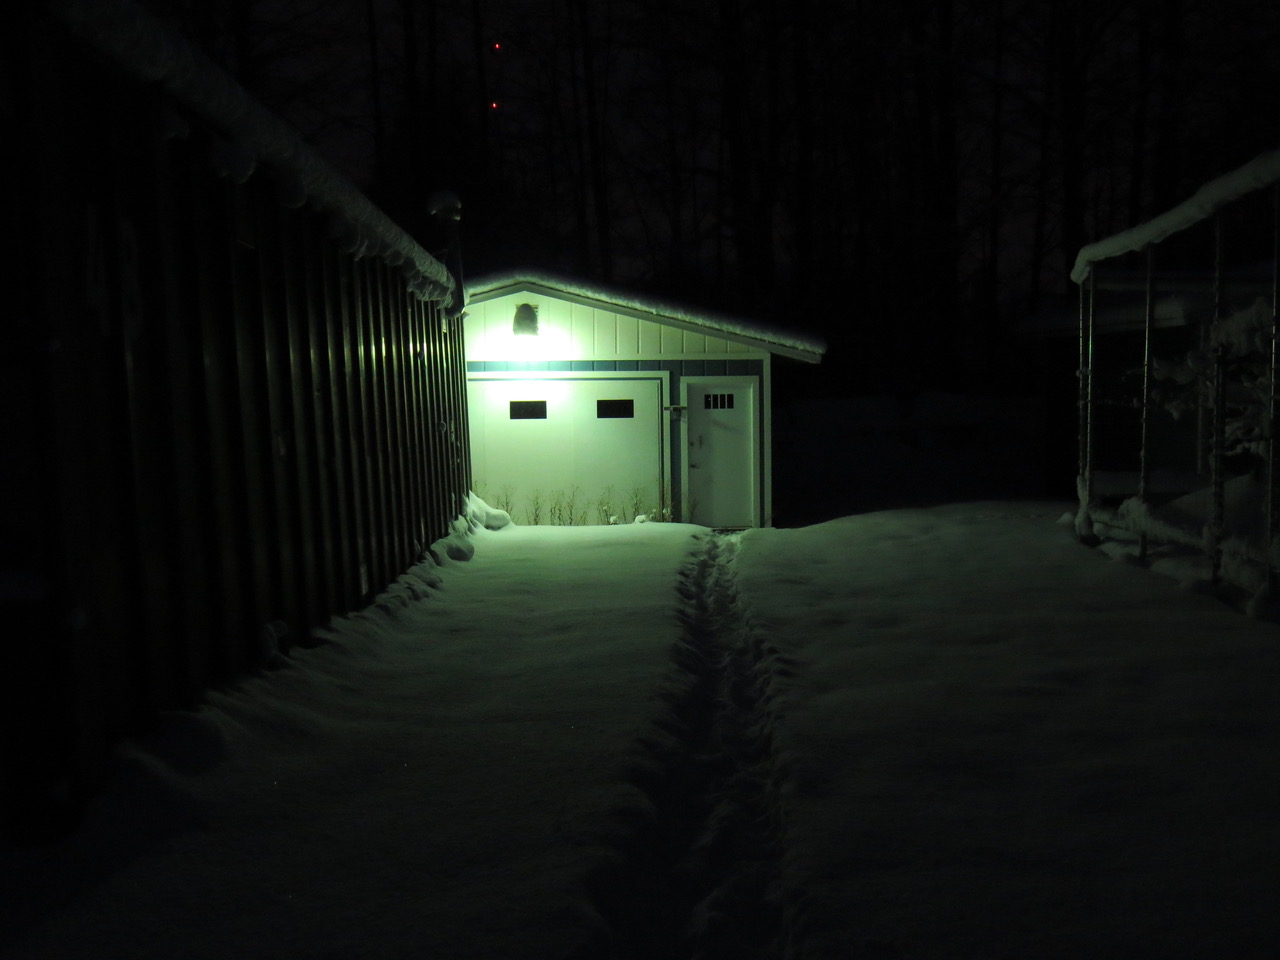
Photo taken at 9am in Anchorage. Still dark out (sunrise was supposed to occur at 10:12 am, but the clouds kept it dark)
As we begin counting longer days, Paul’s toiling away in his warm and cozy garage as the snow falls, the sun hides, and aftershocks rattle Anchorage.
Paul writes, “Since the earthquake November 30th we’ve had almost 5,000 aftershocks in less than three weeks. Many of the tremors are too light to feel but we’ve had a few strong shakers that concerned me enough to make a trip to the local hardware store necessary where I purchased additional tie down straps. The trailer and box assembly is still sitting on two work tables and will remain that way until I finish rolling the upper edge of the trailer box. I’ll rest easier when I get the trailer frame finished, the axle attached and the box lifted off the work tables and bolted to the frame.”
“The trailer box is riveted together so the next step (after the taillights) is to weld the tubing into a big rectangle to match the upper edge of the side panels and then roll the metal over the tubing and weld as necessary. I’m not quite sure how I’ll accomplish this task but I expect it’s going to cost more than I planned and take longer to accomplish than I’d intended but that’s normal for this project.”

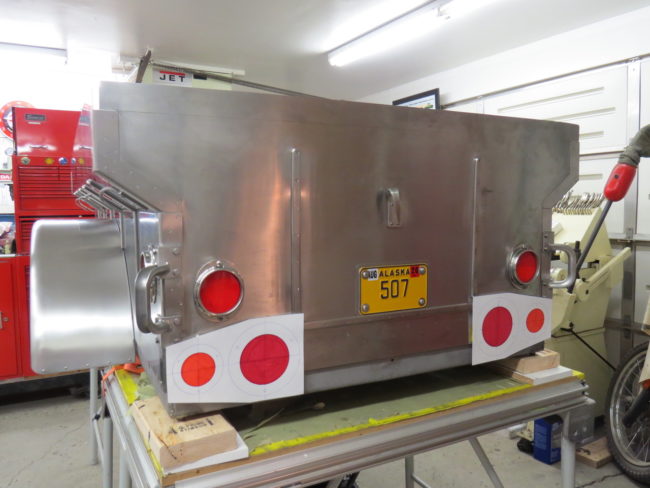
I’ve made 6 or 7 different designs for the taillight/turn signal layout on the M100 trailer but none of them are without problems. Here’s my mockup of the lights mounted to the rear of the trailer. To me they are too close together and would look awkward sticking out from the box.
It would be much easier to position these lights if I went to a smaller size LED light but I want the trailer lights to match the ones I installed on the little Willys so I’m running into location/space issues.
I’ll try again.
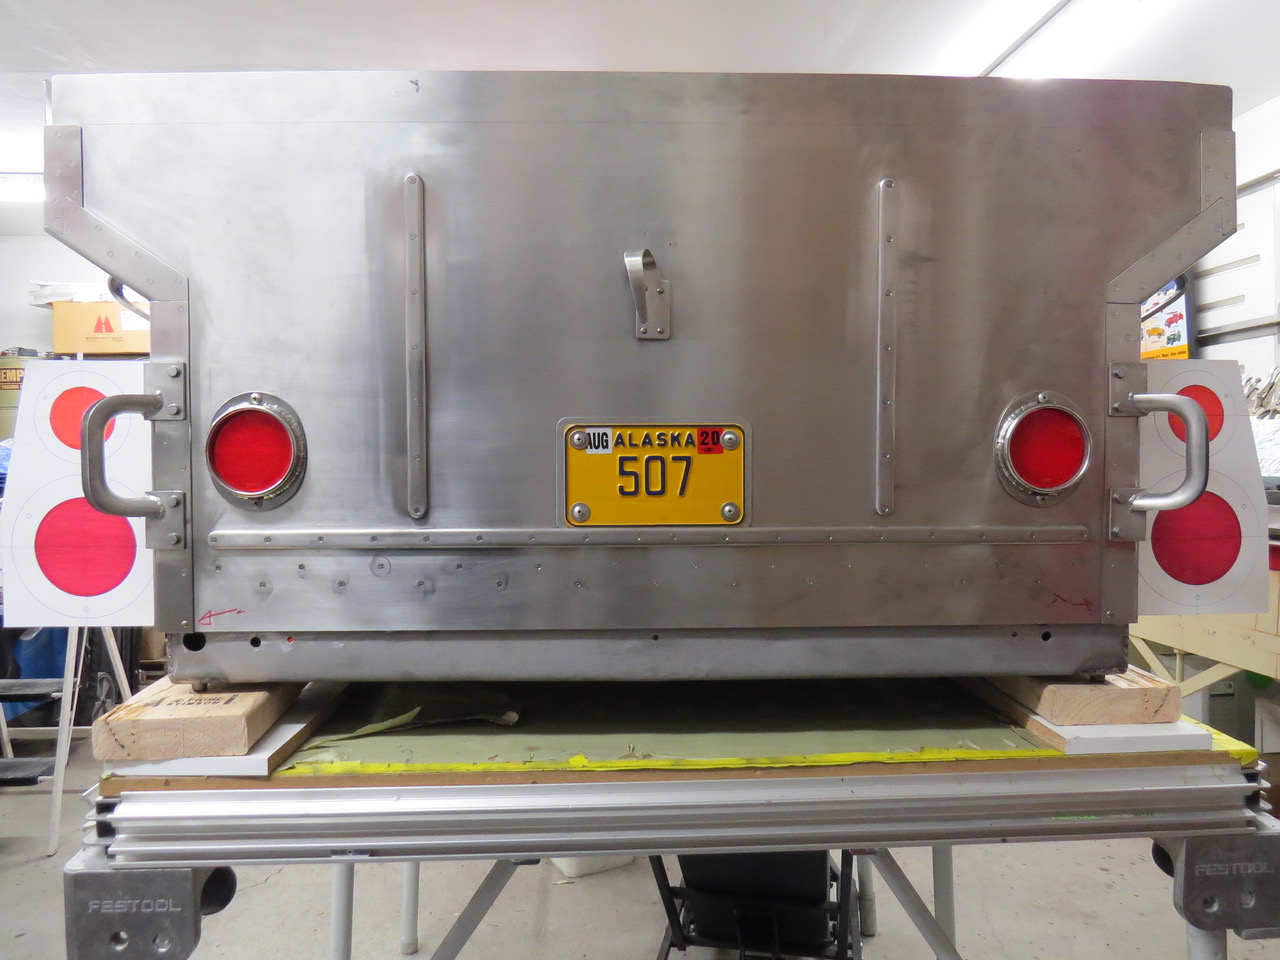
Here the taillight brackets would be mounted to the trailer sides just forward of the rear corner sections. They’d be close to but not interfering with the use of the grab handles bolted to the corners. The housing for the lights would be stainless steel sheet fabricated into a one inch thick box with a removable access panel on the front side.
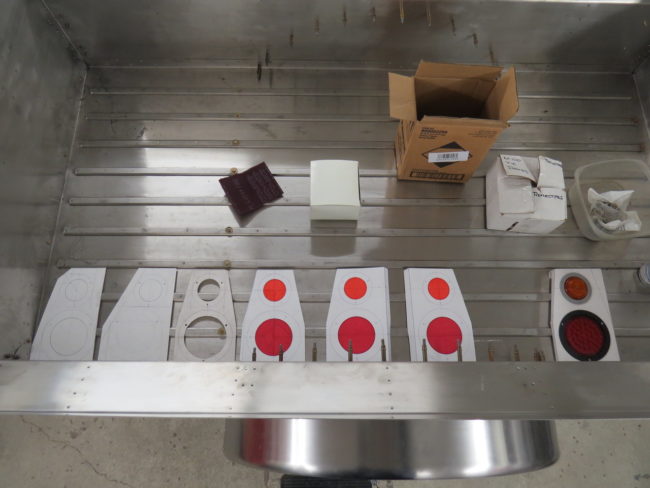
Here are some of the poster board mockups of the tail light housings I’ve made while attempting to achieve a reasonable balance of visibility, secure installation and ease of fabrication. The first mockups were made from white poster board with line drawings to indicate the light assemblies.
As I refined my design I began coloring in the tail/brake light lens (red) and the turn signal lens (orange) with felt markers to give me a better idea of how these lights would look on the trailer. I’m pretty sure I’ll use the mockups number 5 and 6 (starting from the first mockup on the left as #1) as the final design so tomorrow I expect to begin cutting sheet metal.