
As always, Paul’s detailed work has resulted in a work-of-art. Well done Paul!
Paul writes, “The earth has calmed down these last few months so I’ve made good progress on the M100 trailer rebuild. In fact, other than measuring the length necessary for the trailer safety chains and the electrical harness everything else is finished. While I still spent over 300 hours to build the stainless steel box and rebuild everything I planned on reusing it was easier than I’d anticipated. I had no idea I’d need so many 2X4’s but the local Home Depot store was happy to take my money.
This photo shows the jig I made to keep the trailer box in alignment while I fabricated the upper tube reinforcement and rolled the sheet metal before tack welding the edges.”
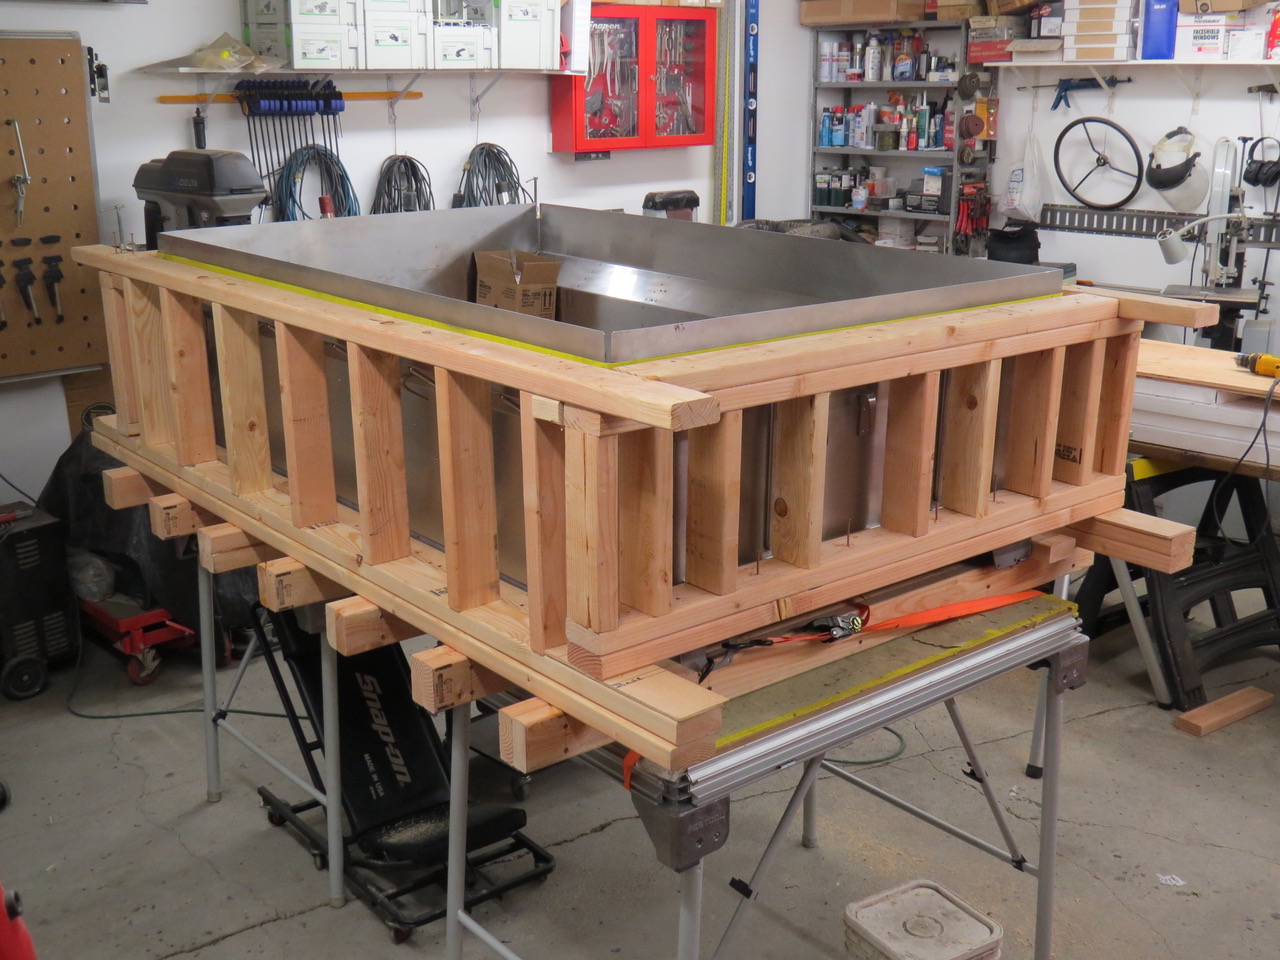
The upper tube has been fitted and held in place with strips of plywood and 24 6 inch C clamps.

I used a plastic hammer to gently form the sheet metal over the curve of the reinforcing tubing. The C clamps were repositioned often to allow hammer access to the 20 feet of 18 gauge stainless sheet metal around the upper edge of the trailer box.

The tack welds are complete so the 2X4 jig can be removed

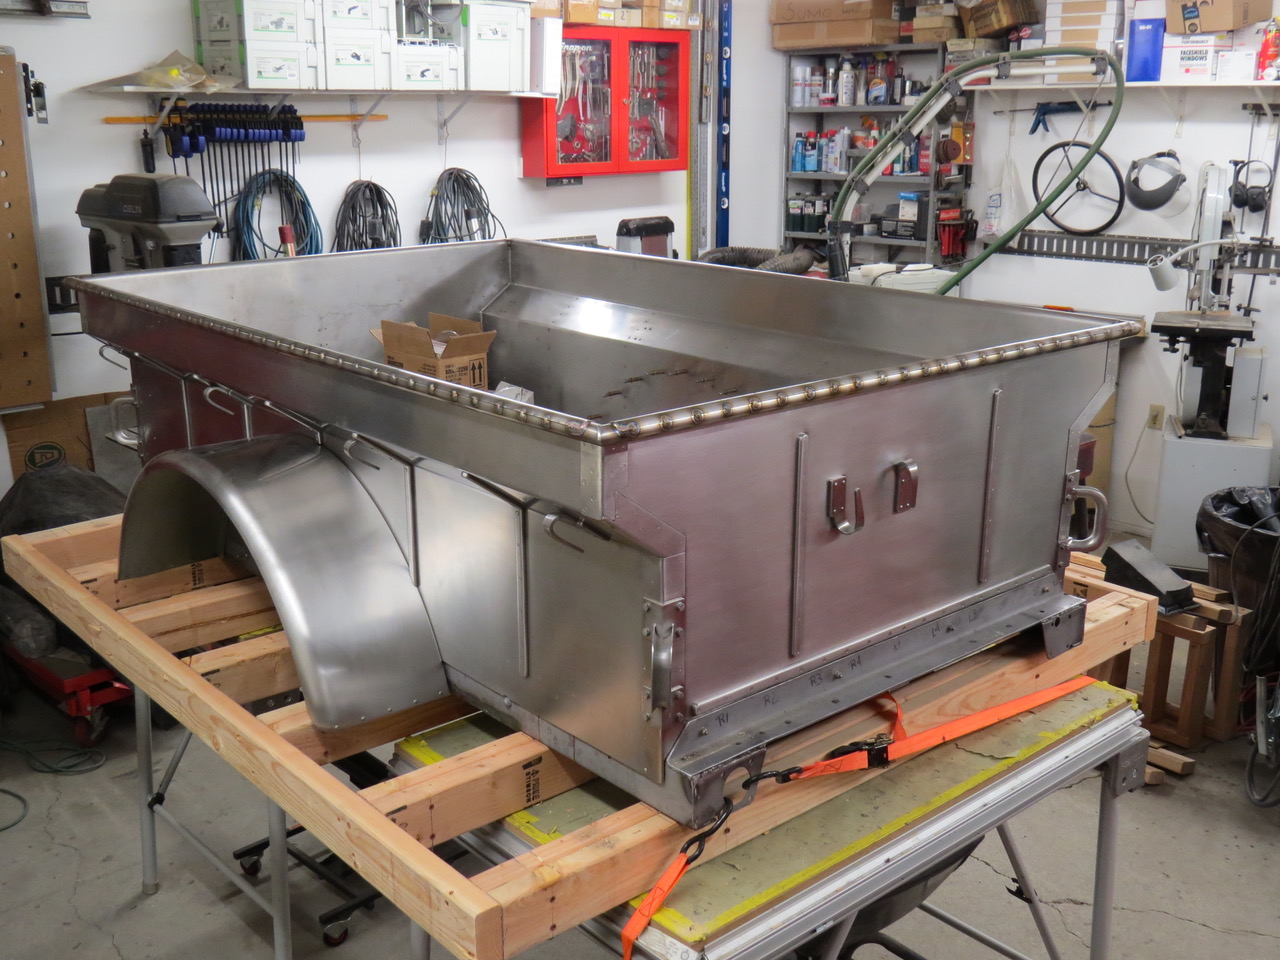
The replacement box is bolted to the original trailer frame and tie down straps hold the frame to the work tables. I had to plan my work around earthquakes.
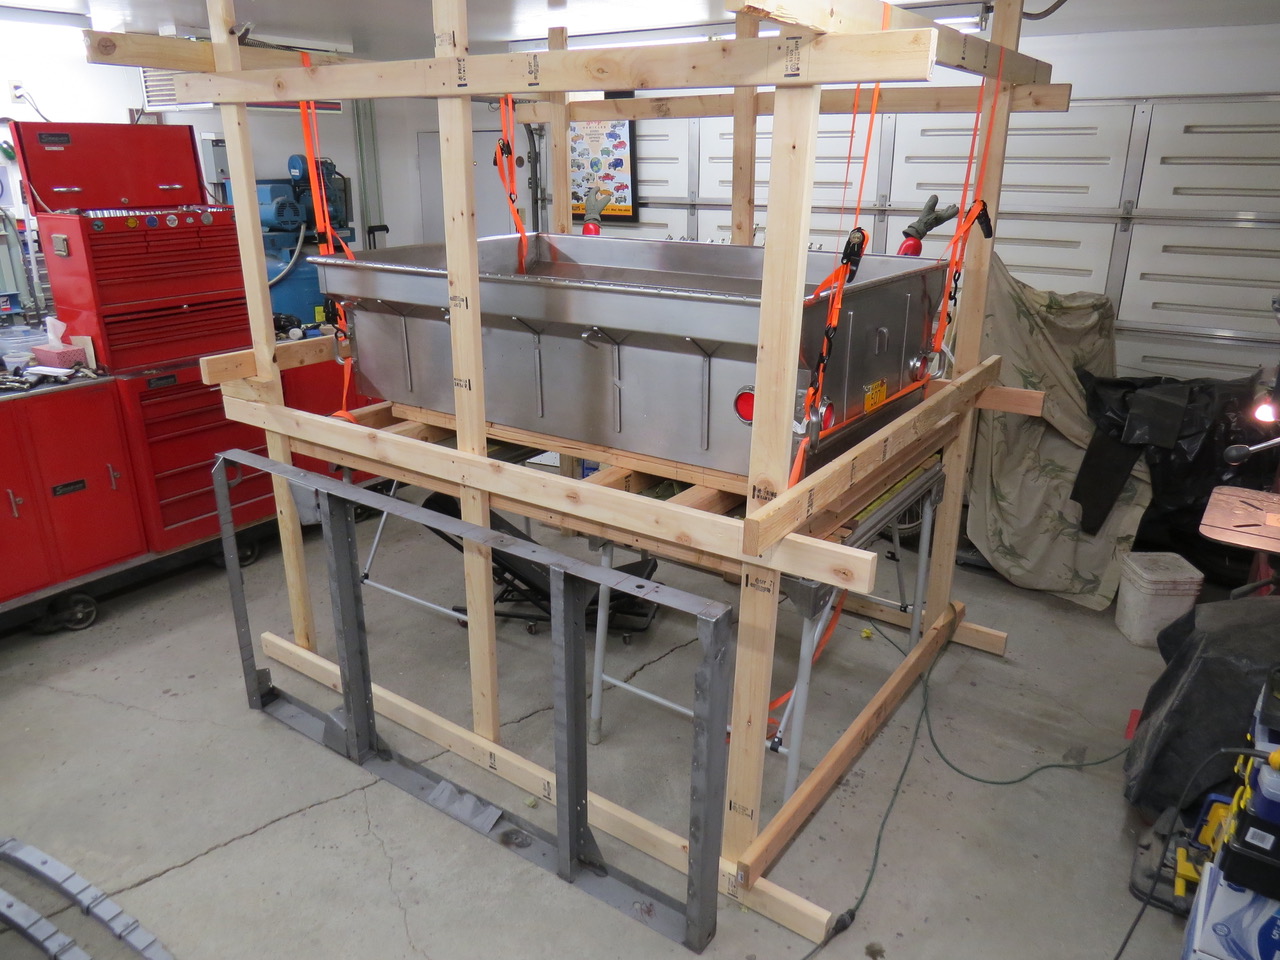
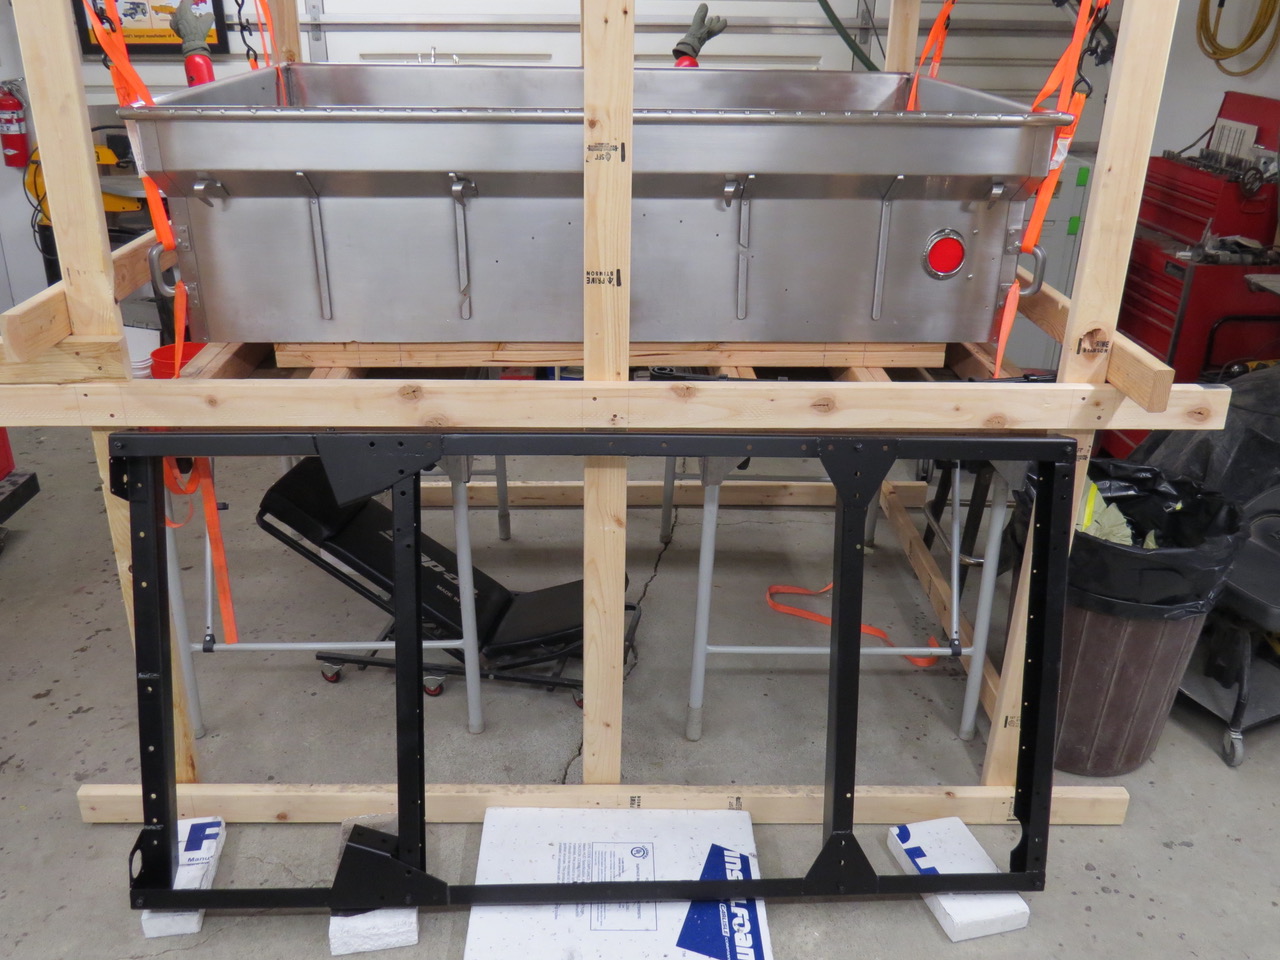
Another 2X4 contraption but this thing allowed me to safely lift the tub (using ratchet straps) so the frame could be removed and sent to the powder coating shop.
The powder coated frame ready for the running gear to be attached.
The springs were installed to keep the mounting brackets in alignment while the attach bolts were tightened and then the forward pivot bolts were removed to allow the installation of the axle.
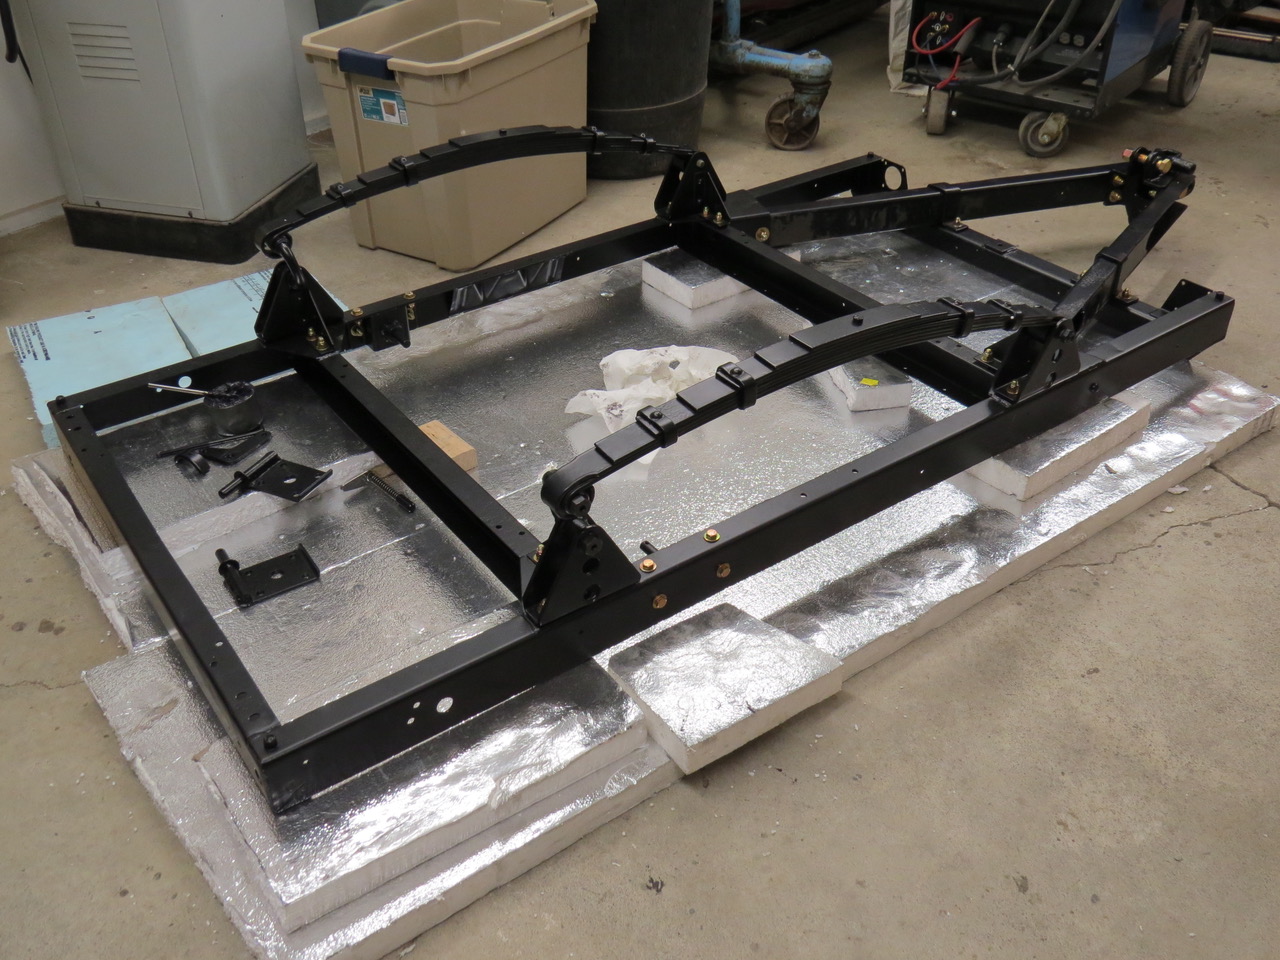
By putting dowels under the lower 2X4’s I was able to move the rack by myself and quickly position the running gear directly under the trailer box. Six ratchet straps were used for this procedure, one ratchet strap per corner and an additional safety strap across the front and rear just in case a corner strap slipped. I expected an earthquake any minute so I worked as fast as I safely could to get the box lowered onto the frame but I really didn’t need to rush. We had no significant earthquakes during this attachment so I was happy.
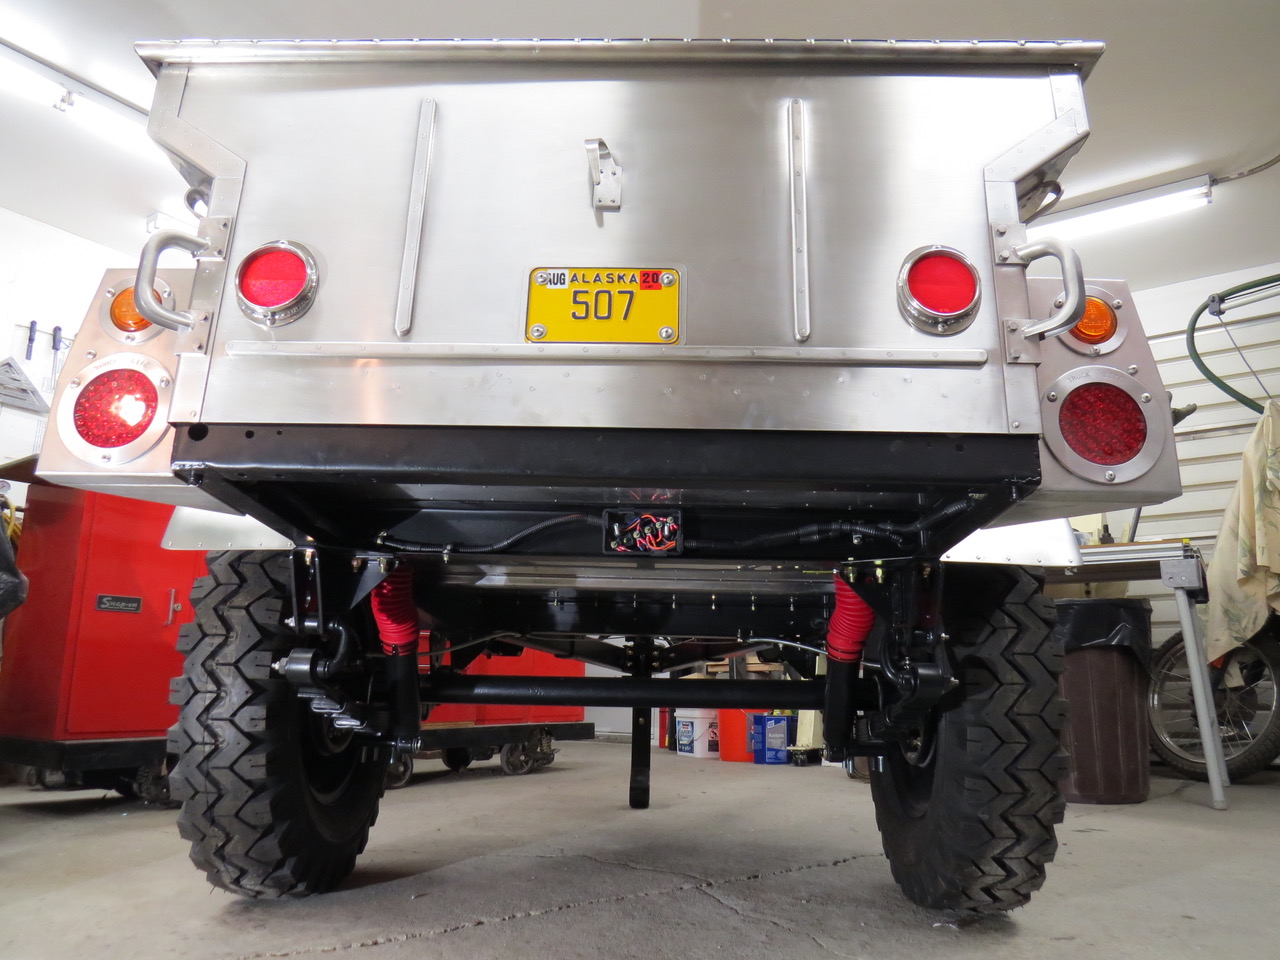
A close up view of the electrical junction box. A cover is attached by two nuts threading onto the large machine screws so for normal operations this unit is waterproof.

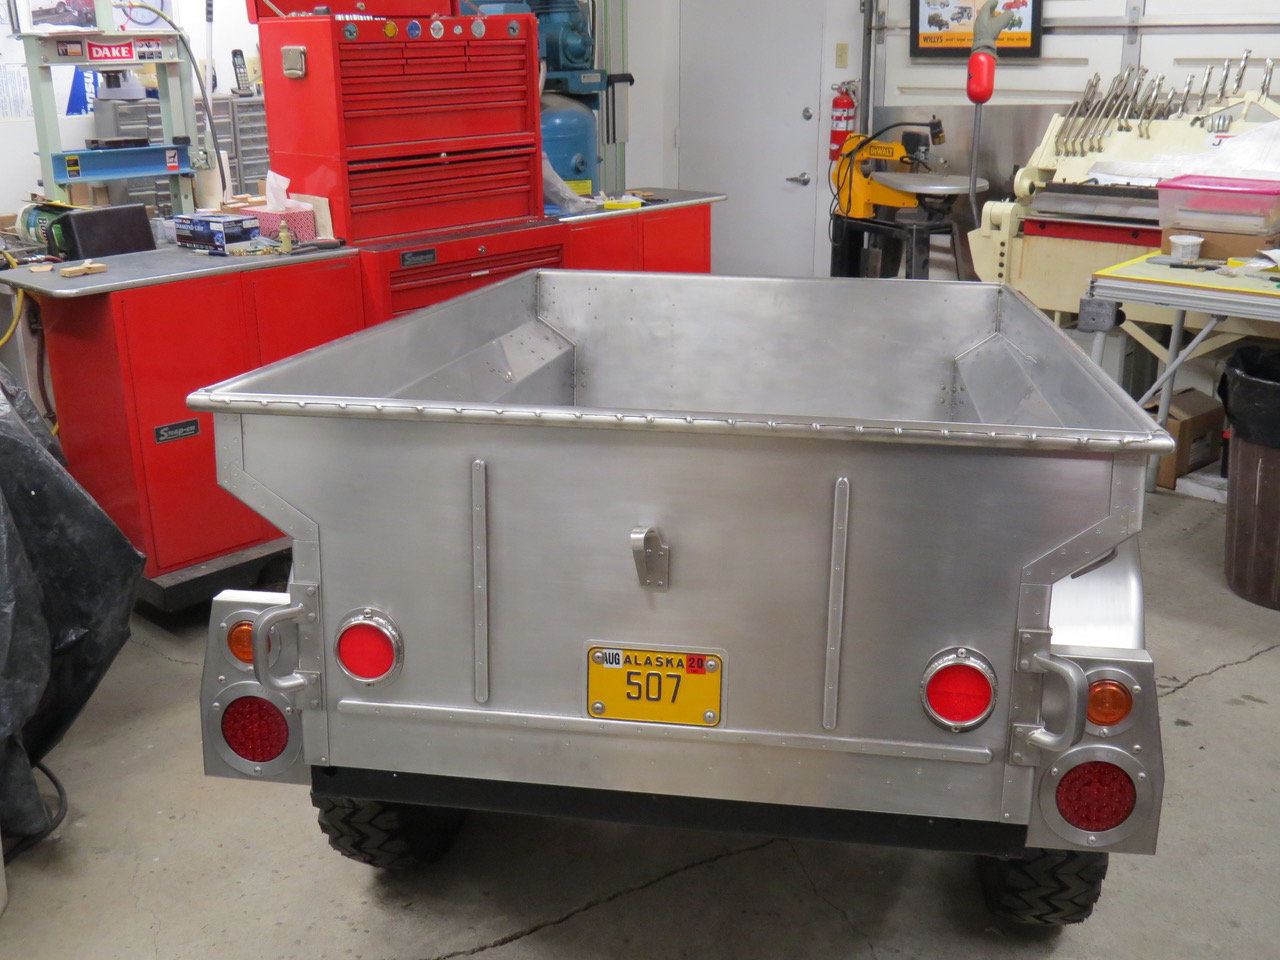
Here’s how the rebuilt M100 trailer looks now.
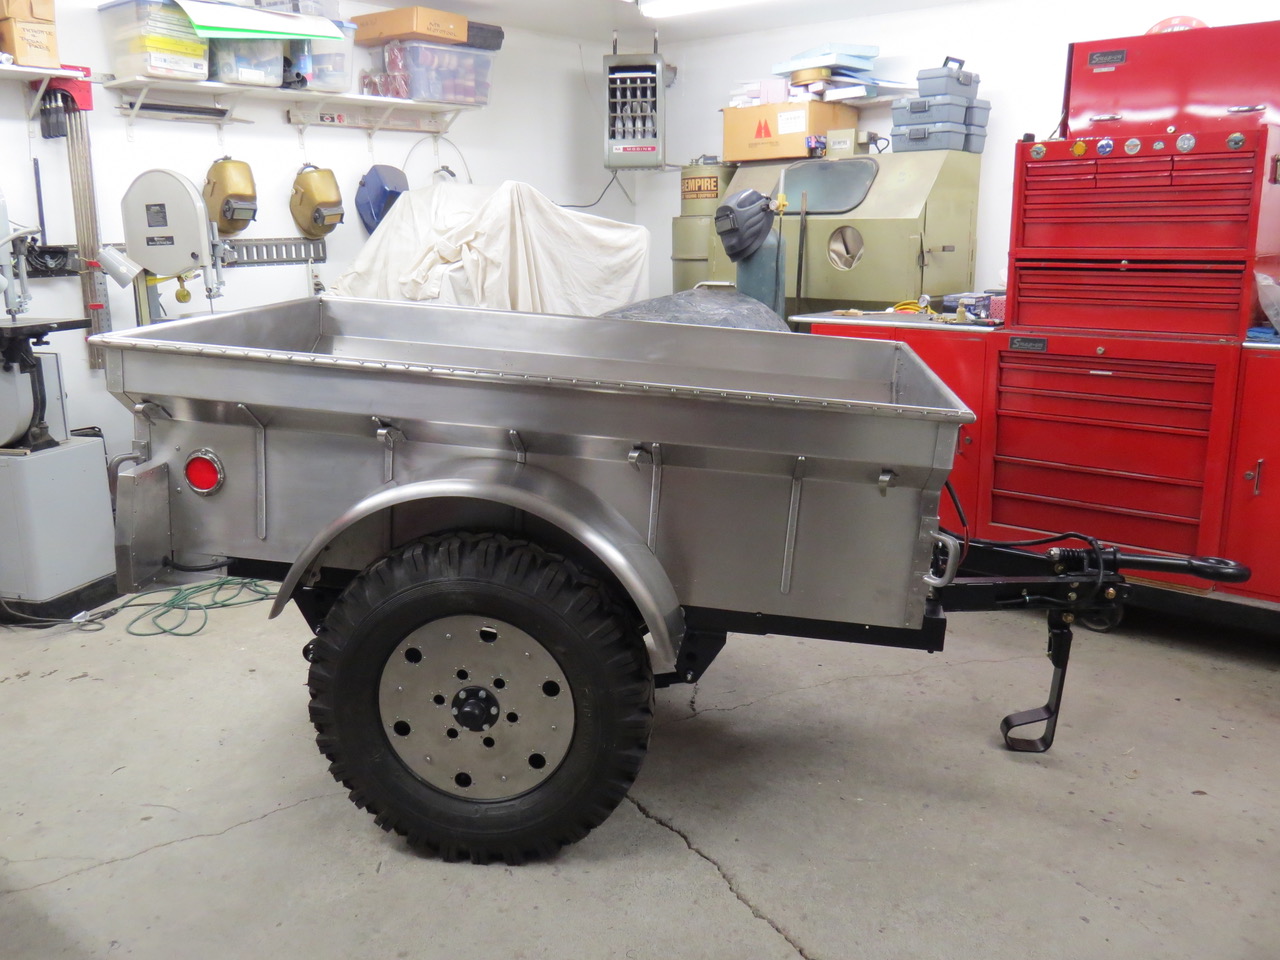
I decided not to repaint the original brass data plates because they’re mounted on the front of the trailer and subject to weather conditions and each plate has some sort of damage that would make them rather difficult to repaint to like new condition. 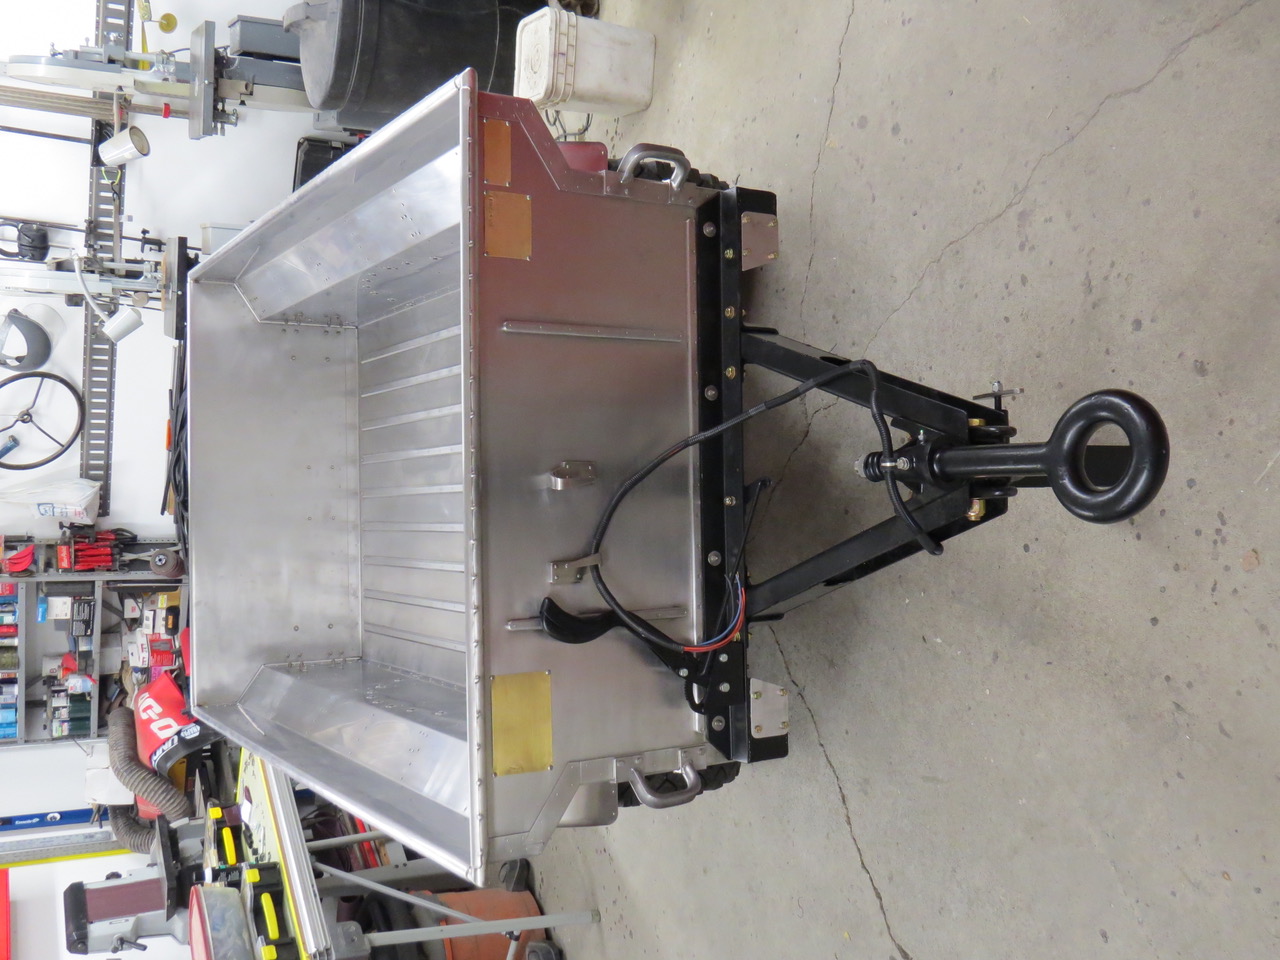
THE END !!!!!!!!
The tail lights still look a little odd to me but the light assemblies match the little Willys so they might look better when the trailer is attached to the Jeep. We’ll see this summer.
That’s all
Alaska Paul
The Goddess
and
Samson the sleeping Wonder Parrot.
Beautiful work.
Fill her up with ice and see if it leaks?
But really, beautiful work.
my friend neil young always says ” rust never sleeps ” so this be assured , it will find a way to infect this trailer , sooner or later ..
Paul … that’s Neil Young’s version of a compliment 🙂
Sexy!
Paul, I admire the skill & patience you have, amazing, the quality of your work is superb. Where did you learn these skills? In a million years, I could never acquire the amount of skill and knowledge that you have.
Pail, I would sure like to get your patterns or templates. do you have them in a digital format?
What an amazing abundance of SKILLS, patience, Stainless Steel metal, wood, clamps, and techniques, displayed in a too organized shop, all foreign to me. WOW! A truly wonderful result and a “one of one”, AND a SECOND PART to the whole Jeep/trailer combo. A SHOW PIECE! Thanks for sharing.
” rust never sleeps ” it lurks in your 1/4 panels !! , this trailer is too nice to use , eh ? or maybe buy a fillipino stainless jeep to tow it ? stainless will rust eventually , even aluminum corrodes , and NEIL YOUNG KEEPS OF ROCKIN IN THE JEEP WORLD !! remember back in 1971 ? broken arrow ranch , la honda ? neil tried to lift a chevy v-8 when working on his willys truck , ruined his back for years , he turned it into art , 2-3 albums worth ,,
Mike, I’m a retired aircraft mechanic and my career was spent maintaining, rebuilding and modifying both fixed wing and rotorcraft. Often times the aircraft I worked on were long out of production so we hand made the parts necessary to keep them flying. It was an interesting job and I learned a lot of useful skills that I could use on the little Willys rebuild. Being patient saved me money… it took longer but the cost of progress was much cheaper. I believe with about twenty minutes of instruction anyone would be able to hand form usable replacement parts from stainless steel with no problem. It’s not that difficult … it’s actually lots of fun.
John, I don’t have any patterns or templates for forming the M100 trailer box. I got measurements from the original sheet metal, compared them to the frame dimensions and duplicated the box using photos of the trailer as a guide. I bought the fenders because they cost way less than it would have cost me to make them and the rest was built using the Measure Twice …. Cut Once plan. Thanks for the kind words and the interest is this loooooong term rebuild.