Rusty-DJ-3A Research Archives

To Top

No Updates on Tuesday

• CATEGORIES: Features • TAGS: This site contains affiliate links for which I may be compensated.

We had a long but enjoyable day yesterday. We picked up the DJ-3A, #56337 10538. Naturally, it will needed more work than it showed, partly because whomever owned it before Lloyd beat the thing up. But, the engine spins, the column-shift transmission shifts. and it’s got plenty of original parts to make it work the trip.

We also had a great time viewing Lloyd’s creations, which I’ll feature on Wednesday, and had a great evening with Robin, who shared his collection of jeeps with us.

1956-dj3a2

Yes, that front grille was pushed inward, I have some ideas for pulling it back out again.

dj3a-postcard

The color isn’t quite right on this, but this is pretty close to what it should look like. I don’t believe mine came with the chrome front bumper.

 
To Top

“Rusty” Photos

• CATEGORIES: Features • TAGS: This site contains affiliate links for which I may be compensated.

UPDATE: I’ve added engine photos to the bottom of the post.

Rusty was owned and driven (apparently very roughly) on a farm near Billings, Montana. There are numerous welds, necessary to fix the cracks that appeared. The hubcaps have all kinds of dents, as does the body, the grille, hood, and the fenders. No part seemed spared. According to Lloyd, the man we bought it from, he purchased at an estate sale. The fact was, the farmer who owned it refused to sell it while alive, so Lloyd had to wait until he died. Lloyd was told it ran until it was parked and that it was parked due to the man becoming unable to drive it. At least, that’s the story. Still, the engine spins, the tranny shifts, and the jeep rolls easily.

Glenn tells me this was manufactured in late 1955 and made available for sale in 1956. I believe the color is pine tint, not far from the sea foam green color I’d intended to paint Biscuit (before I receive the wrong color from the paint company, but that’s another story).

Here are more than thirty photos that show the good, bad, ugly. What I can’t photograph is the smell emanating from the seats. lol.

2016-09-06-1956-dj3a-pics-on-trailer-1

2016-09-06-1956-dj3a-pics-on-trailer-12 2016-09-06-1956-dj3a-pics-on-trailer-11

2016-09-06-1956-dj3a-pics-on-trailer-10 2016-09-06-1956-dj3a-pics-on-trailer-9

Continue reading

 
To Top

Rewind — September 5-7: Our “Rusty” Trip

• CATEGORIES: Features • TAGS: This site contains affiliate links for which I may be compensated.
2016-09-06-lloyds5

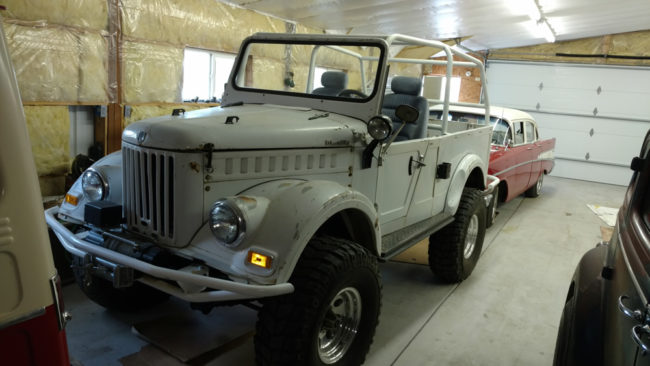
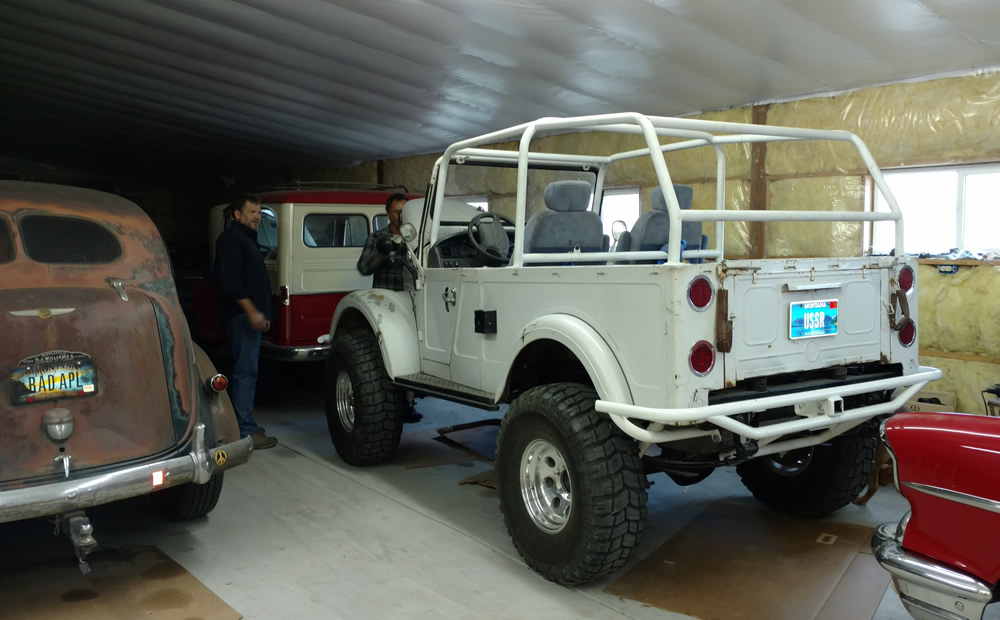
Lloyd’s modified GAZ. Pretty cool vehicle.

Normally, I’m good about updating our adventures daily, but we usually don’t do these hellacious long drives (which is by design). So, this post will cover the last few days …

map-trip

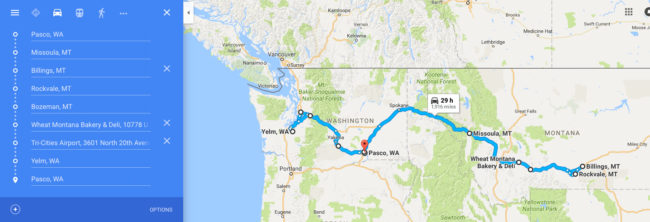
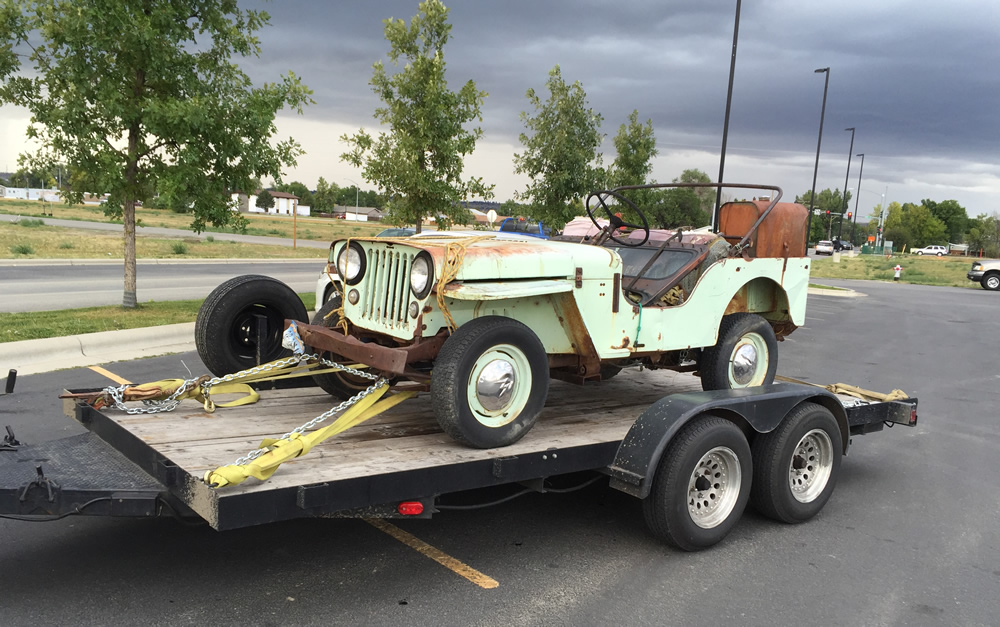
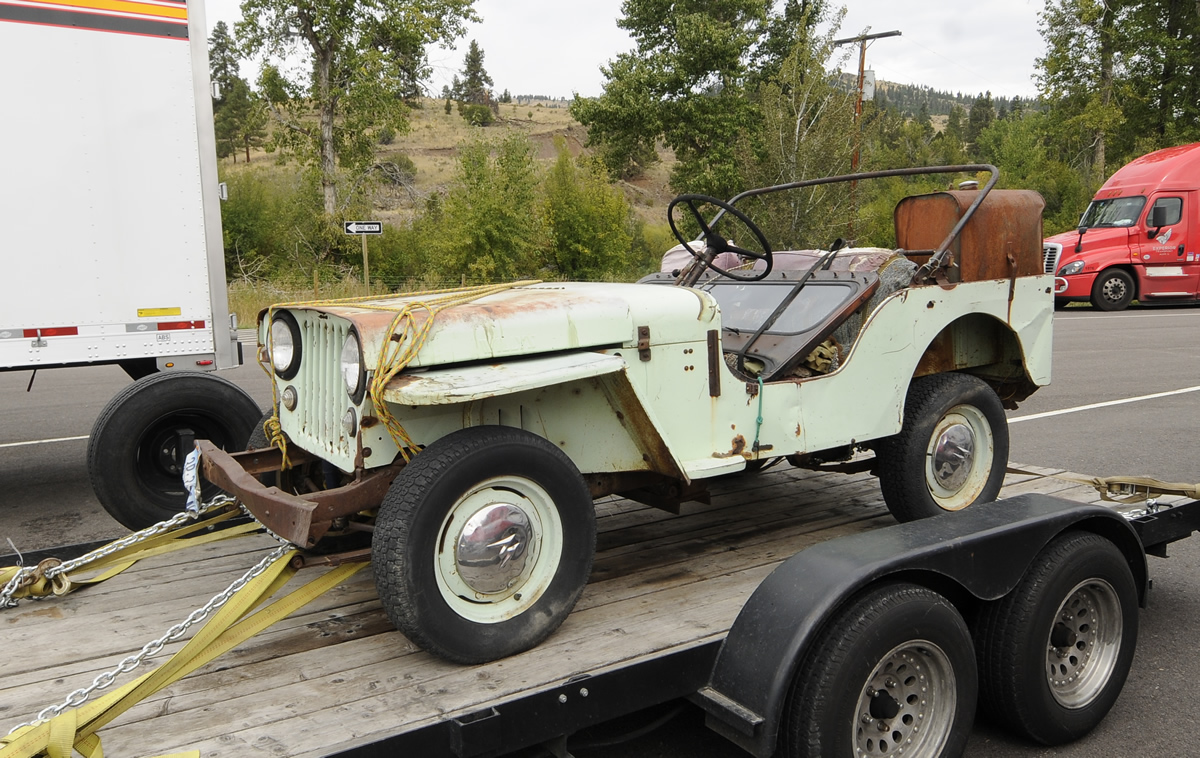
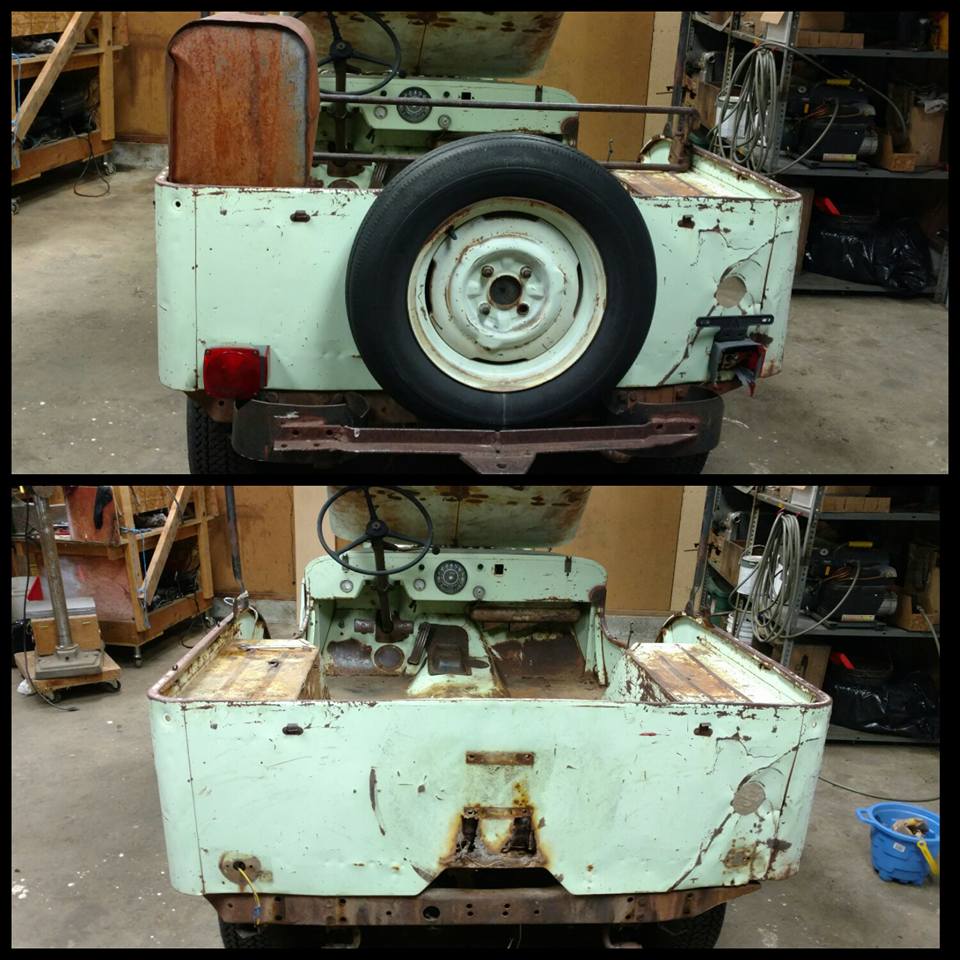
Almost 2000 miles to bring home and store Rusty.

MONDAY SEPTEMBER 5TH —
On Monday morning September 5th we left Missoula, bound for Billings. we arrived at Lloyd’s place near Billings, Montana. We drove a for a few hours, cresting the Continental Divide with temperatures of 34 degrees and some thick almost-snow-like rain, making it clear summer in Montana was near an end. Wanting to avoid putting on chains, I thought it best to avoid going back through in the dark, so I my goal was to sleep Monday night at Bozeman, where we could do all three passes (the divide and the two in Idaho) during daylight hours.

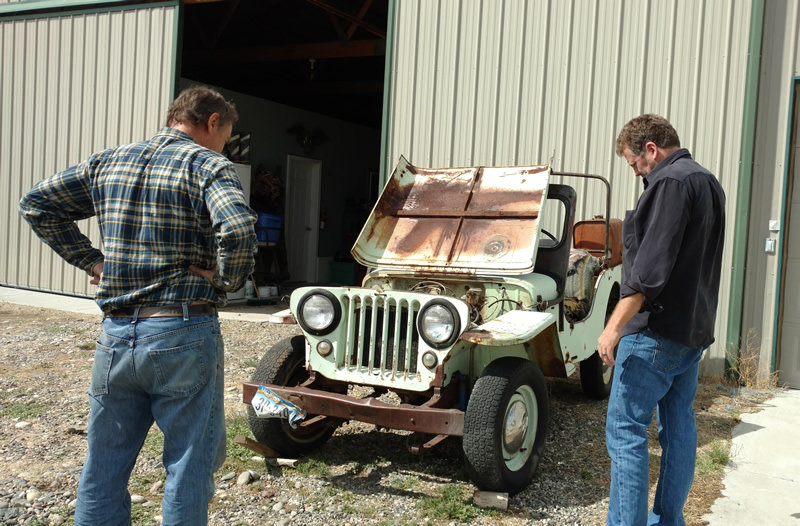
We arrived in Billings in the early afternoon. By then, the clouds that had dogged us since Idaho had given way to sun and warm temperatures. When we pulled in front of Lloyd’s shop, the cross-eyed DJ was parked out front. As soon as I saw it, I was convinced it was going home with us. We hopped out and Lloyd introduce himself.

2016-09-06-lloyds1
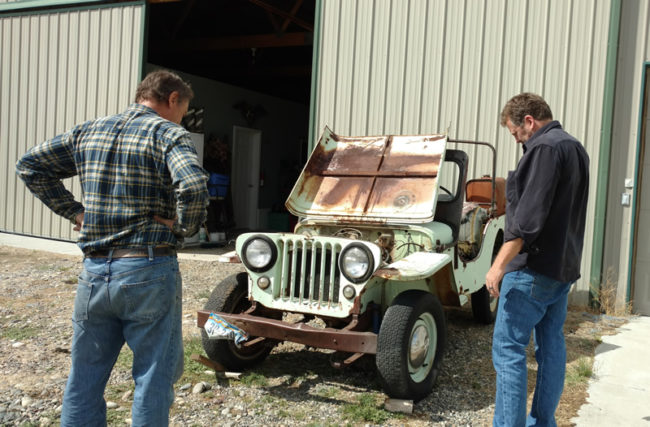
A forest fire fighter by trade, the trim sixty-seven year old man still had plenty of bounce in his step. He explained that he spends much of the non-fire months restoring/refurbing vehicles. It was both a passion and a practical way to reduce his taxable income. He estimated he restored one automobile a year.

As I looked over the DJ I asked Lloyd if he’d originally planned to restore it. He said know. He’d seen this parked at a nearby house, but the owner wasn’t interested in selling. When the owner died, Lloyd purchased it at an estate sale. He told me he’d never seen a 2WD jeep and didn’t know anything about the Dispatchers. He just had a gut feeling about it and decided to pick it up (and probably make a few dollars in the process).

2016-09-06-lloyds2

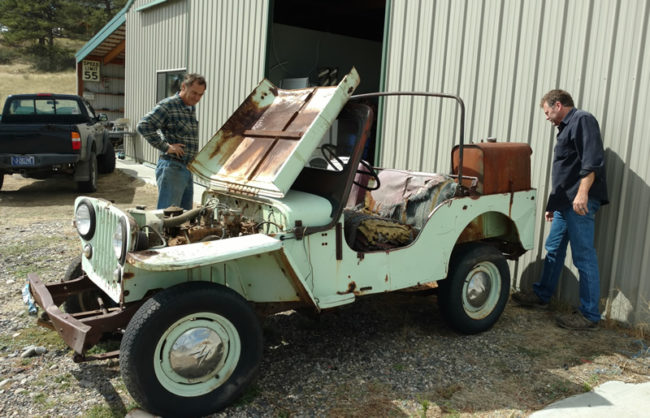
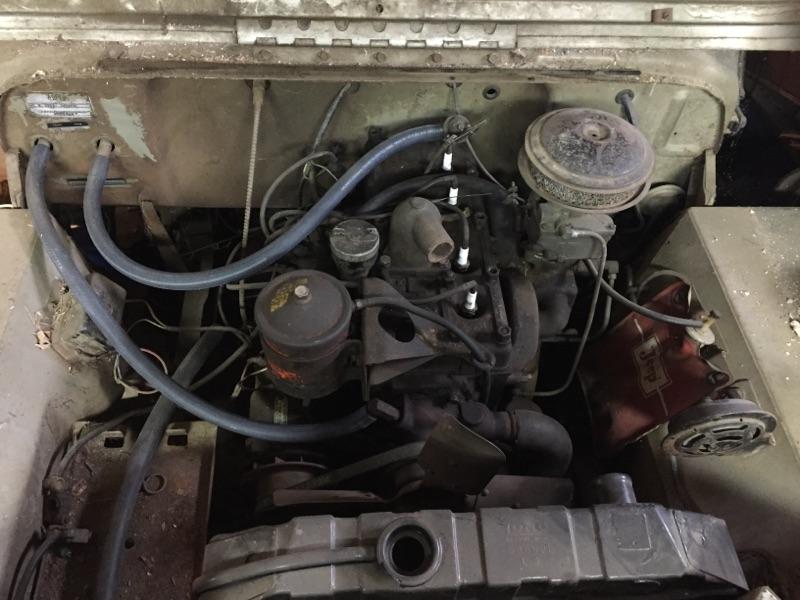
One of the first things I did was try shifting the transmission. I pushed in the clutch, which had good resistance, and awkwardly moved the column shifter about (my first time using one). After some testing, it seems to smoothly move between all the gears (at least that’s my impression). Next, we opened the hood. Lloyd demonstrated that the engine spun. That confirmed I was buying it.

2016-09-06-lloyds3
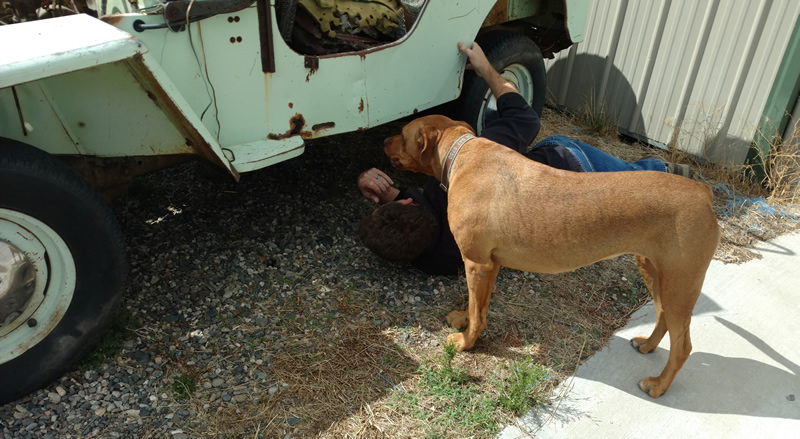
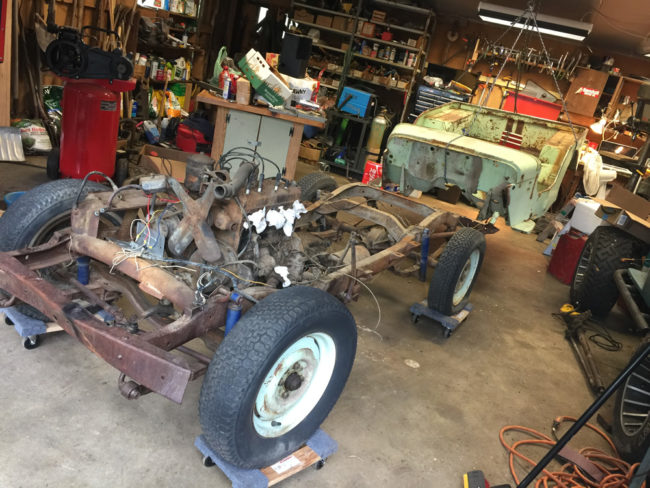
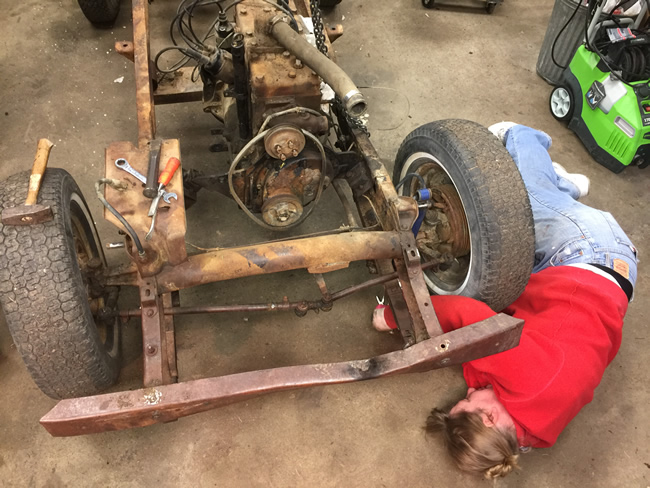
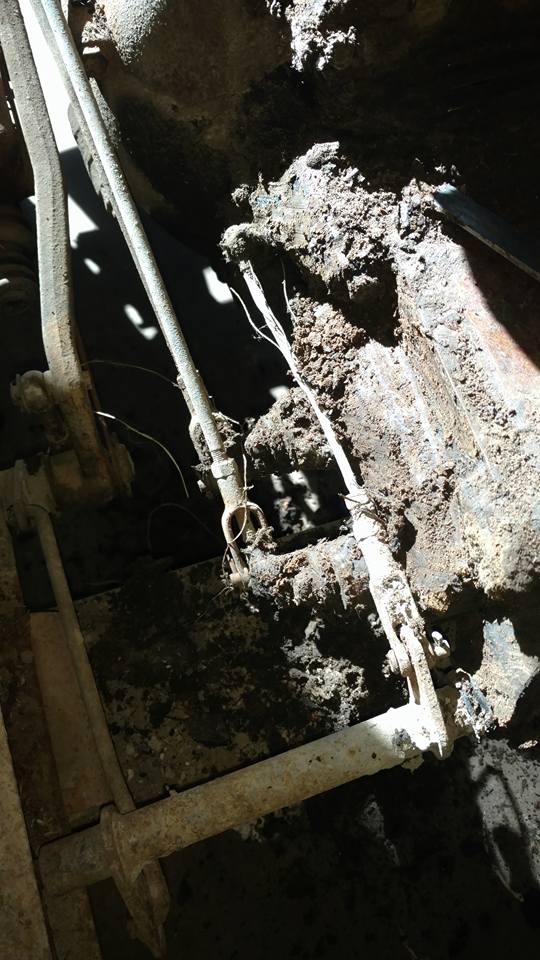
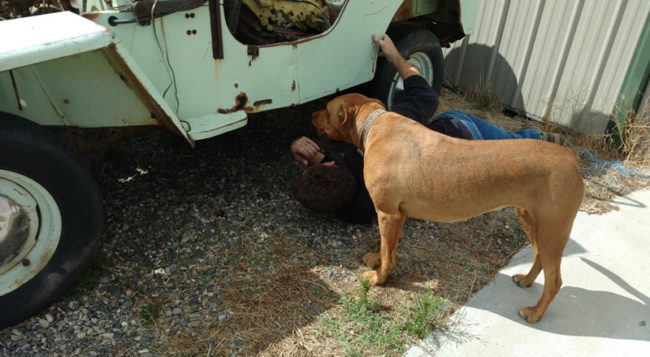
Lloyd’s dog “Crazy” helping me survey the underside of the jeep.

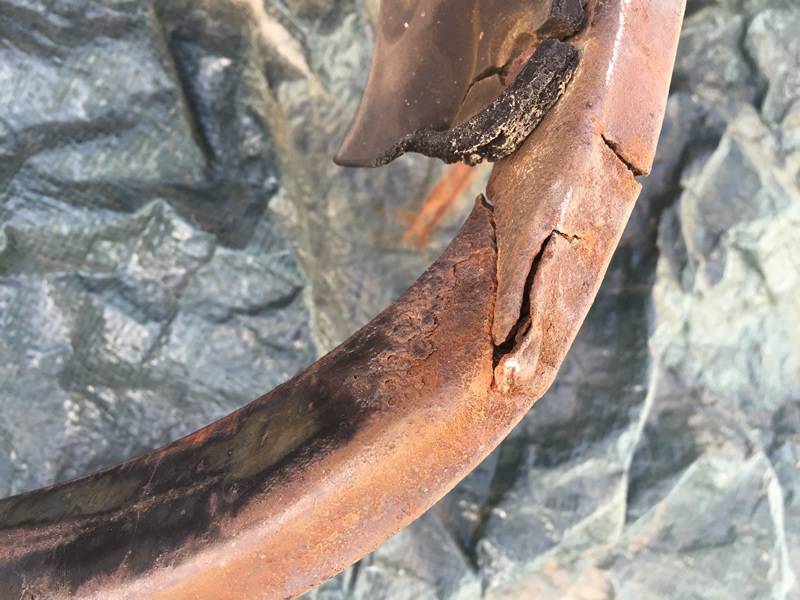
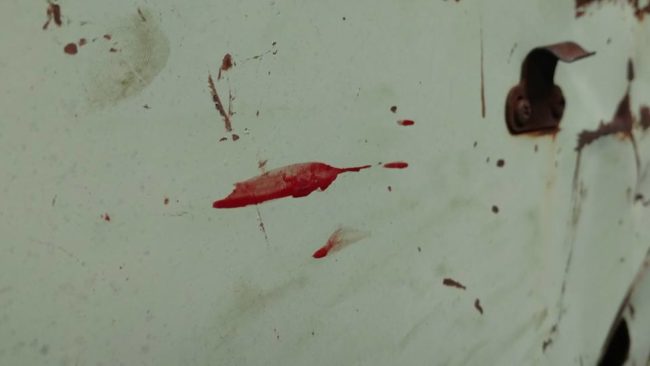
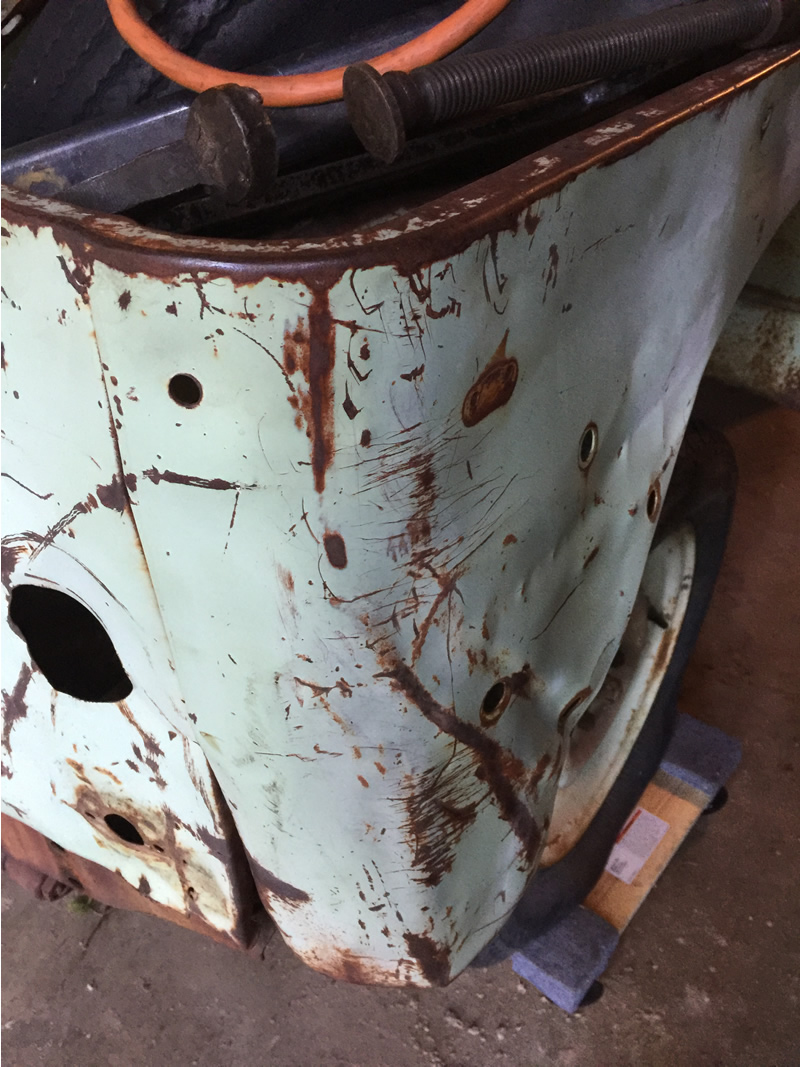
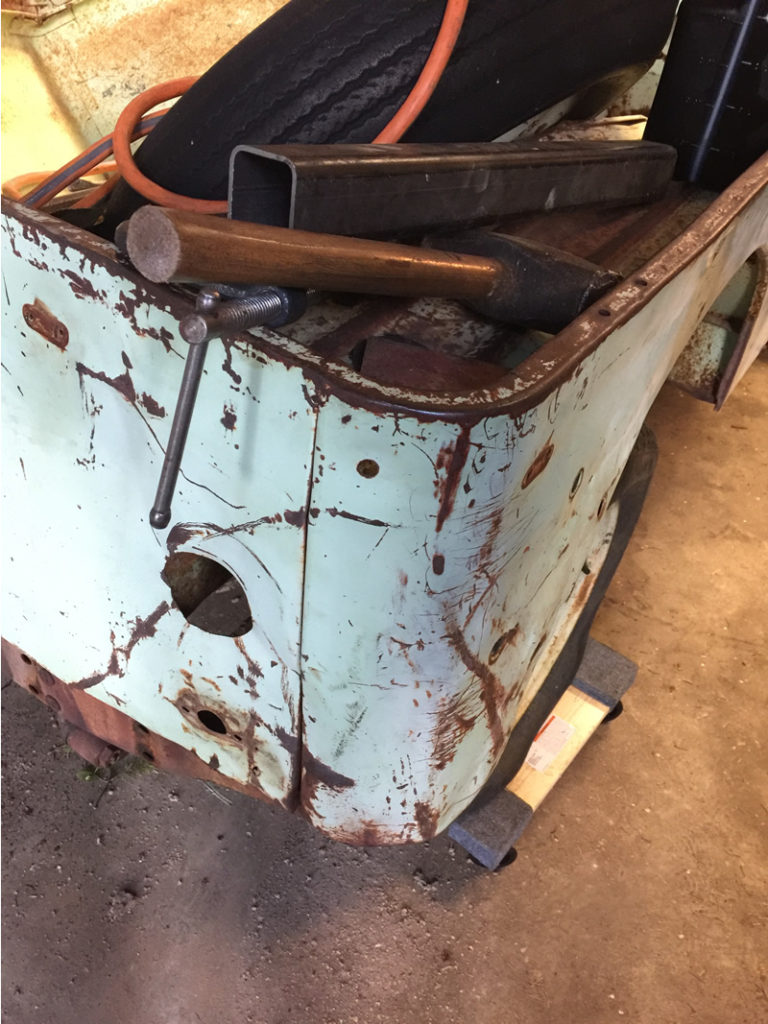
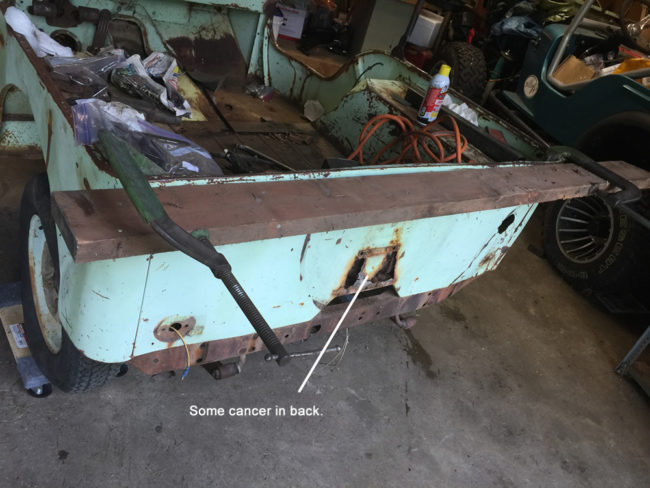
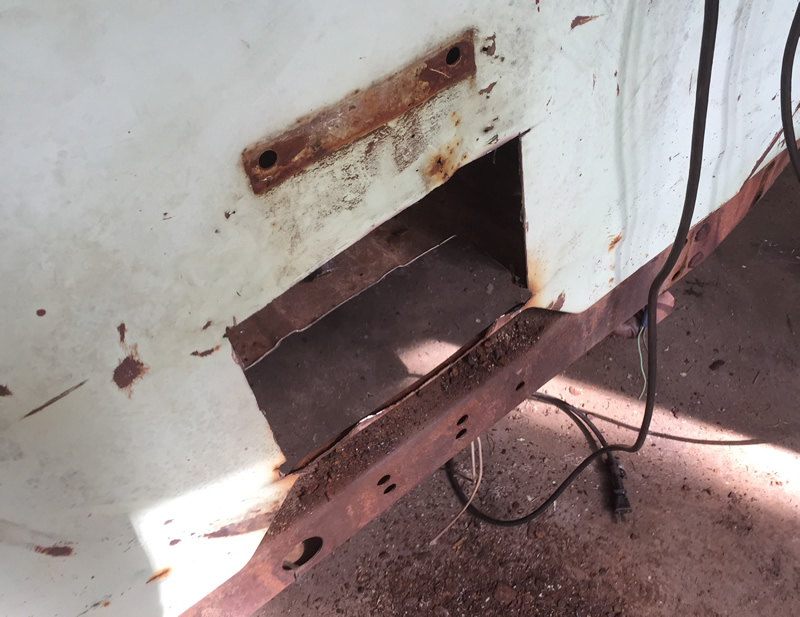
It didn’t take much more looking to see the body wasn’t quite as solid as I’d hoped, with rust a the steps and in a couple spots on the floor. Having seen other save bodies far worse, I knew we were in good shape with this one.

Satisfied, I gave Lloyd his asking price. I felt is was a fair price and I told him that. Besides, not only had he held the jeep for me without a depost, but he was generous with his time. I also hoped he’d give me a tour of his projects.

With the deal done, we pushed “Rusty” onto the trailer. Lloyd helped secure it, even giving me a few heavy duty come-a-longs to help secure my back up chains. With the jeep secure, Lloyd asked us to follow him into his shop. He had a jeep he wanted to show us. Here are some photos of the vehicles we saw. This is a Gaz on a modern chassis. I thought it looked pretty cool!

2016-09-06-lloyds4

Continue reading

 
To Top

Rusty’s Windshield

• CATEGORIES: Features • TAGS: This site contains affiliate links for which I may be compensated.

I had a chance this past week to begin taking apart the windshield. The windshield frame has only surface rust, so that’s a relief, but it does have two cracks. One crack should be easily fixed, but the other is on the arm. It is complete severed except for the cables(?) on the inside. This will be a little more of a challenge. Here are some photos:

2016-09-12-windshield

Fractured support arm:

2016-09-12-windshield-crack-support3 2016-09-12-windshield-crack-support2 2016-09-12-windshield-crack-support1

Continue reading

 
To Top

Rusty’s New Carb

• CATEGORIES: Features • TAGS: This site contains affiliate links for which I may be compensated.

it still needs a rebuild. It’s a Carter O-1538.

2016-10-07-carter-carb1 2016-10-07-carter-carb2 2016-10-07-carter-carb3 2016-10-07-carter-carb4 2016-10-07-carter-carb5 2016-10-07-carter-carb6

 
To Top

No Updates Today

• CATEGORIES: News • TAGS: This site contains affiliate links for which I may be compensated.

Ann and I have been busy with Rusty today. We removed (no easy task given the damage and rusty bolts) the grille and are ready to straighten it. Ann removed the rear tire, lights, and funky rear tow setup. We bought a battery, changed oil, etc. We learned that the starter spins and the engine turns over smoothly. The fuel pump works, too, but there’s no spark to the plugs just yet (seems to be the points — coil is working).

Here are just a few pics.

10-09-2016-dissassembly-Rusty1

The rust areas in the center are rusted through. The cargo area floor has a similar sized rust problem. Both appear patchable. Ann did all this work.

10-09-2016-dissassembly-Rusty3

This is my wife’s blood. I told her to stop bleeding on the jeep :-)

10-09-2016-dissassembly-Rusty2

My ignition didn’t come with a key and wasn’t stock anyway, so I ditched it. Instead, I rigged up this fender mounted dash with an ignition switch and button starter.

 
To Top

Grilling on Rusty

• CATEGORIES: Features • TAGS: This site contains affiliate links for which I may be compensated.

On Monday I spent some time testing the engine. After lightly sanding the points, the spark began to work, but the engine still didn’t start. I took a second look at the fuel pump and discovered it in fact wasn’t working. When I checked the bolts to remove it I discovered that the bolts were snug, but not tightened. So, someone at some point looked at the fuel pump.

After further examining the non-stock solex carb, I then removed it (I plan to sell it anyway). That’s when I noticed there was a pool of varnish/gas along the bottom of the intake. I decided I would get all that cleaned up before trying to restart it.

I next turned to the grille. The first two photos show how bad the grille was bent. I can’t image what they hit. Thankfully, the radiator seems to be fine.

2016-10-10-grille-rusty-straightened1

2016-10-10-grille-rusty-straightened2

Using a variety of strategies, I flattened the grille and straightened the edges. One side smoothed out quickly. In the pic below, you can see the right side too a little extra bending to come out correctly.2016-10-10-grille-rusty-straightened3

Here’s the final result. I’m pleased.2016-10-10-grille-rusty-straightened4

I will still have to repair both sides of the grille where it mounts to the bottom mount. I haven’t decided how I was to repair those areas. Here’s the right side where it mounts to the frame. As  you can see, the metal was cracked.

2016-10-10-grille-broken

We returned to Pasco late yesterday. I won’t be going back to Seattle until after Halloween, so I brought back a box of goodies to work on.


To Top

Rusty / DJ-3A Questions & Needs

• CATEGORIES: Builds, Features • TAGS: This site contains affiliate links for which I may be compensated.

I’ve spent some time over the last couple of days assembling information on what I have/needwant for Rusty.  I’m throwing this info up for questions/answers/comments:

1. AIR CLEANER: Bill has hooked me up with an air cleaner. I just need the horn, seal, and tube –  http://www.jeepsurreygala.com/wp-content/uploads/2012/06/oil-bath.jpg … cj3a looks the same to me? From 3A forum: http://www.cj3apage.com/cgi-bin/3Ayabb26/YaBB.pl?num=1303907998. Nice writeup on air cleaners here. Walcks has an air cleaner sticker, so that takes care of that.

air-cleaner-comparison

2. IGNITION SWITCH: Early ignition switch http://www.jeepsurreygala.com/wp-content/uploads/2012/04/KeychainEmilBruce.jpg. I don’t know if this style was used on any other jeeps? It dishes inward with the word “START”on it.

key-ignition-early-dj3a

3. PARKING BRAKE: I will need parking brake parts: http://www.jeepsurreygala.com/wp-content/uploads/2012/06/62-hand-brake.jpg. Are the later 3B T-handle parking brake setups the same as the DJ cables and parts? I have a handle that is salvageable, but lack the rest. The image below is from a 1962 book. I’ve seen nothing to indicate this changed from early DJ-3As.

1962-dj3a-handbrake

4. TRANNY CROSS MEMBER: I need a transmission cross member: http://www.jeepsurreygala.com/wp-content/uploads/2012/06/55-dj-frame.jpg (image http://s247.photobucket.com/user/64_Surrey/media/rearmount_zpsee48cf46.jpg.html) Should be the same as a 3A/3B/CJ-5? Note the cross member does have the transfercase mounting hole (far bottom) so it may be the same as the typical cross member.

1956-dj3a-transmission-crossmember

Continue reading

 
To Top

The DJ-3A “Wire Gauze” or “Dry Air” Filter

• CATEGORIES: Builds, Features • TAGS: This site contains affiliate links for which I may be compensated.
1954-kaiser-darrin-dry-airfilter

A pretty correct looking dry air or wire gauze filter from a 1954 Kaiser Darrin. Not the diagonal wire mesh on the exterior and the two prominent lips on the lid. The rubber piece on the top is unique to the Darrins. The DJ-3A did not use the rubber top piece.

UPDATE: This modification of the Oil Bath system into a dry air system by installing an air filter inside the oil bath canister might interest some readers: http://z4.invisionfree.com/CJ3B_Bulletin_Board/ar/t1267.htm

On DJ-3As, the stock air filter is a  “Wire Gauze” or “Dry Air” filter type. The oil bath filter commonly seen on earlier L-134 engines was an upgrade option on the DJ-3As. When I looked to see whether my firewall had the holes necessary to mount the oil bath filter, I found the firewall had not been drilled. So, Rusty must have been equipped with a dry air filter.

As far as we know, Willys Motors only installed the dry air filter on the DJ-3As. This same filter appeared chromed on some 1953 & 1954 Corvettes and some 1954 161 Darrins (perhaps other years, too). It’s likely that if someone has one of these lying around, they probably don’t know what it is. If you happen to have one, I’d be interested in it.

Below is one example of a filter about to be restored with a modern mesh in the middle. Charles explained how the NOS filter material can be reproduced: “A NOS corvette, Darrin, or DJ filter core is rare and expensive. Once in a couple of blue moons they show up on eBay. However, they can be made easily . The inner and outer ring are made of extremely thin expanded metal. Make the inner ring, wrap around some air filter grade copper mesh wrap (eBay) and then wrap the outer ring and secure. Unfortunately, the copper would deteriorate over the years and has been talked about badly. Even though they were called dry air filters they were supposed to be kept oiled.”

According to Bill Brown, there’s a K&N filter that can be used. He couldn’t remember the part number, but the “OD of it is 6 3/8″; the ID is 5 1/4″; and the height is 1 1/2”. This is a filter with an accordion fold all the way around with a molded “rubber” top an bottom. Molded into both the top and bottom are a pair of K & N marks the Identification AO62B4 and the words Oil Type.”

dry-filter-1964-surrey1

This photo shows some of the parts to build a custom dry air filter. The bottom is original. The mesh left and right should be criss cross in diamond shapes rather than circles. The air filter at the bottom is meant to replace the shredded copper originally between the circular mesh. The felt circle helps seal the top lid to the tops of the mesh. The item on the lower right compresses the felt onto the mesh.

Here are examples of the filter installed. The diameter of the top lid is about 6 3/4 inches:

dry-filter-1964-surrey2

This rebuilt unit has the incorrect mesh and an aftermarket filter.

Jason64DJ35

This one could be original. I can’t tell what kind of mesh surrounds the shredded interior.

Continue reading

 
To Top

And Then My iPhone Landed in My Soup ….

• CATEGORIES: Features • TAGS: This site contains affiliate links for which I may be compensated.

This story deserves a much longer telling, but let me cut straight to it. I’m in Seattle to work on Rusty. I dropped my iPhone in a bowl of Pho Soup. Not good. I rushed home and set it up to dry. Shortly afterward, I removed Rusty’s heater, only to find someone had built an expansive home inside the heater. This explains some of the missing cushion from the seats. As I was taking pics with the Nikon, the battery died. So, I turned to my computer, but the photos were much worse than I imagined. Not a great tech day.

On the bright side, I tested the heater fan and that works. Also, my phone seems to be drying out … finally.

As you can see below, the inside of the heater is almost entirely filled with stuff:

2016-11-17-heater-core-stuffed

And this is how it looked after that stuff was removed (and after my iPhone started working a little better). I now need to remove debris from the fins and repair the lower tube.

2016-11-17-heater-core-stuffed-cleaned

I also disassembled my speedometer. The rod that powers the pointer had broken. I will see if there is any way to repair it. The part looks awfully like later speedometers, so there may be hope for replacing it, but I first have to disassemble the front plate from the mechanism. Based on what I’ve read, it might never work quite right. But hey, it doesn’t work quite right anyhow!

2016-11-17-speedometer-pointer-rod


To Top

Just A Few Updates Tonight

• CATEGORIES: Features • TAGS: This site contains affiliate links for which I may be compensated.

On the Ann front: 

She hasn’t gotten any better, but hasn’t gotten any worse. She still spends most of the day in bed. We believe that there’s a problem related to neck muscles, nerves, and upper vertebrae. Their interrelationship seems to be causing both the nausea and the pain in her head. She’s had several physical therapy appointments that have helped isolate the area that seems the root of the issue, but it could take quite a bit of therapy to loosen that area.

On the Rusty front:

A couple days ago I bought an NOS 0-9 1956-1957 speedometer face and engine on eBay. If for some reason I can’t get my speedometer fixed, I will go with this. And, if I do get it fixed, then I am sure I can easily sell this. You can see these are pretty close in style, even using the same pointer (which I wasn’t sure how I was going to find it).

0-9 that I just bought:

speedometer-0-90nos

0-8 that I have:

1956-dj3a-speedometer-cluster-8-original-rusty2

While in Seattle the past few days I ran across a fantastic deal on a welder and blasting cabinet. I jumped on them and got both setup. The cabinet (a nothing-fancy Harbor Freight model) should work fine for cleaning parts.

barn-sand-blasting-cabinet

Based on the reviews I found, this Clarke 130EN Mig welder should be good for repairs on the body. Apparently, anything thicker than a 1/4″ is too much for it, but I have an old-fashioned stick welder to tackle those issues. It came with everything you see, including a full bottle of Argon, an extra reel, two masks, cart, and other items.clark-130en-mig-welder

On the Biscuit front:

I found this chevy scatter shield in Pasco a couple weeks ago. I took it with me to Seattle. It was by far the best price I’ve seen on one, primarily due to the holes in it. It was used by an old sand jeep dragger.

While I was in Seattle, I formed a cover plate for the hole that spans the bottom and bolts in place (plate not shown). I plan on patching the side with some 1/4″ steel. I’ve been waiting for quite some time to get a scatter shield. Now I can begin to reassemble it (with a few mods).

scattershield-pic2 scattershield-pic1


To Top

Rusty’s New Speedometer

• CATEGORIES: Features • TAGS: This site contains affiliate links for which I may be compensated.

UPDATER: The 0-10 early CJ-5 speedos did make it into early DJ-3As.

I found this NOS King-Seeley 0-9 speedometer core on eBay. I show it below next to my 0-8 face, whose day-glow white paint flecked off as I cleaned it. I can confirm it is the same size and seems to have the identical parts (though the gears may differ slightly given it goes to 90mph).

The 0-8 speedometers (manufactured in mid-to late 1955) were installed in early 1956 DJ-3As (as well as a few other models, CJ-5 being one). Later in 1956, Willys moved to the 0-9 white face speedometer core. About a year later (sometime in 1957?) Willys moved to the familiar 0-9 orange face. The early CJ-5 0-10 speedometer clusters made it into a few DJ-3As. One side note, those early 0-10 CJ-5 clusters were almost, but not quite identical to the Aero clusters.

speedometer-old-new2

The seller has more units. You can purchase the 0-9 unit on eBay here:


To Top

Odds, Ends, and Working on Rusty

• CATEGORIES: Features • TAGS: This site contains affiliate links for which I may be compensated.

I made it across the mountains on Monday, now that the snow and ice has let up temporarily. And, that reminds me. We traded in Henry, our red 2012 Laredo Grand Cherokee, for a slightly used blue 2016 Limited Grand Cherokee a few weeks ago.

oliver-jeep1

Henry was incredibly dependable over the course of 100,000 miles, but he was due some maintenance and new tires. Once we considered those costs along with the equity, we decided to get something newer that had the upgrades Ann wanted (such as heated seats). Best of all, our payments stayed the same. We still don’t have a name for him yet: oliver-jeep2

And now for a ramond photo. When Ann and I were last in Ellensburg, Washington, eating lunch, I ran across these urinals in the men’s room. I hadn’t seen kegs used that way, but maybe I don’t get out enough ??…

barrel-urinals

Yesterday (Tuesday), I spent the afternoon working on Rusty, triaging next steps (what needs what work done and fix-or-buy assessments). I’m also choosing some projects to bring back to Pasco. One thing I did was remove the bumpers and clean them up (not perfect, but good enough for the moment).

rusty-bumper1

Continue reading

 
To Top

Blasting Away

• CATEGORIES: Features • TAGS: This site contains affiliate links for which I may be compensated.

This was meant to be a longer, more glorious post about the trials and tribulations of setting up the blasting process (and I’d planned a second post on Alaska’ Paul’s blasting). But, this evening my mother needed rescuing after her battery died, so I shall have to skip the day’s drama and Paul’s efforts in favor of a short summation: I ran through three different compressors (a portable pancake, a portable contractor, and finally the 26 gallon wheeled Husky) before getting one that would work. Of course, the Husky had to be repaired, which further delayed work on Rusty.

2017-01-27-blasting-setup

Once the compressor started pumping, I started blasting. After considering various options, I went with fine coal material made by Black Diamond designed for blasting.

2017-01-27-black-diamond-coal-blasting-material

I tackled the headlight buckets first. The photo below shows one side blasted and the other not.

2017-01-27-headlight-bucketsl

I was able to prep a number of parts, but forgot to get a photo of them lined up on my work table. I’m bringing them back to Pasco with me today to paint them.

One reason I need to return home is so Ann can return to our bedroom …. she had a freaky experience at 2AM a few nights ago. Our dog Zollie woke her up, growing at something. He never growls at night. She said he was looking all over as he growled. Once she calmed him down, the Amazon Echo on her side table unexpectedly announced “that’s not a very nice thing to say”. Knowing she hadn’t said anything, she used her Amazon Echo app to determine what the Echo had heard. When she brought it up the echo claimed to have heard the word “die”. As you might imagine, that was enough for her. She went downstairs and slept on the couch. She hasn’t slept in the bedroom since.

One last thing I did yesterday was to spend a little time straightening the rear quarter panels. Plenty of work left, but using some clamps and flat metal I was able to make them look a little better. Here’s the passenger side.
2017-01-27-Rusty-rear-quarter-panel2

2017-01-27-Rusty-rear-quarter-panel1

Plenty of work left …

 
To Top

It’s the Little Things

• CATEGORIES: Features • TAGS: This site contains affiliate links for which I may be compensated.

No updates tonight other than this one.

We made it to Seattle a couple days ago. I made some more progress blasting some smaller parts yesterday. In order to blast the t-handle parking brake, I had to disassemble it. The last thing to remove was a screw/pin so I could remove the brake lever from its housing. I didn’t know whether to unscrew or press out the screw/pin, but as I examined iI felt pretty sure it should press out. Still, I thought it best to text a friend: Chris McKay.  He said he thought it was pressed out, too. So, I set out to remove the pin.

Here is what the brake looks like assembled.

t-handle-parkingbrake

Here’s the top of the pin:

parking-brake-rusty1

This shows the back side. I had to line up the hole in the housing with the back of the pin:parking-brake-rusty3

I grabbed a small socket to catch the pin and an object that could press through the hole:parking-brake-rusty4

Continue reading

 
To Top

Working Away

• CATEGORIES: Builds, Features • TAGS: This site contains affiliate links for which I may be compensated.

With the rain staying away for a few days, I booked it over to Renton for a few days to work on Rusty. Here are a few of the things I did today.

I did a little more straightening to the body. This time I wanted to remove a bow along the top back. I’ve mounted a board as a straight edge. You can see the cancer in the rear.

2017-04-09-rusty-body-work2
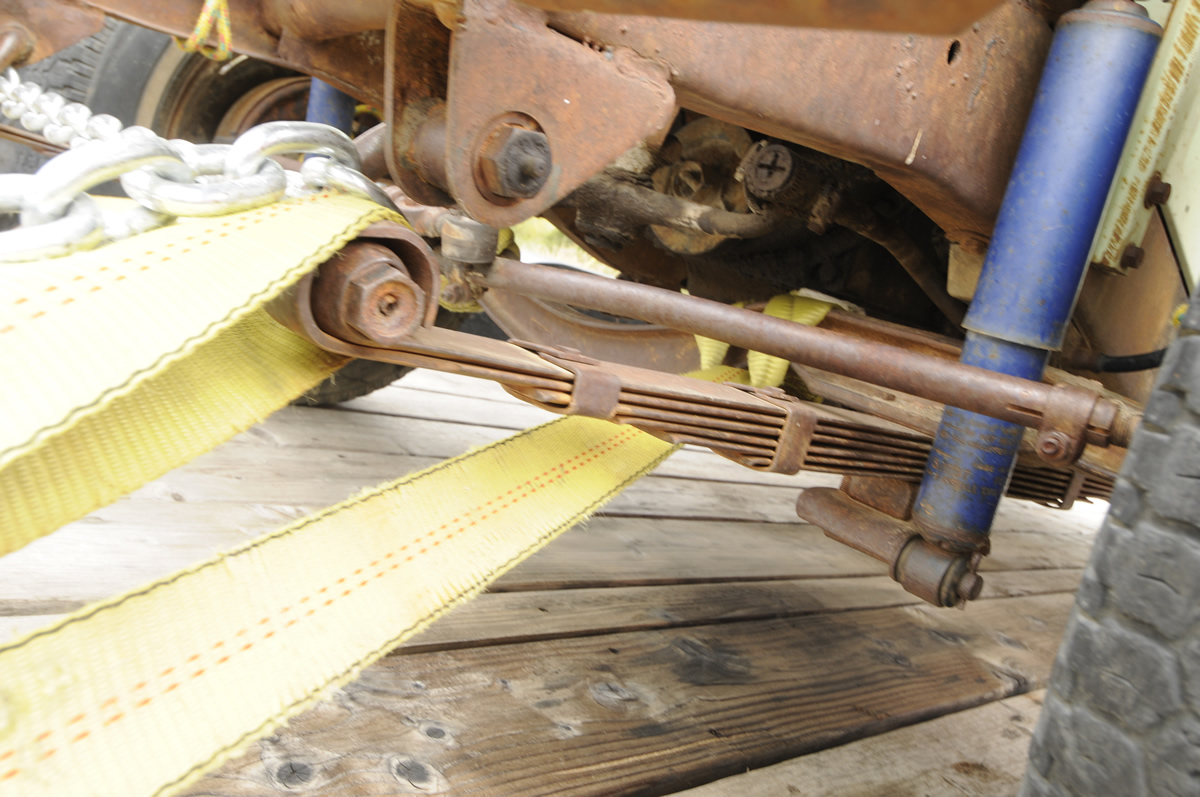
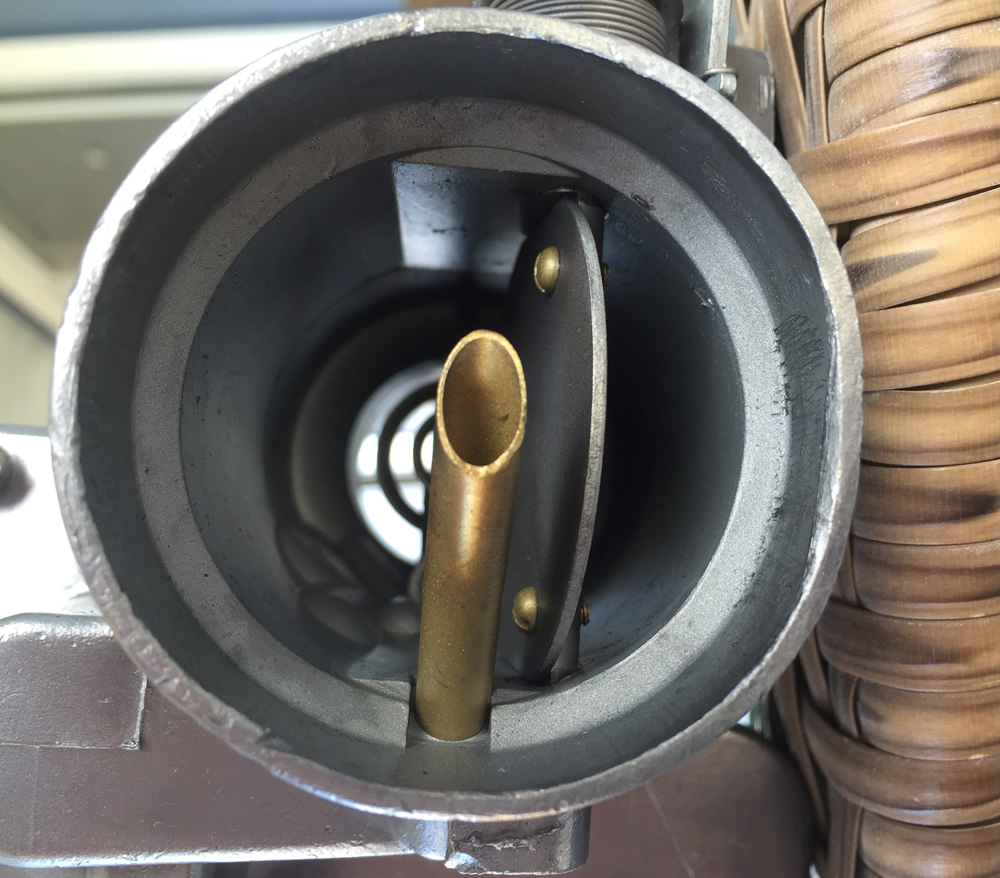
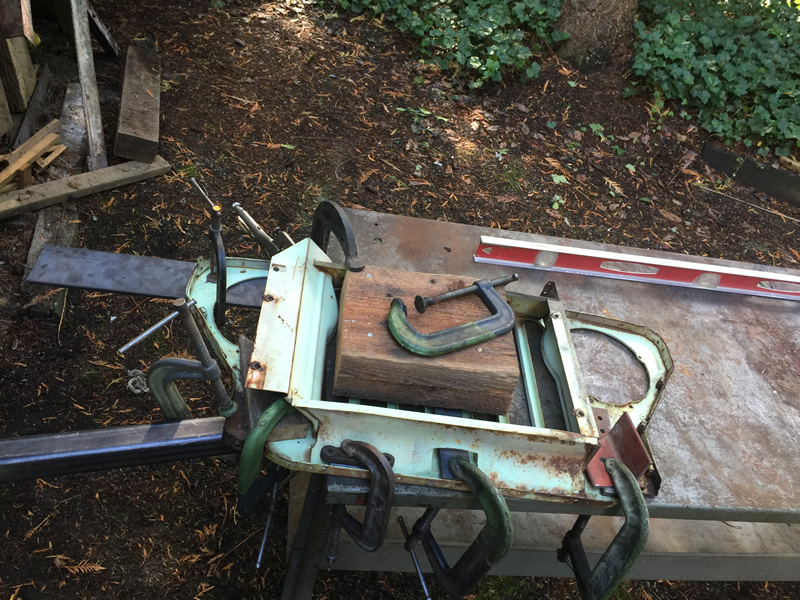
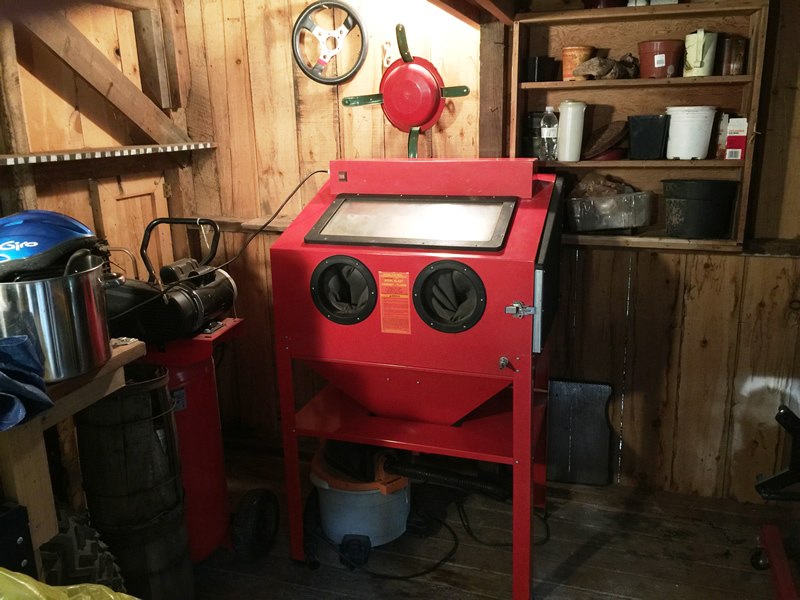
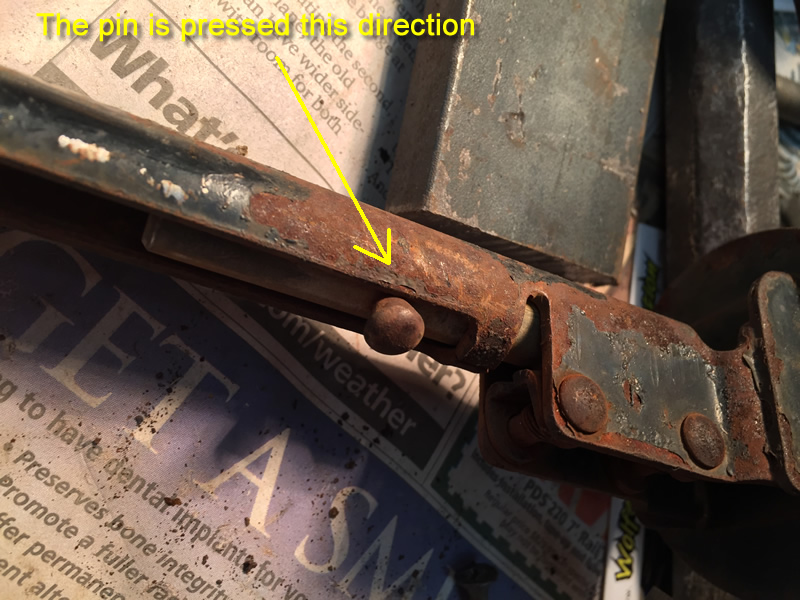
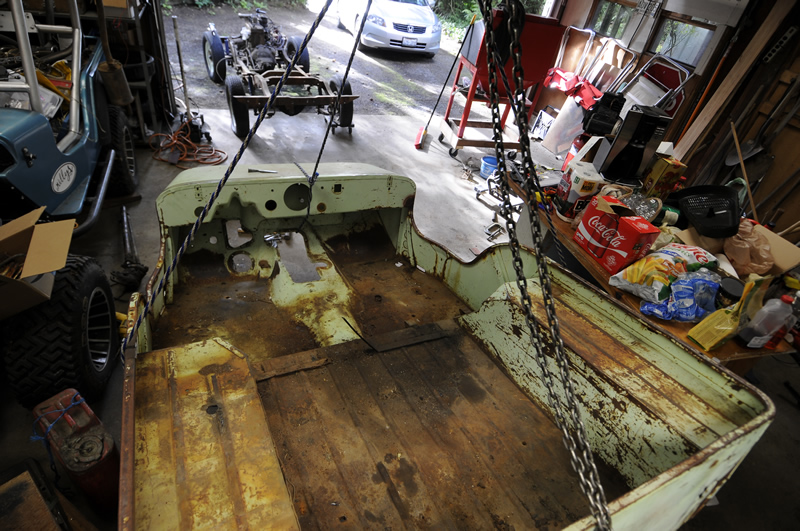
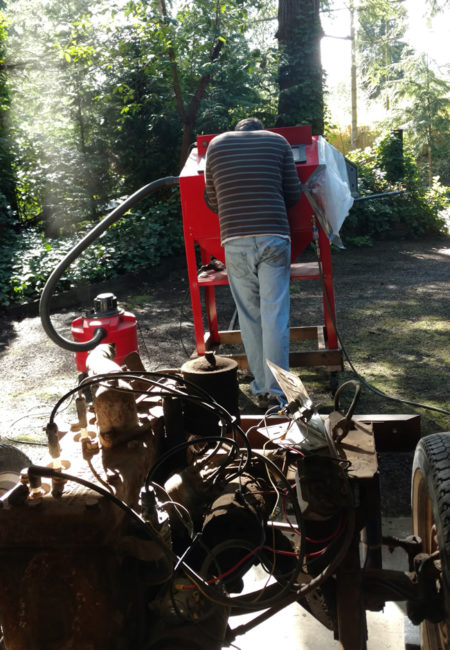
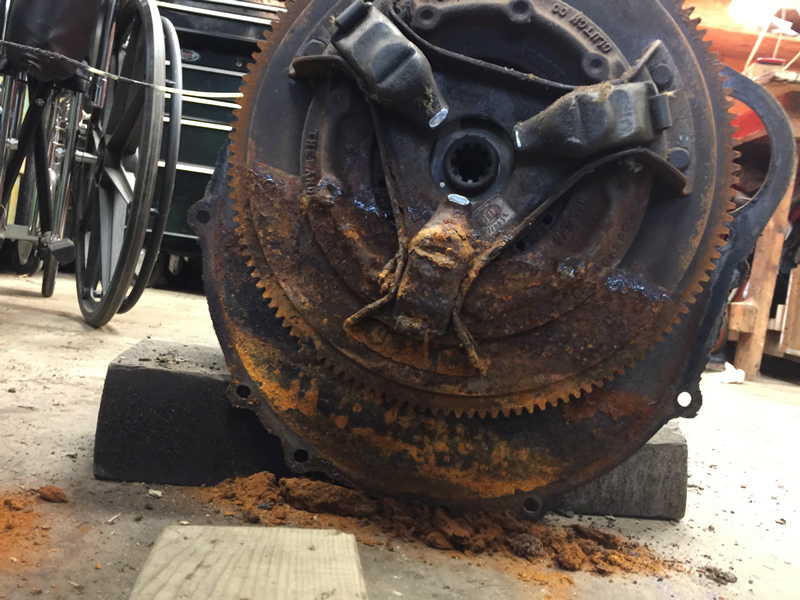
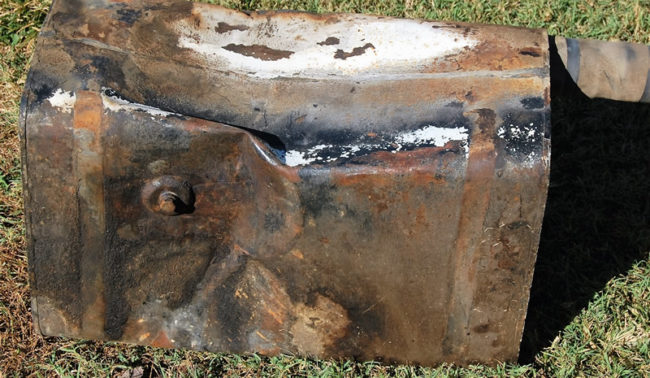
You can see there’s a gap between the board and the back.

2017-04-09-rusty-body-work1After some clamps and some sweet talking with a 5lb sledge, I coaxed the back into line.
2017-04-09-rusty-body-work3

Then I played doctor and removed the cancer.2017-04-09-rusty-body-work4

Continue reading

 
To Top

Bends, Cracks, and Mud

• CATEGORIES: Builds, Features • TAGS: This site contains affiliate links for which I may be compensated.

2017-04-10-rusty-remove-body3

There’s nothing like disassembly to reveal all the problems that remained unseen. Once the body came off, the realities revealed themselves.

The front cross member is cracked on the driver’s side (no surprise there — funny how I didn’t notice it with the body on it). The transmission is so packed with muck that I doubt any oil could leak through it. There are also some odd bends, like the mid cross member, which had something hit it with enough force to bend one side. Maybe the driveline broke at some point and flew up into it? Of course, there were rusty bolts, too, some which not even PB Blaster could save. At least it is getting closer to being disassembled.

The first big event was the removal of the body. I used a block and tackle to pull the body off:
2017-04-10-rusty-remove-body01

2017-04-10-rusty-remove-body02

2017-04-10-rusty-remove-body2 2017-04-10-rusty-remove-body1

Continue reading

 
To Top

Victories ….

• CATEGORIES: Features • TAGS: This site contains affiliate links for which I may be compensated.

Short update. On Tuesday, after buying some parts and fixing some wiring, I got mom’s riding lawn mower running. She’s happy. I am happy.

On Wednesday, after buying a new motor and then upgrading the wiring to 230 … (It sure wasn’t plug and play) … I got the compressor working. I am even happier!

Compressor done? Check …

IMG_2993

Parts ready? Check …

IMG_2992

Parts blasted? Check …

IMG_2996

Nice to be making headway again.

 
To Top

One Part at a Time …

• CATEGORIES: Builds, Features • TAGS: This site contains affiliate links for which I may be compensated.
2017-04-14-Ramen-noodles

All work and no noodles makes David grumpy! Good thing I found a new Ramen noodle place just a few minutes away from my parents. I had them add some pork belly. It was awesome!

More progress on Rusty, one part at a time. I wanted to remove the u-joints so I could sand blast and paint the driveline.

2017-04-14-driveline4

To remove them, I used my favorite vice, something that’s been around longer than me. Using two different sized sockets (one to slide through and one to catch the u-joint as it slides through, I pressed it through. Make sure the grease nipple is NOT on the side you are pressing or it will cause you problems. This shows the u-joint after the springs are removed, but before I began pressing.2017-04-14-driveline5

This shows the u-joint after pressing it through. 2017-04-14-driveline6

Continue reading

 
To Top

Having a Blast

• CATEGORIES: Builds, Features • TAGS: This site contains affiliate links for which I may be compensated.

Just a few updates for today ….

Friday was another day of blasting. And, with Ann’s help, there was plenty of scraping, too. This photo describes my day:

2017-04-20-sandblasting

But, all that work wasn’t for naught. See the much cleaner steering box:

ross-steering-box-rusty-clean2

ross-steering-box-rusty-clean
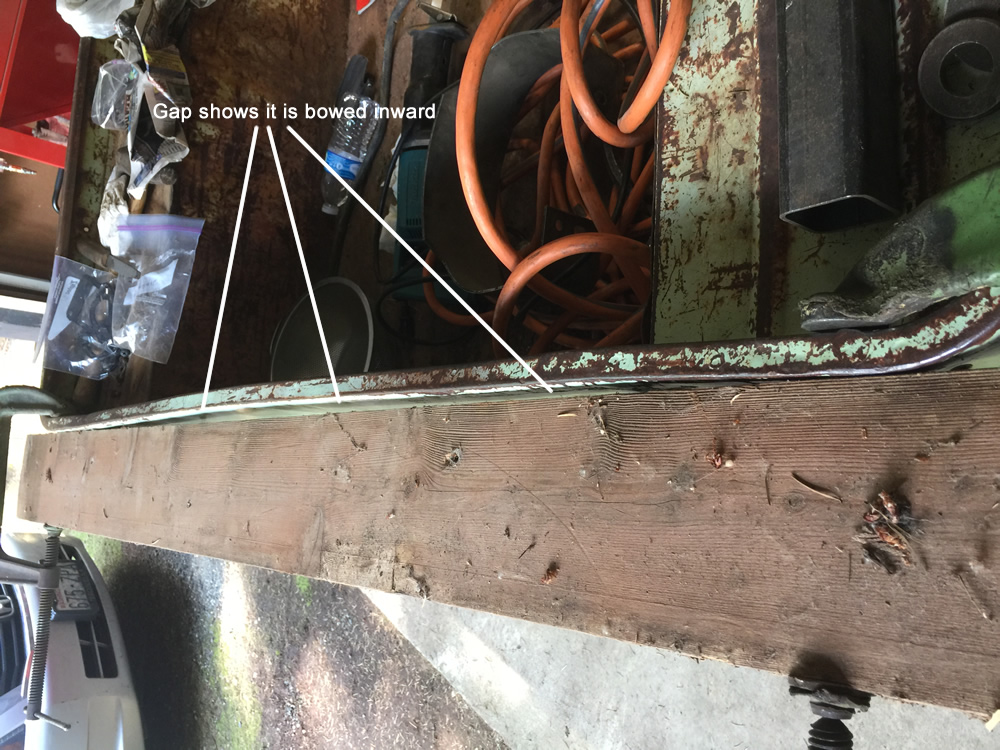
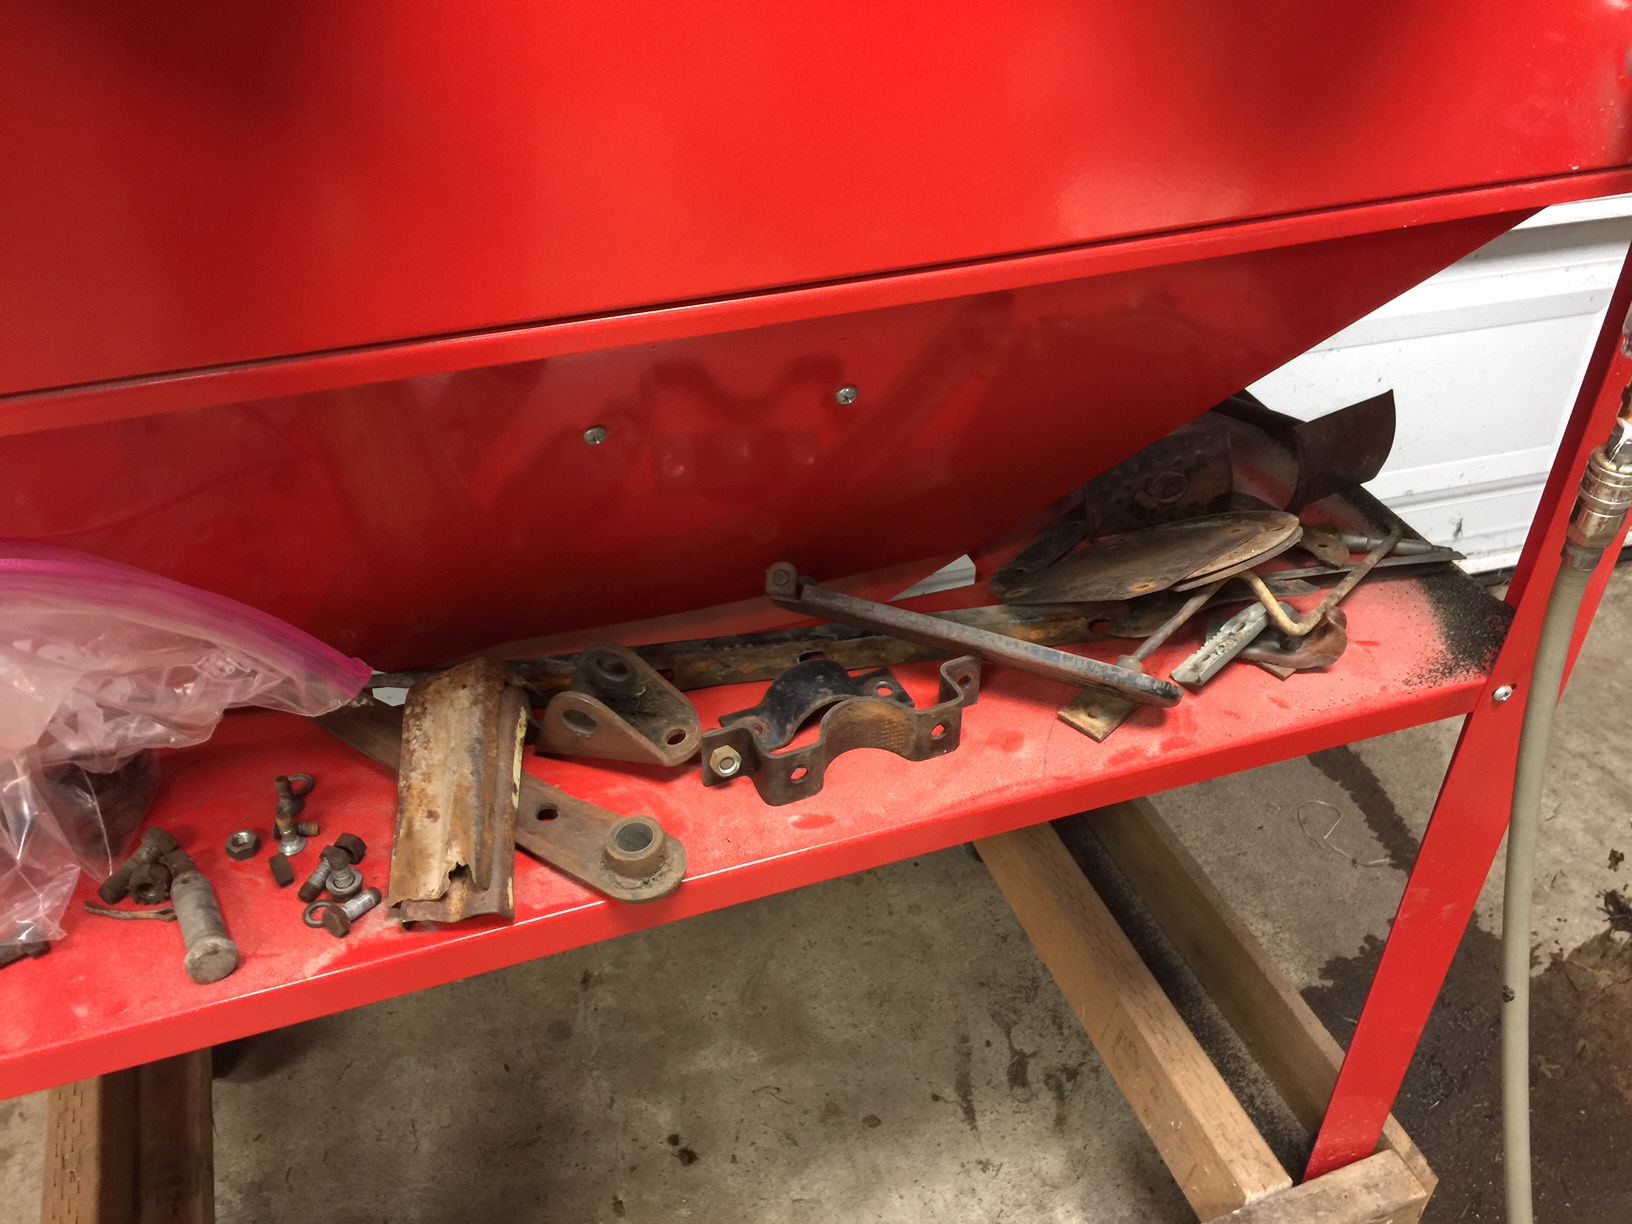
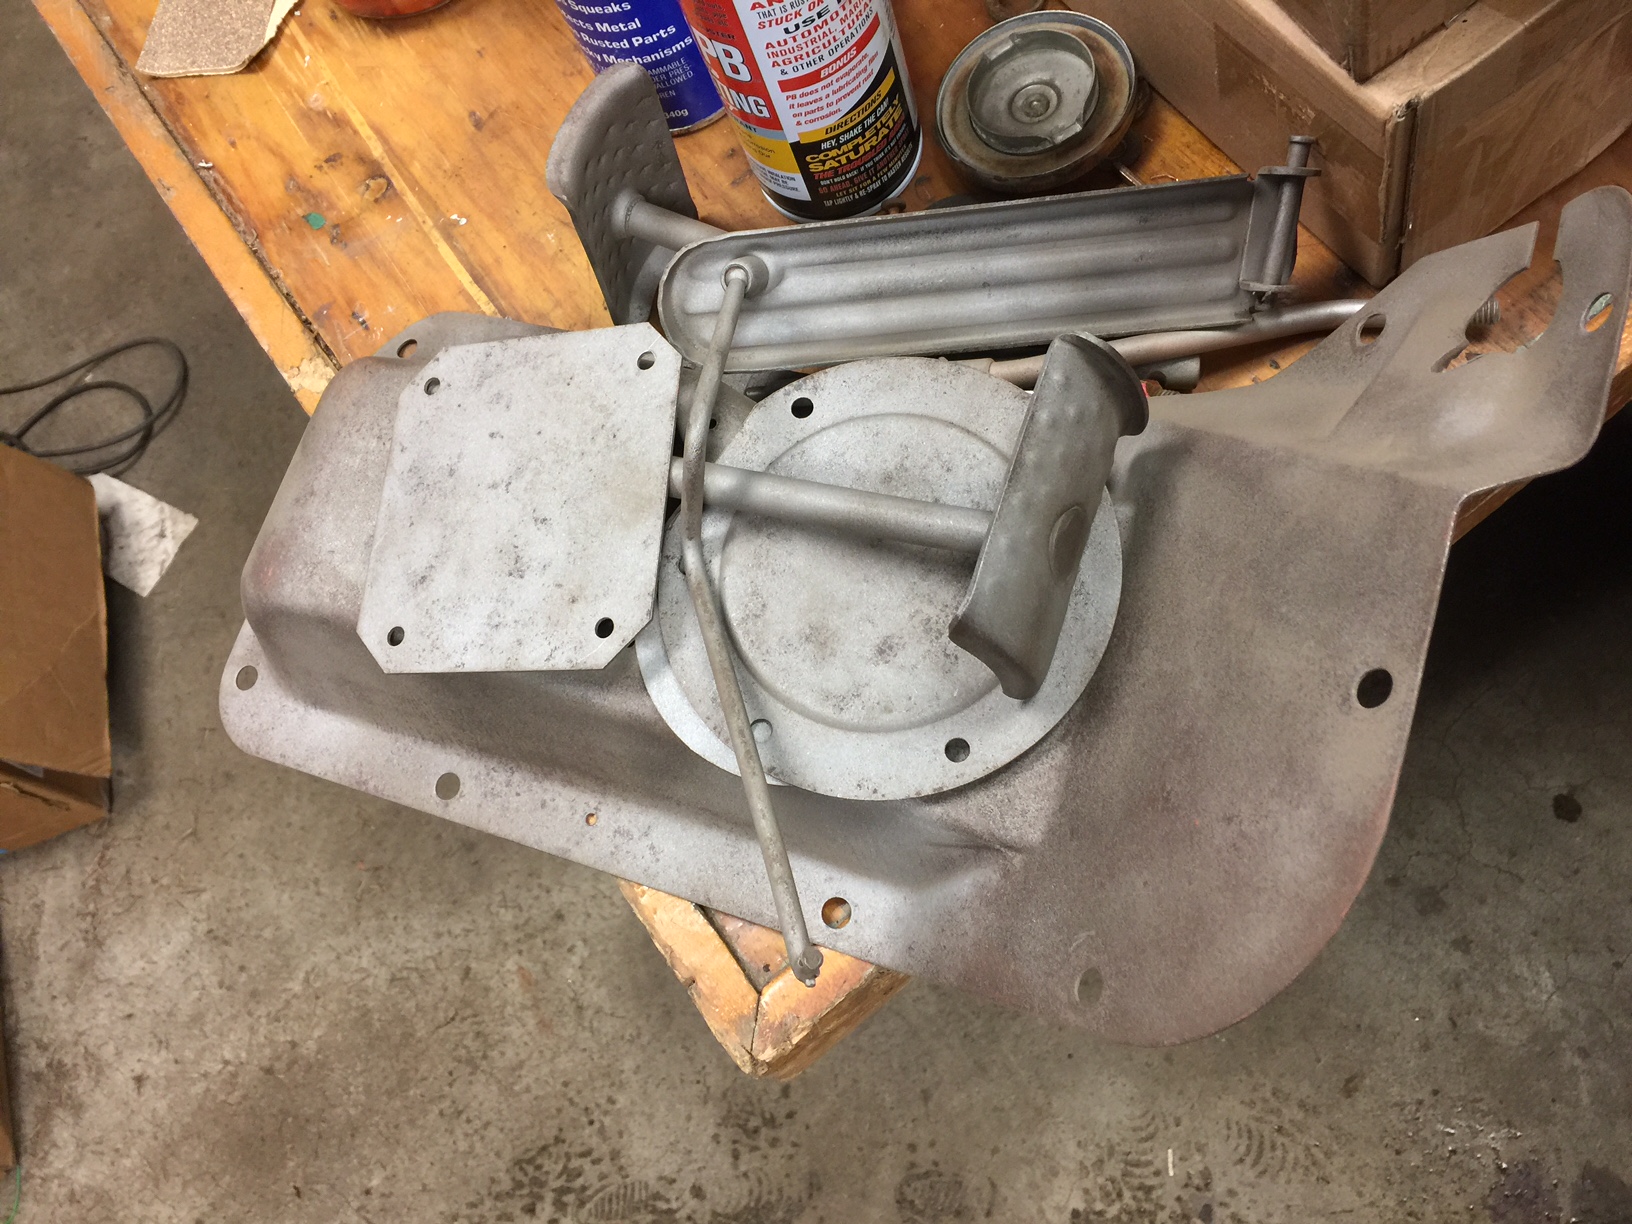
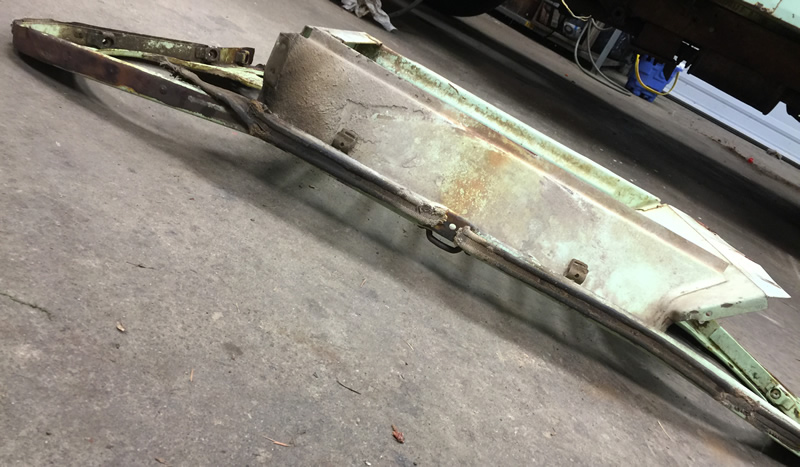
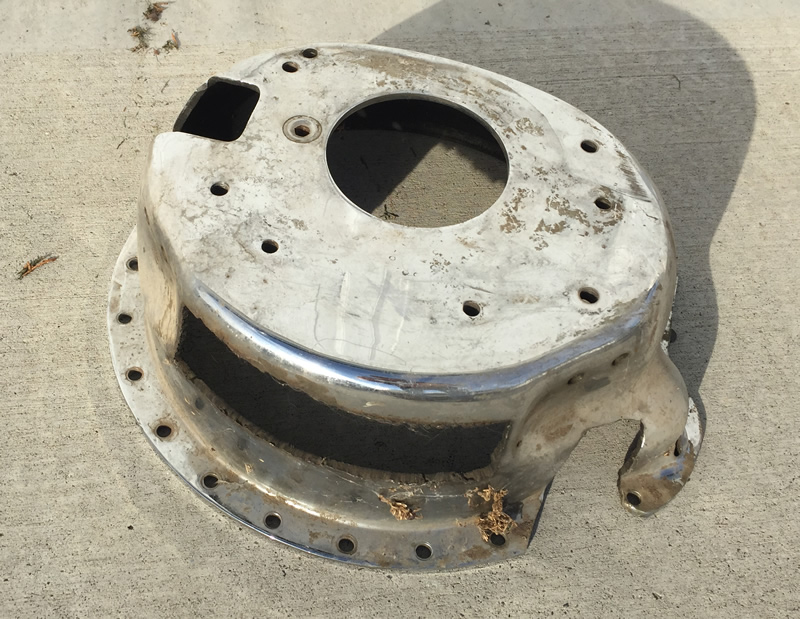
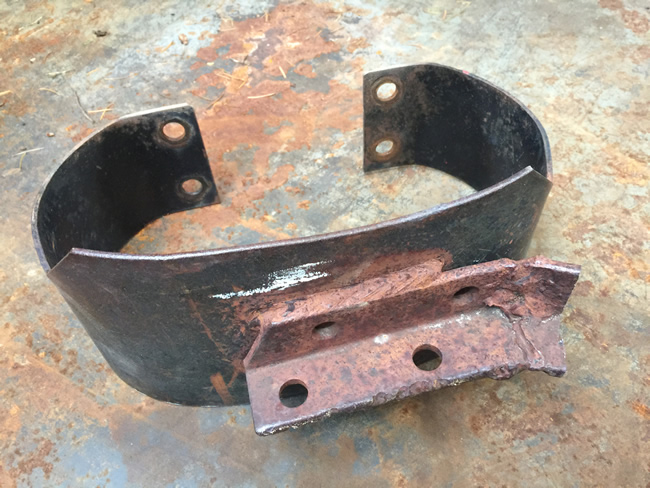
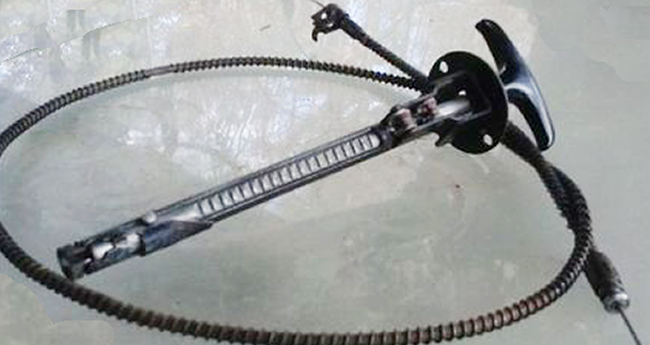
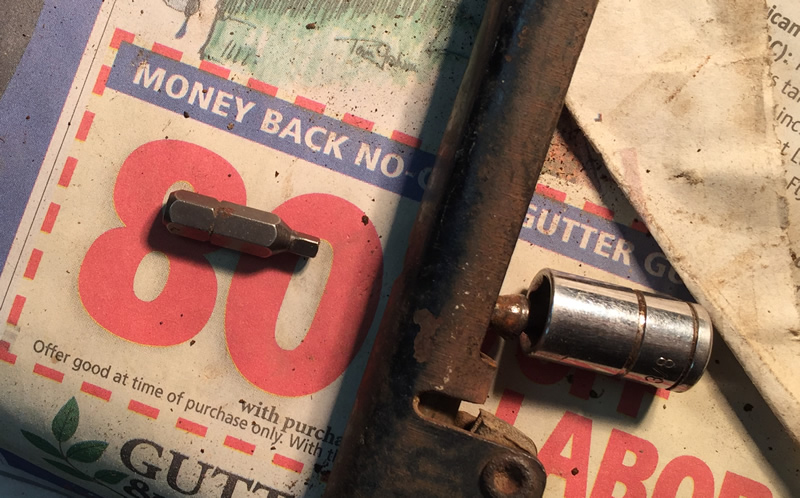
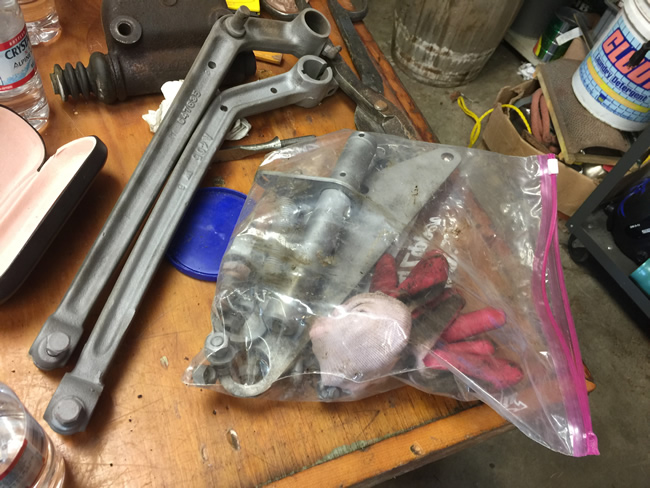
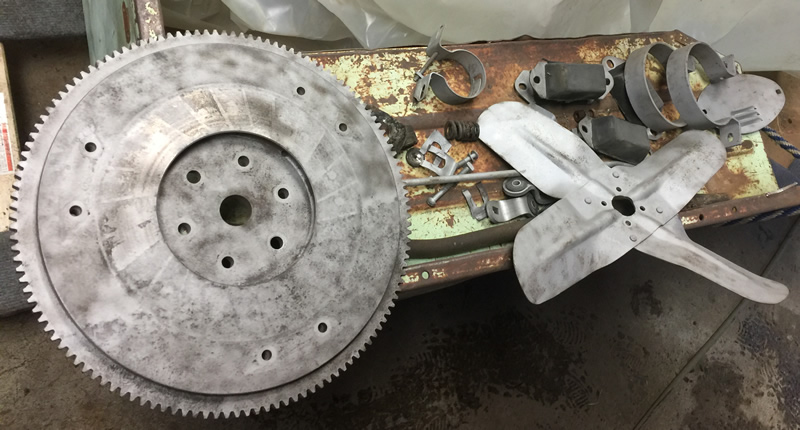
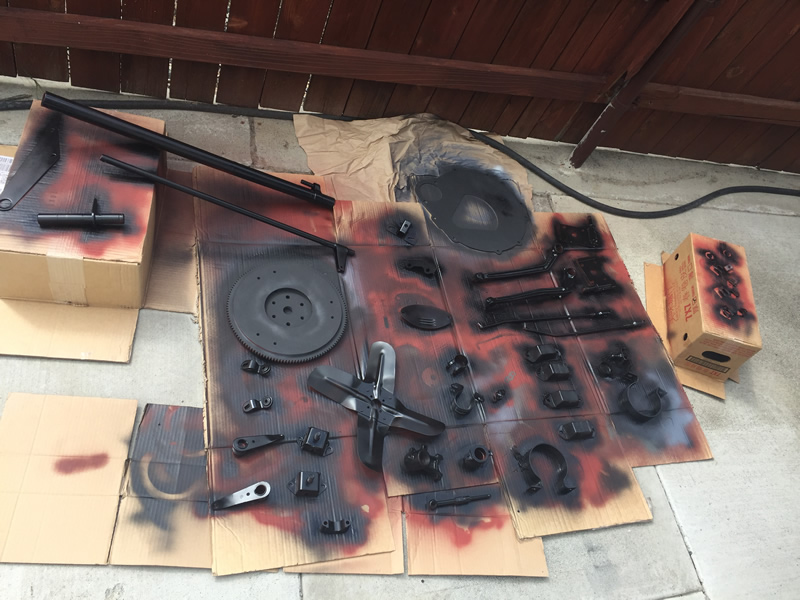
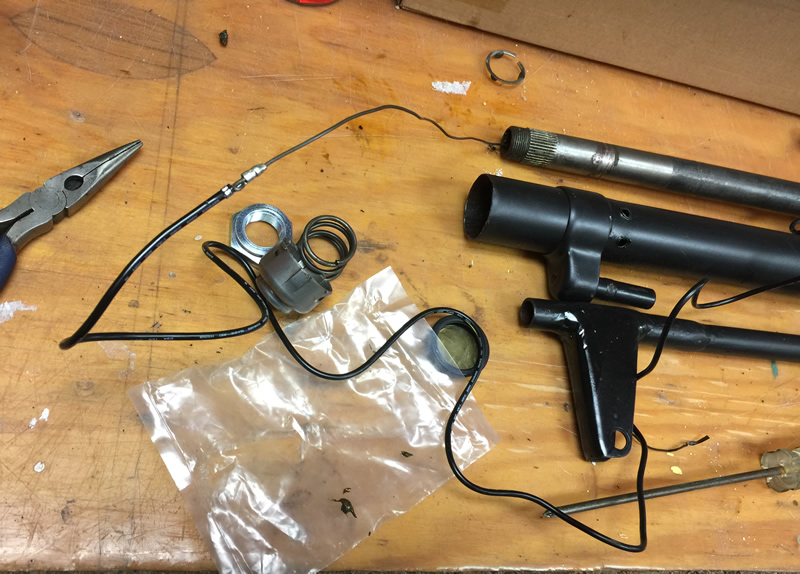
And, some of the blasted parts … clutch linkages, pedal levers, column shift parts, and more:
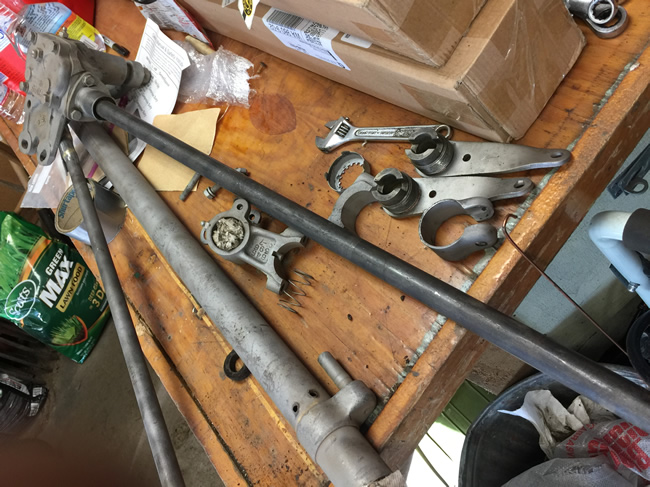
more-blasting-done2 more-blasting-done1

Continue reading

 
To Top

Rainy Days Go Away!

• CATEGORIES: Builds, Features • TAGS: This site contains affiliate links for which I may be compensated.
2017-04-22-ann-garage-floor

Ann is not afraid to get dirty!

Unlike our sunny Friday, today was a rainy day, so any thought of blasting the frame was put on hold. But, we did get nearly all the parts removed from the frame and the engine/transmission ready to pull out. The more we removed, the more we could see that poor Rusty had come from an abusive home.

Case in point: the transmission cross member. Both sides of the frame where the transmission crossmember normally attaches have been beaten, suggesting that the jeep was often bottomed or high centered. That would also explain the need to install a custom cross member:

2017-04-22-frame-crossmember

You can see the wave along the bottom rail. I play on straightening it and then added an extra piece of metal to about a foot long to add additional strength along the bottom of the frame.

This net photo shows the rear passenger spring. The front portion of the bottom leaf is bent down quite a ways. This is slightly problematic in that there aren’t off the shelf springs for DJ-3A convertibles (that I know of anyway).

2017-04-22-springs-bent

I don’t know which year this image was printed, but it highlights the different springs among models.

dj3a-spring-options

Note that the hardtop version had different numbers of springs on the left vs. right sides. From the CJ-2A Page.

To make it more confusing, I have five leafs in the front and four in the back (on both sides). I think I should have only 3 leafs. Perhaps the previous owner broke them and installed heavier ones? Or, the number of leafs was changed after 1956? I don’t know.

Continue reading

 
To Top

Frame Is Painted!

• CATEGORIES: Builds, Features • TAGS: This site contains affiliate links for which I may be compensated.

2017-04-24-david-ann-sand-blastingThis weekend my lovely helper and I blasted and painted the frame. Now, we are both tired. So, here’s a recap in pics …. First the dirt and scraping. Yuck!

2017-04-24-dirty-tranny

2017-04-24-ann-cleaning

2017-04-24-fly-wheel
Continue reading

 
To Top

More Parts Painted ….

• CATEGORIES: Features • TAGS: This site contains affiliate links for which I may be compensated.

More parts have been painted.  On my next visit to Seattle (in a couple days?) I will be pulling the brakes to see what I need, checking the rear end, and working on the gas tank and readying that for installation.

2017-04-28-parts-rusty-paint2

Today I’ll be cleaning the and painting the bell housing and cleaning the generator and starter.

 
To Top

Getting Tanked

• CATEGORIES: Builds, Features • TAGS: This site contains affiliate links for which I may be compensated.

During my brief visit to Seattle the weather was most uncooperative. Today it was rain and hail, intermixed with sun. Two days earlier it was thunder, lightening, and downpours. So, I wasn’t as productive as I would have liked. Still, I managed to clean some more parts, order some parts, and work on the gas tank.

Not surprisingly, there seems to be no aftermarket replacement tank for the DJ-3A. I’m pretty sure a DJ-5 or rear CJ-5 tank would fit just fine, but I didn’t have one readily available and, besides, I was trying to stay with the DJ-3A tank. After some searching, I found one with all the parts, but it was a bit dented.

tank2

This tank took a pretty good hit.

Today I decided to get the dents out. With nothing to lose, I started by drilling an access hole in the good side so I could pound out the worst side.

2017-04-06-gas-tank5

My tool of choice was a 20 pound pry bar that had a round surface at the top. So, I inserted the bar upside down into the newly drilled hold and began working out the dents. It worked surprisingly well.

2017-04-06-gas-tank6

I also had a small sledge and a smaller bar with a rounded end that helped remove some dents. Continue reading

 
To Top

Assembling a DJ-3A Column Shift

• CATEGORIES: Builds, Features • TAGS: , This site contains affiliate links for which I may be compensated.

Yesterday I assembled Rusty’s column shifter. In my head, I took all kinds of photos. One in particular I took (again in my mind) showed the layout of all the parts prior to assembly. Alas, somehow that photo never made it onto my phone!

The DJ-3A shifter is slightly different from a VEC CJ-2A shifter. I can’t say how much it differs from a Jeepster or wagon column shifter. But, i can say that following these VEC CJ-2A instructions were very helpful.

After laying out the parts (and not taking a photo) I began the assembly process by learning how to install the horn wiring. After looking up how to do it on a 3B (thanks CJ-3B Page!), it turned out to be quite easy.

Step 1) Thread some of my grandfather’s wire through steering shaft.

2017-05-20-column-shift-assembly1

Step 2) Attach the wire to the horn wire end. In this case, I ran it through wire connector and then bent it so that the wire would not pull back out of the connector. 2017-05-20-column-shift-assembly2

Step 3) Pull the wiring carefully through the end of the shaft.  2017-05-20-column-shift-assembly3

With the wire installed, next on the list was assembling the shifter. The first step involved installing a washer, a spring, and a second washer onto the column shift tube Next, the interior shift lever must be screwed onto the shift housing. Then, slide the shift housing onto the column shift tube, pushing it far enough up so that a special metal pin can be inserted. Once that is done, you have to weld the end of the tube to the pin to secure it.2017-05-20-column-shift-assembly4

Continue reading