Leftovers-racer Research Archives

This information contains posts related to the racing jeep we call “Leftovers”

To Top

Sidebars and Netting Done; Frame Washed

• CATEGORIES: Features • TAGS: This site contains affiliate links for which I may be compensated.

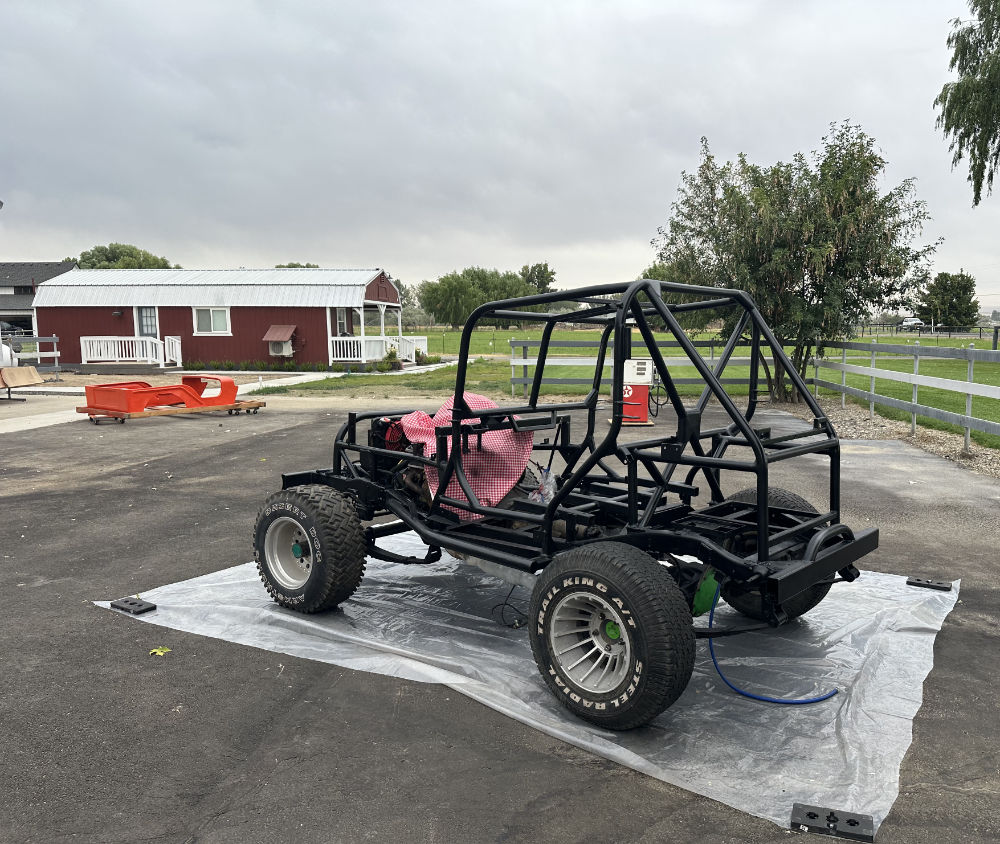
UPDATE: The weather was perfect, cloudy, not so hot, and windless, for painting the chassis outside. 

2023-08-04-chassis-paint1 2023-08-04-chassis-paint2

================================

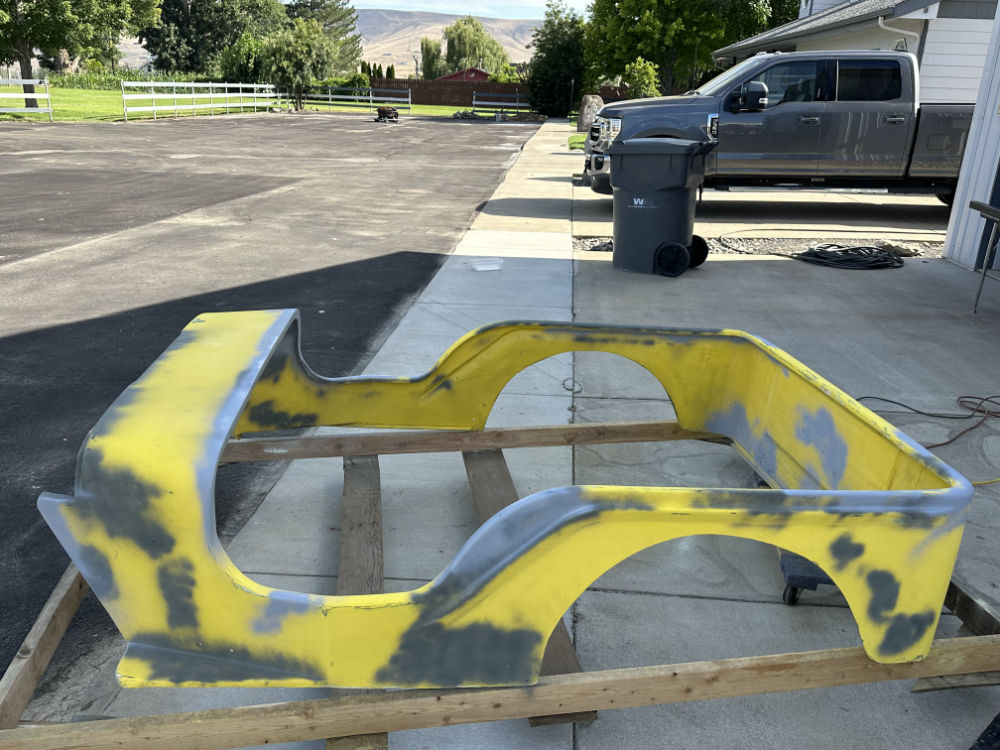
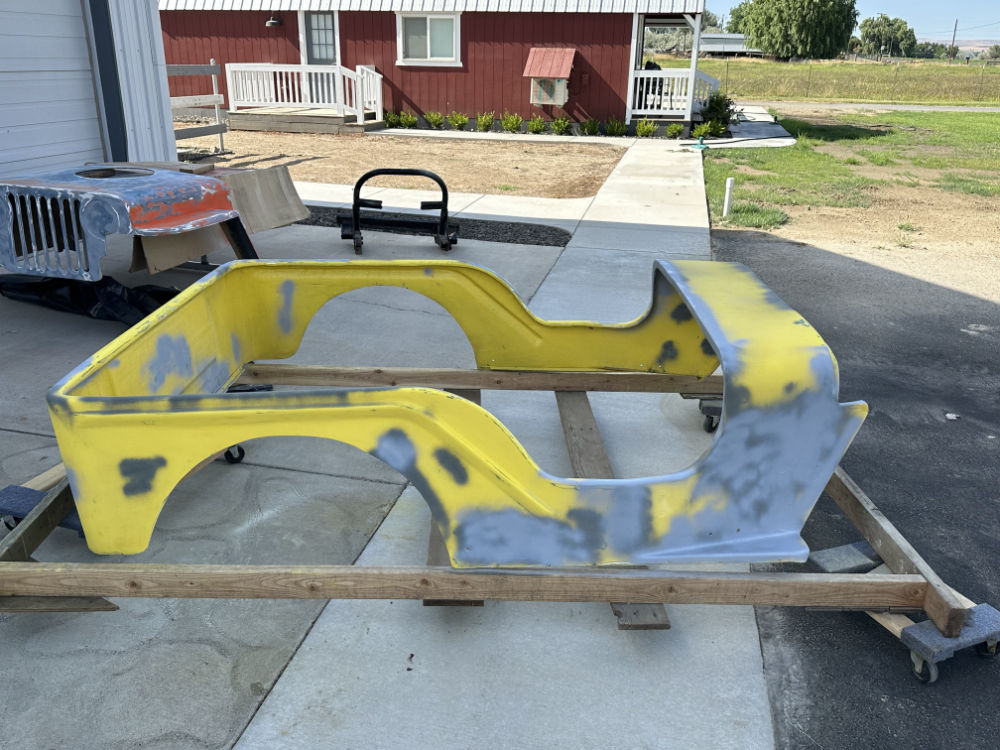
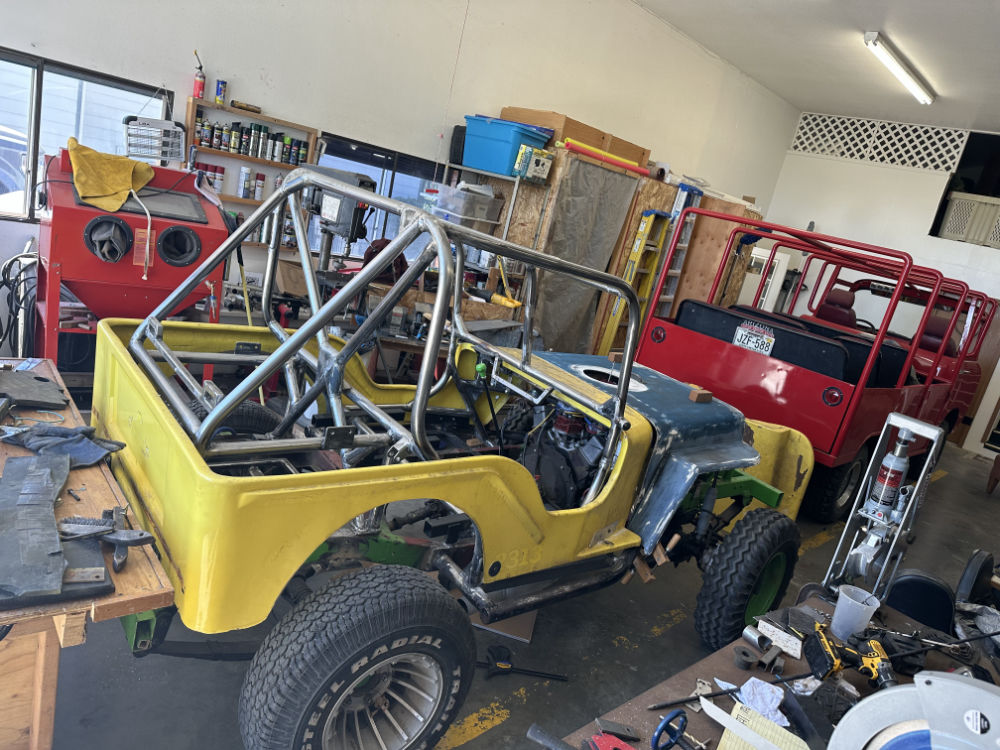
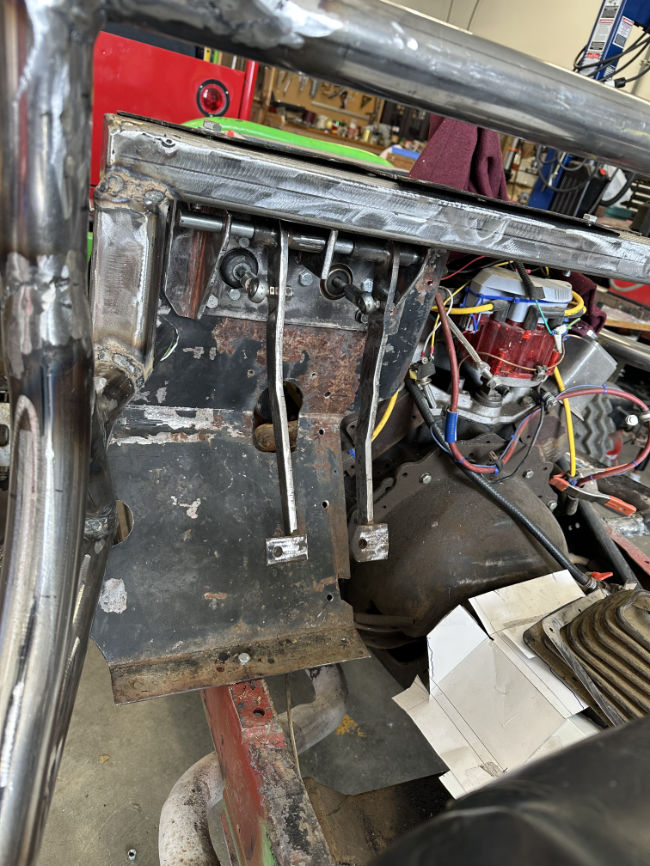
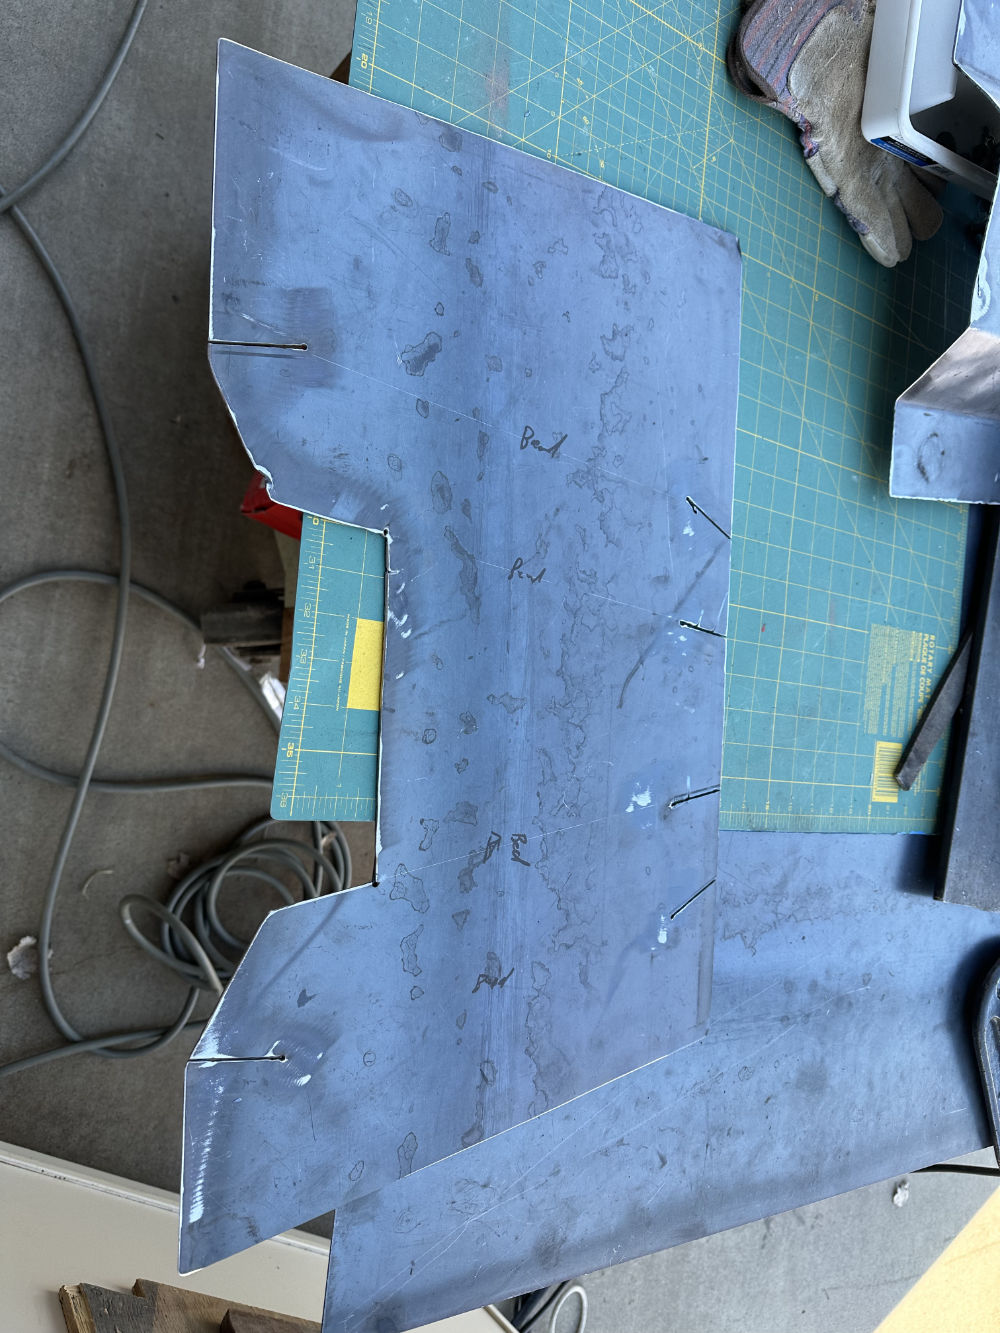
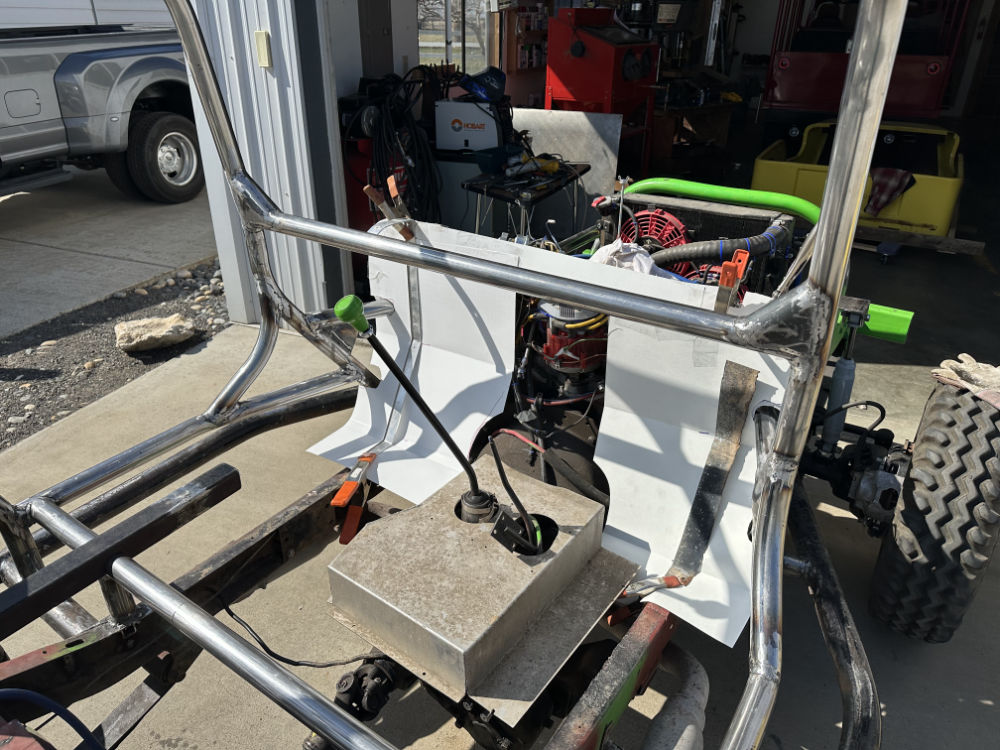
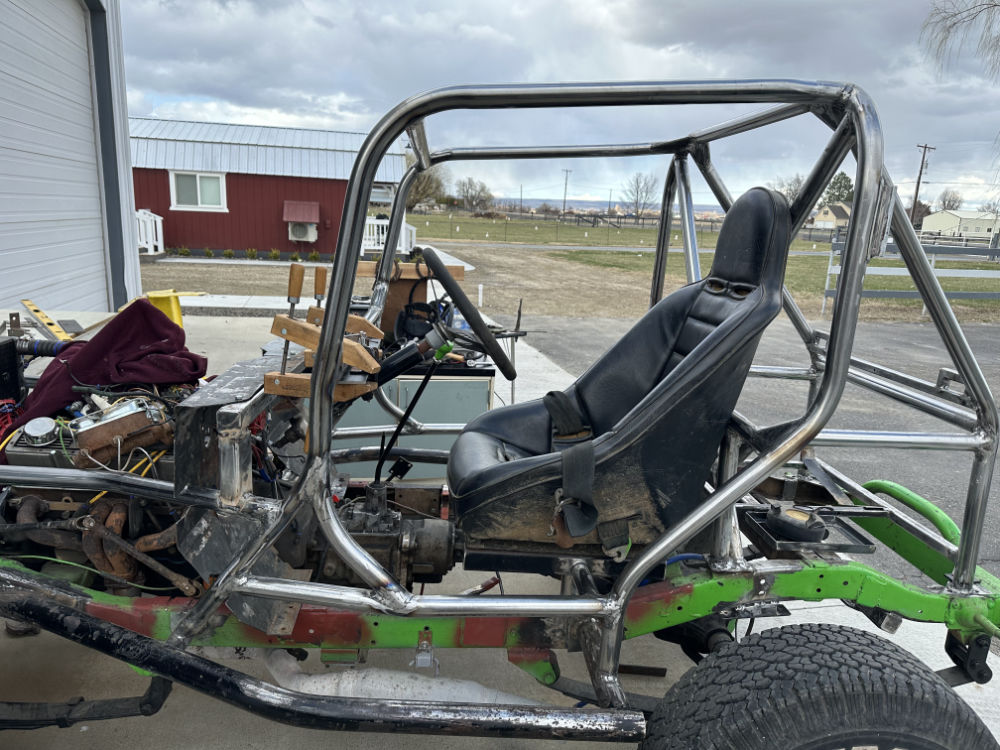
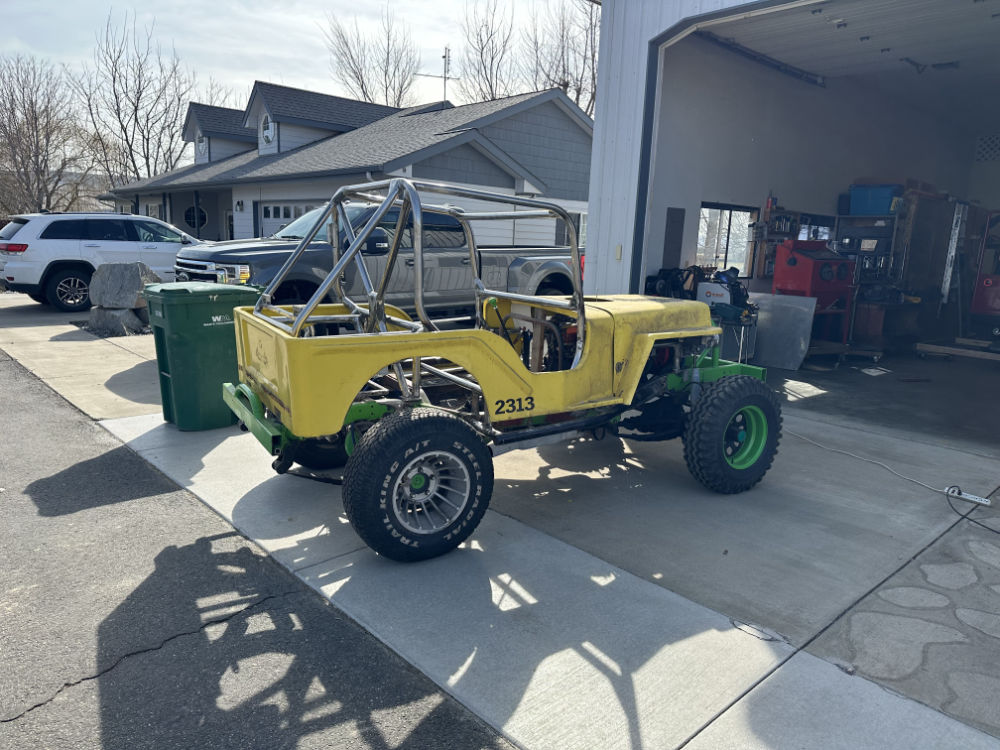
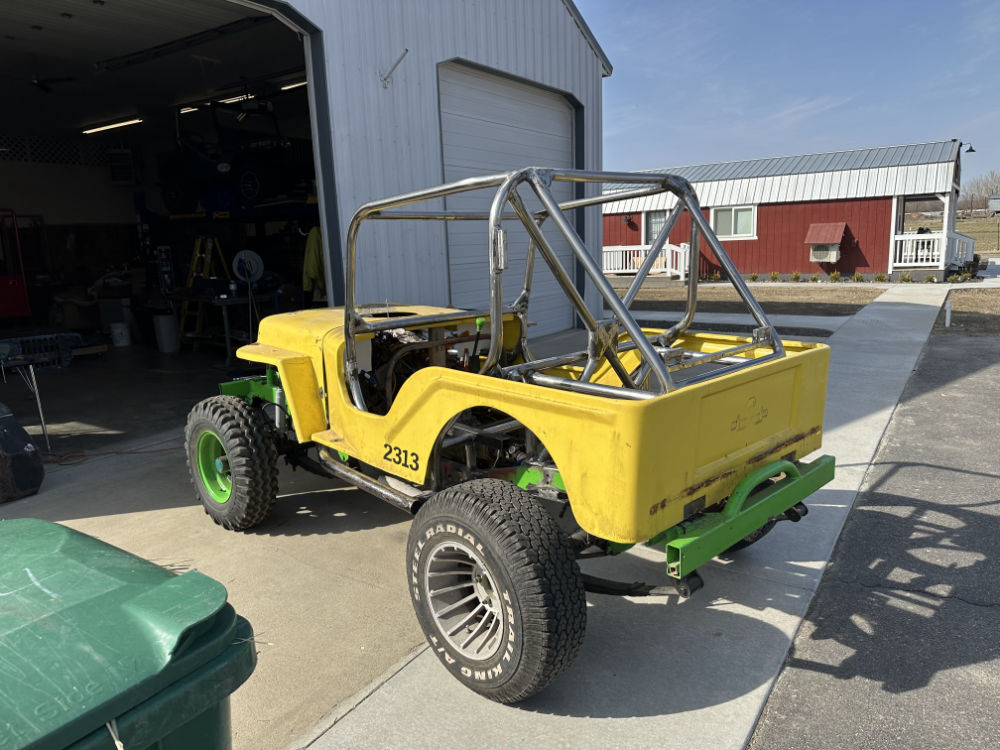
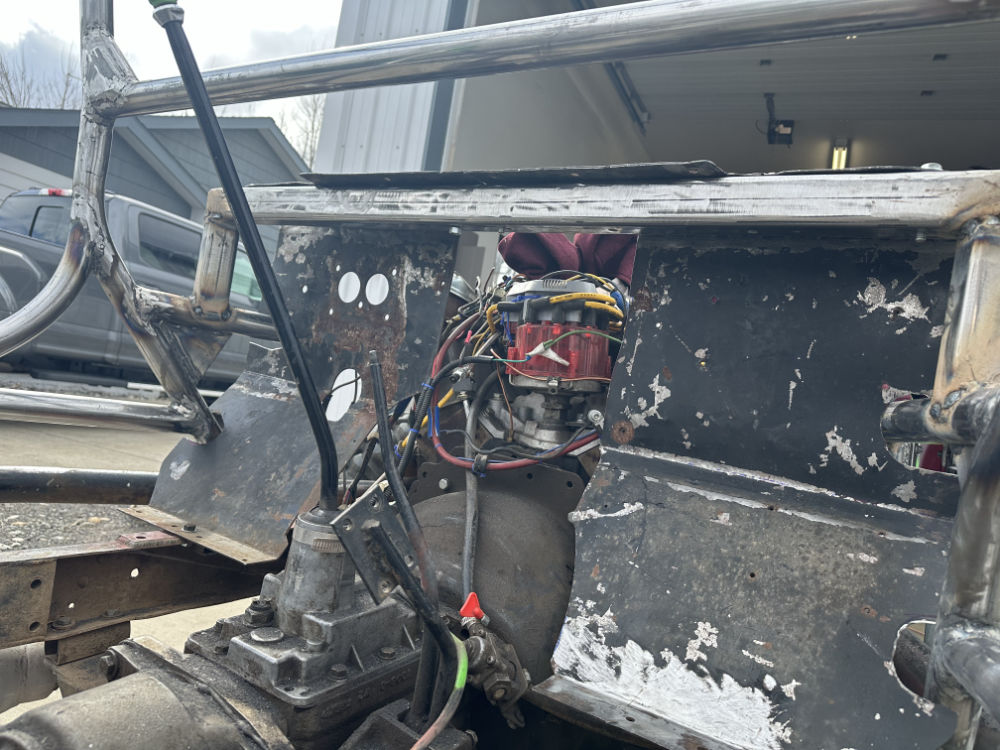
It’s been a busy few days. I completed the sidebars and netting, then washed the frame. It’s drying awaiting a new coat of paint. While I’d prefer to disassemble and properly clean and paint everything, that’s just not possible at this point.

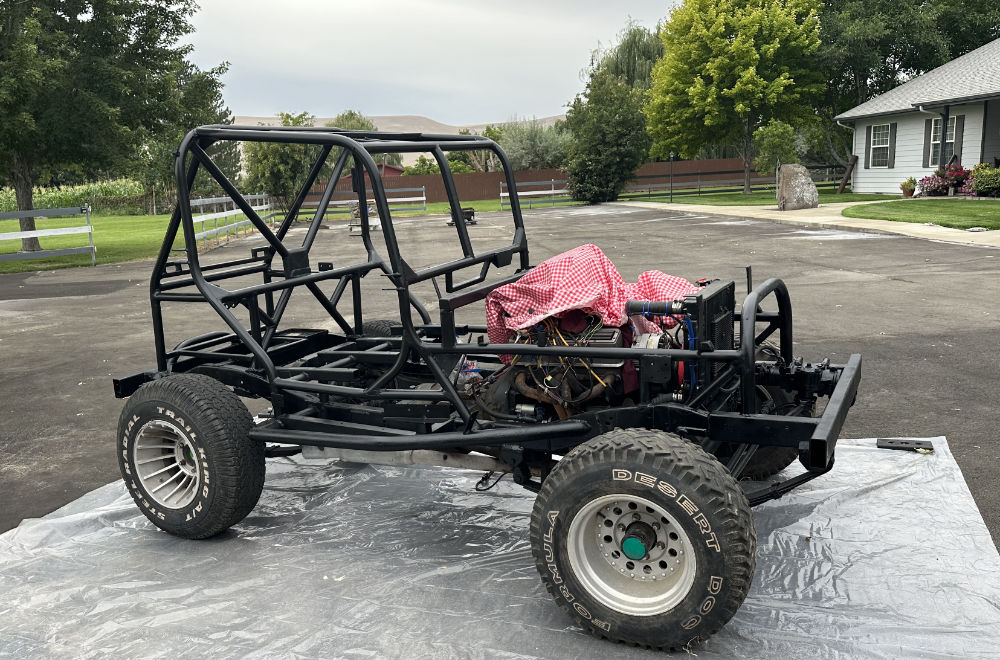
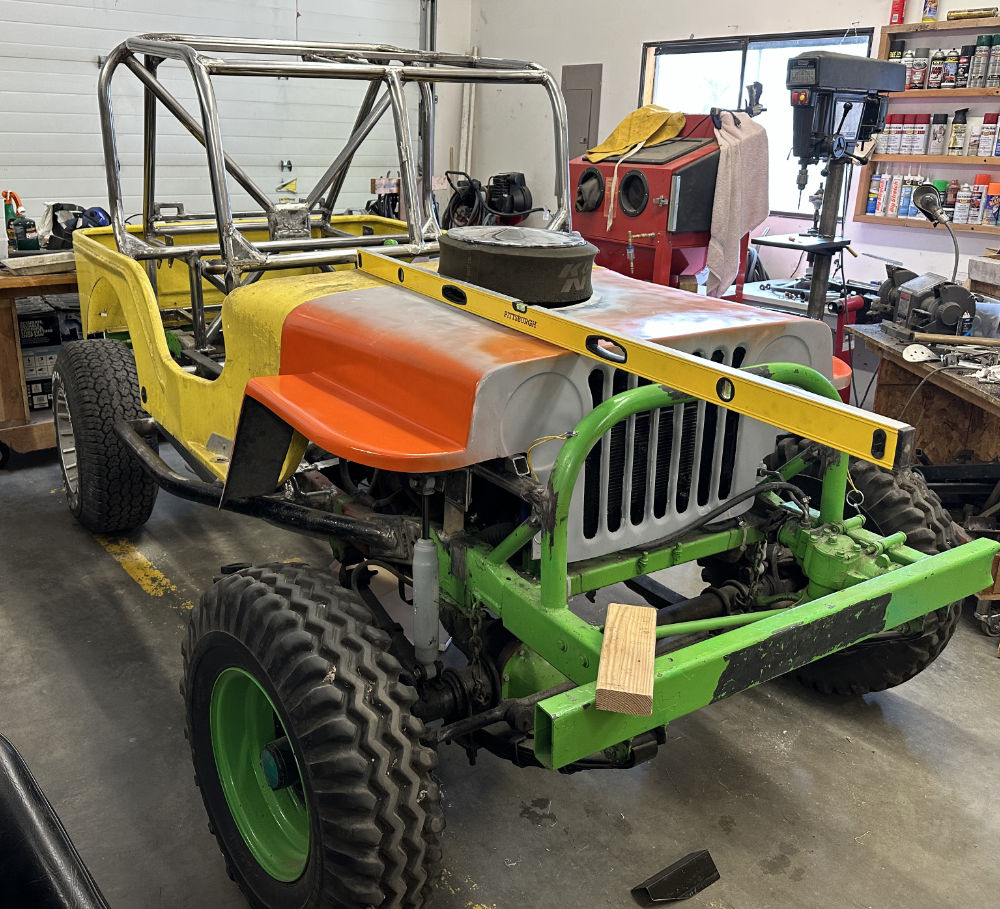
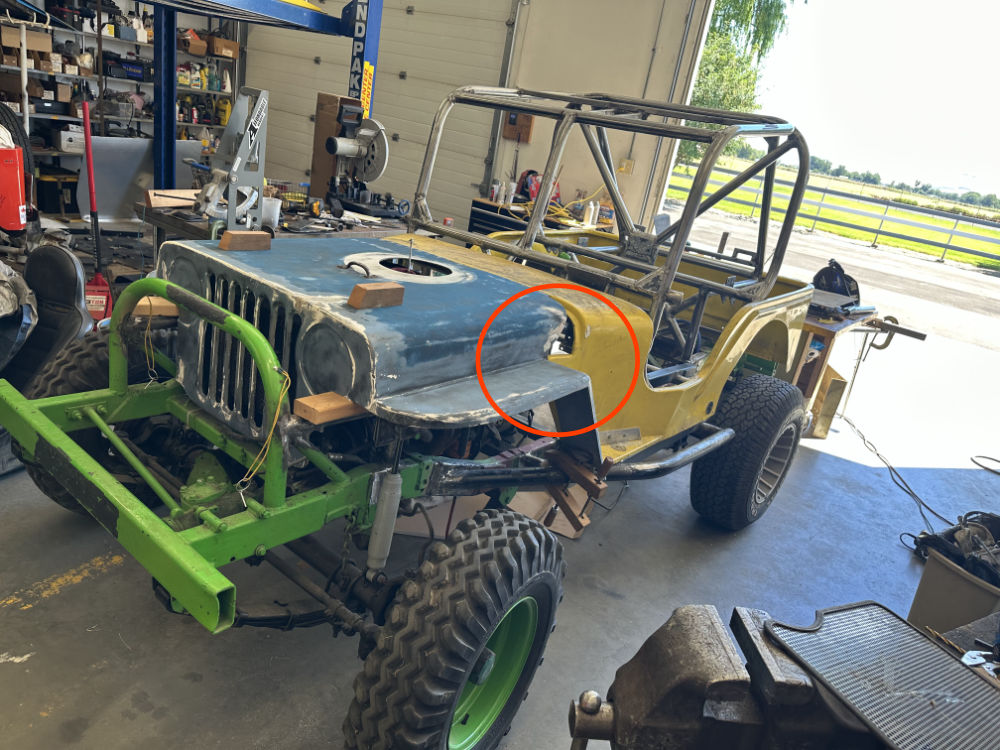
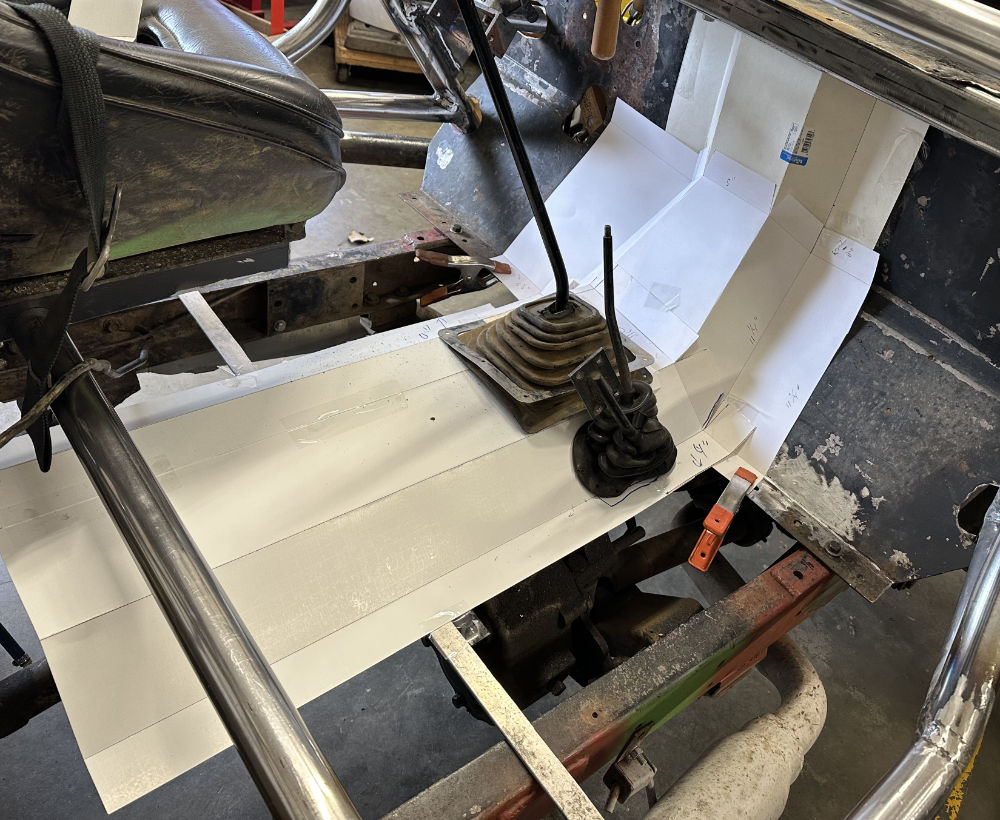
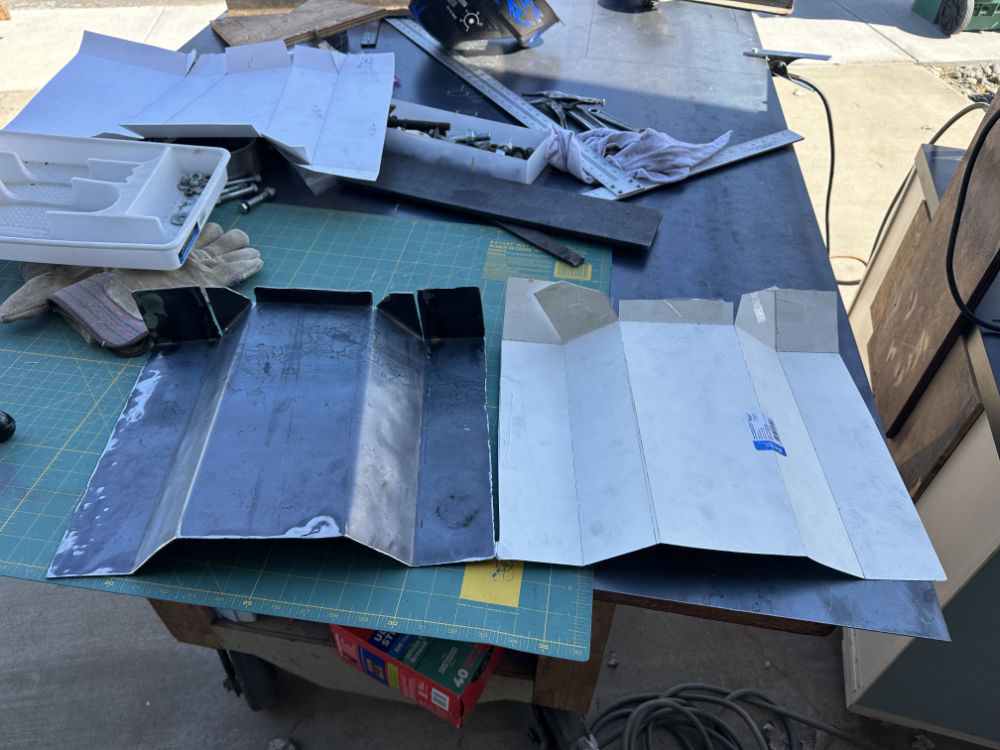
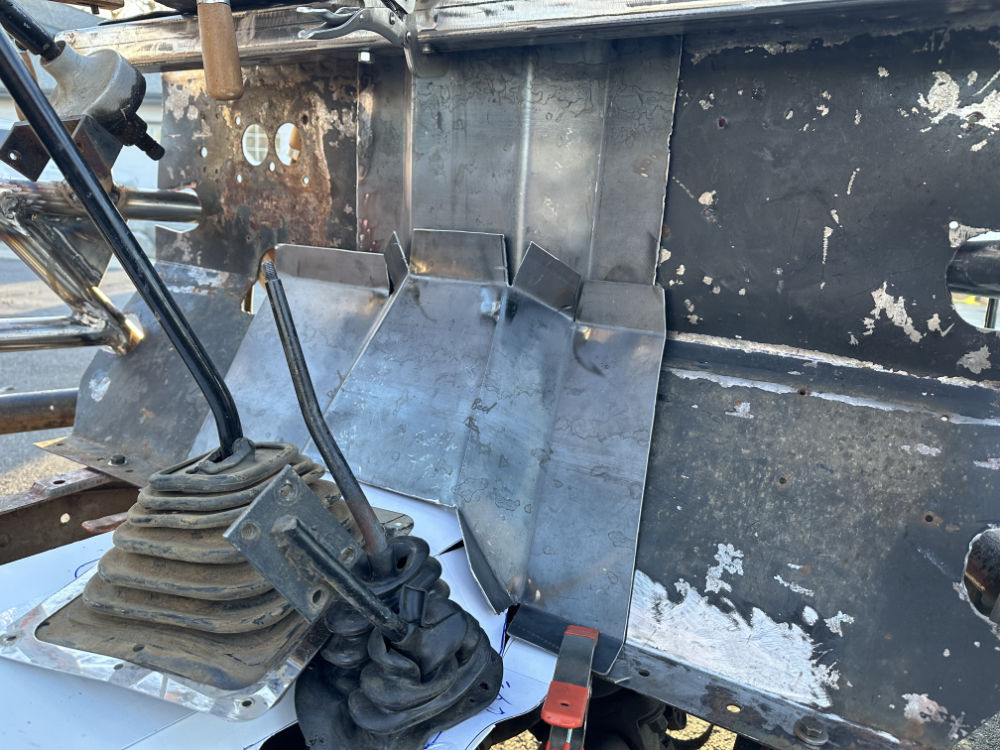
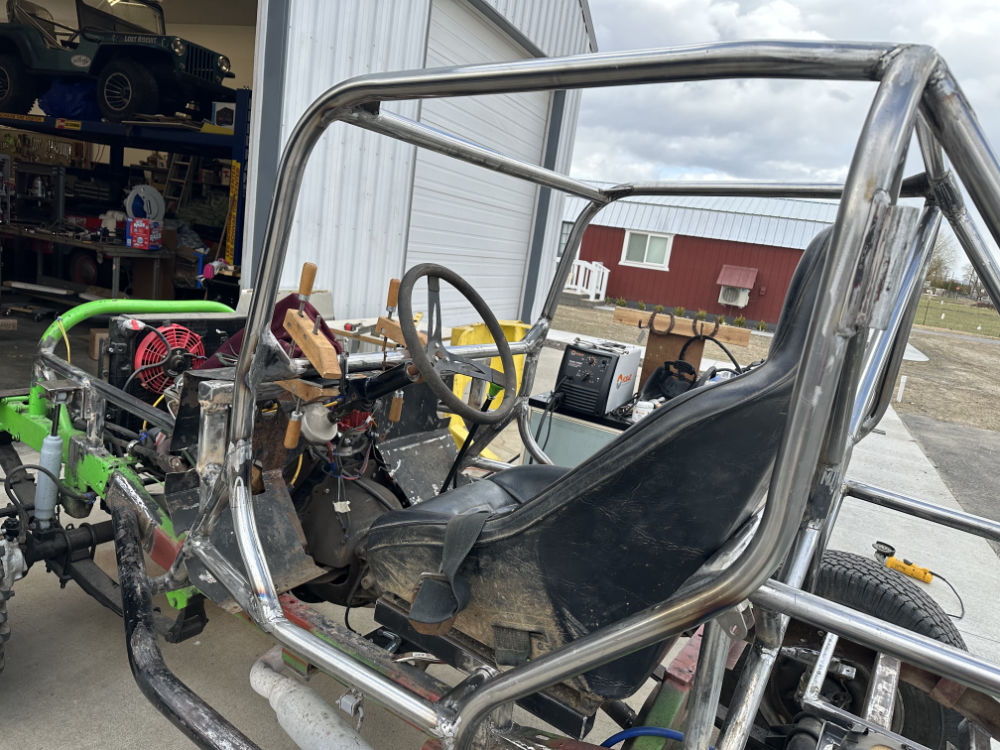
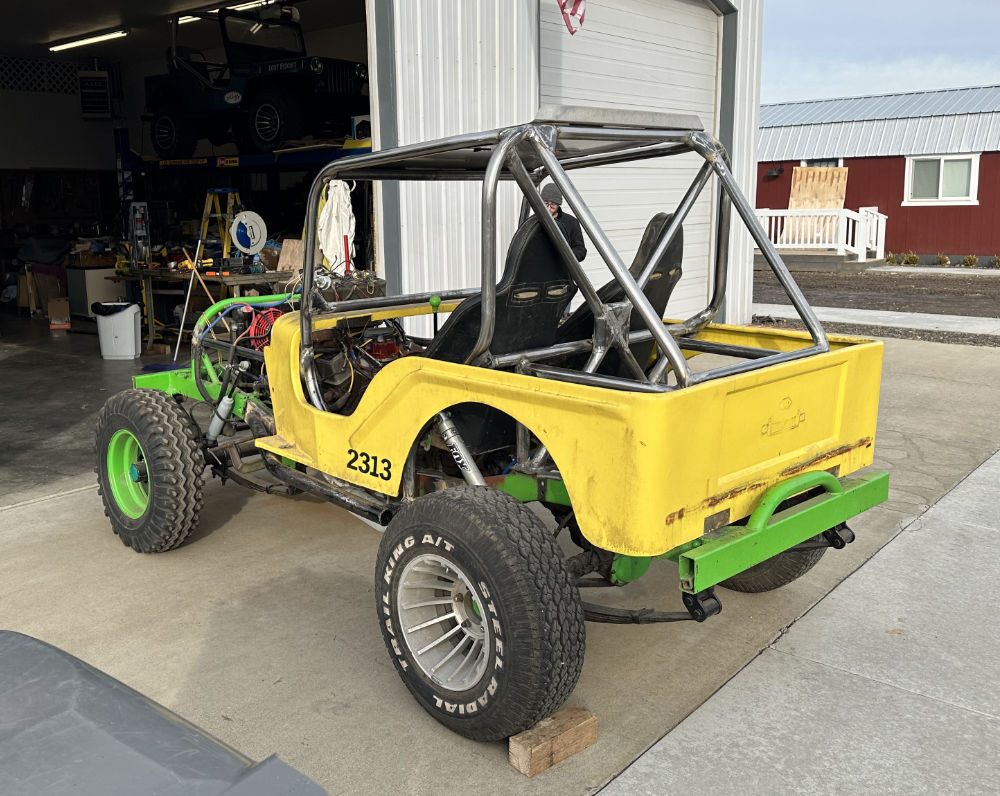
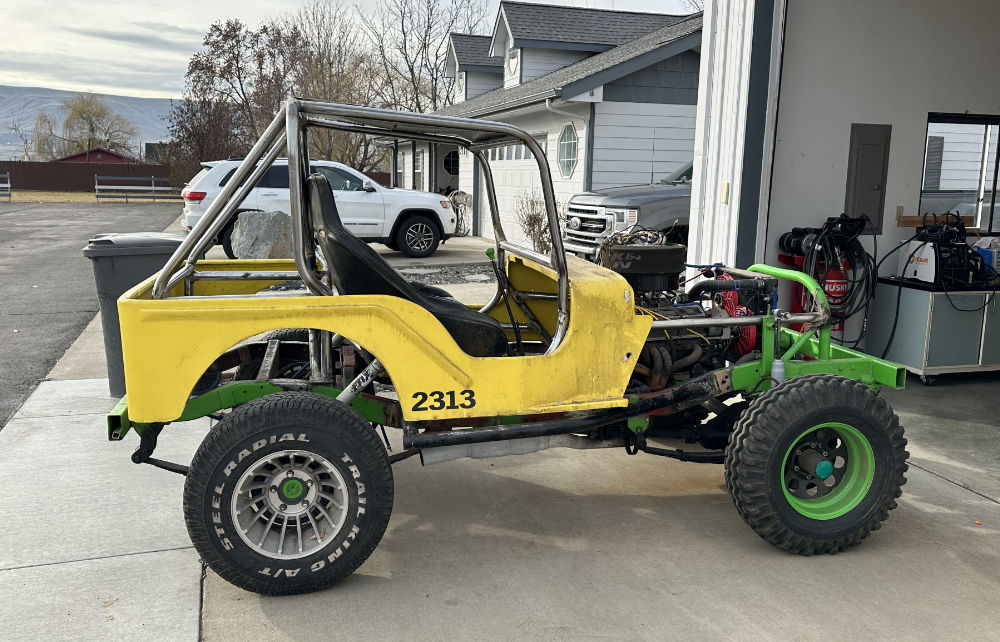
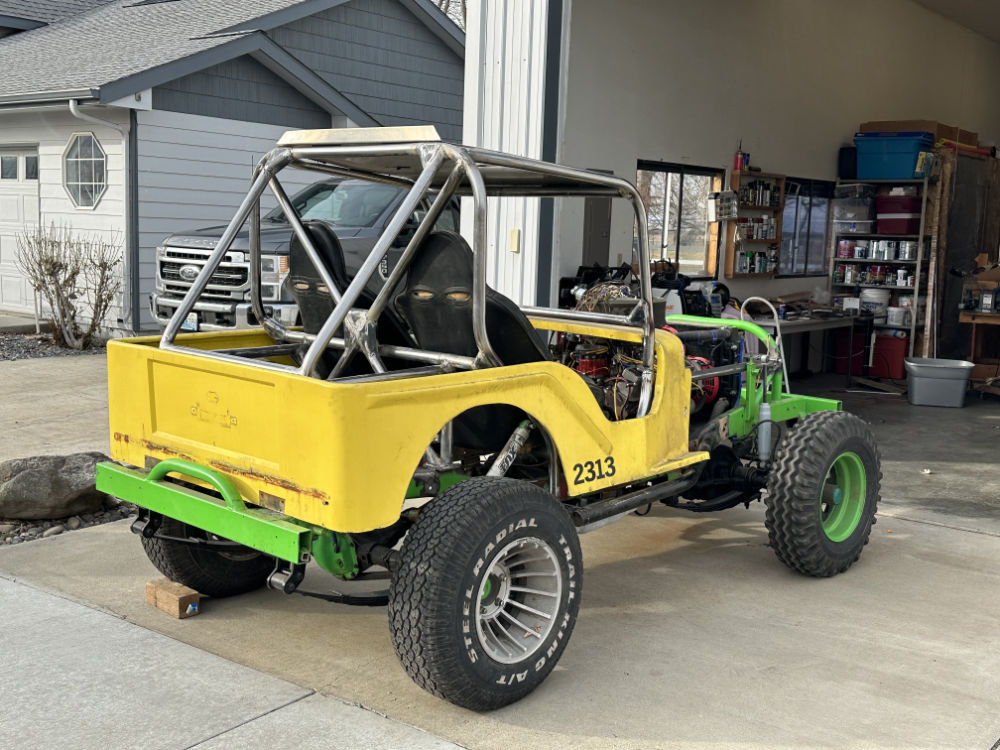
There’s nothing much fancy about the side bars. A bolt secures the back of the bar and acts as the pivot point. A 3/8’s pin holds the front in place and is pulled to release the bar so a person can enter/exit the jeep. The netting is held in place at the front by a seat belt buckle. Undo that, then pull the bottom bar forward slightly, and the bottom of the net comes loose, then a person can swing the netting onto the top. (note, this phone was taken before I welded a short horizontal tube which will hold the back of the top netting bar in place .. the orange clamp was just to figure out where the tube should go).

2023-08-01-racejeep-sidebars-netting2

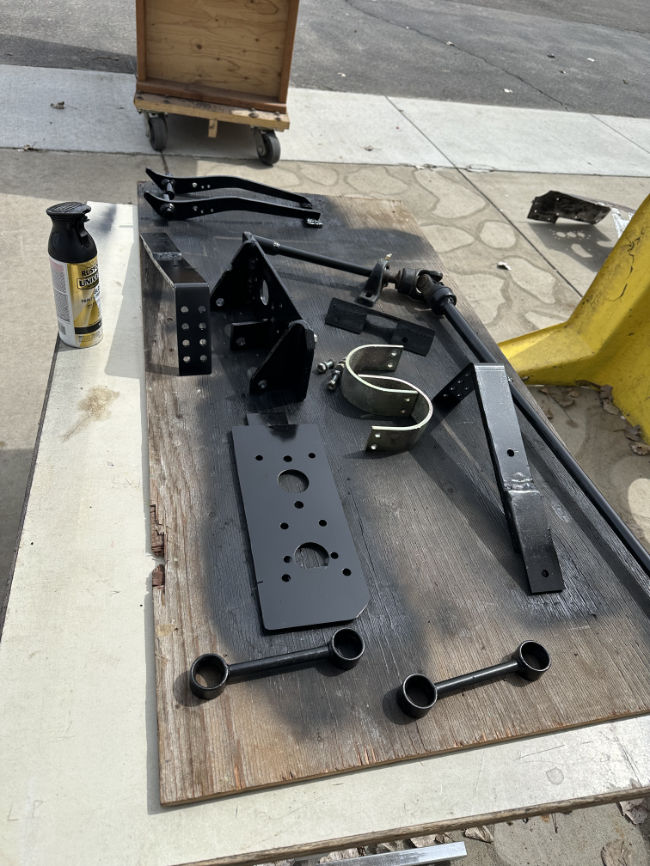
With the bars and netting done, the mods are pretty much complete. Now, to clean, paint, and assembly. Hopefully, everything goes back to gather as it did before …

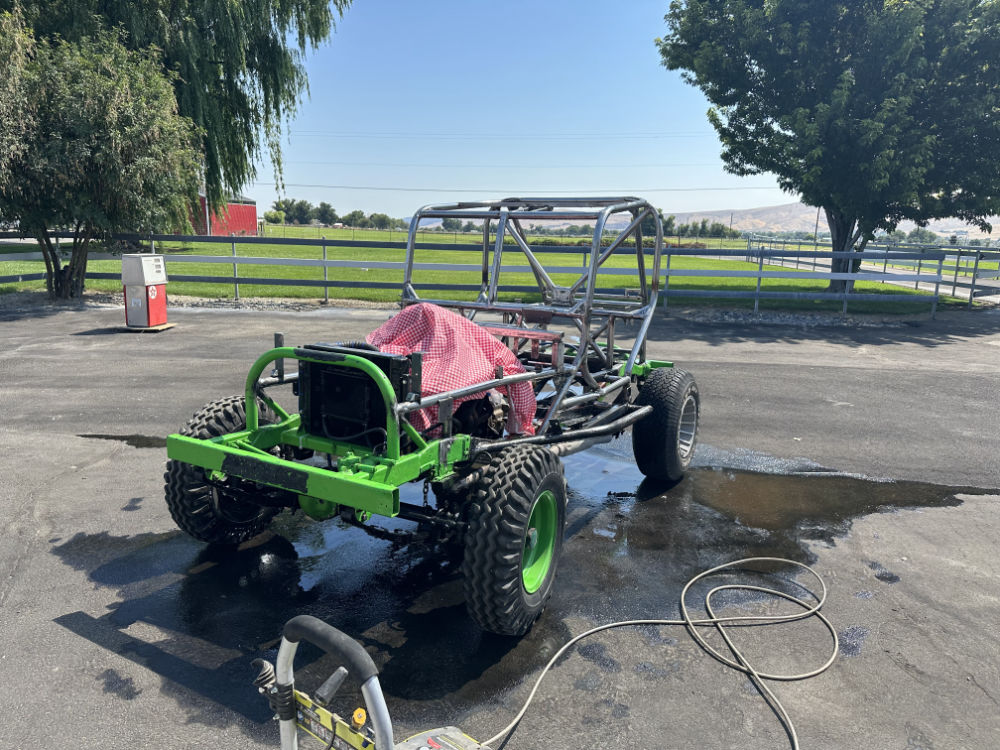
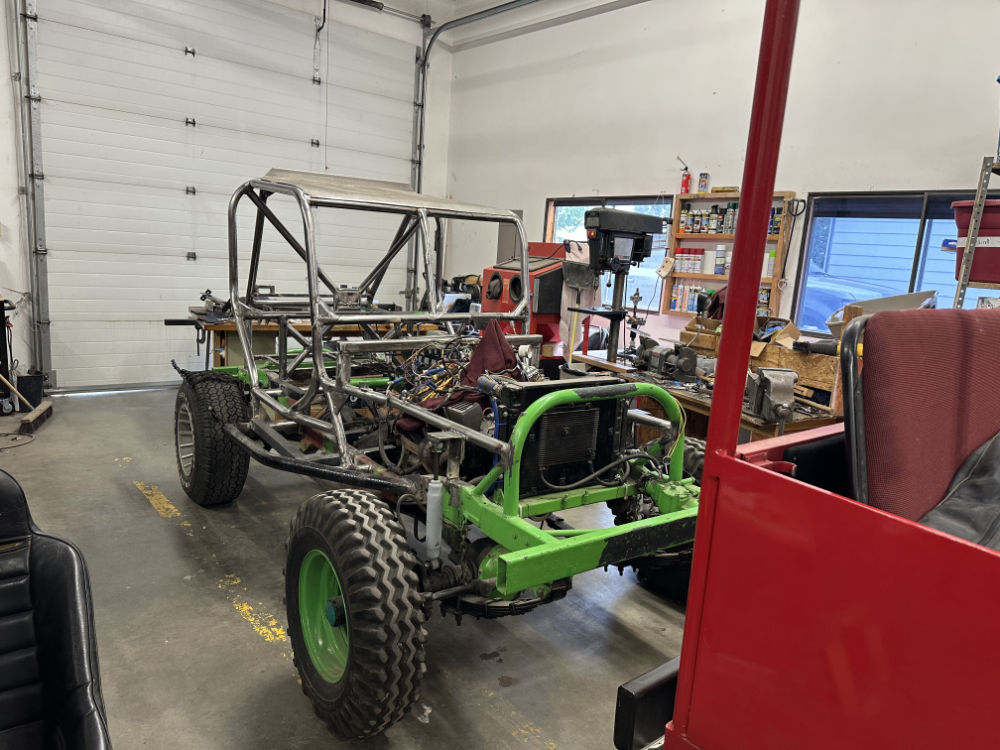
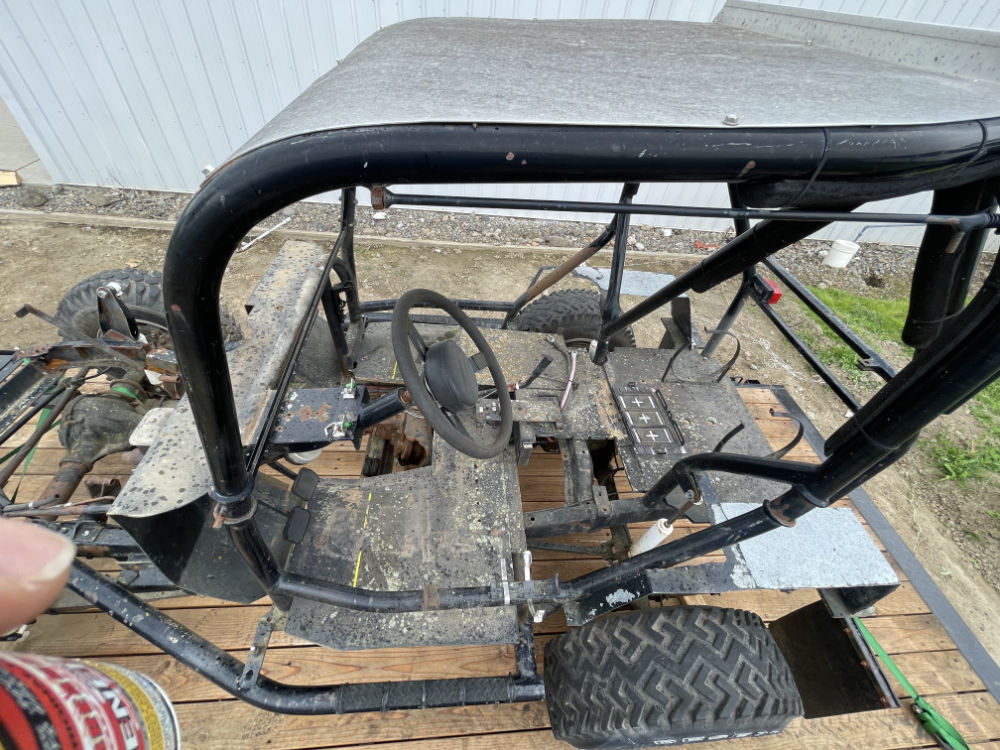
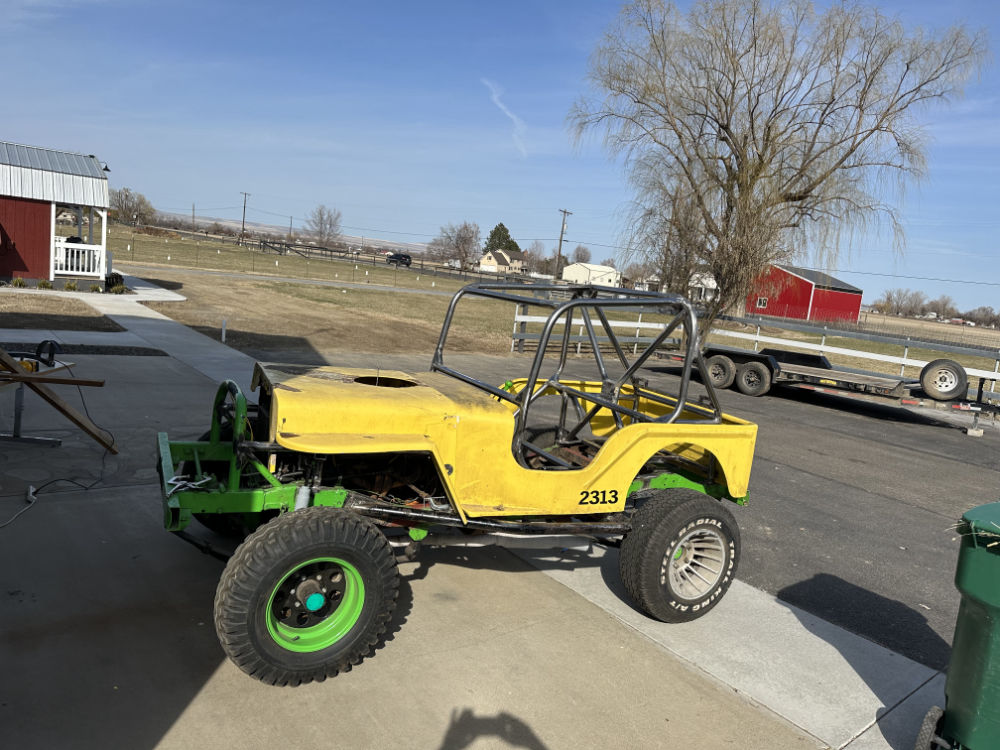
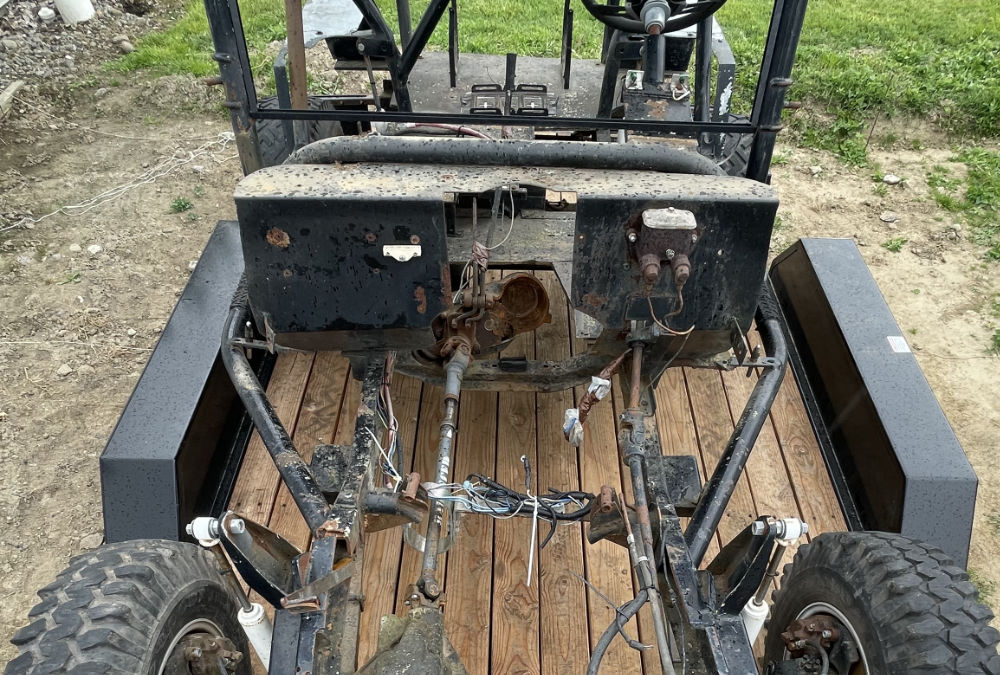
Here’s the chassis a little cleaner. My goal is simply to cover the green and paint the bare metal.

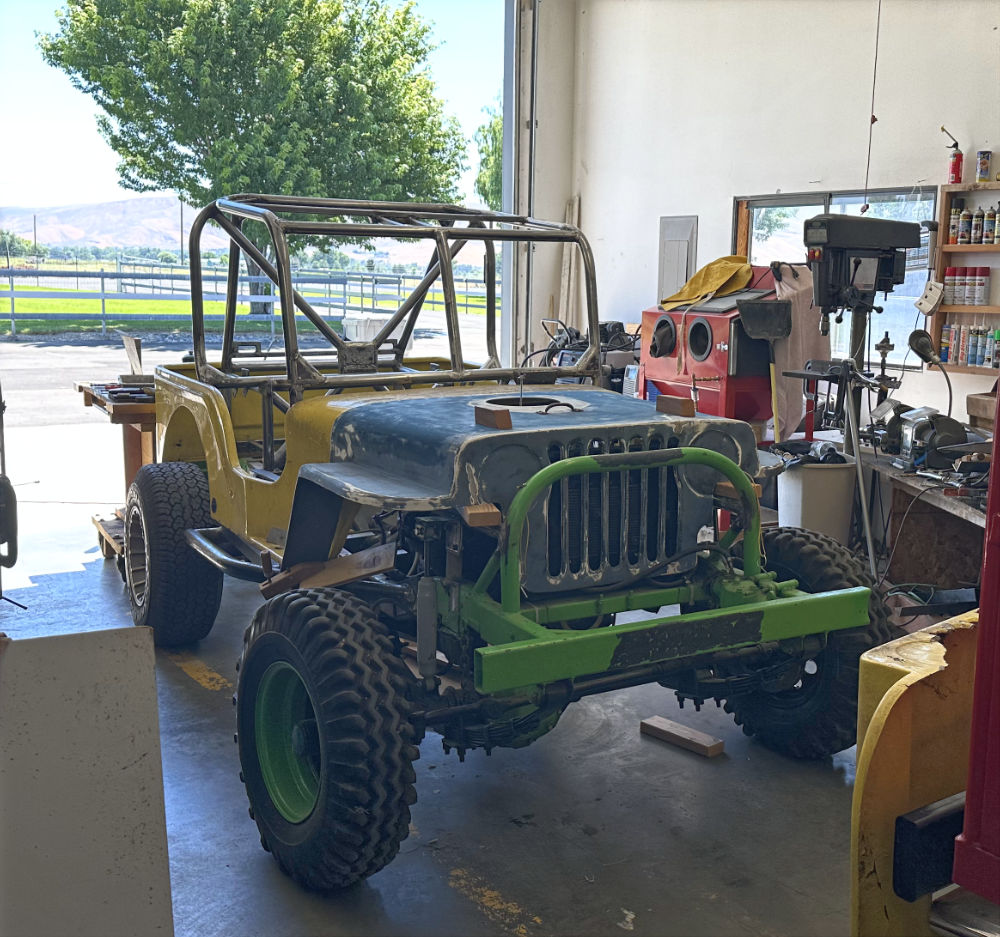
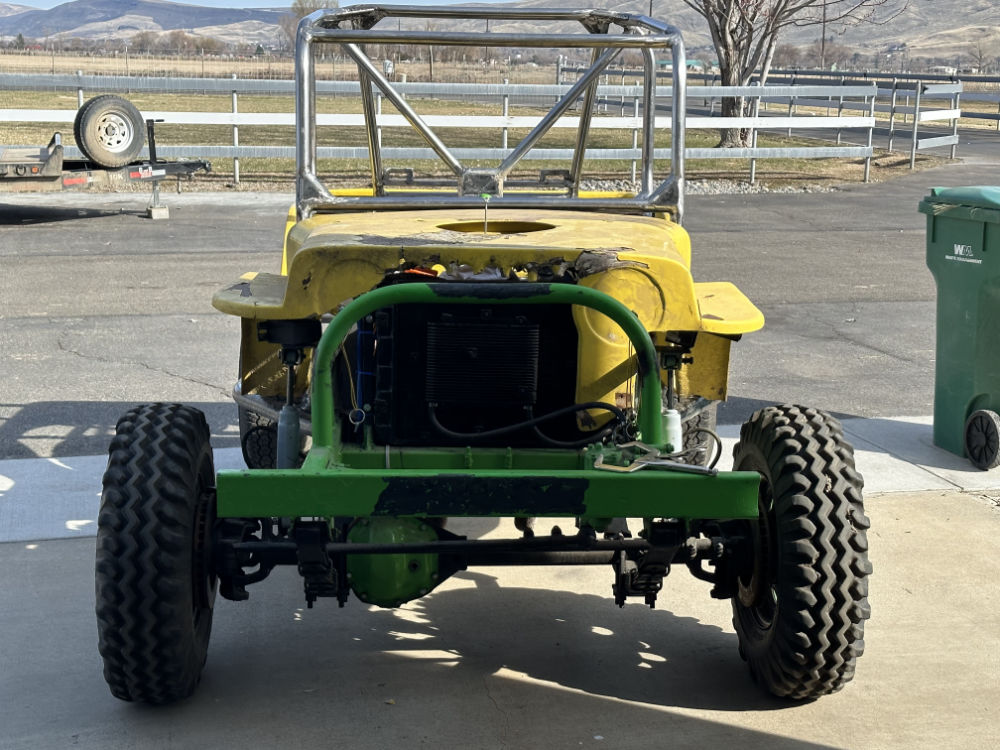
The front tires will go on some aluminum rims, while there will be desert dogs in the back. The back rims remain undecided. I’d rather not use the hurricane finned rims for the rear, but don’t want to crack them. I have some other aluminum rims for the back, but they are six lug, while the rear axle is now a five lug drum.

2023-08-01-racejeep-wash2 2023-08-01-racejeep-wash1

[fb_button]
 
To Top

Orange You Glad I Painted It?

• CATEGORIES: Features • TAGS: This site contains affiliate links for which I may be compensated.
2023-07-18-paint-body9

It is a little more orangey in person. These pics are pulling more red.

Over the past two days I put four coats of rattle-can Kubota Orange paint on the front clip and body (inside a temporary paint booth in the shop). Normally when I paint I use the proper tools, get proper paints, etc. But, the last time I sprayed a jeep was about 14 years ago. I thought, just maybe, naively optimistically, spray can paint tech had improved….

Moreover, one of the upsides of spray can tech is that if there is damage, you can easily get a can to cover up any issues. Since this was to be a temporary paint job, I figured I’d be a guinea pig and see how it turns out.

Well, I can assure you the paint job sucks. While I really like the color, the shine is uneven, there are several runs (despite trying to achieve light coats), and still I can see a slight bit of background color behind the orange. In fact, I found it more difficult, more messy, and stickier to use the cans than paint with a spray gun. Lesson learned!

Thankfully, spectators are usually 30 feet or more away from the track, so I’m sure no one will notice (except when lined up in the rare queue).

[fb_button]
 
To Top

Body Progress

• CATEGORIES: Features • TAGS: This site contains affiliate links for which I may be compensated.

With the roof repaired, I was able to return to the body on Wednesday. From sanding the body, I can see this isn’t the first time it’s been repaired (fiberglass patches and some bondo). Below are pics after applying the fiberglass filler and applying some sandable primer, but before any bondo. I’ve since applied some bondo to fill in some holes, nicks, and cracks.

2023-07-12-parkette-body-primer-filler1 2023-07-12-parkette-body-primer-filler2 2023-07-12-parkette-body-primer-filler3

[fb_button]
 
To Top

No updates Tuesday

• CATEGORIES: Features • TAGS: This site contains affiliate links for which I may be compensated.

Well, I’d planned to do updates, but the weather was perfect for sanding and patching the race body’s big holes with fiberglass (and smaller holes with fiberglass putty), so that took priority. I might be able to have all the body prep done by tomorrow evening.

With the highs around 90 degrees, it’s not too hot, so this week is perfect for prepping and painting the body and front clip.


[fb_button]
 
To Top

Initial Color: Kubota Orange

• CATEGORIES: Features • TAGS: This site contains affiliate links for which I may be compensated.

After one of the nicest April, May and June I think I’ve ever experienced, our summer highs in the 90s have finally arrived. However, work goes on when it can.

We have settled on a temporary color, Kubota Orange. It’s the rattle can color that we think looked the best. I don’t want to do a nicer paint job just yet, because I don’t want to take the time right now to get the body and front clip completely smooth (in case I want to do the mounts differently). Instead, I want to get the jeep running, so that I can test the anchor points to make sure they hold like I hope they will and that the front clip doesn’t rub on the body.

Yesterday I made four of the six front clip mounts, with the final ones to be made today. Here’s the orange on the fender (only two coats). It’s a little darker in person.

2023-07-08-orange

[fb_button]
 
To Top

Body Mounted, Front Clip in Progress

• CATEGORIES: Features • TAGS: This site contains affiliate links for which I may be compensated.

I am typing this while recovering from a wasp sting that caused my right hand to swell (it’s been an odd health year for me!), which sent us to the local doc-in-a-box to get some steroids, which in turn helped reduce the swelling (after 24 hours). I’ve never had a reaction to a stinger like that, so it’s a bit of a surprise!

Last week I finalized the body mounts. Hinges attach the body to the back of the frame in two places. Two single bolts with large washers hold the mid section of the body to a plate on the roll bar. And, two bolts through angled aluminum hold the bottom front portion of the cowl to an angle piece on either side of the body. On the upper portion of the sides of the cowl some rubber taped to the inside of a bracket keep the cowl from shifting back and forth.

The front clip is proving a bigger challenge than the body. First, I had to cut out part of the the driver’s rear-side portion of the front clip because it was too narrow and hit the side of the body. So, I am creating a form and will lay some new glass down (along with patching a few other places).

Then, once the hood fits properly, I will have have to build special mounts for the front clip. The goal is to reduce the stress on the hood, as these things are often mounted with quick release setups that allow the body to flex, making it more prone to breaking and cracking and/or rubbing on the body.

Here are a few pics:

I decided to to throw a couple blocks (made from some of my grandfather’s wood) onto the hood that are a nod to the original hood blocks, but will also tie in a frame underneath the hood to help support and mount the front of the hood.

2023-07-02-racing-body2 2023-07-02-racing-body3

You can see part of where the hood is cut out. The form will allow for the new portion of the hood also down fender to flare outward more (or that’s the plan). 2023-07-02-racing-body4

[fb_button]
 
To Top

Ticking Off the Checklist …

• CATEGORIES: Features • TAGS: This site contains affiliate links for which I may be compensated.


2023-06-16-seat-mounts-miscSlowly, but surely still making progress. Though the garden is done, we are having to re-organize the lean-tos area to accommodate all the hay we need to make it through winter. It’s actually a useful exercise, because there’s a bunch of junk that we just need to take to the dump, especially now that we have a better feel for what we need and don’t need.

I have continued to make progress on the racer.

√ overhead control panel
√ center bar in front (primarily as a conduit for bringing the wiring up to the overhead control panel)
√ seat mounts welded in place
√ mounting bar for shoulder straps (I realized just before I was going to weld in the seat mounts that I didn’t like my original plan for mounting the shoulder straps, so I designed something different.
√ tach holder
√ top drilled and temporarily attached .. need to pull off to clean top and for painting cage.

Next,
1) weld mounts for the side bars and netting
2) finalized body mounts
3) finalize front clip mounts
Getting there ….


[fb_button]
 
To Top

Making More Progress on the Racer

• CATEGORIES: Builds, Features • TAGS: This site contains affiliate links for which I may be compensated.

Sorry the pics aren’t better, but the focus is on creation and not documentation. The goal is to be able to drive it during the first week of May.

The clutch and brake pedal system are all ready for install, though it’s apart for paint. The floor framework is partly complete as of today. I should have the floor frame and floor itself ready for some paint by Sunday (assuming there aren’t more distractions (there have been plenty of those ..).

I ended up building a custom bracket system for the clutch and brake. Because of the holes in the firewall from the old clutch/brake system, I sandwiched the firewall between the bracket I made and a thin sheet of metal to make it look cleaner. Here’s a very rough look from a few days ago. Both pedals had bends, which I straightened (and are straighter than shown below) with the press (as I didn’t need the bends).

2023-04-12-clutch-brake2 2023-04-12-clutch-brake1

Below are some of the parts with a layer of paint. There’s nothing fancy here. I’d love to have the time to tear the whole jeep down, properly clean it, then paint it. But, I want to run the racer first to see how it does before investing more time doing a big overhaul.

2023-04-12-painted-parts1

[fb_button]
 
To Top

Firewall Progress

• CATEGORIES: Features • TAGS: This site contains affiliate links for which I may be compensated.

The warming weather has got me busy, but I was still able to get some progress on the firewall covers. Between a small sledge hammer and my big vice, I was able to bend the steel into shape.

Here are my templates.

2023-03-26-firewall-1

Here’s an example of the steel. I was able to cut this out using my plasma cutter (Yeswelder 55DS). It was my first attempt at using it, but it worked pretty well.

2023-03-26-firewall-2

Here’s it after bending.

2023-03-26-firewall-3

The tabs need some adjusting.  Otherwise ,these two covers should work fine.

2023-03-26-firewall-4

[fb_button]
 
To Top

Reshaping The Firewall

• CATEGORIES: Features • TAGS: This site contains affiliate links for which I may be compensated.

I spent the last couple of days working on the firewall. This is obviously a key element for assembling other items, such as the steering, brake/clutch pedals, gas pedal, etc.

I should begin by noting that we have a new name and theme for the jeep: LEFTOVERS. It’s a food-ish theme that kind of goes with Lost Biscuit. I like that it isn’t a particularly serious name. And, it seems appropriate given I am scavenging two former racing jeeps, but a few parts off of Biscuit, as well as some other random parts.

I saved the original firewall from the yellow-bodied jeep, but it wasn’t in the best shape. I also wasn’t sure if I wanted to use it anyone, because my firewall area includes several rollbar tubes that aren’t present in the yellow-bodied build. Here are some pics of it on the old jeep (btw, I’ve been terrible at taking pics during this build):

2023-03-23-firewall-before2

2023-03-23-firewall-before1

I felt the deciding factor would be how well a template I planned to create for the firewall would overlay the old firewall. If close enough, I’d make the old firewall work (again, leftover theme).

Below is my really fancy paper template (I won’t be using the aluminum cover over the gear box .. I was just experimenting with that).

2023-03-23-firewall-paper

The first thing I realized was that I would need to split the old firewall in two halves in order to install it and have it fit over the roll bars. Once I was reasonably happy with the template, I laid if over the firewall (no pics of that), only to learn that I would need to flatten most of the existing firewall and rebend it; not an easy task!

Fortunately, the other day I bought a 20-ton press from Harbor Freight (I needed it to fix a neighbor’s plow). I used the press to press the bends relatively flat. Then, I cut the firewall in half and began the process of re-bending the firewall to the specs I needed, then cutting out areas to fit one over the roll bars.

Here’s an example of the passenger side after the top part was was bent flat:

2023-03-23-firewall-1

Another obstacle I had to consider was the distributor at the rear of the engine. I needed room to be able to remove that if necessary. Here’s a pic of the two haves bolted to the crossmember I made from spare square tubing. It’s not perfect, but it will look alright once I get the paint off of it and clean up everything else. Besides, it will be hidden under the cowl.

2023-03-23-firewall-2

With the cowl in place, I began playing with the steering column. I never liked the way the steering column in the original green-black jeep wiggled. The yellow jeep had a much more solid setup, so I  will try to use it. It will need a new steering wheel, as that was damaged when the yellow jeep was wrecked.

2023-03-23-firewall-4 2023-03-23-firewall-3

Next up will be getting the clutch/brake assembly attached, build the bracket for the clutch slave cylinder, build the covers that go over the center portion of the firewall, and add a few attach points along the side for the firewall. Still plenty to do!


[fb_button]
 
To Top

Testing The Racer’s Front Clip

• CATEGORIES: Features, Racing • TAGS: This site contains affiliate links for which I may be compensated.

I spent the last couple days figuring out where I want the firewall positioned and how I want to attach it (and watching some March Madness, so not a lot has gotten done). I may even be able to reuse the firewall from the yellow jeep, though I’ve had to “massage” it with a sledge hammer into a useable state. I will know more once I remove the body.

But, before removing the body, I wanted to see if/how well the front clips I have fit the body and frame. It turned out that the radiator (and the attached power steering cooler in front of the radiator) needed to be moved back about an inch for either front clip to fit. Thankfully, that was easily done.

I tested out the better of the two front clips, but it didn’t want to mesh well with the body. So, I tried out the more damaged of the two front clips, which was original to the yellow body, and that fit much better. The problem is it will require more work to fix (which I will take as an opportunity to do something creative with the grille portion).

2023-03-17-racer1

Note that this is sitting crooked at the front. I have not added an mounts for the front clip yet.

2023-03-17-racer2 2023-03-17-racer3 2023-03-17-racer4

[fb_button]
 
To Top

Racer Update

• CATEGORIES: Features • TAGS: This site contains affiliate links for which I may be compensated.

I wasn’t planning on doing a racer update today, but both Facebook Marketplace and Craigslist were having issues last night loading pages. So, since, I took pics with the body yesterday, I figured I’d throw these up here. The cage is almost done, then on to floors and seats. OR, maybe shock mounts and rear sway bar.

2023-02-11-racing-jeep7

2023-02-11-racing-jeep6 2023-02-11-racing-jeep8 2023-02-11-racing-jeep9

[fb_button]