emailNeed to contact me and don't have my email? Click on email button.
About eWillys
Welcome to eWillys.com, a website for vintage jeep enthusiasts. I update this website nearly every day with jeep deals, jeep history, interesting reader projects, jeep related info, and more.
These quick searches can help you find things on eBay. People list in the wrong categories all the time, so don't be surprised to see brochures in the parts area for example. This section used to be split into jeeps, parts and other categories, but recent changes to eBay will require this information to be recoded.
The links to posts below show jeeps grouped by models, condition, and other ways. Some of these jeeps are for sale and others have been sold. If you are unsure whether a vehicle is still for sale or not, email me at d [at] ewillys.com for more info.
Importantly, the allure of buying a project jeep can be romantic. The reality of restoring a jeep can be quite different, expensive and overwhelming without the right tools and resources. So, tread carefully when purchasing a "project". If you have any concerns about buying a vintage jeep, or run across a scam, feel free to contact me for help, comments or concerns .
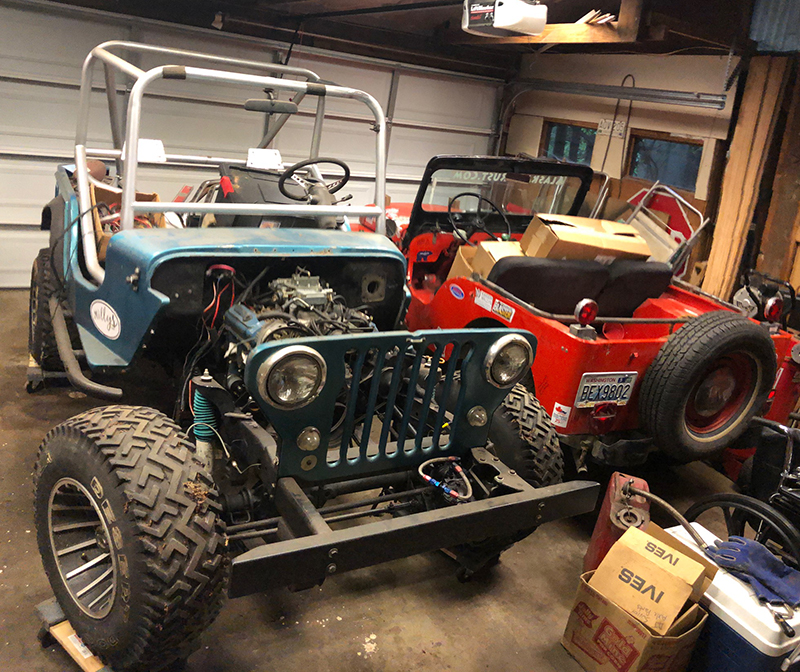
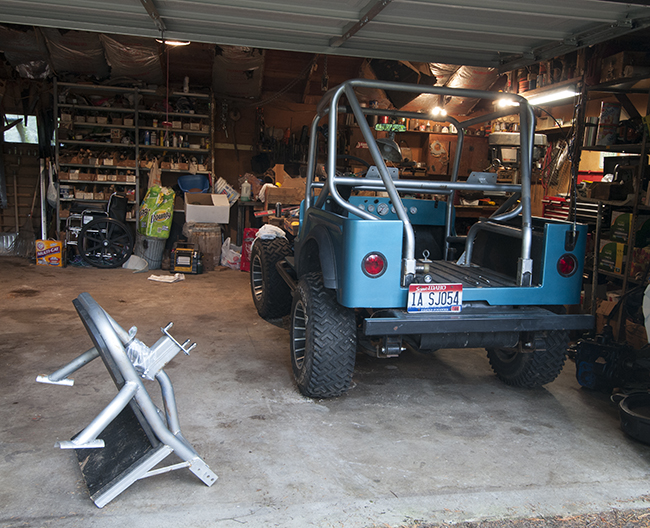
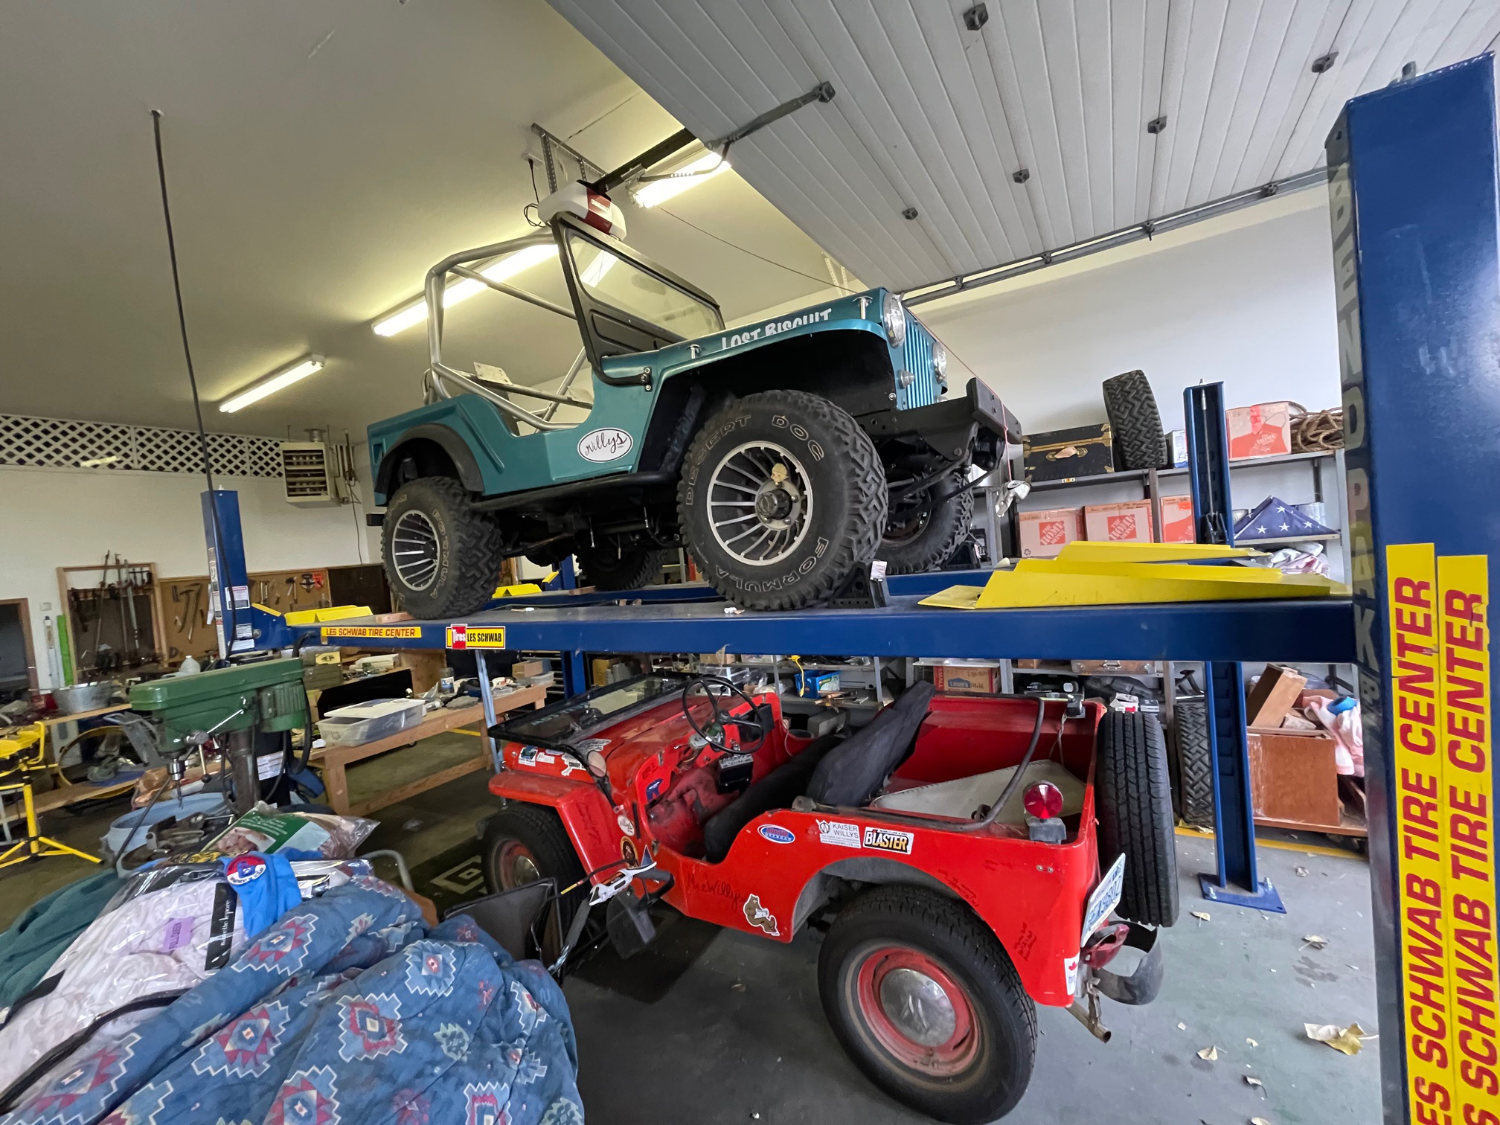
Yesterday, with cold weather arriving soon, I took advantage of a warm, but very windy day, to pull Biscuit off the trailer and put it on the hoist. Now, all three jeeps are in the shop.
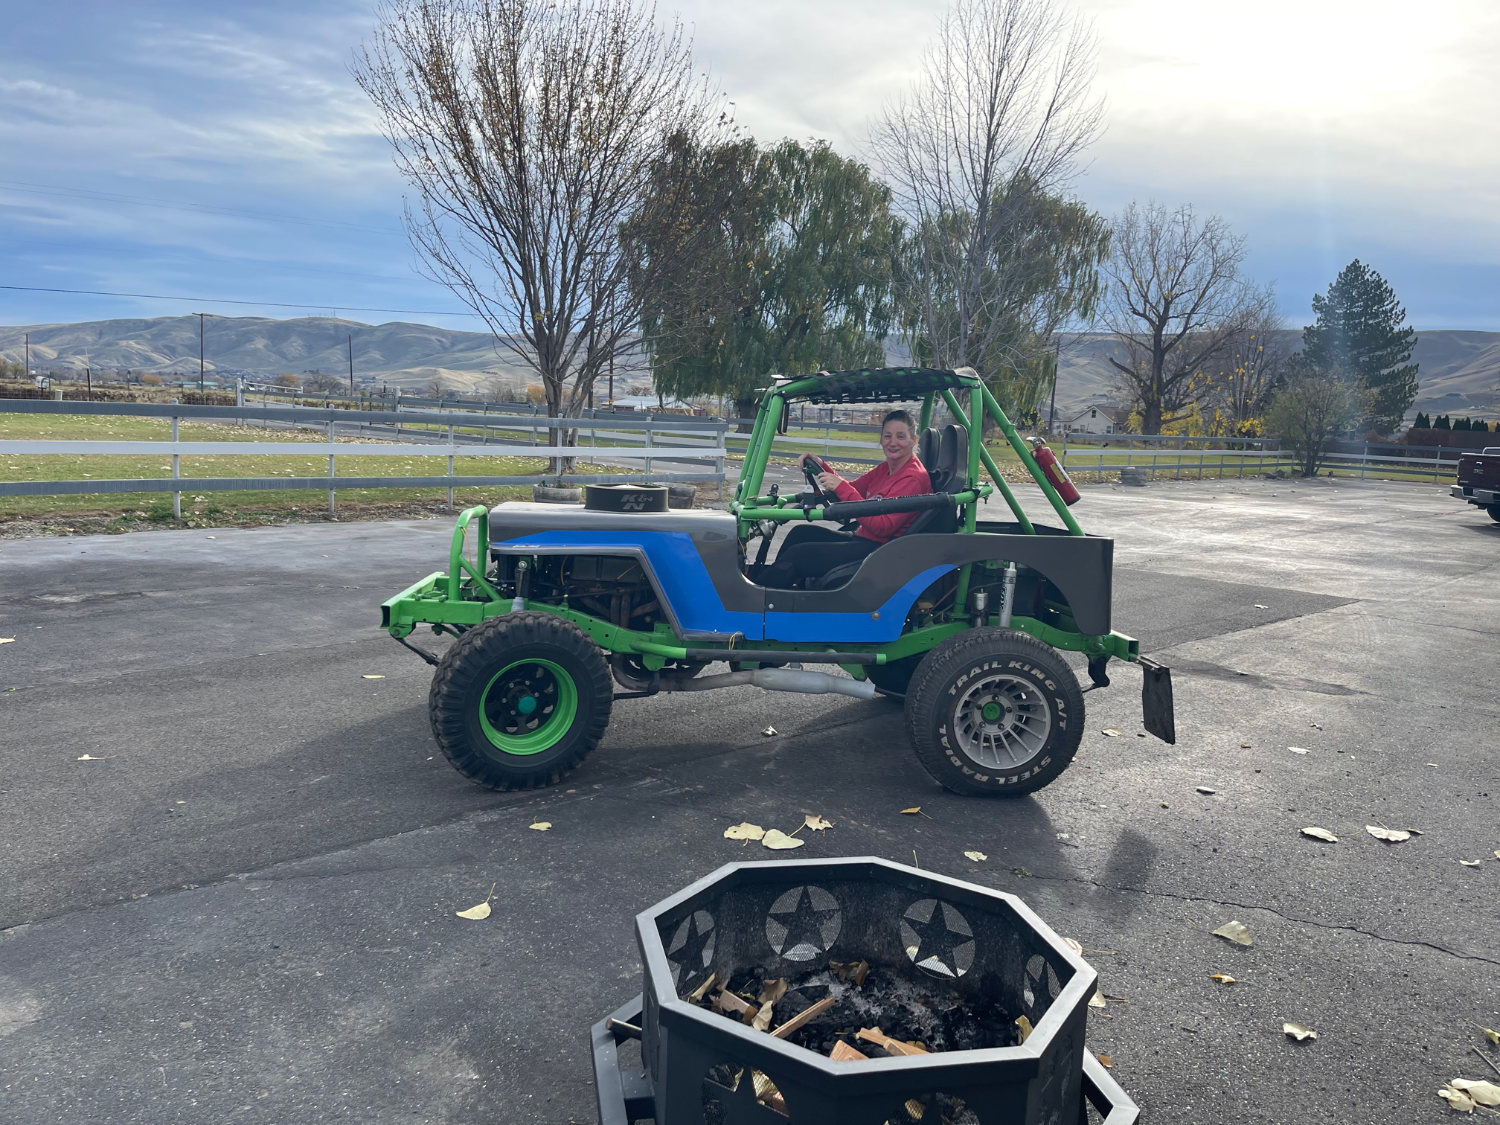
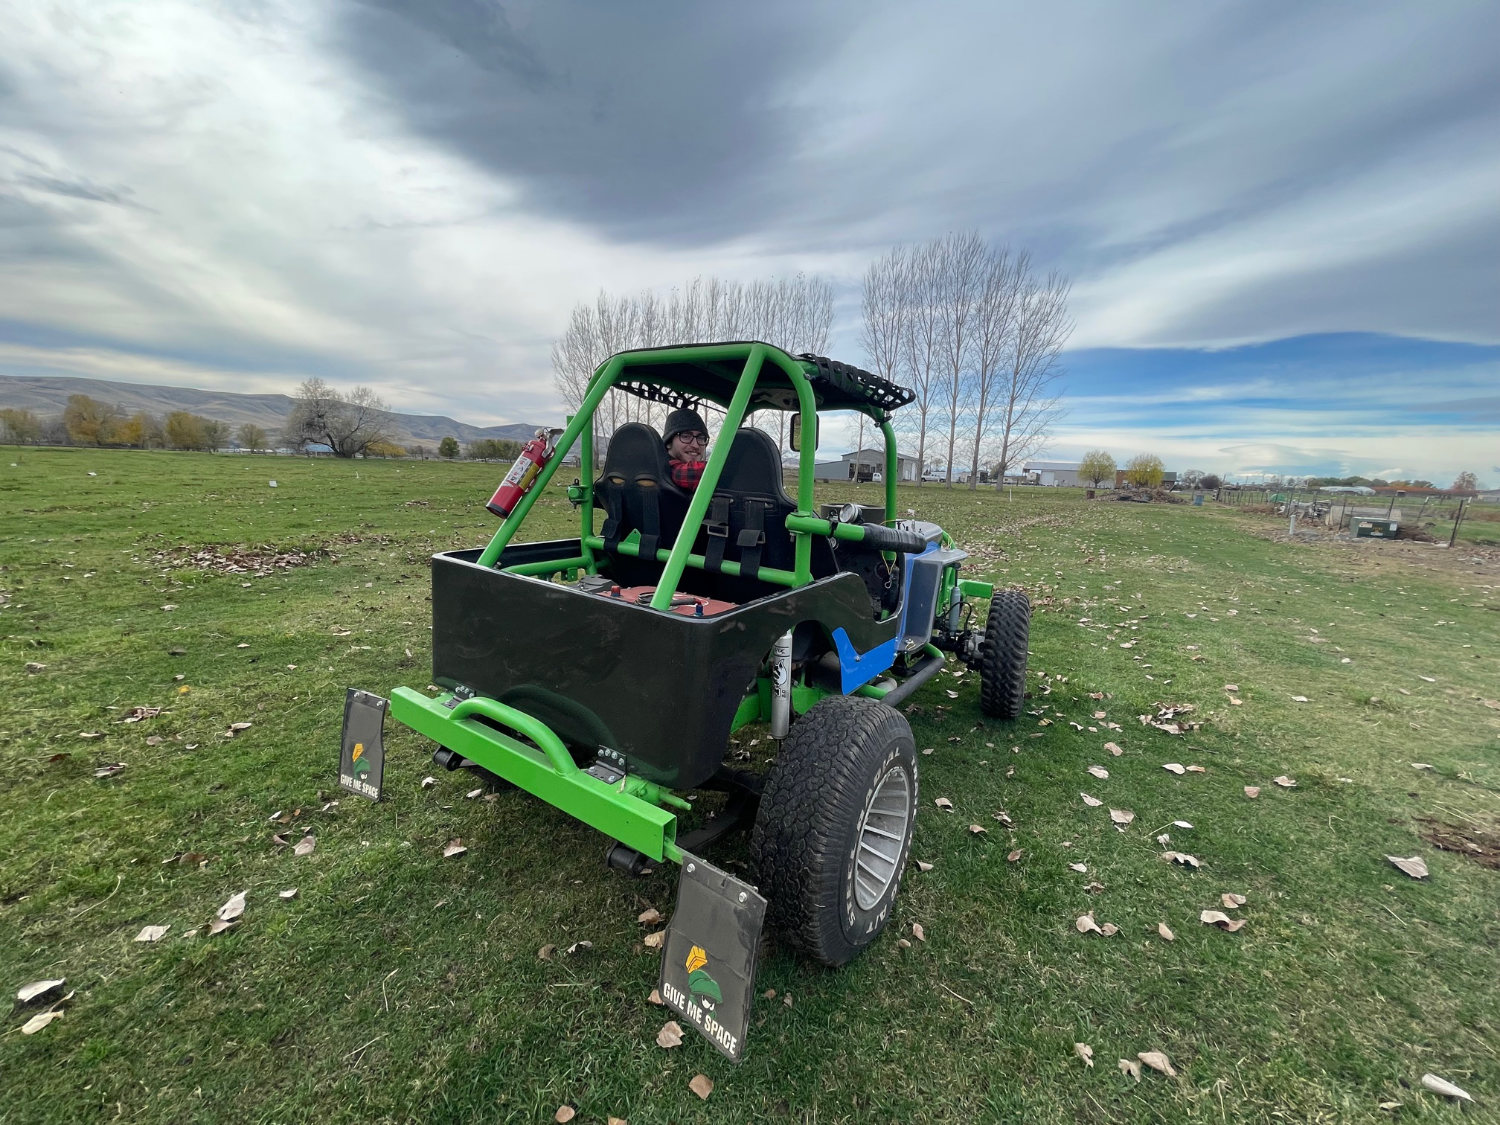
But, before we gathered the jeeps, both Ann and her son Daniel, who has been helping us around the property, each took the race jeep for a run in the pasture.
Here I am giving Daniel a ride. Unfortunately, my long legs preclude me from shifting into second gear (that’s how tight it is). Once I fix that, I can go much faster.
Here are some still shots. First up is Ann in the cockpit:
Here’s Daniel just finished with a run around the pasture:
Ann’s stomach surgery this summer, which as helped her in numerous ways, including solving her several adverse reactions to gluten (unsure why?), has also helped her lose quite a bit of weight. This has helped reduce her over all pain and also allows her to easily fit into the race jeep. Though she didn’t drive too fast, she did have fun racing around our back pasture. Once she gets used to it, I expect she will enjoy racing at a PNW event.
As I may have mentioned, I’m in Renton for the next week at my mom’s place while she’s away. As part of rearranging the garage, I’ve finally pulled Biscuit out of his corner. My goal is to have him running by February, in part because my mom plans on moving!
Last week I dropped by my parents house to visit. Naturally, I also had some sonny-do chores to finish, including my annual ‘sweeping of the roof’. Their tall fir trees might look beautiful, but eventually fall from the limbs and have to land somewhere. How they all seem to reach the roof remains a mystery to me.
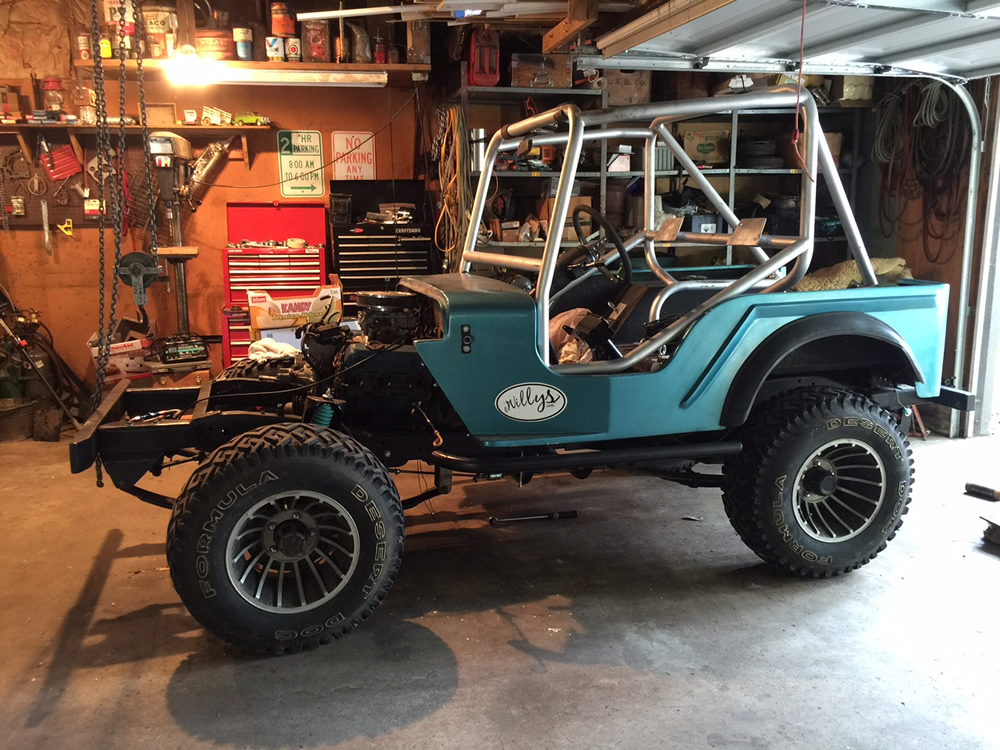
The good news is I did manage to get a little work done on Biscuit. After swapping rear leaf spring combinations more times than i care to count, I finally got a grouping that puts the jeep level and the pumpkin at the right angle. That completes the changes necessary for the rear. Now I just have to finish off the engine compartment, brake, and clutch changes. I’m in no rush as the next book is the priority project, but hopefully by years end the jeep will be running again.
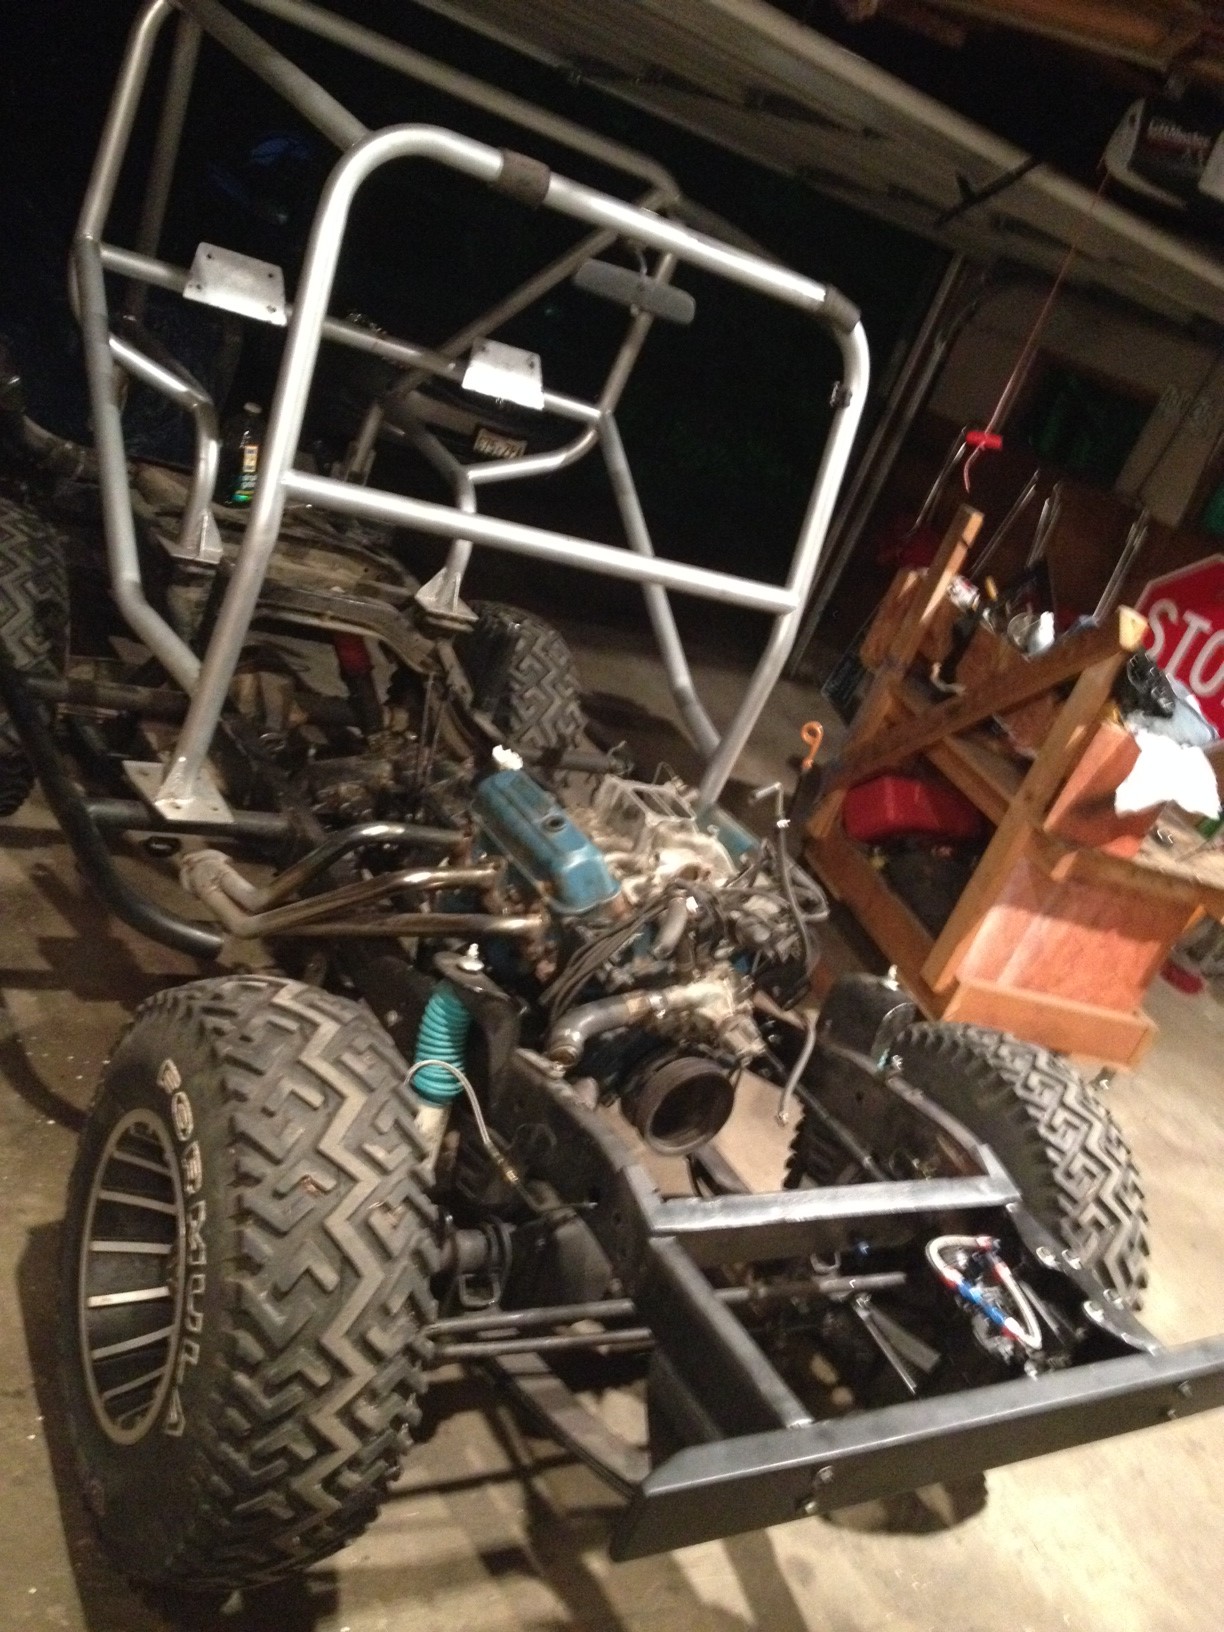
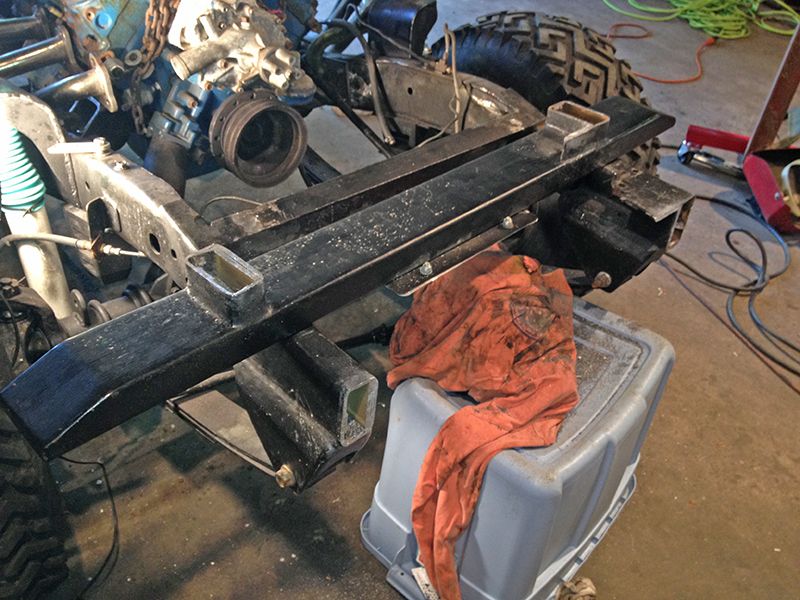
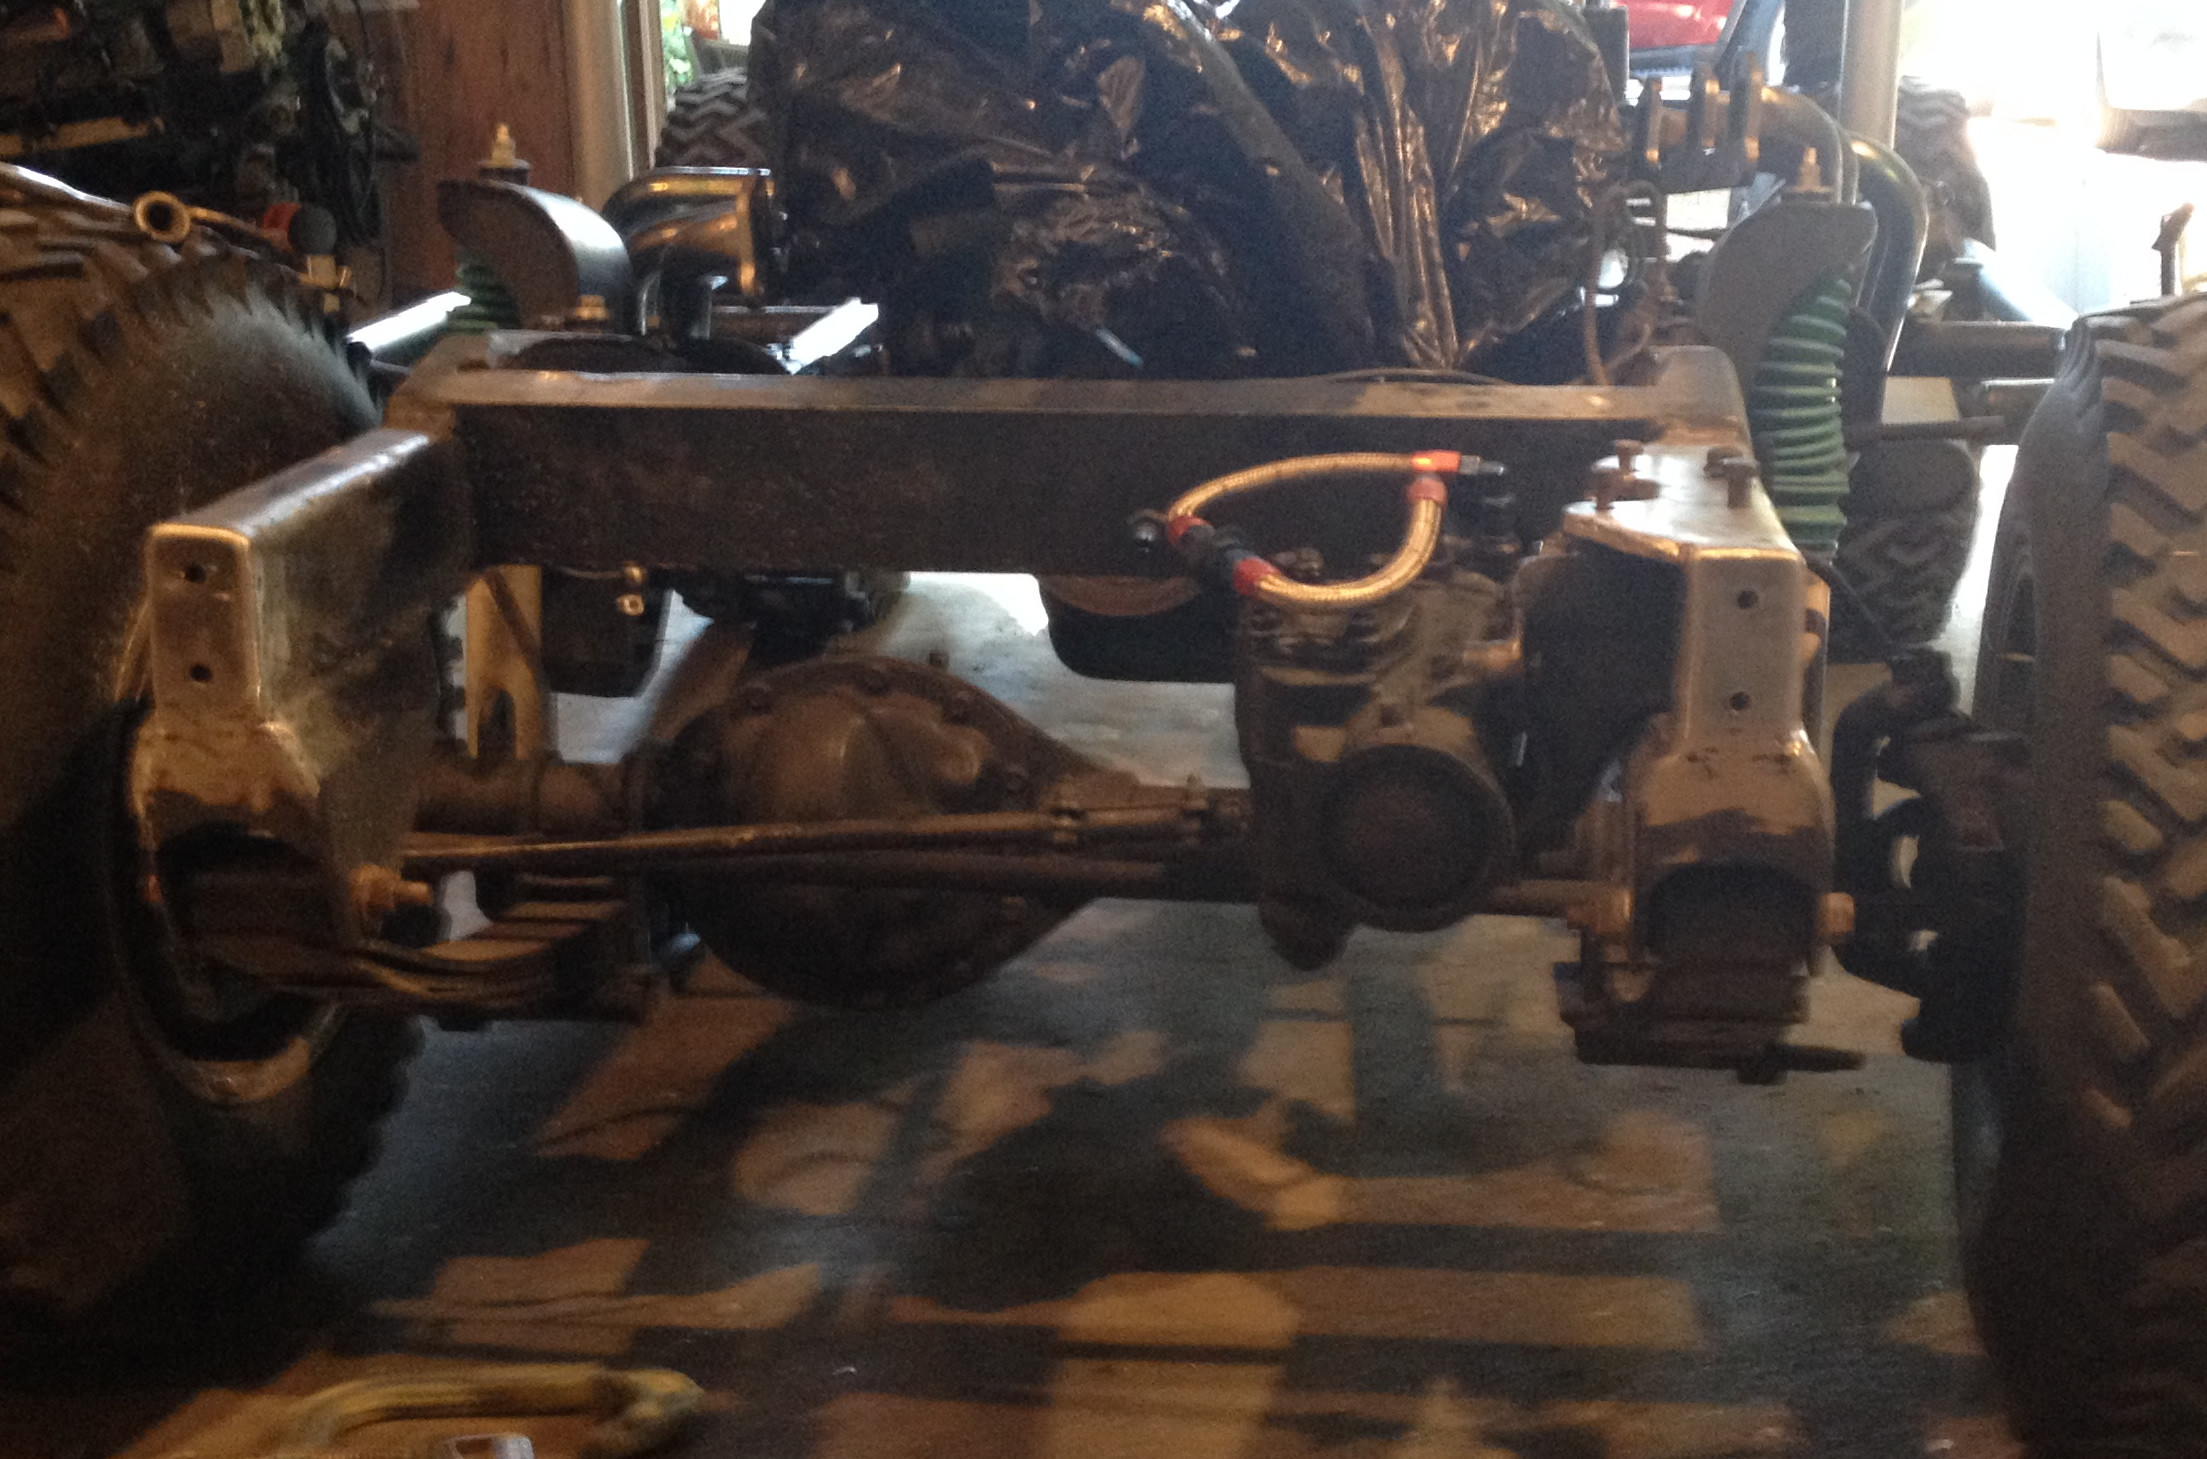
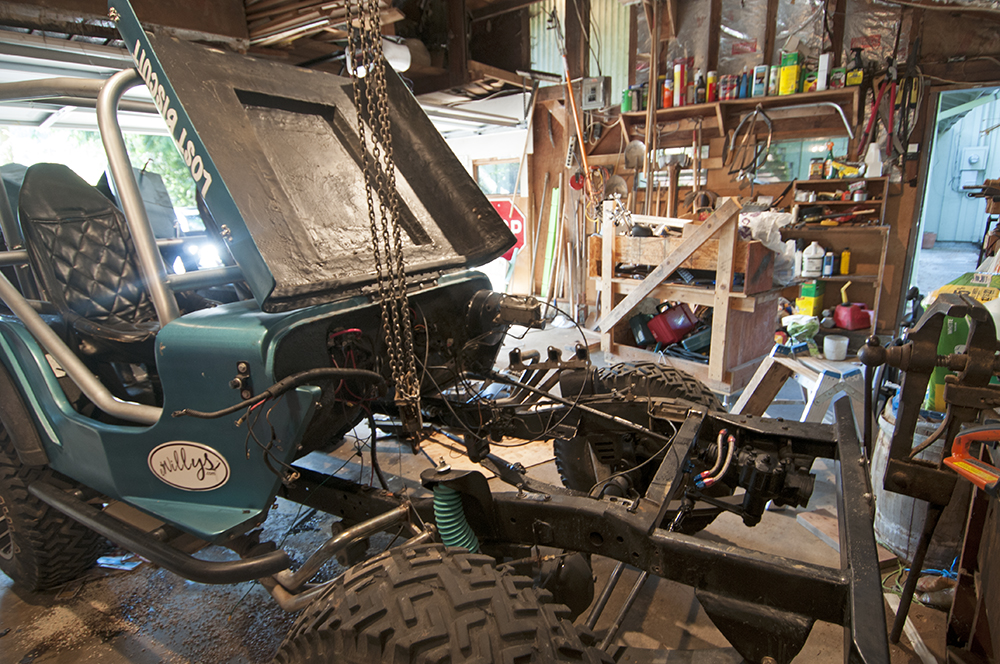
Over the last couple of days I’ve been trying to get as much done as I can before my son arrives. As you can see, I’ve got the engine, transmission and transfer case installed. I’ve also updated all the rear brake lines and installed the new rear springs.
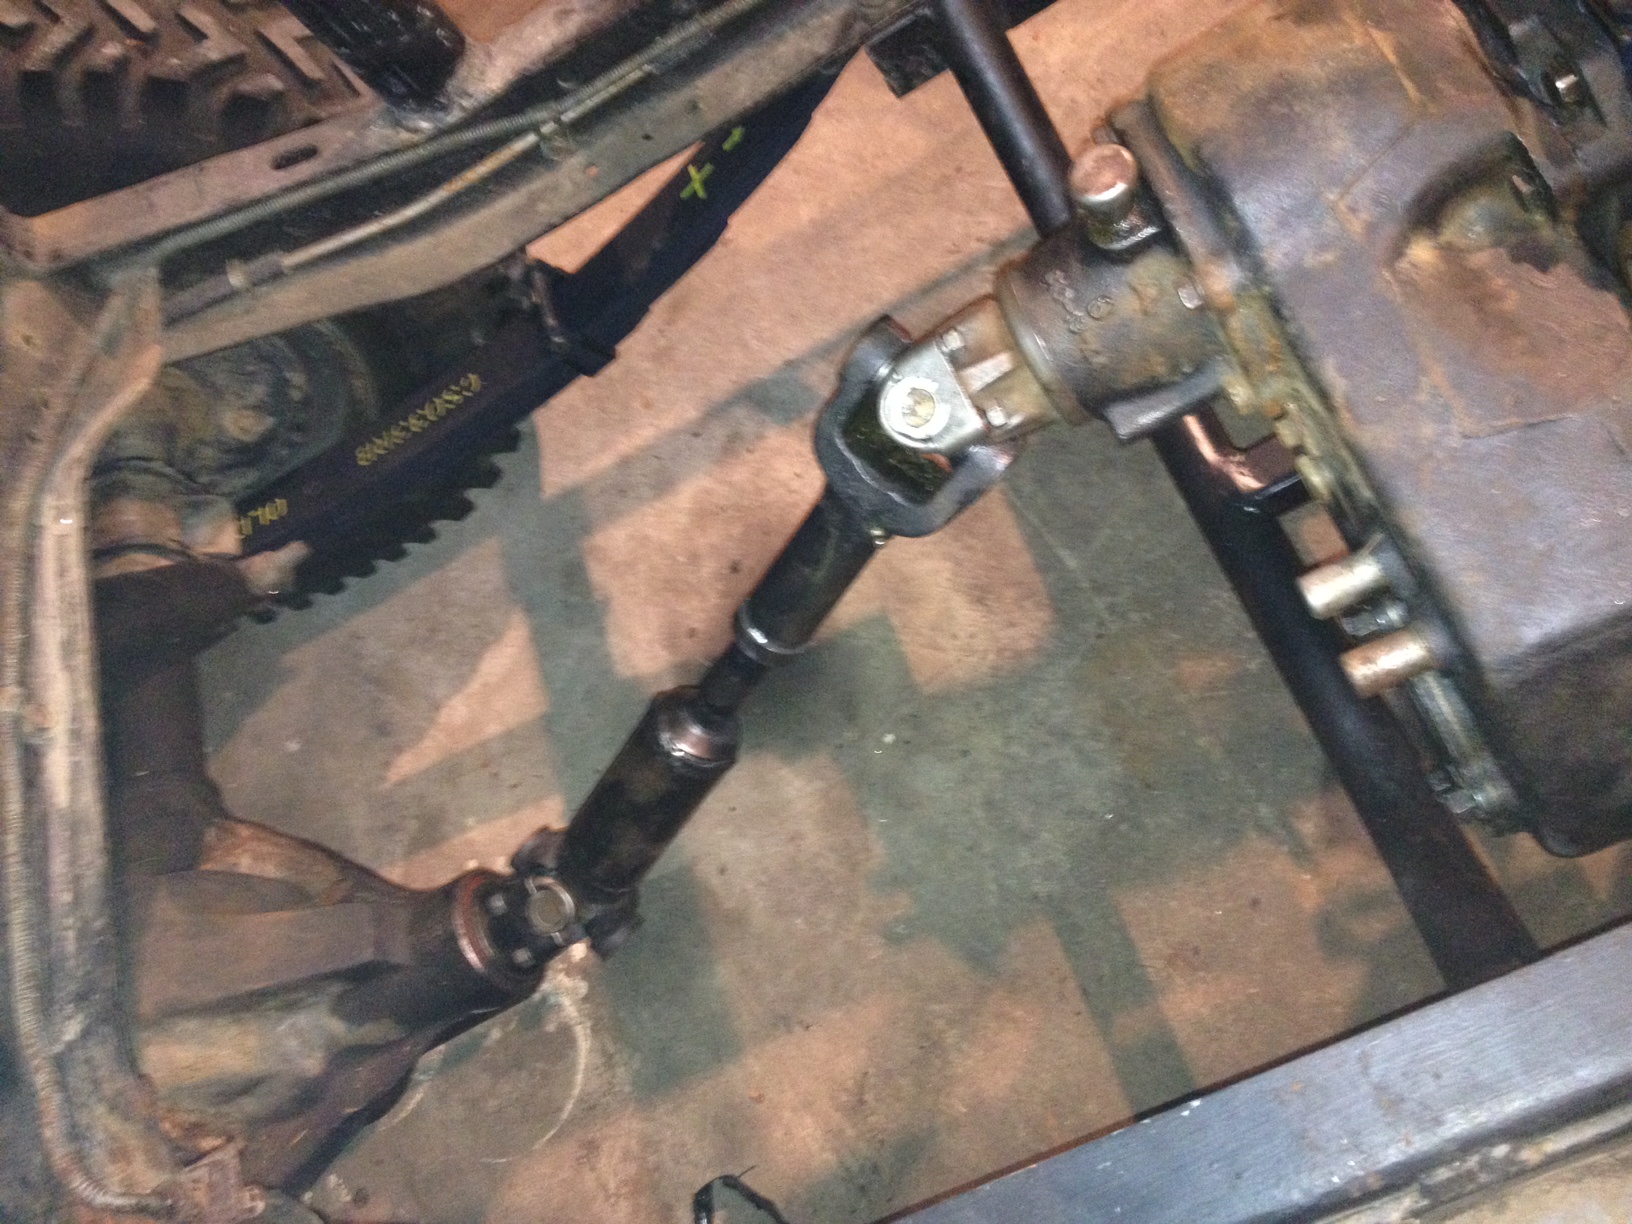
Unfortunately, I dropped the engine down enough within the chassis (when I changed the engine mounts) that the transfer case output yoke is too level, resulting in sharp driveline drop. So, I’m having to drop the tranny and TC. I might have to twist the rear axle as well, but will waiting until I set the body on the frame to see how the rear pinion angle changes.
So, more work ahead . . . This afternoon Colter and I will be heading to Gig Harbor to pick up Track Avenger 470cfm rebuilt carb I found on Craigslist. It will replace the old Carter 500 cfm that needed fixing.
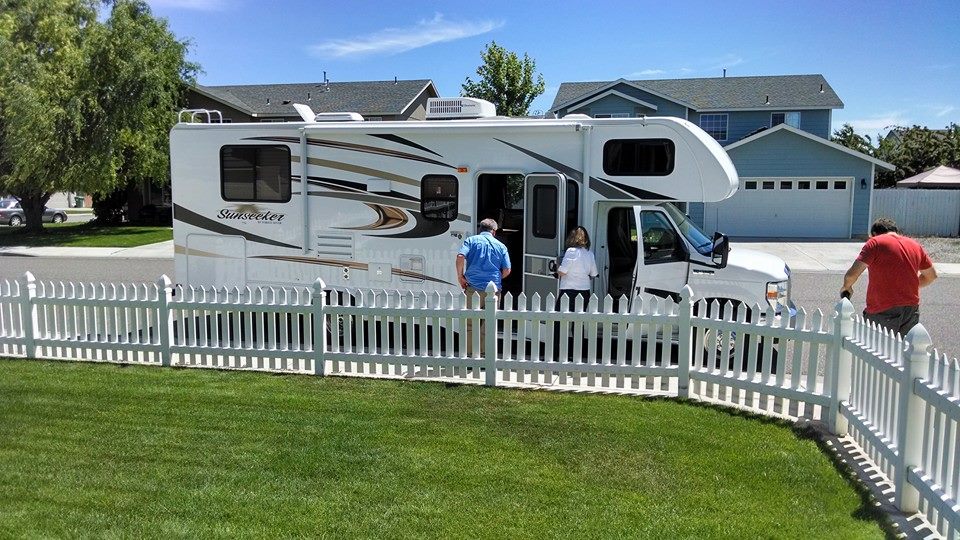
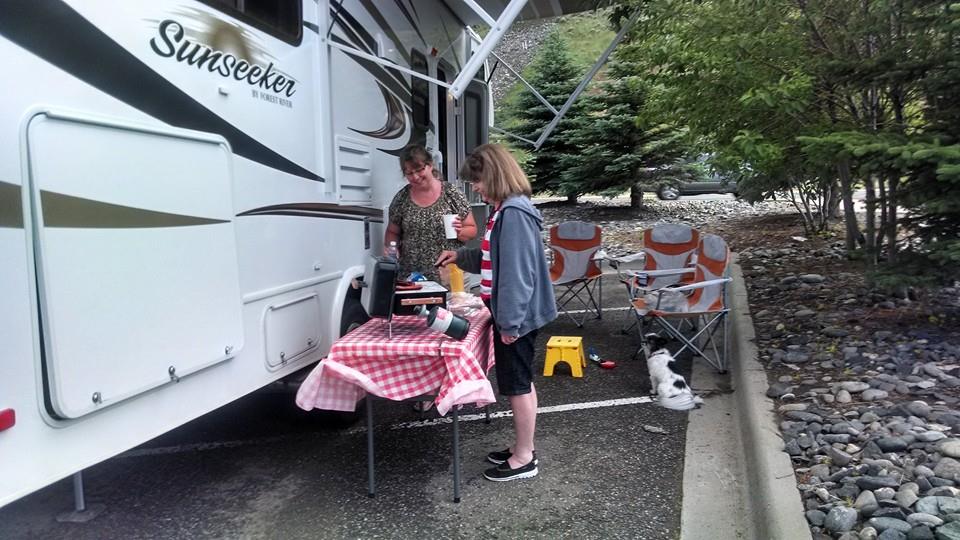
Before I get to the brakes, this past Friday Ann’s mother Rosemary decided to buy a motorhome. Well, not that she’d decided on Friday, but rather earlier in the week she caught the motorhome bug. After plowing through websites, stats and prices over a period of several days, she learned there was a local motorhome show happening. On Friday she and Ann went down to the show and found a 28′ Sunseeker. On Saturday, we brought it home.
I bring this story up because I’d already been planning to head to Seattle for a few days to taken advantage of the nice weather and work on Biscuit. On Saturday I left with the understanding that Ann, her mother, and Ann’s aunt Kathy planned leave on Saturday as well. They were going to drive the motorhome (Apparently nicknamed ‘Abby’ at this point) to Spokane, then head to Seattle to drop off Ann with me. Next, Rosemary would head south to Vancouver, before turning back toward Pasco.
They spent the night Saturday night in Spokane, but instead of going to Seattle, I got word on Sunday that Rosemary hijacked the plans and decided to head to Montana (with Ann and the wheel). Over the next few days they camped in several spots (Walmarts on two occasions — which offers free camping) in Montana and Wyoming. After staying Thursday night in Yellowstone, they finally arrived late Thursday night back home in good spirits.
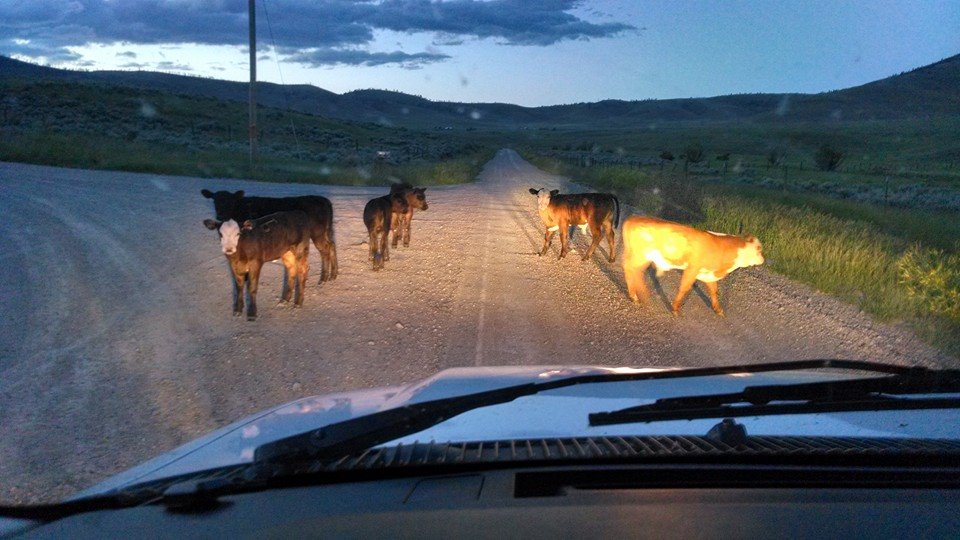
Apparently the navigation in the motorhome doesn’t work well. They ended up traveling on this gravel road through western Montana on this gravel road at night.
This World Market was right across the parking lot from the Walmart where they stayed in Billings. Not exactly my idea of camping, but they were having fun.
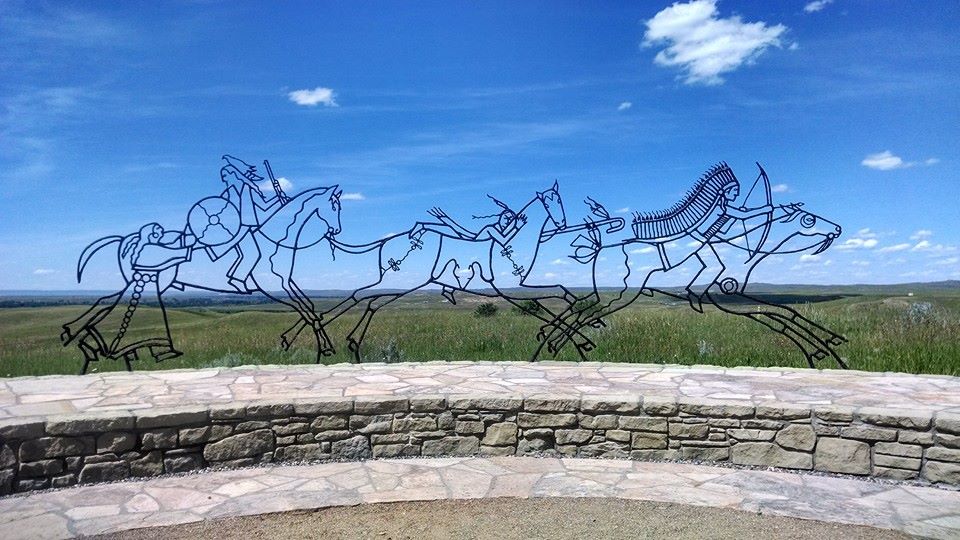
Nice bit of art at the Little Big Horn Battlefield.
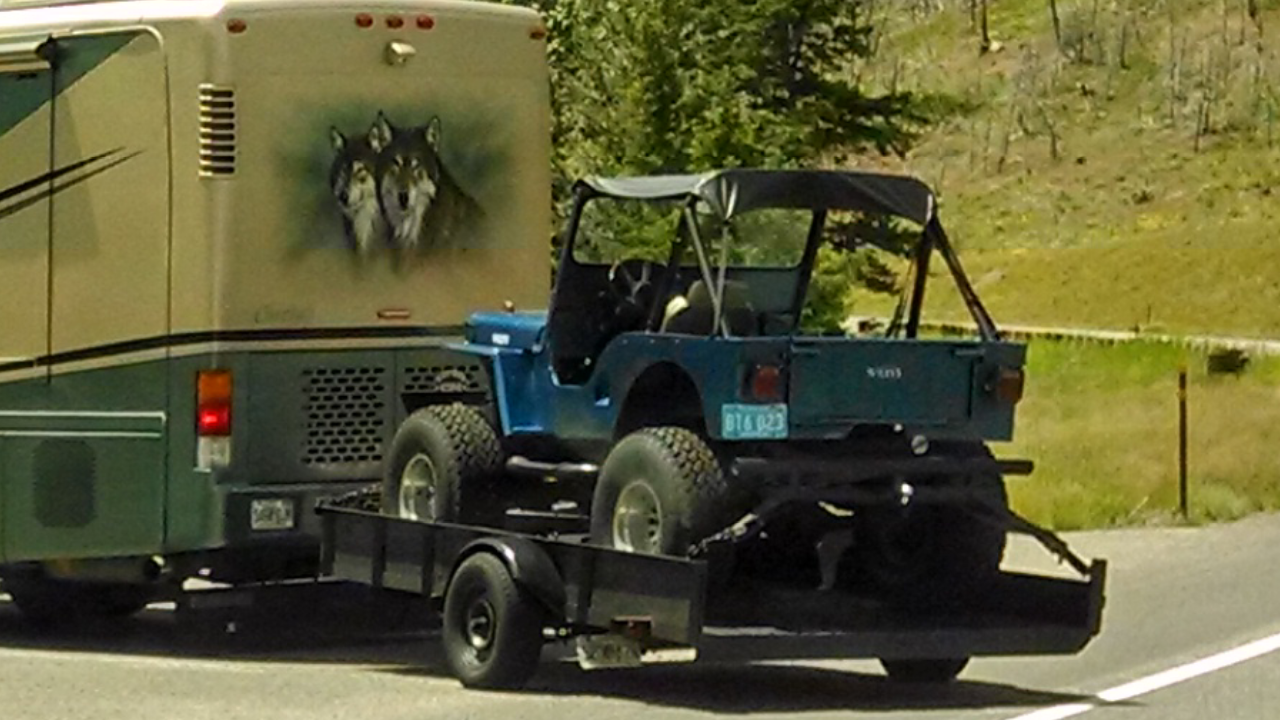
This was a parking lot at the Cody, Wyoming, Walmart. I’ve seen worse campsites!
Ann managed to take this photo on her phone from the camper. They were between Cody and Yellowstone NP.
For the last few days I’ve been in Seattle taking advantage of the nice weather to get some work done on Biscuit. Fortunately there weren’t too many ‘sonny-do’ projects, so I had a chance to get right to work.
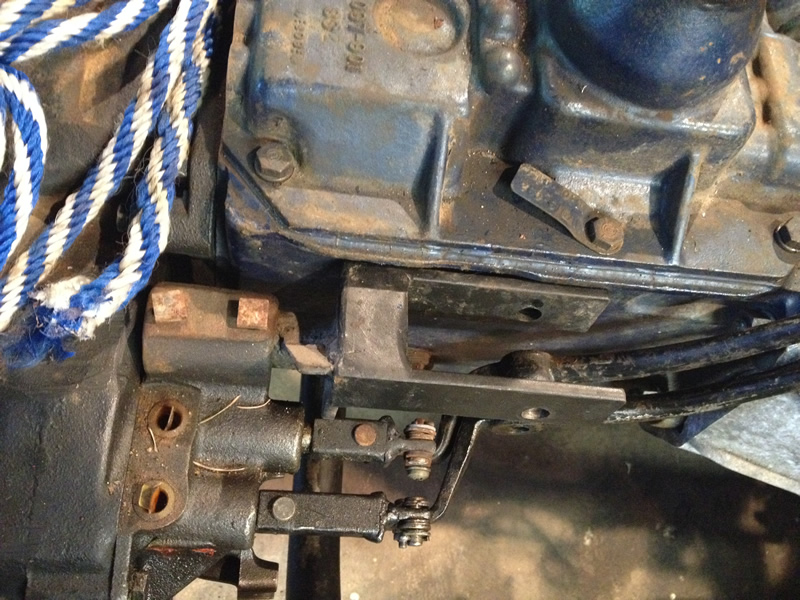
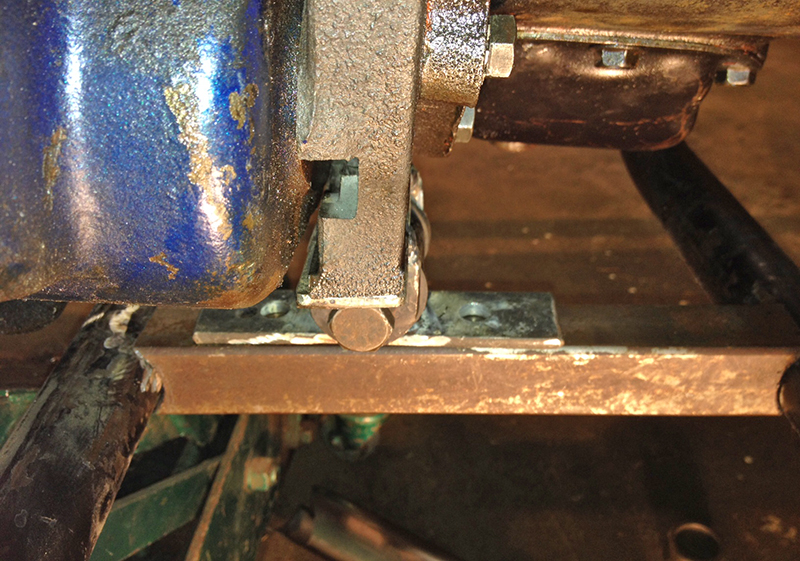
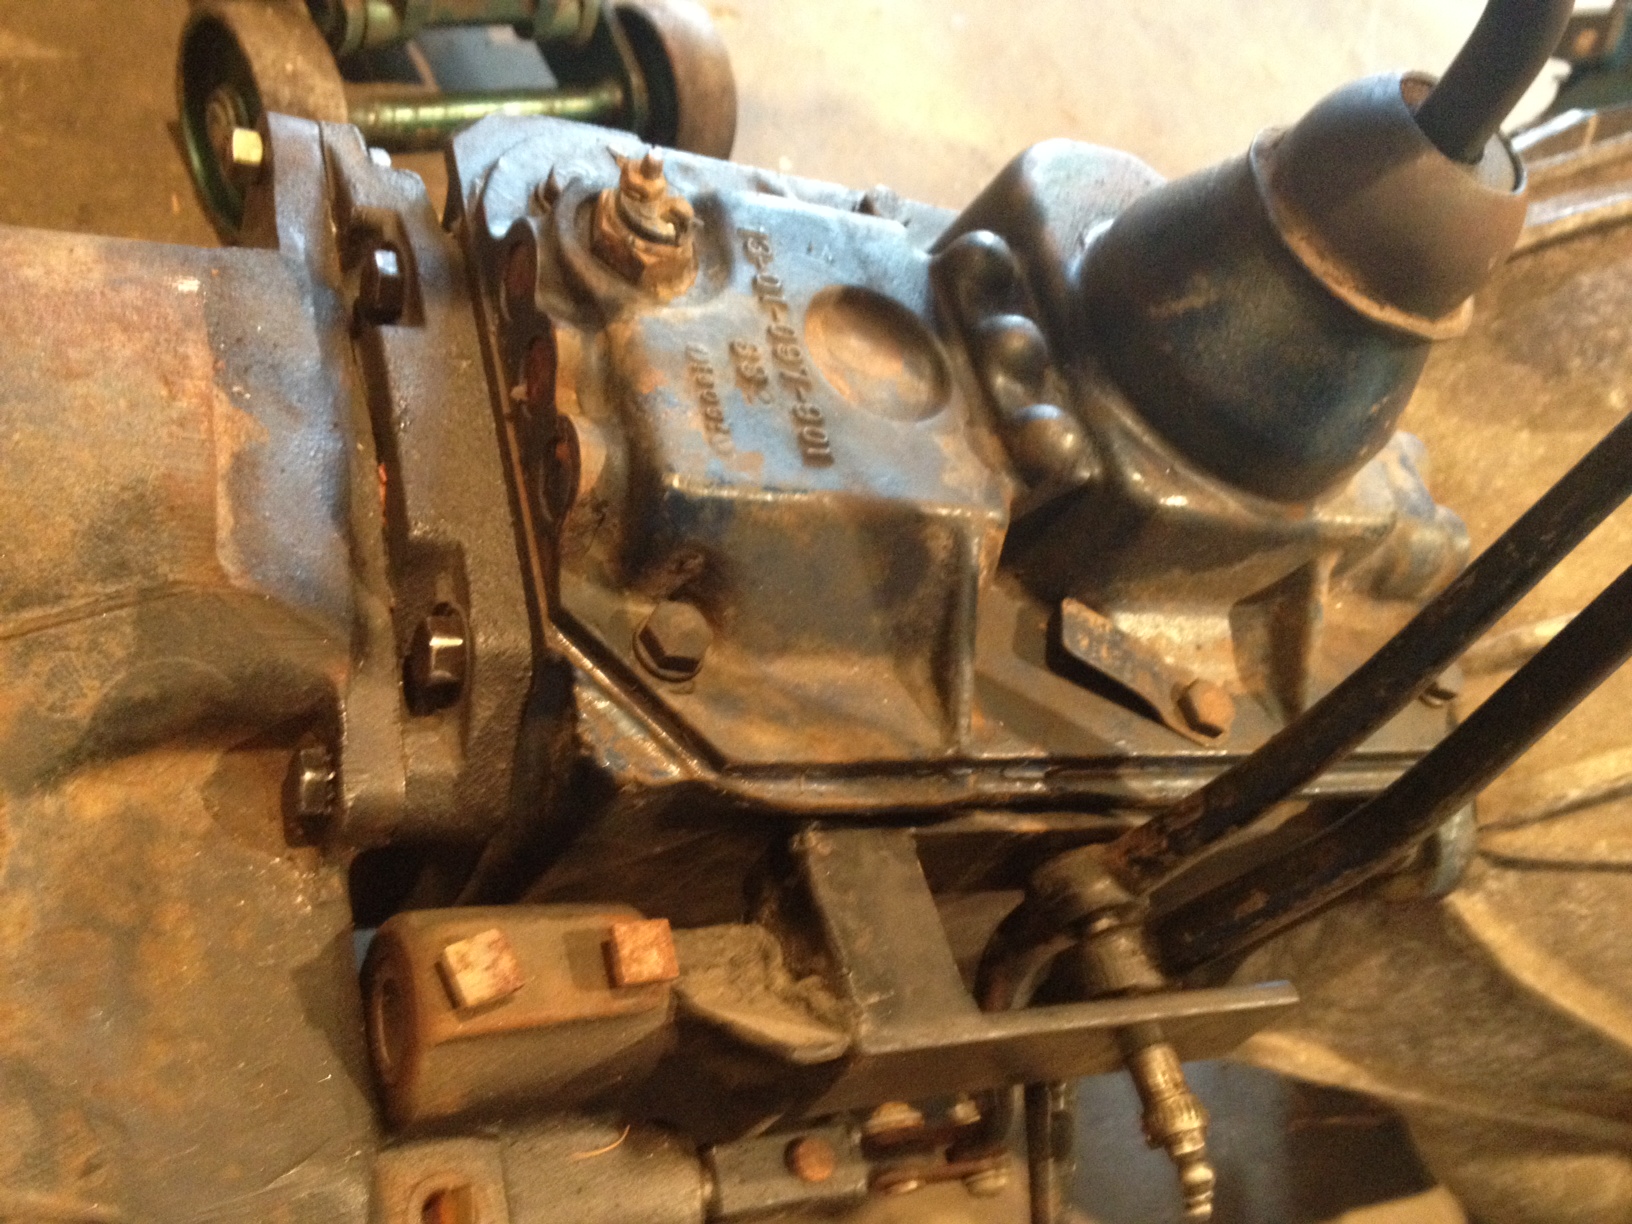
First, I tackled the custom bracket I made for the transfer case. You might remember that I installed Dana 18 gears into a Dana 20 (a good way to improve the gearing) and turned the single Dana shifter into a dual shifter. When I built the bracket, I designed it to fit alongside the TH 350. I didn’t know it wouldn’t fit right against a T-18.
As you can see, the side of the shifter bracket tong sits against the transmission. There was no room to attach a bolt on the backside of the tong.
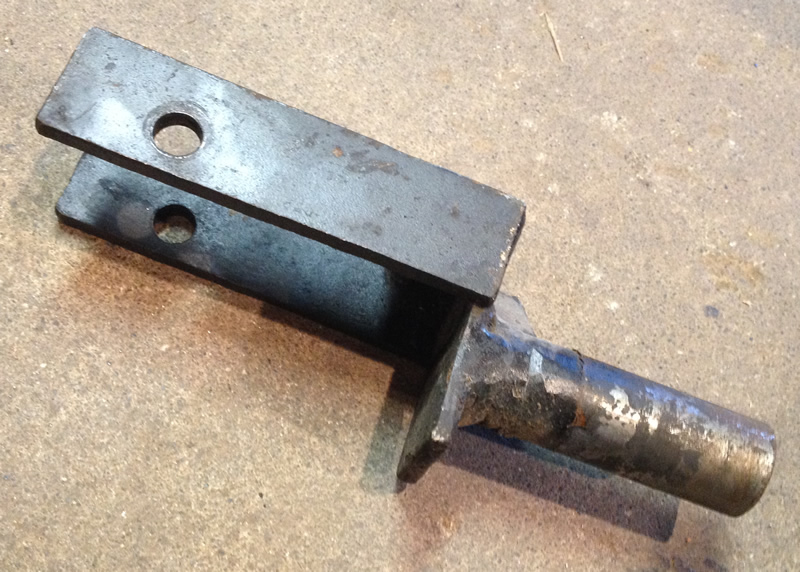
Since the shifter bracket is more functional then beautiful, I reused most of the parts. I simply cut off the old tongs, welded them onto a plate, and welded the plate back onto the bracket.
Not pretty, but works.
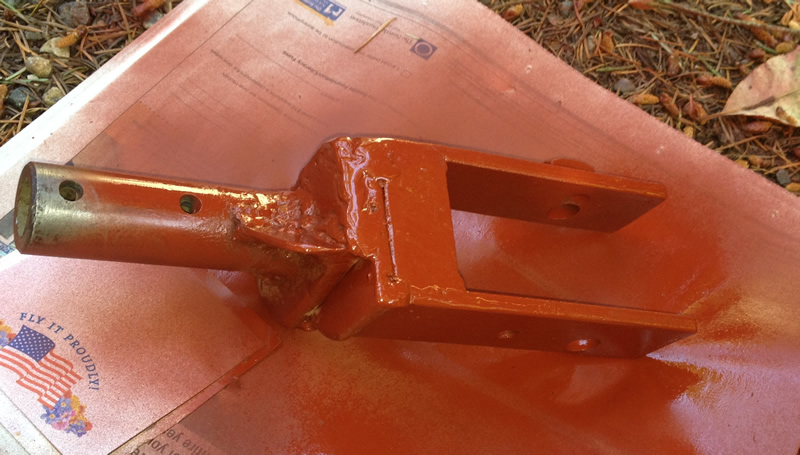
The ‘finished’ bracket with some primer on it. You can just see the bolt that I welded to the back side to make it simpler to bolt the shift levers into place.
Next, since the transfer case sits slightly lower than it did before, I created a new side bracket. I made a template out of aluminum. To build the bracket I took a piece of an angle I had around the garage, cut it, and bent it into the shape of the template. Again, it’s nothing pretty, but gets the job done.
Transfercase side support with primer on it (so it would photograph better).
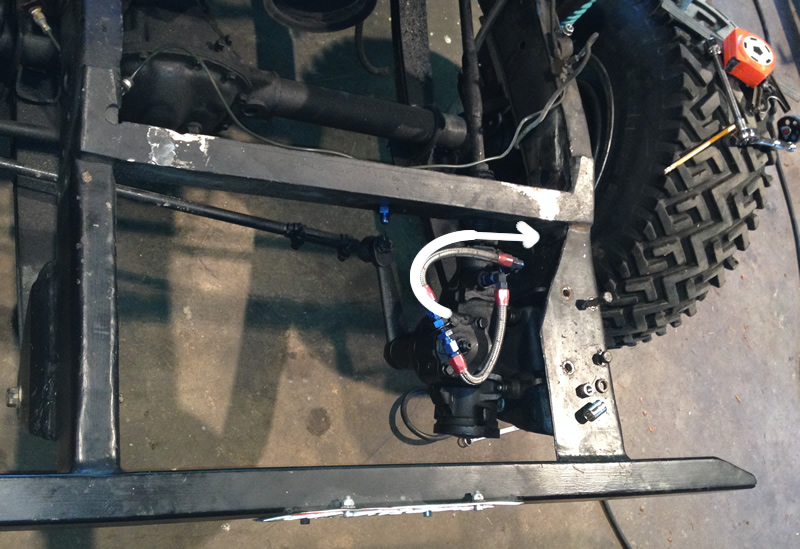
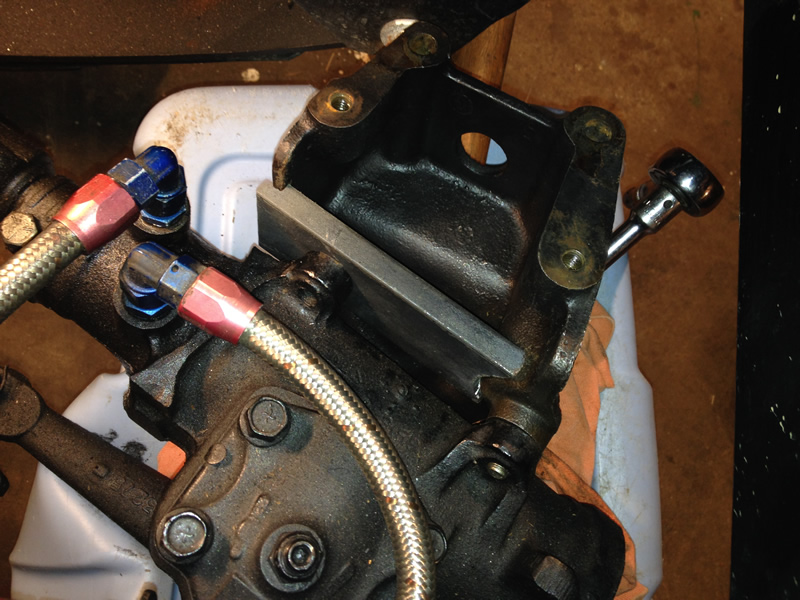
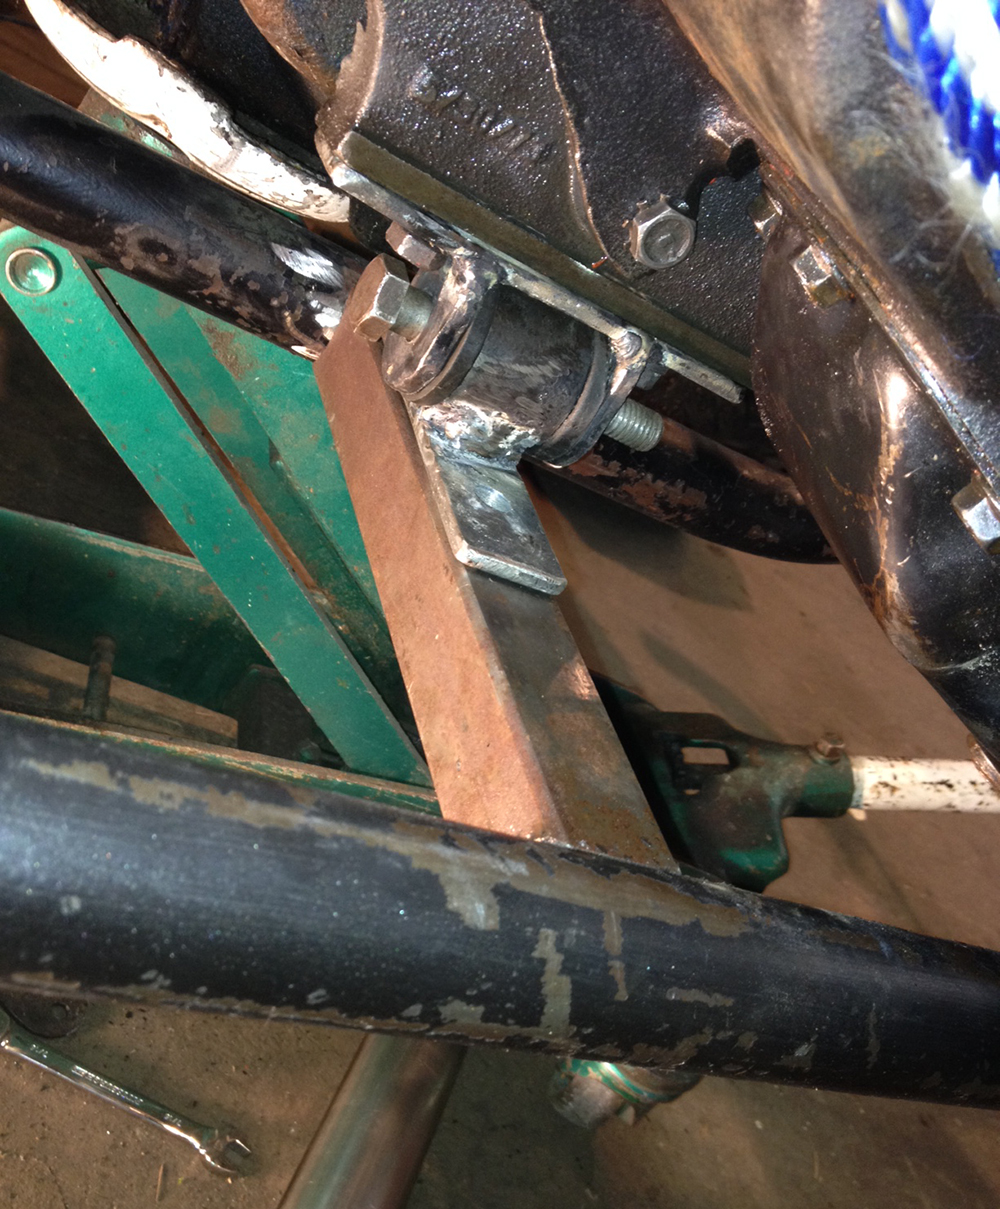
As I explained in a post a couple weeks ago, while I was puling apart my jeep I discovered that the powersteering was rotating slightly as I spun the steering wheel. That’s a problem! So, I dedicated the last few days to fixing that problem and changing the way the front bumper connects.
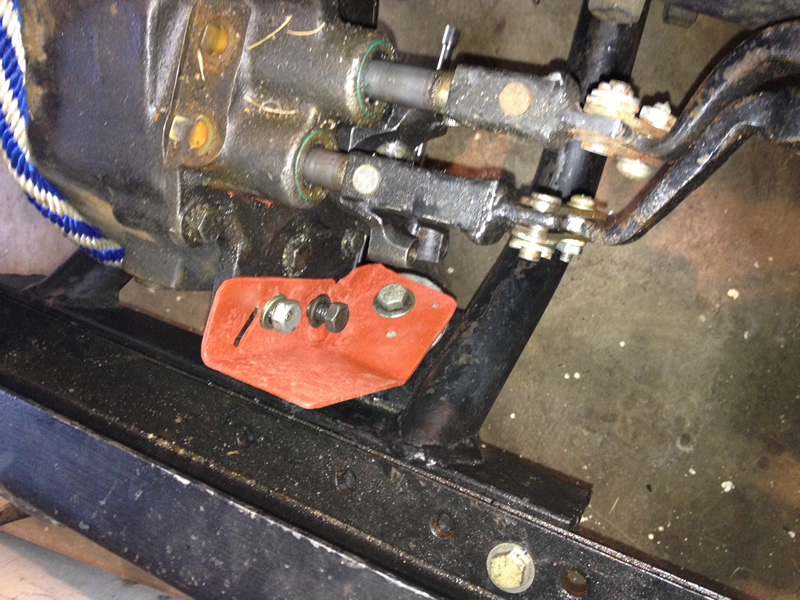
The basic problem was that the stock power steering mount unit only used three of the four holes to attach the steering unit. Therefore, I planned to add a cross piece to provide a place for a fourth bolt to attach. However, that meant I had to cut the plate on top so the bolt could be attached and removed. And, since I was doing that, I figured I would change the way the bumper attached.
The white arrow shows how the unit was rotating to the driver’s side.
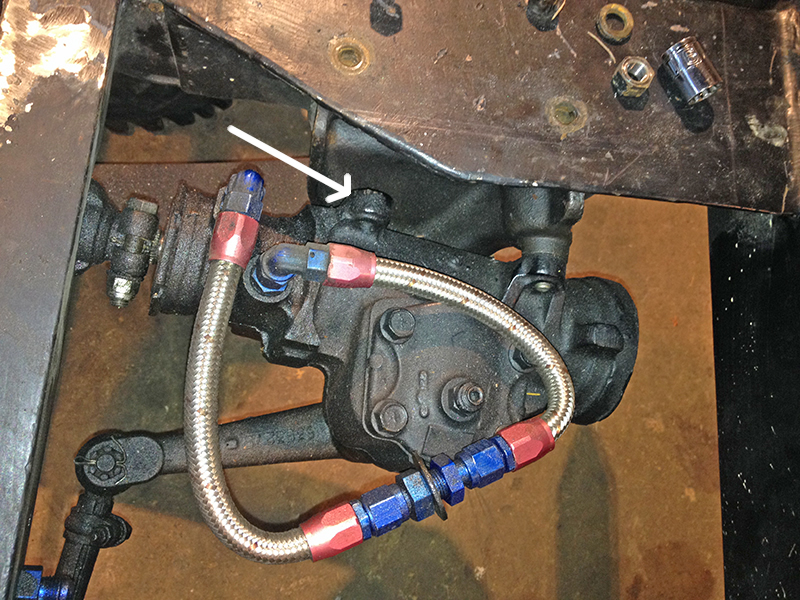
This arrow demonstrates where the power steering needed to attach.
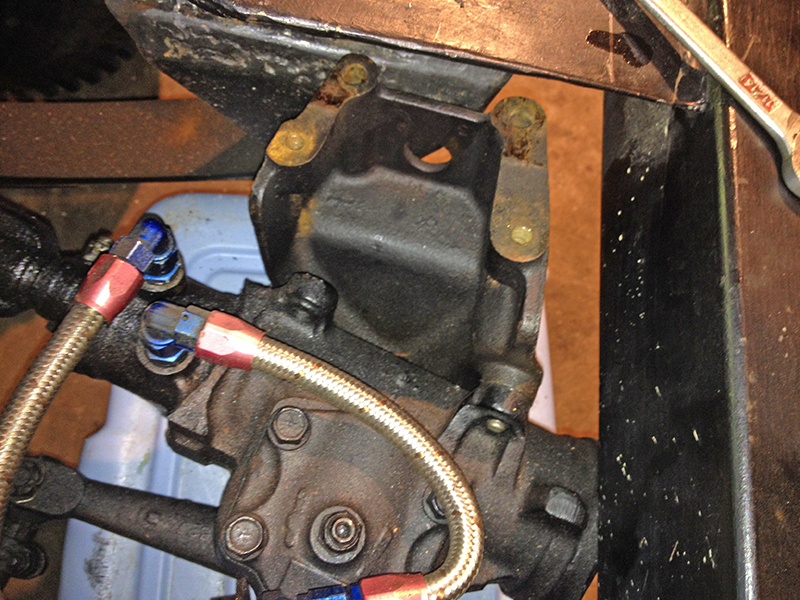
Here I’ve removed the bracket from the frame to provide a better look at it. This is the stock bracket from a 1973 CJ-5.
This shows the cross brace I made from 1/2″ steel.
Next up was the alternation of this top piece. You can see the outlines I’ve scratched into the plate.
Using a cutting blade and a saws-it-all I removed chunks of the plate.
Now it’s looking a little better.
Next off came the bumper:
The length of the bumper in from of the jeep annoyed me a little. So, I wanted to remove a couple inches.
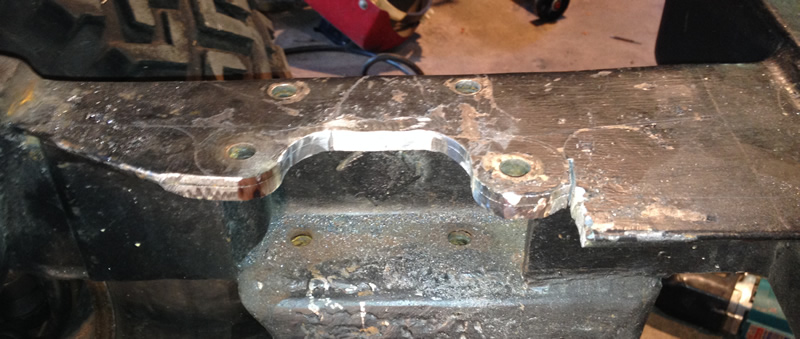
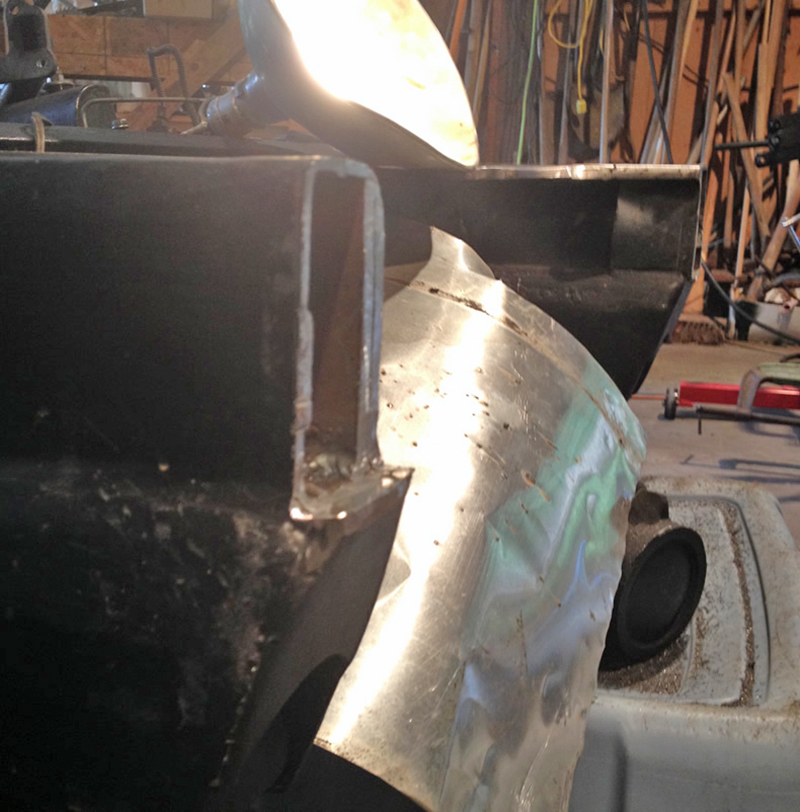
The frame rail on the left has been cut back so the plate can fit snuggly over the custom front shackle. The far right frame rail has not been cut back yet.
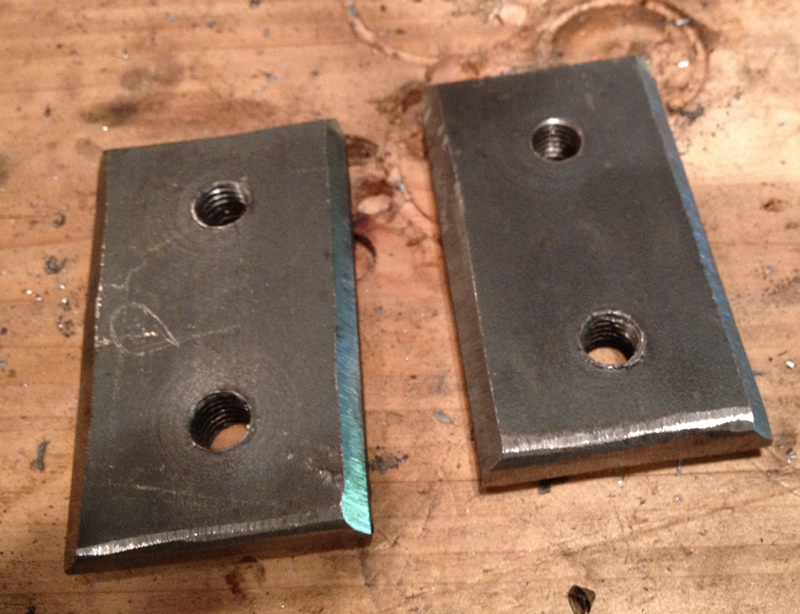
In order to bolt the bumper on to the front of the jeep, I created a set of flat plates and drilled some initial holes into them. The plates are tall so that I can weld a cross piece on to them. The cross piece will allow me to properly position the holes in the bumper with the holes in the plates.
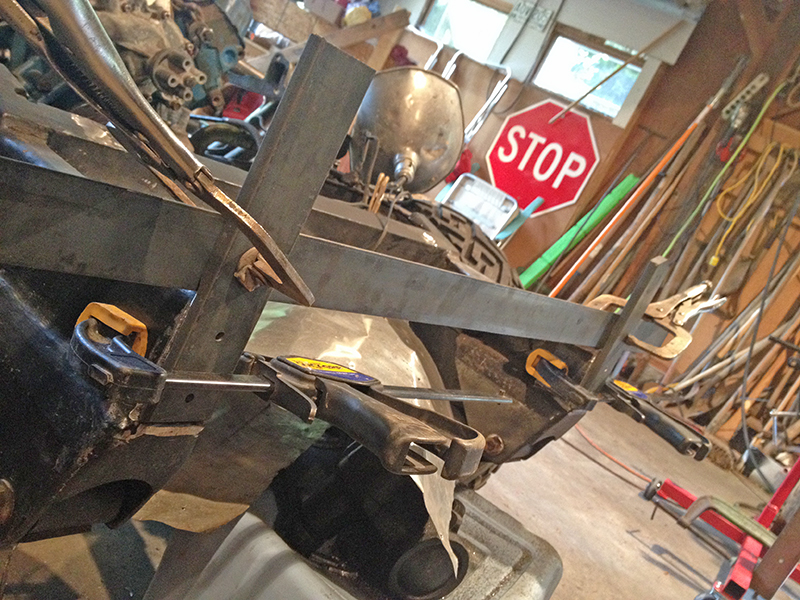
I clamped the new plates with the cross bracket onto the bumper so I could drill the holes. (for the pics I removed the clamps.
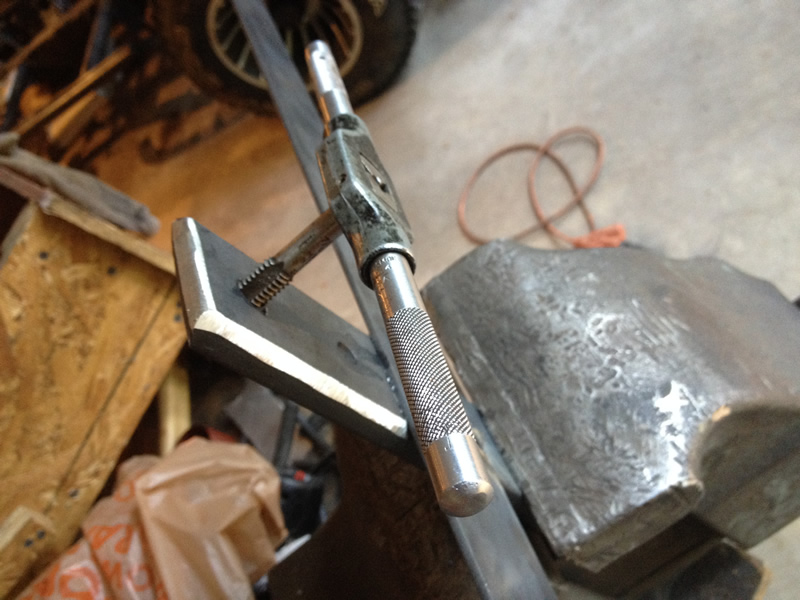
With the bumper holes drilled, I can how set threads into the brackets.
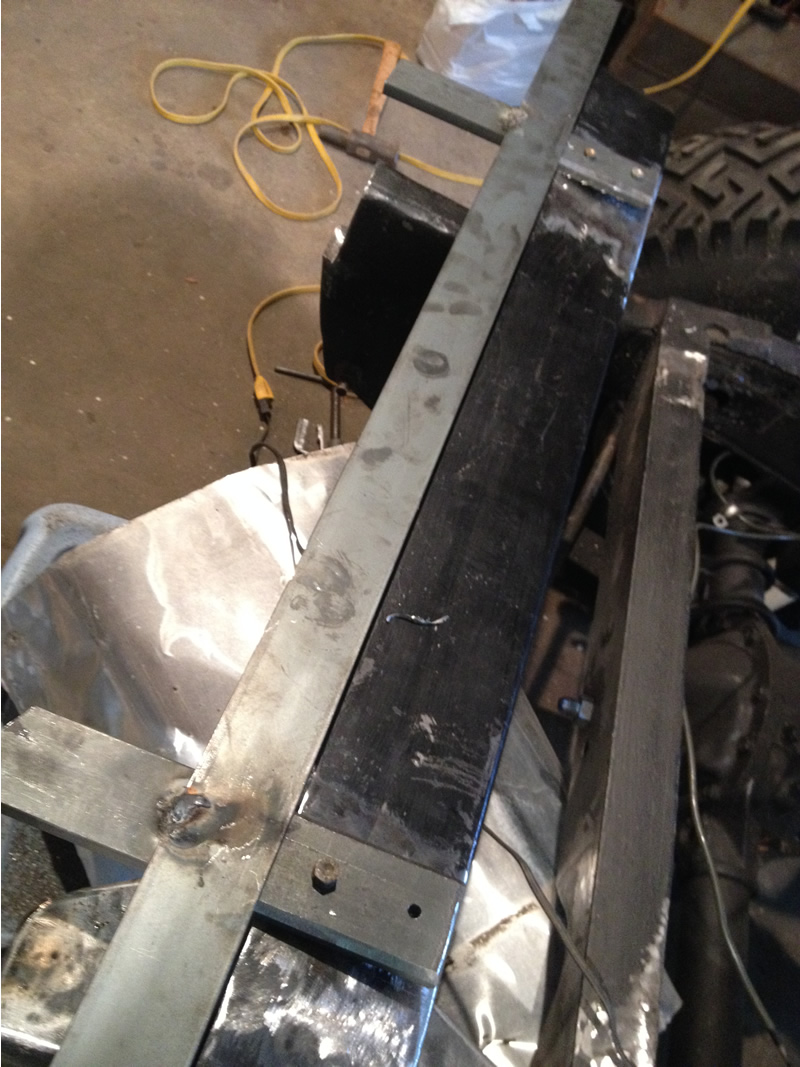
This is another view that shows the brackets, the cross piece and the tap at the far end.
These are the brackets cut down and tapped. I had a little problem threading the hole on the lower right, which is why it doesn’t look quite right. It works fine though. I have also ground down the sides to make it easier to weld and fill the plates to the end of the frame.
This show the plates welded and cleaned up on the end of the frame.
This is a top view.
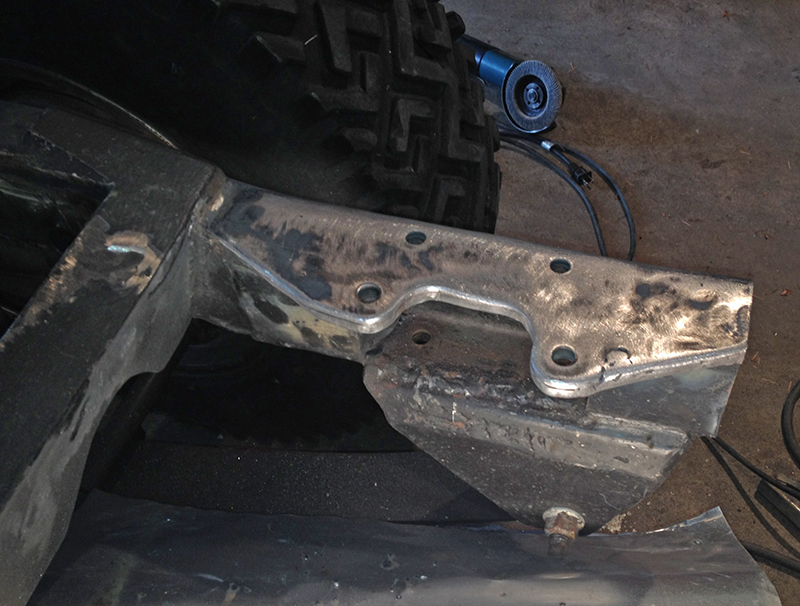
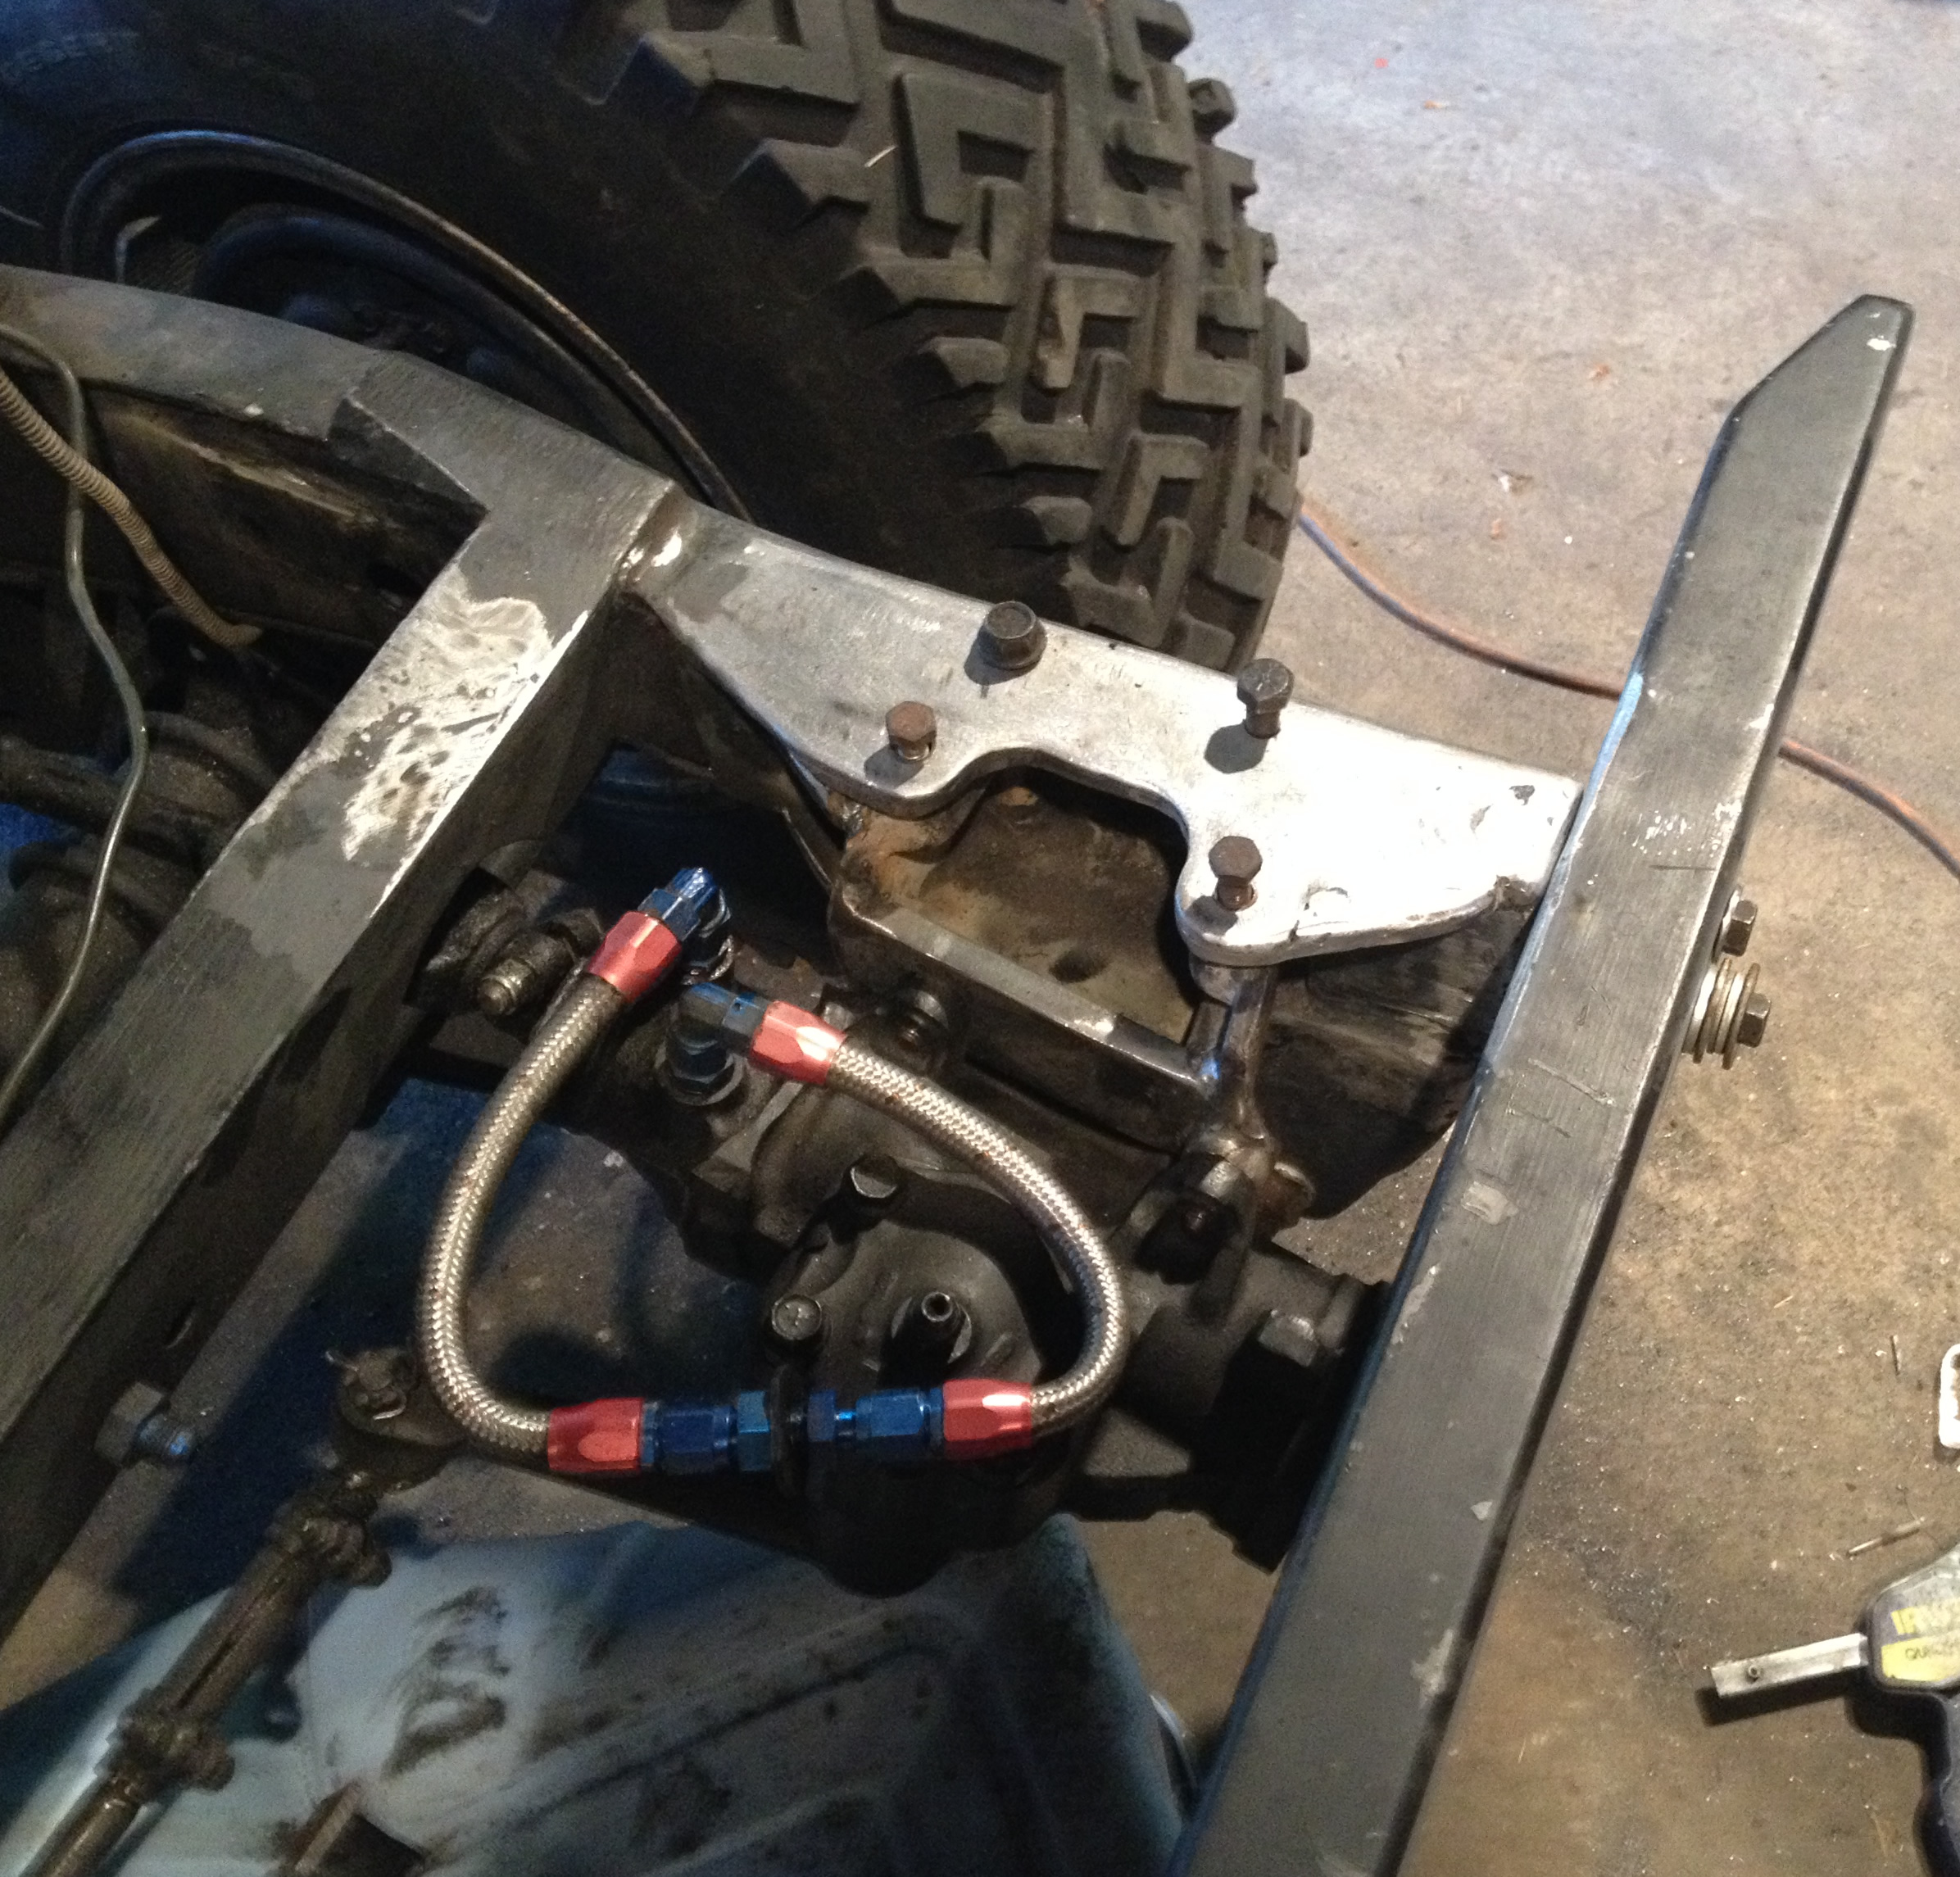
This shows the bumper attached, everything painted, and the power steering affixed to the new and improved bracket.
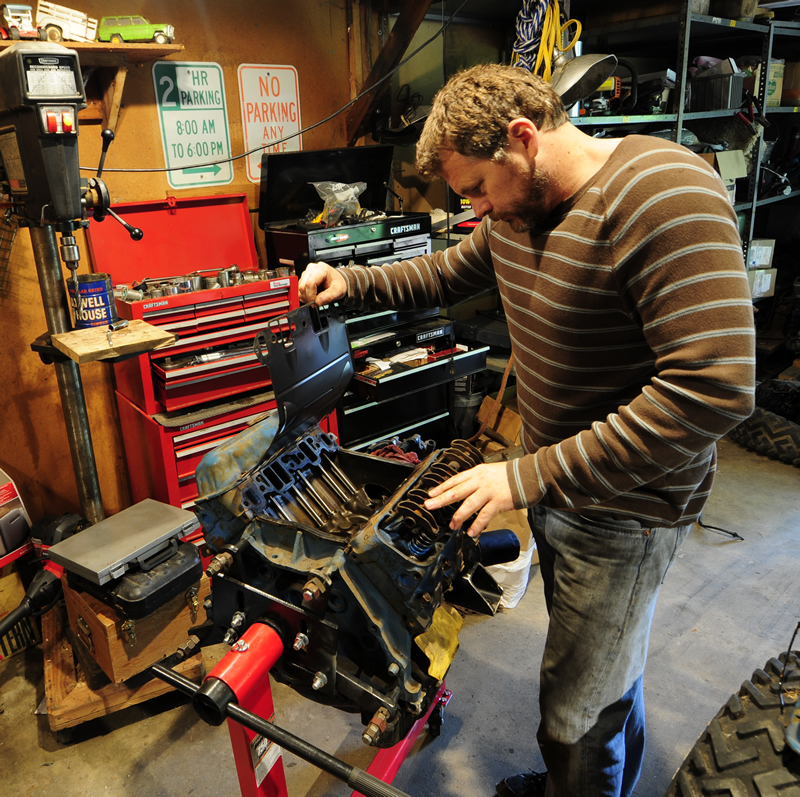
With those projects out of the way I turned my attention to the engine I bought from Daryl last summer. I discovered the motor has stock bores. The pistons appeared cleaned, but never run. The engine looks like it was rebuilt, but never run. The spark plug ends are clean and shiny.
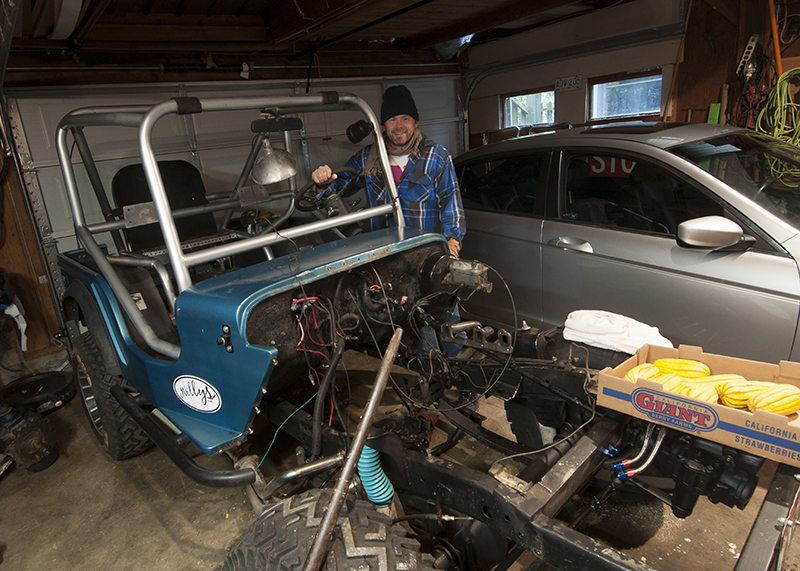
Me checking out the motor. It came without an intake manifold.
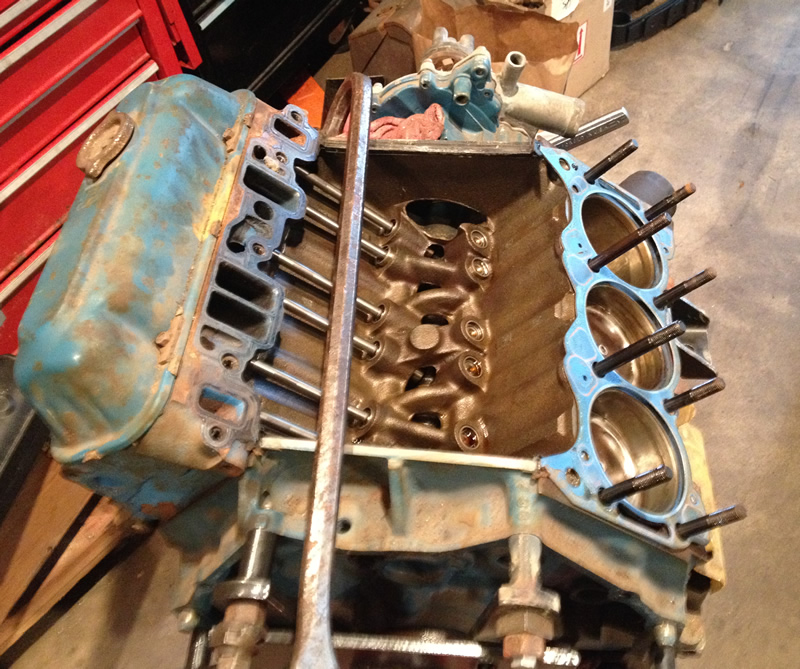
With the head pulled I was relieved to see clean cylinders. Then I noticed there was no build up at all on the gaskets.
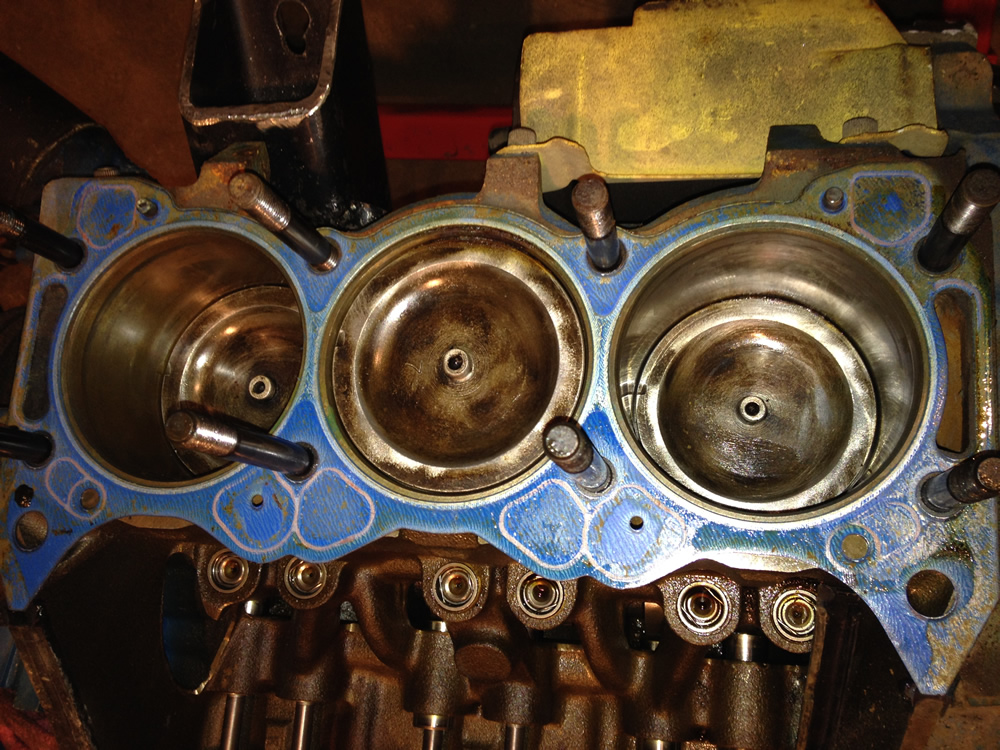
The tops of the pistons showed they weren’t new, but they appeared to have been scrubbed cleaned.
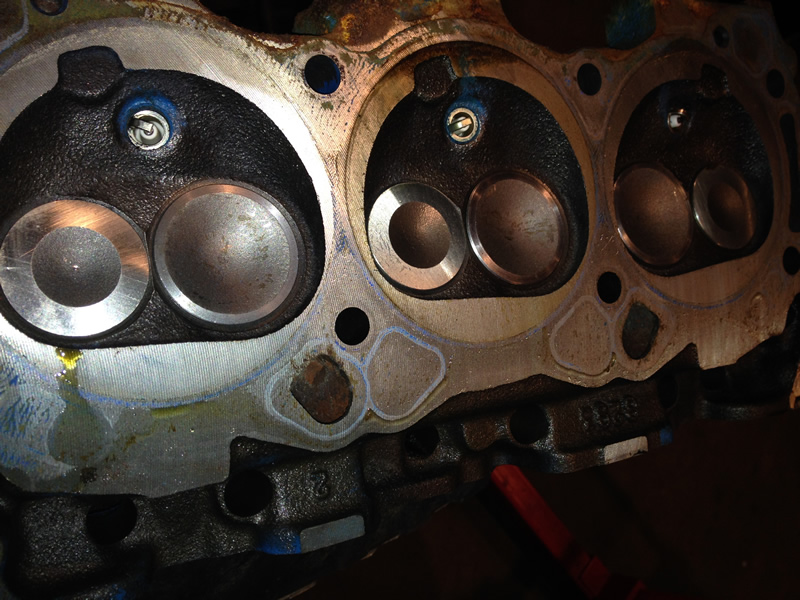
The underside of the heads show no carbon and the plugs look unused.
Given the engine looks unused, I’m not going to attempt to rebuild it. Instead, I’m going to run it as it is and focus resources on properly rebuilding my other motor (with its new heads and updated cam) later this year. In the meantime, I can run with this motor and focus on getting the other parts I need to get Biscuit running. Since they are both Buick V6s switching out motors at some future date won’t take very long.
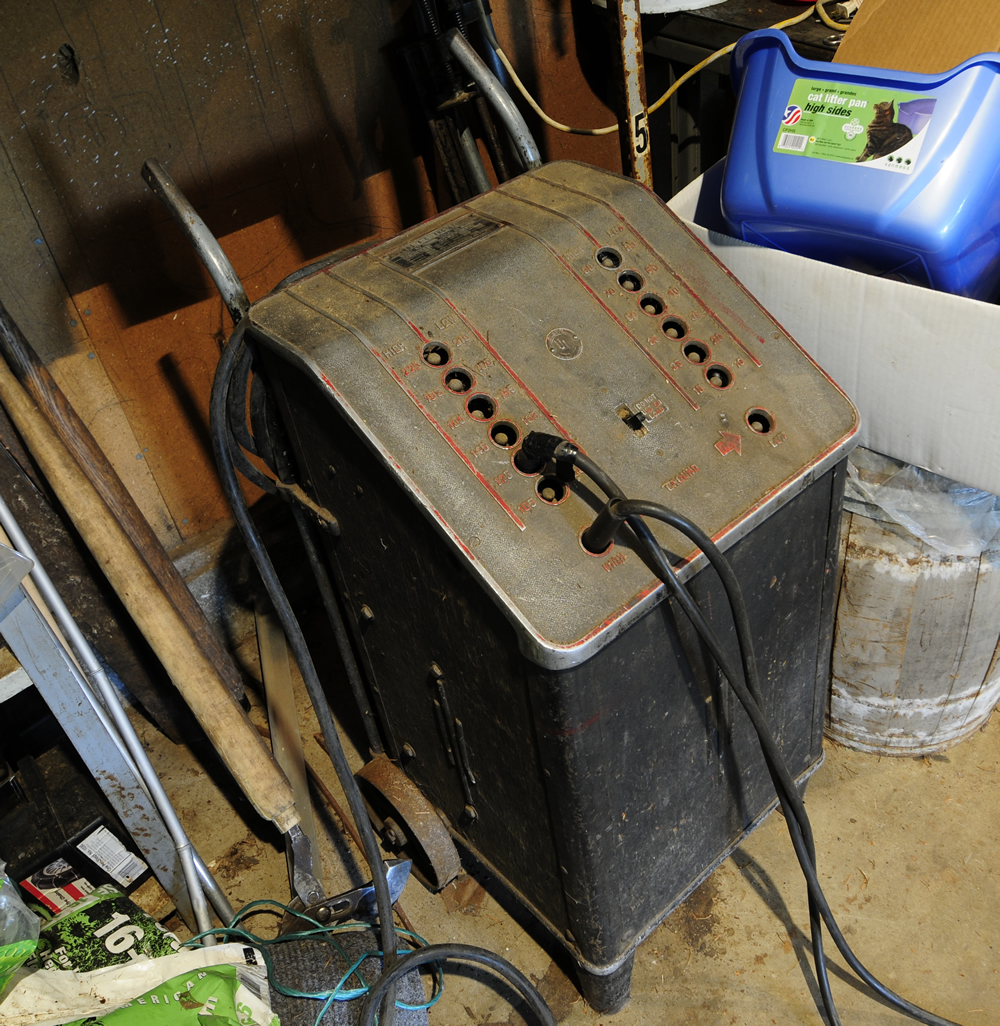
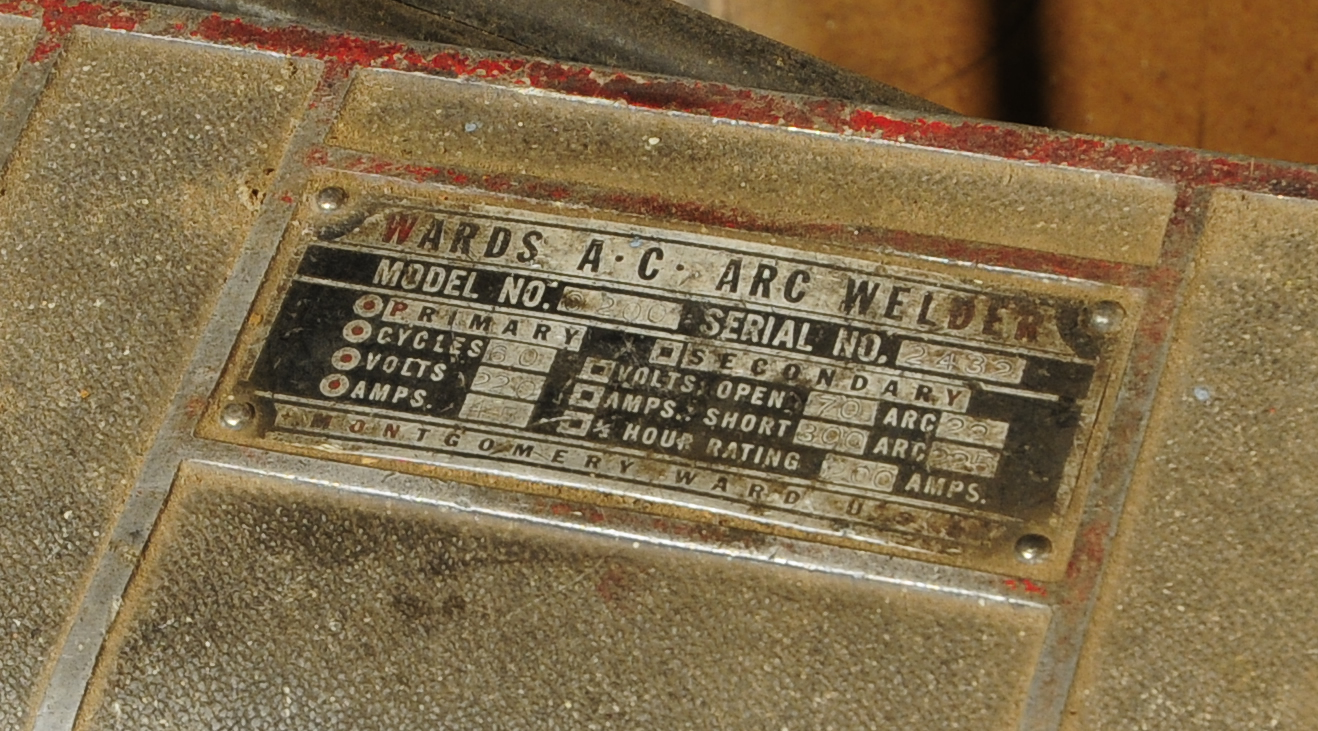
Lastly, I thought you might enjoy seeing the welder I’ve been using. Dad tells me he got this Montgomery Ward classic as a hand-me-down from a local jeep builder (Al Carrol) in the late 1960s. It’s still works real well.
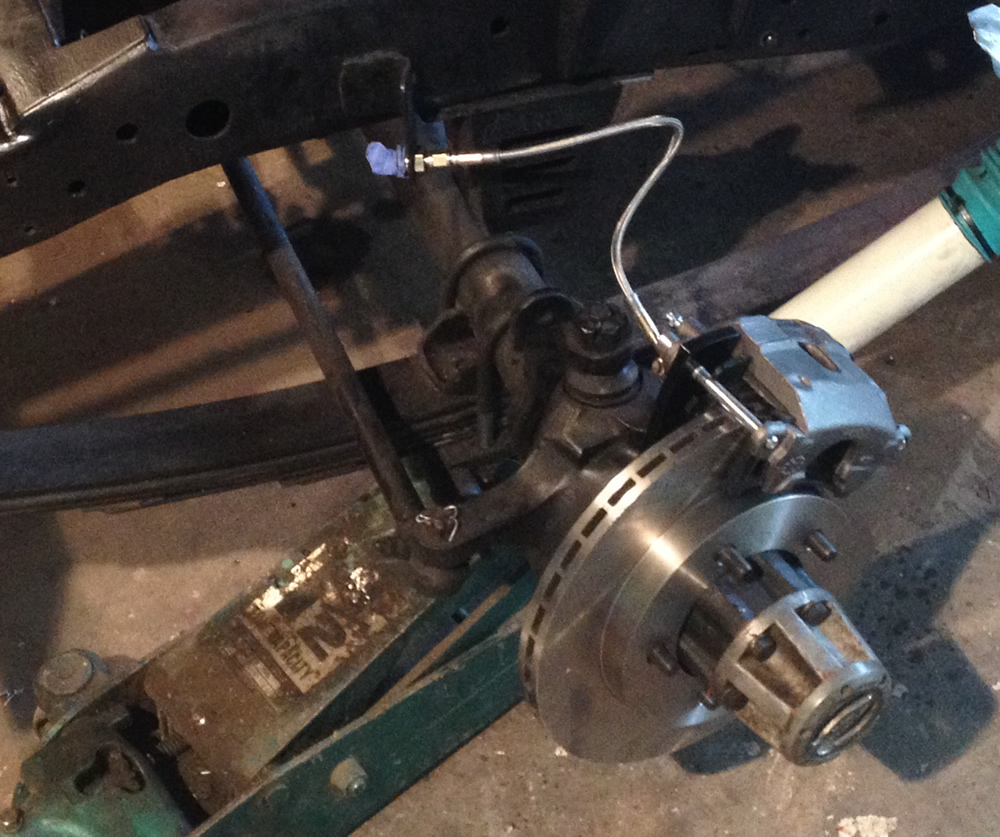
I hope to return later this month to complete some more work. I will be updating the front brakes to discs. Thanks to R&P for the brake kit! I’m also hoping to have all the parts to install the drive train. Here are a few more parts I’ll be adding to the mix:
Holley 390 carb (i have a kenne belle intake)
Clutch kit & pilot bushing
Brake Calipers for the new disc brakes
Brake power CJ-7 unit with proportioner
Bushings for my new rear emu springs (thanks to Mitch at ARB for helping out with those)
Possibly a different set of headers (am waiting to see what I can find online)
I finished the engine mounts … and by finished I mean they are almost ready. They are welded and set in place, but still need some polishing and paint (as if they will be polished — maybe cleaned up a little more). I have to pull the engine and go through it anyway, so there was no rush to get any more done.
I hadn’t planned on going through the trouble of redesigning how my engine sits within the frame, but removing the auto trans gave me more flexibility. I didn’t make the change lightly. I pondered, measured, eye-balled, used a level, and got out a crystal ball to see if I’d really be happy with the change. After all, it seemed like a lot of work for just a few inches gain. But, by making the changes I was able drop the engine slightly and shift it to the center between the frame rails. Yep, that seemed like a good idea, so I made the changes.
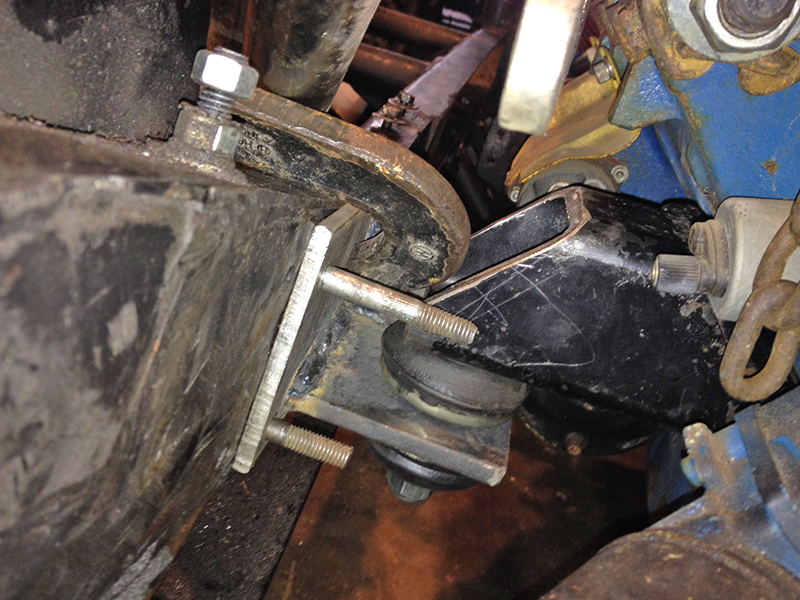
I wouldn’t call the mounts beautiful, but they are functional. They will be both welded to the frame and bolted (as a backup). Unfortunately, I took terrible pics (we didn’t bring our good cameras with us). Here’s a close-up of the passenger-side mount. You can’t really see the mount’s rear support, so the photo isn’t really helpful. The bolts are just placeholder bolts.
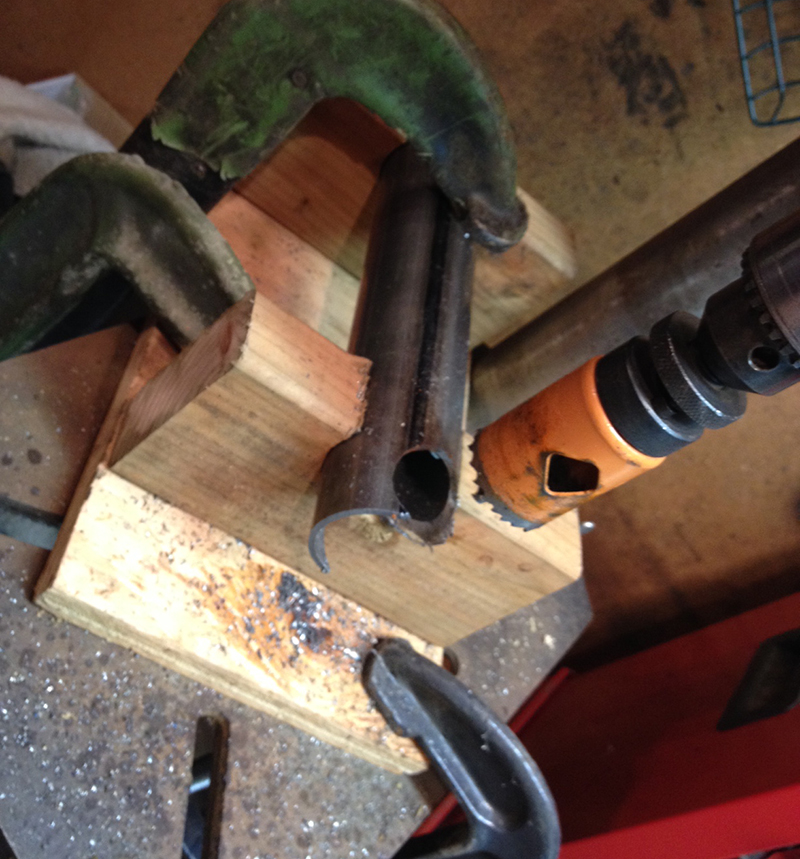
As for the rear center mount, the creation of it started out smoothly. I was going to install a round tube between the two undercarriage tubs that support my tranny and tc. I jigged up the tube to-be-cut and cut a perfect pair of holes for sliding the tube onto the undercarriage tubes.
The jig is holding the tub, which keeps it from spinning. The cutter created a perfect hole. So, why didn’t i use it? Because the installed tube was about a half inch too tall. Damn!
Once drilled, I tested the tube. That’s when I discovered it was barely too tall. I abandoned that plan for a simpler one.
After some scrounging in my very sad metal pile, I found some square tubing that was just the right size, so I drilled that and slide it between the cross members. Then I built a small mount with a rubber housing on top of that (which will be welded to the square tubing). Finally, I created a small piece that bolts to the T-18/TC adapter. The fit is good and solid and the rubber gives it some flexibility.
This will make more sense once I weld the square tubing to the braced on top of it and paint it. But, I wanted to complete the engine mounts before finalizing the position of this back mount.
Here’s a photo from the side. You can see how the square tub fits in between the front and rear round tubing (fits tight enough that I didn’t have to weld it before putting the tranny/engine weight on it).
Tomorrow we head back to Pasco for a while. I’m hoping to get back later this month to make more headway. Hopefully I’ll get better pics, too!
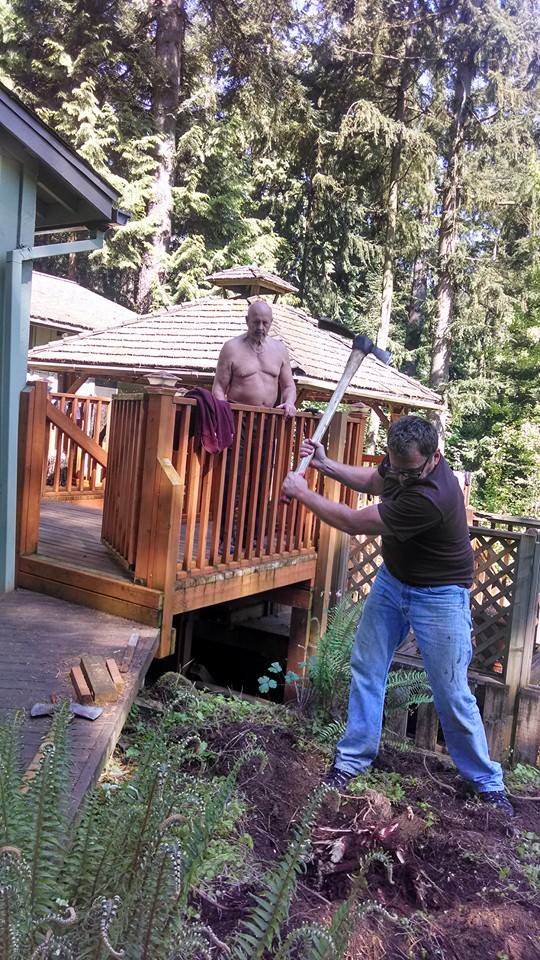
On Monday I spent the day repairing Mom and Dad’s tractor mower, fixing Mom’s computer, getting the chainsaw and weed eater working, and more. Dad made sure I was doing everything right, as you can see in this photo.
On Tuesday I got a chance to work on Biscuit. I started by cleaning up the frame some more so that I could deciding how the engine, tranny and tc would be mounted. The T-18 I’m installing is a bit shorter than the automatic TH-350 I’m replacing, which is the reason for the redesign.
Here’s where I started today.
When I bolted the T-18 to the adapter to the Dana 20/18 (Dana 20 housing, Dana 18 gears) I discovered my custom mount is too tight against the T-18. So, I’m going to have to alter that.
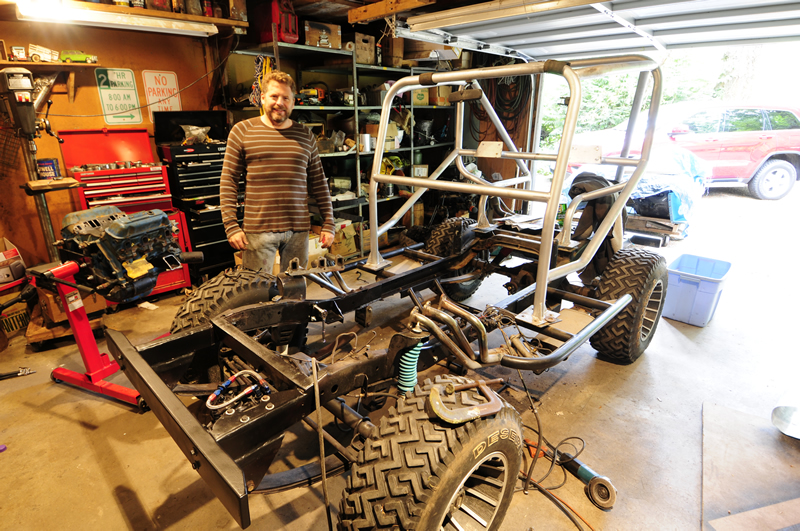
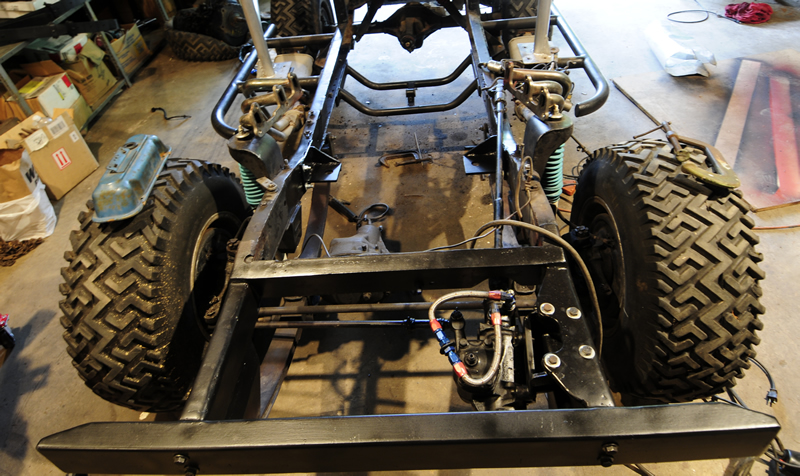
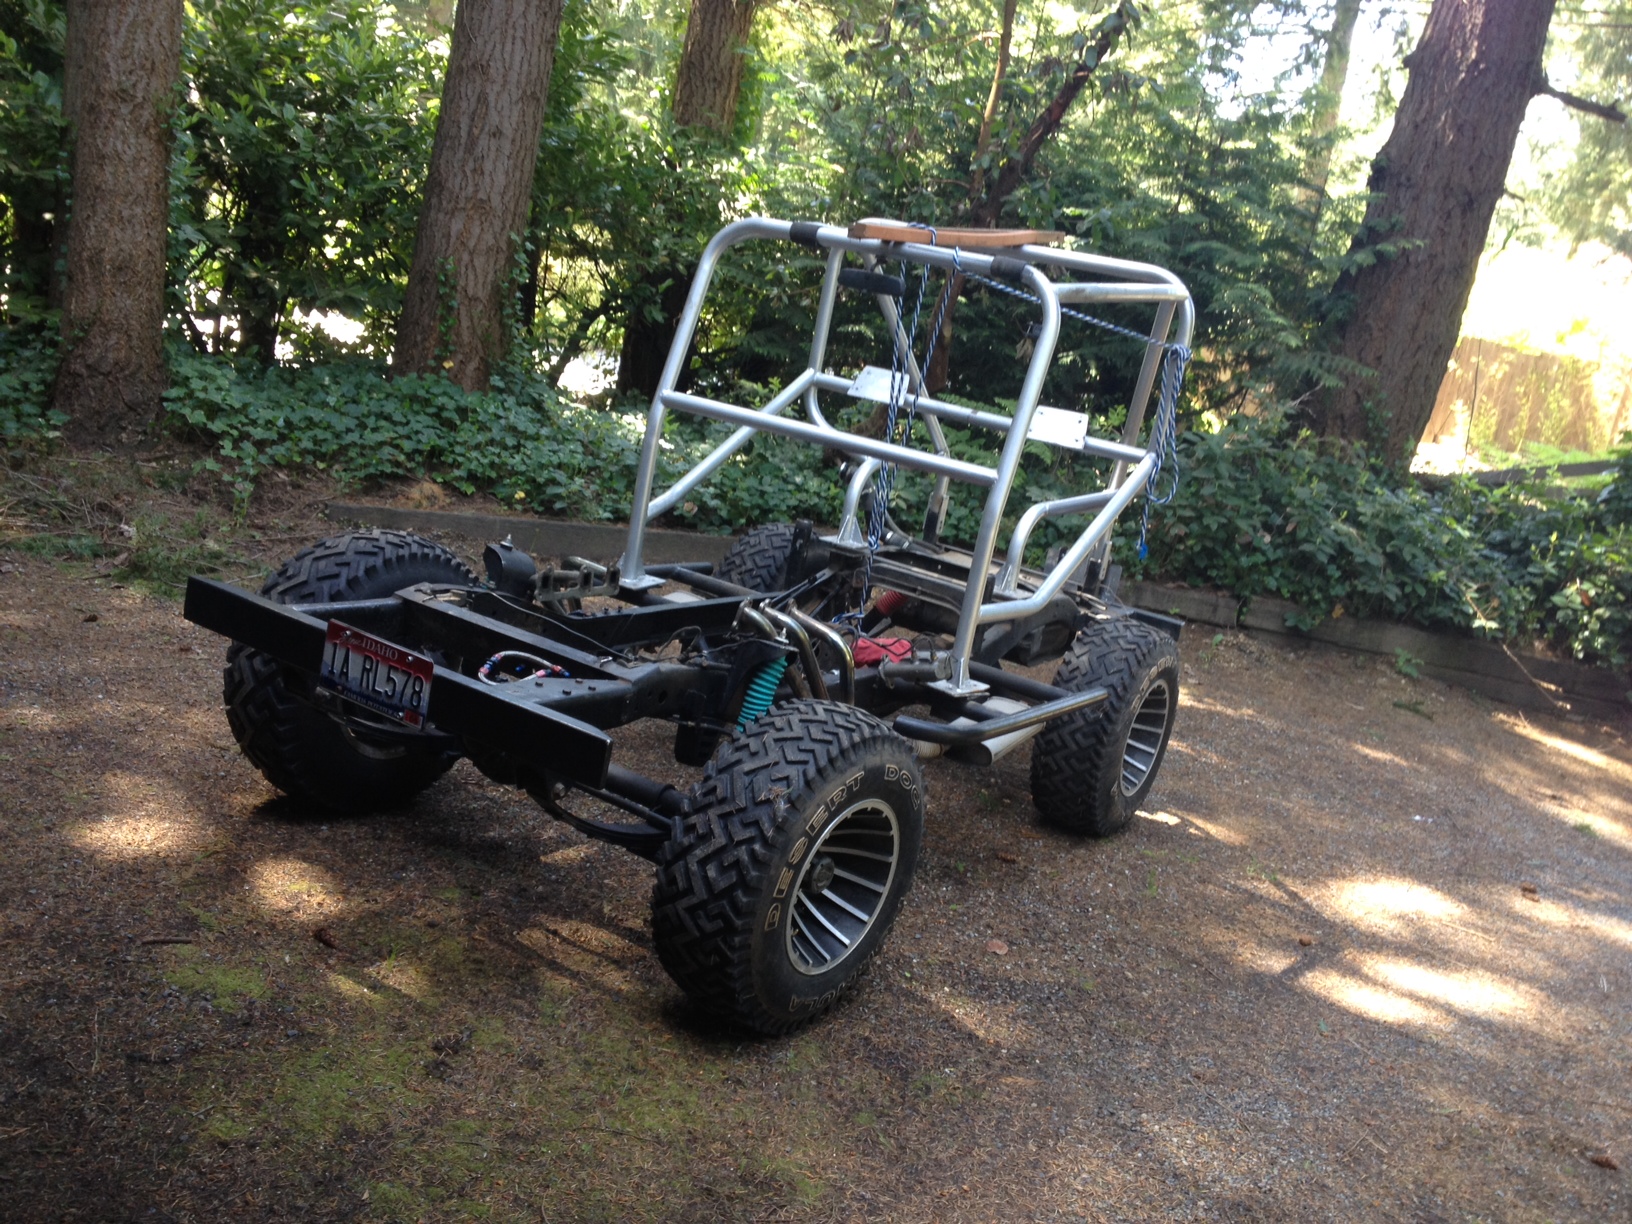
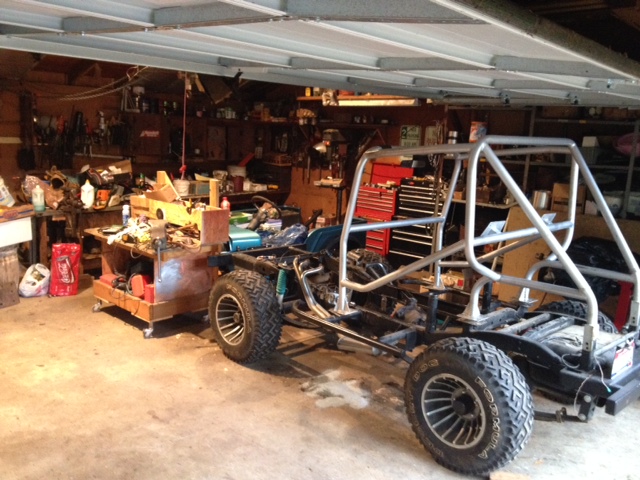
Here’s a photo of Biscuit, undressed and packed away in the garage. The next step is to hang the motor and tranny in the frame so I can install the new motor mounts. I’m hoping to get that configured before leaving tomorrow.
Self Portrait . . . let the unbolting begin! Note what happens when I leave the jeep in my parents garage. It becomes a squash storage facility.
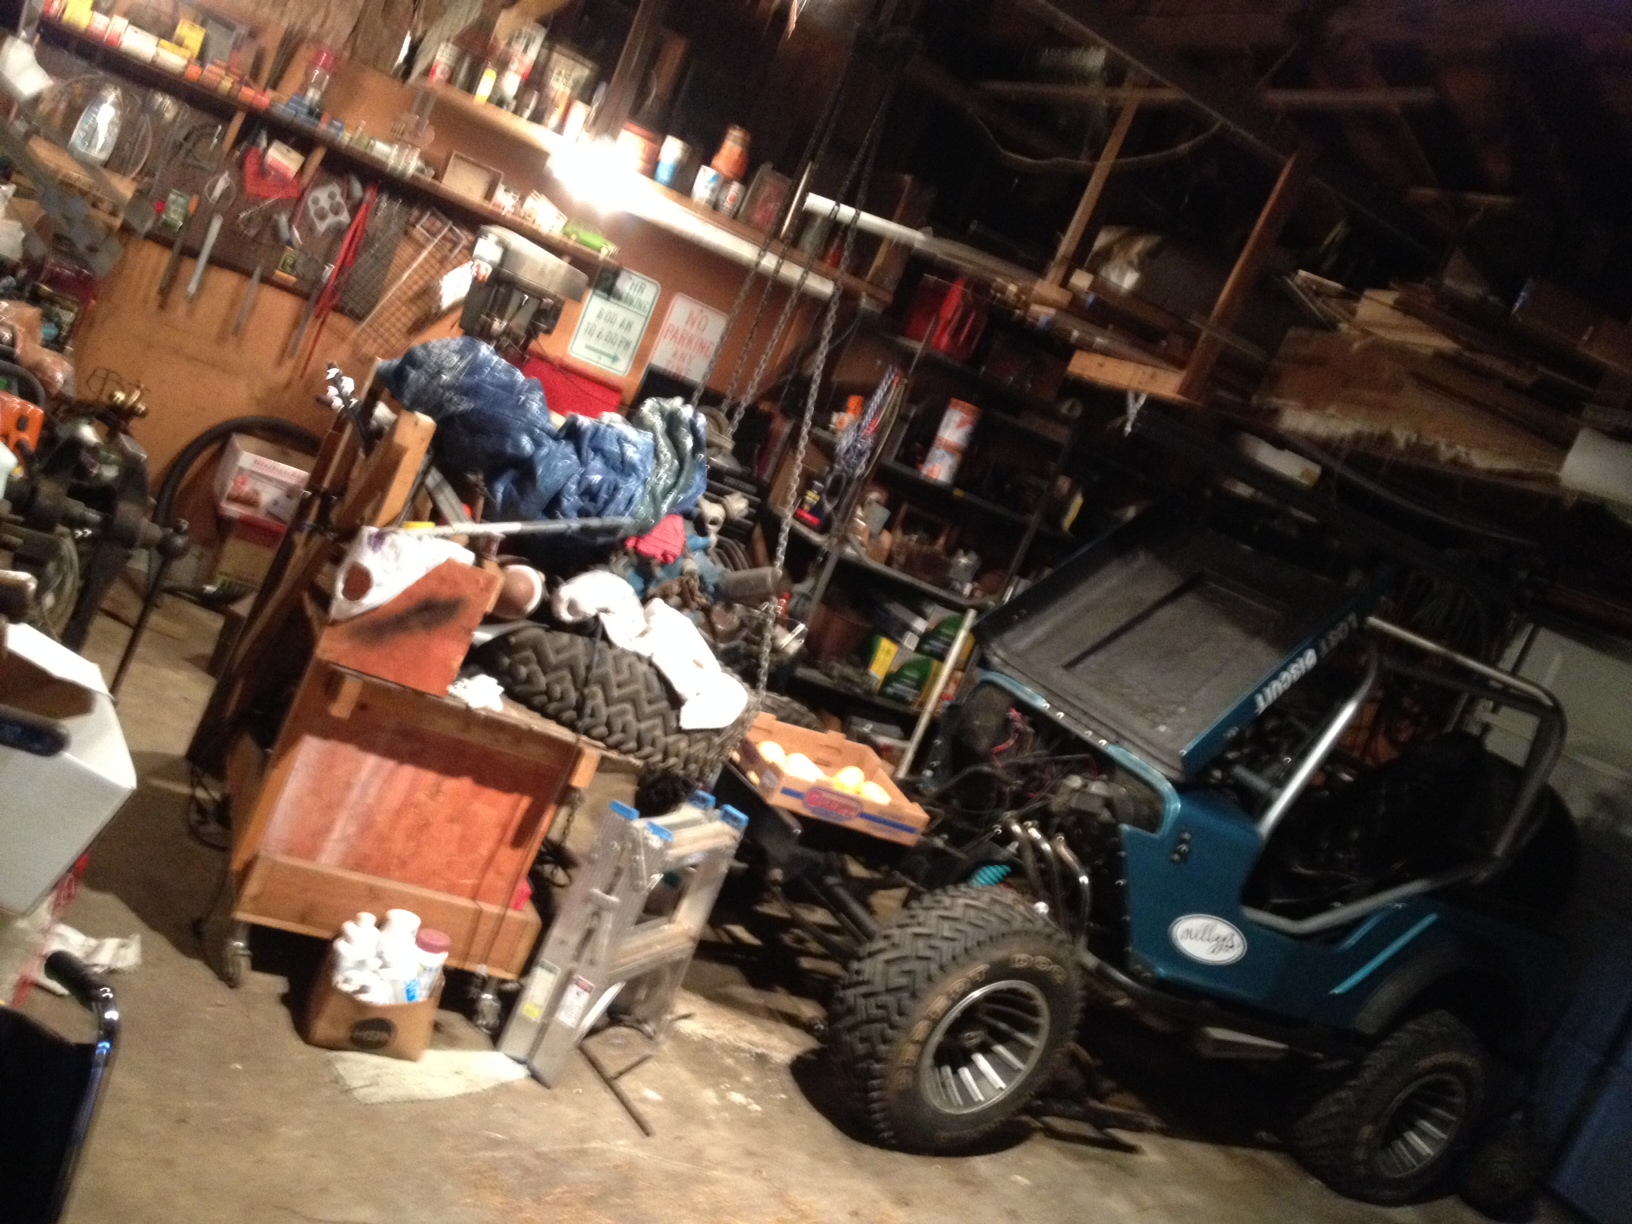
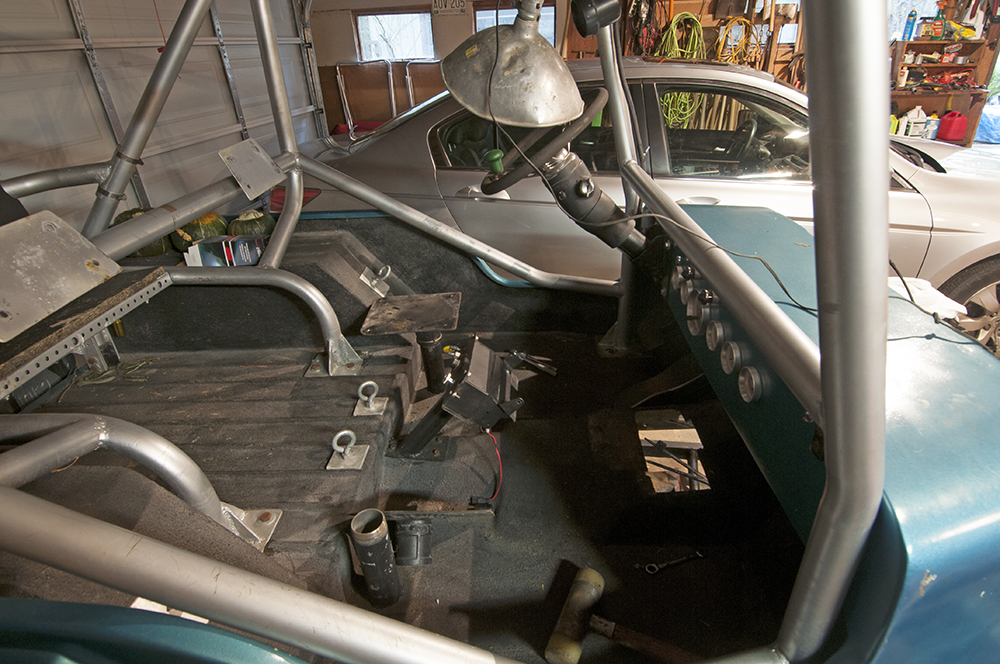
I’ve spent the last couple days moving and reorganizing parts and things so I could make enough room to start disassembly (see pic below). Today I finally got to begin the breakdown process.
As you can see, it was a bit of a mess.
One of my strategies during assembly was to make the body as easy to remove as possible. So, for example, nothing is wired or attached to the fenders. In addition, the wiring along the underside only attaches to the frame in one spot (a ground). It all worked well . . . great when a plan works!
I also removed the seats. Posts welded to the frame stick up through the body (holding the body in position). Seat plates are screwed onto the body. The seats are bolted to the plates. Here the passenger seat plate has been removed and is sitting next to the post.
People have asked how the transmission swap is going. Well, fixing my parents house and finishing the book have trumped work on Biscuit, but I did trade for and bring home a low mile short block that *should* solve my engine woes. Here’s a picture of Biscuit and of the new engine.


