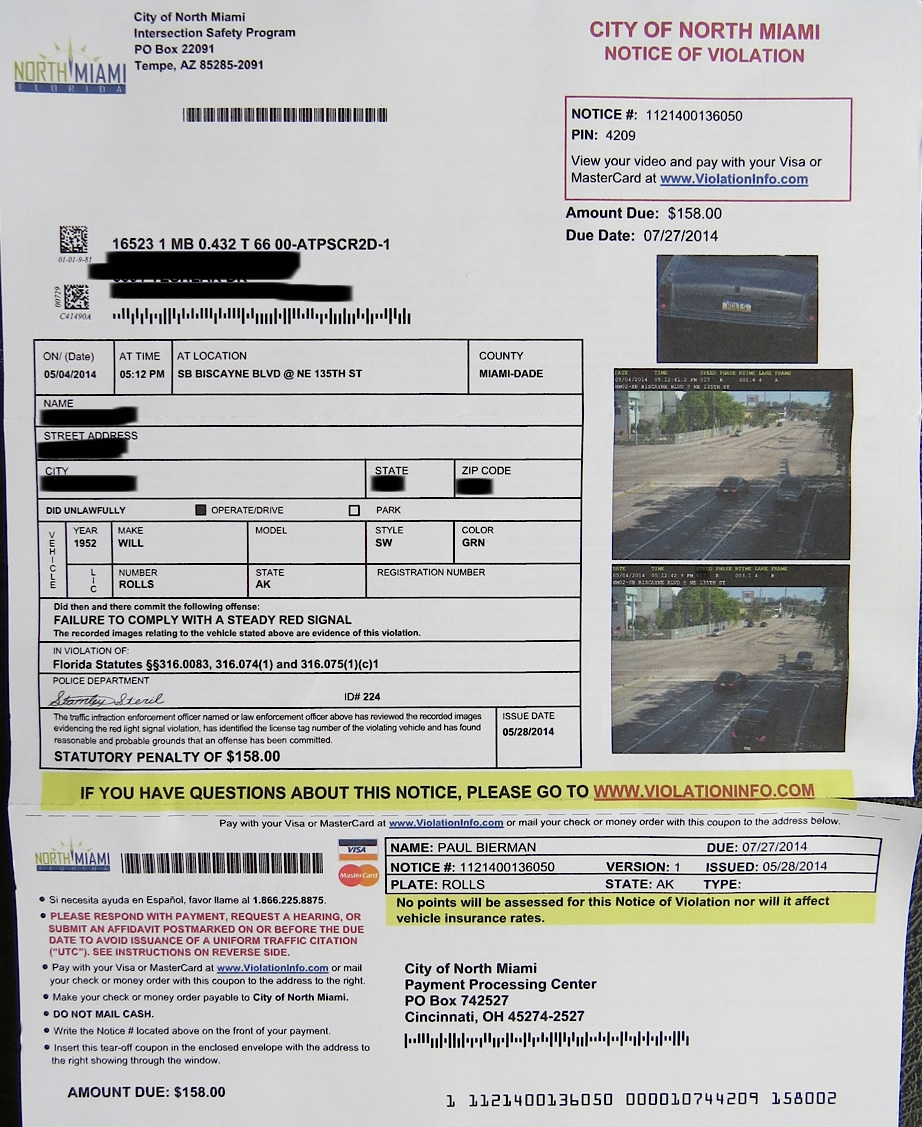
With the return of cold weather to Alaska, Paul’s back in the garage putting some finishing touches on his long-time project.
Paul writes,
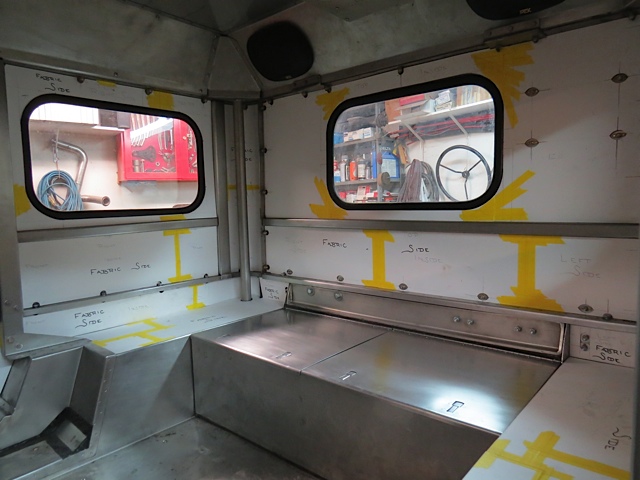
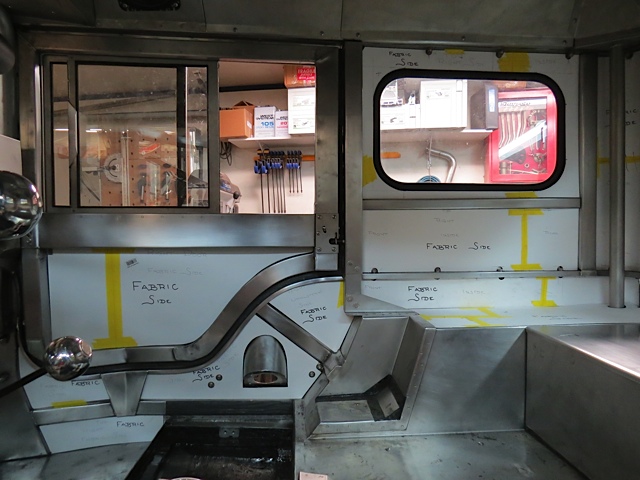
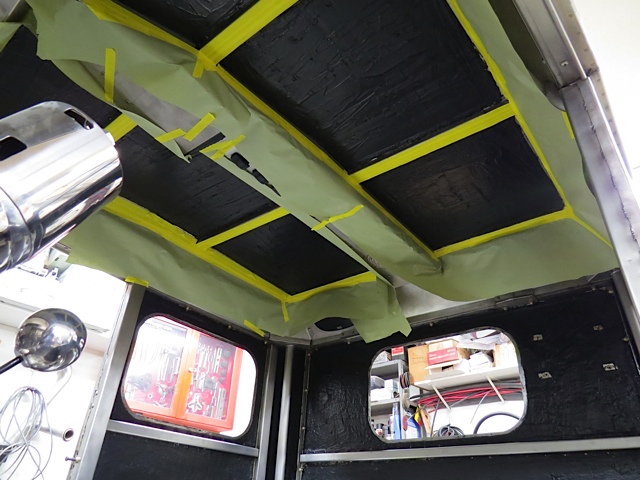
All the wood projects are put away for the winter and I’m back working on the Willys fitting upholstered panels to the interior. Sheets of white high density foam have been cut into the necessary shapes and (depending on their location) either covered with fabric or bonded to .050″ stainless steel. A silver/gray fabric will be used on most of the interior but six panels (three on the left and three on the right) will be attached to metal pieces for extra abrasion resistance in the front seat footwell area. I’ve coated the inside of the Willys with 2 layers of black silicone but I still need to apply the silicone to the open cell interior foam before I can begin installing the upholstery. My plan is to work from the top down so the six overhead panels will be the first fabric covered sections to be installed. Since the silicone takes 24 hours to cure I needed to come up with an easy way to hold these pieces in position while the silicone cured.
The shower curtain rod, oops I mean the upholstery clamping fixture is pressing against the foam block holding the kick panel in position.
The Goddess suggested I lay on my back inside the Willys (just aft of the front seats) where I could hold four panels in position using both my hands and feet. She said 24 hours isn’t that long to stay in one position and after all I’d be laying on my back so it’s not like I’m doing any work or anything like that. Even her offer to bring me some food and a blanket for the night hours wasn’t enough to convince me this was a good idea so I attempted to find a different solution. What I wanted was an adjustable length tube where the clamping force could be increased or decreased as necessary and it should be reasonably cheap. Time to visit Lowes and wander the aisles to see what I could find. The solution to my problem was waiting for me in the bathroom fixtures aisle where I saw a fantastic display of assorted length adjustable shower curtain rods. They were designed as shower curtain rods, they were manufactured as shower curtain rods and they were sold as shower curtain rods but now they were Willys upholstery installation tools. The best part of this deal was the low price of each upholstery tensioner allowed me to buy four long ones (44 to 72 inches in length) and three short ones (24 to 48 inches in length) without spending very much money. I was happy and my back was happy.
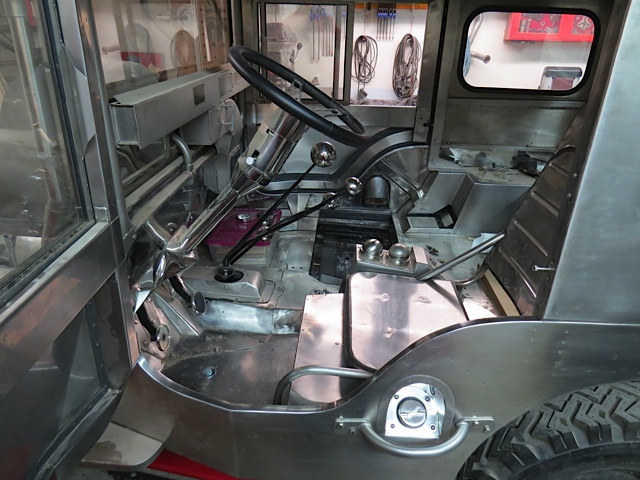
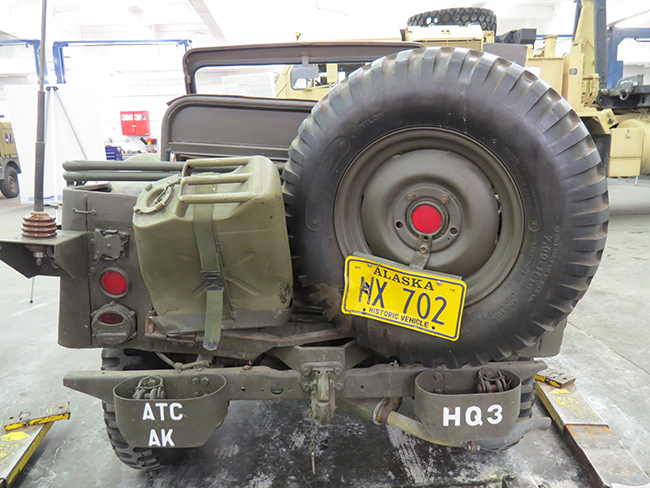
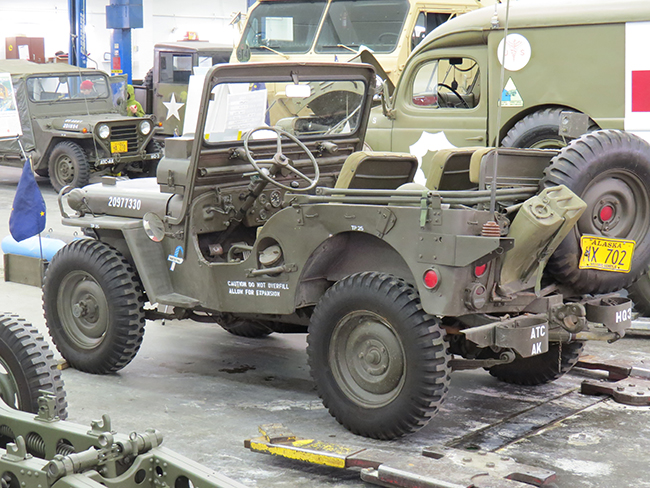
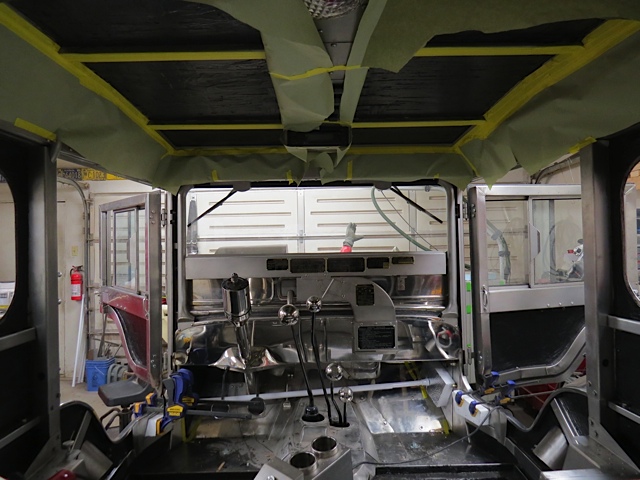
Since I was going to be climbing into and out of the Willys a lot I removed the front seats and the fuel tanks so I’d have more work space.
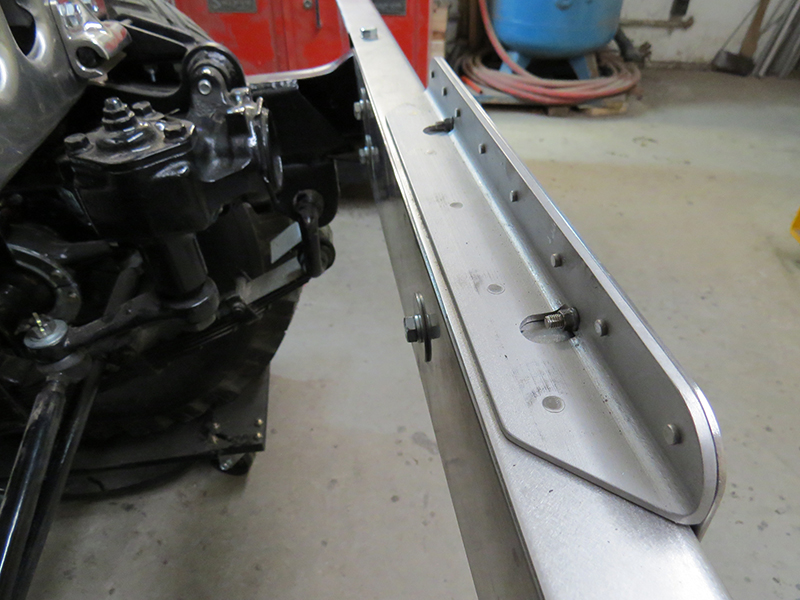
Today I positioned one of the long tubes from the interior of the left side of the Willys, across the transmission tunnel and over to the right side footwell to provide clamping pressure on the abrasion panel. It worked GREAT! There were two more metal clad panels ready for installation (below the door openings) but here I used adjustable clamps along with some small foam board pieces to spread out the clamping force during installation. I’ll send you pictures to go along with my words so you’ll have a better idea of what I’m doing.
Since I was going to be climbing into and out of the Willys a lot I removed the front seats and the fuel tanks so I’d have more work space.
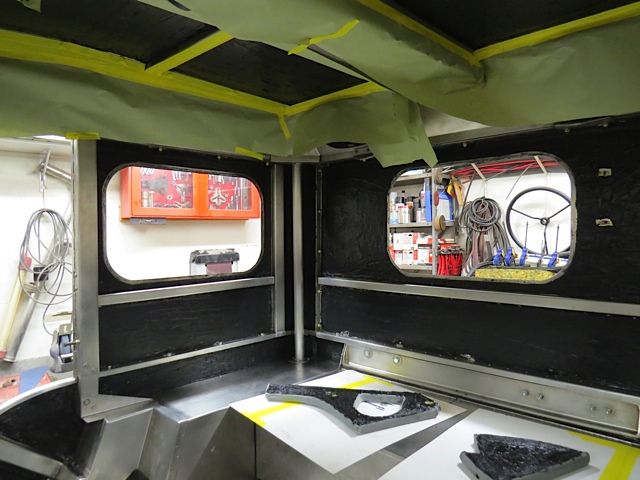
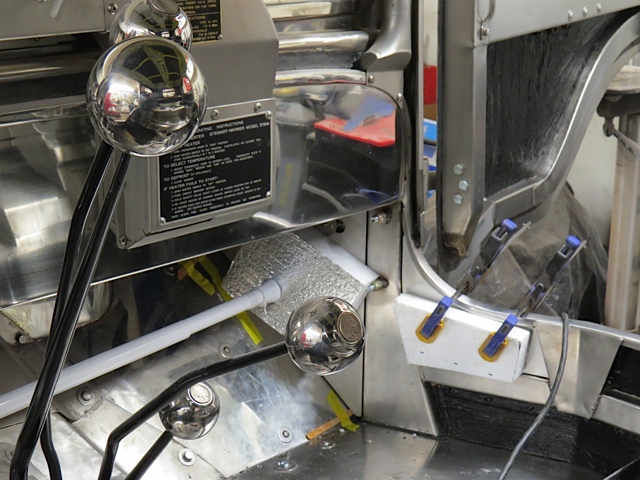
Notice the black silicone trimmed from the edge of the window opening? I still have a little cleaning to do in this area.
To prevent problems with the upholstery I removed the glass from both side windows and the rear window before I applied the black silicone on the interior of these top panels. Not having the glass installed made applying the silicone much easier but I managed to smear silicone where the rubber H channel (used to hold the glass to the metal panels) grips the metal edge. While I let the silicone cure I thought about how I could carefully trim the unwanted silicone from the window opening on the top panels. I could use a razor blade and make the cut free handed but I was hoping to be a little more precise than that so I dug thru my tool box and I came up with a simple but accurate solution. I found an old compass (the circle kind, not the where are we kind) and after removing the pencil I was able to fit a clone of a small Exacto knife where the pencil would go. Using the center pivot as an edge guide I adjusted the blade position by using the knurled knob so the cut would be made slightly past the edge of the rubber H channel. A quick pass around the window opening and the silicone was trimmed back the needed amount.
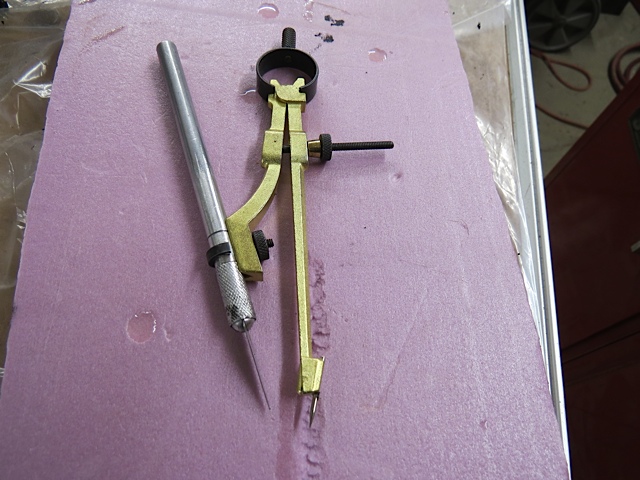
This little cutter worked great, I lucked out and had a cutter that was the same diameter as the average pencil so everything fit together with no problems.