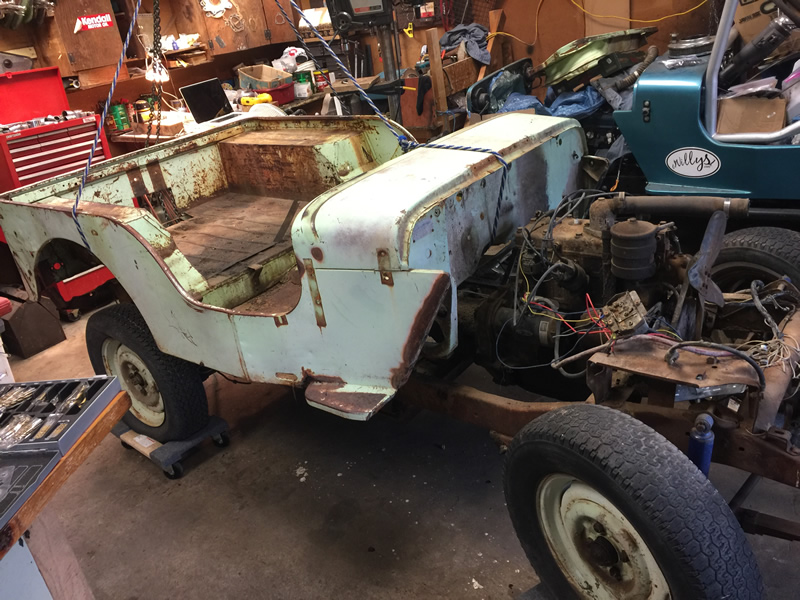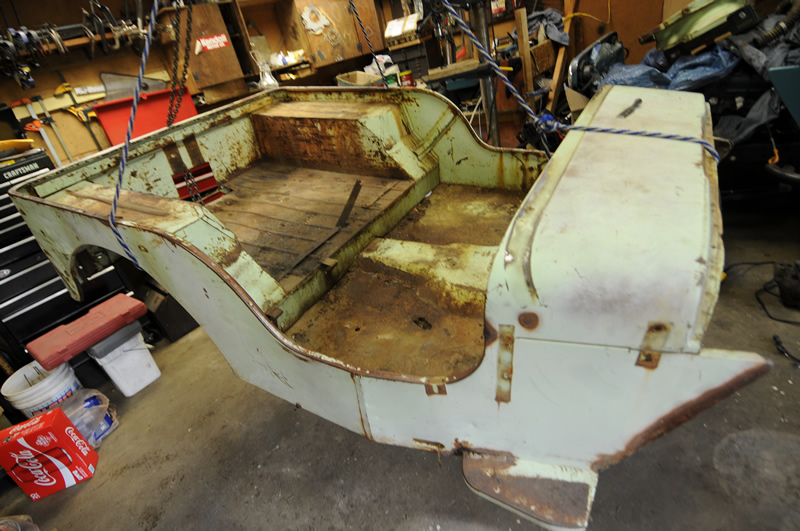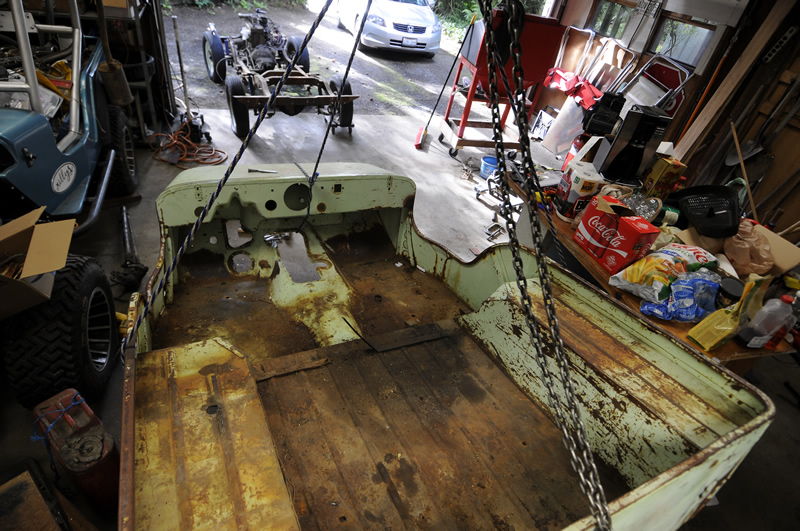
Builds Research Archives

To Top

Fixing Patterson’s Seat Mounts And The Extra Channel

• CATEGORIES: Builds, Features • TAGS: This site contains affiliate links for which I may be compensated.

UPDATE II: Add are some instructions (thanks Terry!) for installing DJ-3A seats:
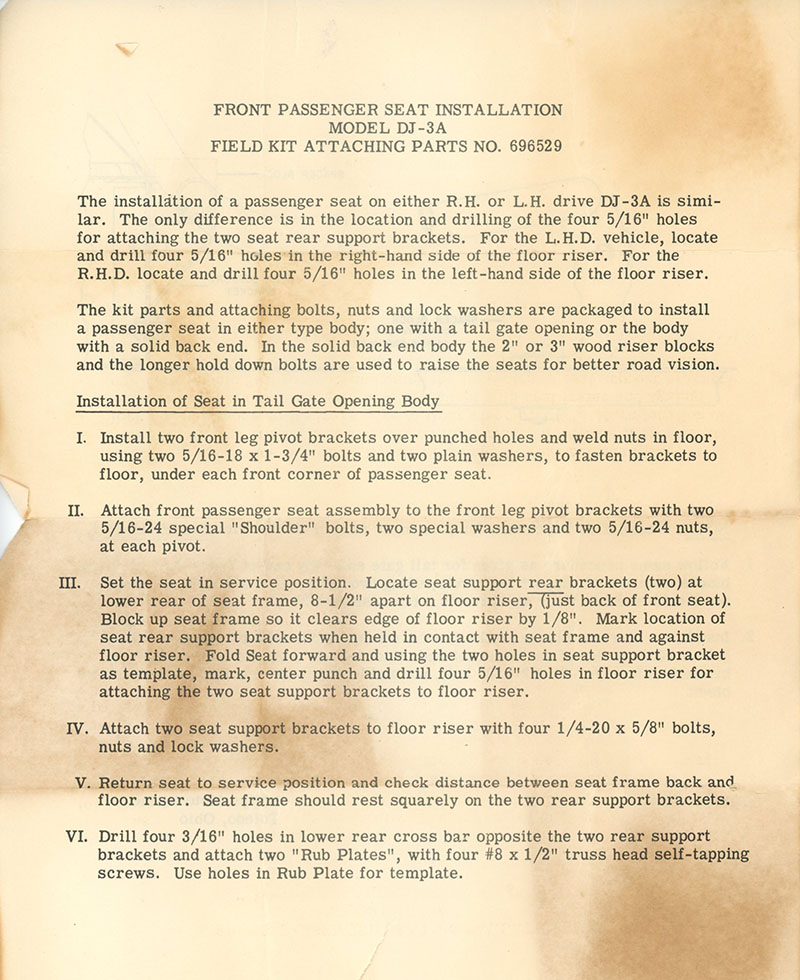
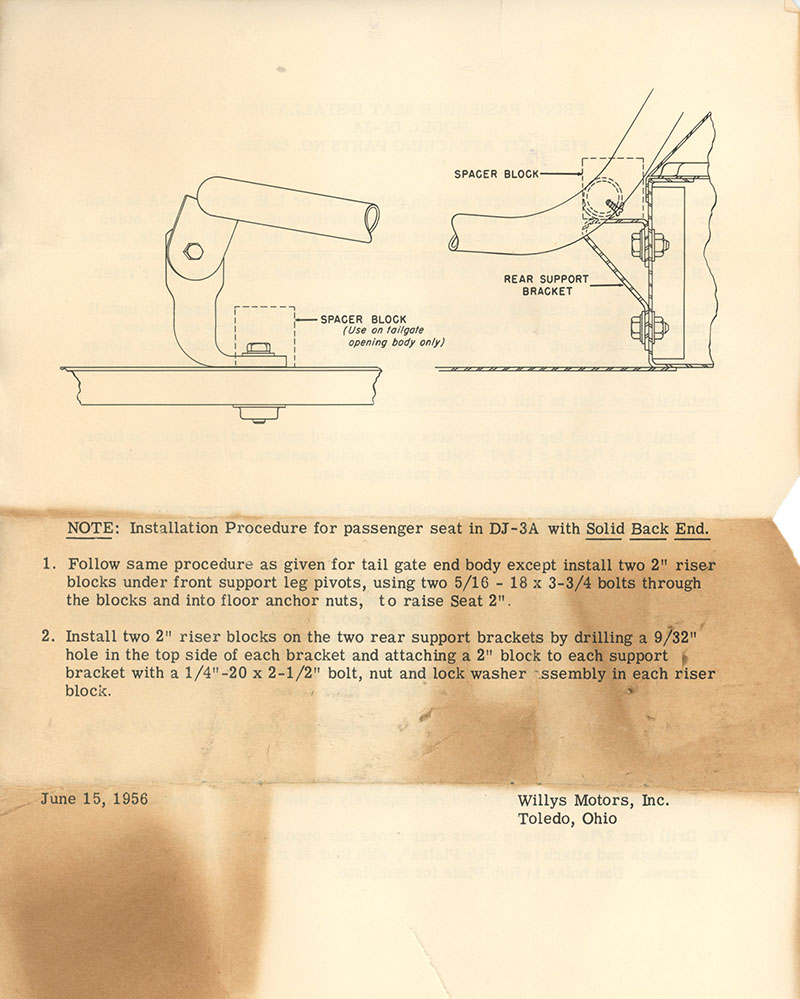
1956-06-15-dj3a-seat-install-directions1-lores 1956-06-15-dj3a-seat-install-directions2-lores

======================

ORIGINAL POST UPDATE MAY 2017: I’ve added a couple pics at the end and included a discussion on the extra channel DJ-3As have.

Last fall, when disassembling Rusty, I thought it was odd that the 2/3 1/3 seats had been mounted on wood blocks. I assumed this had been done by the previous owner to raise the seats.

Yesterday, I discovered that Patterson’s passenger seat was loose. When I examined it more carefully, I learned that it was loose because one of the wood blocks under the seat had broken. I can only conclude that all DJ-3A’s with 2/3 1/3 seats were mounted on wood blocks? Or maybe only the early ones?

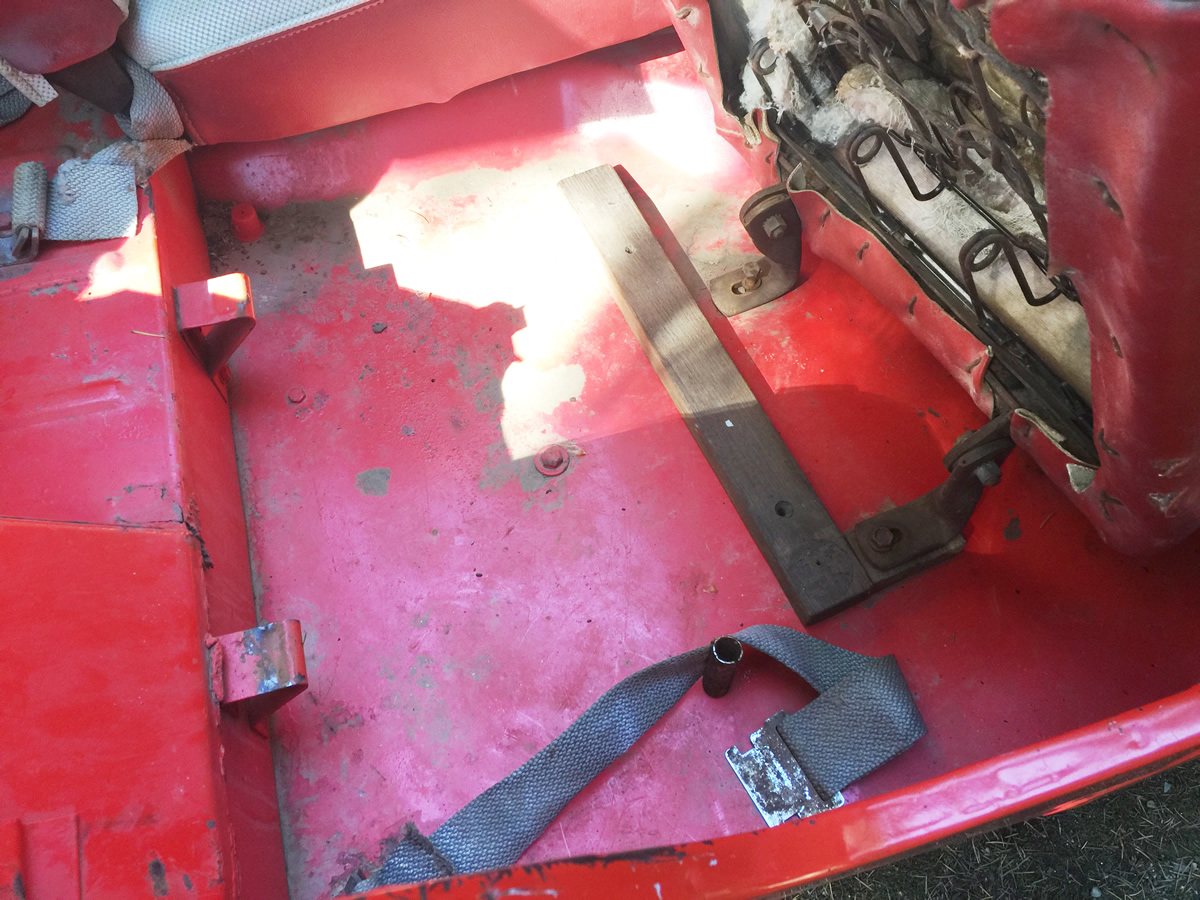
The photo below shows the passenger seat tilted forward. The front of it is mounted in a way that allows it to pivot forward. The mounts are bolted through a piece of wood, then through a piece of cloth, through the body, and into a welded bolt. The rear of the seats rests on the two mounts at the back of the well. The long piece of wood is a well-seasoned (at least 45 years old) and stained piece of oak that will work perfect for replacement blocks.
2017-05-20-seats6

Unlike the passenger seat, the rear of the driver’s seat rests on two posts; slide onto the ends of the posts are rubber feet. Those rubber feat sit on blocks of wood also. 2017-05-20-seats7
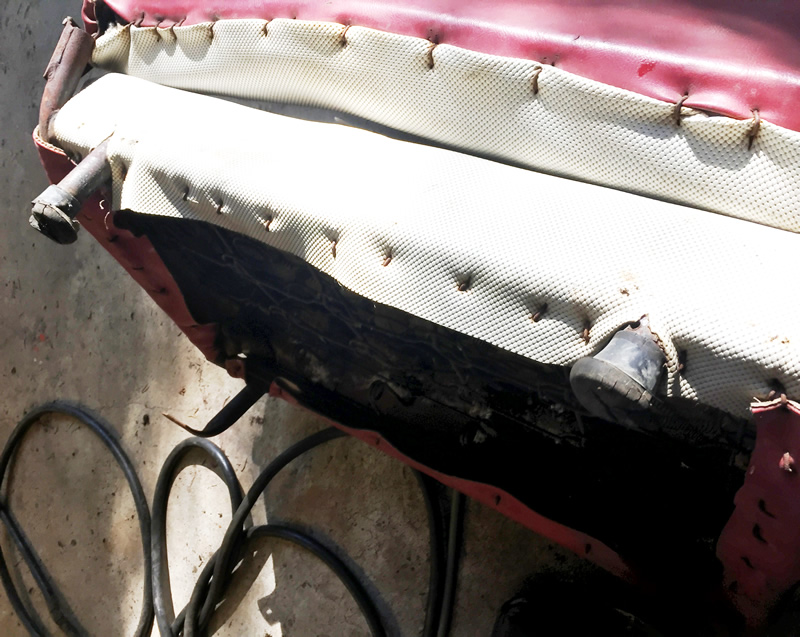
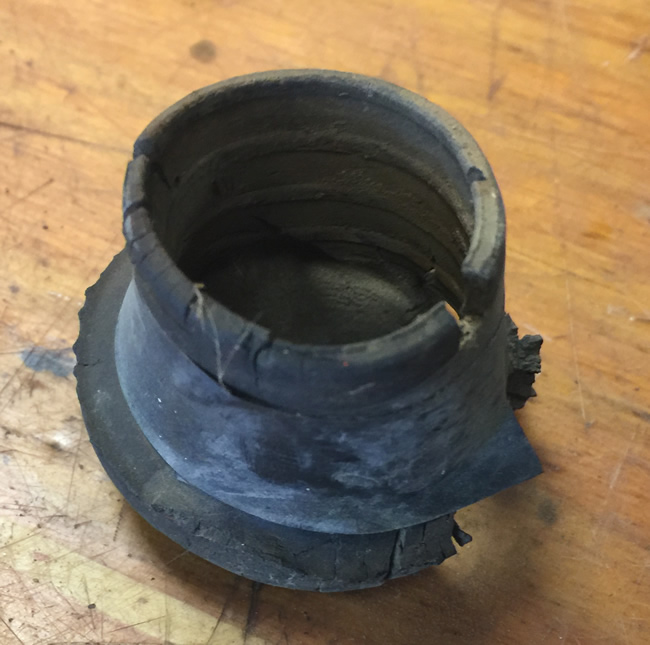
A close up of the rubber foot. The hole is 1 inch in diameter, so I ought to be able to find rubber feet to replace these tired ones.2017-05-20-seats8
This shows how great the floor on this DJ is.
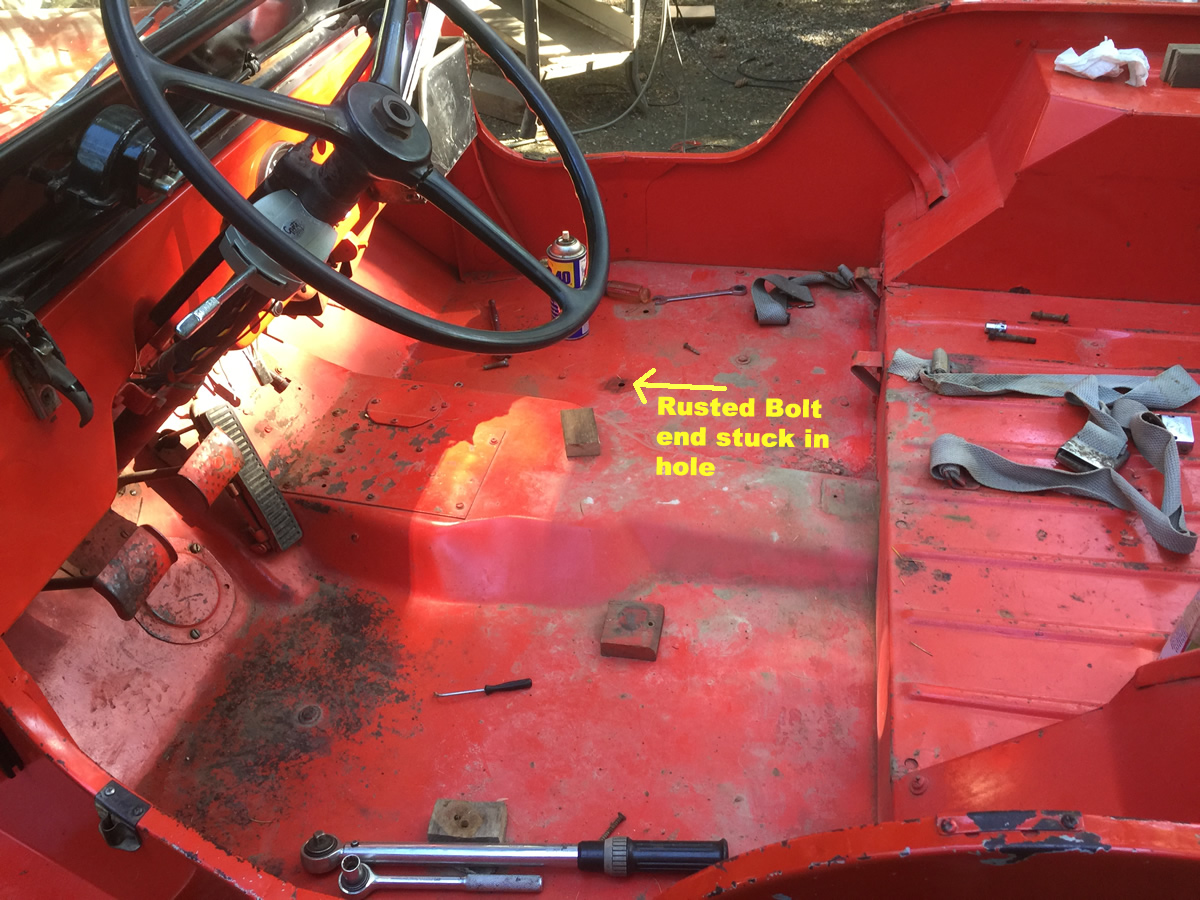
2017-05-20-seats9

Another angle. Blocks 1, 4, 5, and 6 were the same size. Blocks 2 and 3 were larger and screwed down to the body. The rear 2/3’s seat rested atop those blocks.
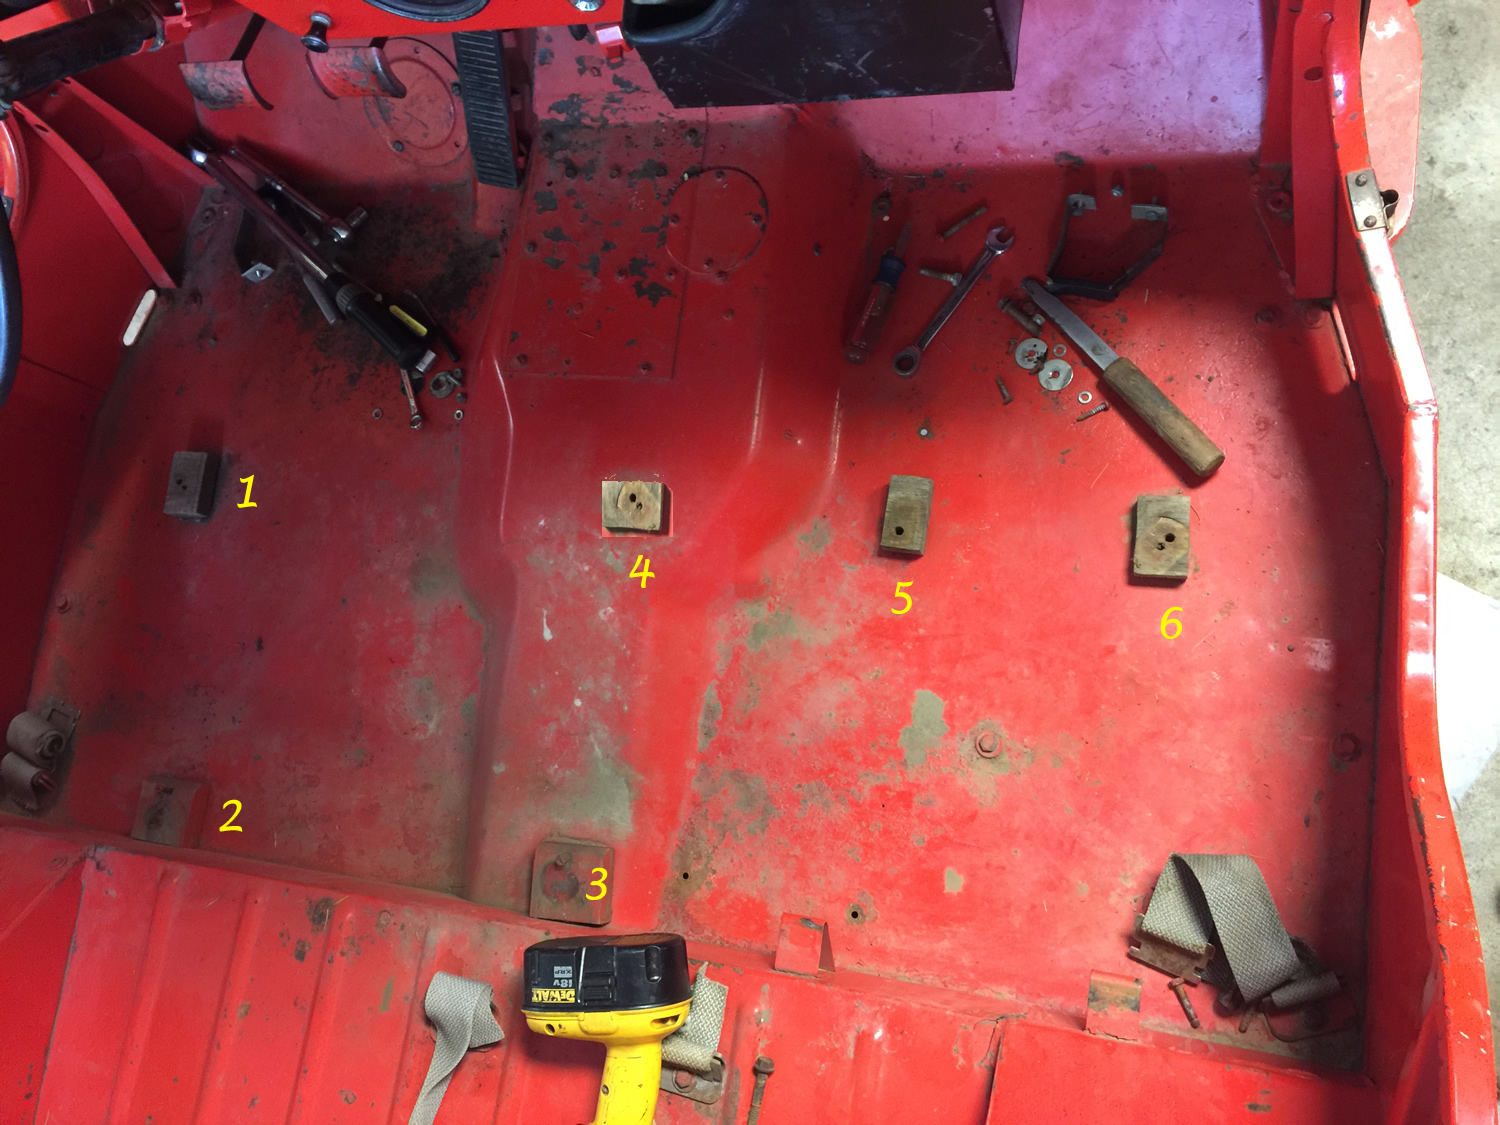
patterson-seat-blocks

I’ve drilled cut and drilled the blocks. They are ready for installation. I plan to add a thin piece of rubber under the blocks. Once I remove the rusted end of one bolt that broke, I’ll be able to reinstall the seats.

If you take a look at wood block #1 and block #6 there’s something curious. While the body area under wood block is similar to a CJ-3A, the body area under #6 has an additional channel (btw, we’ve yet to document any under DJ-3A body channels with wood in them).

This is the passenger side with the extra channel and a welded bolt.
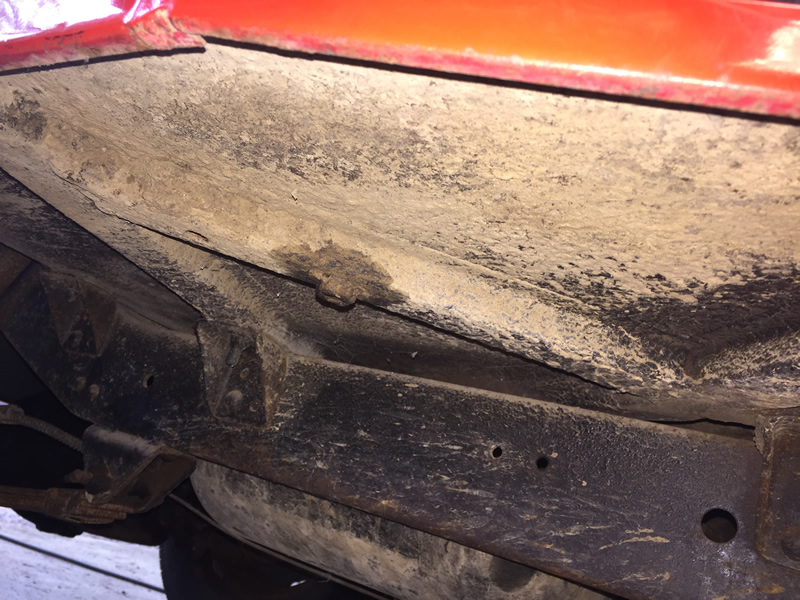
patterson-dj3a-underside2

No channel on the driver’s side even though there is a bolt welded there. patterson-dj3a-underside3
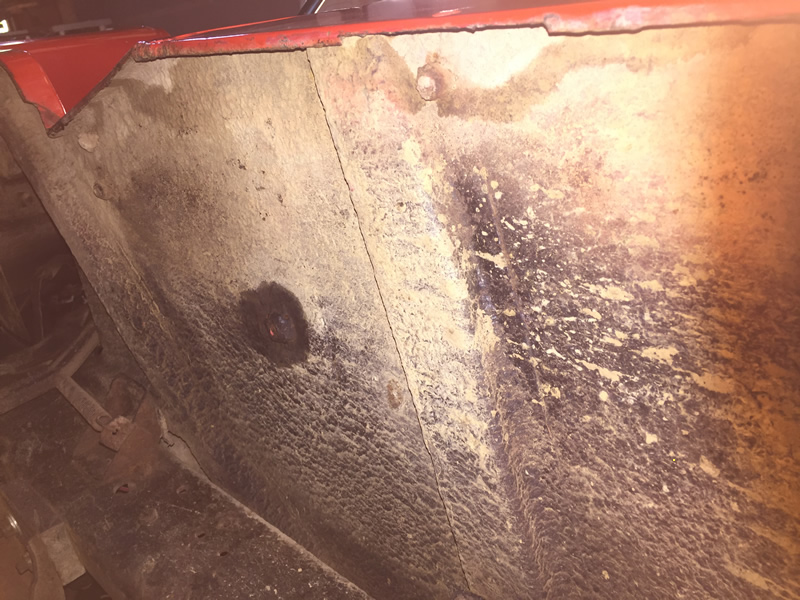
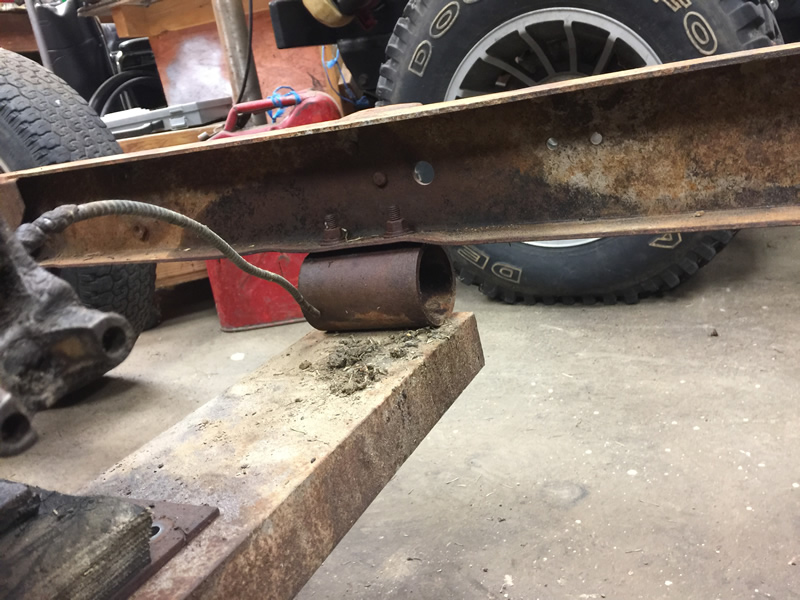
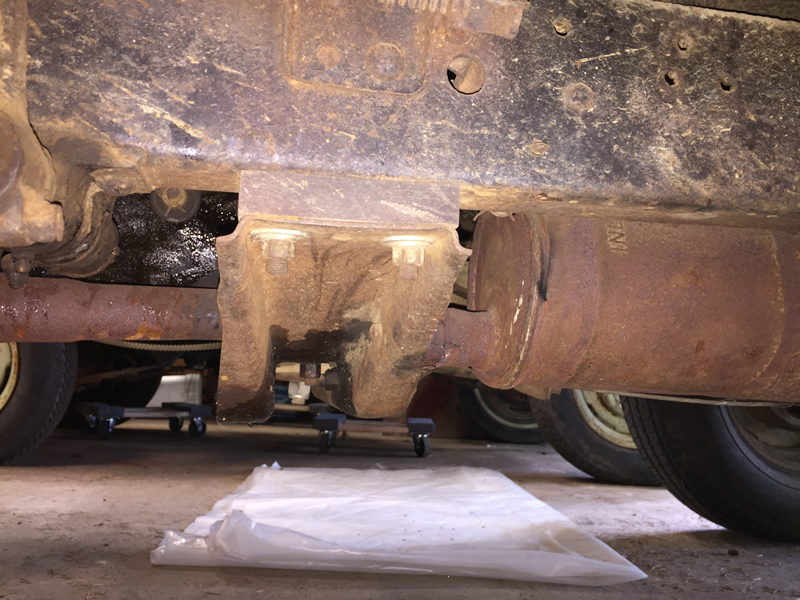
Finally, the DJ-3As used wood blocks between the frame and transmission crossmember.

patterson-dj3a-underside1


[fb_button]
 
To Top

Rusty’s T-96 Transmission Rebuild

• CATEGORIES: Builds, Features • TAGS: This site contains affiliate links for which I may be compensated.

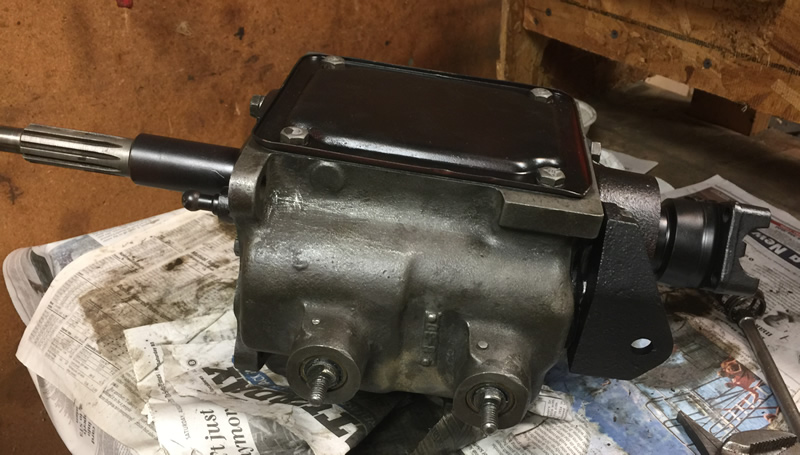
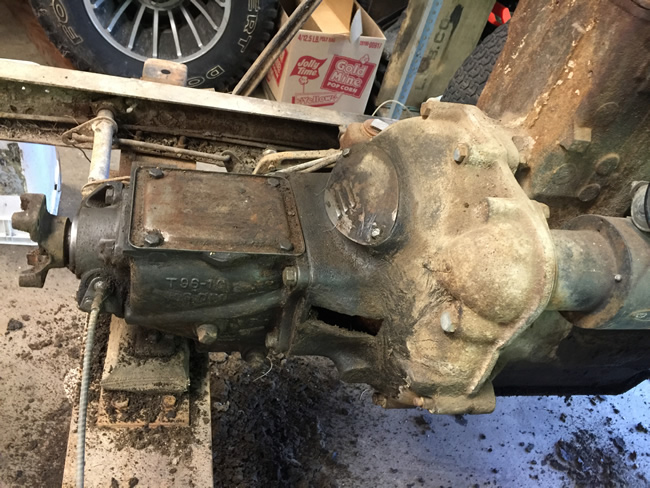
Another thing I got accomplished recently was the rebuilding of Rusty’s T-96 transmission. It’s been a couple decades since I’ve rebuild a T-90, but I think a person could follow a T-90 side shift guide when rebuilding the T-96 (I didn’t think of this until after I was done — instead I used an old rebuild manual from the late 60’s that has rebuilds of 35 different styles of transmissions). Once again, I thought I had more pics, but I didn’t. So, this isn’t a step-by-step overview.

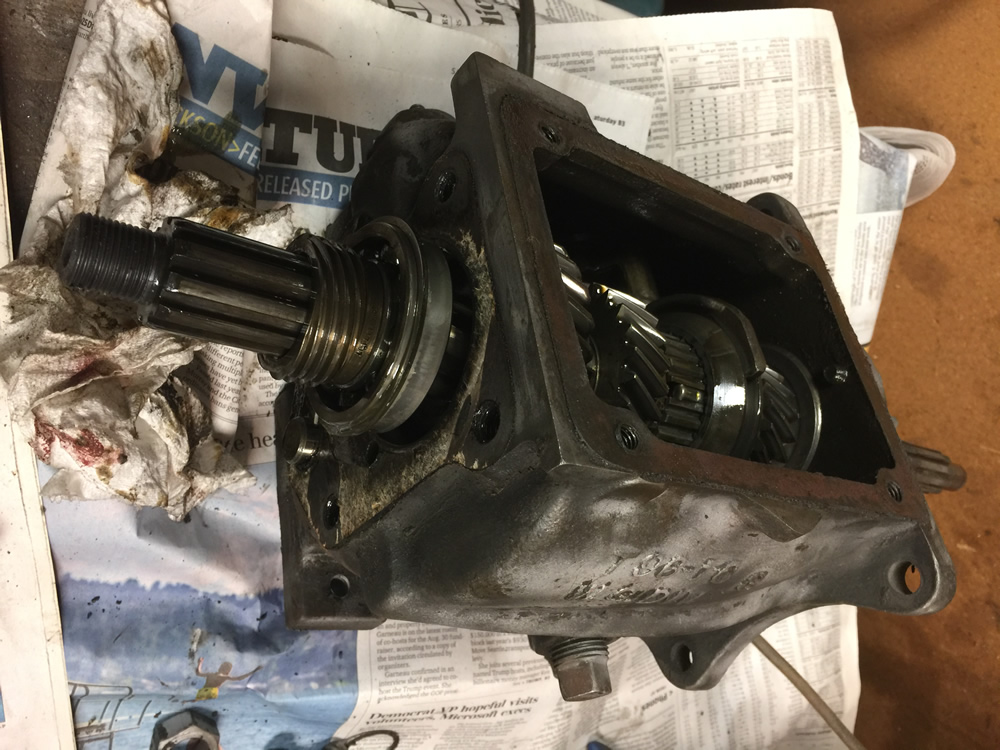
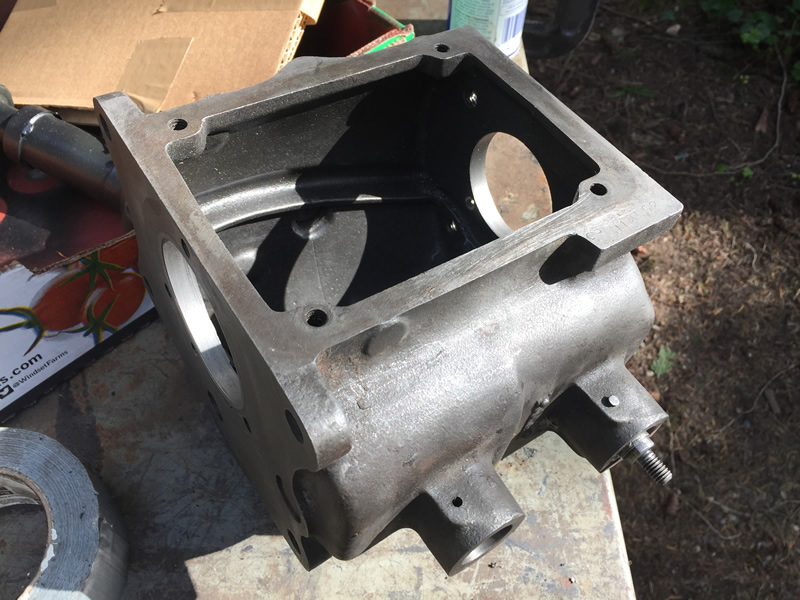
I took this photo at the beginning of the tear-down to remember which way the speedometer gear should face. The lack of a transfercase is part of what makes this rebuild different from most other jeep transmissions. 
2017-05-20-transmission1

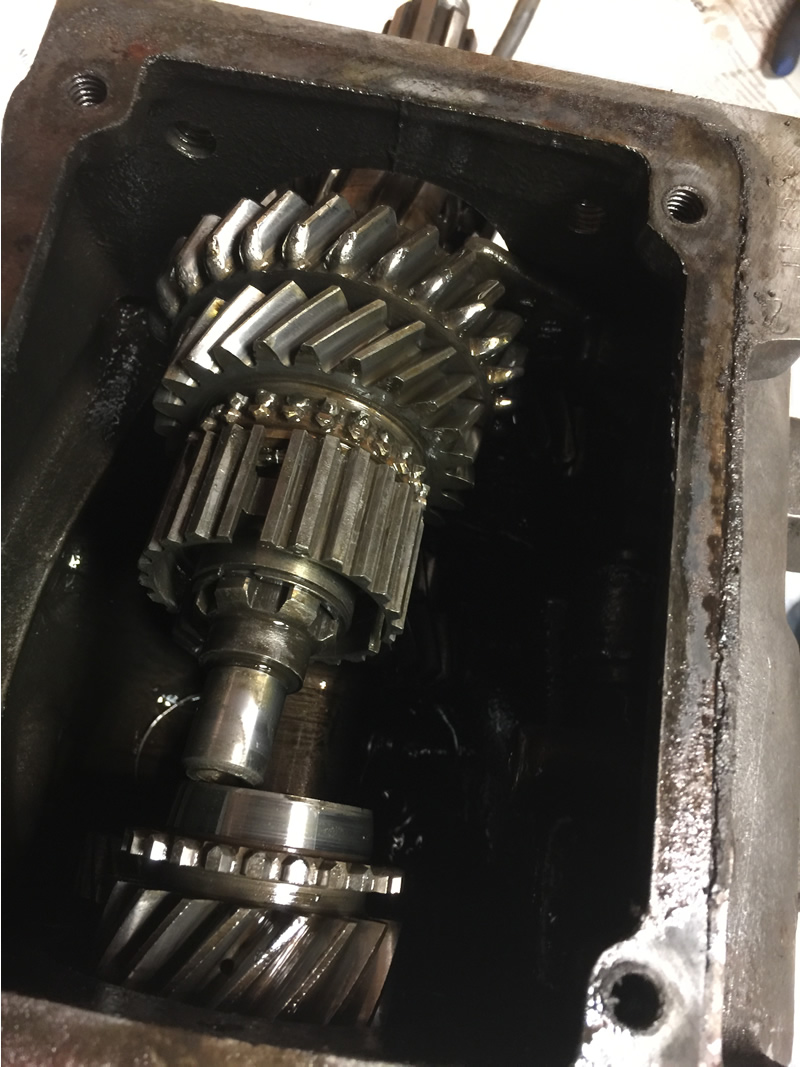
Here’s the transmission with the input shaft pulled forward. My first gear and second gears were a bit worn. 2017-05-20-transmission2

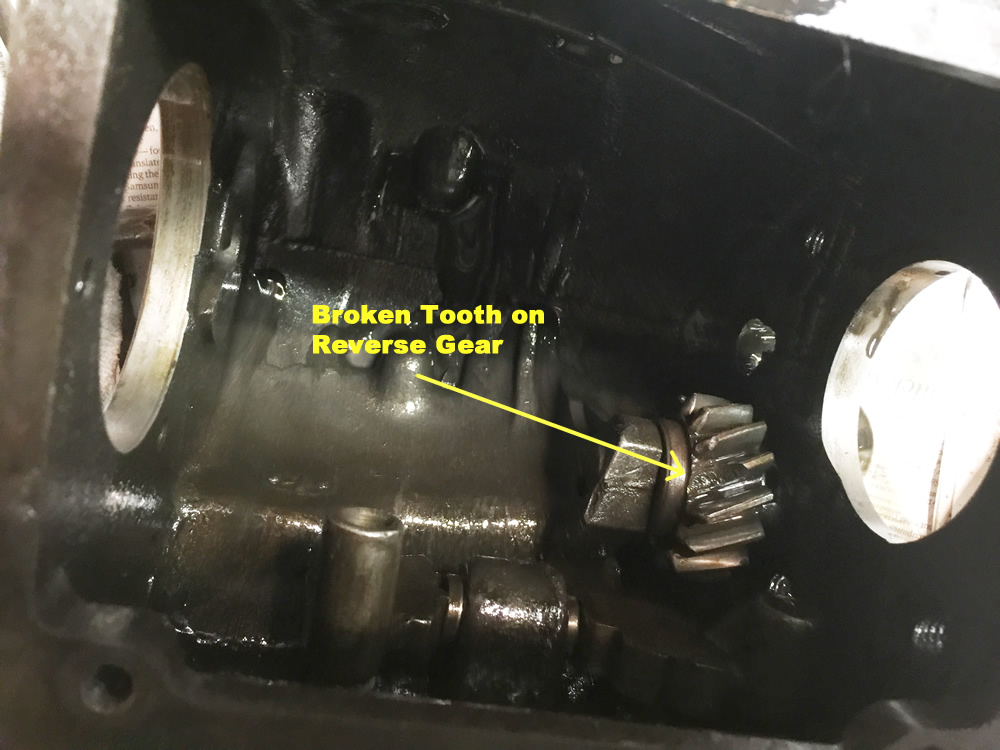
Once I removed all the gears, I discovered the reverse gear had a broken tooth. 2017-05-20-transmission3

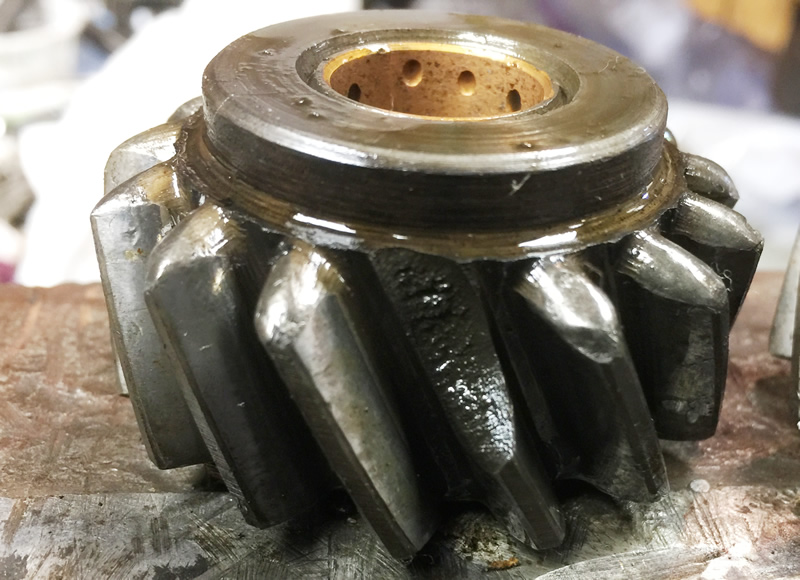
Close up of broken tooth. Thankfully, Charles Tate had sent me a box of T-96 parts that included a reverse gear. I was also able to replace the entire bottom cluster, first gear, and second gear. That saved me some money!

2017-05-20-transmission6

To remove the side shifters, a pin has to be tapped out. I was able to remove the 2/3 gear shifter, but not the first/reverse unit. Since there was no critical reason I could see for removing the first/reverse mechanism, I left it as is and cleaned up the housing.2017-05-20-transmission4

Normally, I’d paint the housing before assembly. However, with time being an issue and lacking enough warmth on the rebuild day to properly paint it, I will paint it at a later date. 2017-05-20-transmission5

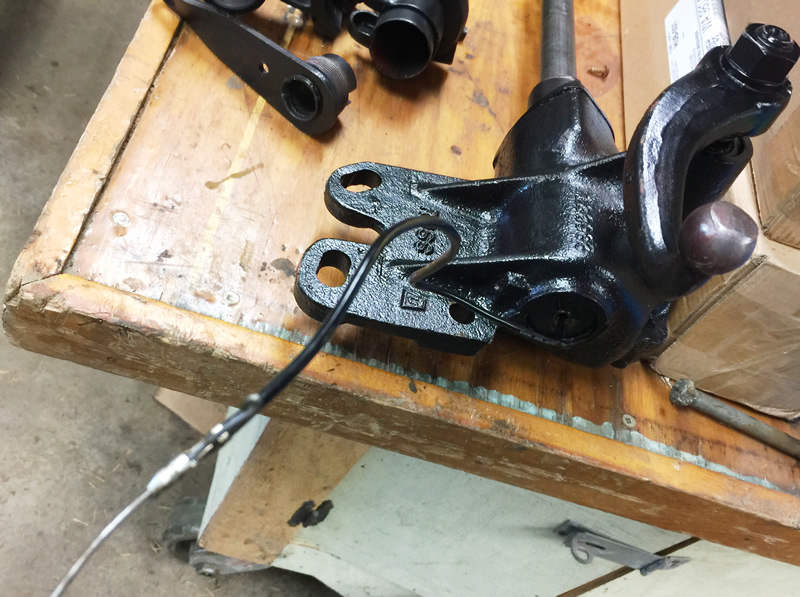
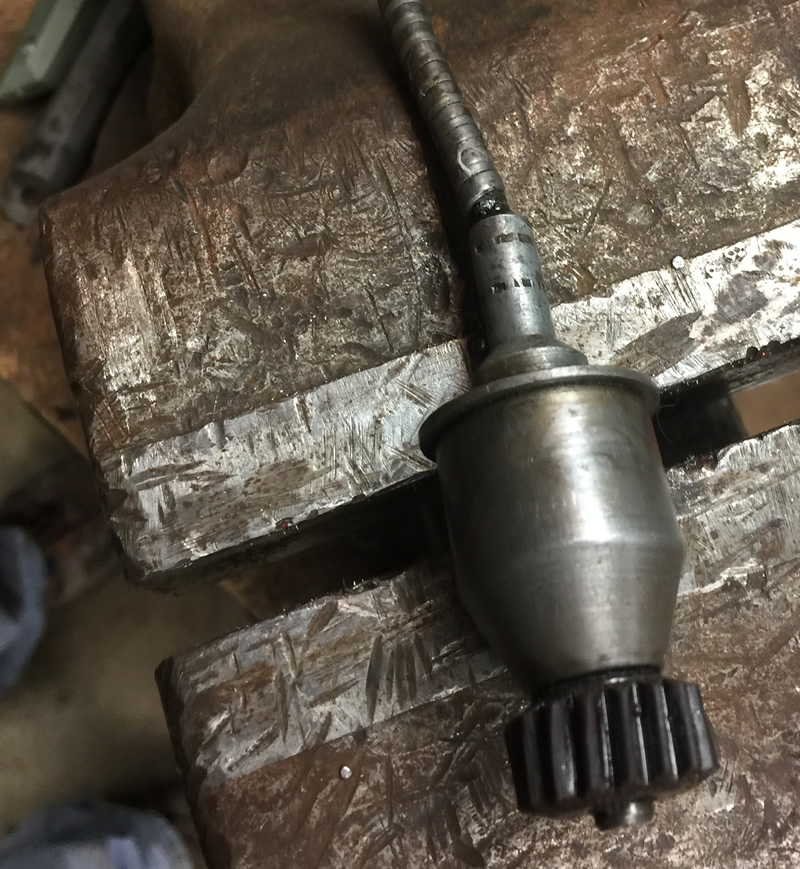
One other unique thing about the T-96: it requires the use of a special speedometer cable that is also used for Jeepsters and wagons.

2017-05-20-transmission0

[fb_button]
 
To Top

Assembling a DJ-3A Column Shift

• CATEGORIES: Builds, Features • TAGS: , This site contains affiliate links for which I may be compensated.

Yesterday I assembled Rusty’s column shifter. In my head, I took all kinds of photos. One in particular I took (again in my mind) showed the layout of all the parts prior to assembly. Alas, somehow that photo never made it onto my phone!

The DJ-3A shifter is slightly different from a VEC CJ-2A shifter. I can’t say how much it differs from a Jeepster or wagon column shifter. But, i can say that following these VEC CJ-2A instructions were very helpful.

After laying out the parts (and not taking a photo) I began the assembly process by learning how to install the horn wiring. After looking up how to do it on a 3B (thanks CJ-3B Page!), it turned out to be quite easy.

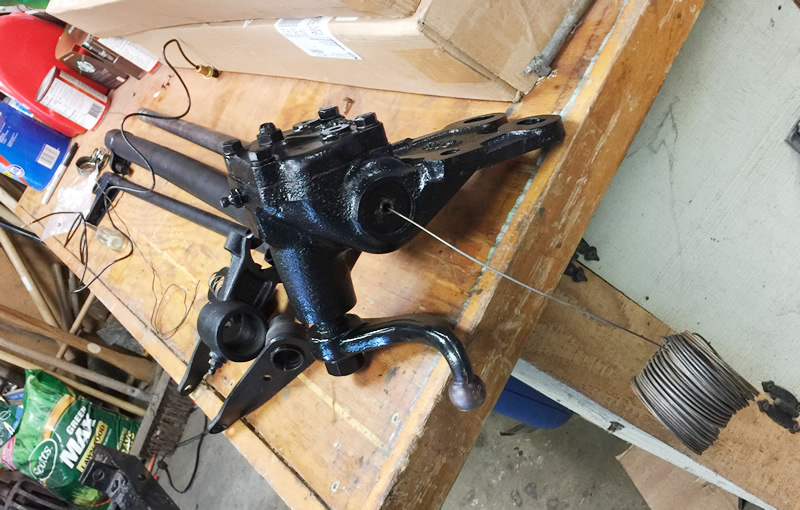
Step 1) Thread some of my grandfather’s wire through steering shaft.

2017-05-20-column-shift-assembly1

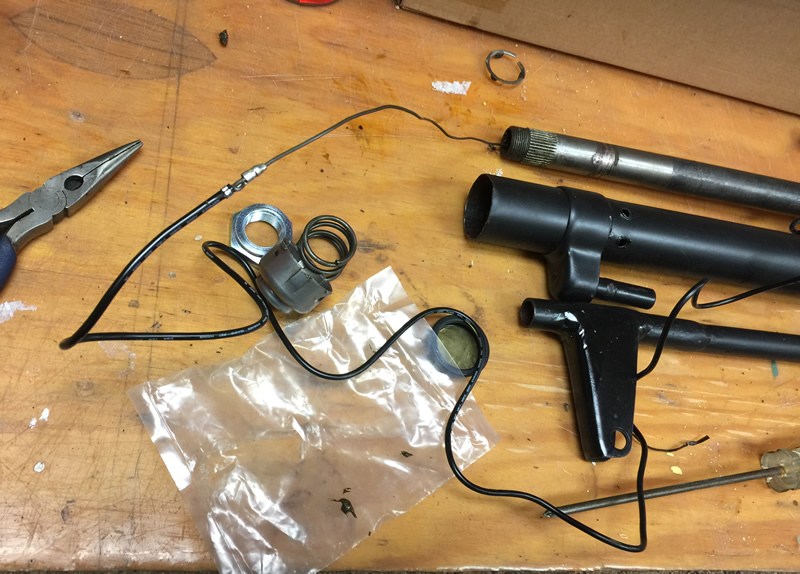
Step 2) Attach the wire to the horn wire end. In this case, I ran it through wire connector and then bent it so that the wire would not pull back out of the connector. 2017-05-20-column-shift-assembly2

Step 3) Pull the wiring carefully through the end of the shaft.  2017-05-20-column-shift-assembly3

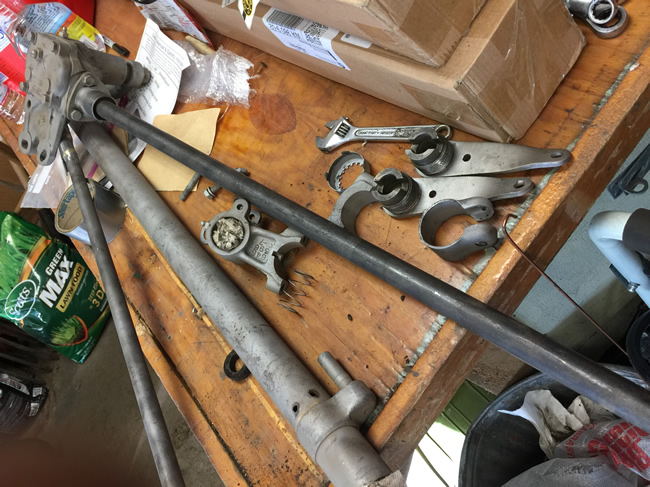
With the wire installed, next on the list was assembling the shifter. The first step involved installing a washer, a spring, and a second washer onto the column shift tube Next, the interior shift lever must be screwed onto the shift housing. Then, slide the shift housing onto the column shift tube, pushing it far enough up so that a special metal pin can be inserted. Once that is done, you have to weld the end of the tube to the pin to secure it.2017-05-20-column-shift-assembly4

Continue reading

[fb_button]
 
To Top

Fixin’ Patterson’s Windshield

• CATEGORIES: Builds, Features • TAGS: This site contains affiliate links for which I may be compensated.

Another item I tackled yesterday was Patterson’s windshield, specifically the twisters and a rear view mirror.

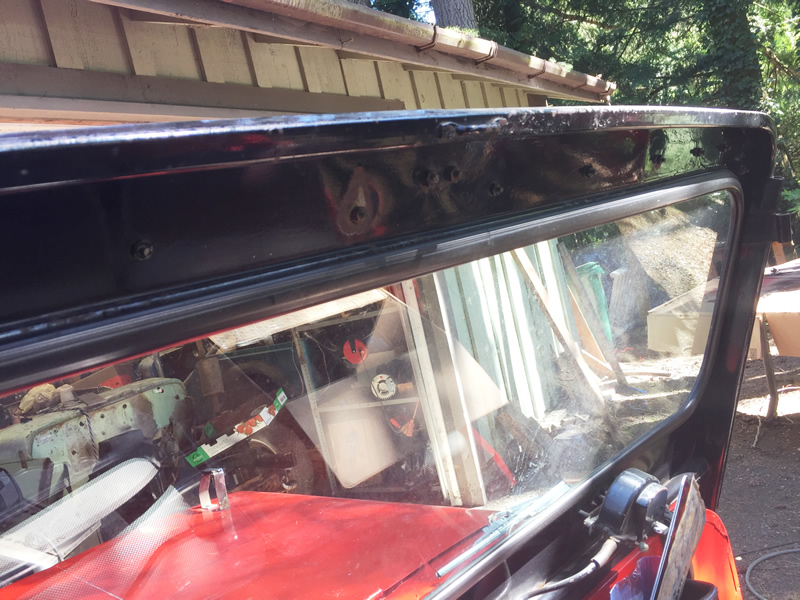
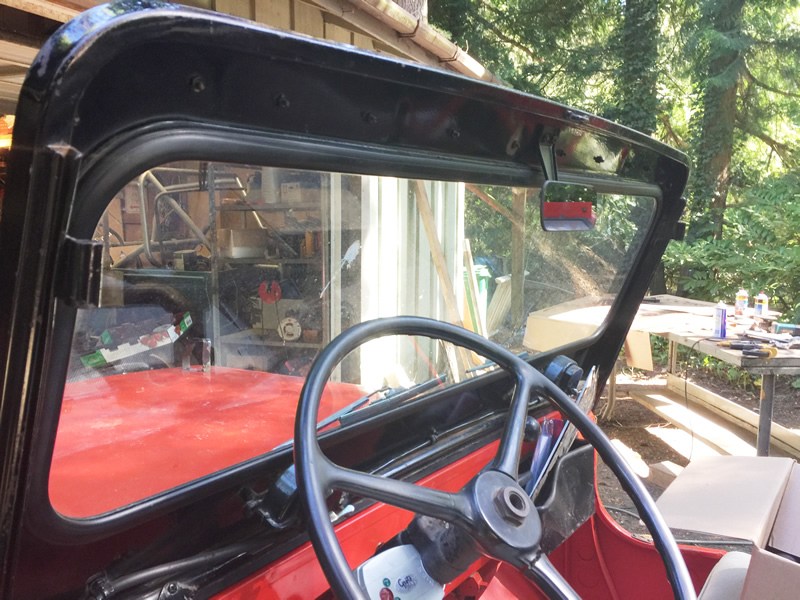
It wasn’t until yesterday that I realized Patterson didn’t have a rear view mirror. Fortunately, I had the mount from Rusty and a nearly correct mirror thanks to Chris McKay. This is before I added the mirror:

2017-05-20-windshield1

And after the mirror. 2017-05-20-windshield2

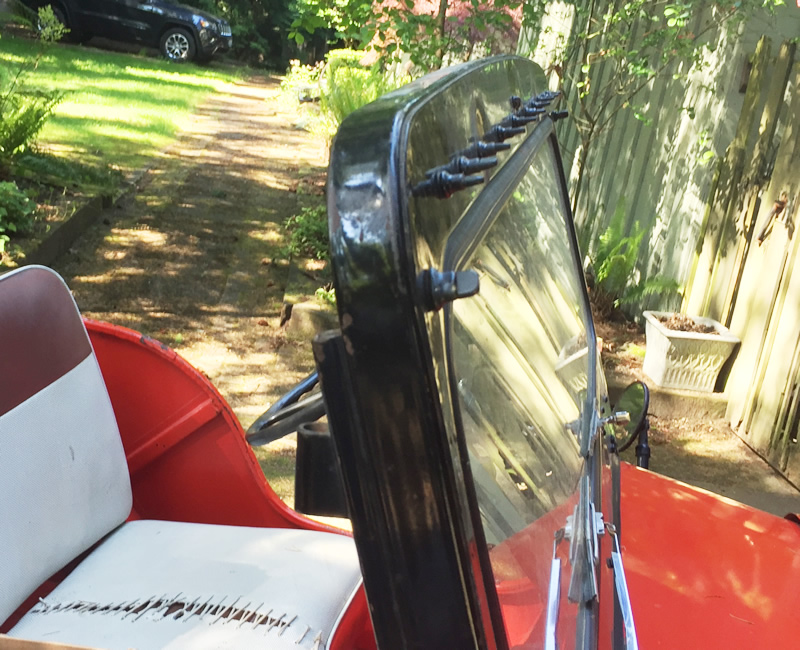
Next I addressed a couple of broken twisters. These are one of the unique features of a DJ-3A Convertible. The windshield is nearly like a CJ-3B, accept for the way the convertible top is supposed to attach to the windshield. Instead of a sliding mechanism, it uses those twisters. Two of Patterson’s twisters were broken. I had a few that I removed from Rusty (most of Rusty’s were broken), so I installed two of those onto Patterson. 2017-05-20-windshield3

The windshield is now complete and ready for a convertible top.

[fb_button]
 
To Top

Modified Hardtop on Tim’s M-170

• CATEGORIES: Builds, M-170 This site contains affiliate links for which I may be compensated.

Tim’s been working on this M-170, bringing it back to stock. One feature he really likes is the Metro Engineering and Manufacturing Top, which was extended to fit his M-170. Tim’s searching for some M-170 seats (probably the same as M-38A1 seats?? Can someone clarify this??).

“I’ve converted the engine back to 24 volts. The unique thing with this M170 is the top. It’s an M38a1 (I think) top that was cut and stretched 20 inches next to the door. Who ever did this did a great job. I like this better than canvas tops. If some one needs measurements contact me. One photo has the tag info on the top.”

m170-tim-0 m170-tim-1 m170-tim-2 m170-tim-3

Continue reading

[fb_button]
 
To Top

Getting Tanked

• CATEGORIES: Builds, Features • TAGS: This site contains affiliate links for which I may be compensated.

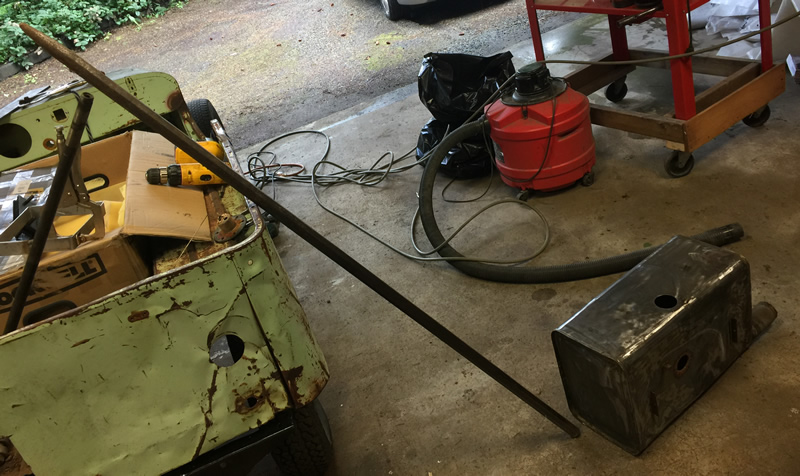
During my brief visit to Seattle the weather was most uncooperative. Today it was rain and hail, intermixed with sun. Two days earlier it was thunder, lightening, and downpours. So, I wasn’t as productive as I would have liked. Still, I managed to clean some more parts, order some parts, and work on the gas tank.

Not surprisingly, there seems to be no aftermarket replacement tank for the DJ-3A. I’m pretty sure a DJ-5 or rear CJ-5 tank would fit just fine, but I didn’t have one readily available and, besides, I was trying to stay with the DJ-3A tank. After some searching, I found one with all the parts, but it was a bit dented.

tank2

This tank took a pretty good hit.

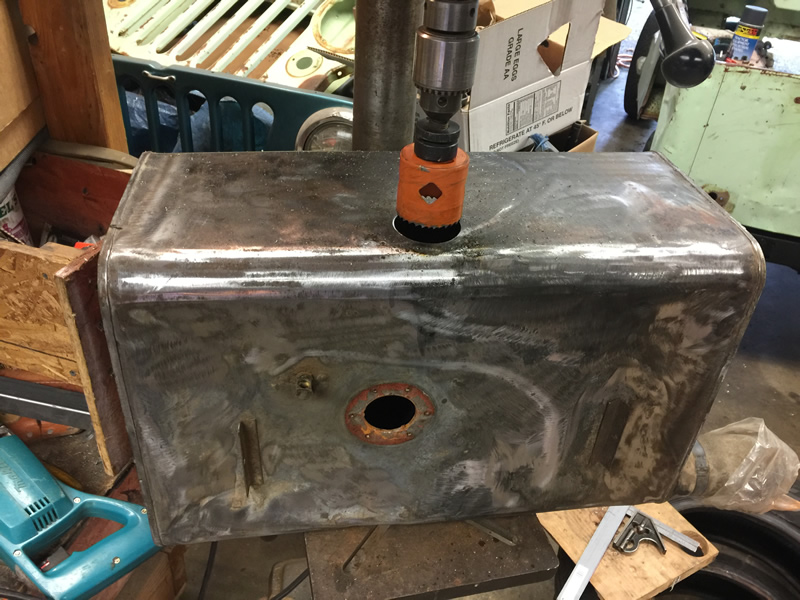
Today I decided to get the dents out. With nothing to lose, I started by drilling an access hole in the good side so I could pound out the worst side.

2017-04-06-gas-tank5

My tool of choice was a 20 pound pry bar that had a round surface at the top. So, I inserted the bar upside down into the newly drilled hold and began working out the dents. It worked surprisingly well.

2017-04-06-gas-tank6

I also had a small sledge and a smaller bar with a rounded end that helped remove some dents. Continue reading

[fb_button]
 
To Top

Rainy Days Go Away!

• CATEGORIES: Builds, Features • TAGS: This site contains affiliate links for which I may be compensated.
2017-04-22-ann-garage-floor

Ann is not afraid to get dirty!

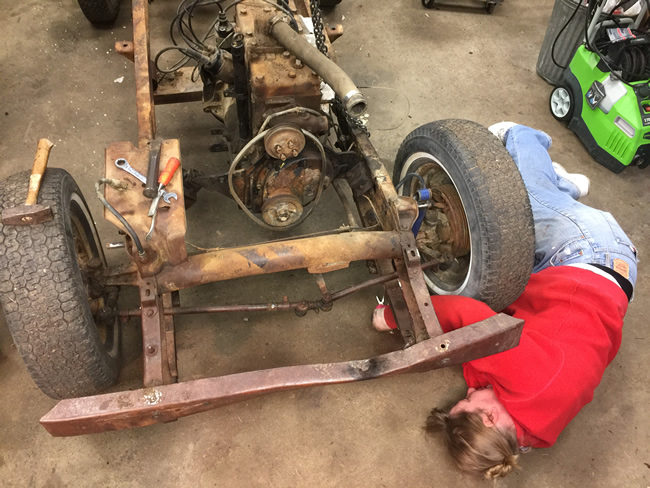
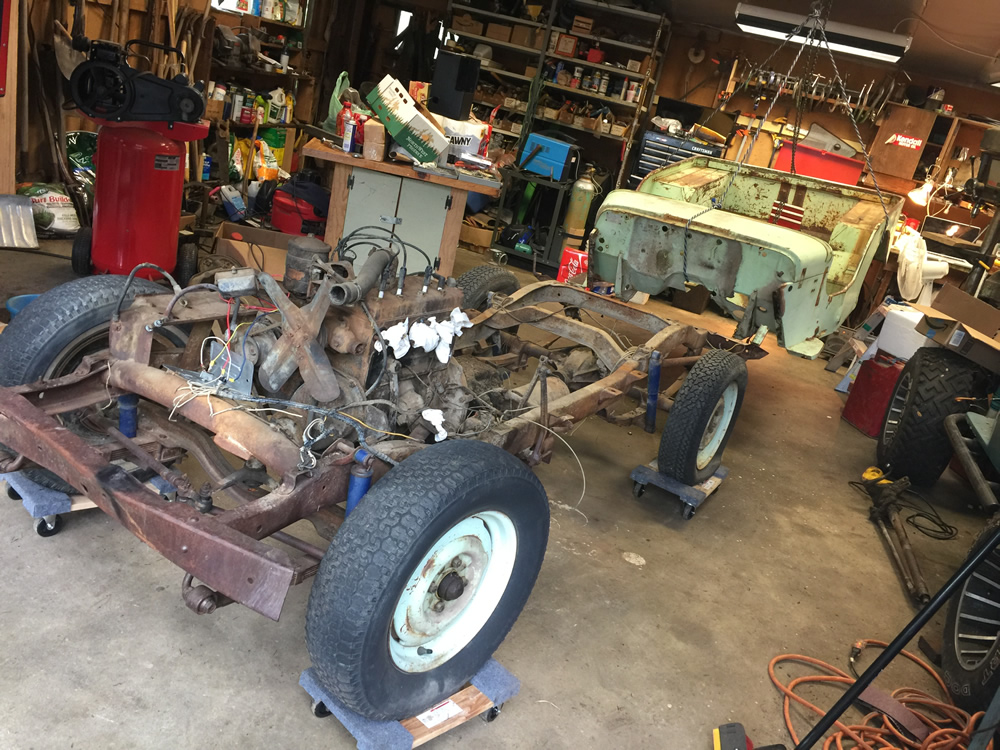
Unlike our sunny Friday, today was a rainy day, so any thought of blasting the frame was put on hold. But, we did get nearly all the parts removed from the frame and the engine/transmission ready to pull out. The more we removed, the more we could see that poor Rusty had come from an abusive home.

Case in point: the transmission cross member. Both sides of the frame where the transmission crossmember normally attaches have been beaten, suggesting that the jeep was often bottomed or high centered. That would also explain the need to install a custom cross member:

2017-04-22-frame-crossmember

You can see the wave along the bottom rail. I play on straightening it and then added an extra piece of metal to about a foot long to add additional strength along the bottom of the frame.

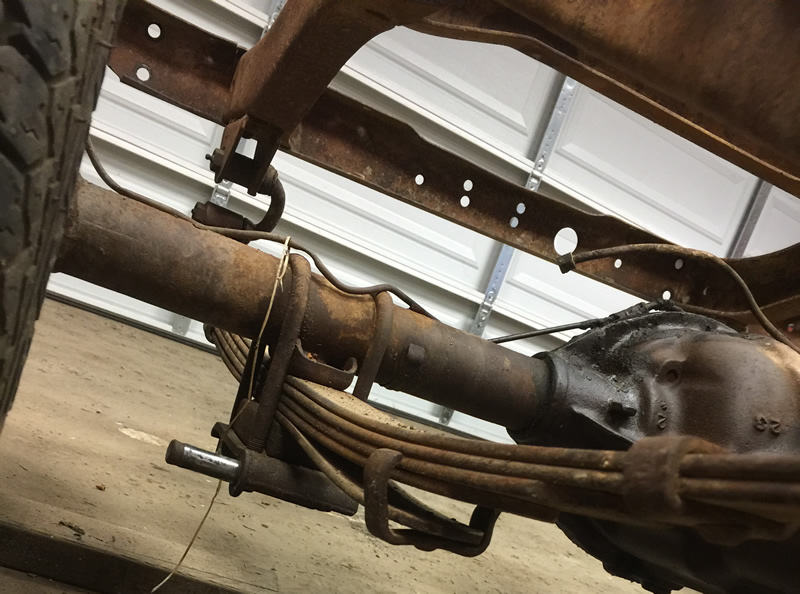
This net photo shows the rear passenger spring. The front portion of the bottom leaf is bent down quite a ways. This is slightly problematic in that there aren’t off the shelf springs for DJ-3A convertibles (that I know of anyway).

2017-04-22-springs-bent

I don’t know which year this image was printed, but it highlights the different springs among models.

dj3a-spring-options

Note that the hardtop version had different numbers of springs on the left vs. right sides. From the CJ-2A Page.

To make it more confusing, I have five leafs in the front and four in the back (on both sides). I think I should have only 3 leafs. Perhaps the previous owner broke them and installed heavier ones? Or, the number of leafs was changed after 1956? I don’t know.

Continue reading

[fb_button]
 
To Top

Having a Blast

• CATEGORIES: Builds, Features • TAGS: This site contains affiliate links for which I may be compensated.

Just a few updates for today ….

Friday was another day of blasting. And, with Ann’s help, there was plenty of scraping, too. This photo describes my day:

2017-04-20-sandblasting

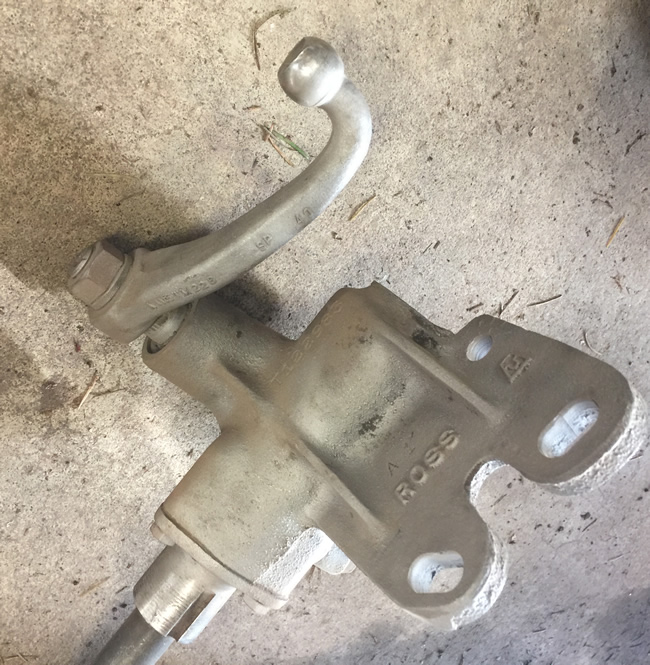
But, all that work wasn’t for naught. See the much cleaner steering box:

ross-steering-box-rusty-clean2

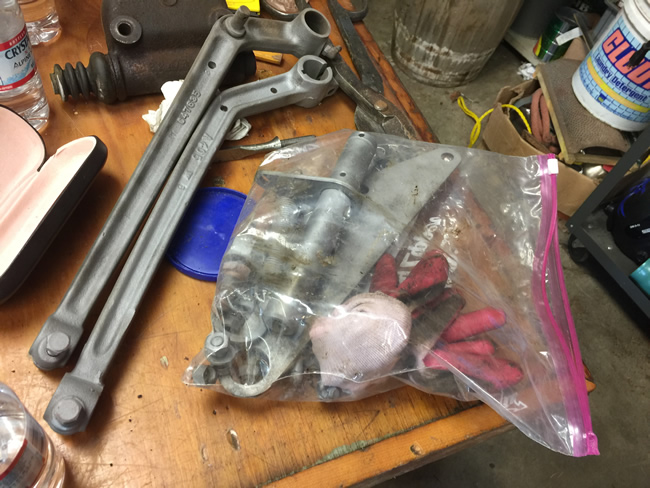
ross-steering-box-rusty-cleanAnd, some of the blasted parts … clutch linkages, pedal levers, column shift parts, and more:
more-blasting-done2 more-blasting-done1

Continue reading

[fb_button]
 
To Top

One Part at a Time …

• CATEGORIES: Builds, Features • TAGS: This site contains affiliate links for which I may be compensated.
2017-04-14-Ramen-noodles

All work and no noodles makes David grumpy! Good thing I found a new Ramen noodle place just a few minutes away from my parents. I had them add some pork belly. It was awesome!

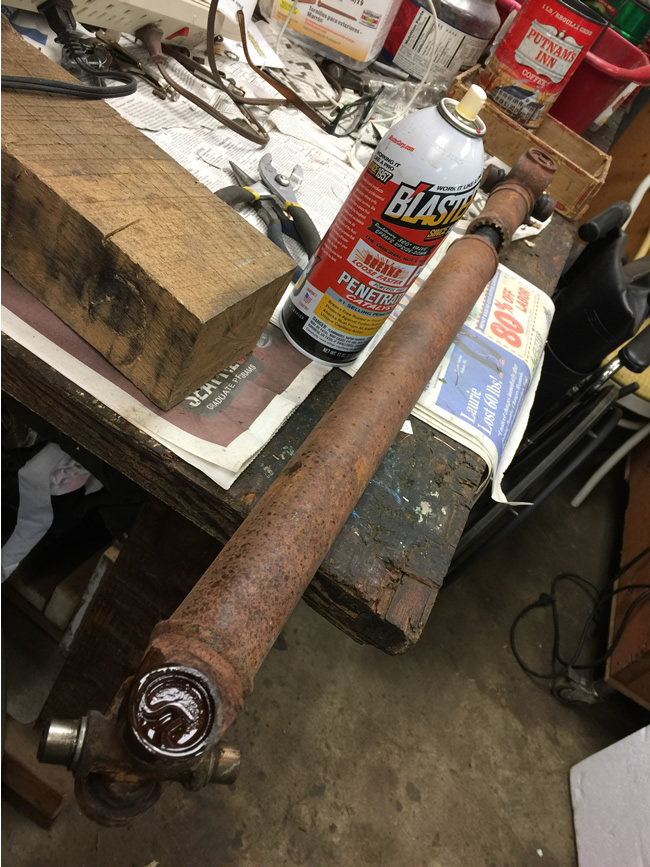
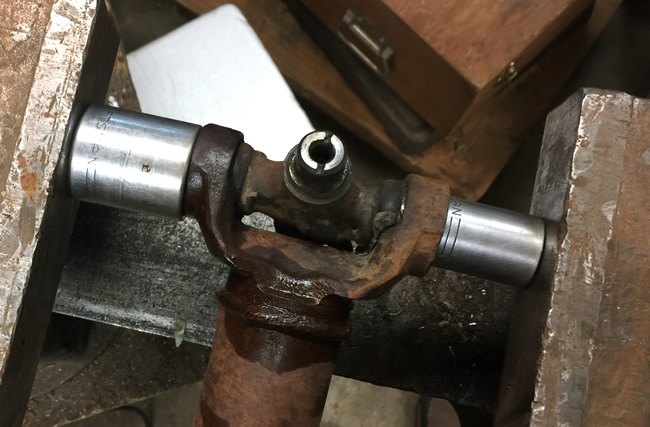
More progress on Rusty, one part at a time. I wanted to remove the u-joints so I could sand blast and paint the driveline.

2017-04-14-driveline4

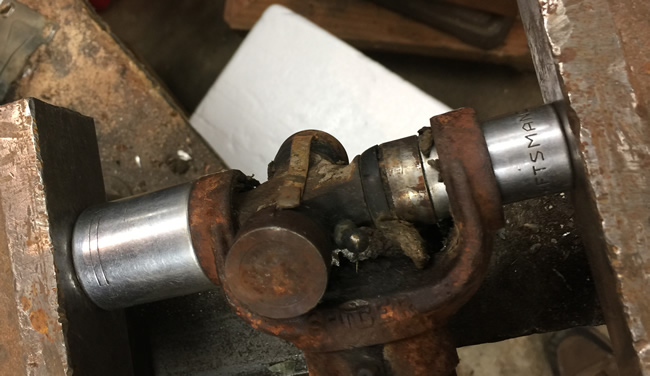
To remove them, I used my favorite vice, something that’s been around longer than me. Using two different sized sockets (one to slide through and one to catch the u-joint as it slides through, I pressed it through. Make sure the grease nipple is NOT on the side you are pressing or it will cause you problems. This shows the u-joint after the springs are removed, but before I began pressing.2017-04-14-driveline5

This shows the u-joint after pressing it through. 2017-04-14-driveline6

Continue reading

[fb_button]
 
To Top

Bends, Cracks, and Mud

• CATEGORIES: Builds, Features • TAGS: This site contains affiliate links for which I may be compensated.

2017-04-10-rusty-remove-body3

There’s nothing like disassembly to reveal all the problems that remained unseen. Once the body came off, the realities revealed themselves.

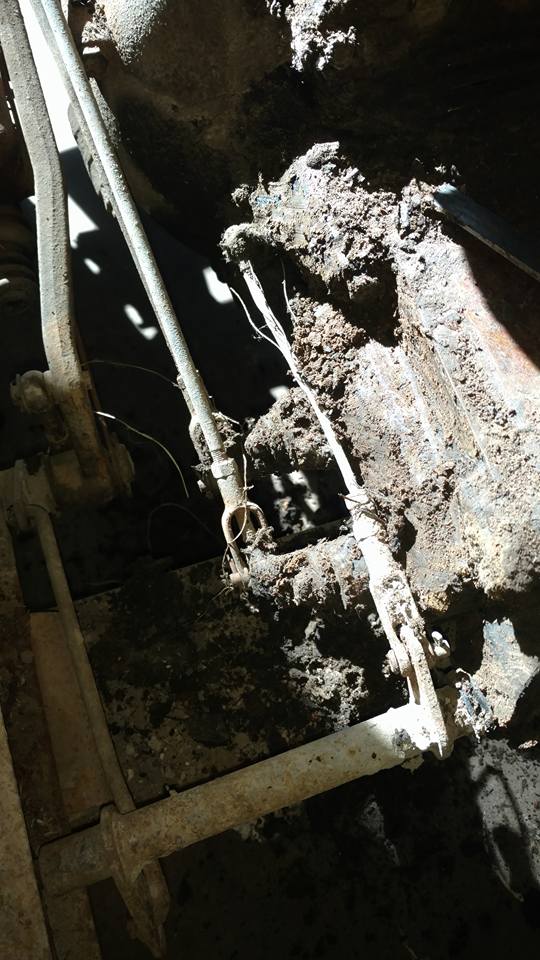
The front cross member is cracked on the driver’s side (no surprise there — funny how I didn’t notice it with the body on it). The transmission is so packed with muck that I doubt any oil could leak through it. There are also some odd bends, like the mid cross member, which had something hit it with enough force to bend one side. Maybe the driveline broke at some point and flew up into it? Of course, there were rusty bolts, too, some which not even PB Blaster could save. At least it is getting closer to being disassembled.

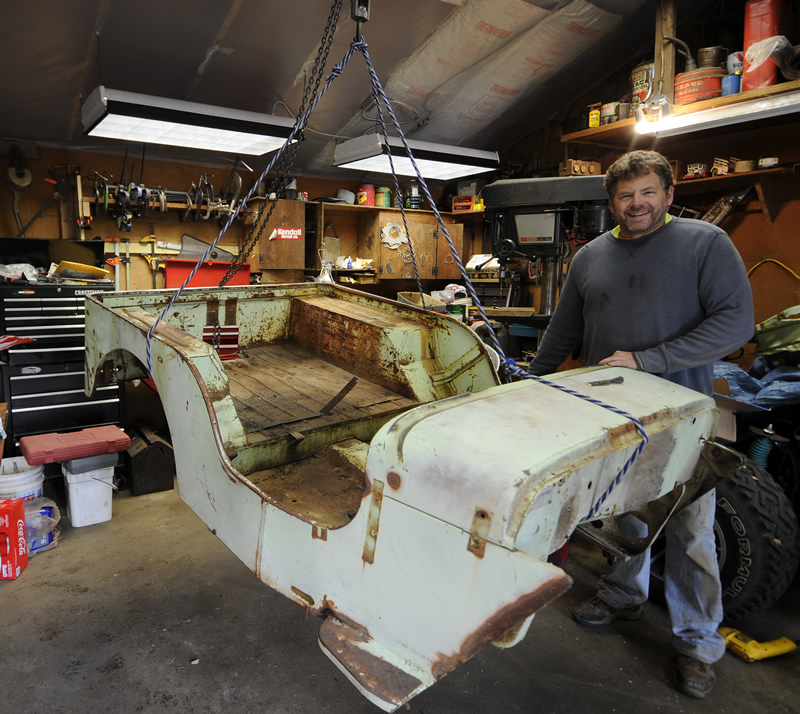
The first big event was the removal of the body. I used a block and tackle to pull the body off:
2017-04-10-rusty-remove-body01

2017-04-10-rusty-remove-body02

2017-04-10-rusty-remove-body2 2017-04-10-rusty-remove-body1

Continue reading

[fb_button]
 
To Top

Working Away

• CATEGORIES: Builds, Features • TAGS: This site contains affiliate links for which I may be compensated.

With the rain staying away for a few days, I booked it over to Renton for a few days to work on Rusty. Here are a few of the things I did today.

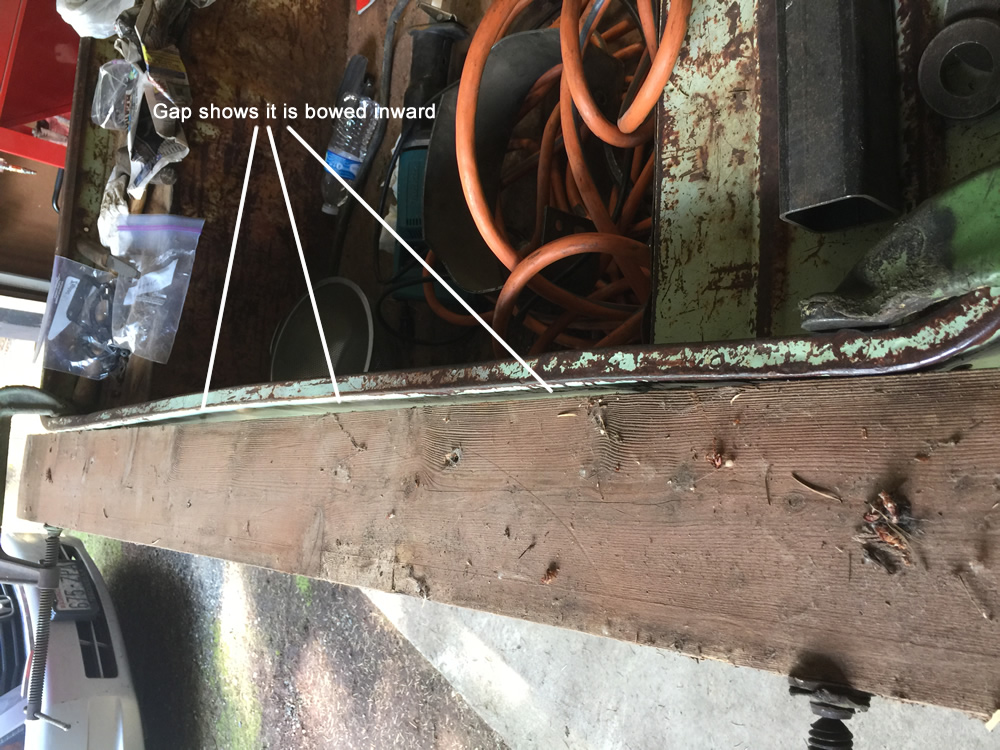
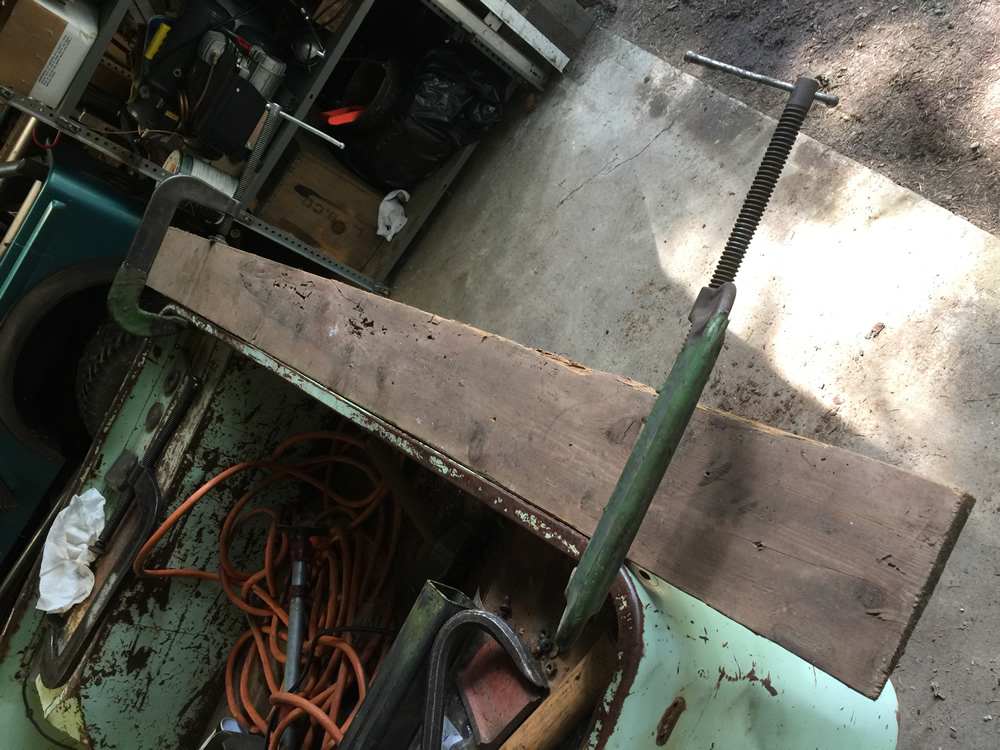
I did a little more straightening to the body. This time I wanted to remove a bow along the top back. I’ve mounted a board as a straight edge. You can see the cancer in the rear.
2017-04-09-rusty-body-work2You can see there’s a gap between the board and the back.
2017-04-09-rusty-body-work1After some clamps and some sweet talking with a 5lb sledge, I coaxed the back into line.
2017-04-09-rusty-body-work3

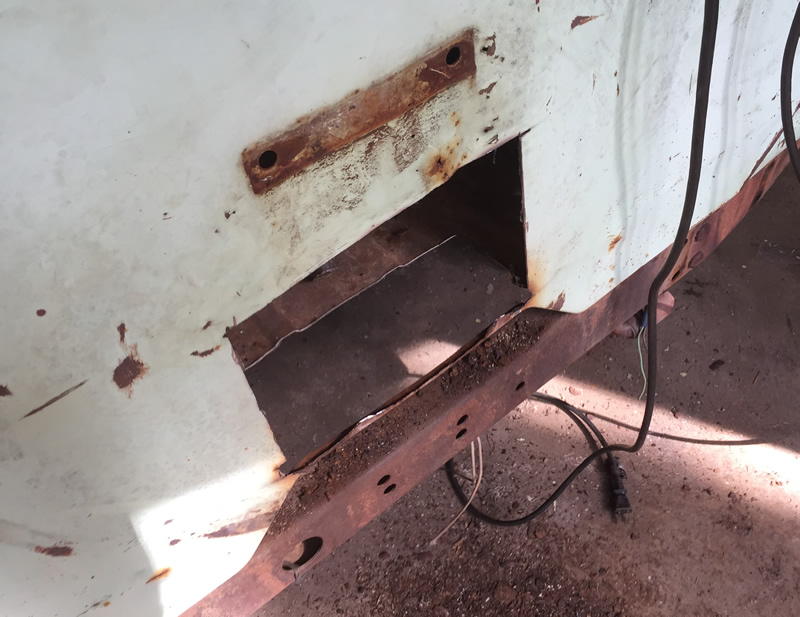
Then I played doctor and removed the cancer.2017-04-09-rusty-body-work4

Continue reading

[fb_button]