Builds Research Archives

To Top

Alaska Paul’s Placard Progress

• CATEGORIES: Builds, Features • TAGS: This site contains affiliate links for which I may be compensated.

Today’s the last day of the year, so let’s go out in style with Alaska Paul’s placard progress. Paul understands that his one-of-a-kind electrically and mechanically designed jeep will require information assistance just in case any of us lesser mortals attempt to drive it. So, he spend some time over the holidays playing with placards.

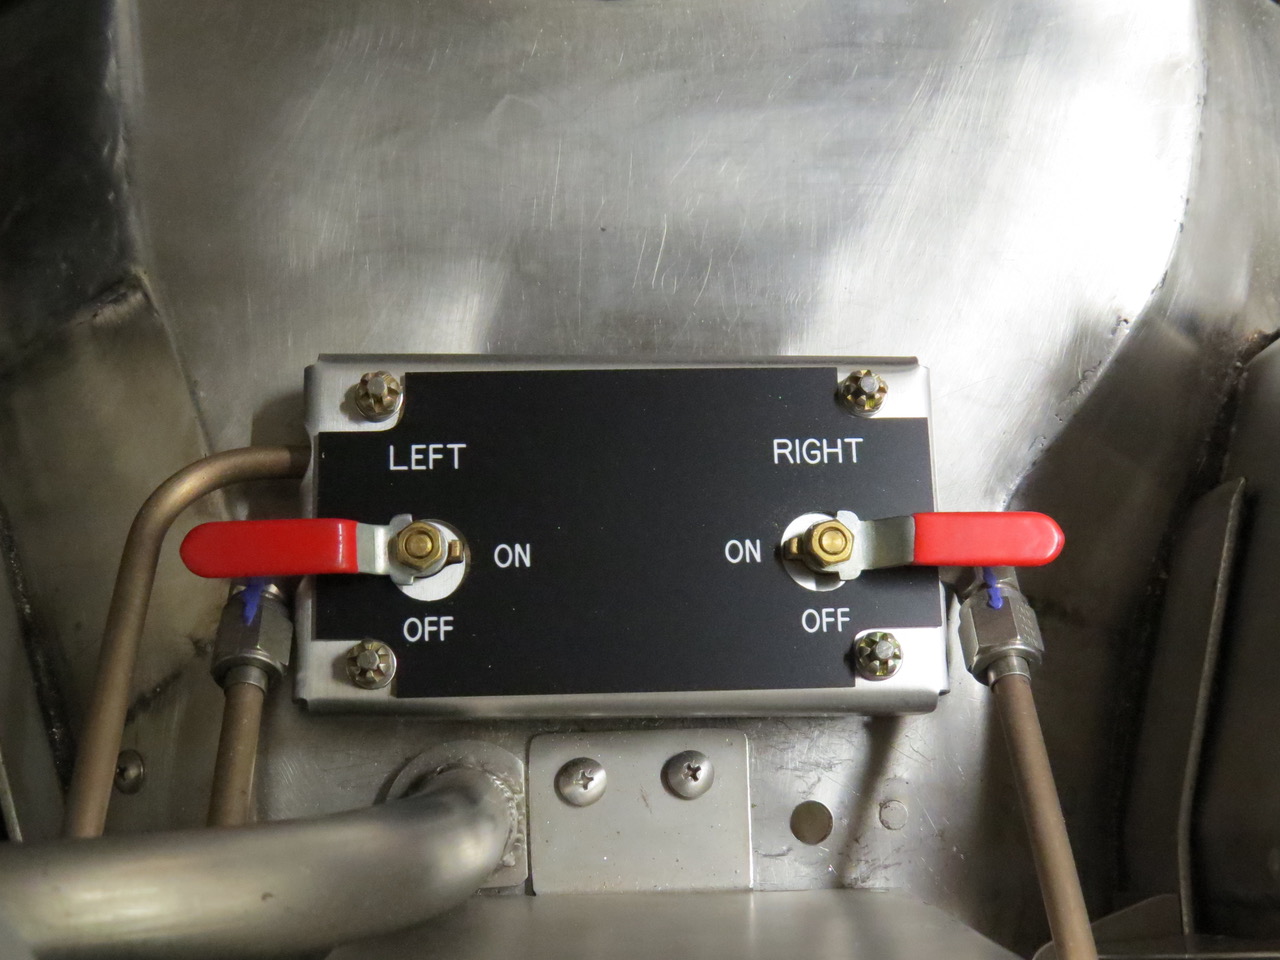
Paul writes, “It’s been a while, so I figured I’d send some Willys progress photos your way. This photo is of the fuel valves between the front seats with an engraved placard sitting on the metal cover. A local sign shop (Alaska Laminated Signs) made up some test placards so I could see how different colors would look with the stainless, gray and blue interior of the Willys.  While this placard has all the necessary information and the correct shape to fit the metal cover plate I wasn’t too happy with the black background and the white lettering.  I wanted something with more visual appeal so Dave (the sign shop owner) duplicated this placard using a brushed aluminum outer layer over a black base.(see next pic)”
2017-12-31-placards2
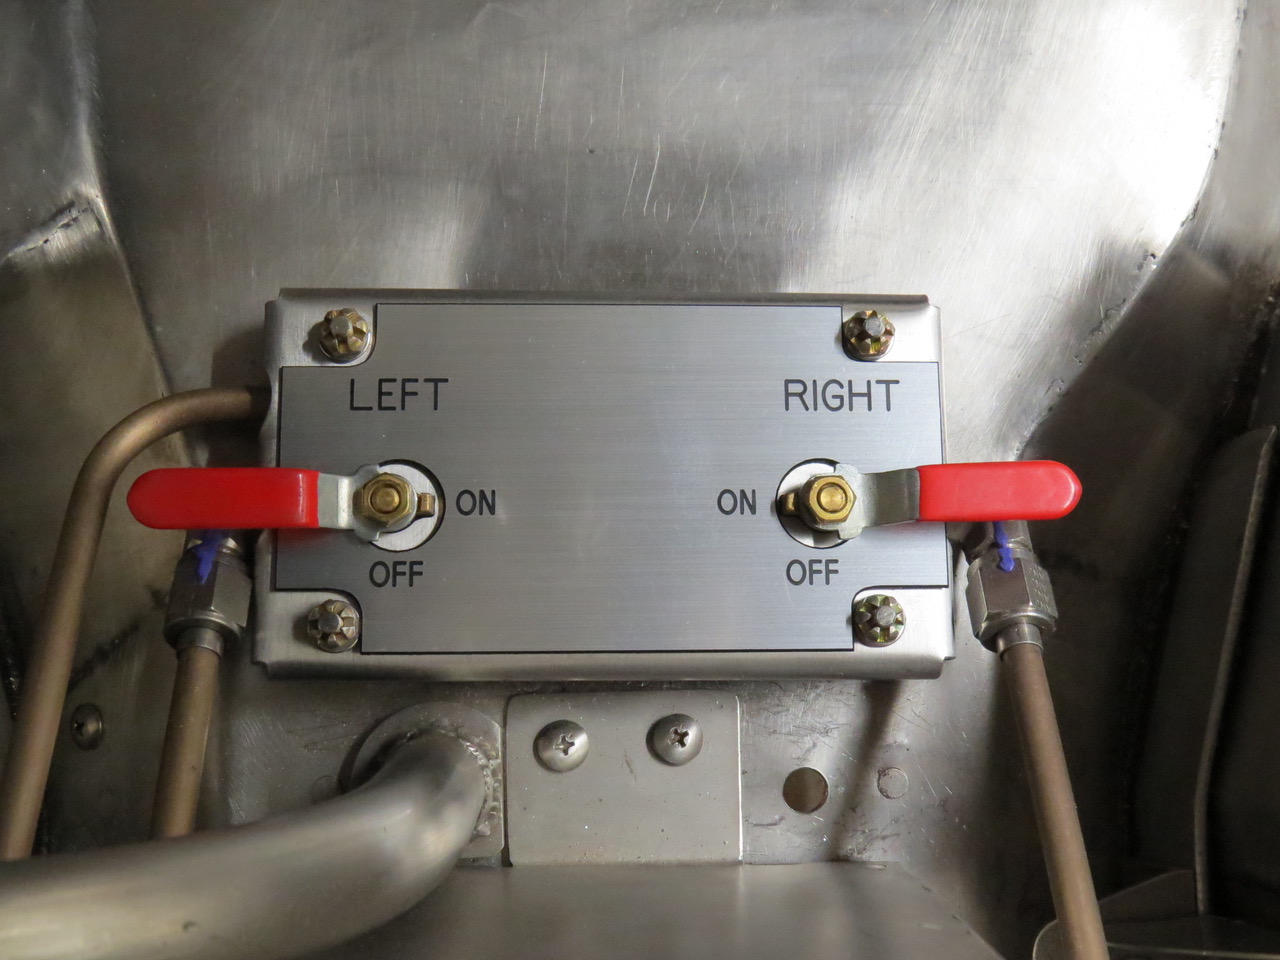
“This aluminum/black combination looks good by itself but I didn’t feel it looked good when it was placed next to the stainless steel parts so Dave made a third placard using a dark blue upper layer and a white base (see next pic).”
2017-12-31-placards3
“Now this is what I was looking for.  While the blue on the placard isn’t a perfect match to the blue on the seats they’re close enough so they look good together and the contrast between the white letters and the blue background makes it bright and easy to see.  Now that we had a color selected I gave Dave my metal full size patterns for the five placards needed for the little Willys and he began the cutting and engraving process.”
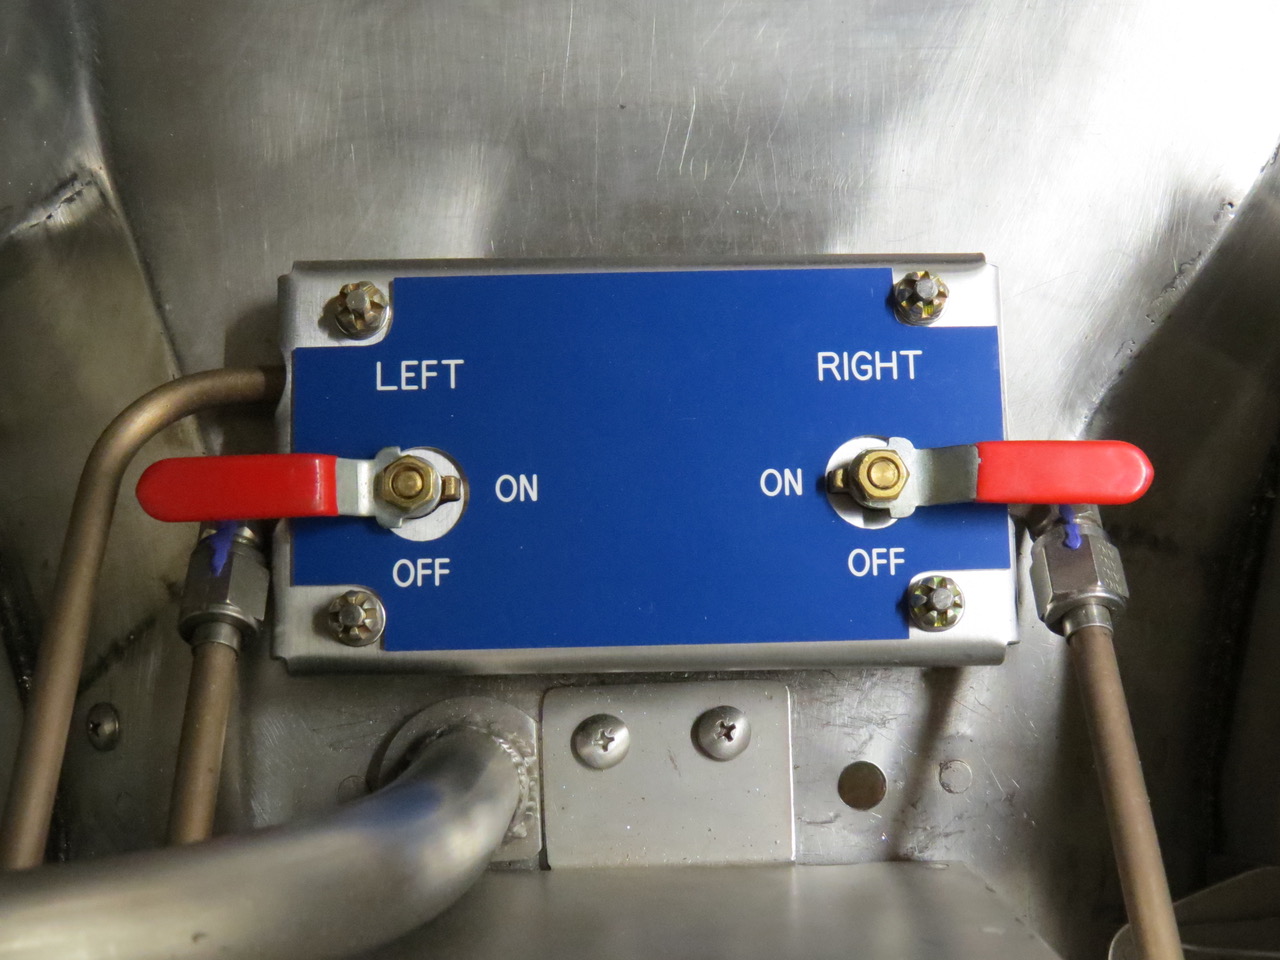
2017-12-31-placards4
“Here’s the finished product. From left to right we have the overhead switch placard, the circuit breaker placard and below that is the fuel tank selector placard and the final two placards are for the 12 Bosch relays (two rows of six each) in the electrical bay just aft of the passenger seat.

The placards fit perfectly which made installing them a fast and simple task.”
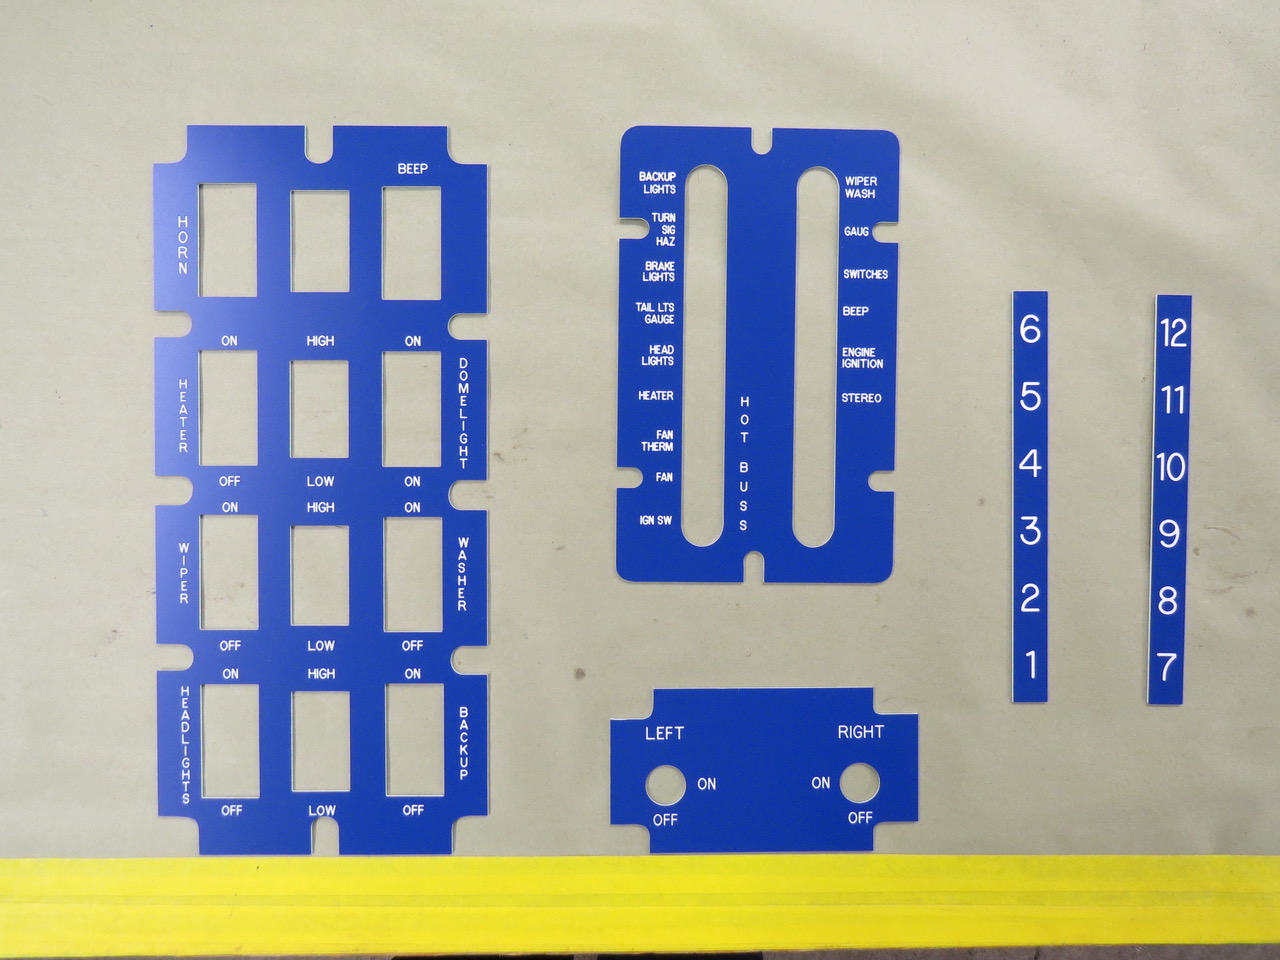
2017-12-31-placards5

“The electrical bay with the placards installed.  It’s hard to see but just below the row of number 1 thru 6 relays is another row of 7 thru 12 relays but not all are in use right now.  I wired in some extra relays and extra circuit breakers incase someone wanted to install additional electrical equipment in the future.” Continue reading
[fb_button]
 
To Top

To(w) Hell & Back

• CATEGORIES: Builds, Features • TAGS: , This site contains affiliate links for which I may be compensated.
2017-07-16-patterson-tow-failure9

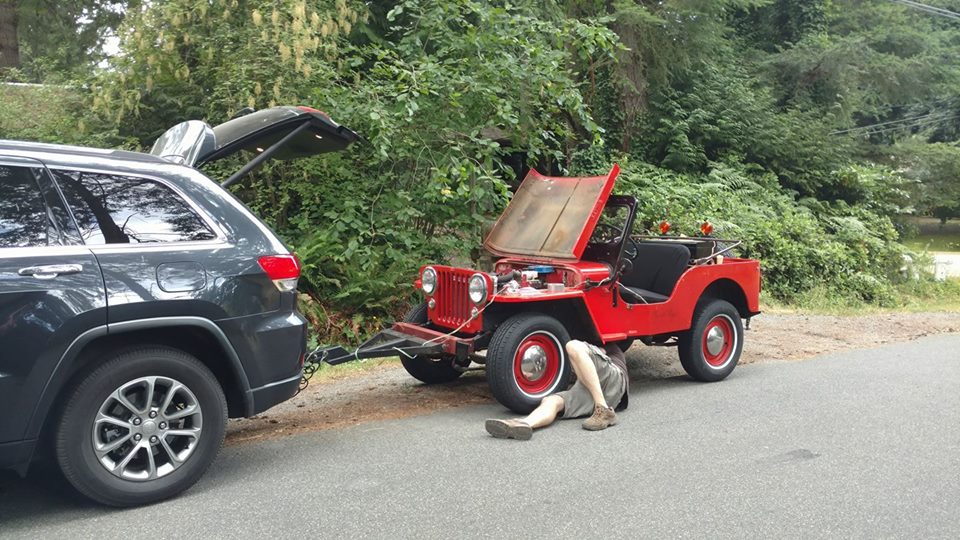
Patterson looks ready for the big tow to Eastern Washington.

Claiming that Sunday was “Tow Hell” day might be a slight exaggeration, but I wouldn’t call it a winning day either. Let’s recap the last couple days as I’ve been so busy I haven’t had time to photograph some of it.

I finally got the jeep running well on Friday after determining there was an air leak in a short piece of hose (let air in, but did not let gas out). I then timed it by ear and feel, rather than diagnostics, and that seemed to do the trick. On Saturday, I built a tow setup that utilized existing holes in the front bumper. I wanted some thing strong, but didn’t want to drill into the bumper.

Once the tow setup was ready, I turned to the exhaust. I’d already had Ann go to a muffler shop to replicate the 1.5″, 7′ section of tailpipe I needed (thankfully I had an original end section leftover from one of the DJs to use as a template). I combined the tail pipe with a Walker muffler I bought off Amazon and some Oreilly’s clamps and assembled the exhaust with relative ease.

I thought we were ready to head for Pasco on Sunday morning.

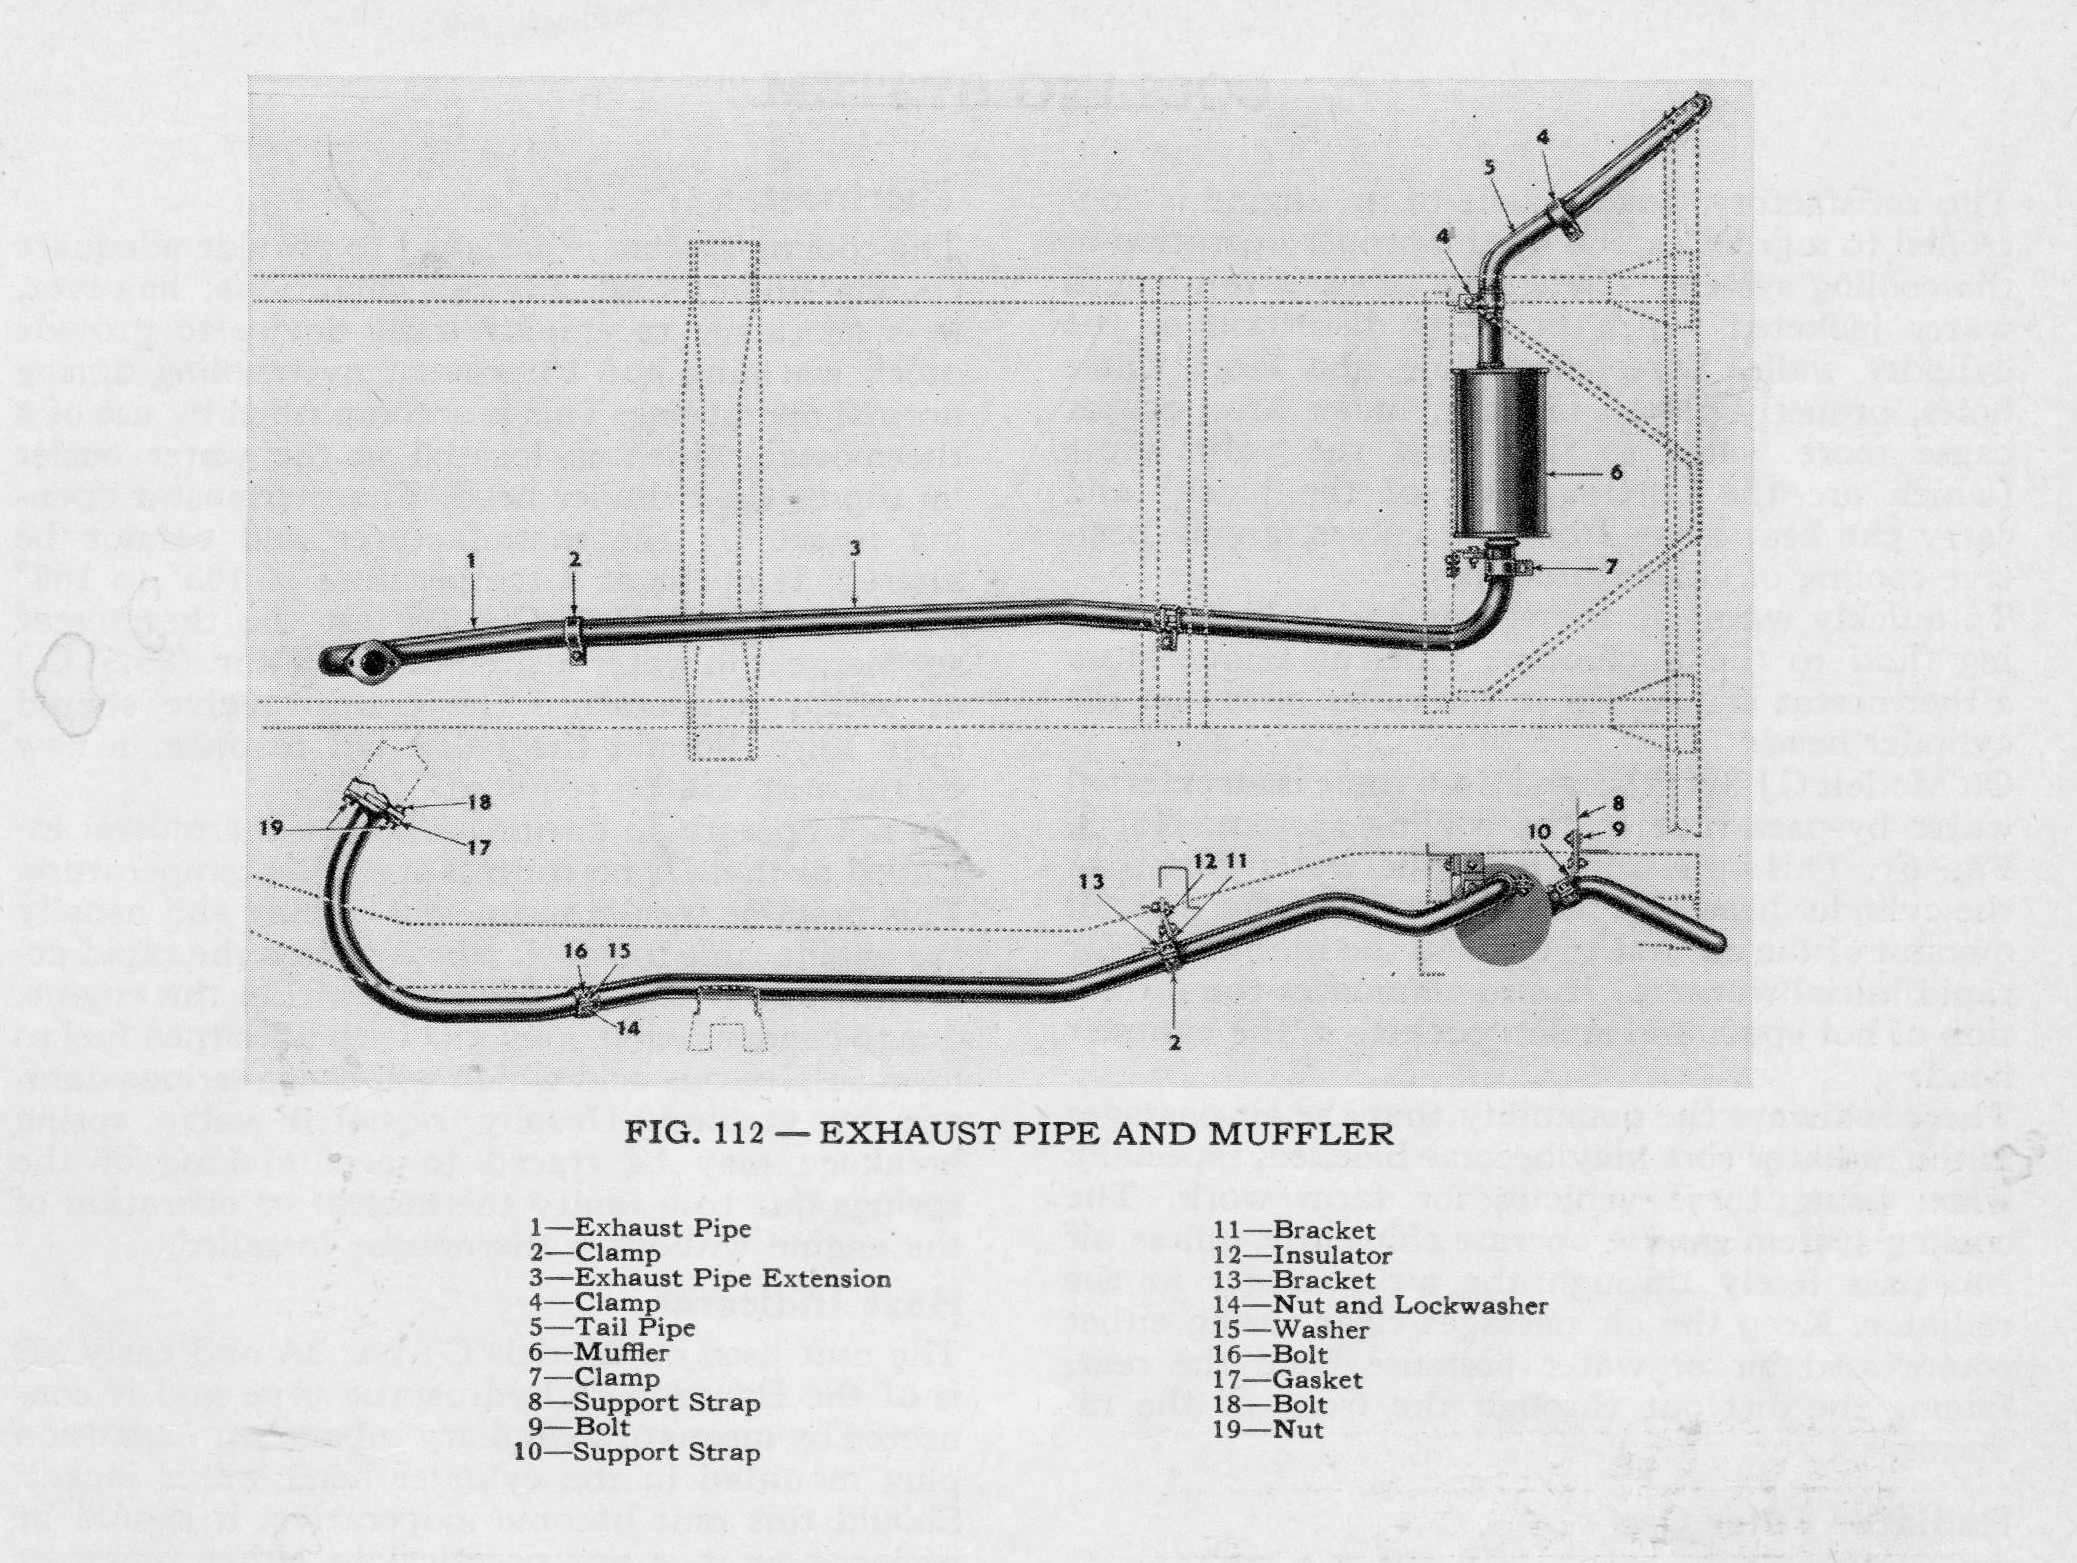
dj-exhaust2

The early DJ-3As has an exhaust that pretty much was straight. The only bends needed were 1) the bend on the front piece from the manifold down to the cross member, 2) the exhaust piece has to bend over the rear axle, and 3) the exhaust bends to the outside past the gas tank (not pictured). (1955 DJ-3A manual). Good luck finding a shop that had this series of bends in their shop manuals or computer!

surrey-exhaust

For comparison, this is the more likely setup that you’ll find at a muffler shop (if they have anything this old). It’s a more typical setup for 2As, 3As, 3Bs, etc. This doesn’t work for the DJ, because the muffler is positioned where the rear gas tank is installed.

We spent the first part of Sunday morning cleaning up the garage. It was a bit of a mess! Once that was done, we hooked up Patterson and began slowly towing him. We didn’t make it through the first intersection of my parent’s quiet neighborhood before I realized that the jeep wasn’t tracking around the corner. When I turned slowly right, it began to turn slowly left, forcing me to hit the brakes.

What the hell? I’ve towed a number of vehicles and never, ever run into this type of trouble.

We carefully tried a couple more corners and each was the same. The jeep began to turn the opposite way. I’d have to hop out and correct Patterson’s direction. After a trip around the block, we arrived at my parent’s house once more.

2017-07-16-patterson-tow-failure2

Testing the tracking at a very slow pace.

I pulled out my googler, but couldn’t find anyone having a similar problem. I concluded the drag link/ross box was somehow interfering with the jeep from tracking properly. I did read were “Dr. Verne” (aka Verne Simmons) would remove his drag link to tow it, but my custom radiator made that strategy near impossible without disassembly of multiple items. I was just about ready to remove the drag link when I decided, on a lark, to unscrew the control screw(could be the wrong name for this) on the Ross box. My assumption was that this would loosen the Ross mechanism, freeing the drag link to spin the steering wheel more easily.

2017-07-16-patterson-tow-failure10

Me trying to work through the steering problem.

Continue reading
[fb_button]
 
To Top

My Wife’s a Genius

• CATEGORIES: Builds, Features • TAGS: This site contains affiliate links for which I may be compensated.
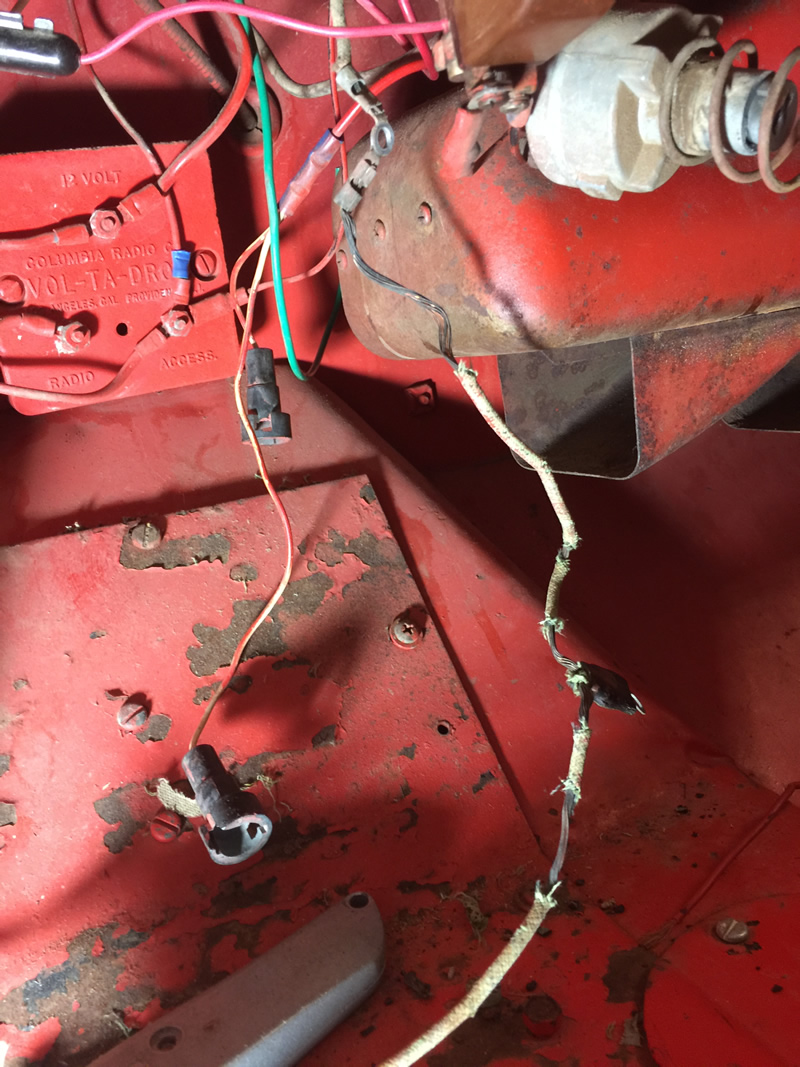
patterson-wiring

This photo provides a good look at how frayed some of the wire was behind the speedometer. Worse, this wiring was sitting on the metal brace!! in the background is the volt-a-drop which provides stepped down voltage to the King Seeley speedometer).

Electrical Mess:

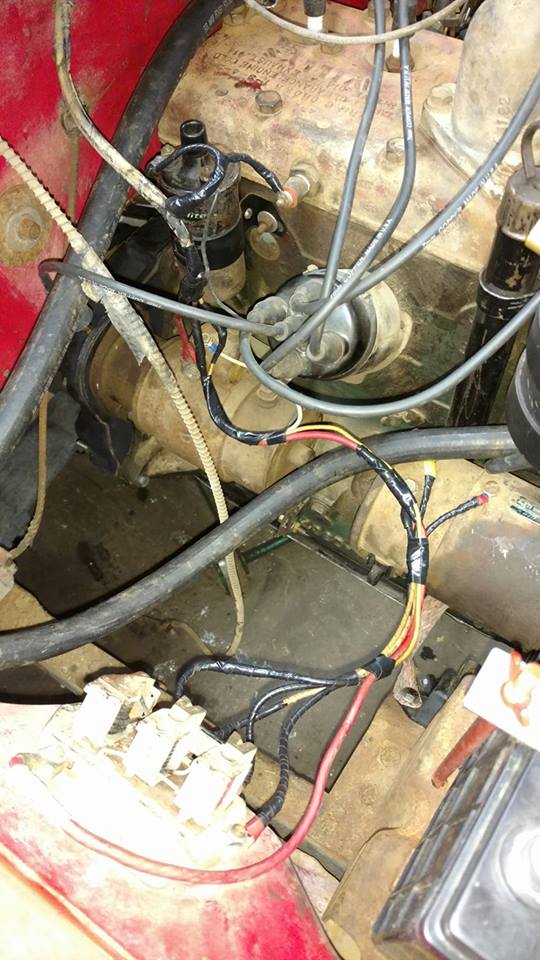
We’ve been working hard on Patterson the last couple of days. Most of our time has been consumed with checking wiring and rewiring stuff. Between frayed wires and mis-wired stuff, it’s filled our time. Apart from the types of frayed wire seen in the pic above, I discovered 1) the wires to the amp gauge and light were wired into the oil light (fortunately, all I had to do was pop out the light and plug it into the amp light), 2) the amp light was missing altogether (thankfully I could steal one off of Rusty’s speedometer), 3) the ignition jumper that screws to the back of the speedometer was laying on the metal brace (must have caused some shorting), 4) the oil light wire was wired to the fuel gauge (which explains in part why the fuel gauge didn’t work … well that and there was no wire connected to the fuel tank wire.

Dimmer Switch:

patterson-dimmer-switch2

No more red paint on this dimmer switch.

The dimmer switch has been lubed, reassembled, de-painted, and installed.

The Horn Wire

Patterson came with a button attached to the side of the steering column that was used as a horn, but it didn’t work. Since we were already changing some of the wiring around, we decided to steal the column shift button wiring from Rusty’s steering column I wired last month and use it on Patterson.

To start, I knew we had to run some non-electric wire (similar to bailing wiring) through the length of the column in order to pull the horn button’s electric wire down the shaft. That sounded like a good idea, but several attempts at pushing the wire up the column  were a failure: the wire kept getting snagged as I pushed it up the column. I was getting frustrated.

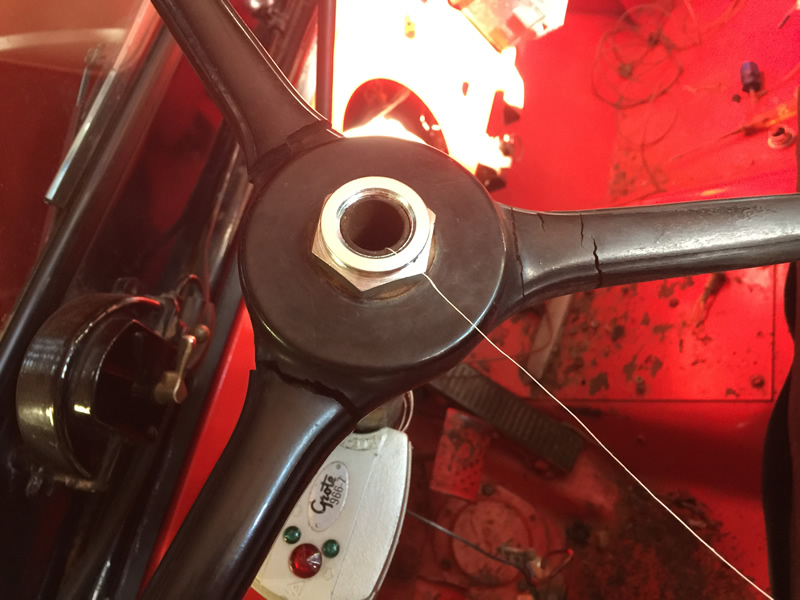
But then, my genius wife had an idea. Why not blow some thread down the column using an air compressor nozzle. Once the thread came out the bottom, we could pull the bailing-like wire back through. I admit, at first I thought it sounded a little crazy. After all, near the bottom of the column shaft it narrows, so I thought for sure the thread would be stopped by it. But, then I took a breath and thought …. hmmm … what could it hurt to try?

Sure enough, she produced some thread, dropped a little down the column, then stuck the air nozzle into the hole. That thread blew threw the bottom of the column in a couple seconds. It was genius! Well, almost genius, as we had to upgrade our thread to thicker thread. Other than that, we had the column horn working in no time!

patterson-horn-steering0

This is the thin thread we tried. It didn’t she enough tensile strength to pull up the wire. She just dropped some thread in and the air blew the rest of the thread down through that small hole at the bottom.

patterson-horn-steering2

Once we shifted to the thicker, black thread it worked perfectly.

Continue reading
[fb_button]
 
To Top

Disassembling A DJ-3A Dimmer Switch

• CATEGORIES: Builds, Features • TAGS: This site contains affiliate links for which I may be compensated.

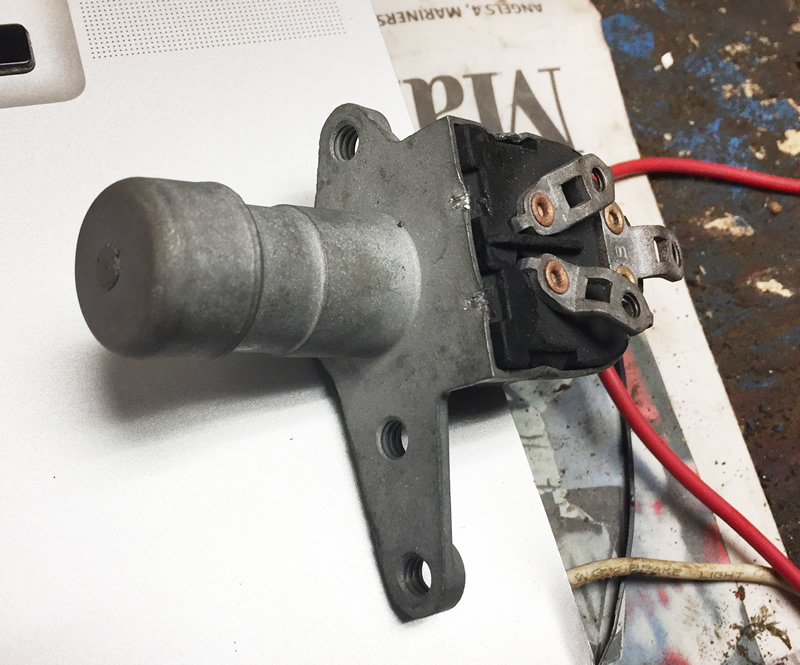
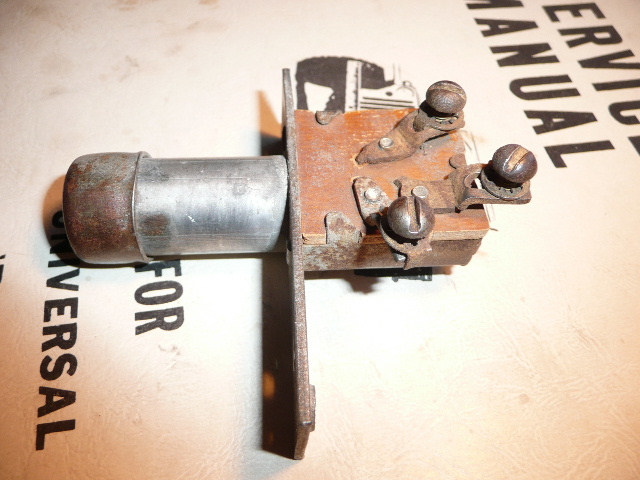
Last week when we were in Renton, we tested Patterson’s headlights and discovered the foot-based dimmer switch wasn’t always working correctly. After a little research, I discovered the CJ-3A page had a useful thread on the topic, but naturally the switch demonstrated wasn’t exactly like the DJ-3A switch. The one shown on the CJ-3A page had a square end, while the DJ (and I’m assuming others of the same vintage?) have a rounded end. In fact, It isn’t clear to me which models use which dimmer switches?

square-dimmer-switch

Example dimmer switch from the CJ-3A page forum.

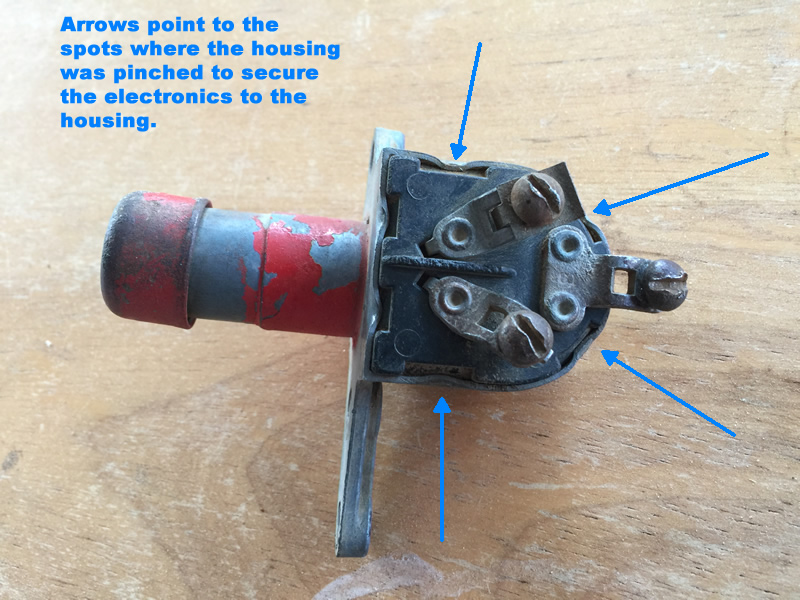
So, here’s a look at Patterson’s switch. The first obvious difference is that the housing doesn’t have tabs. Instead, it has crimps and, let me tell you, those crimps wouldn’t bend easily outward.

2017-07-01-patterson-headlight-dimmer-switch1

Using a small screwdriver, I eventually got the crimps straightened. As soon as I tugged at the top part to remove it, everything kind of tumbled onto the table (oops).

2017-07-01-patterson-headlight-dimmer-switch2a

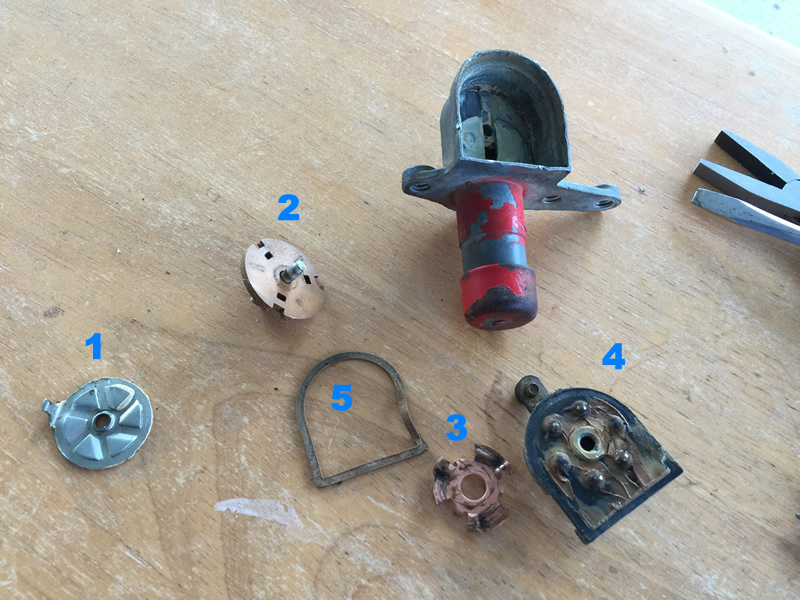
  1. #1 is the bottom piece. When the actuator is depressed it catches on #1 on the bottom of the piece and spins it.
  2. The metal tab that sticks up on #1 connects to #2 and spins it. #2 is actually made up of 3 pieces a) the disc, b) a shaft, and c) a spring.
  3. #3 is a copper propeller that rotates in conjunction with #2 and #1 each time the actuator is depressed. As you can see, it is very dirty.
  4. Part #3 connects with copper highpoints on #4, which shifts the electricity from the high beam to the low beam, then to the high beam, etc, in a circular pattern. The contacts on #4 were dirty, too, but hard to clean without scraping the copper points. I did not have a good cleaner handy, so I only gently cleaned them.
  5. This is a gasket.

2017-07-01-patterson-headlight-dimmer-switch3

Continue reading
[fb_button]
 
To Top

Proof of Life!

• CATEGORIES: Builds, Features • TAGS: This site contains affiliate links for which I may be compensated.

On Tuesday afternoon, Patterson sprang to life with it’s new transplant!

patterson-runs

We started Tuesday morning working through the wiring. I asked Ann to rewire the low-beam/high-beam floor switch, since much of the fabric had fallen away. That led to rewiring more of the harness than expected, which in turn delayed messing with the engine.

Once I could focus on the engine, the first thing I did was swap distributers, as Patterson’s engine had newer internals (and I knew for sure it worked). When installed, I tried starting the engine a few times, but didn’t have success. So, I rotated the distributor wires 90 degrees. When that didn’t work, I rotated them another 90. When that didn’t work, I rotated them another 90. That’s when I got the engine to fire, but not run. At that point I began rotating it a few degrees, then cranking the engine, then rotating again, so I could get a feel for which position seemed to fire the best. But, after trying this a few times, we still didn’t get it to run.

At that point, Ann suggested we try different spark plugs. I’d forgotten I hadn’t installed the ones that had been on Patterson (still attached to the head). So, we pulled them, checked the gaps, then installed them in the “new” engine. We got it to fire again, but then, mysteriously, it stopped firing no matter where the distributer was located. That was puzzling. About that time, ann noticed some heat at the generator. I suspect the regular got stuck, causing the battery to discharge into the generator, creating heat (at least that’s what I determined later of after doing some reading). So, I pulled the battery cable and let the system cool.

Once it was cool, I rotated the distrbutor back to teh position where it had fired the best, then climbed into Patterson to start the jeep, simultaneously working the choke and gas pedal. Sure enough, Patterson just needed some physical presence in the driver’s seat, because he started right up. At that point, I climbed out and played with the distributor to locate the sweetest sounding spot. (see the video on Facebook … I can’t seem to make it appear on eWillys … it lacks a muffler, so it’s a little noisy).

So, Patterson runs again. But, we discovered the temp gauge and oil gauges are not working, so those will need some attention. Unfortunately, we had to return to Pasco last night, because Ann has a doc appointment Wednesday. I accompanied her back to Pasco, as I have some updating to do to the website and need to organize the sale of some Alaska Or Rust t-shirts. More on that Thursday morning. We plan to be back in Renton early next week. My mother has knee surgery scheduled for the 5th, so we need to be around to help out.

[fb_button]
 
To Top

Looking Like a Jeep Again

• CATEGORIES: Builds, Features • TAGS: This site contains affiliate links for which I may be compensated.

Now, if only it sounded like a jeep. It seems the timing it off, so I’ll be working my way through that Tuesday morning. One fun fact I didn’t know … there’s no top center on an L-head. I wished I’d known that BEFORE I assembled everything. I didn’t check to see whether my flywheel has the flywheel marks.

Anyway, Patterson is all assembled. We only had one oil leak, but that was only because someone forgot to tighten the inlet line at the block. We also had a minor gas leak at the carb, but that was a trivial issue. Some plumbers tape solved that.

So, now I believe it’s down’ to timing. For those looking for a good resource on L-head timing strategies, this thread on the CJ-2A page is helpful: https://www.thecj2apage.com/forums/l134-ignition-timing_topic13819.html. The also may be helpful: http://www.cj-2a.com/techtips/timing/howto/l134-timing.pdf

Here are a few pics from the day:

2017-06-26-patterson-ann-wiriing

This rewiring is Ann’s handiwork.

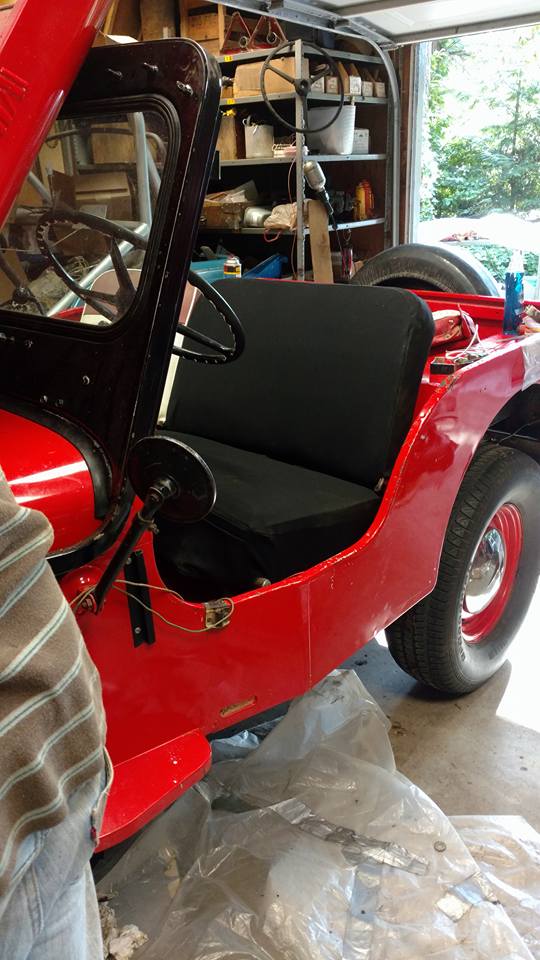
2017-06-26-patterson-seats

Ann also produced some seat covers that have pockets at the front for things like a phone or wallet.

2017-06-26-patterson-grille

The grille installed.

2017-06-26-patterson-timing2

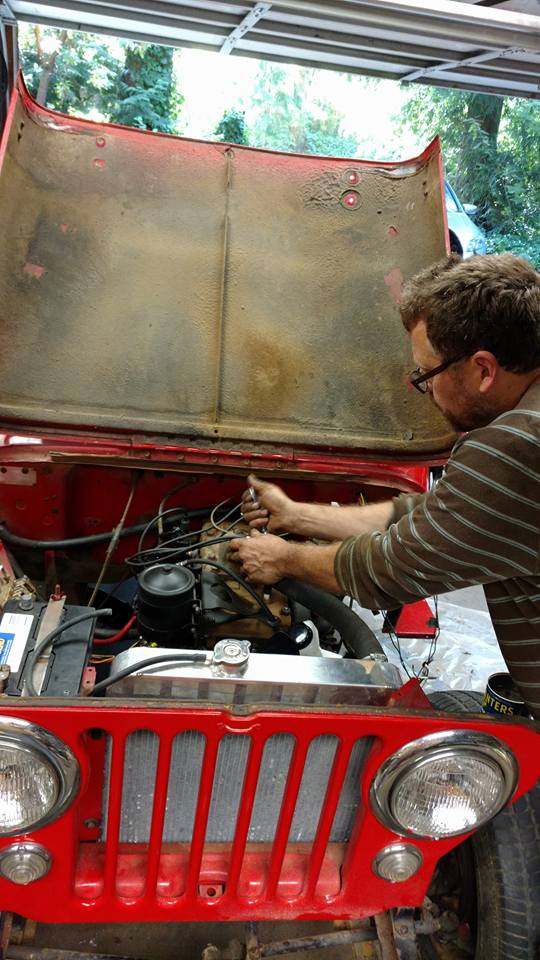
The radiator is installed. Just need the driver side fender installed.

Continue reading

[fb_button]
 
To Top

A Little Confused …

• CATEGORIES: Builds, Features • TAGS: , This site contains affiliate links for which I may be compensated.

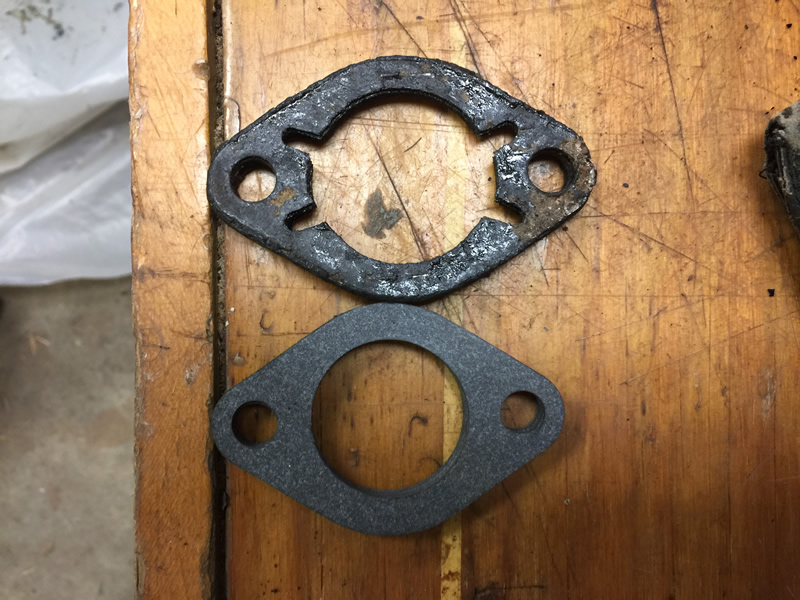
A couple things confused me today. In this first example, we have at top the original gasket between the intake manifold and carb. On the bottom is the replacement gasket included in a rebuild kit. As you can see, it won’t work. Is the DJ-3A intake that unique? I know it uses a Carter YF 2392, so that’s unique.

2017-06-24-carb-gasket-comparison

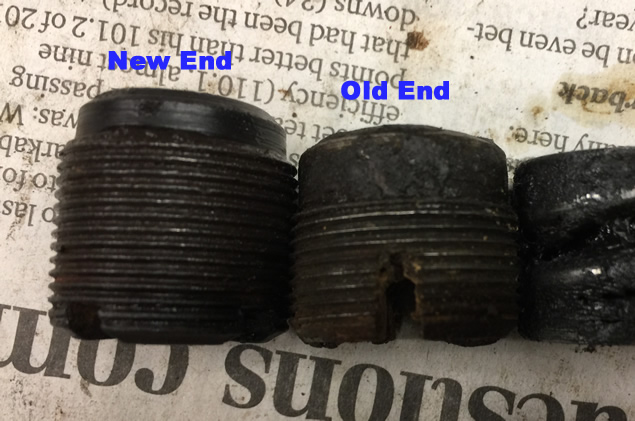
Next up, the ends for the dragline. On the left is the new end and on the right the old one. The new one is taller and has shallower slots for installing it. The old end is shorter and has much deeper slots (those deeper slots are really helpful) . Anyone know why these are so different? Between the longer end and longer springs, I couldn’t put all the parts together around the bell crank arm (and I tried). In the end I was forced to use some old and some new parts.2017-06-24-draglink-end-piece-comparison

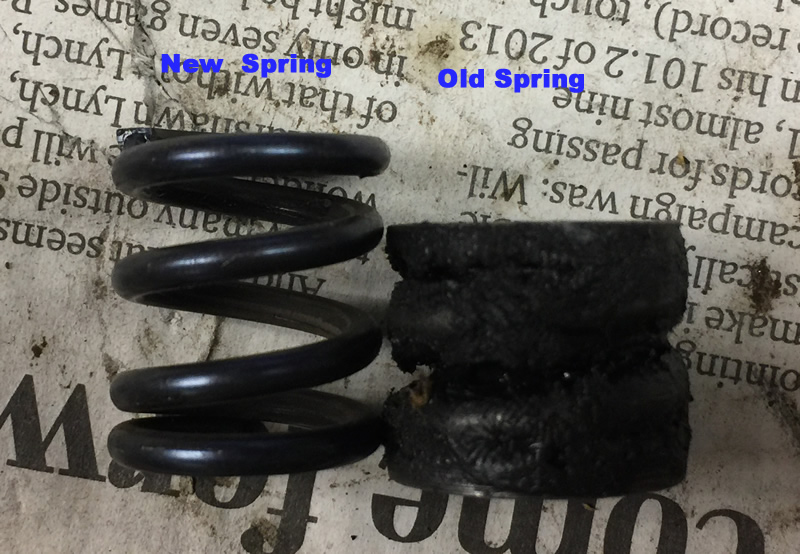
Note the difference in the spring heights. Try as I might, I could not compress the spring enough to install an end. I changed to the old end.2017-06-24-draglink-spring-comparison

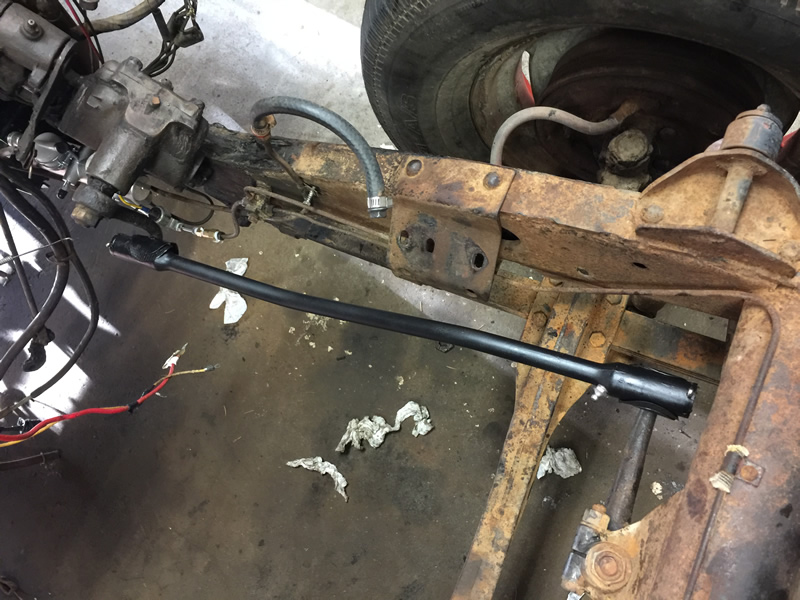
Once I used some of the old parts, I was able to get the draglink installed.2017-06-24-draglink

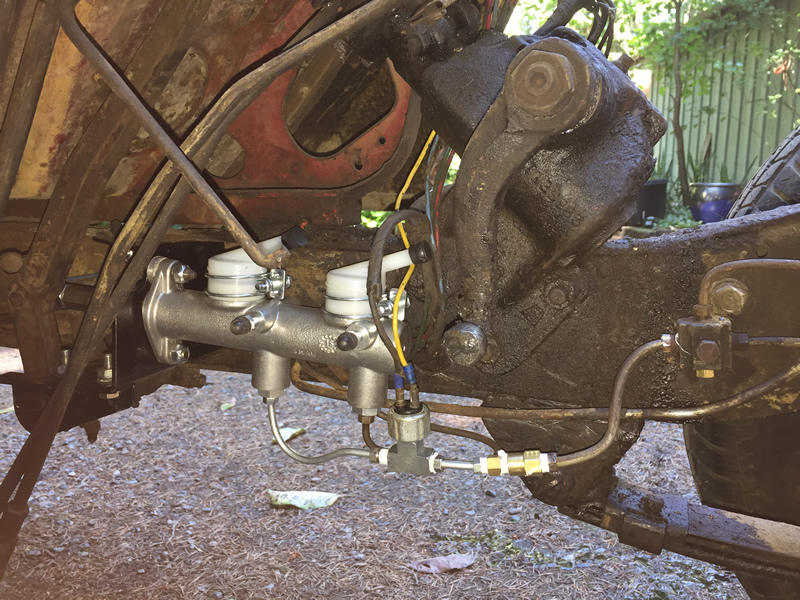
I also installed the dual master cylinder. The rear brake line connected perfectly. I just had to add one bend. The front brake lines were a big problem. You’d think trying to locate an 3/16-1/4 adapter would be easy, but it turned into multiple trips to the auto store, where I hunted for the right sizes with the right threads. The staffs at two different auto stores were not useful (nice, but not helpful). So, this will work for now, but I’d like to get the proper adapter and remove the connectors and line on the right side. 2017-06-24-master-cylinder-brake

Sunday morning we’ll 1) bleed the brakes and then, if all goes well with that, 2) replace the front springs and then 3) drop in the engine.


[fb_button]
 
To Top

DJ-3A Gas Pedal Linkage

• CATEGORIES: Builds, Features • TAGS: , This site contains affiliate links for which I may be compensated.

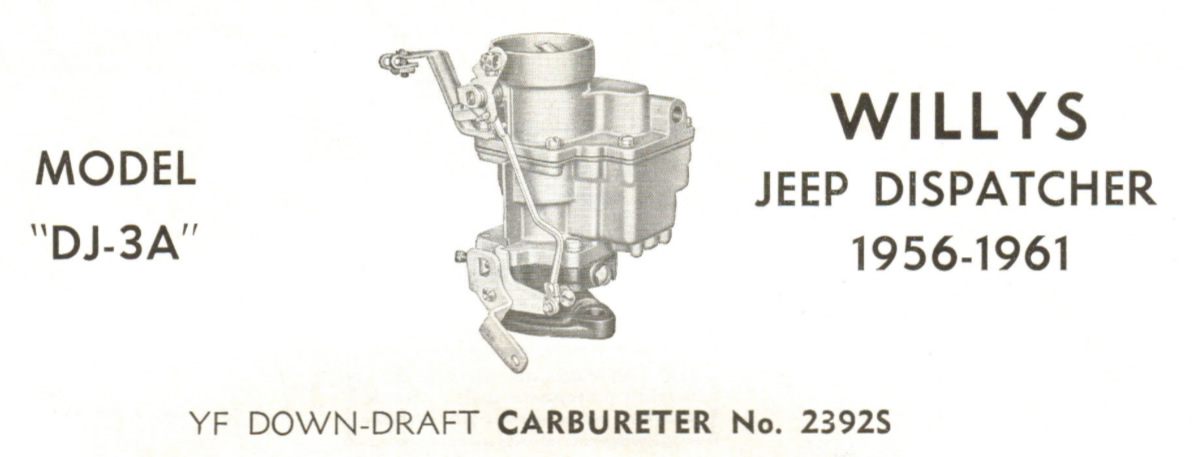
UPDATE: More DJ-3A carb info here:

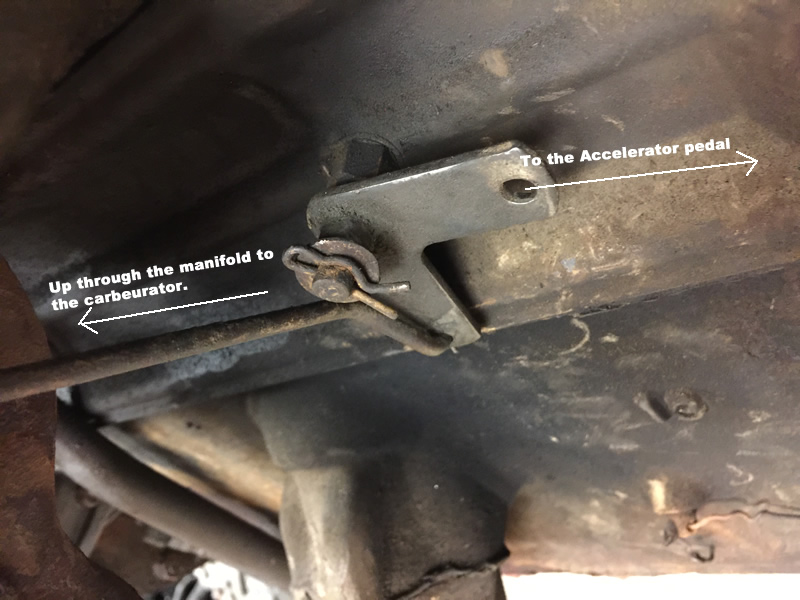
On Thursday evening I spent time moving parts from Patterson’s stock, but tired,  DJ-3A engine to Rusty’s rebuilt M-38 engine so I could install it in Patterson. One item that caught my attention was Patterson’s DJ gas pedal linkage versus Rusty’s. Patterson’s appeared stock, while Rusty’s had a modified pivot point, probably the result of using the M-38 block. I decided to keep Patterson’s as it was and recreate the part for Rusty’s engine.

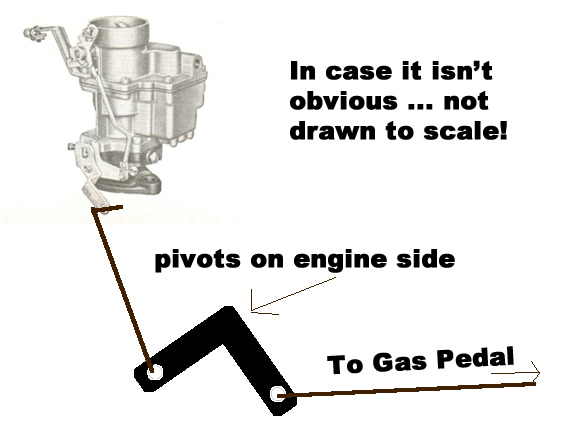
DJ-3A gas pedal Linkage: The linkage goes through the firewall to a pivot point on the driver’s side. When the gas pedal is depressed, a rod pushes an angle piece around a pivot, forcing a second rod upwards to a YF 2392S carb, causing the gas flow to increase.

yf-2392s-carb yf-2392s-carb2

Patterson’s real pivot piece (and it seems I misspelled carburetor in my pic).

gas-pedal-linkage

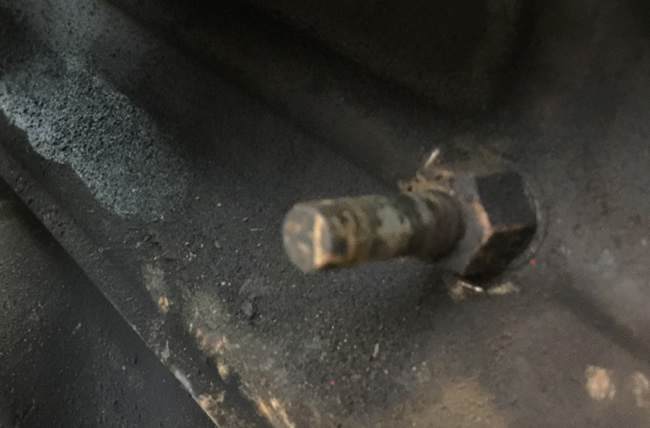
This shows the piece after removing the parts. The pivot bolt is solid on the end with a hole for a cotter pin.

gas-pedal-linkage5

Example of what I removed from Rusty (bottom) and the bolt I will use to make a new one (top with new threads extended up it so I can add a bolt). The biggest problem with the custom piece at bottom is that it had no cotter pin. It was only held on by a bolt, which could have easily have come unscrewed as the gas pedal pivot piece moved back and forth.
gas-pedal-linkage2 Continue reading
[fb_button]
 
To Top

Ark-Les Switch Repair

• CATEGORIES: Builds, Features • TAGS: This site contains affiliate links for which I may be compensated.

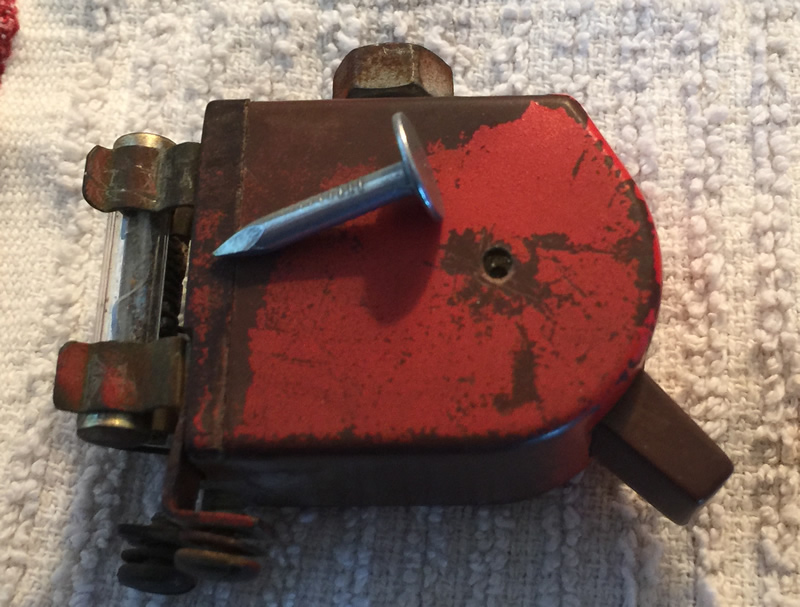
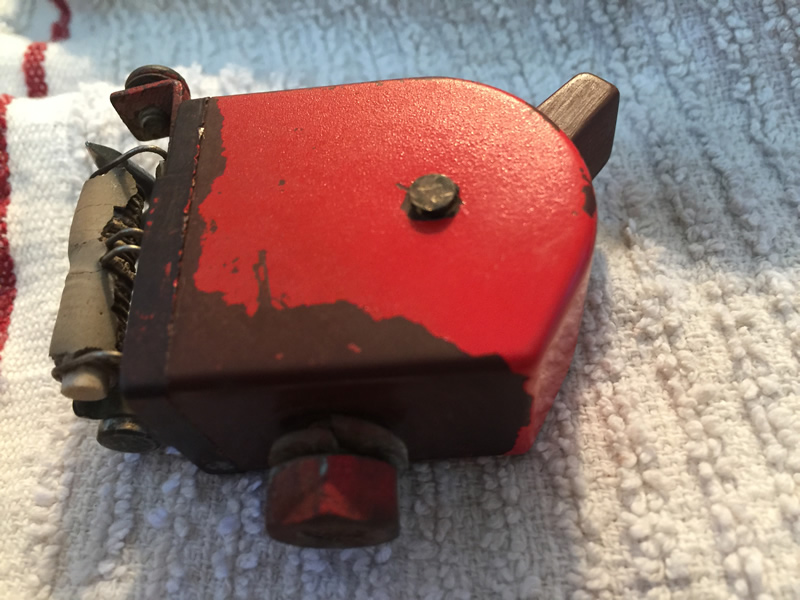
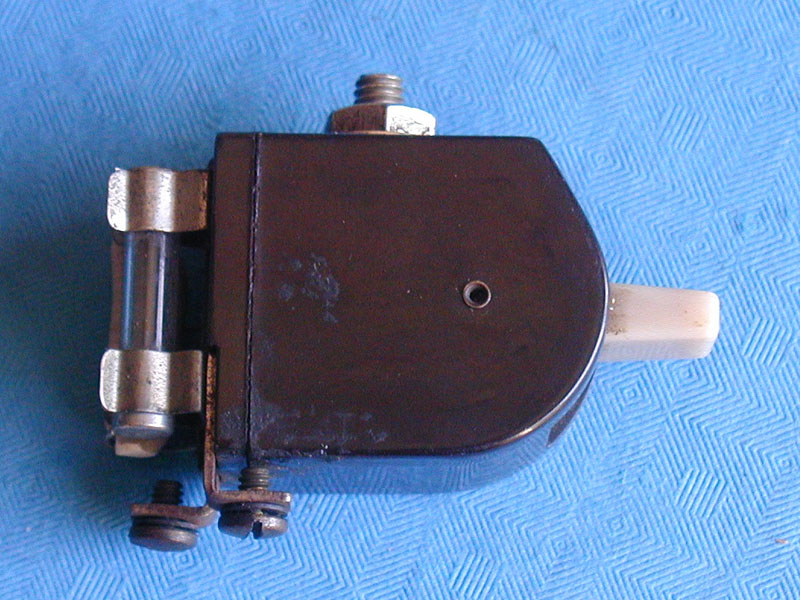
Patterson has a Harrison Heater, common in the early DJ-3As. Attached at the bottom of the dash is an Ark-Less four position switch (Off, Low, Medium, High) that controls the fan speed. The switch wasn’t delivering current, so I spent the day figuring out how to pull it apart and clean it up in the hopes that the switch could be resurrected.

The switch is held together by a long pin in the center. The switch also rotates on this pin. To remove the pin, the rounded edges on the pin must be drilled/pressed together/or someone modified. I chose to drill out the ends.

Here’s what it looks like to begin (not my switch .. I forgot to take this pic .. thanks to the cj-2a.com page)

OLYMPUS DIGITAL CAMERA

Note the small hole. That pin must be pushed out

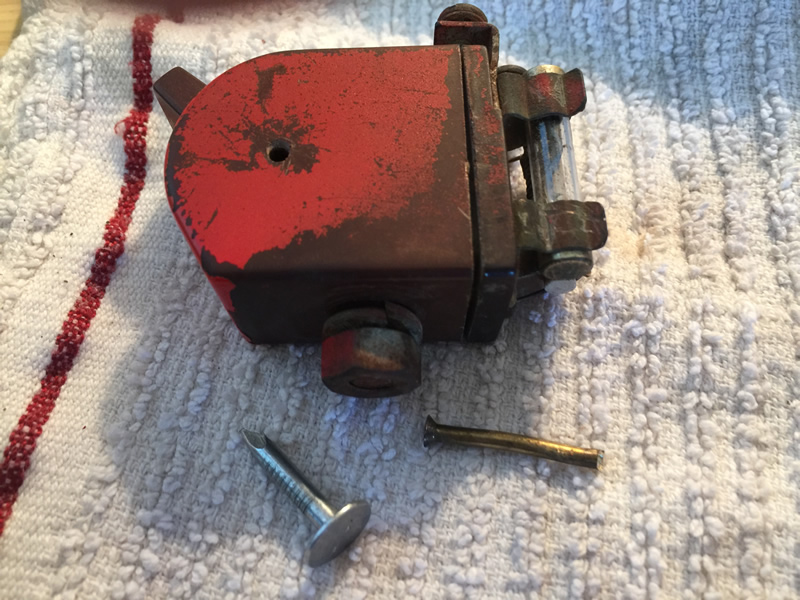
Now, here’s my switch. It received some paint when Patterson was repainted (I believe the paint was touched up some at some point). Once I drilled out the end of the pin a little, I used the nail to push the pin through.

arkless-harrison-heater-switch3

Here’s the other side of the pin. Now that it is sticking up, I can remove it.arkless-harrison-heater-switch4

Pin removed. I didn’t put much pressure on the pin when I first pushed it through, so I *think* the pin was already bent somehow.arkless-harrison-heater-switch5

Continue reading
[fb_button]
 
To Top

Patterson’s Vacuum Reservoir System

• CATEGORIES: Builds, Features • TAGS: This site contains affiliate links for which I may be compensated.

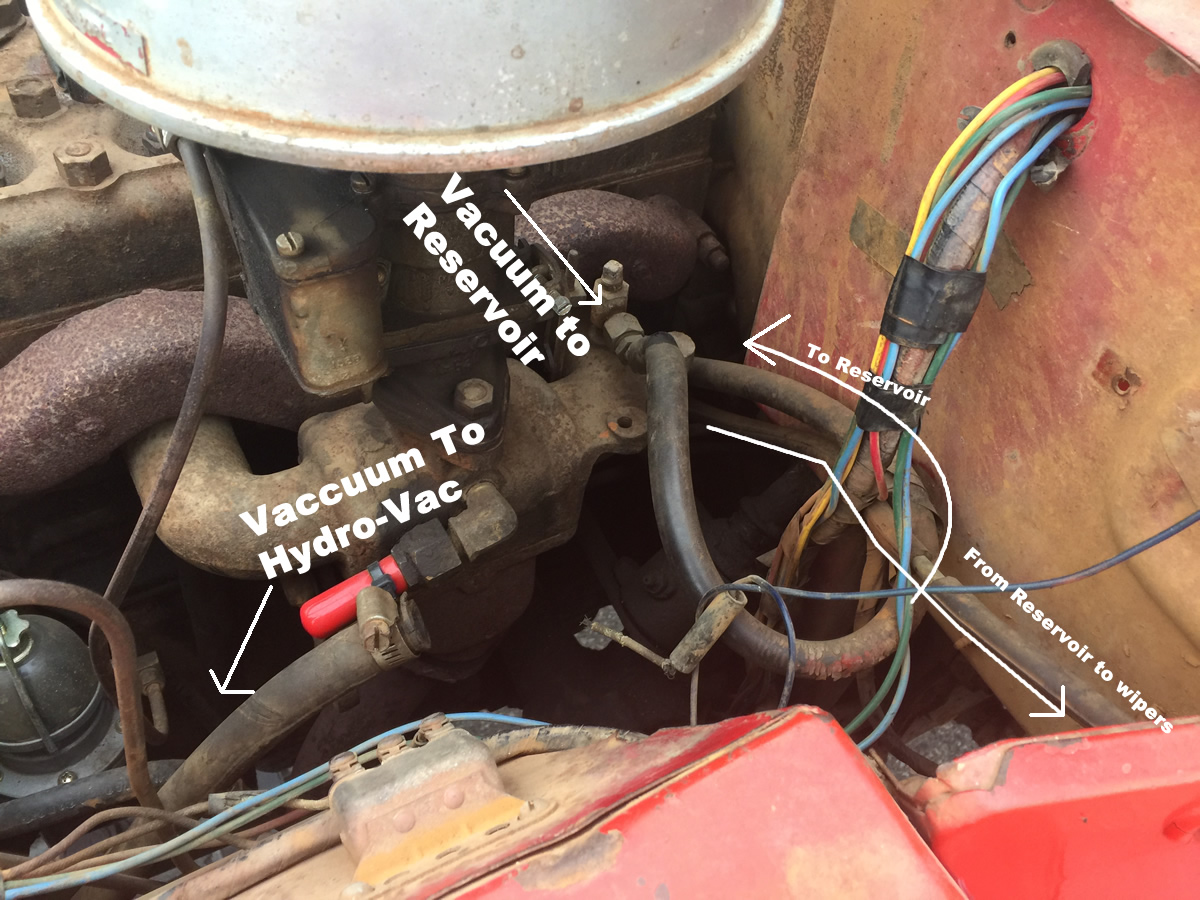
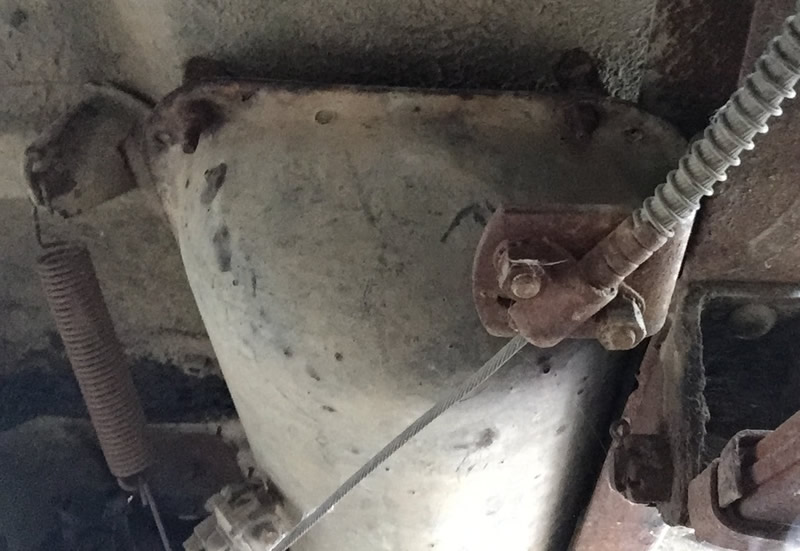
In case anyone’s curious, this is how Patterson’s vacuum reservoir is setup. Based on what I’ve read, a reservoir was important if running dual wipers. The vacuum begins at the manifold, then winds down under the body.

2017-05-16-engine-vacuum

It winds up underneath to a reservoir tucked in between the frame and the spring for the parking brake.

2017-05-16-vacuum-reservoir2

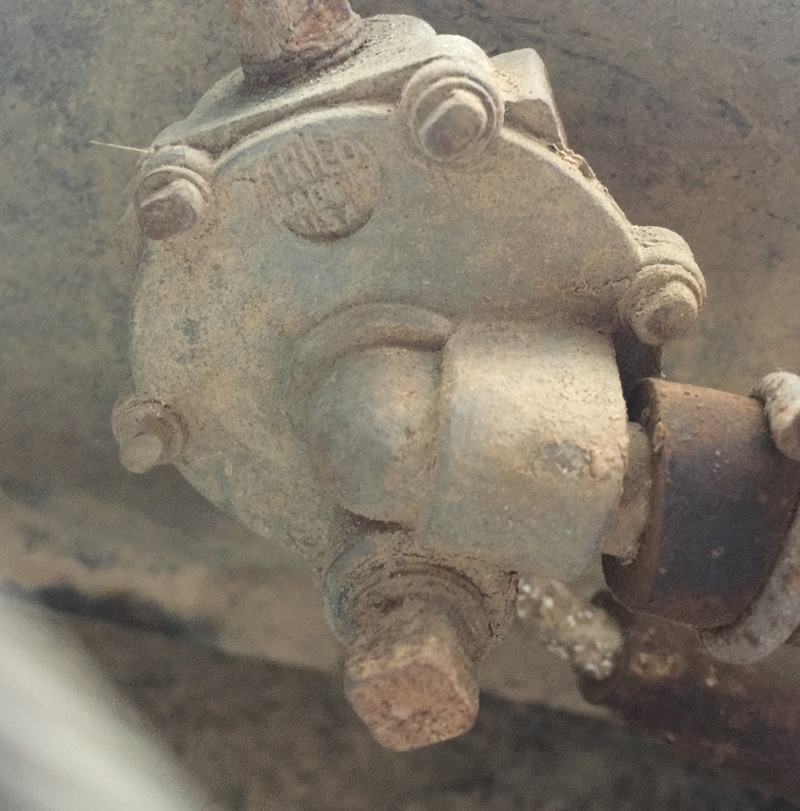
This is a close up look at the TRICO valve on the reservoir.

2017-05-16-vacuum-reservoir1

This is a not so perfect illustration of how it mounts. Because of the support channels on the floor of the body, the reservoir had to be shimmed down about an inch. The solution was a set of three nuts between the body and the reservoir. Continue reading
[fb_button]
 
To Top

Patterson Losing Its Head
• CATEGORIES: Builds, Features • TAGS: This site contains affiliate links for which I may be compensated.

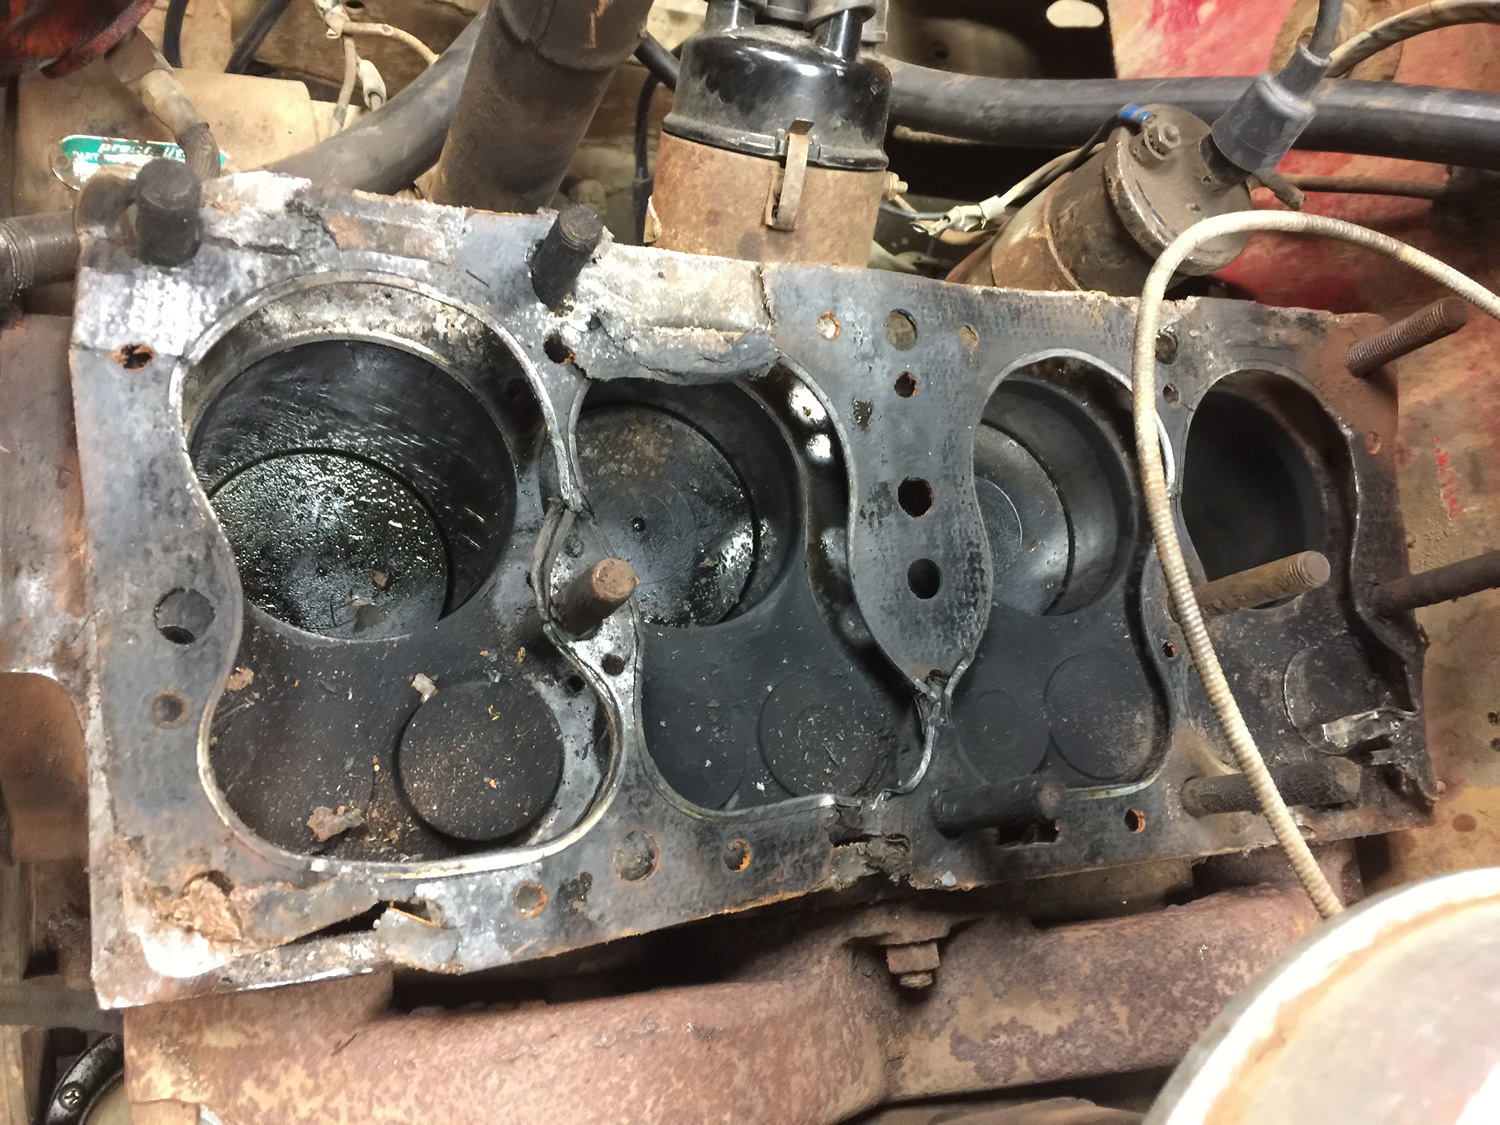
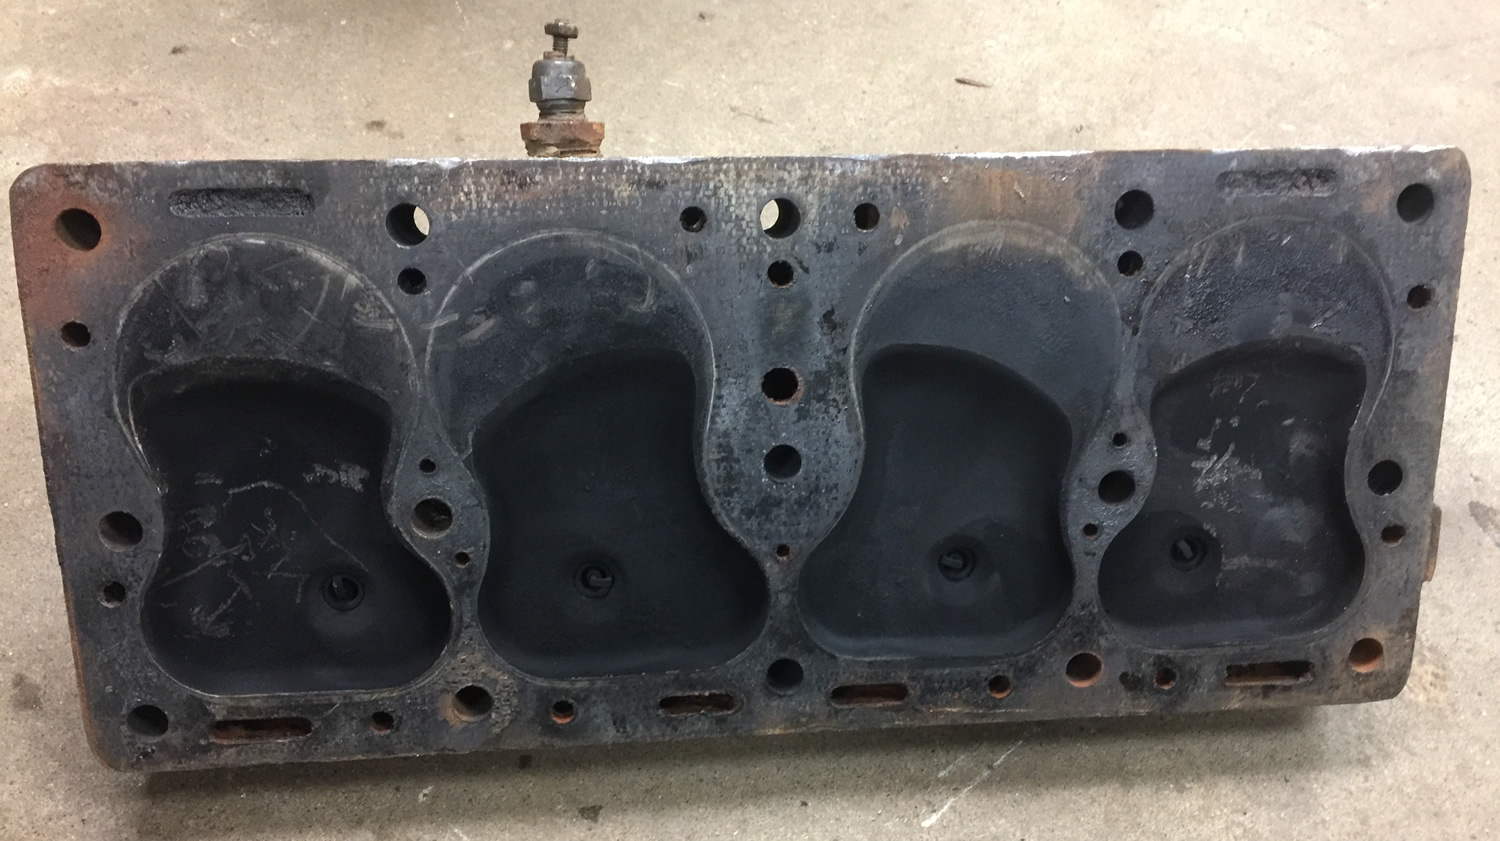
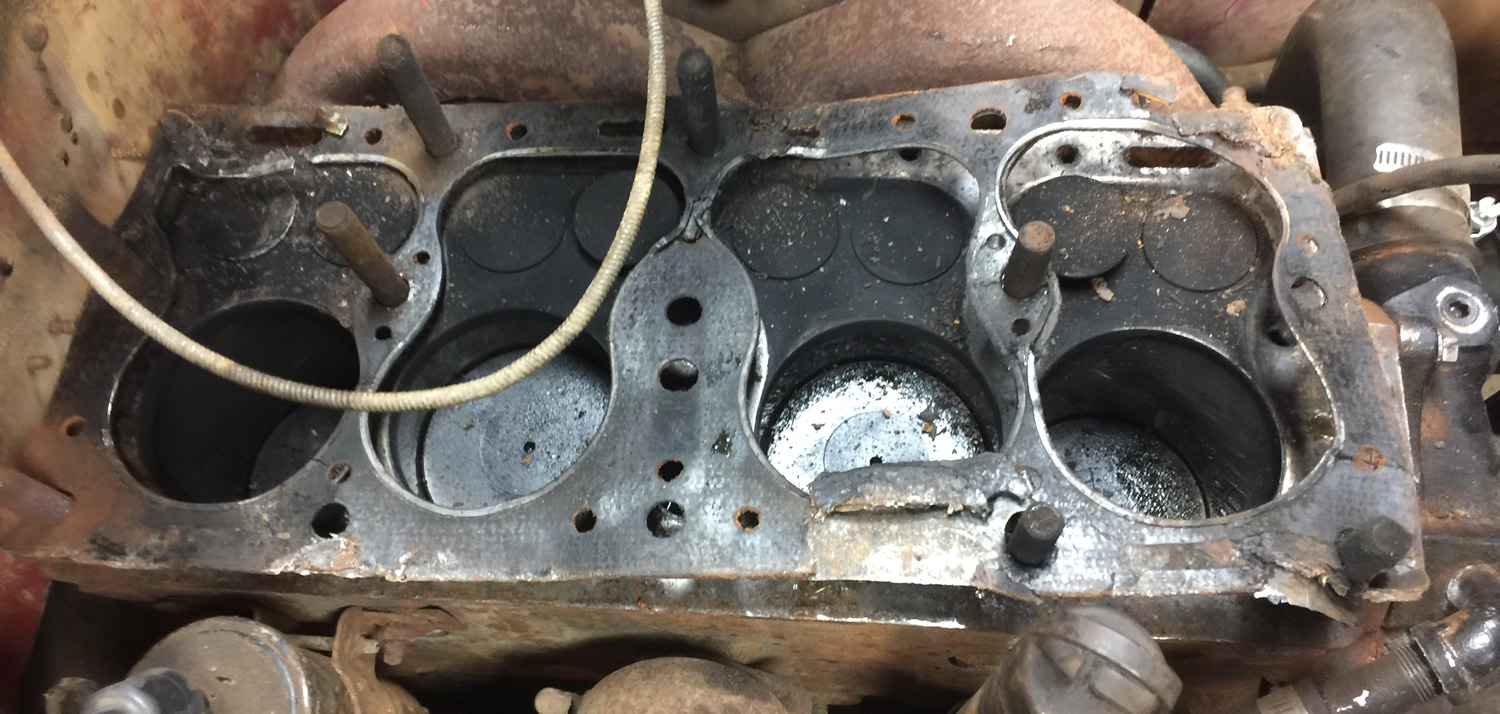
I pulled the head on Patterson last night. I don’t see any cracks in the block nor do I see any obvious signs of coolant, though there might be a tiny bit of residue on the tops of pistons 1 and 2. My initial reaction is that coolant is entering the oil elsewhere. The engine does appear to have a recently replaced water pump. Anyway installing that incorrectly would result in mixing coolant and oil??
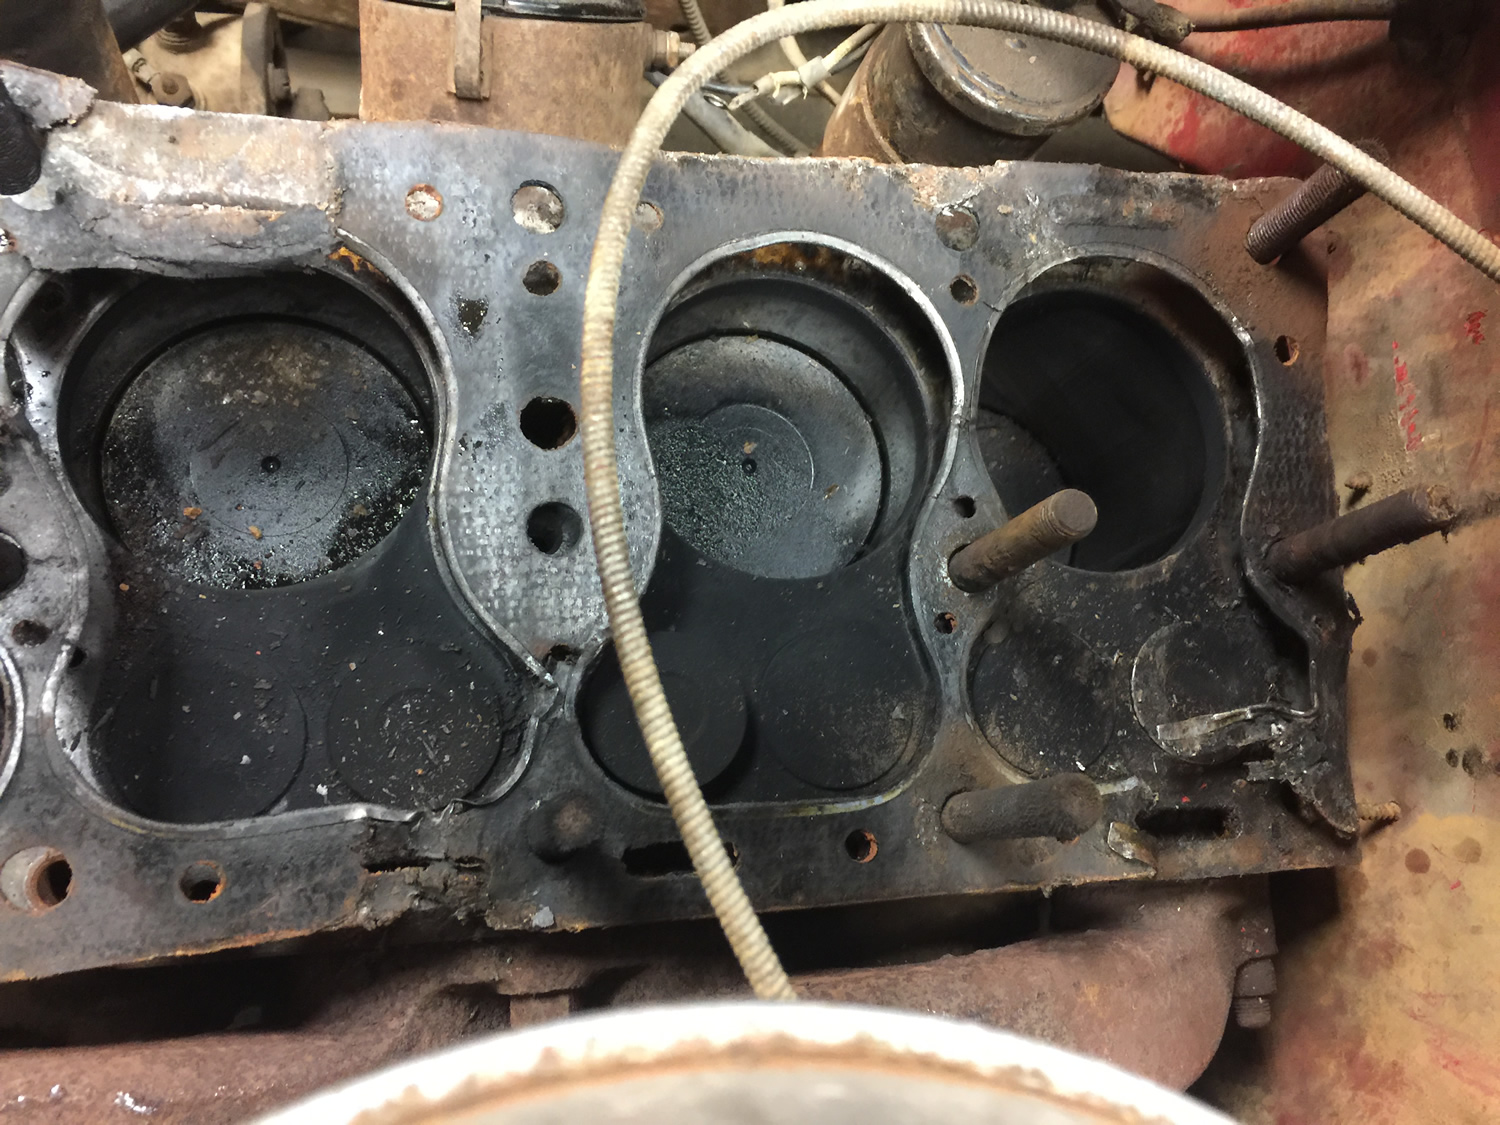
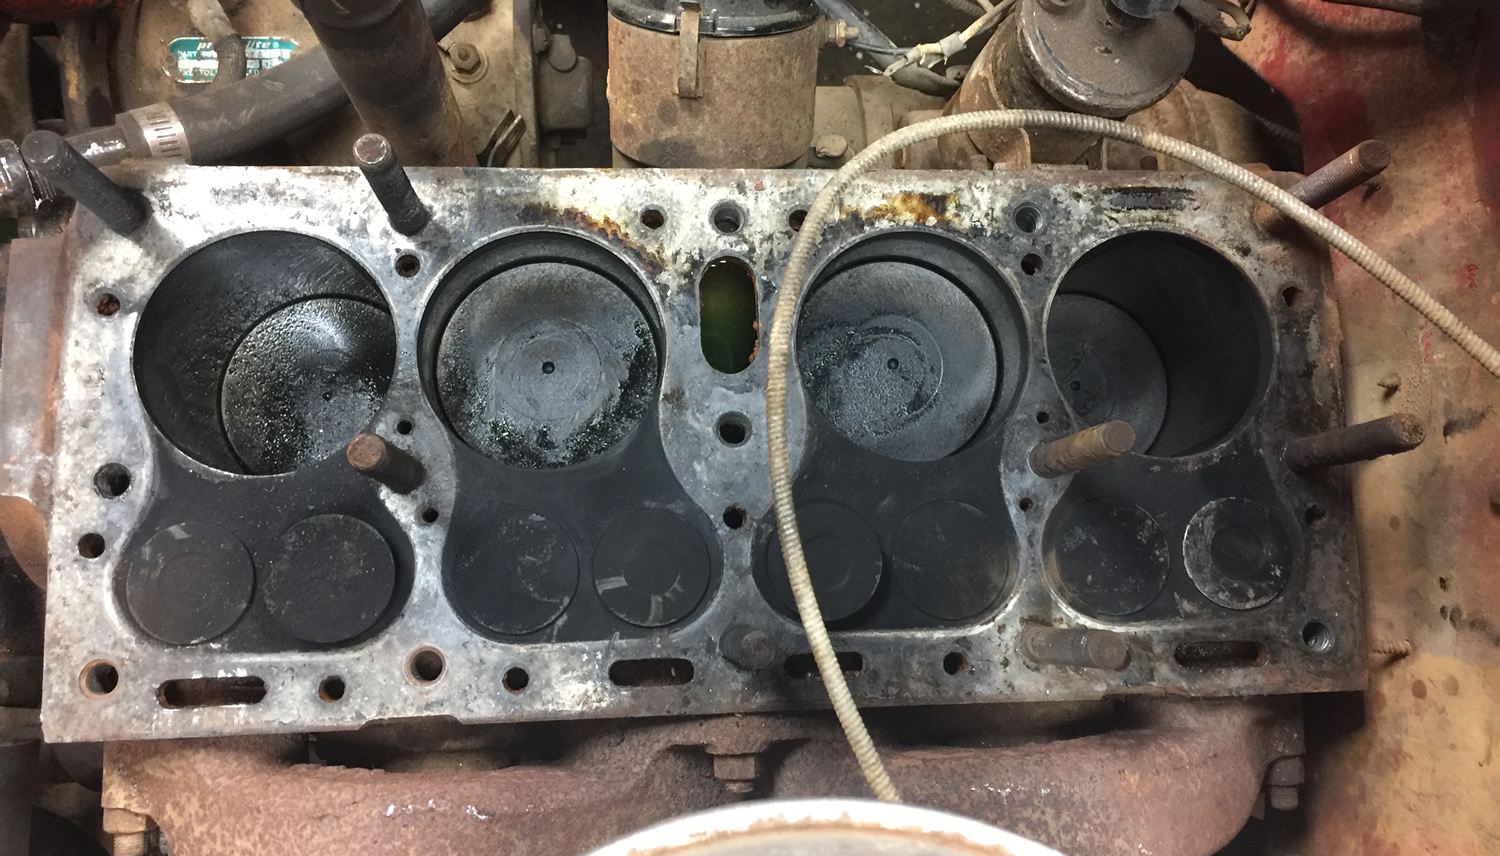
The first two photos show how the pistons and head gasket looked right after pulling it. 
2017-05-23-head-gasket1 2017-05-23-head-gasket2

2017-05-23-head-gasket7

Then after pulling off the gasket and vacuuming up the dirt:
2017-05-23-head-gasket4

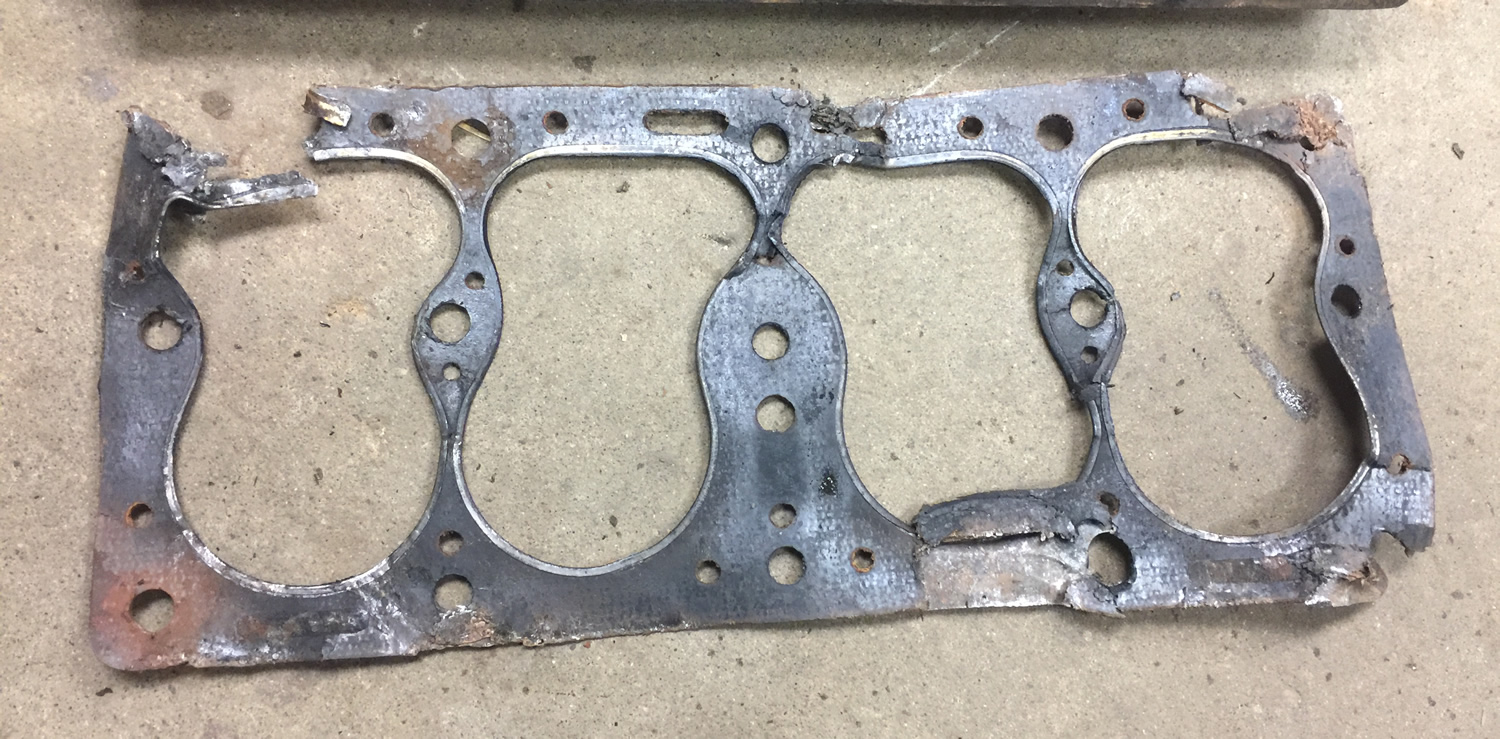
The head gasket:2017-05-23-head-gasket5

The bottom of the head:

2017-05-23-head-gasket6

[fb_button]
 
To Top

What the Bell Crank?

• CATEGORIES: Builds, Features • TAGS: This site contains affiliate links for which I may be compensated.

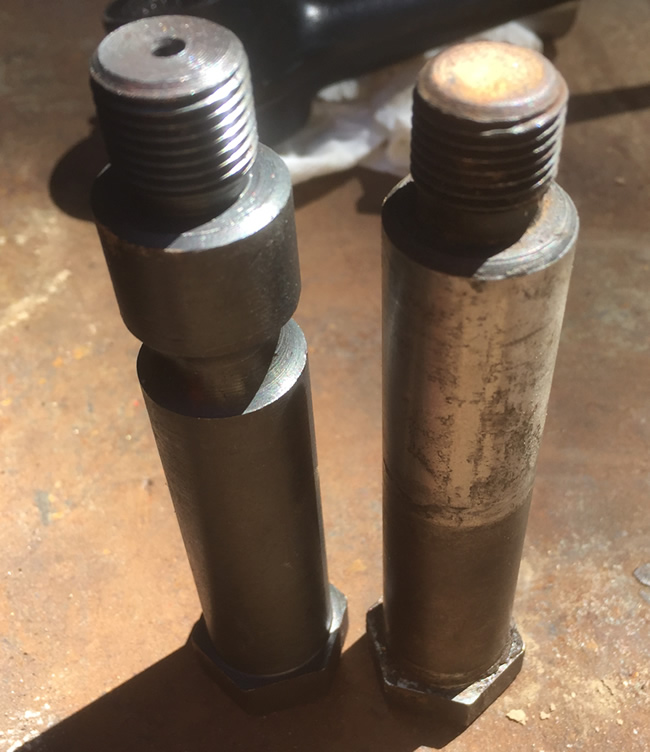
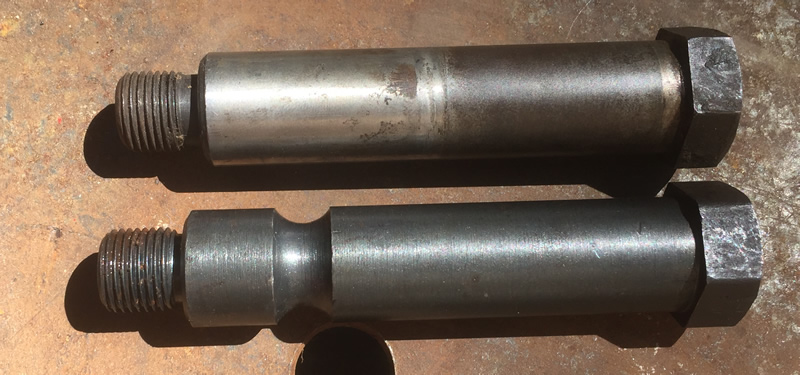
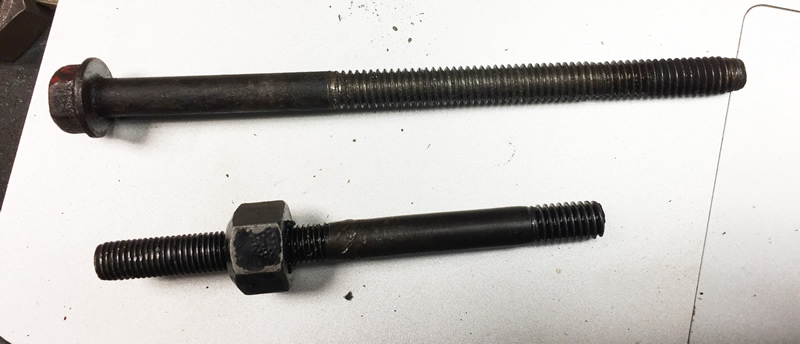
I made an puzzling discovery about bell cranks the other day. I ordered a rebuild kit for Rusty’s bell crank. When I began assembling it, I discovered the original and new bolts were different. So, I had to use my old bolt (which fortunately was in good shape). Going back online, all the bell crank rebuild kits show the left hand bolt below (anyone need a new bolt .. I don’t). Do any other jeeps use the shorter bolt in their bell cranks?

Both of the DJ-3As have the same setup. The bolts they use lack an indent (used to secure the bolt to the bell crank mount). They are slightly shorter and 1/16th larger in diameter than the replacement crank. The DJ bolt lacks the hole at the end.
2017-05-22-bell-crank-bolts2 2017-05-22-bell-crank-bolts1

Here it is reassembled. The horizontal bolt clamps the unit together, but does not anchor the bolt.

2017-05-22-bell-crank-bolts3


[fb_button]