Builds Research Archives

To Top

Paul’s Trailer Update

• CATEGORIES: Builds, Features • TAGS: This site contains affiliate links for which I may be compensated.

Paul’s continuing to make progress on his trailer.

I can’t remember if I explained about the lunette thread damage and what it took to get it repaired so here’s the brief story. Before I began disassembly of my M100 trailer I liberally sprayed all the fasteners with penetrating oil numerous times in hopes of easing the removal process. Most of the nuts and bolts unscrewed with normal effort (including the castle nut on the lunette) but I was disappointed to see some of the threads on the lunette were damaged by the nut when things came apart.

Once the lunette was cleaned and bead blasted I took it to a local machine shop to see what could be done to repair or replace the damaged threads. Because I didn’t know if the lunette was cast or forged the machinist said welding was out of the question and suggested I just buy a replacement lunette. I returned home and made numerous phone calls to military parts sellers, Jeep parts sellers and anyone else I thought might possibly have an M100 lunette for sale. Not only did I come up with a big fat nothing for a replacement lunette I also learned these things are harder to find than unicorns. I made a trip back to the machine shop and had another conversation with the talented folks about the lack of replacement lunettes before we brainstormed about the possibility of thread repairs.

After I answered all their questions about the M100 trailer weight, load capacity and the type of use it will be subjected to a solution was suggested. The plan was to carefully remove the damaged threads and then cut new threads on the slightly smaller diameter of the lunette. The thread pitch would be an uncommon type so they would have to make a castle nut of the correct diameter with matching threads but very little strength would be lost with this repair. I wanted one change made with their repair plan, instead of making one castle nut I wanted them to make four nuts. That way if I ever lost or damaged a special nut I’d have spare nuts on hand.

The attached photo shows the thread damage on the lunette, the focus is poor but the missing threads are still visible.
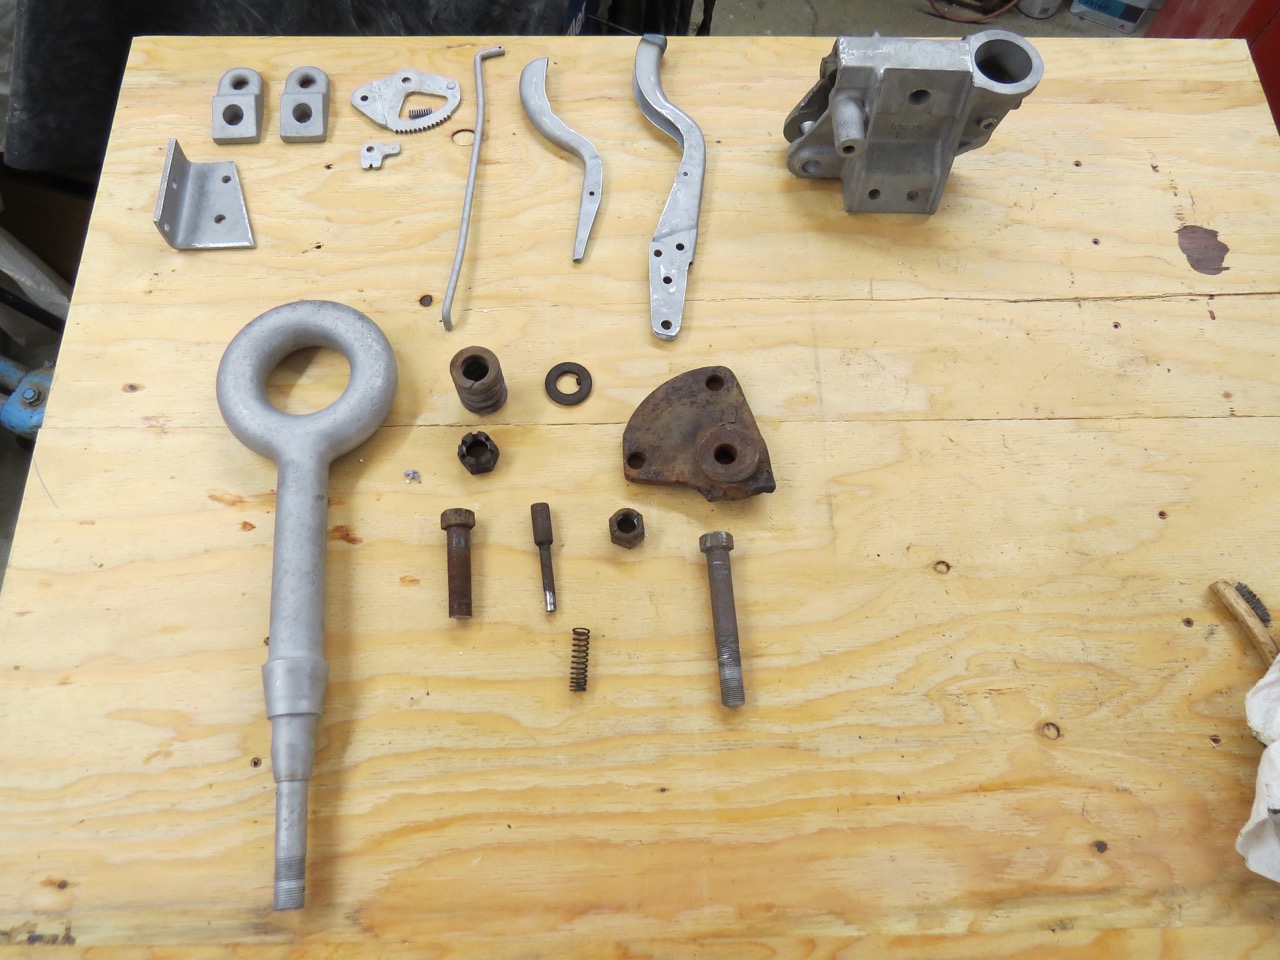
paul-lunette-repair

Continue reading

[fb_button]
 
To Top

David Tracy’s 1948 Project is Ruining Him

• CATEGORIES: Builds, Features This site contains affiliate links for which I may be compensated.

How many of us bought that first project flat fender knowing it would be an easy restoration. After all, they are such simple vehicles, right? Well, David Tracy got an introduction into the hazards of purchasing a “fixer-upper”. He documents some of his trials and tribulations on Jalopnick. It’s a reminder that when picking your first jeep, choose wisely!

http://thegarage.jalopnik.com/my-1948-jeep-off-road-project-is-ruining-me-1792102804

cj2a-projet-jalopnik

[fb_button]
 
To Top

Maury’s Foot Pedal Cure For His CJ-5

• CATEGORIES: Builds, Features This site contains affiliate links for which I may be compensated.

Maury shared this cure for his foot pedal:

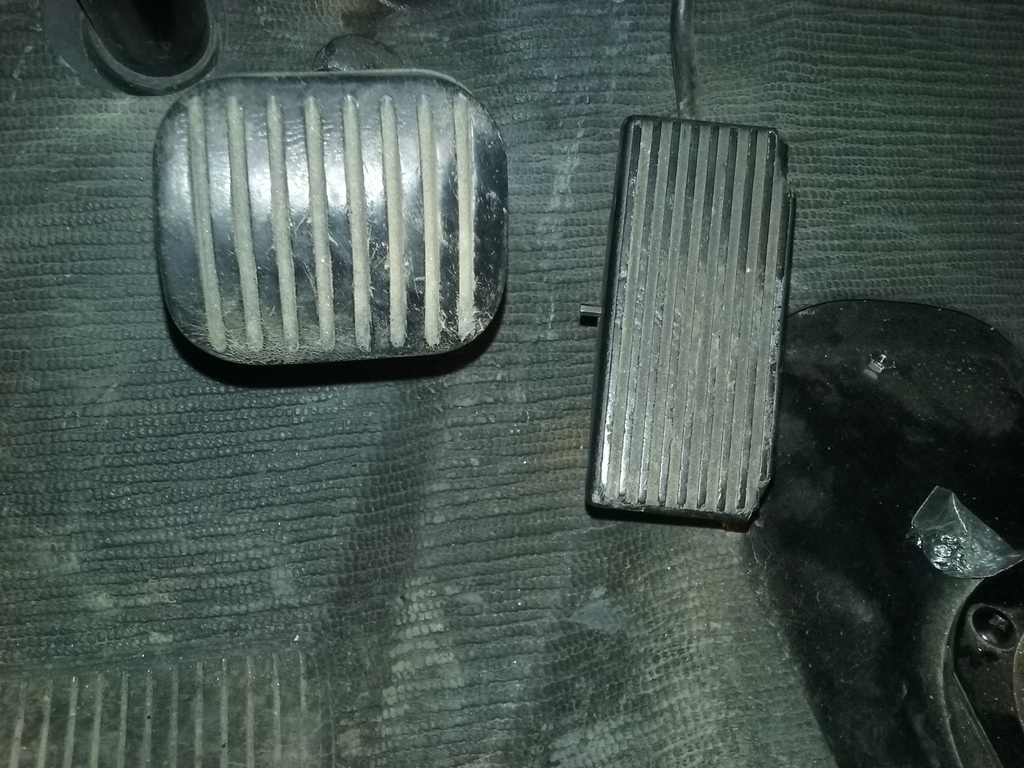
Like some others who have mid-60’s V6 CJs with the hanging (suspended) type accelerator pedal, I’ve found my ’67 CJ5 to be somewhat uncomfortable to drive over long, and even not-so-long distances due to the awkward placement and size of the original stock gas pedal. It’s no problem for me to reach the gas pedal with the front part of my foot when my heel is on the floor, as I wear a size 13 shoe. Even so, I’ve found that the muscles in the front of my shin frequently begin to ache from having to constantly hold my foot up at the angle necessary to depress the gas pedal.

Read more and see all the photos here: http://forums.4wdmechanix.com/topic/956-substitute-for-oem-hanging-gas-pedal-in-1967-v6-cj/

maury-floor-pedal

[fb_button]
 
To Top

Paul’s Putting on Powder

• CATEGORIES: Builds, Features • TAGS: This site contains affiliate links for which I may be compensated.

Take it away Paul ….

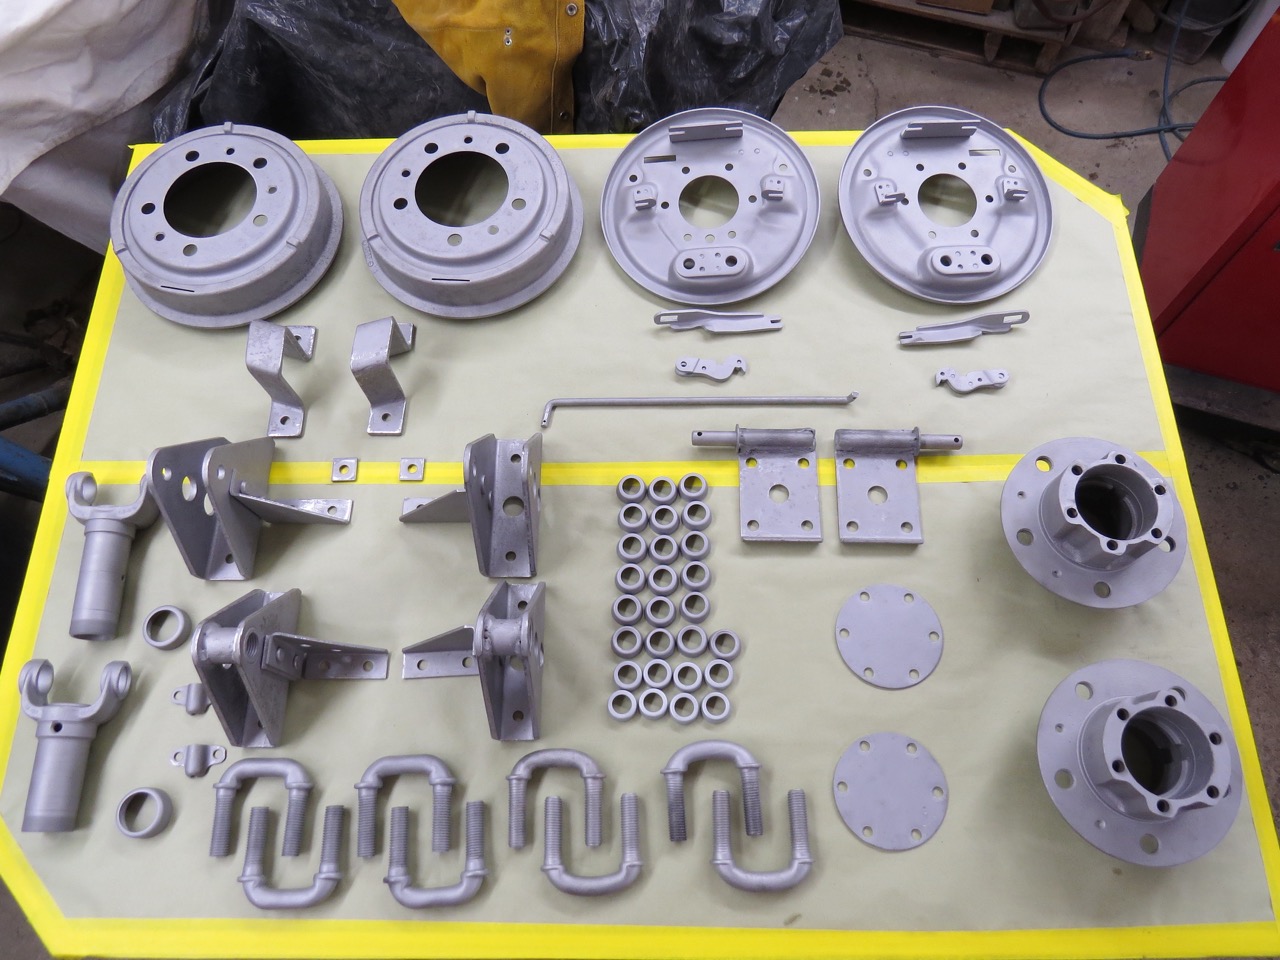
For the past couple of weeks I’ve been disassembling, cleaning, bead blasting and repairing parts for the little Willys and the M100 trailer so they would be ready to be powder coated.  I still need to install new wheel studs in the hub flanges along with pressing in the new bearing races but that task should be finished tomorrow.  The driveshafts need one to be shortened and one to be lengthened before they’ll go to the powder coater but progress is being made.

paul-powder-coating7

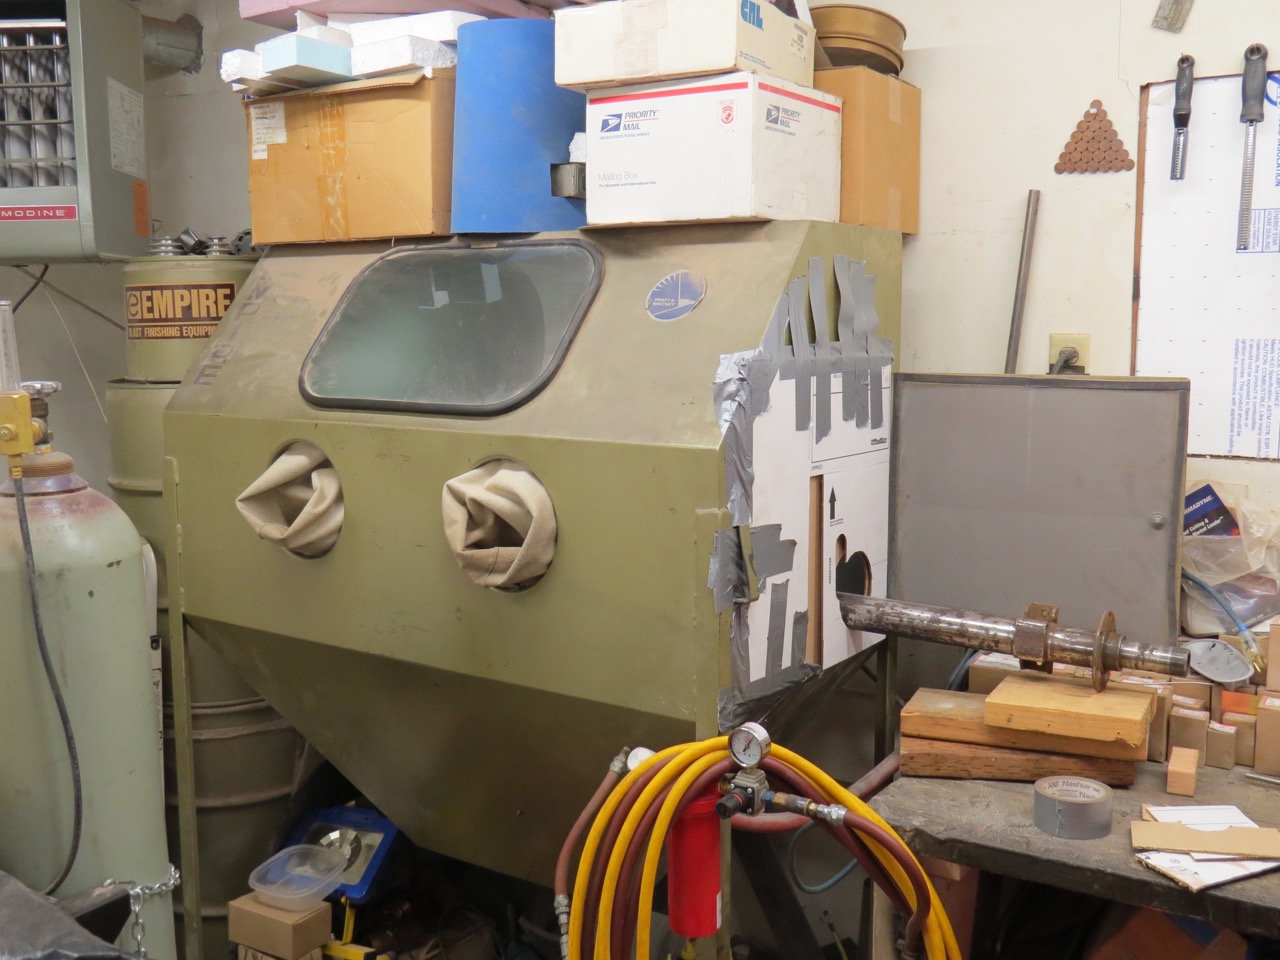
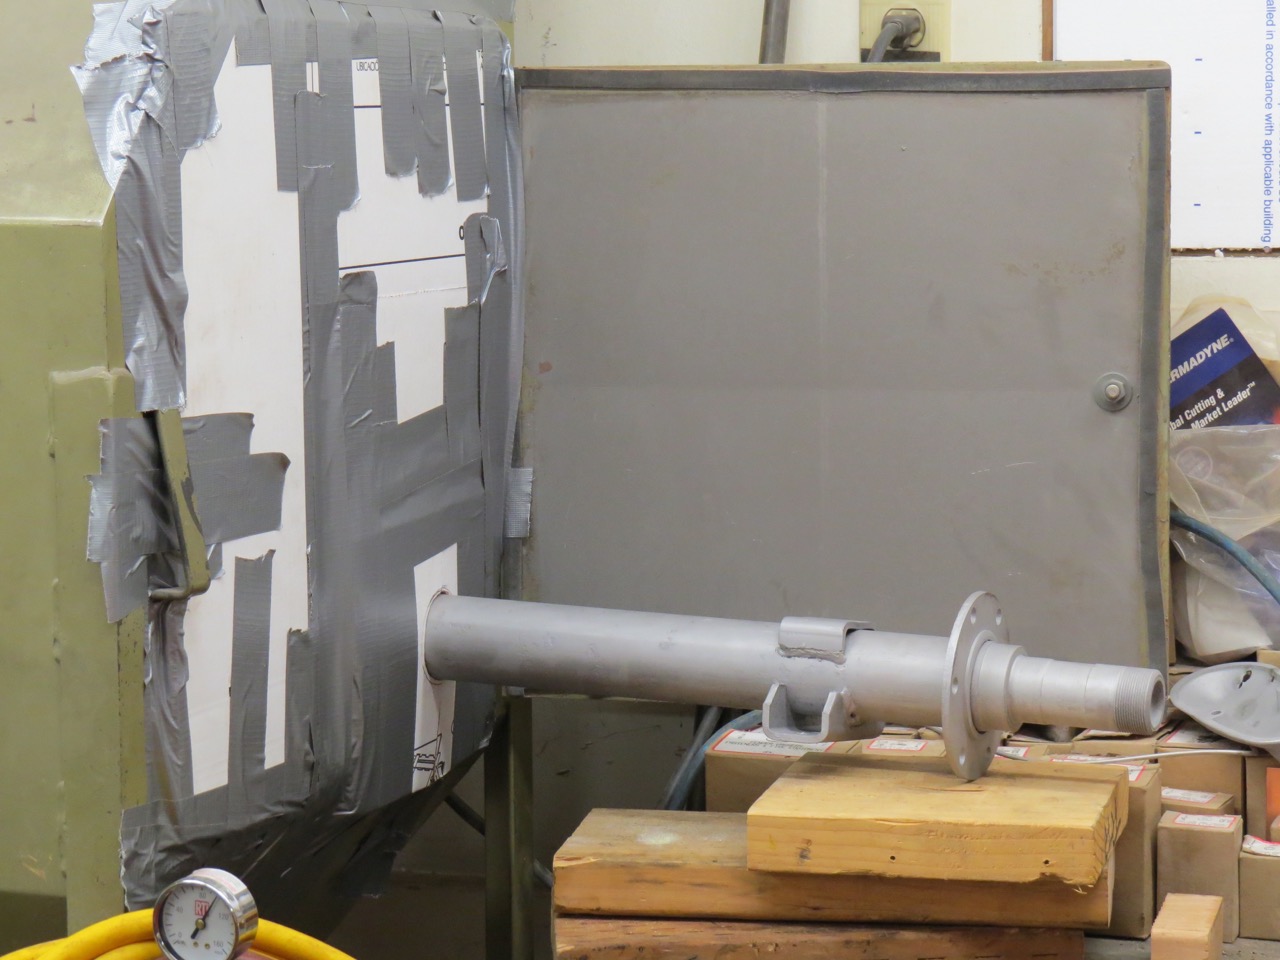
The blast cabinet is 48 inches wide overall and the axle is slightly over 53 inches long so I had a bit of a problem fitting the axle in the blaster and still having room to clean the rusty steel.  My solution was to leave the side door open and block the opening with multiple layers of cardboard (taped to the cabinet)  with a hole cut slightly larger in diameter than the brake backing plate mount on the axle to allow movement of the axle during blasting.  

Before I began blasting I added two more pieces of cardboard (cut to fit snug around the axle tube) to cover the larger hole in the cardboard end cover.  With this cardboard and duct tape combination I was able to carefully blast two thirds of the axle without filling the air with glass bead dust.  Once the axle section in the cabinet was clean I removed the axle, turned it end for end and inserted the rusty end into the cabinet to finish cleaning the metal.  This photo shows the low tech cardboard and cheap duct tape alteration of the blast cabinet so the axle blasting could begin.

paul-powder-coating6

The air compressor was blowing lots of air but the glass beads still had to work pretty hard to clean all of the rust off this 65 year old axle.  The metal is lightly pitted (especially on the forward side) but I don’t feel the original strength of the axle has been weakened in any way.  I checked the axle and the spindles with a straight edge and a level every 90 degrees of rotation to see if it was bent but the axle tube and the spindles are straight.

paul-powder-coating5

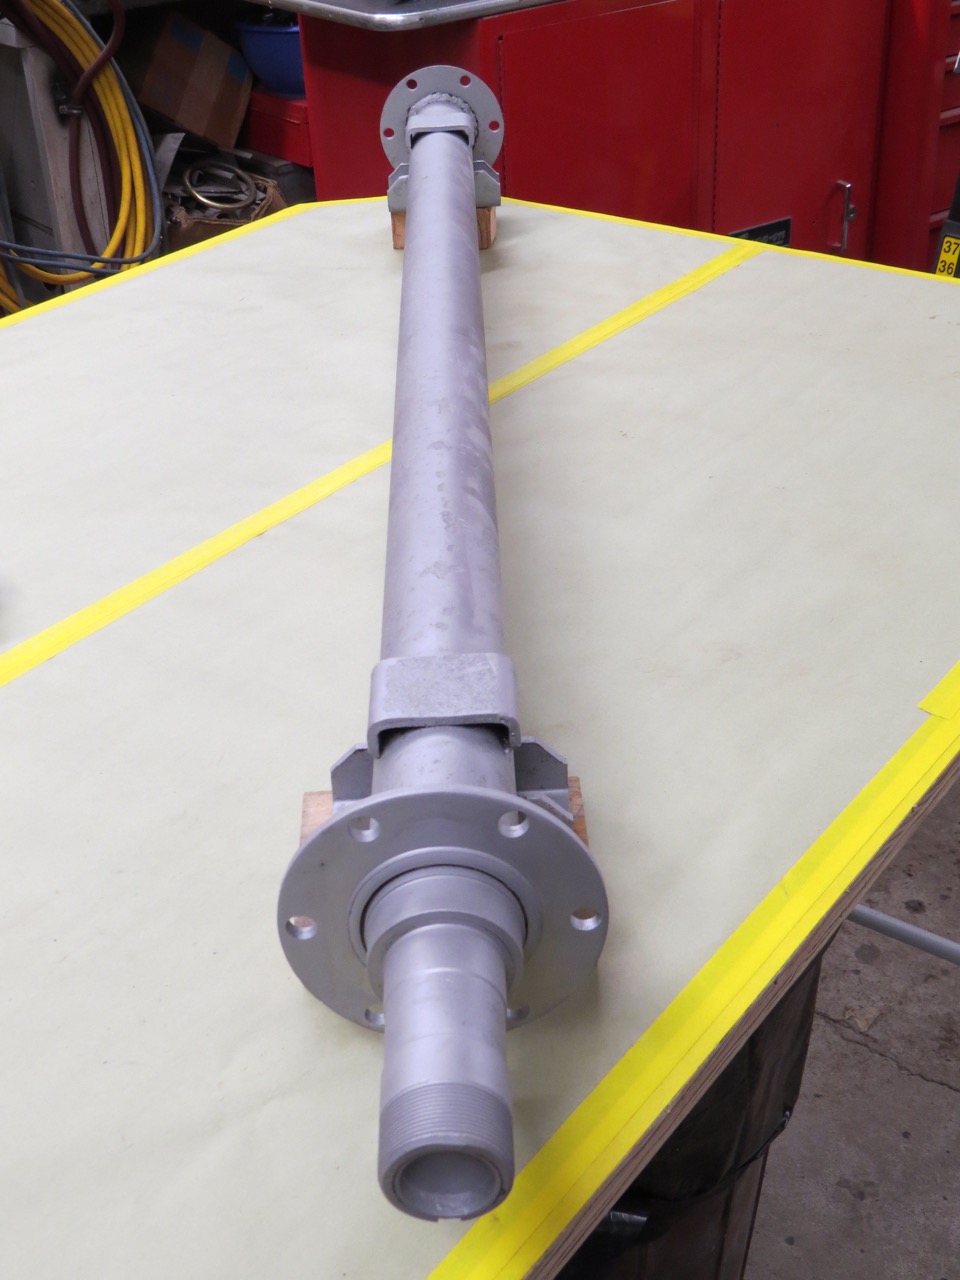
Here’s the axle just out of the blast cabinet ready to visit the powder coaters where it will receive a nice satin black coating.

paul-powder-coating4

Continue reading

[fb_button]
 
To Top

Jason’s Dually Truck Project

• CATEGORIES: Builds, Features, Willys Trucks This site contains affiliate links for which I may be compensated.

Jason Potts, out of Burnettsville, Indiana, shared a couple photos of his Willys Dually project, so I asked him where he found his adapters and how he got into jeeps.

14241468_10100479635074969_9222073552002417203_o

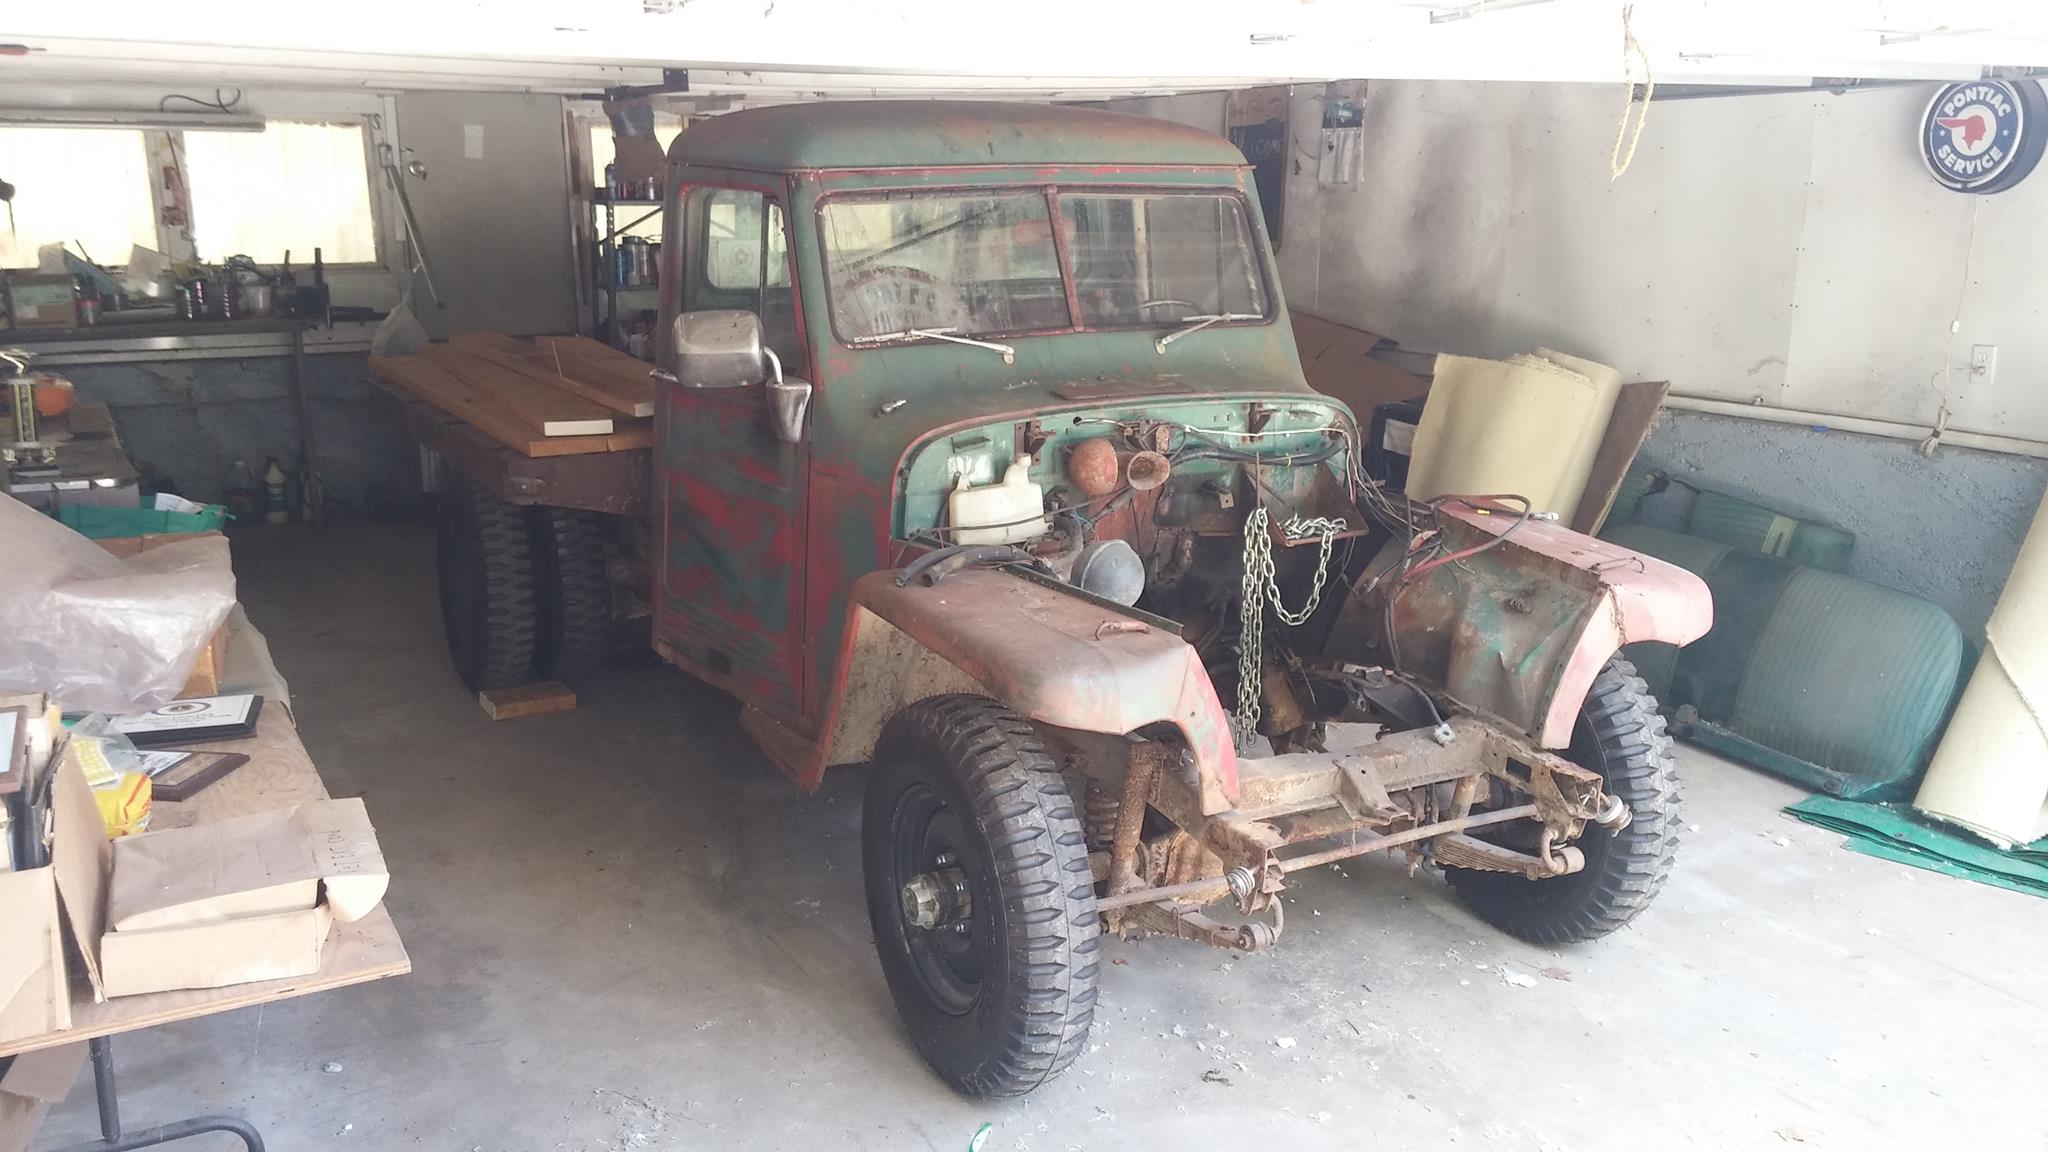
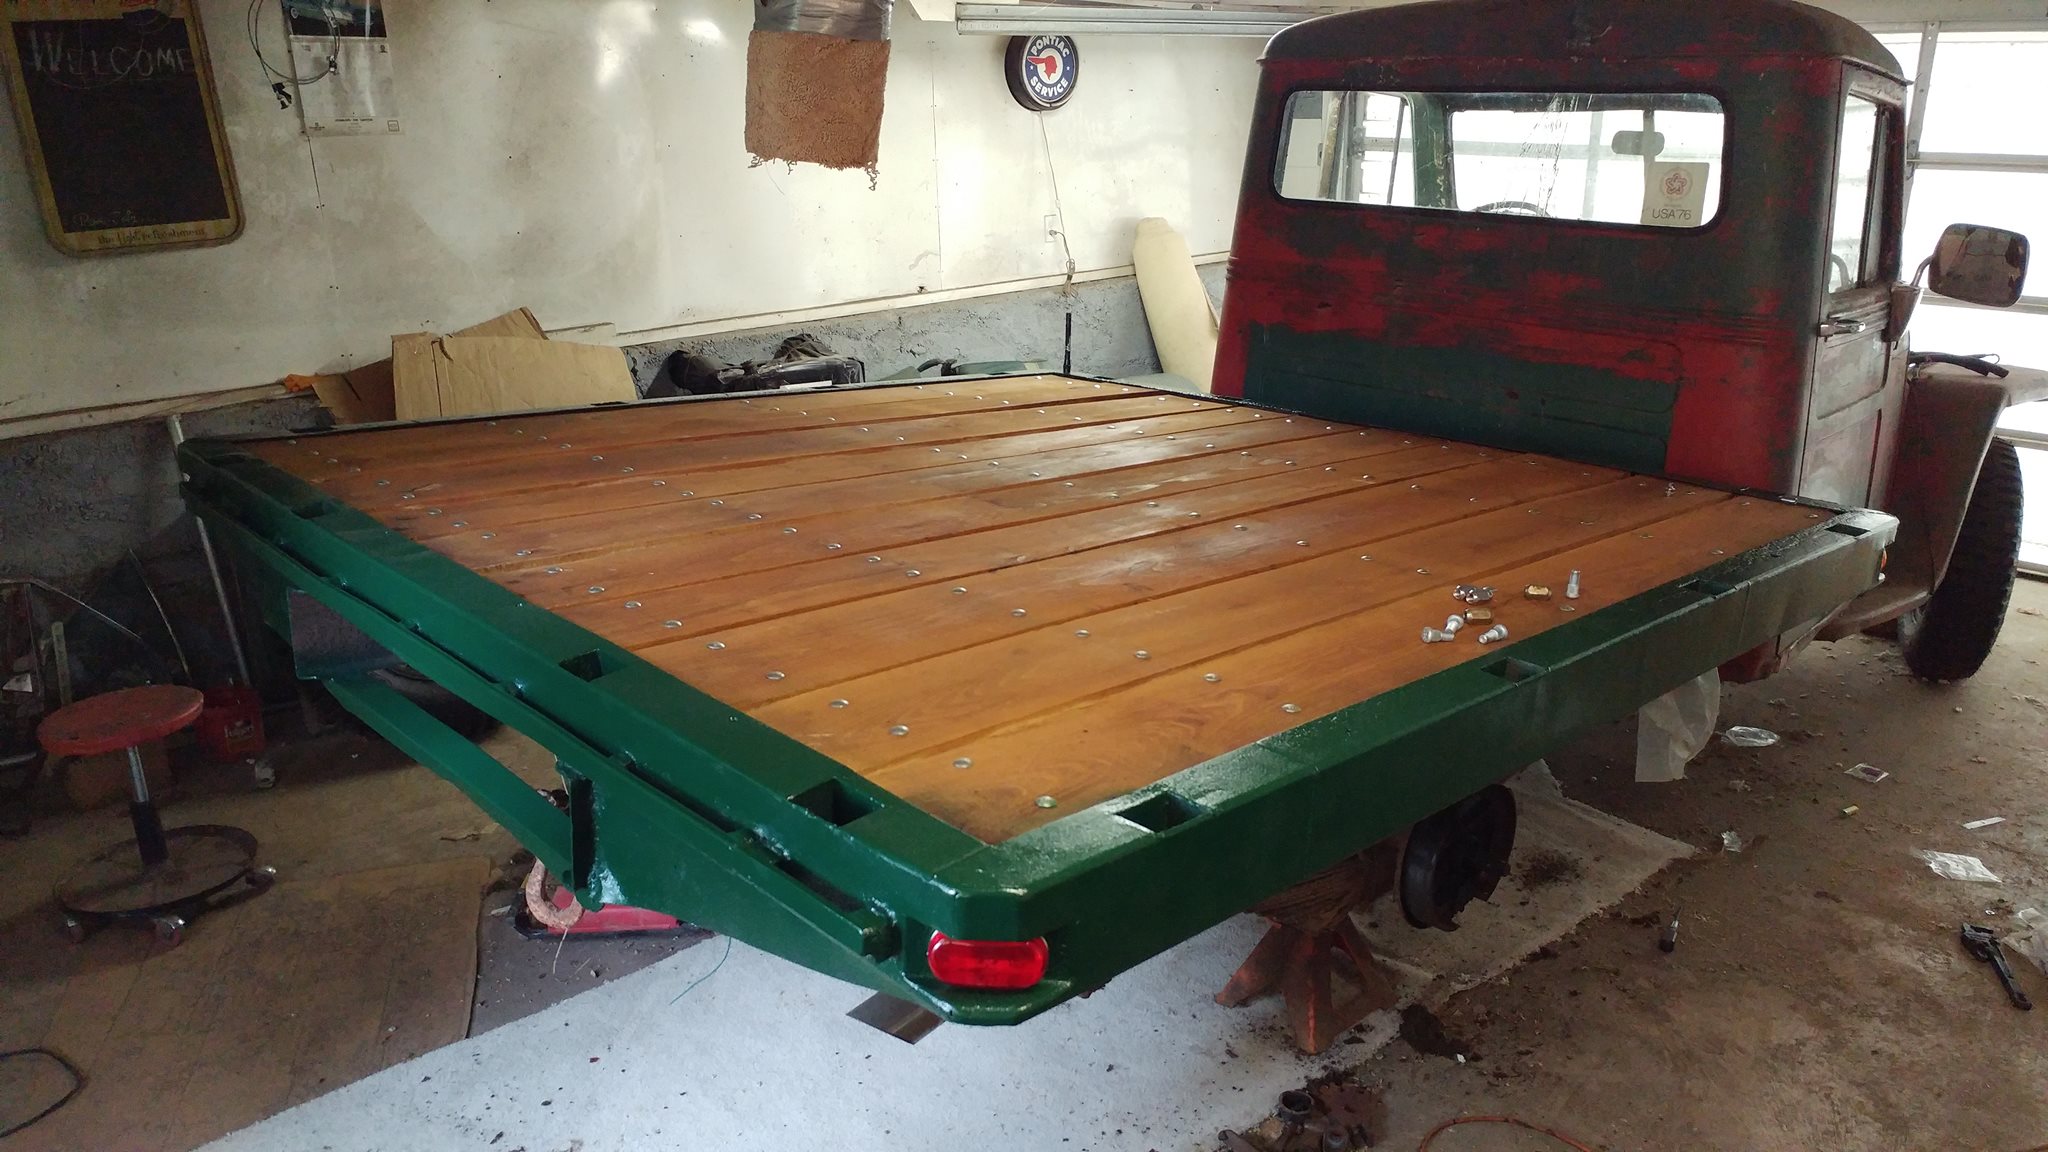
Of the truck adapters he wrote, “The adapters came from Hank himself. With the original bed rusting out on me, I bought the flatbed knowing someday the original would go bad. I had a local welder cut the length of the bed down 22 inches. The black locust was cut out of my family’s woods and milled at a relatives mill. I live in an apartment and the truck is currently stored in an enclosed metal barn and will see a garage again in the spring to continue work. The motor is a 232 out of a 70’s CJ and is being rebuilt.”

15196027_10100531861048699_2781110104452442629_o

Then he shared his jeep history. “Originally my dad bought a 63 Cj5 at an implement auction and we used it to get around on county roads for fishing, hunting, and for other adventures. I was in my early teens at the time. In the early spring of 2004 (Junior in high school) a culvert washed out down the road from our house forcing myself and my dad to find alternate ways to work and school. His route took him past a place that had the 54 Willys and knowing I wanted a truck he told me about it. I bought the truck for $1500 and had to buy an electrical kit for it as its wires were all the same color and no lights worked. After about 2 months it became road legal and I started driving it to school.

Senior year of high school I was still driving it. Ever since owning it, the truck always smoked and was burning through oil at such a fast rate I eventually had to put the hottest burning spark plugs and plug extensions on just to keep up, in the end I resorted to using used tractor oil. The truck got 27 miles to the quart of oil. For a long distance football game I burned through 9 quarts of oil and $27 in gas.

Through the years since I have owned/or still own a 92 Jeep Cherokee, 66 Cj5, 75 Cj5, and a 95 Wrangler. Not to be outdone my older and little brothers also bought Jeeps. Older brother bought an 88 Wrangler and little brother has bought 2 Cherokee Country’s (both were previously rolled and used as trail rigs), a 47 Cj2A and a 65 CJ5.”

995041_819334365909_1526413902_n

[fb_button]
 
To Top

Ben & Lil’ Joe, an M-38A1

• CATEGORIES: Builds, Features This site contains affiliate links for which I may be compensated.

This is a great story form the Winston-Salem Journal about a teenager named Ben Zenger who began rebuilding an M-38A1 named Lil’ Joe at age eleven. Learn more here:

http://www.journalnow.com/journal_west/news/parade-entry-includes-teenager-s-restored-jeep/article_04903af5-dca3-5d76-b936-3fdb6d414c3c.html

m38a1-ben-zenger

[fb_button]
 
To Top

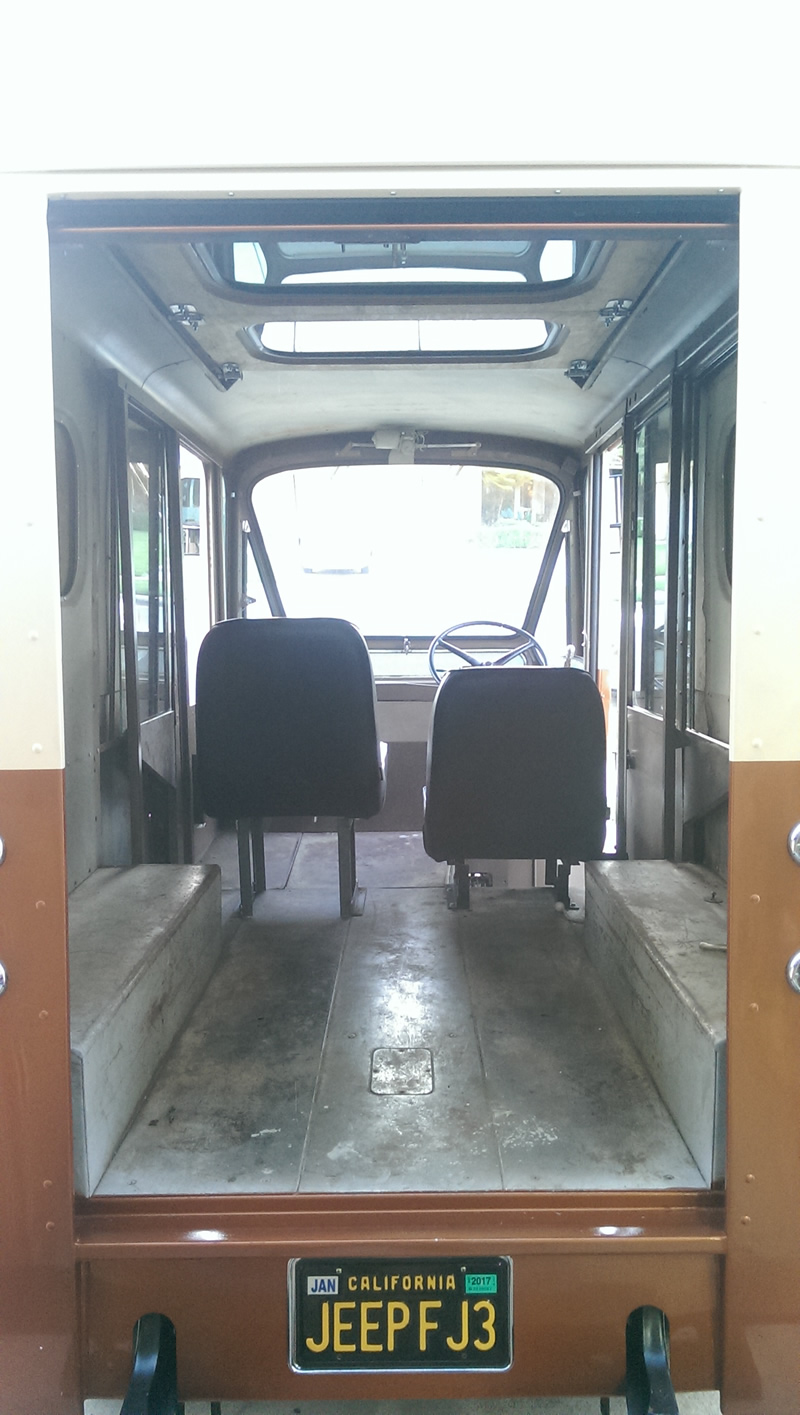
Paul’s Restored 1963 FJ-3

• CATEGORIES: Builds, FJ This site contains affiliate links for which I may be compensated.

UPDATE: Paul shared some additional pics.


paul-fj3a-6 paul-fj3a-8

paul-fj3a-7 paul-fj3a-9

Paul bought this FJ-3 back in 2014. He’s restored it beautiful. He wrote: “Her new home is in Orange County, California. This FJ3 is now a daily driver and is used both in my business, and as a fun vehicle to take to shows and cruises. It is looking a little different now. It is still running the original engine and transmission. The rear end is now a freshly rebuilt Dana 44 with taller gears so it can do a decent highway. On the exterior, all the rusty metal has been replaced and the rear side windows have been removed. The rear door is still a wood roll-up, but it is now clad with aluminum sheet to make it maintenance free.”

Continue reading

[fb_button]
 
To Top

The DJ-3A “Wire Gauze” or “Dry Air” Filter

• CATEGORIES: Builds, Features • TAGS: This site contains affiliate links for which I may be compensated.
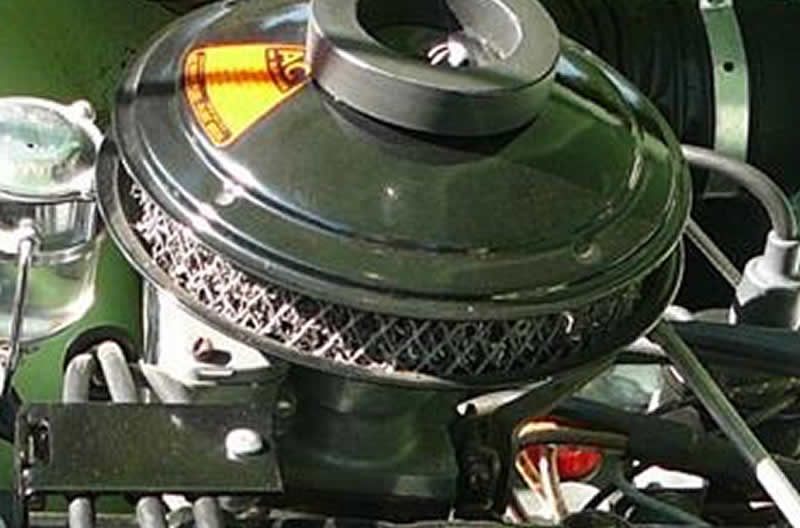
1954-kaiser-darrin-dry-airfilter

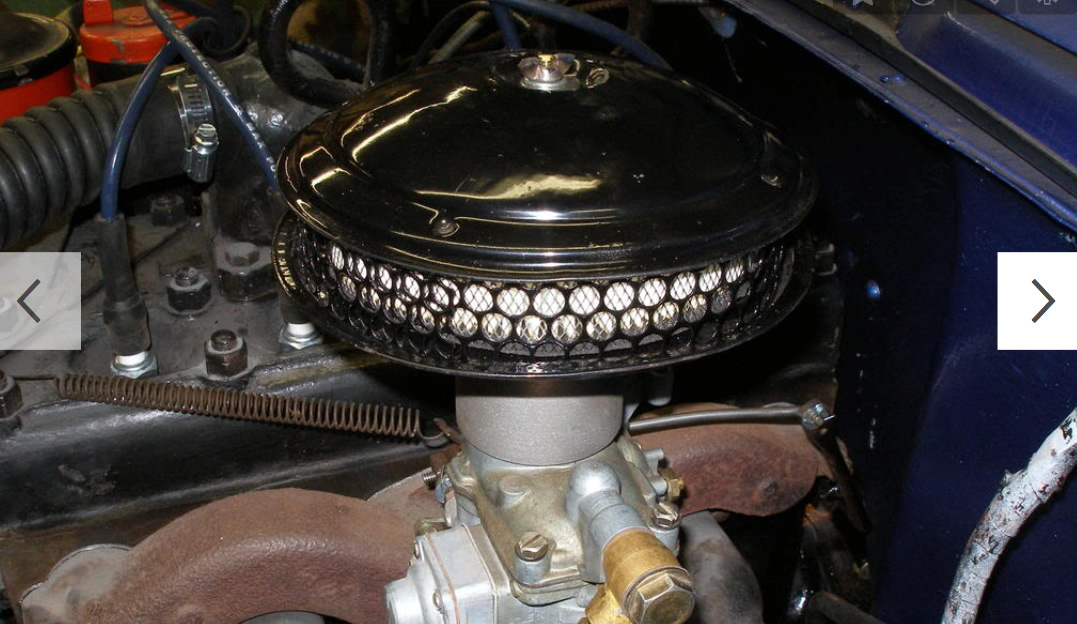
A pretty correct looking dry air or wire gauze filter from a 1954 Kaiser Darrin. Not the diagonal wire mesh on the exterior and the two prominent lips on the lid. The rubber piece on the top is unique to the Darrins. The DJ-3A did not use the rubber top piece.

UPDATE: This modification of the Oil Bath system into a dry air system by installing an air filter inside the oil bath canister might interest some readers: http://z4.invisionfree.com/CJ3B_Bulletin_Board/ar/t1267.htm

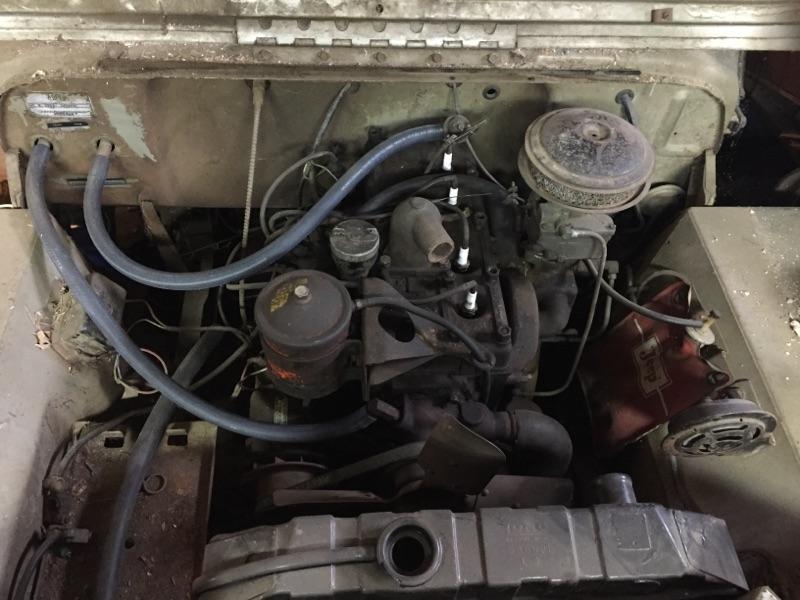
On DJ-3As, the stock air filter is a  “Wire Gauze” or “Dry Air” filter type. The oil bath filter commonly seen on earlier L-134 engines was an upgrade option on the DJ-3As. When I looked to see whether my firewall had the holes necessary to mount the oil bath filter, I found the firewall had not been drilled. So, Rusty must have been equipped with a dry air filter.

As far as we know, Willys Motors only installed the dry air filter on the DJ-3As. This same filter appeared chromed on some 1953 & 1954 Corvettes and some 1954 161 Darrins (perhaps other years, too). It’s likely that if someone has one of these lying around, they probably don’t know what it is. If you happen to have one, I’d be interested in it.

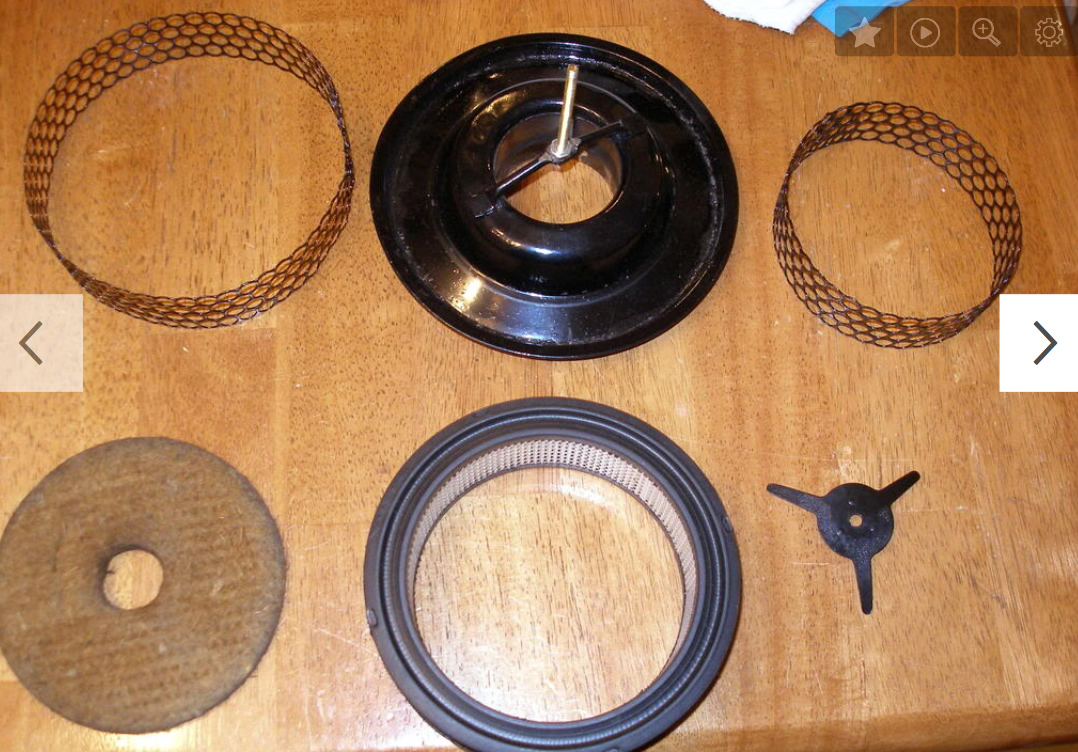
Below is one example of a filter about to be restored with a modern mesh in the middle. Charles explained how the NOS filter material can be reproduced: “A NOS corvette, Darrin, or DJ filter core is rare and expensive. Once in a couple of blue moons they show up on eBay. However, they can be made easily . The inner and outer ring are made of extremely thin expanded metal. Make the inner ring, wrap around some air filter grade copper mesh wrap (eBay) and then wrap the outer ring and secure. Unfortunately, the copper would deteriorate over the years and has been talked about badly. Even though they were called dry air filters they were supposed to be kept oiled.”

According to Bill Brown, there’s a K&N filter that can be used. He couldn’t remember the part number, but the “OD of it is 6 3/8″; the ID is 5 1/4″; and the height is 1 1/2”. This is a filter with an accordion fold all the way around with a molded “rubber” top an bottom. Molded into both the top and bottom are a pair of K & N marks the Identification AO62B4 and the words Oil Type.”

dry-filter-1964-surrey1

This photo shows some of the parts to build a custom dry air filter. The bottom is original. The mesh left and right should be criss cross in diamond shapes rather than circles. The air filter at the bottom is meant to replace the shredded copper originally between the circular mesh. The felt circle helps seal the top lid to the tops of the mesh. The item on the lower right compresses the felt onto the mesh.

Here are examples of the filter installed. The diameter of the top lid is about 6 3/4 inches:

dry-filter-1964-surrey2

This rebuilt unit has the incorrect mesh and an aftermarket filter.

Jason64DJ35

This one could be original. I can’t tell what kind of mesh surrounds the shredded interior.

Continue reading

[fb_button]
 
To Top

Rusty / DJ-3A Questions & Needs

• CATEGORIES: Builds, Features • TAGS: This site contains affiliate links for which I may be compensated.

I’ve spent some time over the last couple of days assembling information on what I have/needwant for Rusty.  I’m throwing this info up for questions/answers/comments:

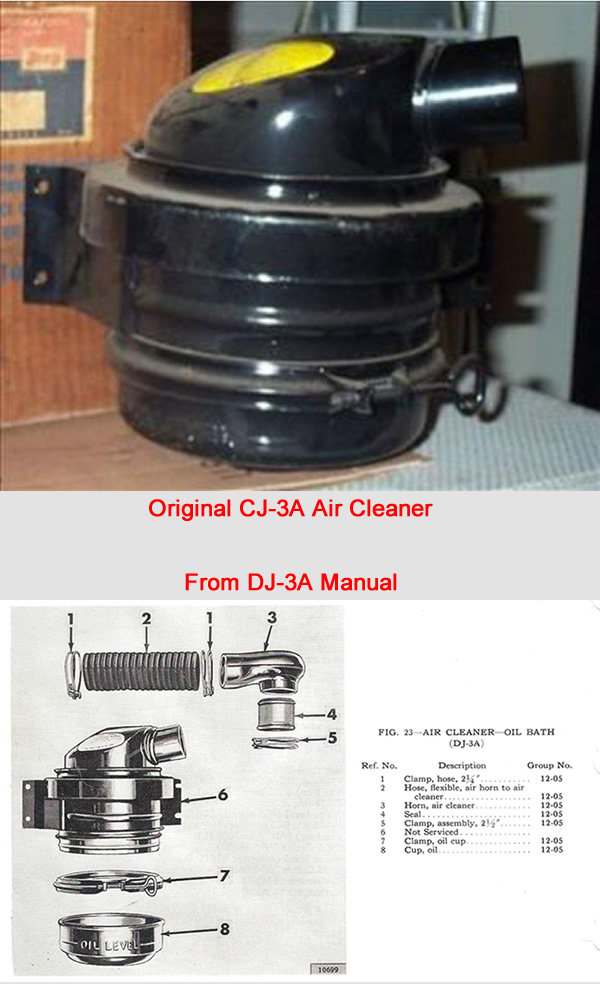
1. AIR CLEANER: Bill has hooked me up with an air cleaner. I just need the horn, seal, and tube –  http://www.jeepsurreygala.com/wp-content/uploads/2012/06/oil-bath.jpg … cj3a looks the same to me? From 3A forum: http://www.cj3apage.com/cgi-bin/3Ayabb26/YaBB.pl?num=1303907998. Nice writeup on air cleaners here. Walcks has an air cleaner sticker, so that takes care of that.

air-cleaner-comparison

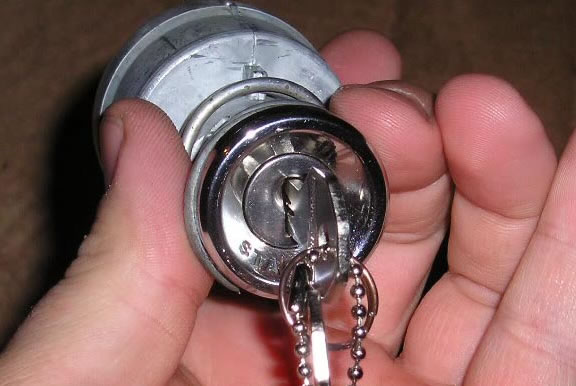
2. IGNITION SWITCH: Early ignition switch http://www.jeepsurreygala.com/wp-content/uploads/2012/04/KeychainEmilBruce.jpg. I don’t know if this style was used on any other jeeps? It dishes inward with the word “START”on it.

key-ignition-early-dj3a

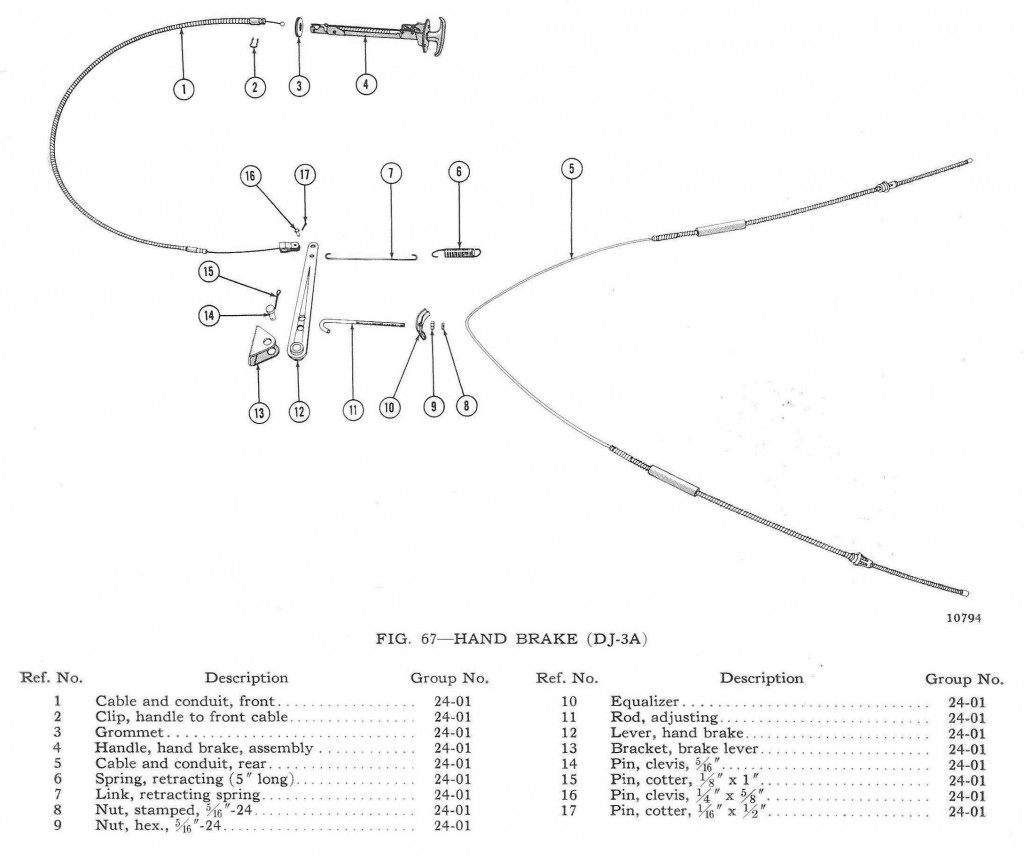
3. PARKING BRAKE: I will need parking brake parts: http://www.jeepsurreygala.com/wp-content/uploads/2012/06/62-hand-brake.jpg. Are the later 3B T-handle parking brake setups the same as the DJ cables and parts? I have a handle that is salvageable, but lack the rest. The image below is from a 1962 book. I’ve seen nothing to indicate this changed from early DJ-3As.

1962-dj3a-handbrake

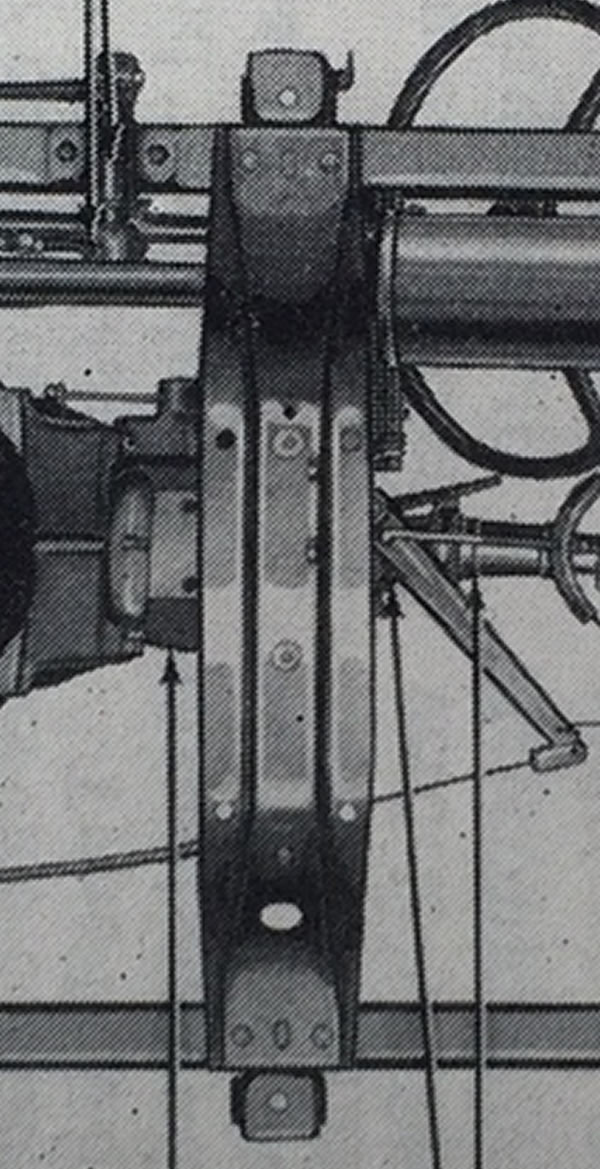
4. TRANNY CROSS MEMBER: I need a transmission cross member: http://www.jeepsurreygala.com/wp-content/uploads/2012/06/55-dj-frame.jpg (image http://s247.photobucket.com/user/64_Surrey/media/rearmount_zpsee48cf46.jpg.html) Should be the same as a 3A/3B/CJ-5? Note the cross member does have the transfercase mounting hole (far bottom) so it may be the same as the typical cross member.

1956-dj3a-transmission-crossmember

Continue reading

[fb_button]