emailNeed to contact me and don't have my email? Click on email button.
About eWillys
Welcome to eWillys.com, a website for vintage jeep enthusiasts. I update this website nearly every day with jeep deals, jeep history, interesting reader projects, jeep related info, and more.
These quick searches can help you find things on eBay. People list in the wrong categories all the time, so don't be surprised to see brochures in the parts area for example. This section used to be split into jeeps, parts and other categories, but recent changes to eBay will require this information to be recoded.
The links to posts below show jeeps grouped by models, condition, and other ways. Some of these jeeps are for sale and others have been sold. If you are unsure whether a vehicle is still for sale or not, email me at d [at] ewillys.com for more info.
Importantly, the allure of buying a project jeep can be romantic. The reality of restoring a jeep can be quite different, expensive and overwhelming without the right tools and resources. So, tread carefully when purchasing a "project". If you have any concerns about buying a vintage jeep, or run across a scam, feel free to contact me for help, comments or concerns .
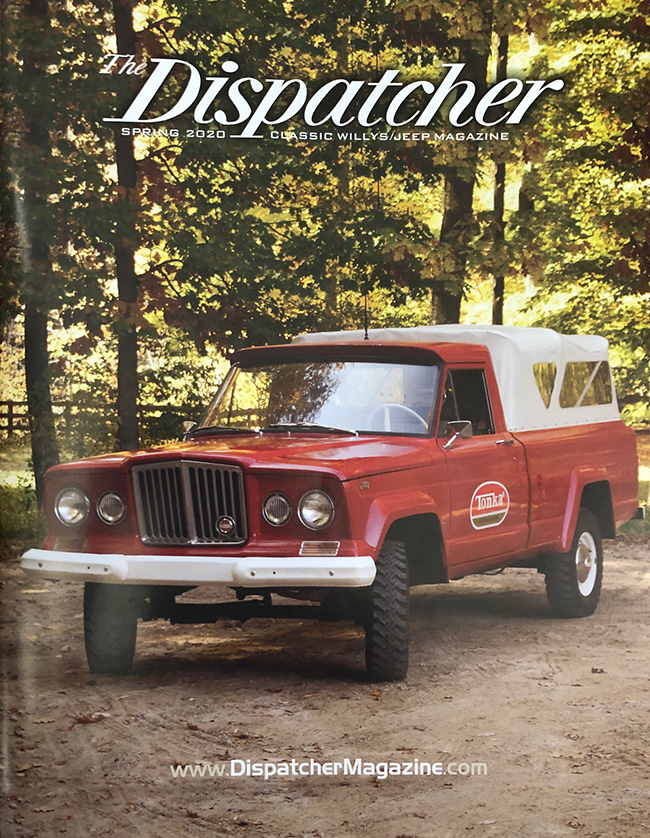
The newest issue of the Dispatcher Magazine arrived at my mailbox. It’s another great issue full of vintage jeep info, including a listing for the “world’s oldest jeep touring company” out of Ouray, Colorado, that is for sale (yes, the owner is considering retirement).
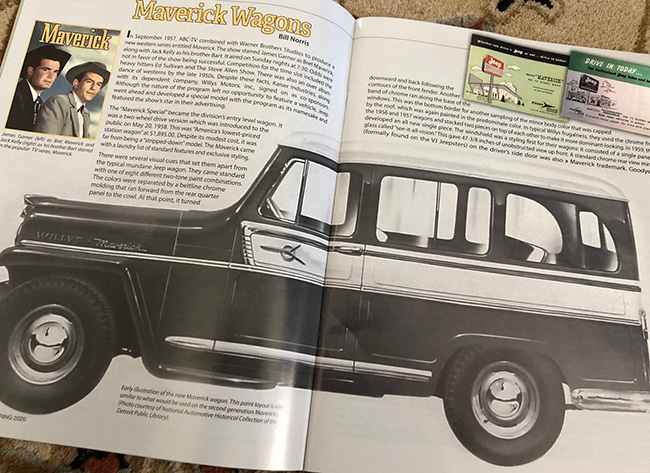
However, the article that really snagged me was Bill Norris’ Maverick article (Thank You Bill!). I now finally understand the Maverick Wagon history (1958-1964) and how some Maverick TV show drama resulted in the 1960-1964 ‘Maverick’ wagons not really being Maverick’s anymore, despite having the Maverick pre-fix. It’s also why some folks are pro ‘1958-1959 were the years that the only true Maverick wagons were produced’, while other folks point to the pre-fix in the years 1959-1964 and argue that any wagons that used the pre-fix are actual Maverick wagons.
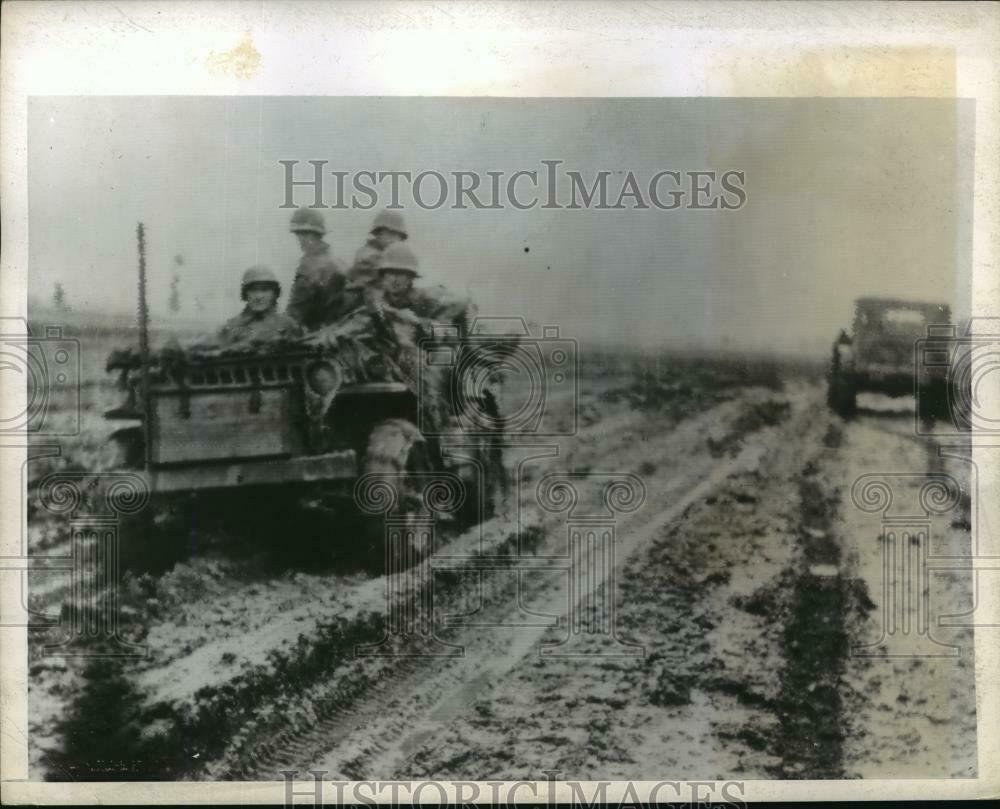
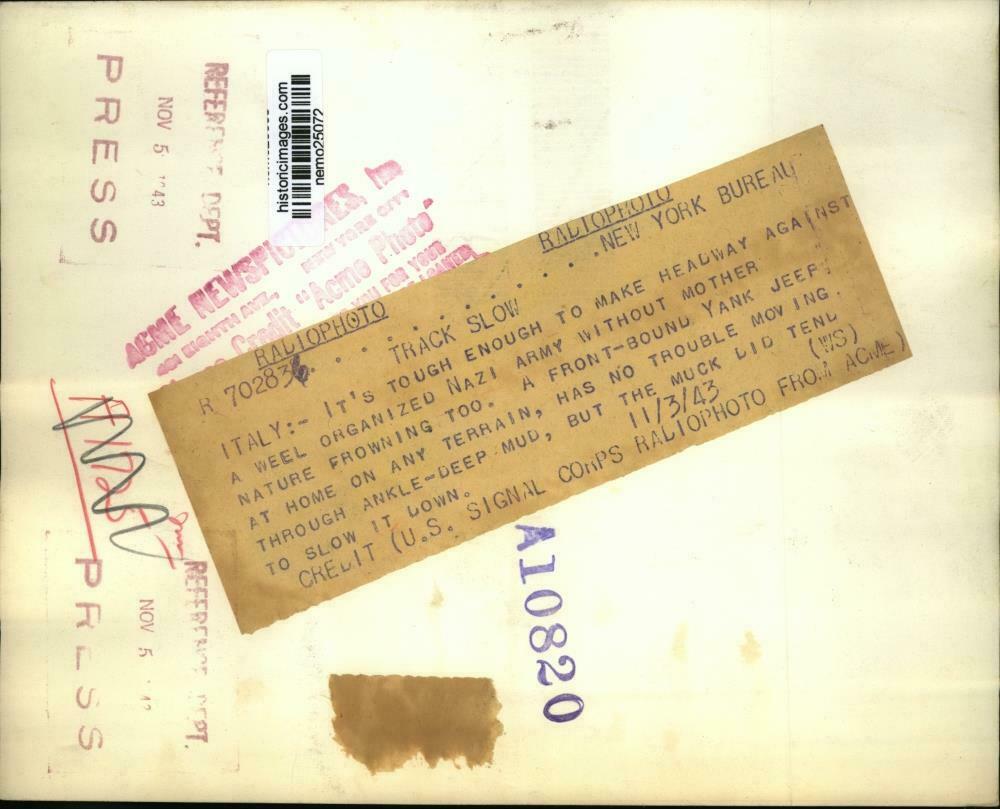
“1943 Press Photo Front-Bound Yank Jeep Moves Through Ankle Deep Mud in Italy. This is an original press photo. Italy: It’s tough enough to make headway against a well organized German Army, without mother nature too. A front-bound Yank jeep at home on any terrain, has no trouble moving through ankle-deep mud, but the muck did tend to slow it down. Photo measures 9 x 7.25inches. Photo is dated 11-3-1943.
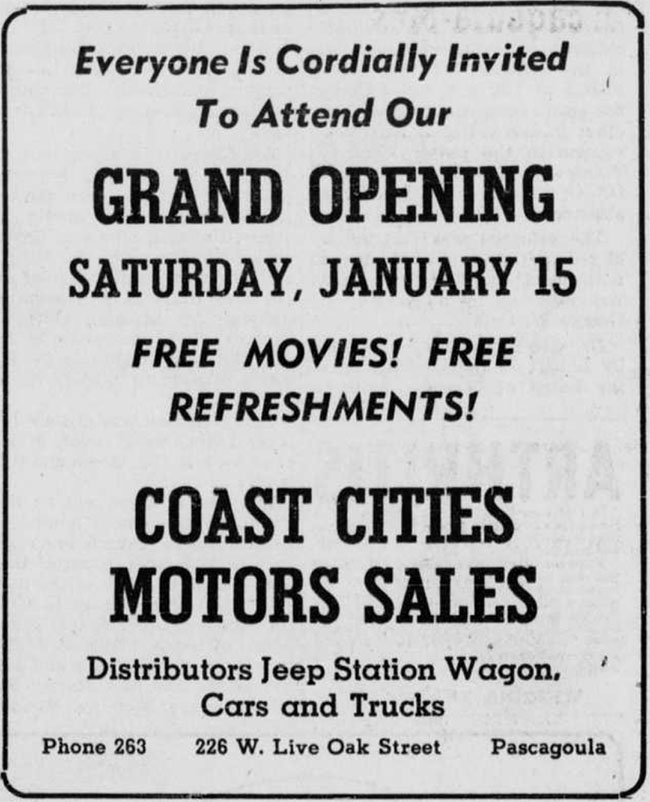
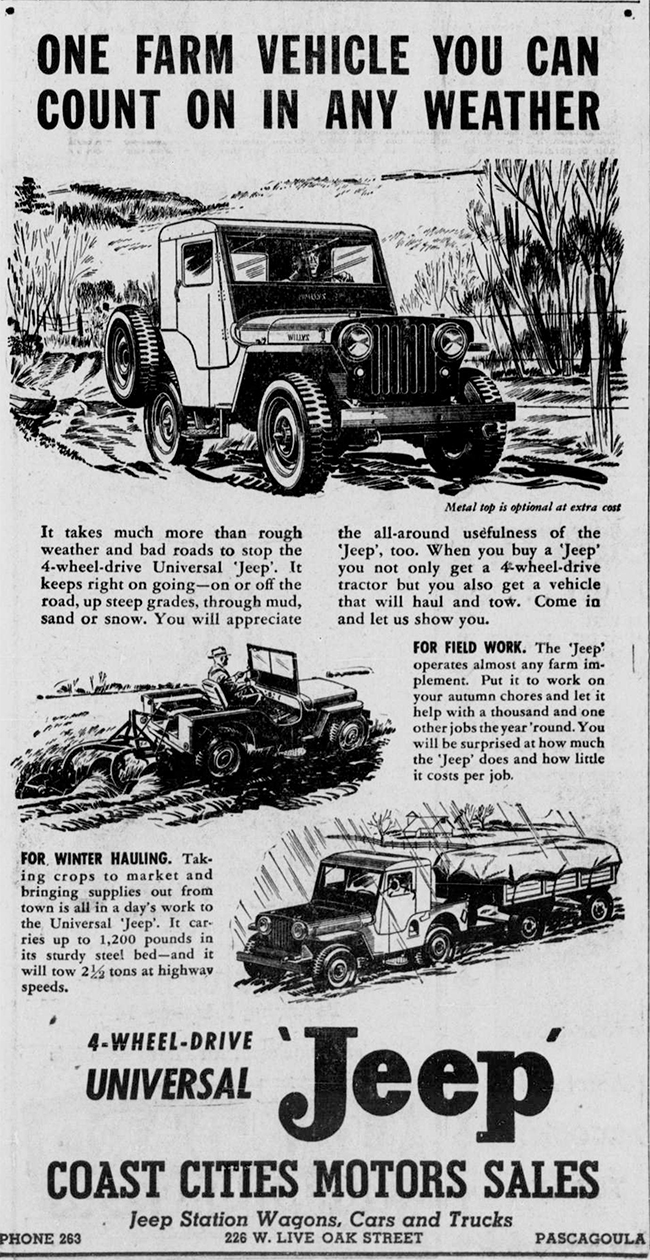
Later, In May of 1950, a new seller, Jackson County Motor Company, appeared. Perhaps, not coincidently, Jackson County Motors launches on the same highway (HWY 90) as Coast Cities Motor Sales had been located.
Prior to Coast Cities Motors Sales. jeep dealer Caver-Wiggins advertised from July 1946 to November 1947 in the Chronicle Star. Subsequently, in a corporate restructuring, Runnel-Wiggins became the main seller/advertiser. Runnel-Wiggins ran ads from November of 1947 through April of 1948. No additional information appeared in the Chronicle Star about Runnel-Wiggins.
After April, the next Jeep ad for 1948 was the December 10th, 1948 ad by Coast Cities Motors. Whether Coast Cities Motor Sales was related to the previous dealer isn’t clear, as they were located in a different places.
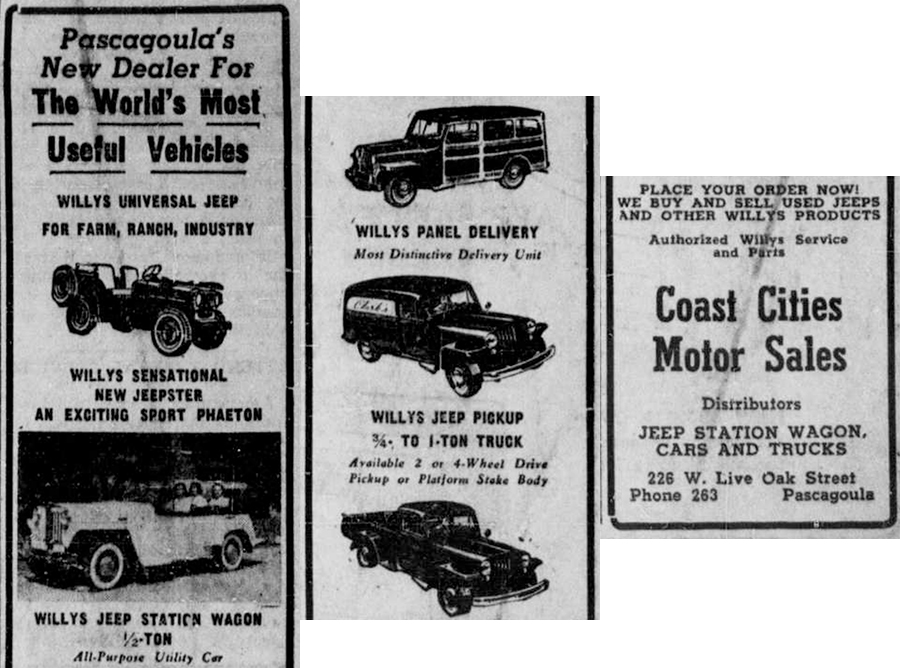
Below are some Coast Cities Motor Sales ad example:
December 17, 1948 & January 07, 1949: Pascagoula’s New Dealer For The World’s Most Useful Vehicles (The ad shown is actually the January 07 ad. The December 17, 1948, ad has only minor text differences from the January ad. This is a long one-column ad, so it’s been chopped to better fit the page)
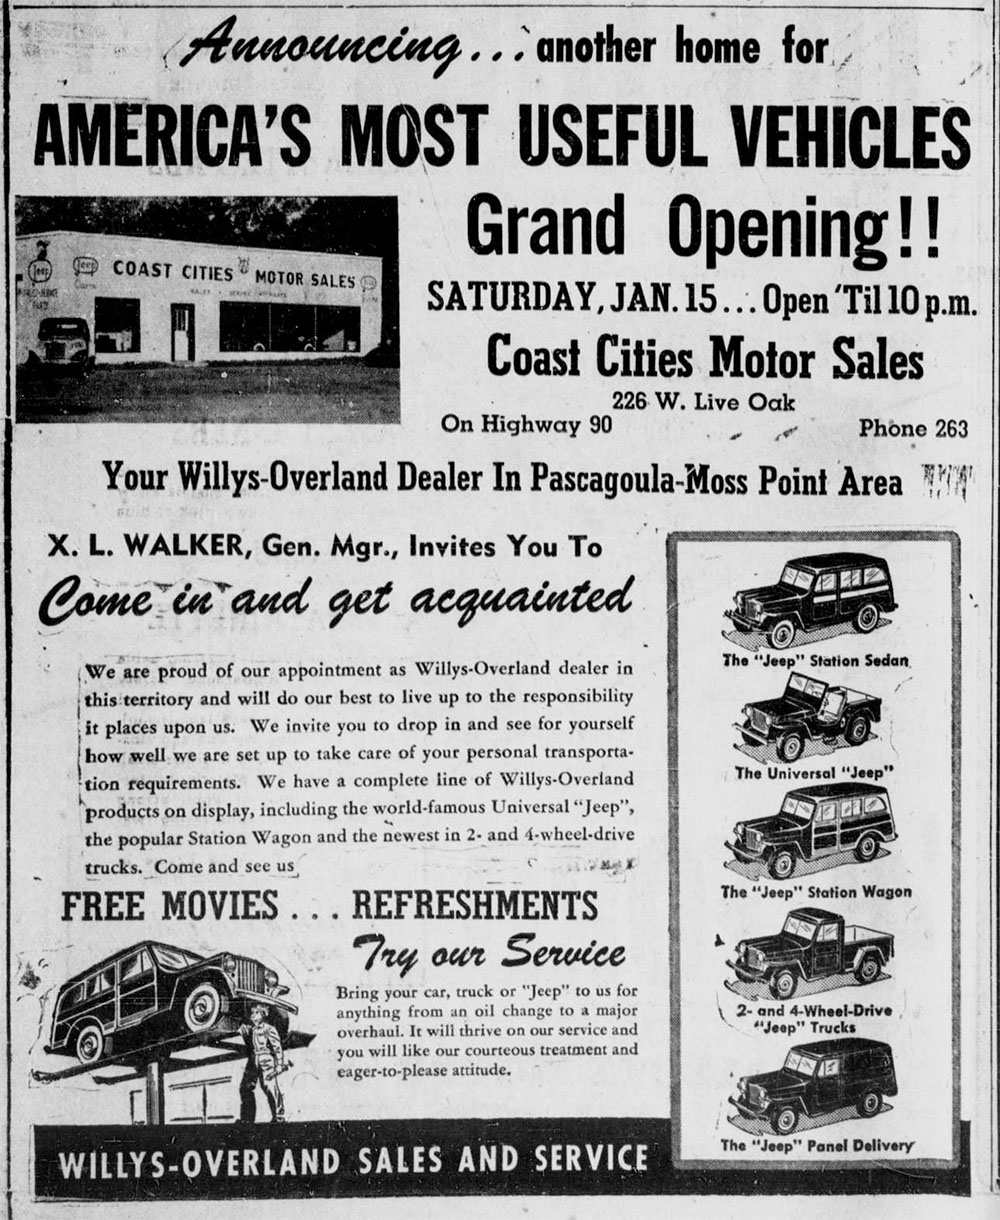
January 14, 1949: Announcing … Another Home for the World’s Most Useful Vehicles
“1944 Press Photo General Mark Clark & officers ride jeep in Rome During WWII. This is an original press photo. World War II – Italy (Entry into Rome). In three-star jeep, Lieutenant General Mark Clark (left front), fifth army commander, rides through a Rome street June 5, day after Allies captured the city. In rear seat are Major General Alfred M. Gruenther (left), Clark’s chief of staff, and Major General Geoffrey Keyes, second corps commander. St. Peter’s cathedral is in background. Photo measures 7.5 x 10.5 inches. Photo is dated 6-5-1944.”
=========================
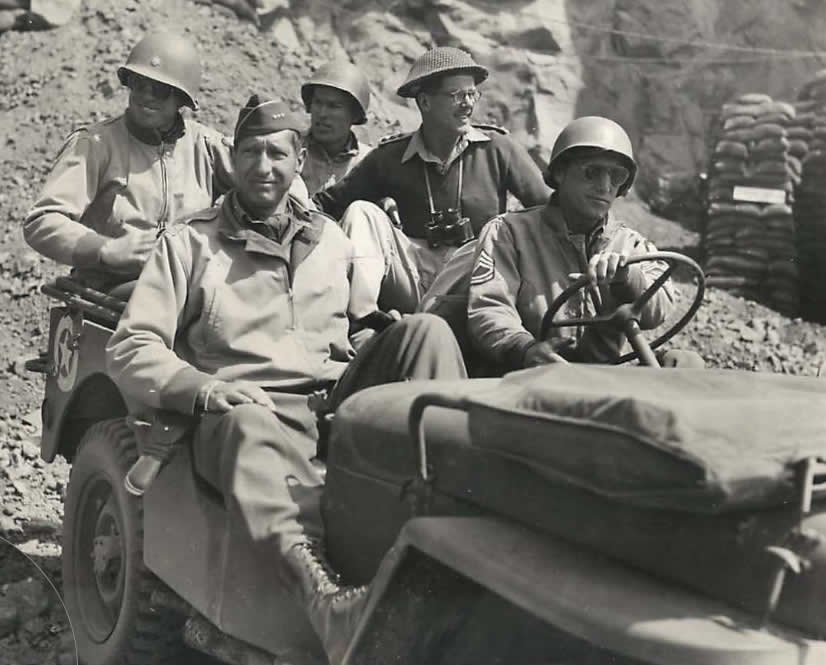
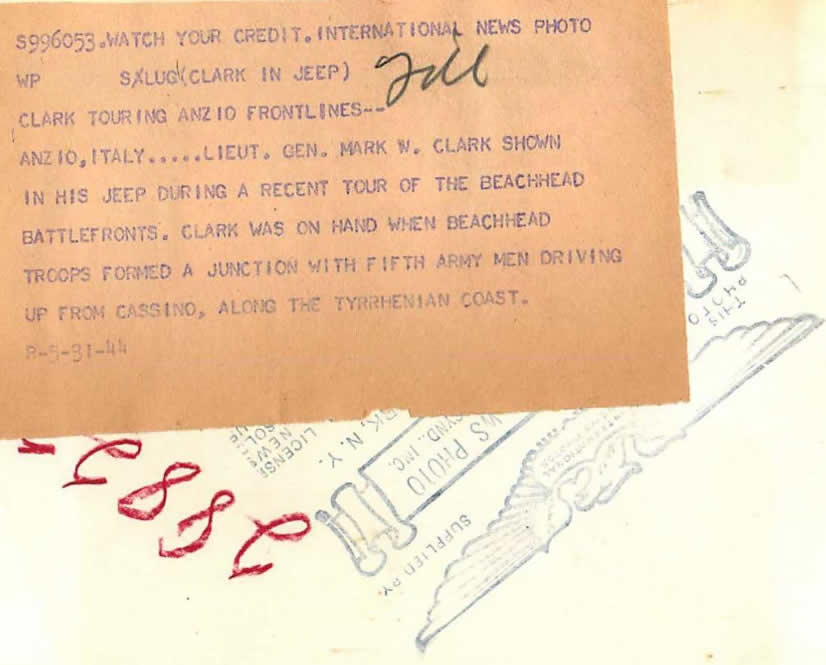
From a 2017 eBay auction: “1943- Lieutenant General Mark Clark, Commander of the Allied Fifth Army in Italy, reviews beachhead battlefronts near Anzio from a jeep with Army officers during an inspection tour.
Photo measures approx. 6 1/2″ x 8 1/2”
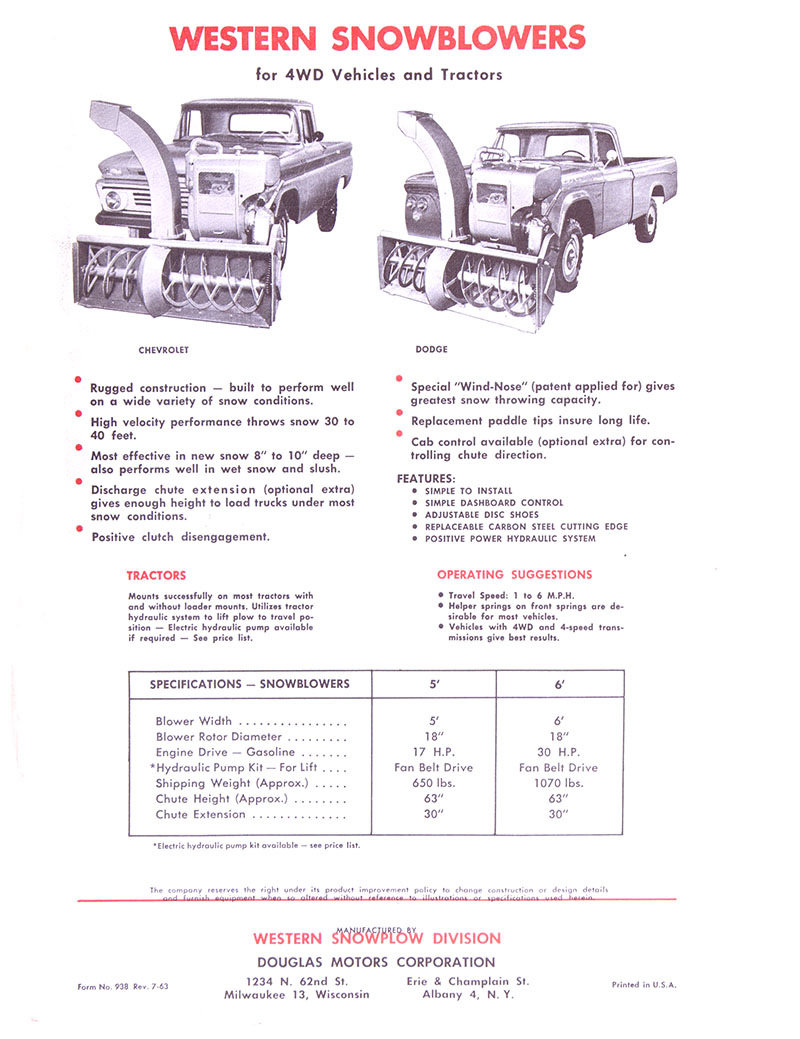
Has anyone ever seen one of these Western Snowblowers mounted to a jeep?
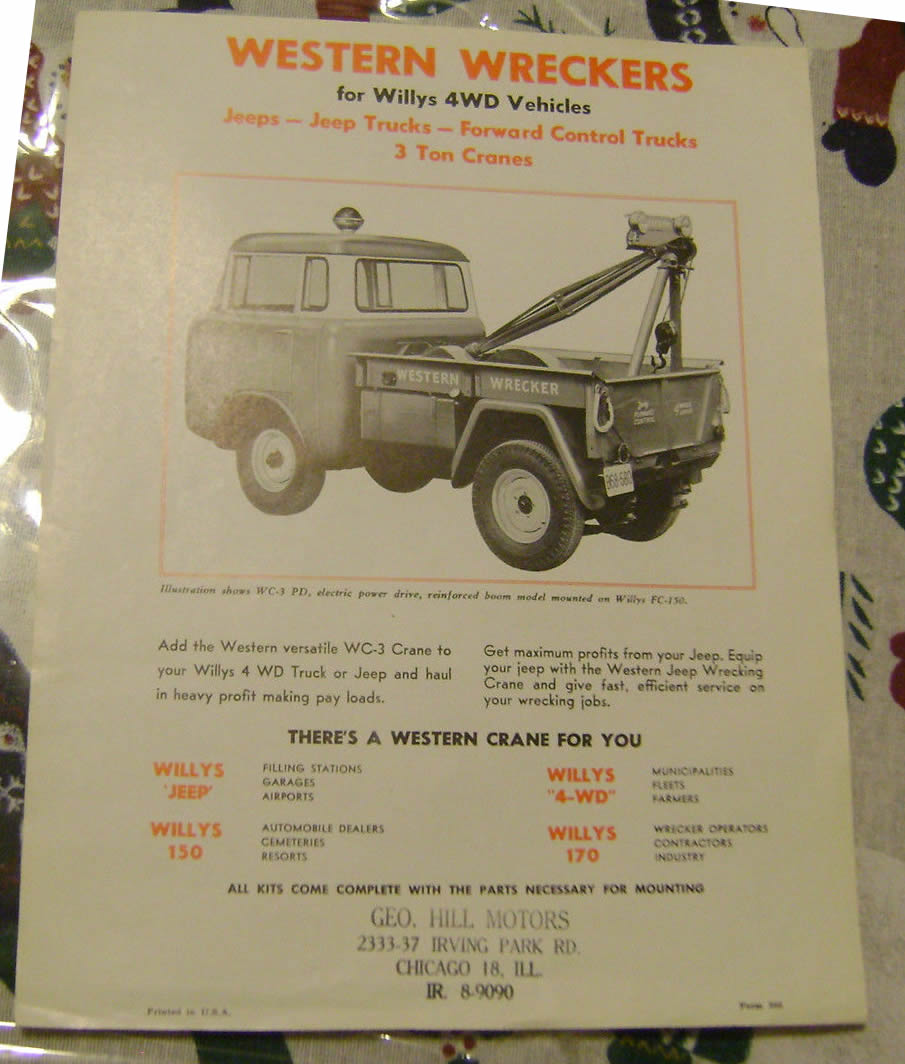
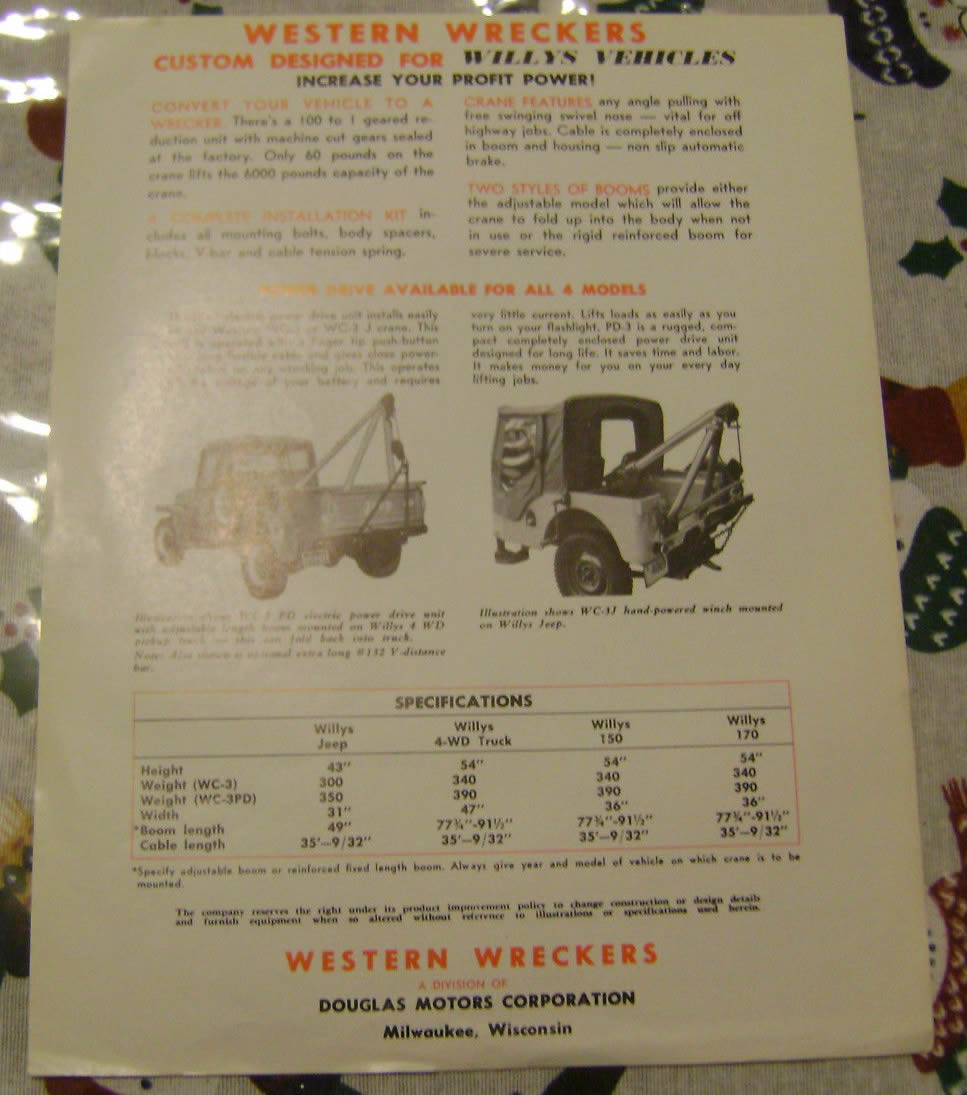
Western also produced wrecker setups as well (Pics from a 2015 eBay auction):
This brochure highlights the Western WC-3 Cranes for the FC, Jeep, and Jeep Truck.
“Up for Auction is a Rare and Amazing Western Wreckers for Willys 4WD Vehicles Jeeps-Jeep Trucks-Forward Control Trucks-3 Ton Cranes Brochure there are 2 pages in very good condition.”
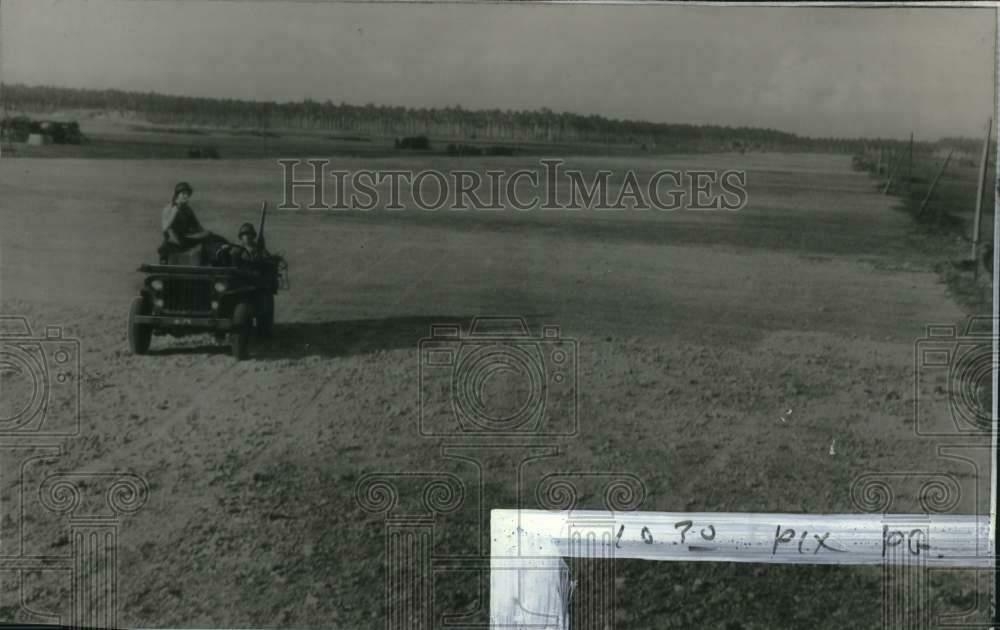
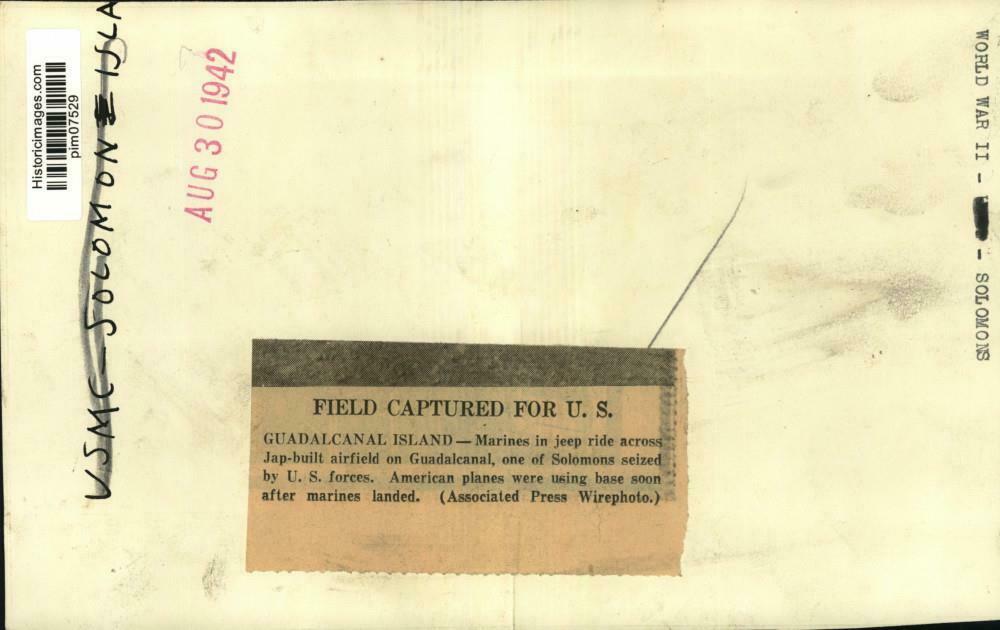
“1942 Press Photo US marines drive jeep on Guadalcanal air field in World War II. This is an original press photo. World War II – Solomons – Marines in jeep ride across Japanese-built airfield on Guadalcanal, one of Solomons seized by US forces. American planes were using base soon after Marines landed Photo measures 9.25 x 5.75 inches. Photo is dated 08-30-1942.”
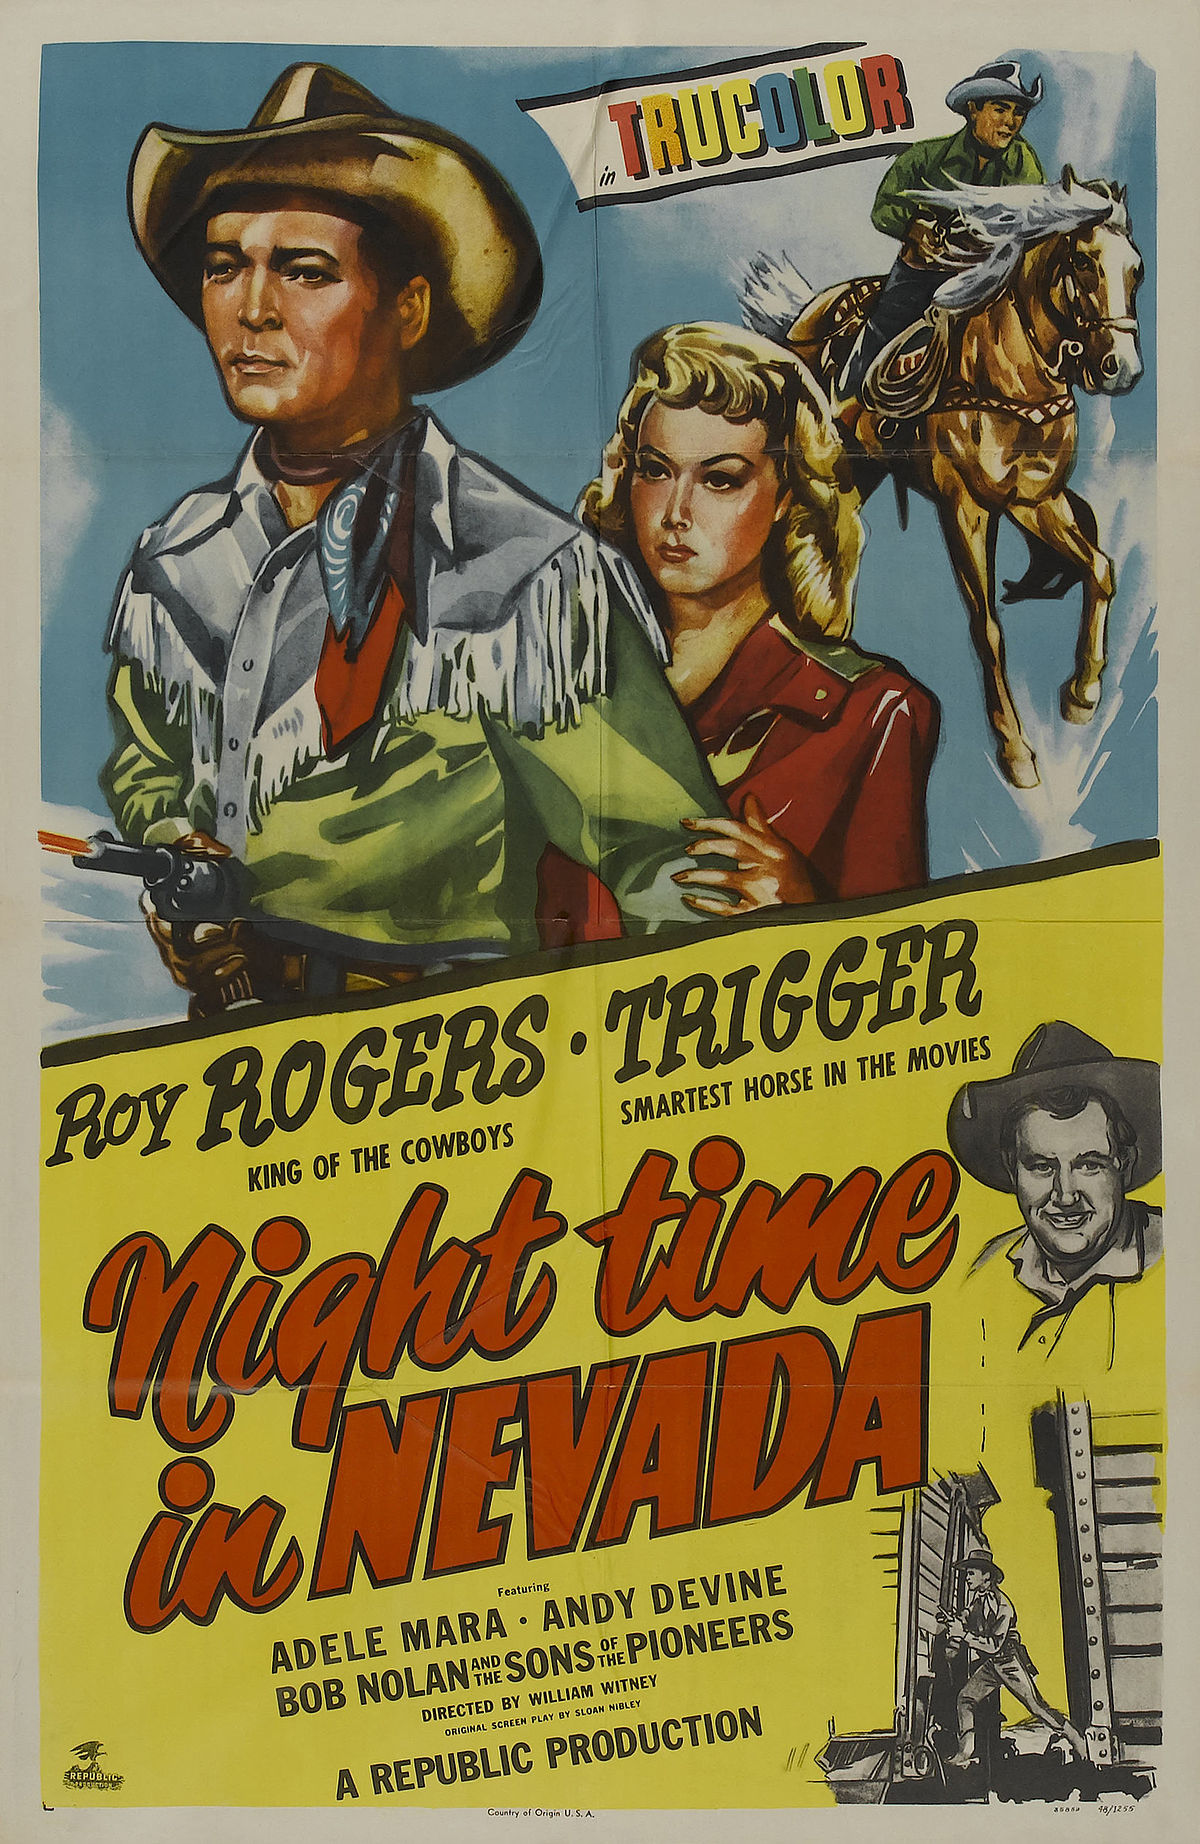
Kevin mentioned the film Night Time in Nevada the other day, noting it showed a CJ-2A pulling a trailer. Well, it does’t just pull the trailer, it races through the desert with the trailer at one point. Oddly enough, the sound effects at that point in the film make it sound like the jeep and trailer are swerving with screeching tires on streets rather than on a sandy trail dual-track trail.
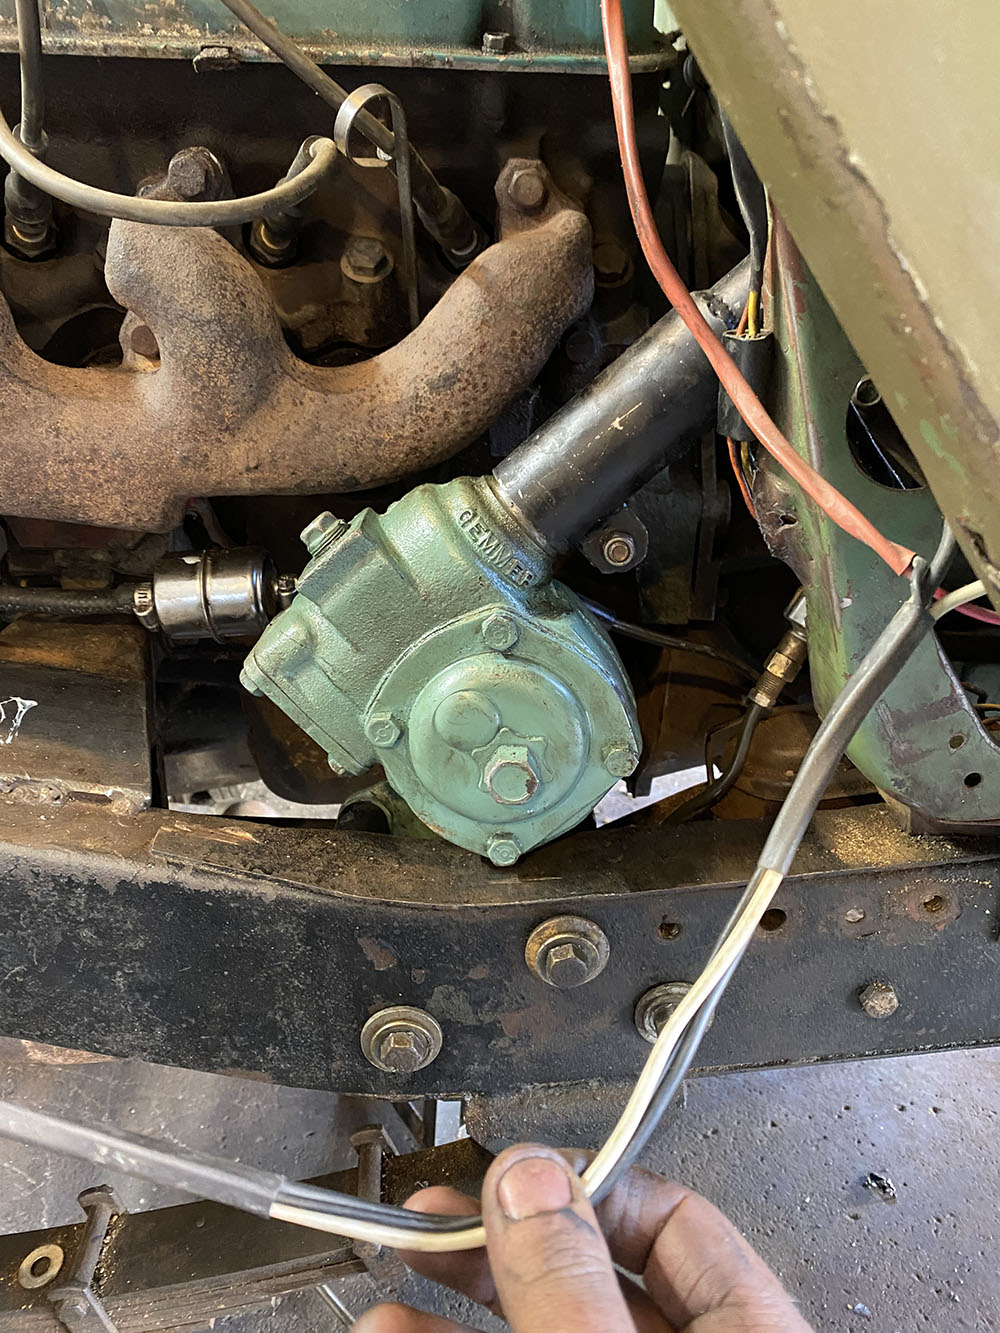
1951-1953 Hudson Hornet steering box installed on John’s CJ-2A.
I’ve been very interested in the Hudson Hornet Steering Modification since I heard about it a decade ago. Unfortunately, there’s scant information about implementing the modification, but reports were that it was a relatively easy one that produced fantastic results, offering a power-assist feel to the steering and reducing play (a similar, alternative steering modification is the use of a 1980s Ford Ranger box, which Lawrence Ellliot shared back in 2018).
Now, thanks to Adam, we have some new insights into the obstacles and benefits of installing a Hudson unit into a vintage jeep! Perhaps the most difficult obstacle to overcome is locating the steering box itself! Adam’s provided some great details below, but If you want to ask Adam more questions directly, he’s offered his email ahedgcock @ gmail.com (remove the spaces around the @).
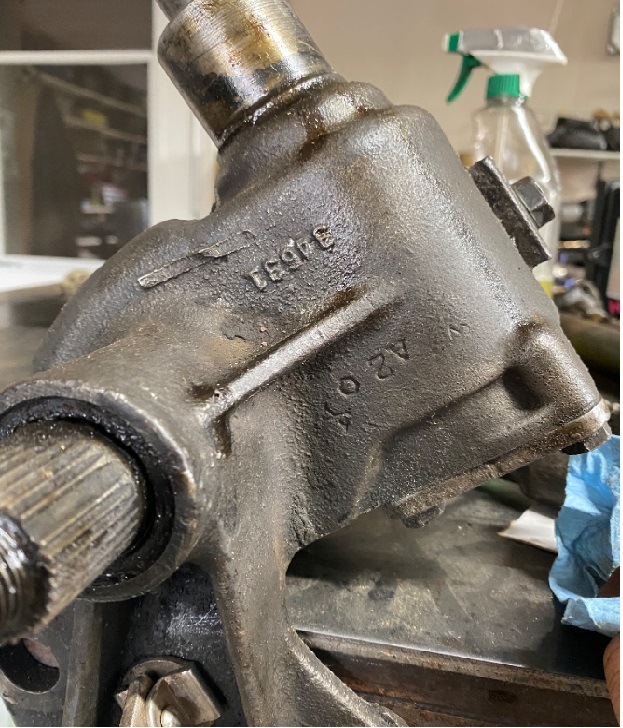
Below, Adam shows some of the differences between the Hudson and Ross (Willys) units:
Here’s Adam’s description:
Find box. Perhaps the most difficult task .. 51 to 53 Hudson Hornet.
Pitman Arm/Get Drag Link. Try to get the bell crank and drag link. The Hudson splined pitman shaft is quite a bit larger than the willys splined shaft so it is good to use the original. The pitman arm itself is similar in how it bends, but is 7” long ( instead of 5” on the willys)
Pitman Arm Ball. The pitman arm ball end on the Hudson is larger than the willys, so I welded the Hudson drag link end onto my willys drag link.
Hudson Box bolts right up, but …The Hudson box could be bolted directly to the frame rail with 3 bolts, but the steering column will be 2.5” too far on the drivers side to hit you body tub hole. Having all stock brake and clutch pedals, and not wanting to make my tub Swiss cheese, I chose to move the box 2.5” off the frame with a fabricated spacer. This would be similar to the level of fab needed to convert a Saginaw box up front.
Or Shift the Hudson Bracket. The cast steel Hudson bracket could be cut and re-welded to the box 2.5” over also, with the same results.
Modify the Column Tube. The steering column is similar to the willys but the Hudson column tube is larger than the Willys. I welded a larger OD sleeve at the base of an existing willys column, cut a split in it and welded on 2 ears so I could clamp it tight.
Steering Shaft Differs. The steering shaft does not have the same end spline for a willys steering wheel, so you can either cut and weld a willys spline to the end, or find a Hudson steering wheel.
Gear ratio. I did not take the box apart, but it is clearly a roller bearing worm shaft, and this thing came tight, even after presumably many years of use. The Hudson box is 6 turns lock to lock, and the Ross is 3 turns. It is worth noting the pitman arm is longer, 7” vs 5” on the willys, but you get a definite advantage in ratio. A bit less than half the effort to turn the wheels. I have taken it on road, and there is not the same “twitch” at speed, and off-road it does not tear your thumbs off like before. The wheel still happily spins back to center by itself nicely when you let it go, just more revolutions.
Placement of box. This will be subjective, I have a Buick V6 and I found the longer pitman arm worked better because it swings below my bellhousing rather than ramming I to it with the Ross. Just like placing an engine, you would want to mock up the ideal spot, and make the bracket accordingly.
Original look. This is basically a similar box, and does not effect the outward appearance at all.
Finding parts…this is the fun part, I needed to talk to people, and ultimately find a person willing to go digging through an old barn. Once I found my source, I bought 2. Paid $200 each.
Very fun swap, more original than the Saginaw, similar performance to a manual Saginaw provided to have a good tight bell crank and good tie rod ends.. I don’t see any need for a steering stabilizer
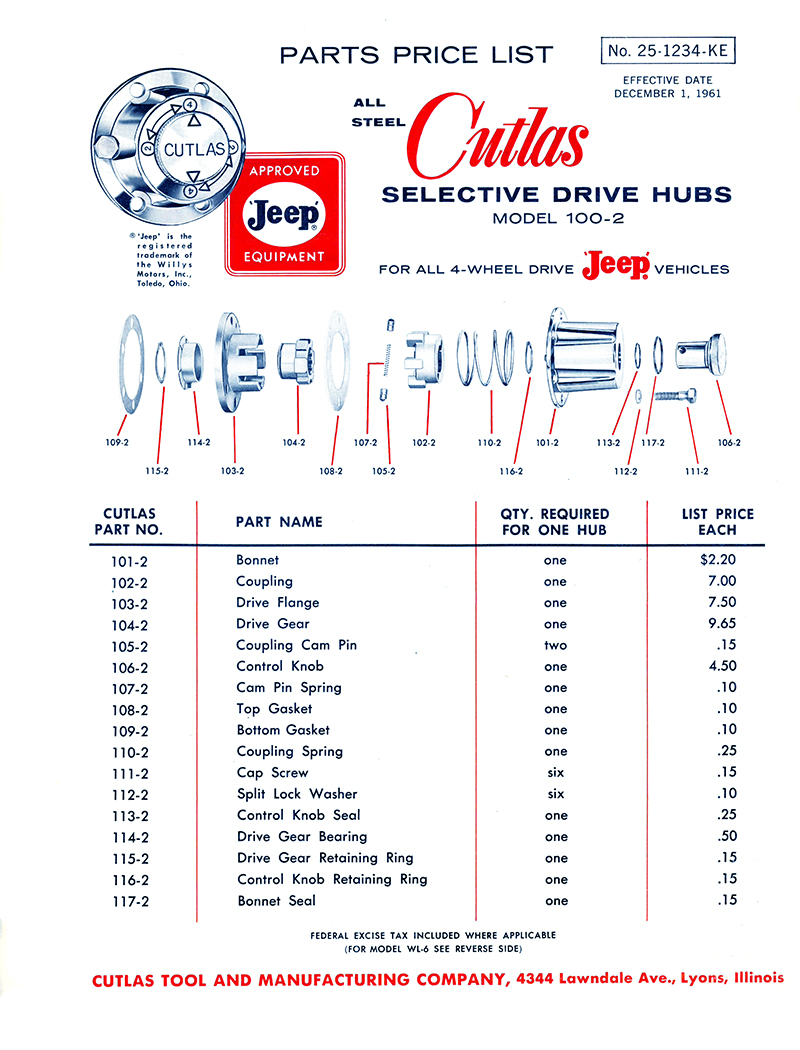
John recently rebuilt a set of Cutlas Selective Hubs, the type with the knob that rotates to engage and disengage the hub. There appear to be at least two styles of these hubs, one with a flat top and one with a groove, so that a tool (or improvised tool) can be used to help engage, disengage the hub.
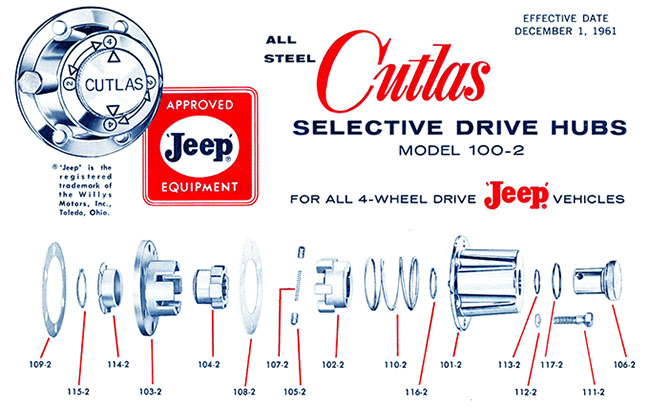
As you can kind of see from this diagram, there are two sections: 1) is the hub cap that holds the knob and the spring in place (from part 107-2 in the middle and everything to the right of it) and 2) the hub base (part 108-2 and everything to the left of it).
John wrote, “Overall I’d say these are my favorite hubs I’ve worked on so far. I have a pair of Warn hubs (with the tiny needle bearings) and a pair of Selectro hubs (big chrome knob type). The Warns seemed like a real pain to rebuild since the needle bearing were in rough shape. And the Selectro hubs, while very easy to operate, were probably the weakest design I’ve seen.”
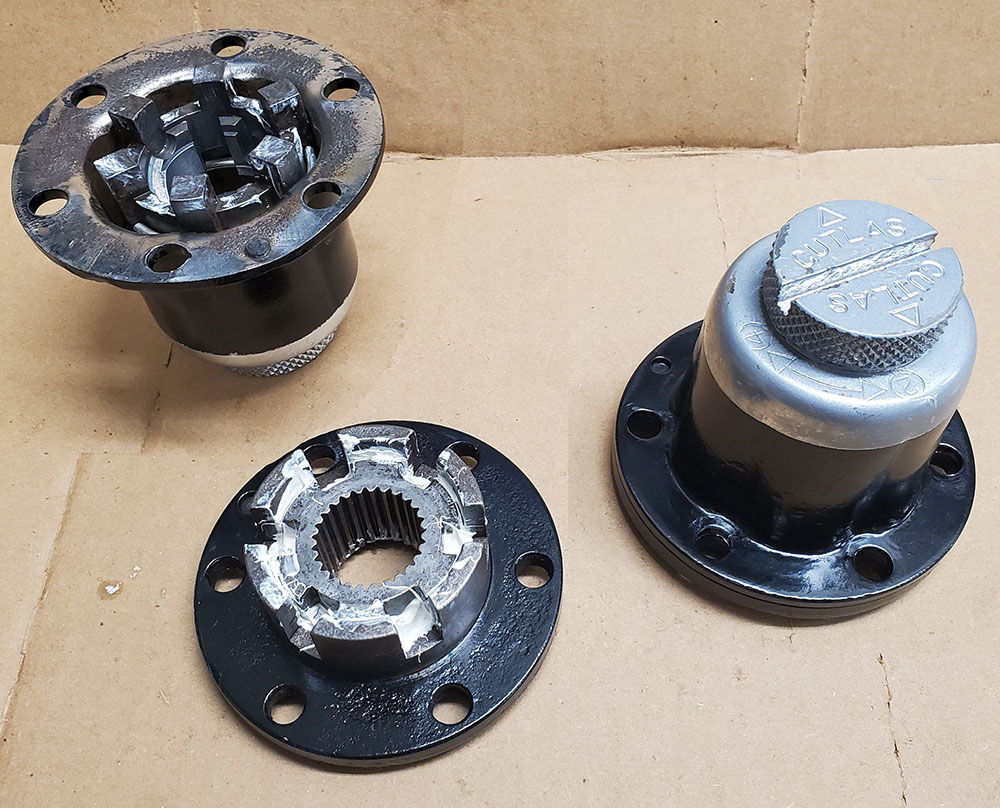
Here’s a look at John’s finished product, as it’s the best example a complete hub next to a hub with the top separated from the base:
I went with a 2 tone paint job just for fun. If it doesn’t last for any reason I’ll end up with the whole thing gloss black and a chrome knob. The body was so badly pitted there was no saving the original finish
HUB CAP:
We’ll start with the hub’s cap first. John provided the following note: “To remove the coupling piece (part 102-2 Coupling) from the chrome cap (with the cutlas knob) you have to line it up right with the correct groove, then push down firmly against the spring inside (part 110-2 coupling spring). While pushing down spin the coupling, and then the coupling spring will pop the coupling right out and its free.”
With the inner portion of the cap apart, you can see the coupling ring, the coupling, the coupling cam spring (part 107-2) and the coupling cam pins (parts 105-2).
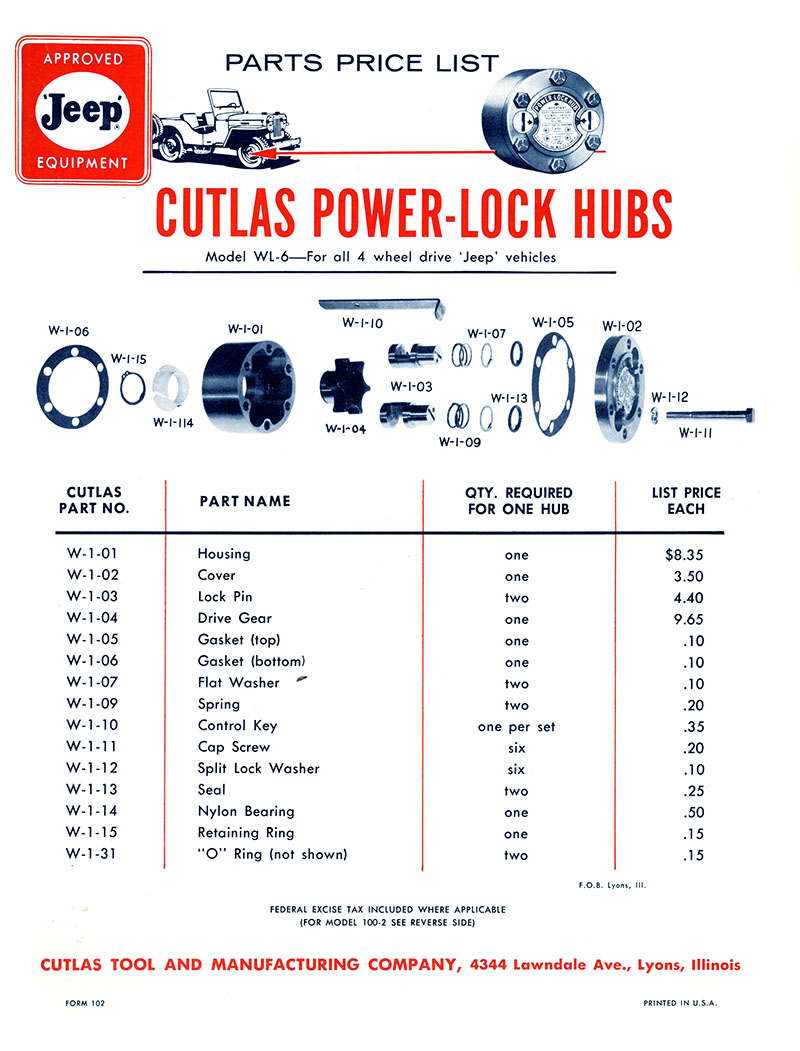
This December 1961 back-to-back brochure shows the parts break-downs and price lists for the early non-slot Cutlas Selective Hub model 100-2 and the Power Lock Hub. See John’s rebuild of the Cutlas Selective Hub here.