Builds Research Archives

To Top

FC Tour Jeep Transfer Case Shifter Update

• CATEGORIES: Builds, Features • TAGS: This site contains affiliate links for which I may be compensated.

Now that I have the longer, six foot cable, I had a chance to continue with the transfer case shifter. The bracket that was provided by JB Customs, caused the shifter cable to run into the engine, which didn’t seem like a valid strategy, so I roughly calculated the angle, then made two cuts into the aluminum bracket. This allowed me to re-mount the bracket and then bend the bracket into the right position, but maintain the correct bracket-end distance.

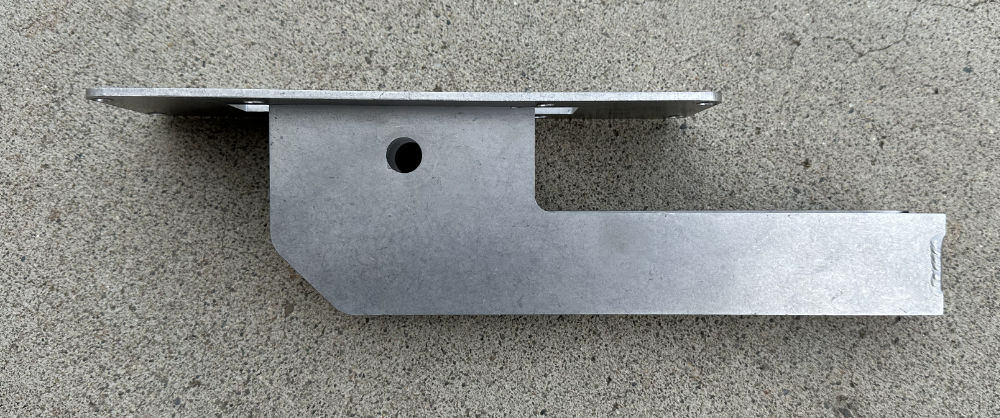
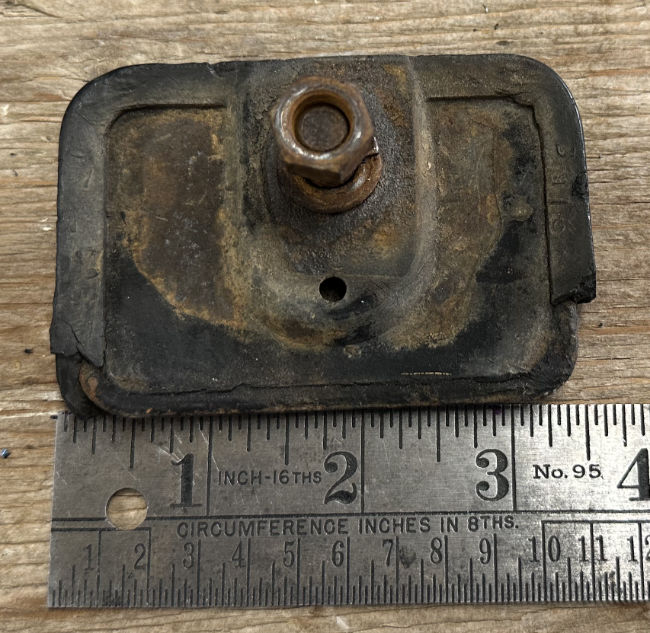
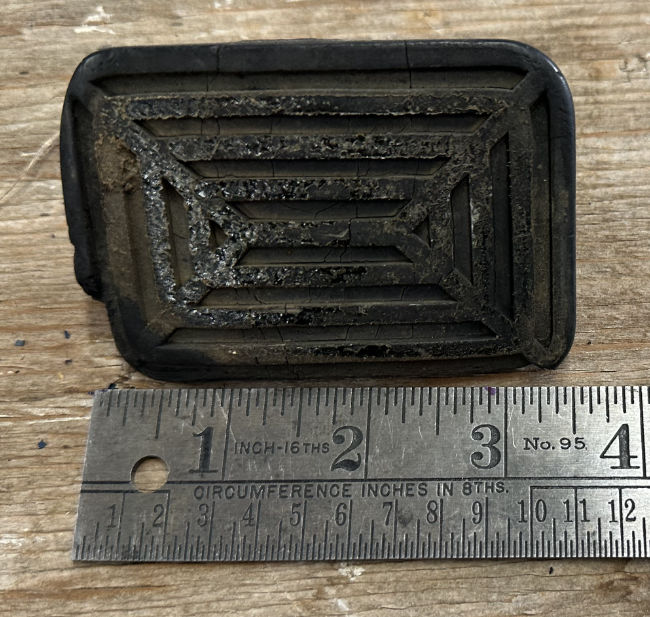
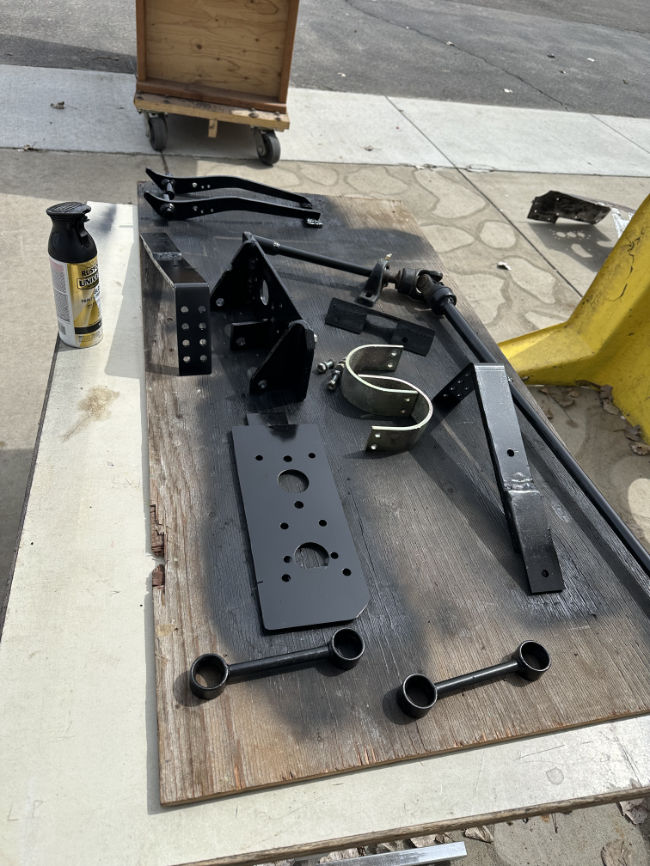
Here are two pics of the original bracket:

2024-04-24-4wd-shifter6

2024-04-24-4wd-shifter7

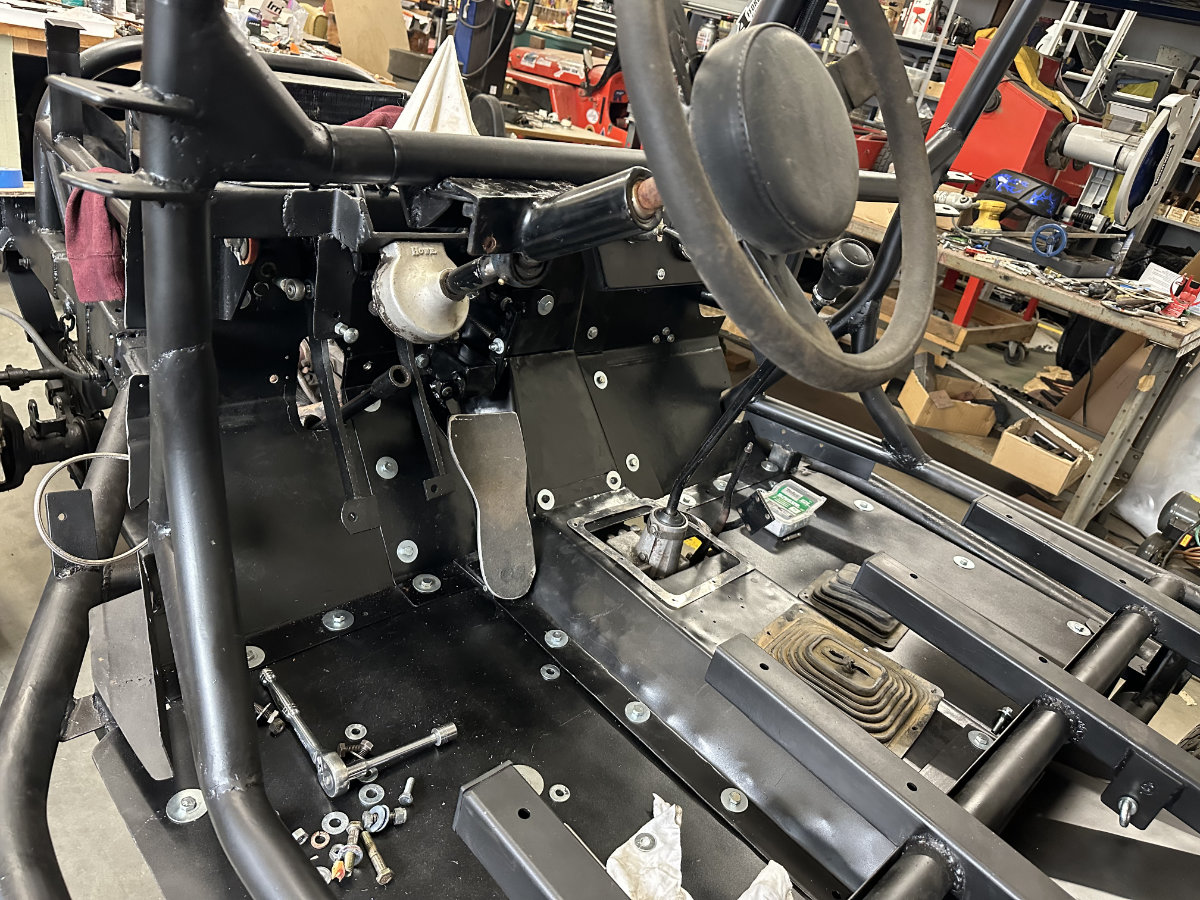
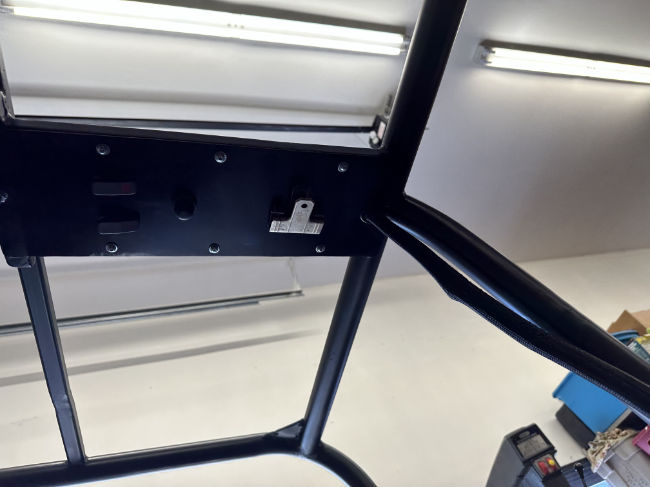
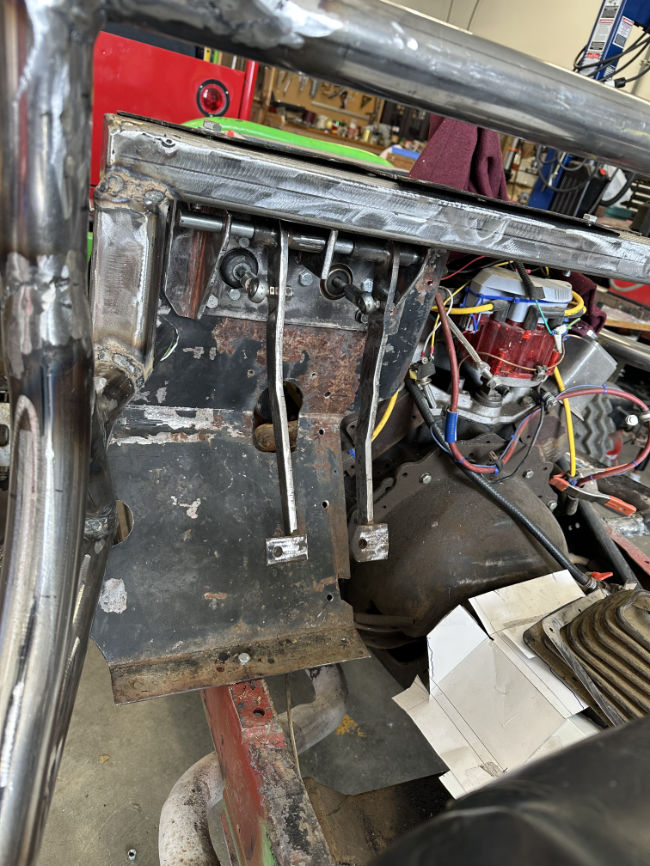
This pic shows one of the two cuts plus the new angle. Even with that small bit of metal holding up the bracket, the shifter could easily shift through the gears. So, next I’ll repair that gap.

2024-04-24-4wd-shifter5

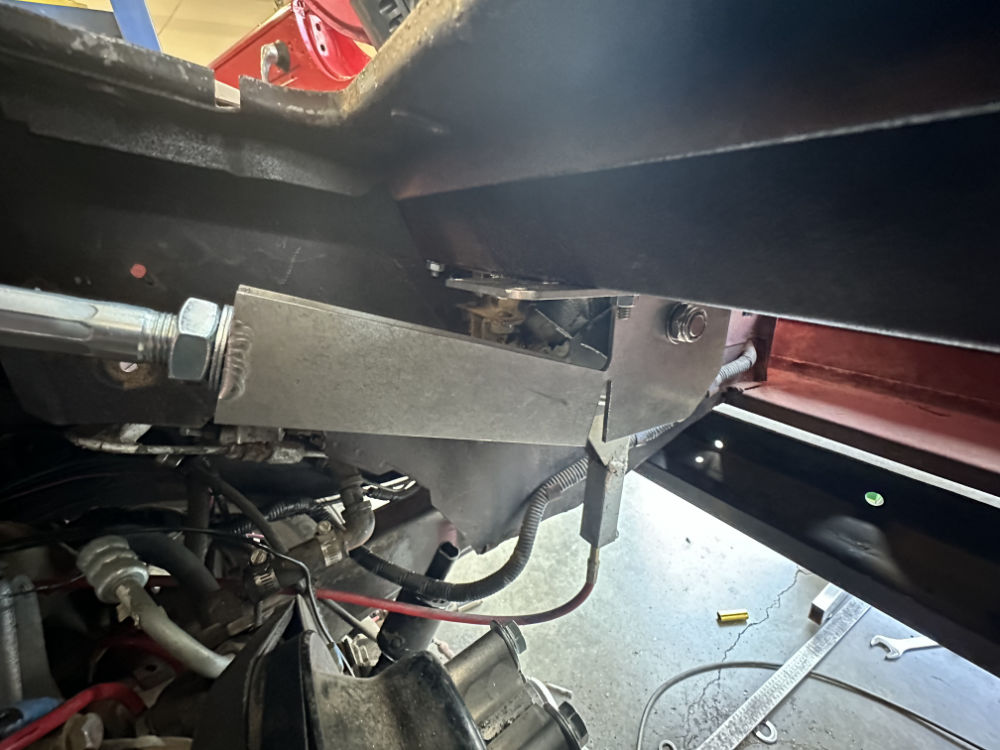
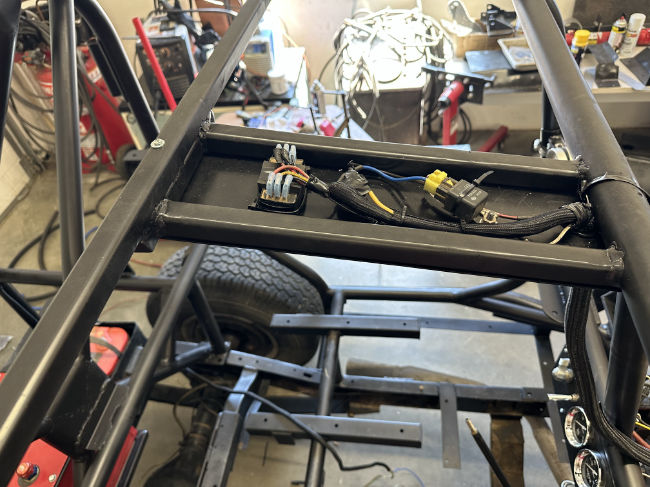
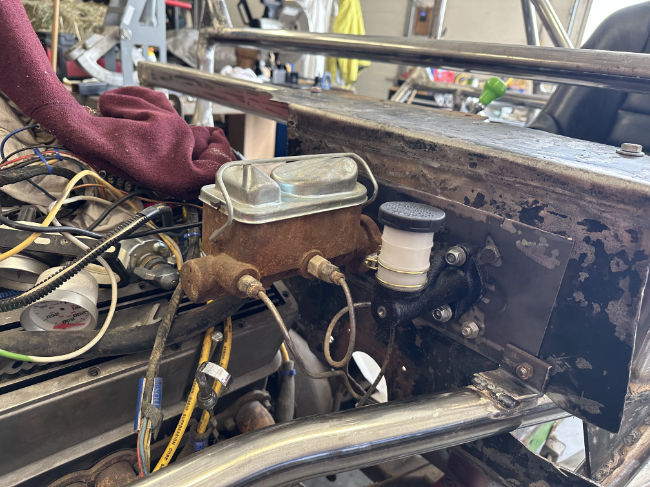
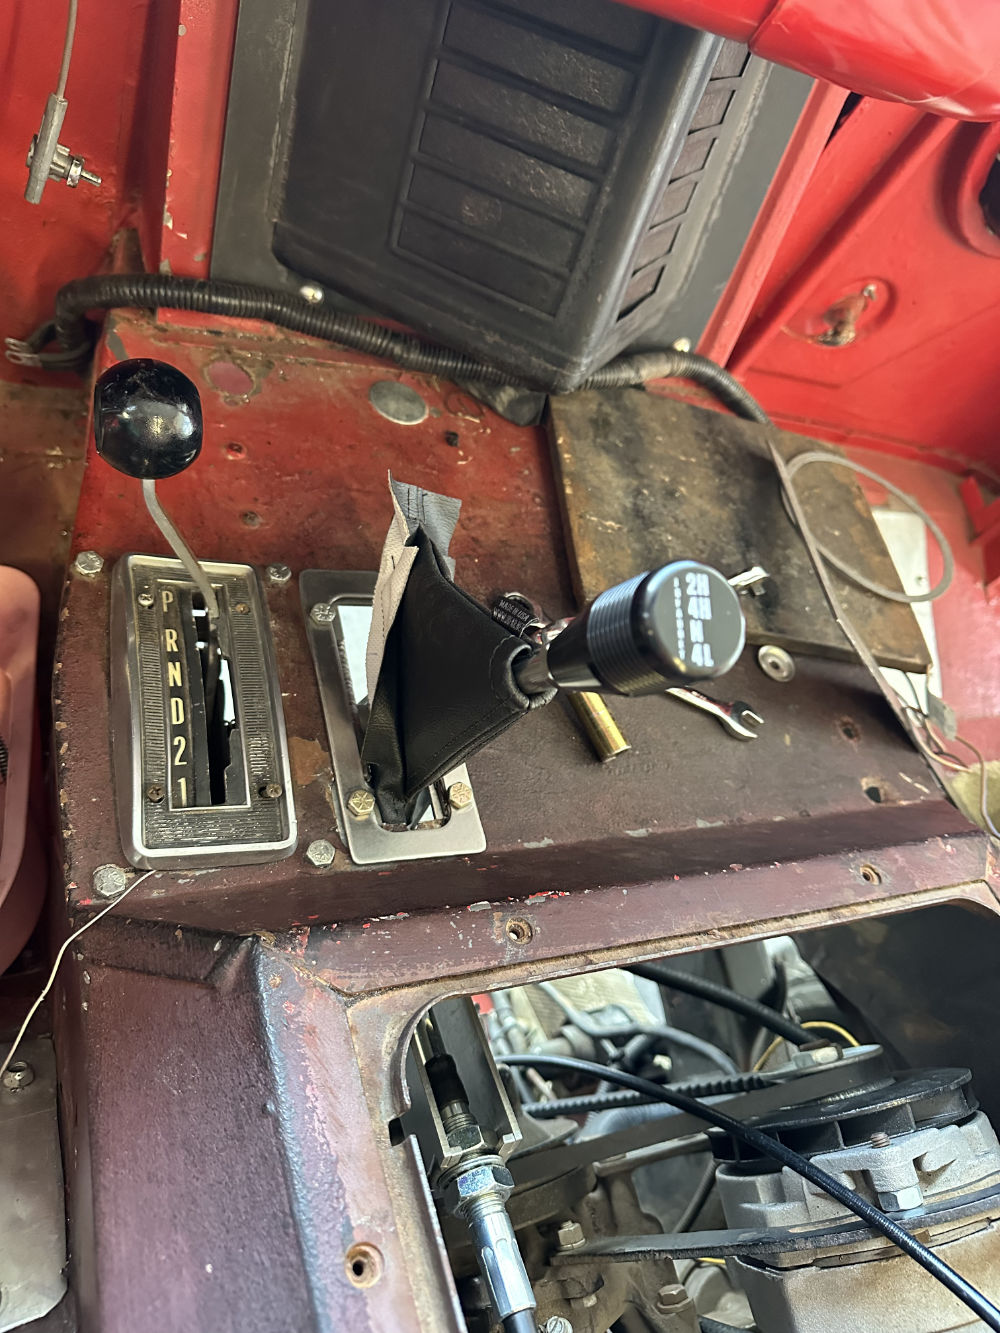
Here you can see how the cable angles upward, the veers toward the driver’s side. I haven’t determined where I’ll be securing the cable.

2024-04-24-4wd-shifter4The shift boot needs to be reattached under the bezel. The bezel is the original bezel with the colorful surface sanded, which turned out to be exactly what I wanted. I’ve painted it red since this pic was taken.

2024-04-24-4wd-shifter2

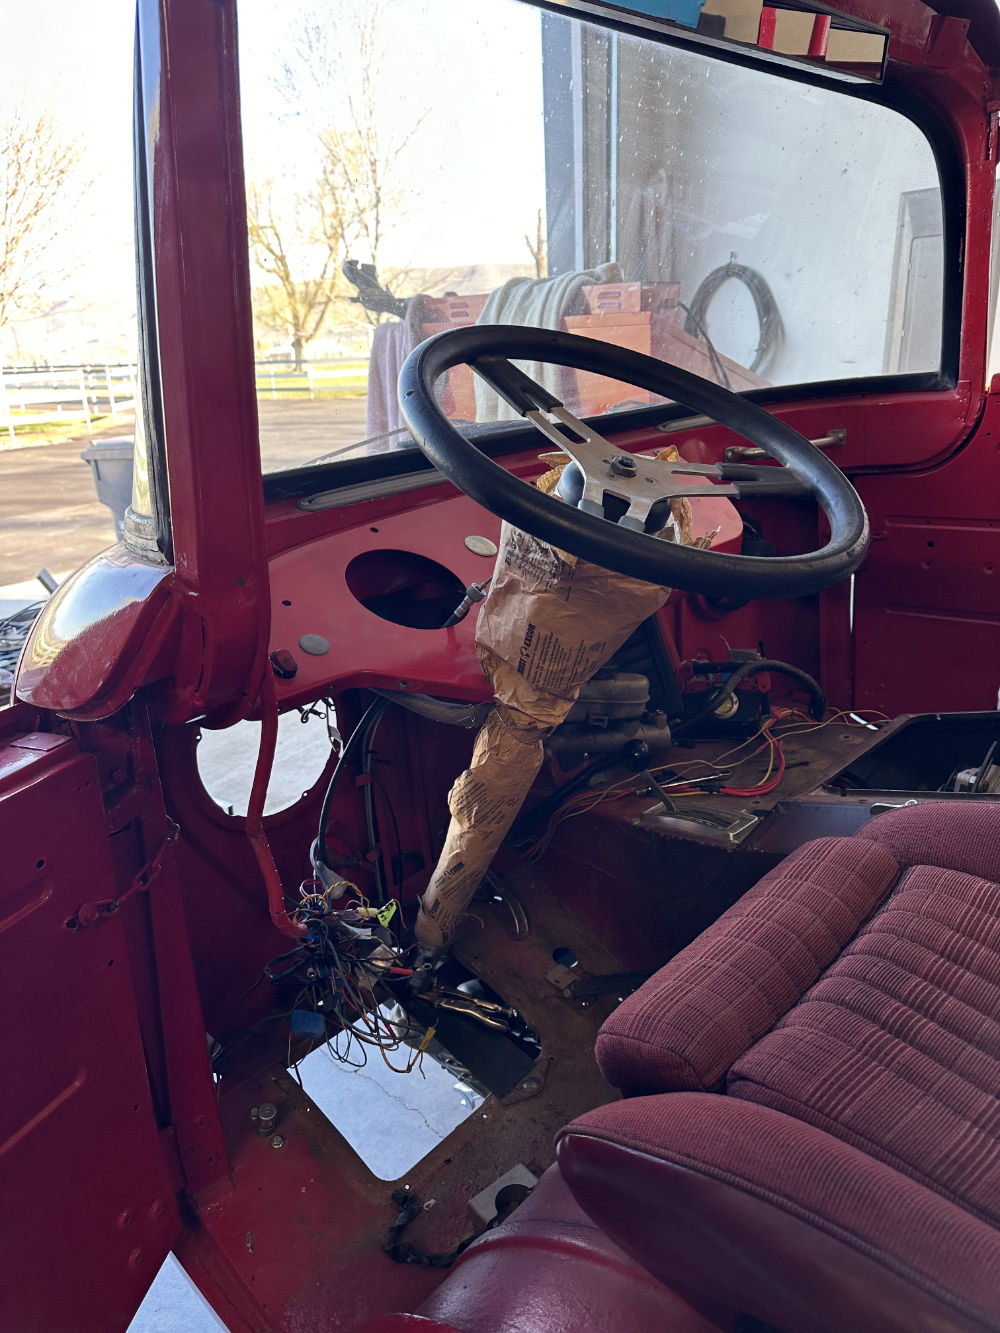
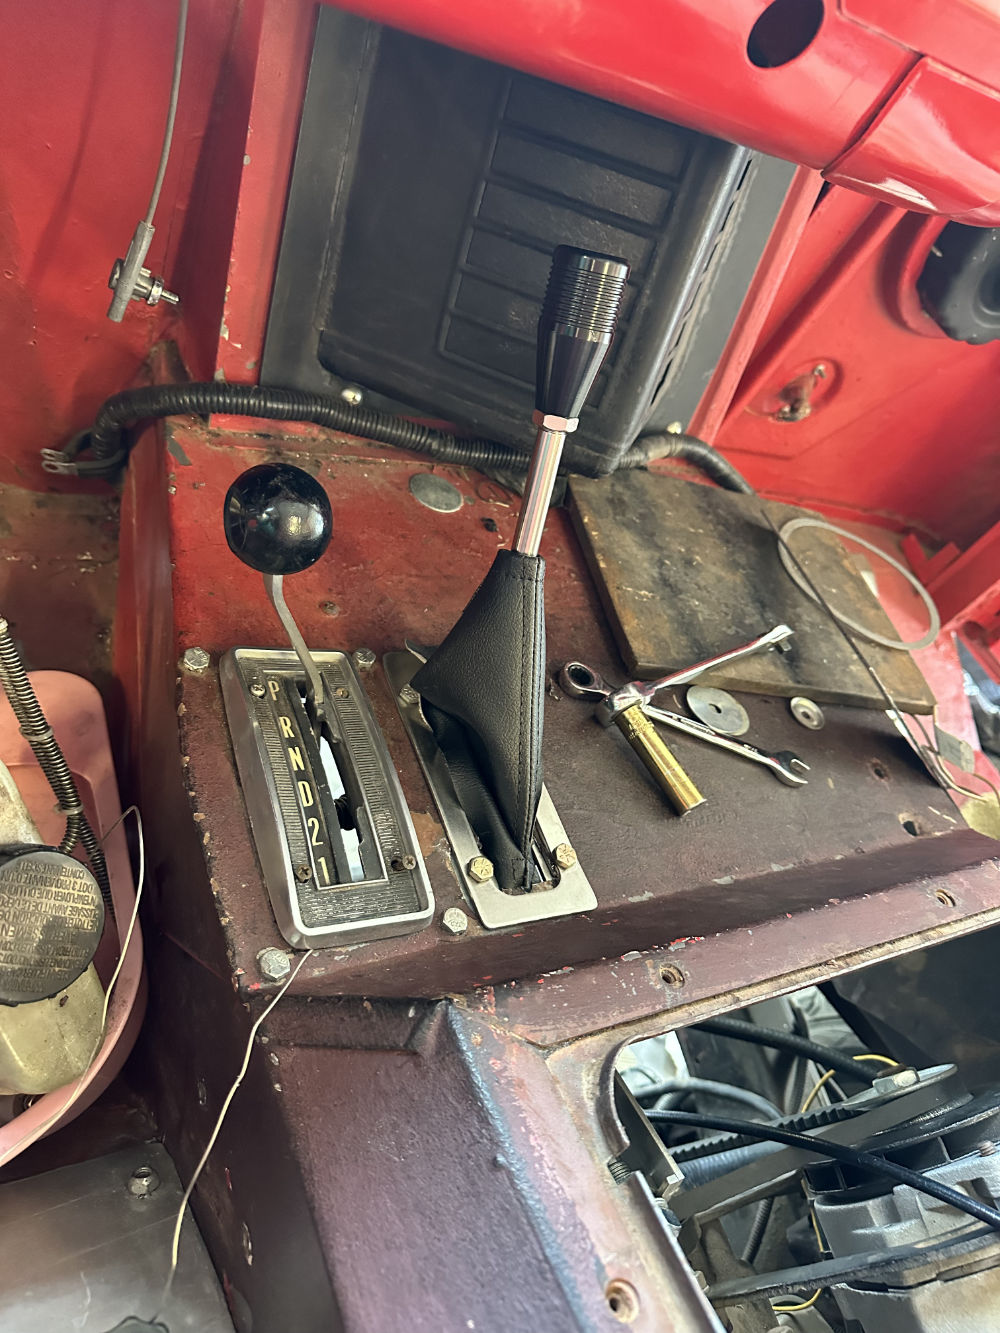
Here’s the shifter all the way forward. It’s surprisingly (to me anyway) easy to shift.

2024-04-24-4wd-shifter3

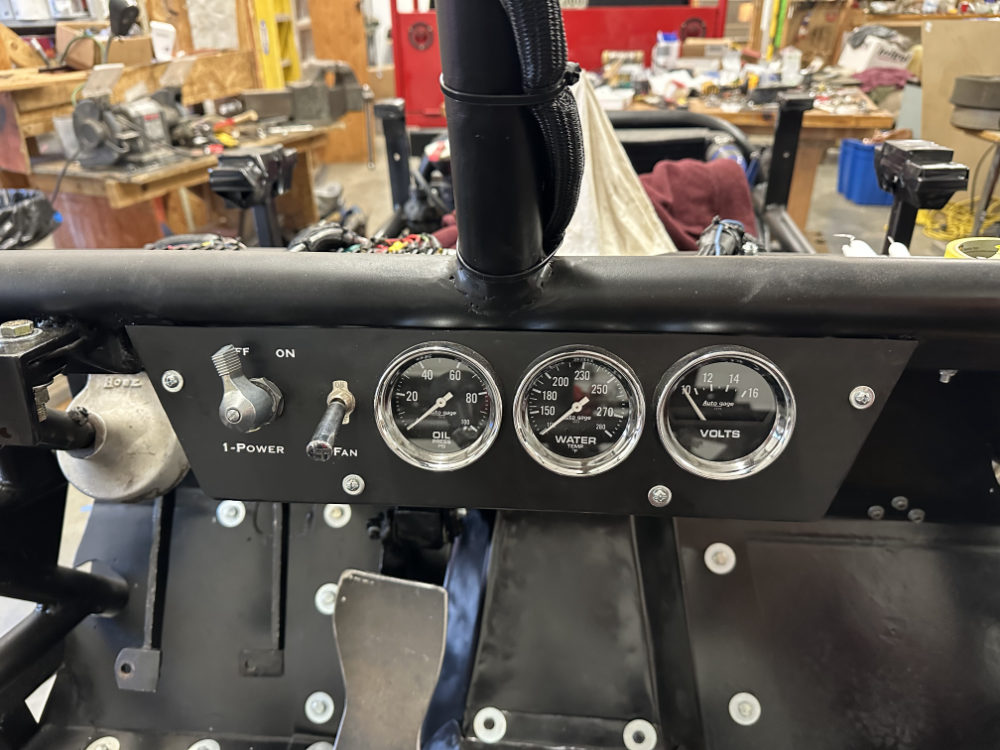
Next up I was going to build the final parts for the transmission oil cooler and fan bracket, but I have misplaced a couple pieces that I created and now can’t find them. So, I’ll work on the 1.5″ gauges next. Then, the gas pedal.


[fb_button]
 
To Top

16 Minute 1943 MB Rebuild Video

• CATEGORIES: Builds, Features, videos This site contains affiliate links for which I may be compensated.

Blaine shared this MB rebuild video by Al’s Garage. There are a few deviations from stock, but still it’s clear a lot of time was put into saving this old MB. Kudos for documenting this as getting the light and other details correct while focusing on rebuilding is a tedious task!

To view the video, you’ll need to go to Youtube: https://www.youtube.com/watch?v=p5XbCjy4nW4

als-garage-1943-mb-rebuild

[fb_button]
 
To Top

Steering Parts Gathered

• CATEGORIES: Builds, Features • TAGS: This site contains affiliate links for which I may be compensated.

The 60 to 70 degree highs the past few days made for some optimal outside work weather, so there was lots of recovering from winter (picking up branches), to restocking with hay for the next month, to spraying fence lines, among other tasks, so there was no time for eWillys. I did get a little work done on the FC, but not much.

Below is a pic showing how the steering column goes from the rack and pinion’s stock connector (2000 Ford Explorer), switching from the Ford V connection on the R&P to the 3/4 DD shaft (not shown is the 1″DD to 3/4″ DD Borgensen joint that will over the joint). A 3/4″ Heim Joint will help keep the shaft in place, but the mount is yet to be built.

The 3/4 DD shaft enters a 3/4″ DD / 3/4: 36-spline U-Joint, which connects to the VDog 90 degree joint. The V-Dog has an aluminum block mount that will bolt to a yet-to-be made mount to the frame. The V-Dog will also bolt to the bottom of the floor access cover.

Here is the pic from a below. Atop the VDog is a temp plate for testing how it will fit. It’s a close fit between the frame and cab, but everything clears with room to spare.

2024-03-15-lower-steering-column

From the top of the V-Dog another 3/4″ DD / 3/4: 36-spline u Joint connects to the column. The column itself is a IDIDIT 28″ tilt column with hazards and turn signals.  As it sits, it’s a couple inches higher than stock, but it’s at more of an angle, so it looks in the pic like it is sticking up higher than that.

2024-03-15-upper-steering-column

Before I can mount the column, I need to finalize the pedal. I made a prototype today, but it’s pretty ugly. I hope to have a final version in the next couple of days.

The column is larger around (2″) than a stock column, so I might not use the stock column mount as I’d planned to do.

Again, this is all rough work to make sure things fit.

[fb_button]
 
To Top

Scott’s “TTT” Tiny Trash Truck

• CATEGORIES: Builds, Features, Fire/Police/Industry Vehicles This site contains affiliate links for which I may be compensated.

Cowboy shared this photo from Scott Ingram, who built a Tiny Trash Truck out of an old DJ-5 (Scott operates a garbage collection firm in Paris, Illinois). I don’t see an obvious seat, so this may only be for show. That’s something I’ve never seen done with a DJ-5.

scott-ingrum-dj5-garbage-truck

[fb_button]
 
To Top

Race Jeep Instructions

• CATEGORIES: Builds, Features • TAGS: This site contains affiliate links for which I may be compensated.

Ann fired up her Cricket yesterday and printed out some labels that also act as instructions for starting and managing the jeep. She also add “ON” and “OFF” labels to make clear what switches need to be pressed. Starting the jeep is a five step process:

  1. Power
  2. Fan
  3. Fuel pump
  4. Ignition
  5. Start (button)

In the first pic, the “2-” for the fan label is hiding behind the switch.

2023-08-22-race-jeep-lettering1 2023-08-22-race-jeep-lettering2 2023-08-22-race-jeep-lettering3

[fb_button]
 
To Top

Racer Progress Pedaling Along

• CATEGORIES: Builds, Features • TAGS: This site contains affiliate links for which I may be compensated.

More progress made on the racer this weekend. The floors are installed and mostly bolted. The pedals are all in place. The steering was in place, but I was unhappy with the final angle of the front support bearing, so I plan to redo that support so that it angles differently. Hopefully, I will get that done and installed today.

Here’s how the rear top crossmember that holds the rear fire extinguisher looks. The two holes on either side are the shoulder strap attachments.

2023-08-20-racer-pedals-rear-extinquisher

Here are the three pedals (with the steering drive shaft disconnected from the quick-turn unit).

2023-08-20-racer-pedals2

One thing I still need are a brake and clutch pedal pad. Any recommendations on what I can use that has a similar mount point and size? (these were from the yellow racer .. I didn’t like the other racer’s pedals). These look to be rubber casings over metal pedals, but both pedal bolts are in bad shape. this is the good one …

pedal2 pedal1

The master cylinders are attached (the brakes are ready to go). I have to get an adapter to connected the clutch line to the clutch master cylinder. Everything is fitting well. I have to say the fire wall turned out better than I thought. Remember, I flattened the old firewall from the yellow racer and re-bent it into the shape I wanted.

2023-08-20-racer-pedals1

Here side view of the gas pedal setup. One thing I learned from my first race jeep was that having a firm, stable gas pedal was greatly beneficial when racing, due to the bouncing. I could plant the bottom of my foot firmly, while using the top of my foot to feather the gas. This setup is based on what I built for Biscuit, but heavier duty.

Continue reading

[fb_button]
 
To Top

Racer Updates

• CATEGORIES: Builds, Features • TAGS: This site contains affiliate links for which I may be compensated.

I’ve made some assembly progress. The tank is installed and hooked up (which took me a short while to remember exactly how I fit it into that tight space, lol), the battery is setup, the upper wiring is in place, the rear sway bar is installed, the rear lights are installed and wired and the gauges are in place.

Currently, I am focused on setting up the wiring. I saved the previous wiring, since little will electrically, so it shouldn’t take too long to alter some wire distances. 
2023-08-10-racer5 2023-08-10-racer6 2023-08-10-racer7 2023-08-10-racer8

2023-08-10-racer9

[fb_button]
 
To Top

John’s Completed His 1955 USAF M-38A1 Build

• CATEGORIES: Builds, M-38A1 This site contains affiliate links for which I may be compensated.

John’s complete the build of a 1955 M-38A1 USAF. Looks well done!

My 1955 M38A1 is finished.
I bought it in late 2021 and has Dave Arnold (the area’s leading MV guy) go over it.
It had recently had an engine rebuild, so it was just the usual stuff as well as all new seals, radiator and wiring harness.

Wanting seatbelts, I wanted something period correct, so I used aircraft seat belts like the motor pool could have gotten from base supply. They were reconditioned by an aircraft supply store.
I also got an orange/white “flightline flag”, that vehicles had to display back then. The holder used an existing hole. Finally, there is a decal on the dash explained the control tower traffic signals; back then they used a light gun in place of a radio.

The power plug is operational and I bought a slave cable that is compare with airplanes (today’s planes use the same 24v plug). So when I’m at the airport, I could jumpstart aircraft.

Lacking a hood number, I put it in USAF Markings and made it from Larson AFB (Moses Lake, WA), and my dad’s unit circa ’55-57…the
62nd Troop Carrier Wing. I was born at Larson a couple of weeks before the Jeep was built.

The current Hood number is, in AF style:
55 (year contracted for),
K (Military vehicle, General Purpose),
82551 (Willys serial).

The paint is the PPG formula, (I fixed test shots of the other two and This looked best). Growing up in AF based and spending 20 years in myself, I knew what looked correct to me.
Since gloss finish shows body issues, I had some minor bodywork and final paint done by a pro body guy.
When our purchased, it was straight (except the back panel was pushed in a bit from a backing accident…we straightened it, but most of the damage was covered by the spare tire) with no rust except in the fuel tank well.”

IMG_20230527_145538_hdr_kindlephoto-3019713 IMG_20230527_145554_hdr IMG_20230527_145617_hdr_kindlephoto-2953202 IMG_20230527_145644_hdr_kindlephoto-2899671 IMG_20230527_145711_hdr

[fb_button]
 
To Top

Unusual Customized CJ-3A(?)

• CATEGORIES: Builds, Features, Unusual • TAGS: This site contains affiliate links for which I may be compensated.

David Adams posted this oddity on Facebook. He was hoping to learn more about it. The jeep appears to be a CJ-3A that’s been modified for some purpose that’s not clear.  The side looks kind of like a Willys Quad; was that a coincidence?

Here’s one of his posts (there were several posts and I got several IMs about it).

unusual-cj3a-david-adams-5 unusual-cj3a-david-adams-6 unusual-cj3a-david-adams-7 unusual-cj3a-david-adams-8 unusual-cj3a-david-adams-9


[fb_button]
 
To Top

Making More Progress on the Racer

• CATEGORIES: Builds, Features • TAGS: This site contains affiliate links for which I may be compensated.

Sorry the pics aren’t better, but the focus is on creation and not documentation. The goal is to be able to drive it during the first week of May.

The clutch and brake pedal system are all ready for install, though it’s apart for paint. The floor framework is partly complete as of today. I should have the floor frame and floor itself ready for some paint by Sunday (assuming there aren’t more distractions (there have been plenty of those ..).

I ended up building a custom bracket system for the clutch and brake. Because of the holes in the firewall from the old clutch/brake system, I sandwiched the firewall between the bracket I made and a thin sheet of metal to make it look cleaner. Here’s a very rough look from a few days ago. Both pedals had bends, which I straightened (and are straighter than shown below) with the press (as I didn’t need the bends).

2023-04-12-clutch-brake2 2023-04-12-clutch-brake1

Below are some of the parts with a layer of paint. There’s nothing fancy here. I’d love to have the time to tear the whole jeep down, properly clean it, then paint it. But, I want to run the racer first to see how it does before investing more time doing a big overhaul.

2023-04-12-painted-parts1

[fb_button]
 
To Top

Propane Powered 6×6

• CATEGORIES: Builds, Features • TAGS: This site contains affiliate links for which I may be compensated.

Barry Andre posted pics of his 6×6 to Facebook. It’s a pretty cool rig.

837017479769475https://www.facebook.com/groups/837017479769475/?multi_permalinks=2504533526351187&ref=share

“Here’s my 6wd Willys 231 Aluminum Industrial Buick 231 V6 on Propane Twin Stick Transfer case Hydraulic Steering and all 6 wheels drive when it 4wd”

unsual-6x6-propane3 unsual-6x6-propane4 unsual-6x6-propane5 unsual-6x6-propane6 unsual-6x6-propane7

Continue reading

[fb_button]