Biscuit Research Archives

My Rebuild

To Top

My Build – Front brake brackets

• CATEGORIES: Biscuit This site contains affiliate links for which I may be compensated.

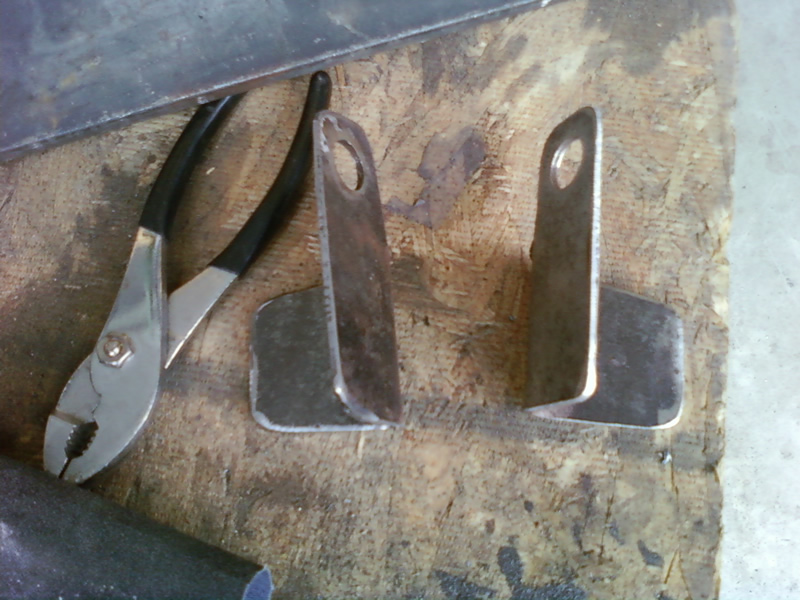
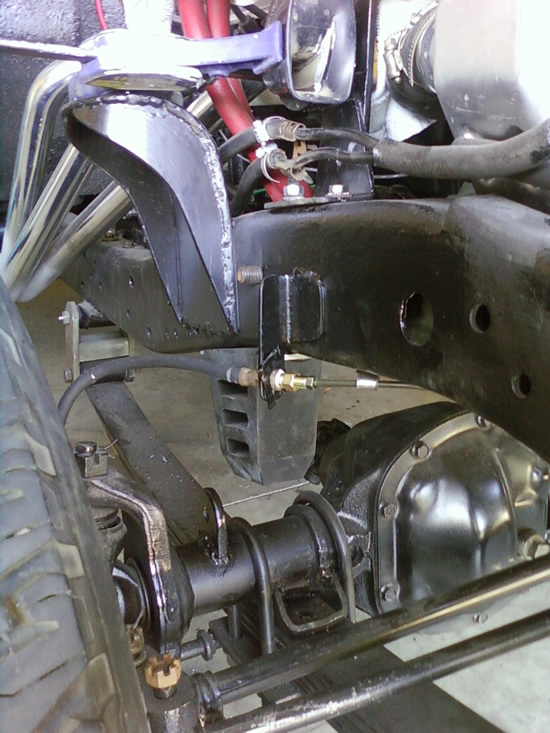
Because the frame is about 8″ higher than stock and due to the frame changes, I had to reroute the brake lines underneath the frame rather than through the middle of the frame.  Another advantage of this system is that I can use standard CJ-5 flexible brake lines, which reduces my costs. I considered a variety of bracket ideas, but finally developed the following:

These two brackets were cut from flat steel,  drilled and then bent.

brakes_2

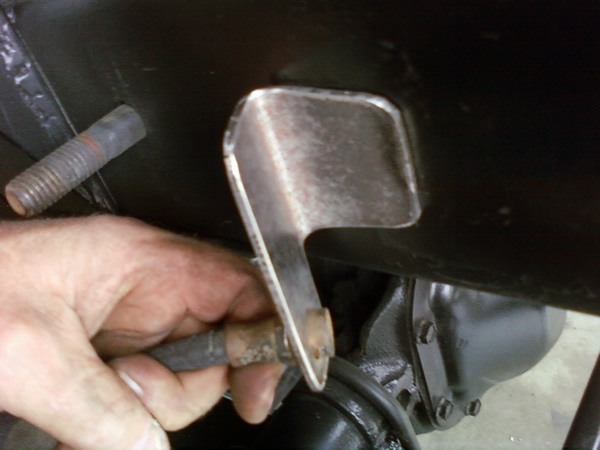
Next, I put it against the frame to figure out the exact position.

brake_2_5

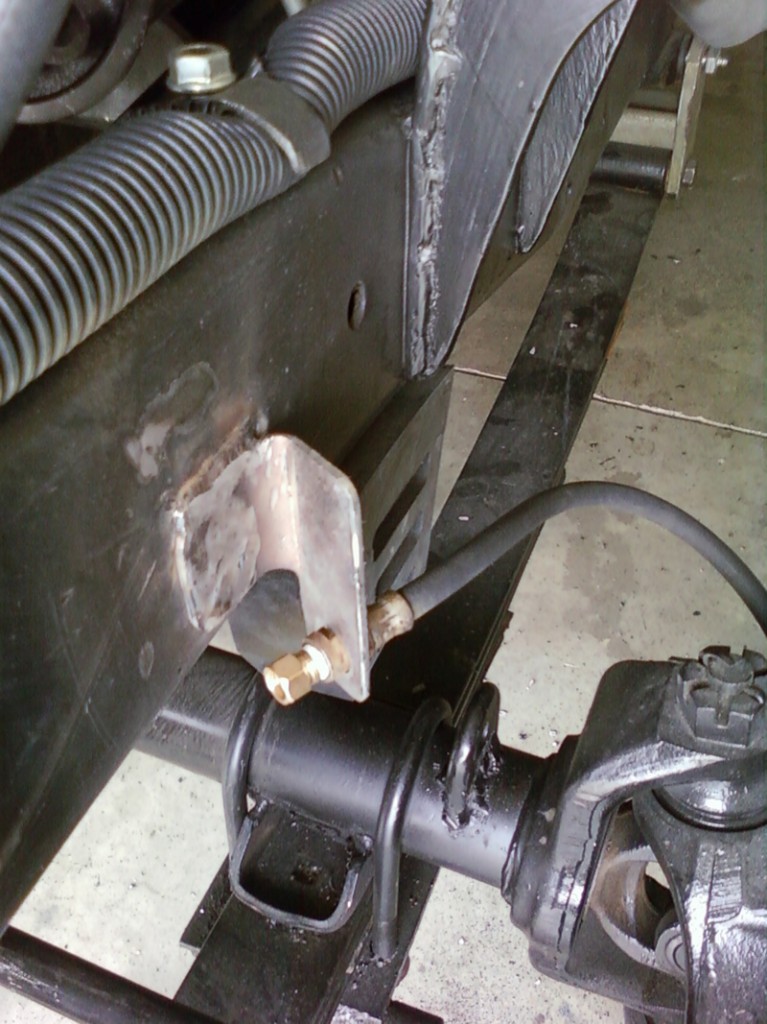
Next, I welded them to each side of the frame. You can’t see it from the pic, but I drilled a hole near the bottom of the bracket so I could fill in the hole and weld the bracket to the frame. I also welded the top of the bracket to the frame.

brake_3

brake_4

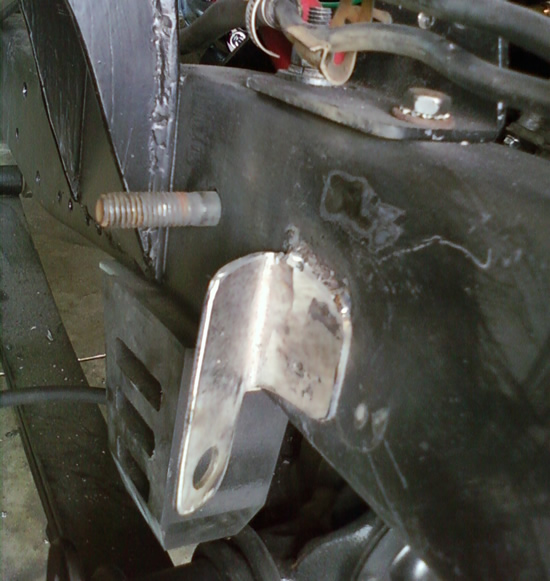
And here’s the passenger side with paint and everything tightened.

brake_final

 
To Top

No Updates Tonight – Squashed Finger

• CATEGORIES: Biscuit This site contains affiliate links for which I may be compensated.

UPDATE:  Well, my finger is better, though swollen and purple, but for some reason the internet is crawling very slowly tonight.  So, I’ve made a couple updates and will try again in the AM (5/25).  I’ll also include an update on finishing up my brakes today (yeah) and a cool video of how to re-seat a tire using WD-40 and a flame.

No updates tonight (5/23), except for the brief info below.  I was pulling off one of my shocks when it suddenly slipped off, catching my finger between the shock end and the brake backing plates.  It’s a nice rosy purple 🙂

The good news is that I got my custom front brake hose brackets cut and bent (pics tomorrow).  I also welded the brackets on to my front housing so that I can attach limit straps for racing.

Tomorrow I’ll weld on the brake hose brackets, reattach my proportioning valve, and hook up my brake lines.

 
To Top

My Build: My windshield frame painted

• CATEGORIES: Biscuit This site contains affiliate links for which I may be compensated.

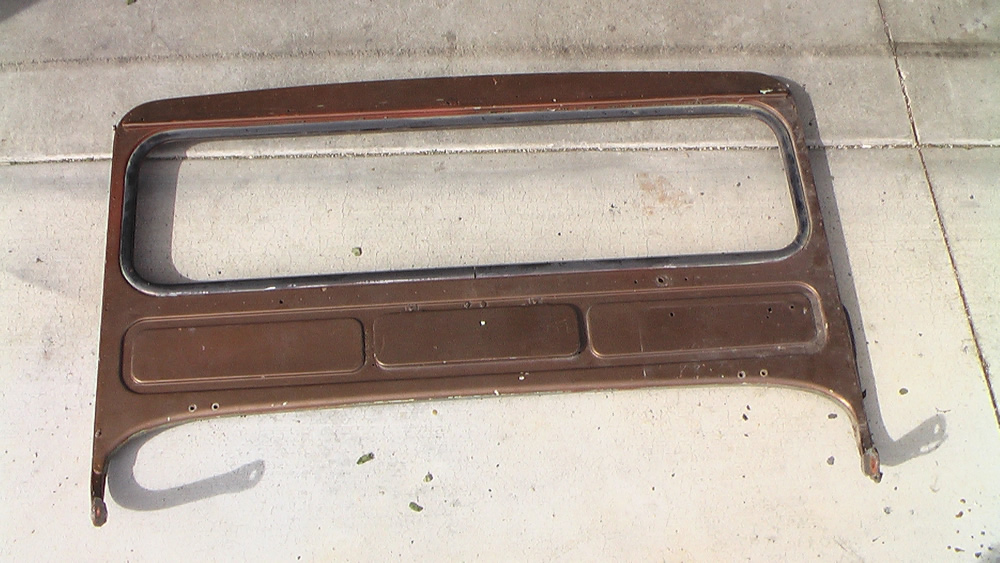
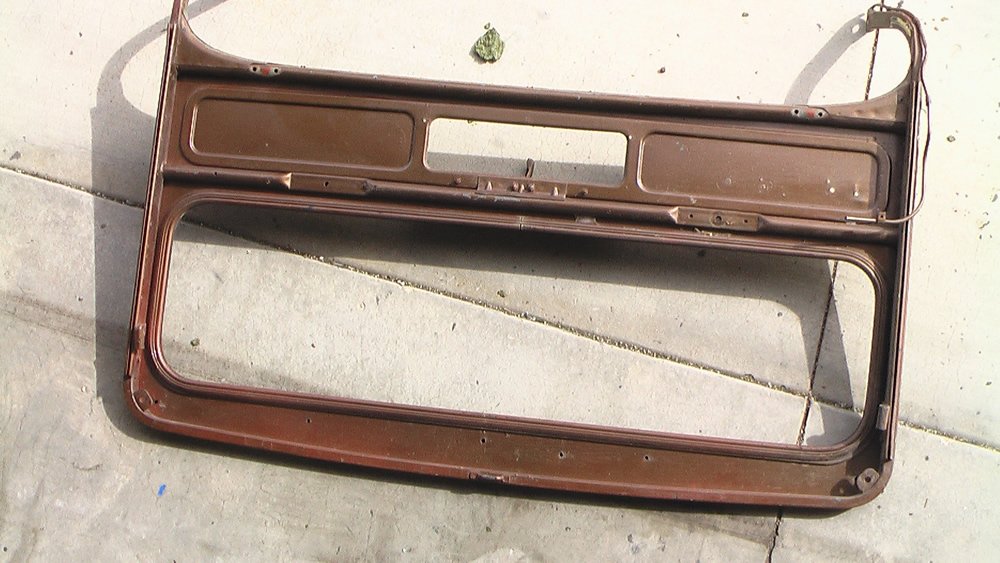
Here’s some before, during and after shots of my CJ-3A windshield rebuild.  Special thanks to John for the vent bracket.  Mine broke off and John created a new one for me.  It works beautifully.  I was able to de-paint and can reuse the windshield gasket, so now all I need is the glass and the cowl rubber and it’s completed.  Necessary repairs included welding up 8 holes and welding the crack in the frame.  Next, finishing the brakes.

BEFORE PAINT REMOVAL:

windshield_front

driver_side_crack

windshield_back

Continue reading

 
To Top

Ya win some and ya lose some …

• CATEGORIES: Biscuit This site contains affiliate links for which I may be compensated.

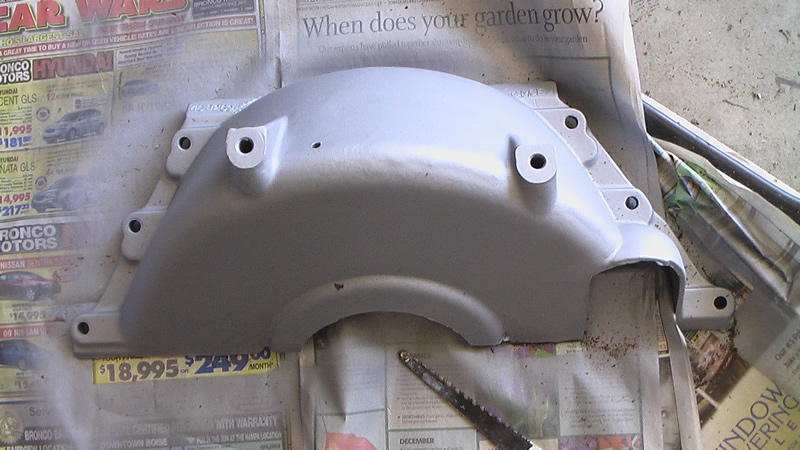
At the 4wd swap meet  in March, my only purchase was a bottom cover for my TH-350 housing.  I was assured it would fit a TH-350.  I figured, for $10, it was worth a try.

I got it home, cleaned it up, even painting it.  It looked like it should fit.  But alas, no matter how many ways I tried to make it work, the holes didn’t line up.  That will teach me to try something new (as in trying an automatic).  So, my search continues ….. here’s a picture, for what it’s worth 🙂

th350_bottom_not

 
To Top

My Build — Disc Brake Anchor Plate issue?

• CATEGORIES: Biscuit This site contains affiliate links for which I may be compensated.

caliper2Winter has a funny way of blowing all kind of things into and around the garage. Last November I took a break from projects in the garage, but when I went out there a couple of weeks ago, it was a bigger mess than I remembered it.  So, I spent last weekend cleaning (including cleaning out the parts washer — uggh), organizing and getting ready to attack my first project of the year, getting the disc brake parts cleaned up and painted.
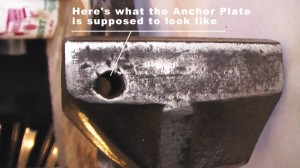
caliper_correct1So, when I went out today to start with the brake parts, naturally I ran into problems.

PROBLEM 1: My parts washer repaid my efforts at cleaning by developing a leak at the base of the pump.  Not cool.  Since this parts washer is older than some of the wagon wheel trails around here, I’m not entirely sure if I can find parts for it.  It’s entirely possible it’s a custom tank.  So, I get to spend this upcoming weekend removing the washing liquid and attempting to patch the leak.
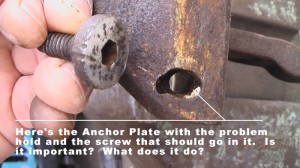
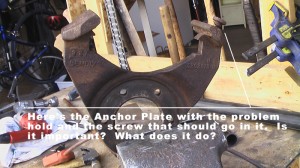
caliper_problemholePROBLEM 2: Since the parts washer wasn’t going to work, I decided to use a wire brush and a sander to clean up the parts.  So, I cleaned up one of the anchor plates, no problem.  I got to the second anchor plate and noticed that what’s supposed to look like a hole with threads had chunks missing and the threads are gone.  Having not worked with these brakes before, I decided it was time to close up the garage for the day and hop on the internet to see if I could learn more about the problem.  Unfortunately, I couldn’t find anything about the problem.

So dear readers, what’s the bolt for?  Is it important?  I’ve got two images to the right.  The image at the top shows the entire anchor plate.  The second pic highlights a correct hole and the bottom image highlights the problem and shows the bolt that should go there?  Do I need the bolt (of course, I’m sure I do)?

 
To Top

Mods – Steering upgrade options for Early Jeeps

• CATEGORIES: Biscuit This site contains affiliate links for which I may be compensated.

UPDATE: 08/12/2010: I’ve added a link and section regarding the rack and pinion mod implemented by Sam.

UPDATE 01/19/2010: Here is a link to the post about Lawrence Elliot’s nice little mod of the bell crank to eliminate sloppiness.  This is a simple way to improve steering sloppiness while keeping everything else stock.

UPDATE:  The picture below is how NOT to update your the steering in your jeep! I found a picture of this crazily creative solution for updating the steering mechanism on an early jeep at JP Magazine, so I’ve added it to a post I made about steering upgrades last April.  I’ve also updated this post with images from two different jeeps that installed a saginaw non-power unit within the engine compartment and can be found under section 3B.

scary_steering

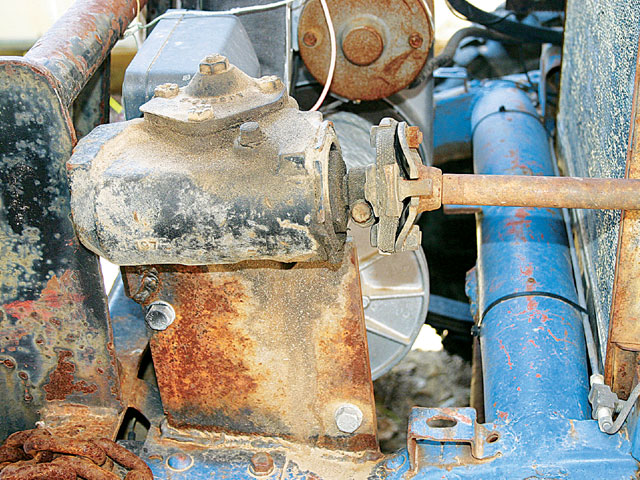
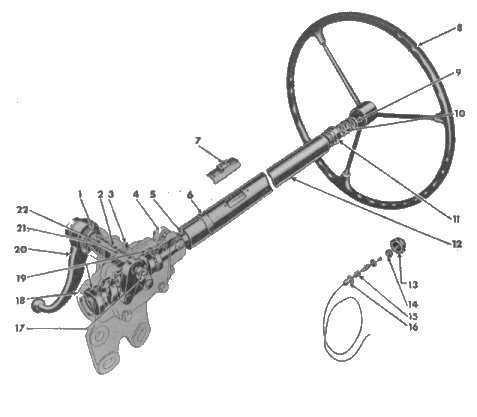
Modifiying the steering system of early jeeps might be one of the most common upgrades around.  It often follows the upgrade of the engine to a V6 or V8, right after the jeep owner discovers how much work it is to turn the wheel while jeeping.  So, here’s my list of steering options:

1)  Keep the stock setup (but this is often impractical when upgrading to a v6 or v8).  This is a Ross worm/sector manual steering box and a drag link that connected to a frame-mounted bellcrank.

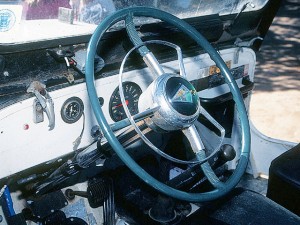
hudson_steering_wheel2)  Swap in a Hudson steering unit.  I exchanged emails with with a reader named Larry who had one of these in a CJ3B and loved it (calling it the sweetest driving jeep he’d ever owned — he planned to put one in a  1949 CJ-2A he just bought).  I’ve never tried the swap nor tried driving a jeep with the setup in place. I doubt these would work on a MB/GPW setup. (To the right is an image of a Hudson steering wheel in a jeep from Jp Magazine.)

These can still be found using craigslist and junkyards. Here’s a quote from the CJ-3B site.

“Forget the power steering and get a 1949-1954 Hudson steering set up. You can swap out the whole steering column or just machine the steering box to fit your original steering column. They both used Ross steering boxes, but the Hudson used a tapered roller bearing with a different gear ratio, making it feel just like power steering and gives you the tighter turning radius.”    http://cj3b.info/Tech/Upgrades.html

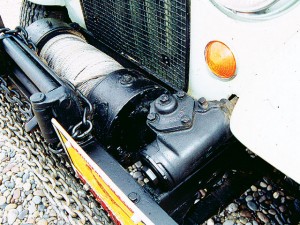
saginaw_steering Continue reading

 
To Top

My Build — Playing With the Roll Cage Design

• CATEGORIES: Biscuit This site contains affiliate links for which I may be compensated.

I thought I’d reassemble my mockup roll cage to see how everything is coming together.  After making a few small changes, I’ve decided the front hoop will need to go up about an 1″ or so and the back hoop will need to drop about 2″, which should provide a more balanced look to the cage and allow a top to fit more easily.

Continue reading

 
To Top

Attaching The Front of the Roll Cage

• CATEGORIES: Biscuit This site contains affiliate links for which I may be compensated.

Last week, Siva asked about my strategy for attaching the roll cage to the front area of the jeep. So, I put my mockup cage back into the jeep to demonstrate this.  The two pics below show the PVC tube landing squarely on the 1/4″ thick plate of steel.  There will be four bolts that go through the plate connected to the cage to a plate underneath the body connected to the frame (see drawing at the bottom).  This sandwiches the body between the roll cage plate and the frame plate, keeping everything together.  There will also be one or two triangle plates from the tube to the plate (as demonstrated by the piece show in the pic).  This will help provide some additional lateral strength.

Continue reading

 
To Top

My Build — Frame Cage Mockup

• CATEGORIES: Biscuit This site contains affiliate links for which I may be compensated.

I spent some time this evening cleaning up some older posts that didn’t have working links. While doing this, I’ve discovered that I didn’t have any posts regarding my ‘rough draft’ of the roll cage. I put this together early this year using some PVC. Here are some images from different angles.

Continue reading

 
To Top

My Build — The Seats

• CATEGORIES: Biscuit, Features This site contains affiliate links for which I may be compensated.

A reader just received a 1951 CJ-3A. Since the seats in it weren’t something he wanted, he asked what I had done for seats. I realized I hadn’t really covered the topic, so here’s what I did and why I did it.

As you probably know, my first jeep was built from an ex fiberglass racing jeep (oh where oh where did those pictures go). From that jeep I used the body, frame, roll cage and seats as the foundation for what became my first jeep (which I called the ‘great escape’). The fiberglass seats were mounted on a 2 1/2″ pipe that was welded to the frame. A hole was cut through the bottom of the body and the pipe stuck through the body (not only did the thickness of the body help keep the pipes from moving, but the pipes held the body in place — a nice synergistic effect). On the upper end of the pipe were threads. Onto those threads a square platform was screwed onto the pipe. The seats were screwed onto the platform. It’s a one size fit’s me approach that works for me and people of similar size. The back of the seats were then bolted to a plate that connected to a bar that was part of the rollcage. So, those seats did not move. They were solid, despite their thin profile.

Because the seats were already there and they seemed to fit me fine, I went ahead and used them as is. As I raced, drove it every day, and used it in the trails, the positioning of the seats was perfect. I felt secure and tight when I raced, I never got uncomfortable during long drives, my back never got sore, and there was enough padding for enduring the trails. For me, those were some of the most perfect driving seats I have ever used.

Continue reading