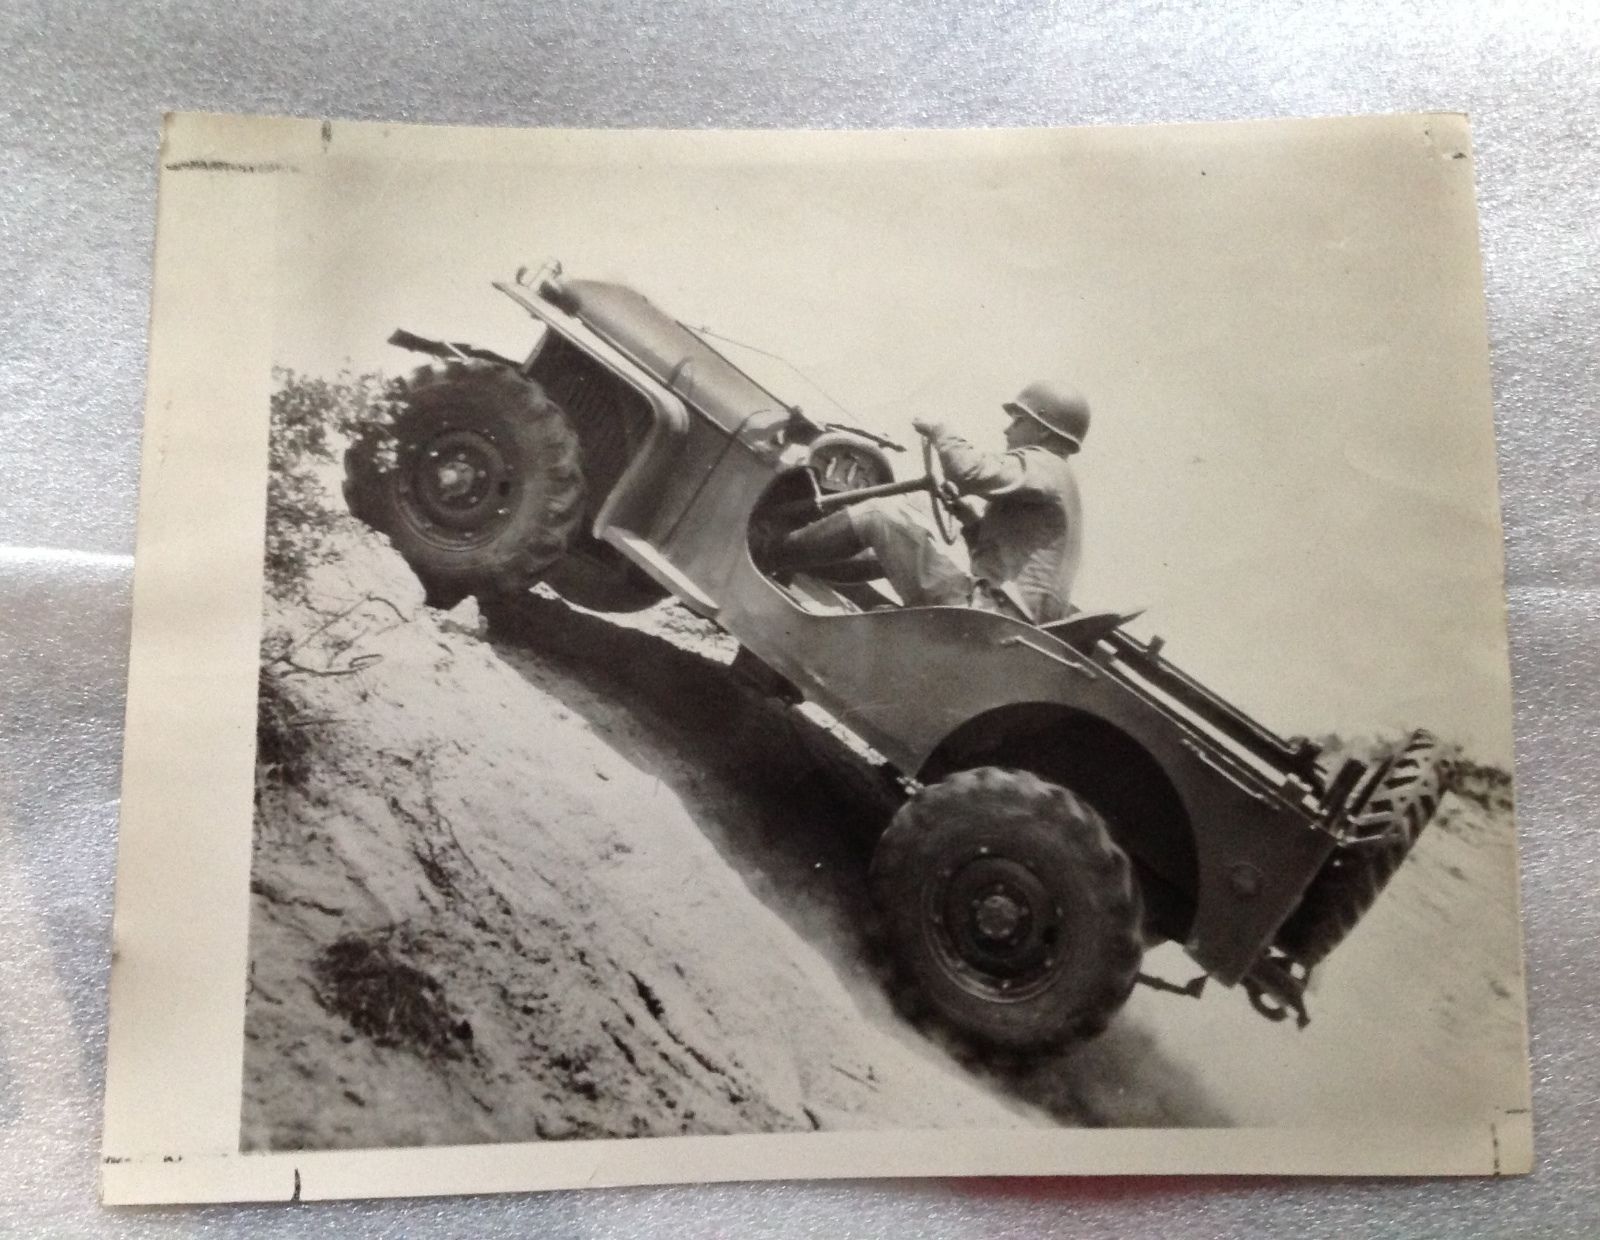
Nice press photo of a BRC-40 climbing a hill.
“Original 8″ x 10″ glossy press photo. Hand written on back : ARMY ARMORED SCOUT COMMAND CAR PEEPS. Dated May 4, ’41. Good condition for its age.”
View all the information on eBay

emailNeed to contact me and don't have my email? Click on email button.

Welcome to eWillys.com, a website for vintage jeep enthusiasts. I update this website nearly every day with jeep deals, jeep history, interesting reader projects, jeep related info, and more.
These quick searches can help you find things on eBay. People list in the wrong categories all the time, so don't be surprised to see brochures in the parts area for example. This section used to be split into jeeps, parts and other categories, but recent changes to eBay will require this information to be recoded.
The links to posts below show jeeps grouped by models, condition, and other ways. Some of these jeeps are for sale and others have been sold. If you are unsure whether a vehicle is still for sale or not, email me at d [at] ewillys.com for more info.
There are plenty of interesting, unusual, historic and surprising stories related to Jeeps and their owners. In addition, some of these features have nothing to do with jeeps. This link will display all featured stories starting from the latest.
Looking for parts and not sure where to go? There are a variety of large and small new and used parts sellers both online and offline.
Importantly, the allure of buying a project jeep can be romantic. The reality of restoring a jeep can be quite different, expensive and overwhelming without the right tools and resources. So, tread carefully when purchasing a "project". If you have any concerns about buying a vintage jeep, or run across a scam, feel free to contact me for help, comments or concerns .
Nice press photo of a BRC-40 climbing a hill.
“Original 8″ x 10″ glossy press photo. Hand written on back : ARMY ARMORED SCOUT COMMAND CAR PEEPS. Dated May 4, ’41. Good condition for its age.”
View all the information on eBay
Lots of great details about the build included within the description.
View all the information on eBay
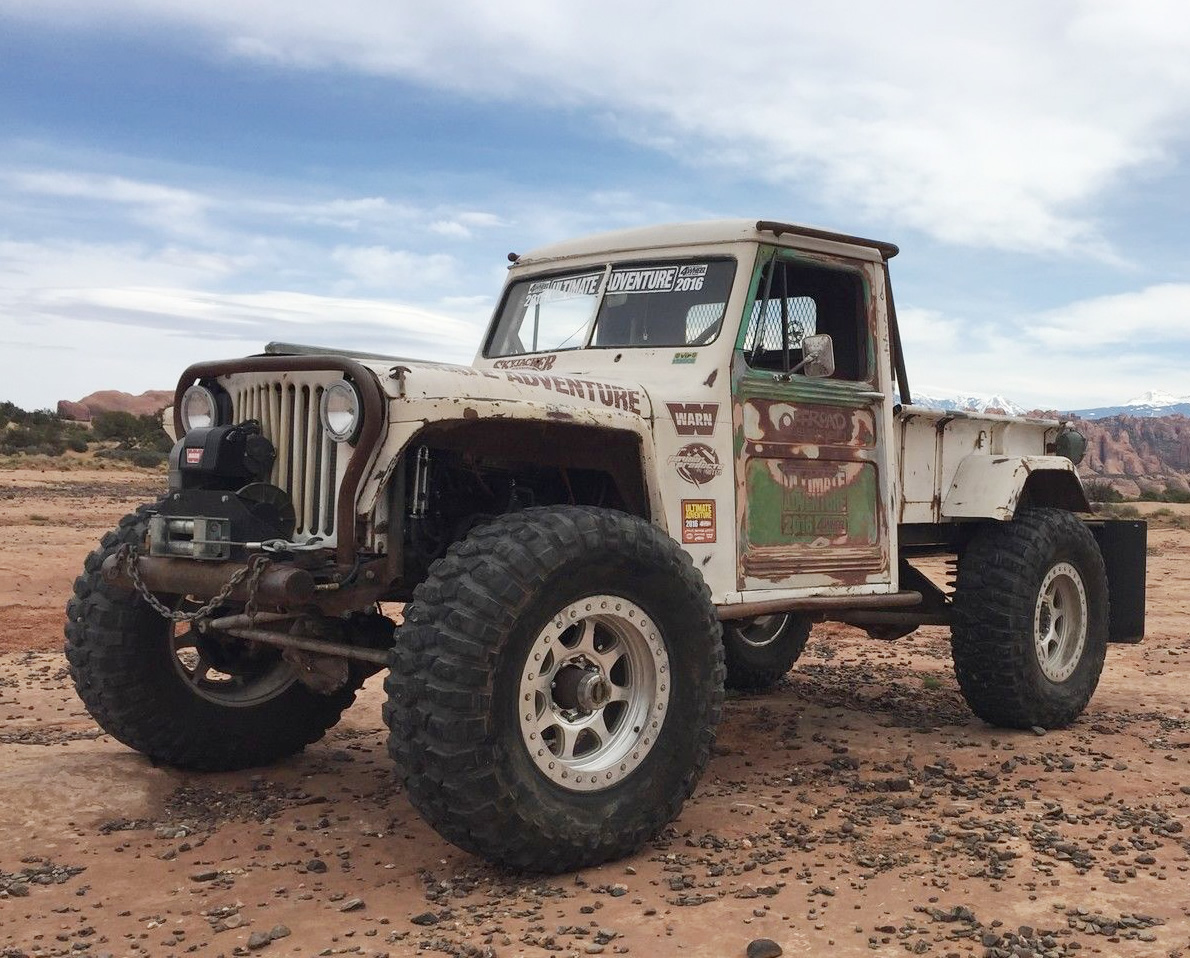
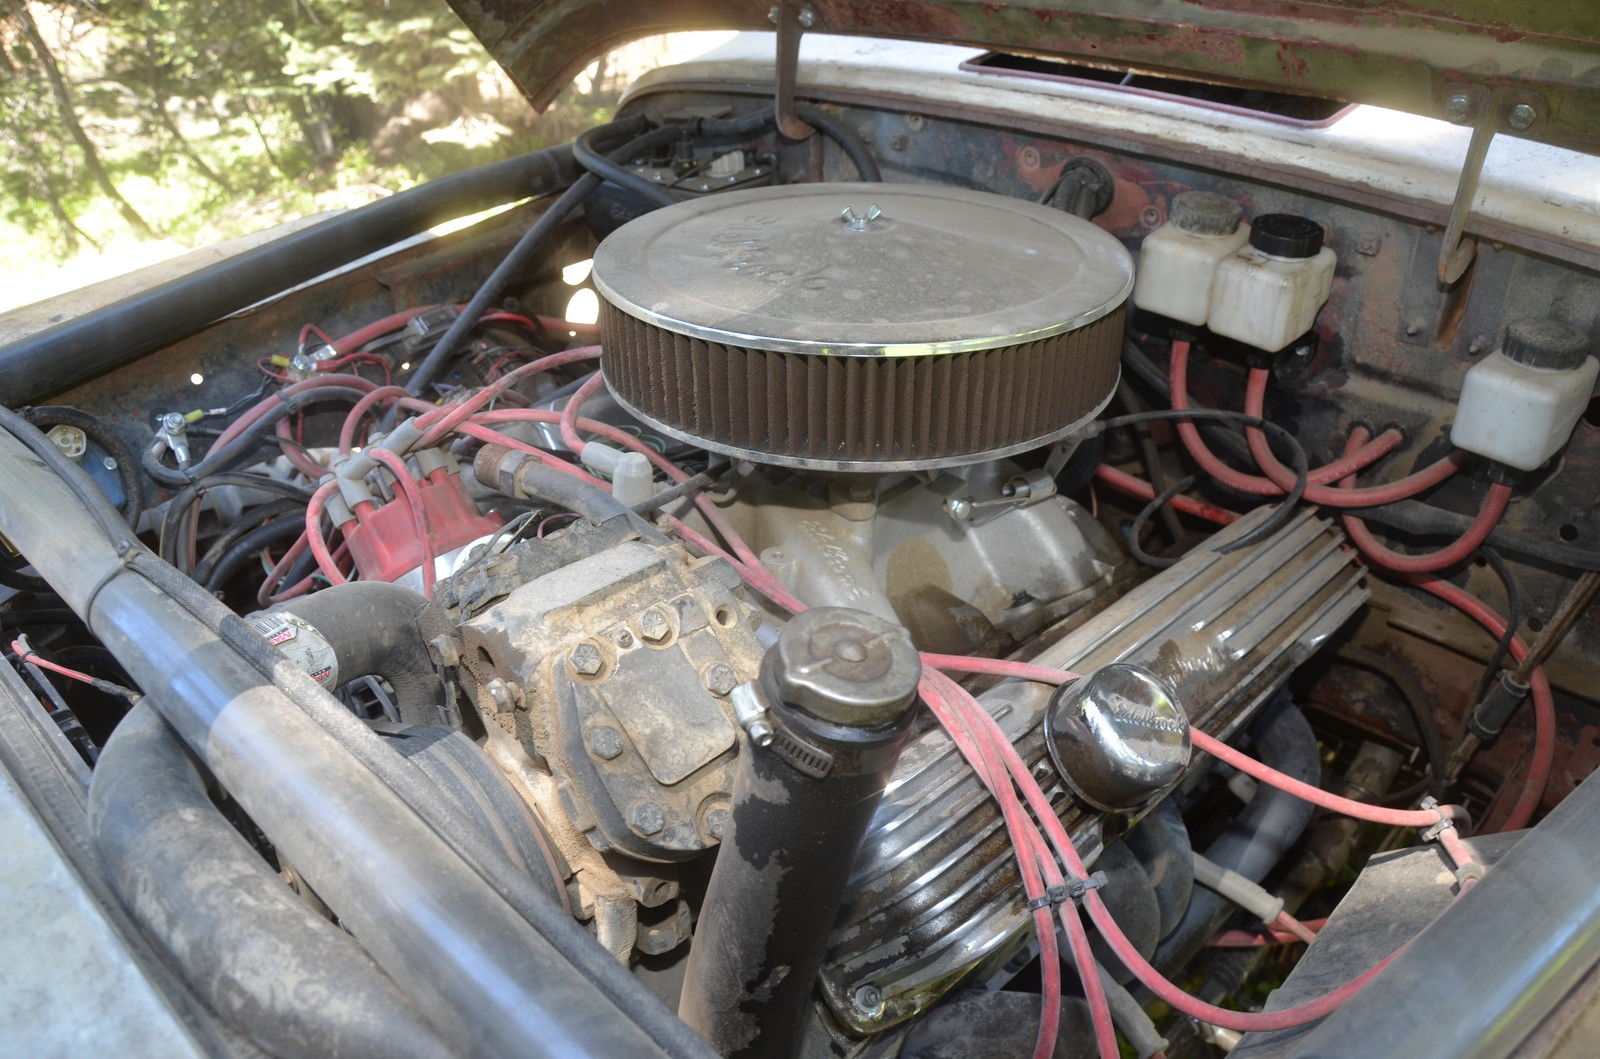
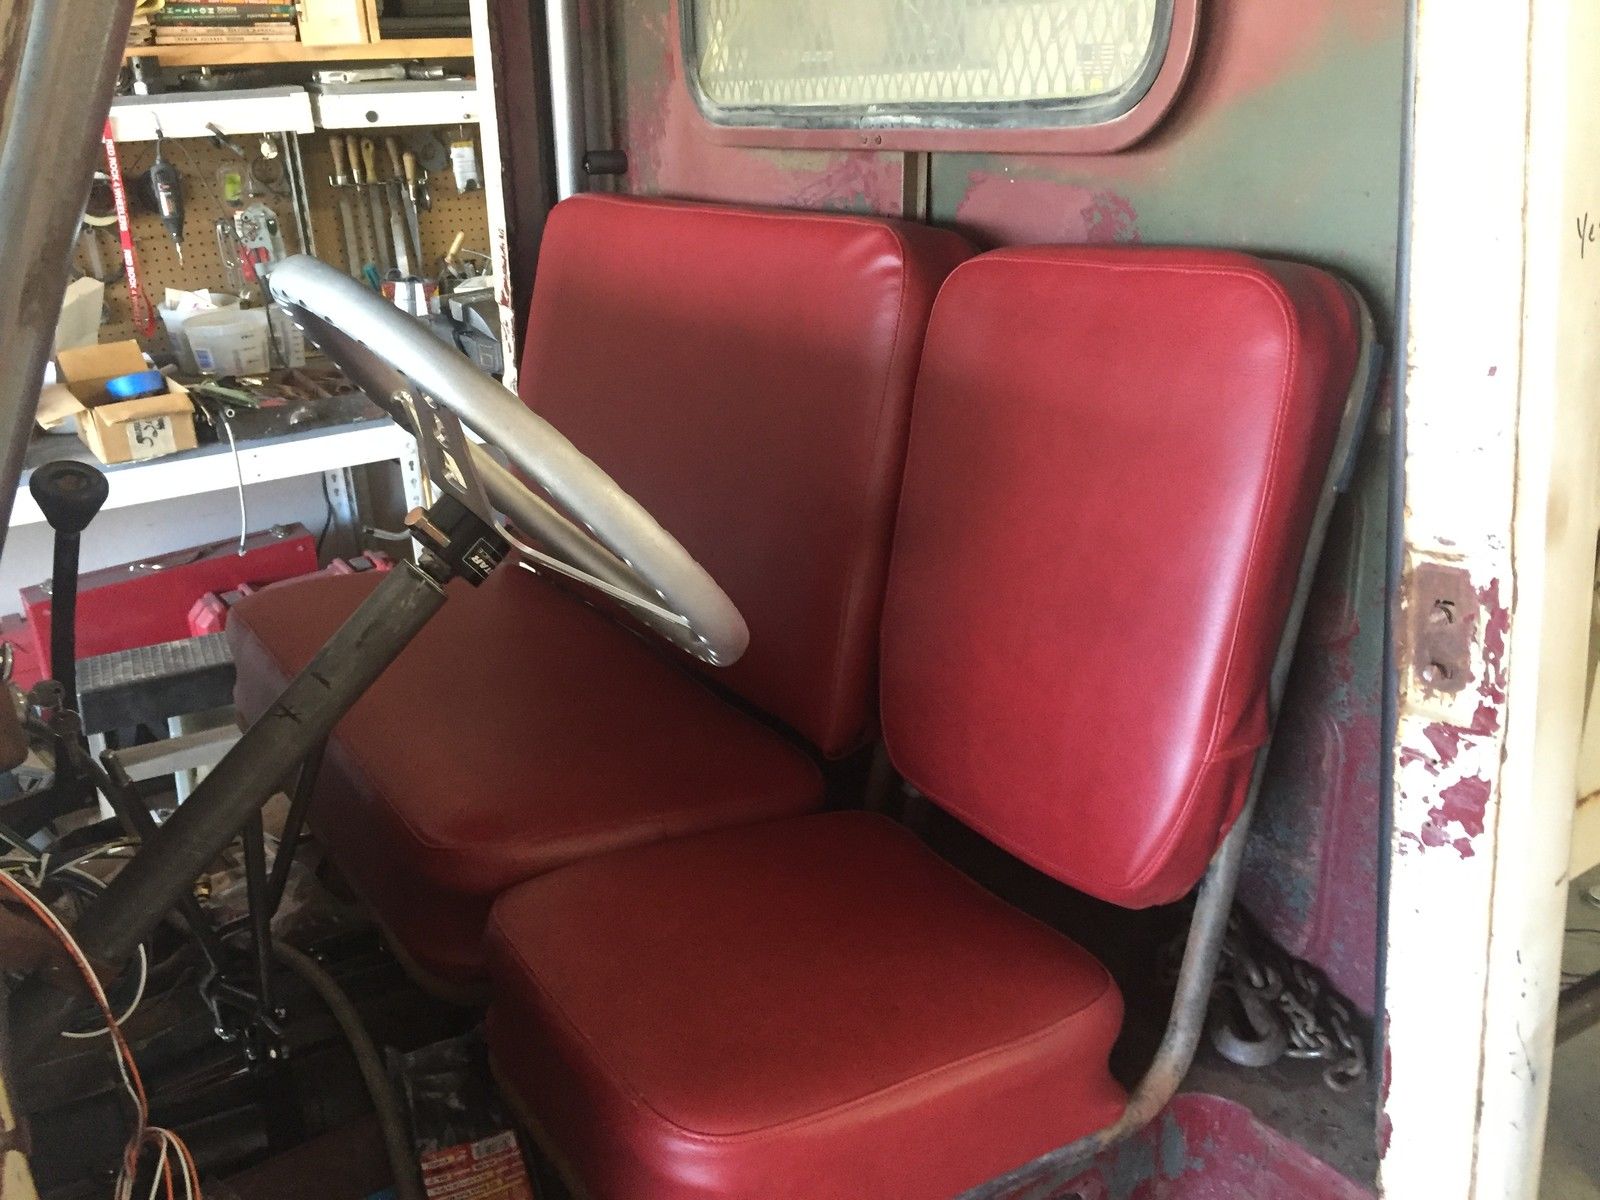
” This is an Arizona titled (clean and clear) 1949 Willys Pickup built on a stretched 1997 Jeep Wrangler frame with a three-link front, 4-link rear, one-ton axles, manual transmission, 505 cubic inch Dodge/Chrysler RB Big Block engine. There are many many details that went into this build and I will try to list them here, but may miss some or forget some. Any really interested parties need to come see this truck first hand and ask questions. I reserve the right to cancel the auction any time in case of local sale, or if I decide to keep the truck. The truck drives great on-road and is extremely capable off-road. It has plenty of power, and turns heads everywhere it goes. Everyone loves it from Rednecks, to Hippies, and everyone in between.
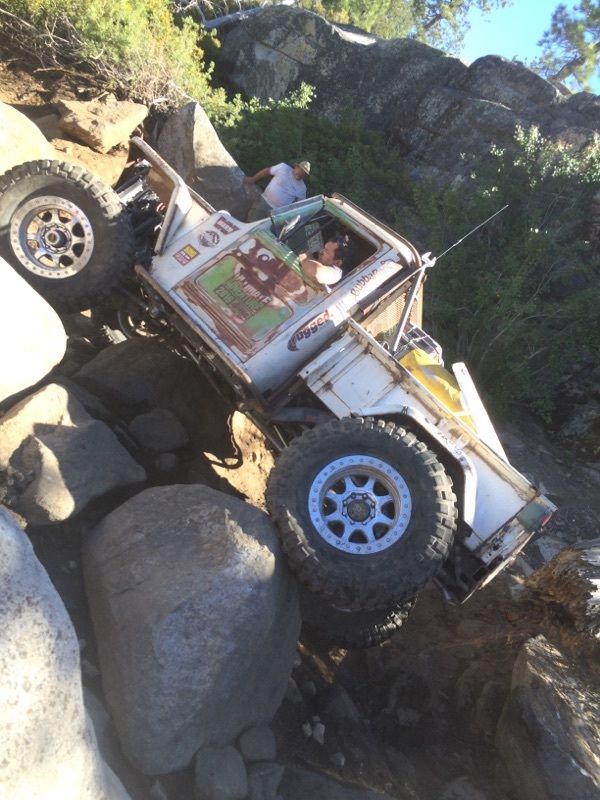
Built as a Jp Magazine project Vehicle there are 8 or 9 3-4 page articles on the build. To see them Google: “Jp Magazine Wicked Willys”
You can also Google “Wicked Willys Ultimate Adventure” for more info on the truck and the UA trip
The truck, since I finished it in june of last year, has been on Petersen’s 4-Wheel & Off-Road Ultimate Adventure for 2016 (that included about 2000 miles of on road and trail driving) Over the Rubicon, Isham trail near Trona, CA, and part of Fordyce. Its also been on a few trails in AZ and all over Moab during Easter Jeep Safari 2017. It drives over almost anything the driver aims it at and is very stable off-road. I’d love to keep it, but I like to build 4x4s and can’t keep them all.
Continue reading
After fixing some wiring and correcting the clutch cable length, I was able to take Patterson down the street and back. Brakes worked, clutch worked, and it felt like there was plenty of power. However, it’s definitely running rich, so we’ll tackle that tomorrow, along with improving the timing.
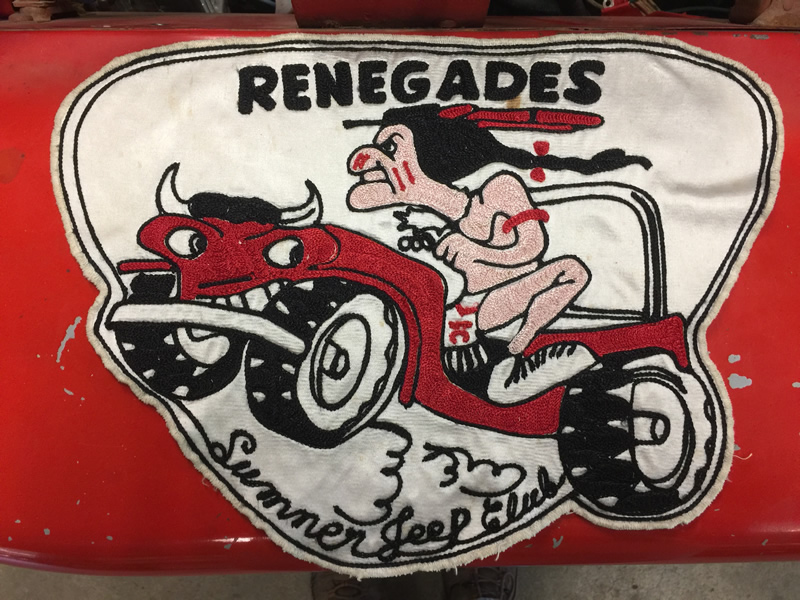
Rob won these old club jacket patches and didn’t have a use for them, so he gave them to me. Given the art, I’d guess these (I have two patches) were produced in the 1970s or earlier. Sumner is a city about an hour south of Seattle. They are a laying on Patterson’s driver’s side fender, so that gives you a sense of their size. What great vintage jeep art they are.
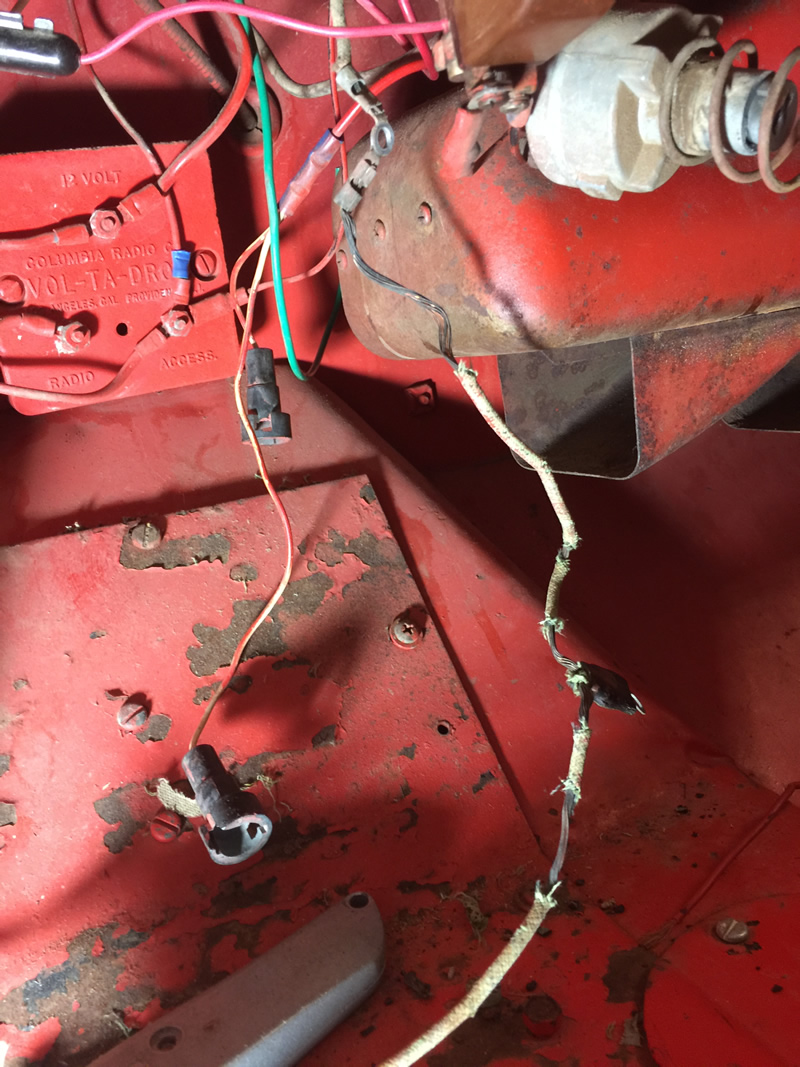
This photo provides a good look at how frayed some of the wire was behind the speedometer. Worse, this wiring was sitting on the metal brace!! in the background is the volt-a-drop which provides stepped down voltage to the King Seeley speedometer).
Electrical Mess:
We’ve been working hard on Patterson the last couple of days. Most of our time has been consumed with checking wiring and rewiring stuff. Between frayed wires and mis-wired stuff, it’s filled our time. Apart from the types of frayed wire seen in the pic above, I discovered 1) the wires to the amp gauge and light were wired into the oil light (fortunately, all I had to do was pop out the light and plug it into the amp light), 2) the amp light was missing altogether (thankfully I could steal one off of Rusty’s speedometer), 3) the ignition jumper that screws to the back of the speedometer was laying on the metal brace (must have caused some shorting), 4) the oil light wire was wired to the fuel gauge (which explains in part why the fuel gauge didn’t work … well that and there was no wire connected to the fuel tank wire.
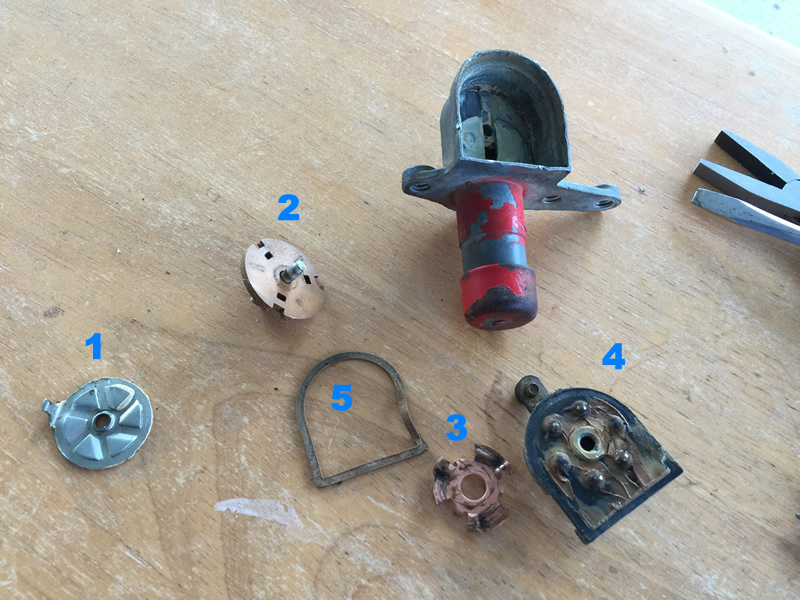
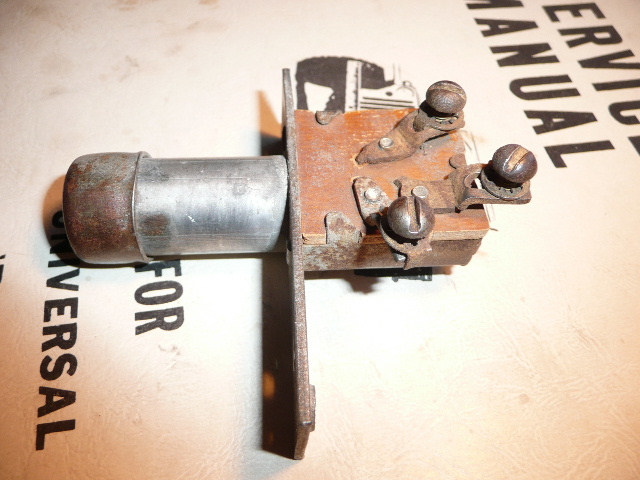
Dimmer Switch:
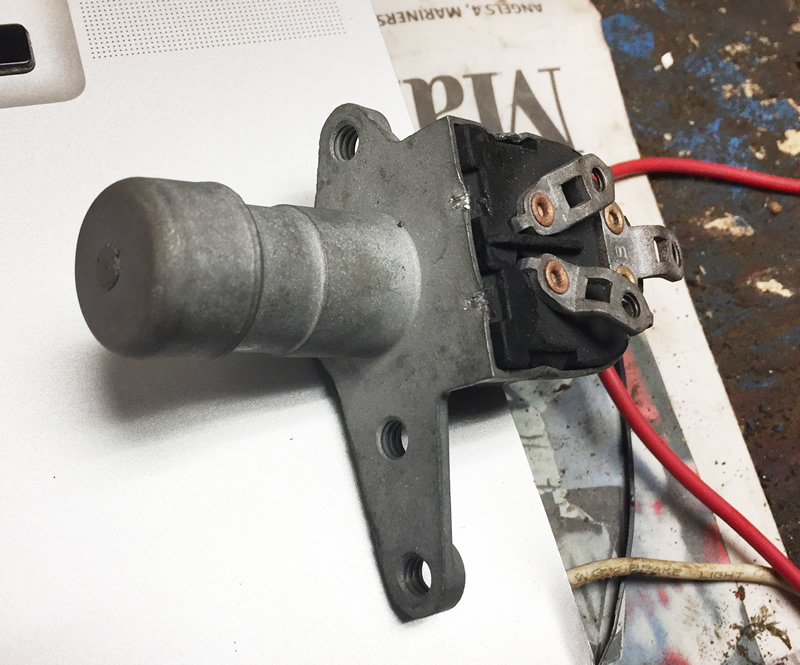
No more red paint on this dimmer switch.
The dimmer switch has been lubed, reassembled, de-painted, and installed.
The Horn Wire
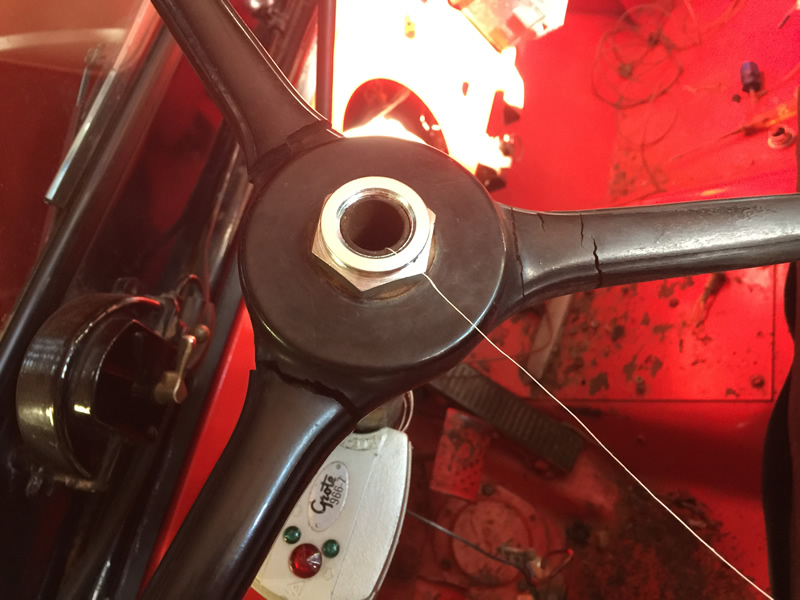
Patterson came with a button attached to the side of the steering column that was used as a horn, but it didn’t work. Since we were already changing some of the wiring around, we decided to steal the column shift button wiring from Rusty’s steering column I wired last month and use it on Patterson.
To start, I knew we had to run some non-electric wire (similar to bailing wiring) through the length of the column in order to pull the horn button’s electric wire down the shaft. That sounded like a good idea, but several attempts at pushing the wire up the column were a failure: the wire kept getting snagged as I pushed it up the column. I was getting frustrated.
But then, my genius wife had an idea. Why not blow some thread down the column using an air compressor nozzle. Once the thread came out the bottom, we could pull the bailing-like wire back through. I admit, at first I thought it sounded a little crazy. After all, near the bottom of the column shaft it narrows, so I thought for sure the thread would be stopped by it. But, then I took a breath and thought …. hmmm … what could it hurt to try?
Sure enough, she produced some thread, dropped a little down the column, then stuck the air nozzle into the hole. That thread blew threw the bottom of the column in a couple seconds. It was genius! Well, almost genius, as we had to upgrade our thread to thicker thread. Other than that, we had the column horn working in no time!
This is the thin thread we tried. It didn’t she enough tensile strength to pull up the wire. She just dropped some thread in and the air blew the rest of the thread down through that small hole at the bottom.
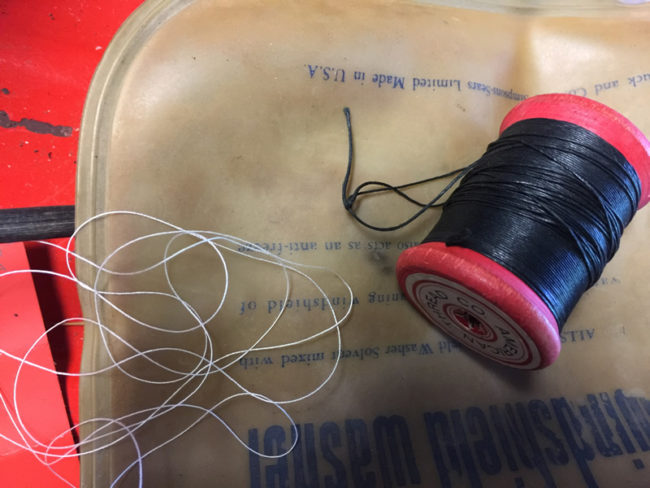
Once we shifted to the thicker, black thread it worked perfectly.
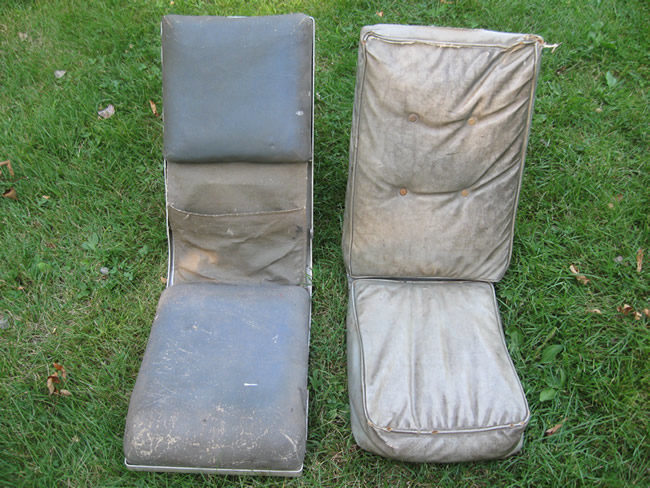
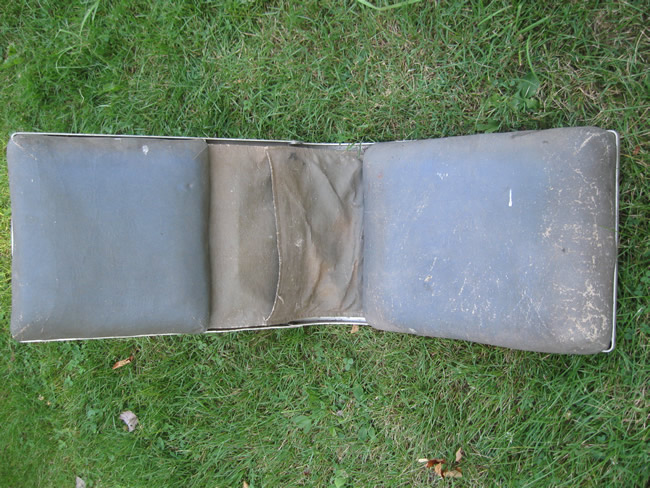
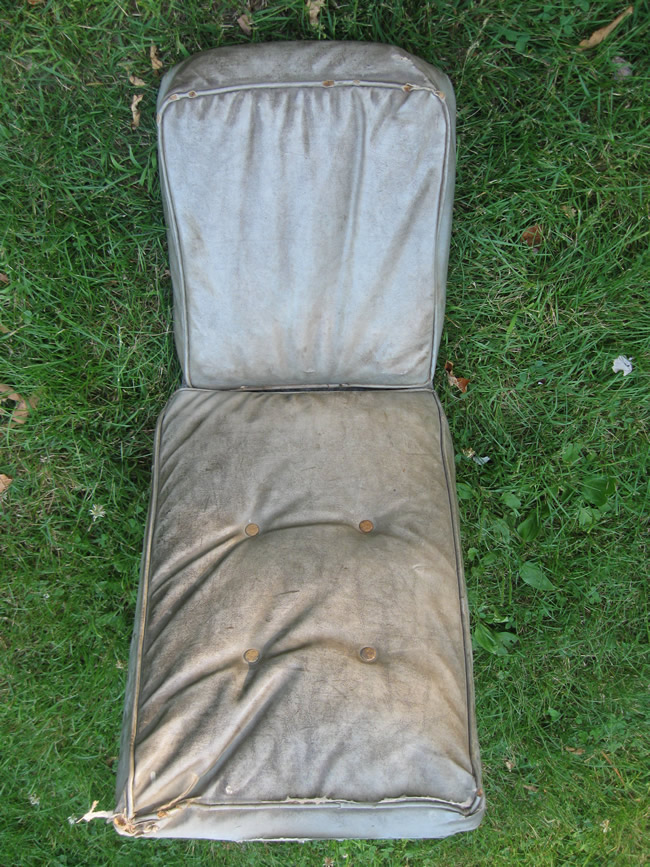
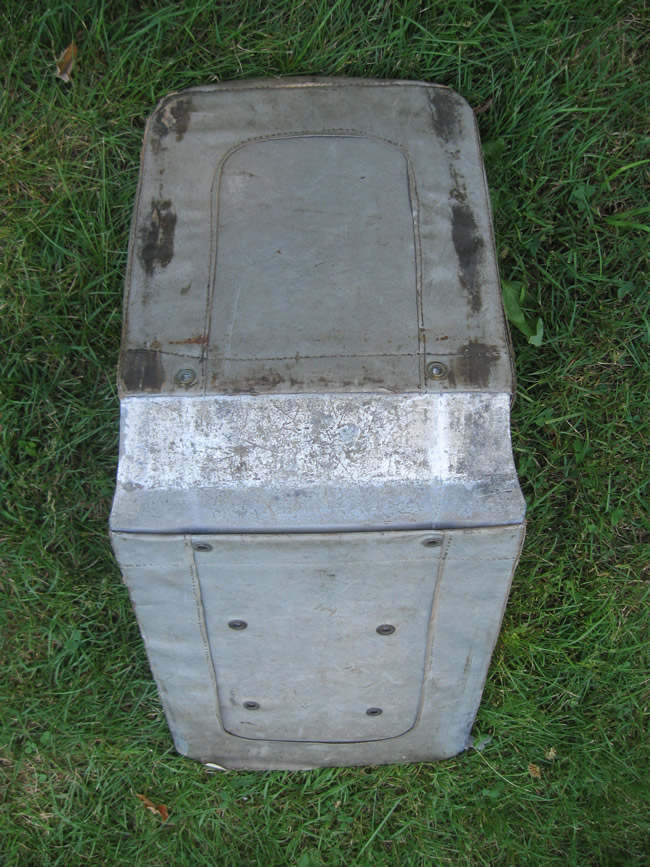
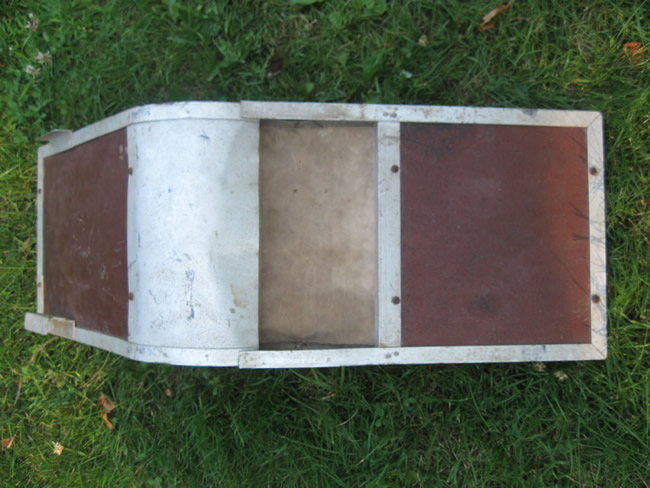
Ted Jordan shared these photos showing a comparison between Dumas and Carson center seats. In the photo below, the Carson seat is shown on the left and the Dumas on the right.
Help us out by buying an Alaska Or Rust T-shirt. They are now available for sale. They are 100% heavy cotton and are priced at $25 from the Alaska Or Rust site (to cover shipping**) or $20 in person. You can use paypal or use a credit card. If you’d prefer to send a check (or have questions), email me at d@ewillys.com.
http://www.deilers.com/AlaskaOrRust/shop/
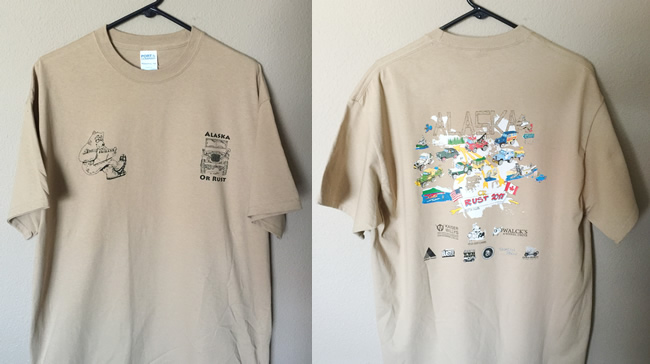
Most of our shirt sizes are XL and L, but we have some XXL, M, and a handful of Smalls.
**If you live outside of the US or Canada, we may have to charge extra for shipping.
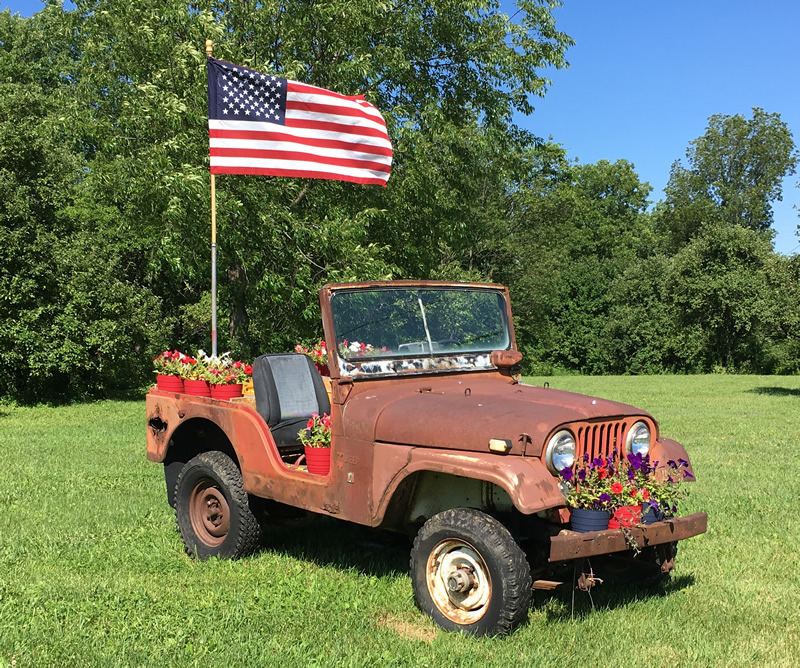
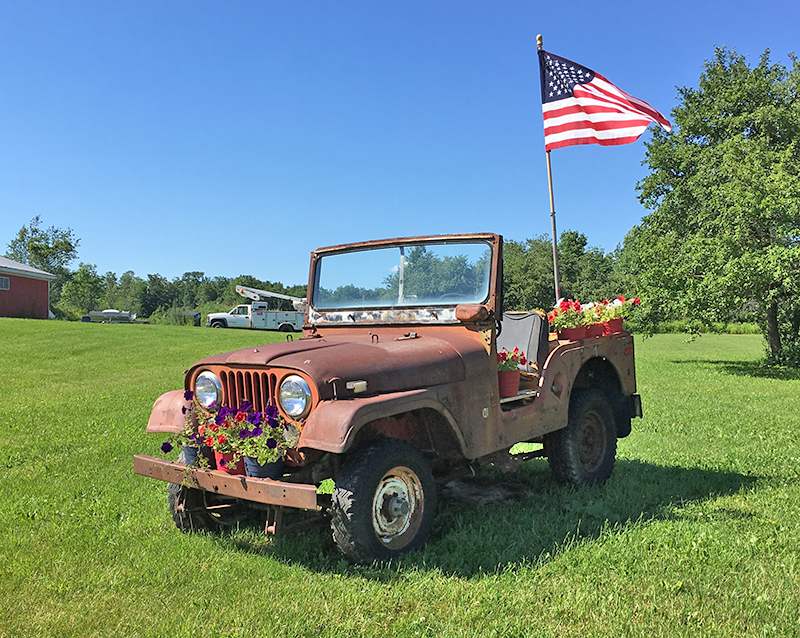
Thanks to Kevin for sharing these photos from Cranesville Auto in Amsterdam, New York. Inside the jeep there are red, white and blue flowers planted, too.
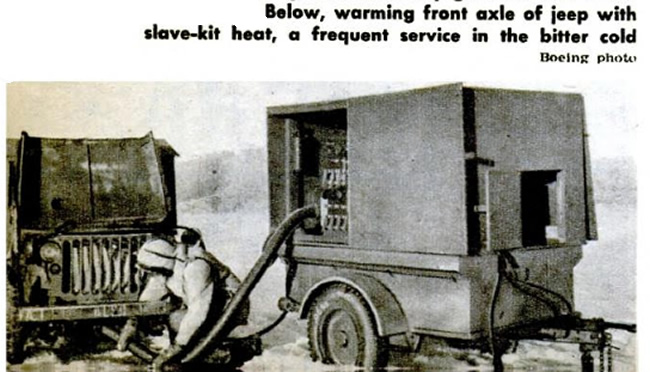
The machine shown below was used to thaw front axles, among other things I’m sure. It was published in the January 1947 issue of Popular Mechanics.
Last week when we were in Renton, we tested Patterson’s headlights and discovered the foot-based dimmer switch wasn’t always working correctly. After a little research, I discovered the CJ-3A page had a useful thread on the topic, but naturally the switch demonstrated wasn’t exactly like the DJ-3A switch. The one shown on the CJ-3A page had a square end, while the DJ (and I’m assuming others of the same vintage?) have a rounded end. In fact, It isn’t clear to me which models use which dimmer switches?
Example dimmer switch from the CJ-3A page forum.
So, here’s a look at Patterson’s switch. The first obvious difference is that the housing doesn’t have tabs. Instead, it has crimps and, let me tell you, those crimps wouldn’t bend easily outward.
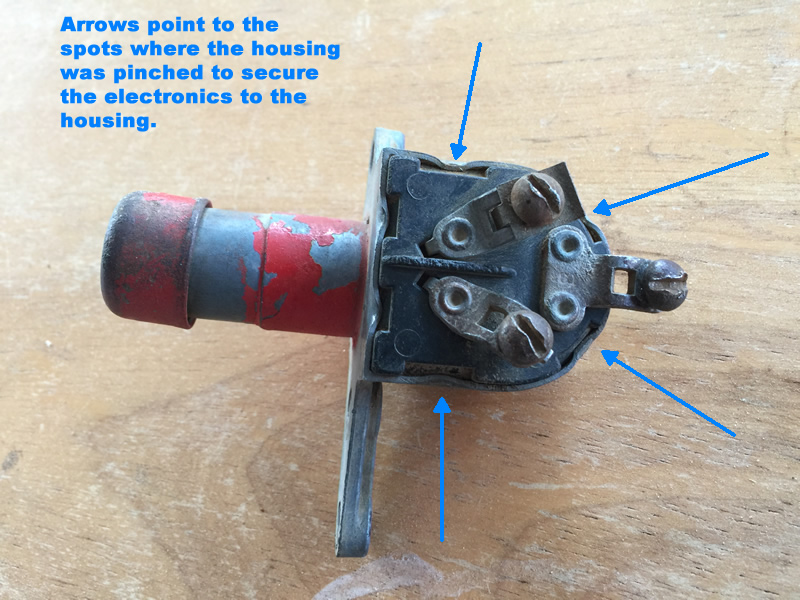
Using a small screwdriver, I eventually got the crimps straightened. As soon as I tugged at the top part to remove it, everything kind of tumbled onto the table (oops).