
Dan has provided us with some additional coverage of the resurrection of his Grandfather’s jeep. This might just become a series :-). Besides, I’m a sucker for anyone will to take the time to breath life into the family jeep. There’s plenty of people who would have junked this CJ-5. Thanks for sharing Dan!
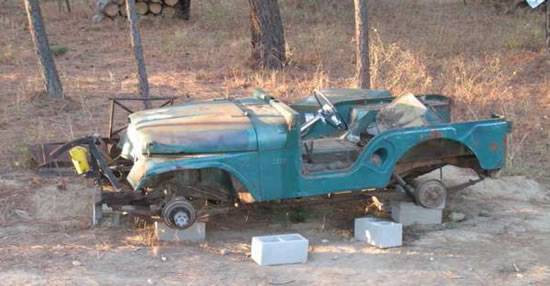
Dan writes, “One of the great things about a Jeep project is that you can work on all the little things while you save up for or look for those parts for the big jobs. Here is a brief look at some of my smaller repairs. First, here is the project Jeep. A 1955 CJ5. [editor’s note: the front shackles were reversed on this CJ-5 which produced some understandable discussions about whether this was actually a M-38A1. Clearly it’s not :-).]

Starting with the gas tank, after cleaning all the surface rust off of the gas tank, I discovered a series of little holes. Now you can easily find an after-market steel or plastic tank, but for about $5 I may be able to fix it.

Here is the gas tank all cleaned up and patched with epoxy (JB Weld). If it works than I saved about $100. If it doesn’t work, well then it didn’t cost me too much to give it a try.

Here is the finished gas tank all sealed, primed, and painted.

Some parts like the gas tank and instrument cluster are easily found new, while others like the E-brake handle and bracket are much harder to find. This is a restored instrument cluster and emergency brake handle and bracket. The emergency brake bracket had to have a bit of welding done to it before it was usable again.

A close up of the restored instrument cluster. It was cleaned and painted. The bulbs and wires were replaced and new gasket was made made. I tested each of the gauges and reset the odometer to 0. It didn’t have far to go, and it wasn’t its first trip around [Editor’s note: Dan’s grandfather put the mileage at 500,000. Even if off by a couple hundred thousand miles, the bottom line is the same — the jeep was loved to pieces, literally]. This way I know how many miles I’ve put on it since the rebuild.

This is the back of the instrument cluster. Notice the resistor that my grandfather installed years ago. This is what lets it run off a 12 volt system even though it was designed for 6 volts.

Moving to the front of the jeep, here is the finished grill. I left a few dents and holes for fun and character. The marker lights are original as far as I can tell. The headlights are H4 halogen type for a modern Jeep. They fit perfectly. I used weather striping for the grill to hood seal.

Shifting behind the grille, it’s hard to believe that the battery had slipped forward and crushed the headlight socket. I had to pound it out and epoxy in a new piece of aluminum. Then I painted it with galvanizing spray paint.

As often happens, the windshield needed a good cleaning. This is the windshield and its hinges all sand blasted and coated with Permatex rust killer. I pulled out about a dozen hornets nests from inside the windshield duct work.

Here it is all finished with new rubber and glass. After searching around for CJ5 glass I figured that I’d just take the old windshield to the local auto glass shop. It is after all just flat automotive safety glass. They used the old windshield as a pattern and cut me a new one in two days. It only cost $75. Installing the glass was a challenge to say the least. One hint is to use a lot of Windex as a lubricant and weed whacker string to help feed the rubber around the glass. I still have to mount the new electric wiper motors.

The front view of the windshield. I replace all the nuts and bolts as I go. Whenever possible/practical I use stainless steel fasteners. This Jeep spent its life either up in the Colorado Rockies or on a ranch in the Washington State Colville Indian Reservation. Either way, there was no hardware store within an hour or two drive. I found many items being held on with one wood screw and one square headed bolt.”

That’s all for this post. You can view Dan’s previous post about his Hudson/Saginaw swap here.
Lookin Good!… Is that JB weld you used on the gas tank? FWIW I tried the same thing and it would hold for a little while then leak again…I finally replaced it. I hope you have better luck than I did.
Thanks,
Yep, it’s JB Weld. I applied it in multiple coats making sure that each one was a little larger diameter than the last. Also, the tank was very well cleaned and dried before the application. I guess we’ll see if it works. If it does leak than I’ll just buy a new one. I won’t mess with it too much more since it is fairly inexpensive and easy to replace.