Biscuit Research Archives

My Rebuild

To Top

Finally, All Three Jeeps in the Shop!

• CATEGORIES: Biscuit, Cosmic-Crisp-Race-Jeep, Features • TAGS: This site contains affiliate links for which I may be compensated.

Yesterday, with cold weather arriving soon, I took advantage of a warm, but very windy day, to pull Biscuit off the trailer and put it on the hoist. Now, all three jeeps are in the shop.

But, before we gathered the jeeps, both Ann and her son Daniel, who has been helping us around the property, each took the race jeep for a run in the pasture.

Here I am giving Daniel a ride. Unfortunately, my long legs preclude me from shifting into second gear (that’s how tight it is). Once I fix that, I can go much faster.


Here are some still shots. First up is Ann in the cockpit:
2021-11-15-ann-race-jeep

Here’s Daniel just finished with a run around the pasture:2021-11-15-daniel-race-jeep

Ann’s stomach surgery this summer, which as helped her in numerous ways, including solving her several adverse reactions to gluten (unsure why?), has also helped her lose quite a bit of weight. This has helped reduce her over all pain and also allows her to easily fit into the race jeep. Though she didn’t drive too fast, she did have fun racing around our back pasture. Once she gets used to it, I expect she will enjoy racing at a PNW event.

Continue reading

 
To Top

Time for a Biscuit

• CATEGORIES: Biscuit, Features This site contains affiliate links for which I may be compensated.

As I may have mentioned, I’m in Renton for the next week at my mom’s place while she’s away. As part of rearranging the garage, I’ve finally pulled Biscuit out of his corner.  My goal is to have him running by February, in part because my mom plans on moving!

2019-09-06-cleaning-house-lores

 
To Top

Robert Flores Illustrates Me & Biscuit

• CATEGORIES: Artists/Drawings, Biscuit, Features • TAGS: This site contains affiliate links for which I may be compensated.

Roberto surprised me today with an illustration of me and Biscuit. How cool is that! Thanks so much! I’m even more handsome than I imagined, lol 😉

2015-roberto-dave-lostbiscuit-ewillys-blue-lowres

 
To Top

Progress on Biscuit

• CATEGORIES: Biscuit, Features This site contains affiliate links for which I may be compensated.

Last week I dropped by my parents house to visit. Naturally, I also had some sonny-do chores to finish, including my annual ‘sweeping of the roof’. Their tall fir trees might look beautiful, but eventually fall from the limbs and have to land somewhere. How they all seem to reach the roof remains a mystery to me.

The good news is I did manage to get a little work done on Biscuit. After swapping rear leaf spring combinations more times than i care to count, I finally got a grouping that puts the jeep level and the pumpkin at the right angle. That completes the changes necessary for the rear. Now I just have to finish off the engine compartment, brake, and clutch changes. I’m in no rush as the next book is the priority project, but hopefully by years end the jeep will be running again.

2015-07-10-biscuit

 
To Top

Biscuit Updates

• CATEGORIES: Biscuit, Features This site contains affiliate links for which I may be compensated.

Over the last couple of days I’ve been trying to get as much done as I can before my son arrives. As you can see, I’ve got the engine, transmission and transfer case installed. I’ve also updated all the rear brake lines and installed the new rear springs.

2014-07-15-biscuit-engine1


Unfortunately, I dropped the engine down enough within the chassis (when I changed the engine mounts) that the transfer case output yoke is too level, resulting in sharp driveline drop. So, I’m having to drop the tranny and TC. I might have to twist the rear axle as well, but will waiting until I set the body on the frame to see how the rear pinion angle changes.

2014-07-15-biscuit-drivelineSo, more work ahead . . . This afternoon Colter and I will be heading to Gig Harbor to pick up Track Avenger 470cfm rebuilt carb I found on Craigslist. It will replace the old Carter 500 cfm that needed fixing.


To Top

Biscuit’s New Disc Brakes

• CATEGORIES: Biscuit, Features This site contains affiliate links for which I may be compensated.
brakes-13

The driver’s side new disc brake.

Before I get to the brakes, this past Friday Ann’s mother Rosemary decided to buy a motorhome. Well, not that she’d decided on Friday, but rather earlier in the week she caught the motorhome bug. After plowing through websites, stats and prices over a period of several days, she learned there was a local motorhome show happening. On Friday she and Ann went down to the show and found a 28′ Sunseeker. On Saturday, we brought it home.

2014-06-21-new-motorhome

I bring this story up because I’d already been planning to head to Seattle for a few days to taken advantage of the nice weather and work on Biscuit. On Saturday I left with the understanding that Ann, her mother, and Ann’s aunt Kathy  planned leave on Saturday as well. They were going to drive the motorhome (Apparently nicknamed ‘Abby’ at this point) to Spokane, then head to Seattle to drop off Ann with me. Next, Rosemary would head south to Vancouver, before turning back toward Pasco.

They spent the night Saturday night in Spokane, but instead of going to Seattle, I got word on Sunday that Rosemary hijacked the plans and decided to head to Montana (with Ann and the wheel). Over the next few days they camped in several spots (Walmarts on two occasions — which offers free camping) in Montana and Wyoming.  After staying Thursday night in Yellowstone, they finally arrived late Thursday night back home in good spirits.

2014-06-21-new-motorhome-montana

Apparently the navigation in the motorhome doesn’t work well. They ended up traveling on this gravel road through western Montana on this gravel road at night.

2014-06-21-billings-worldmarket

This World Market was right across the parking lot from the Walmart where they stayed in Billings. Not exactly my idea of camping, but they were having fun.

2014-06-21-custer

Nice bit of art at the Little Big Horn Battlefield.

2014-06-21-cody-walmart

This was a parking lot at the Cody, Wyoming, Walmart. I’ve seen worse campsites!

jeep-trailer-outside-yellowstone

Ann managed to take this photo on her phone from the camper. They were between Cody and Yellowstone NP.

Continue reading

 
To Top

Biscuit Progress – Bump and Steer

• CATEGORIES: Biscuit, Features This site contains affiliate links for which I may be compensated.

2014-jeep-rebuild-may-june-david-jeep1
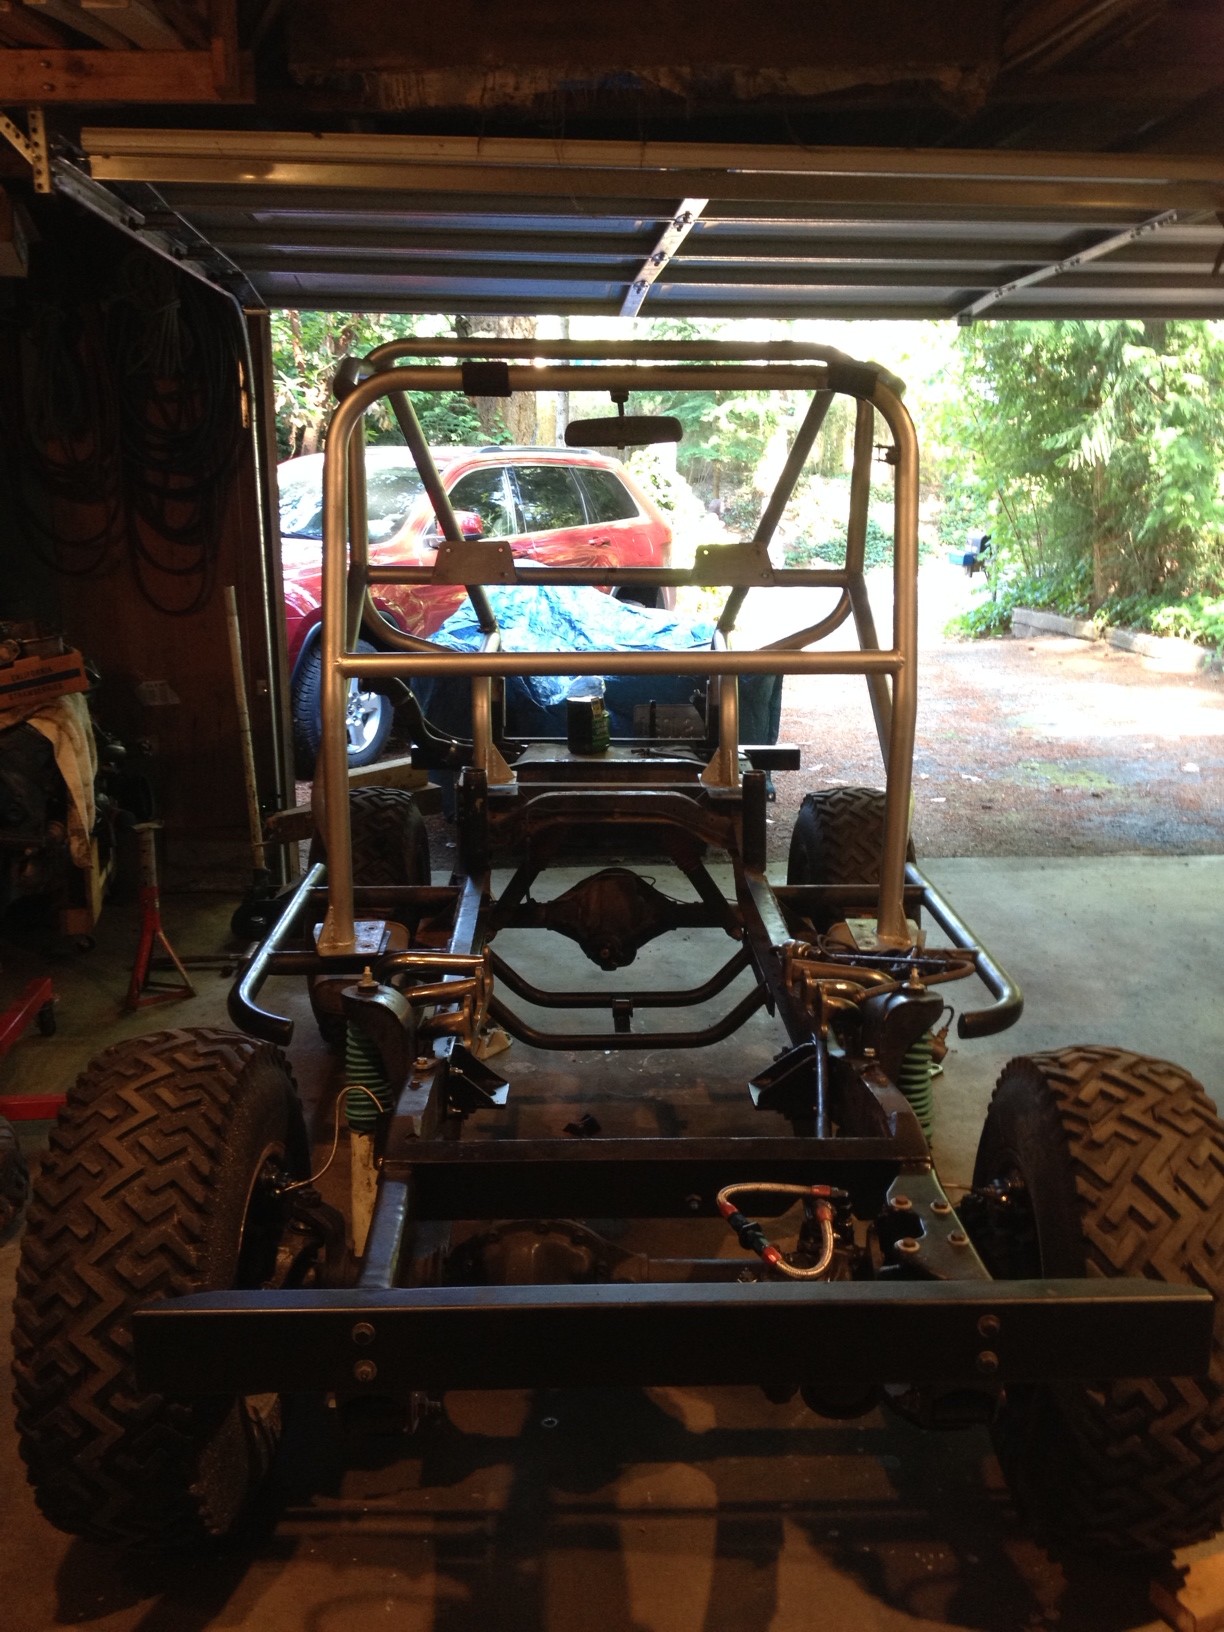
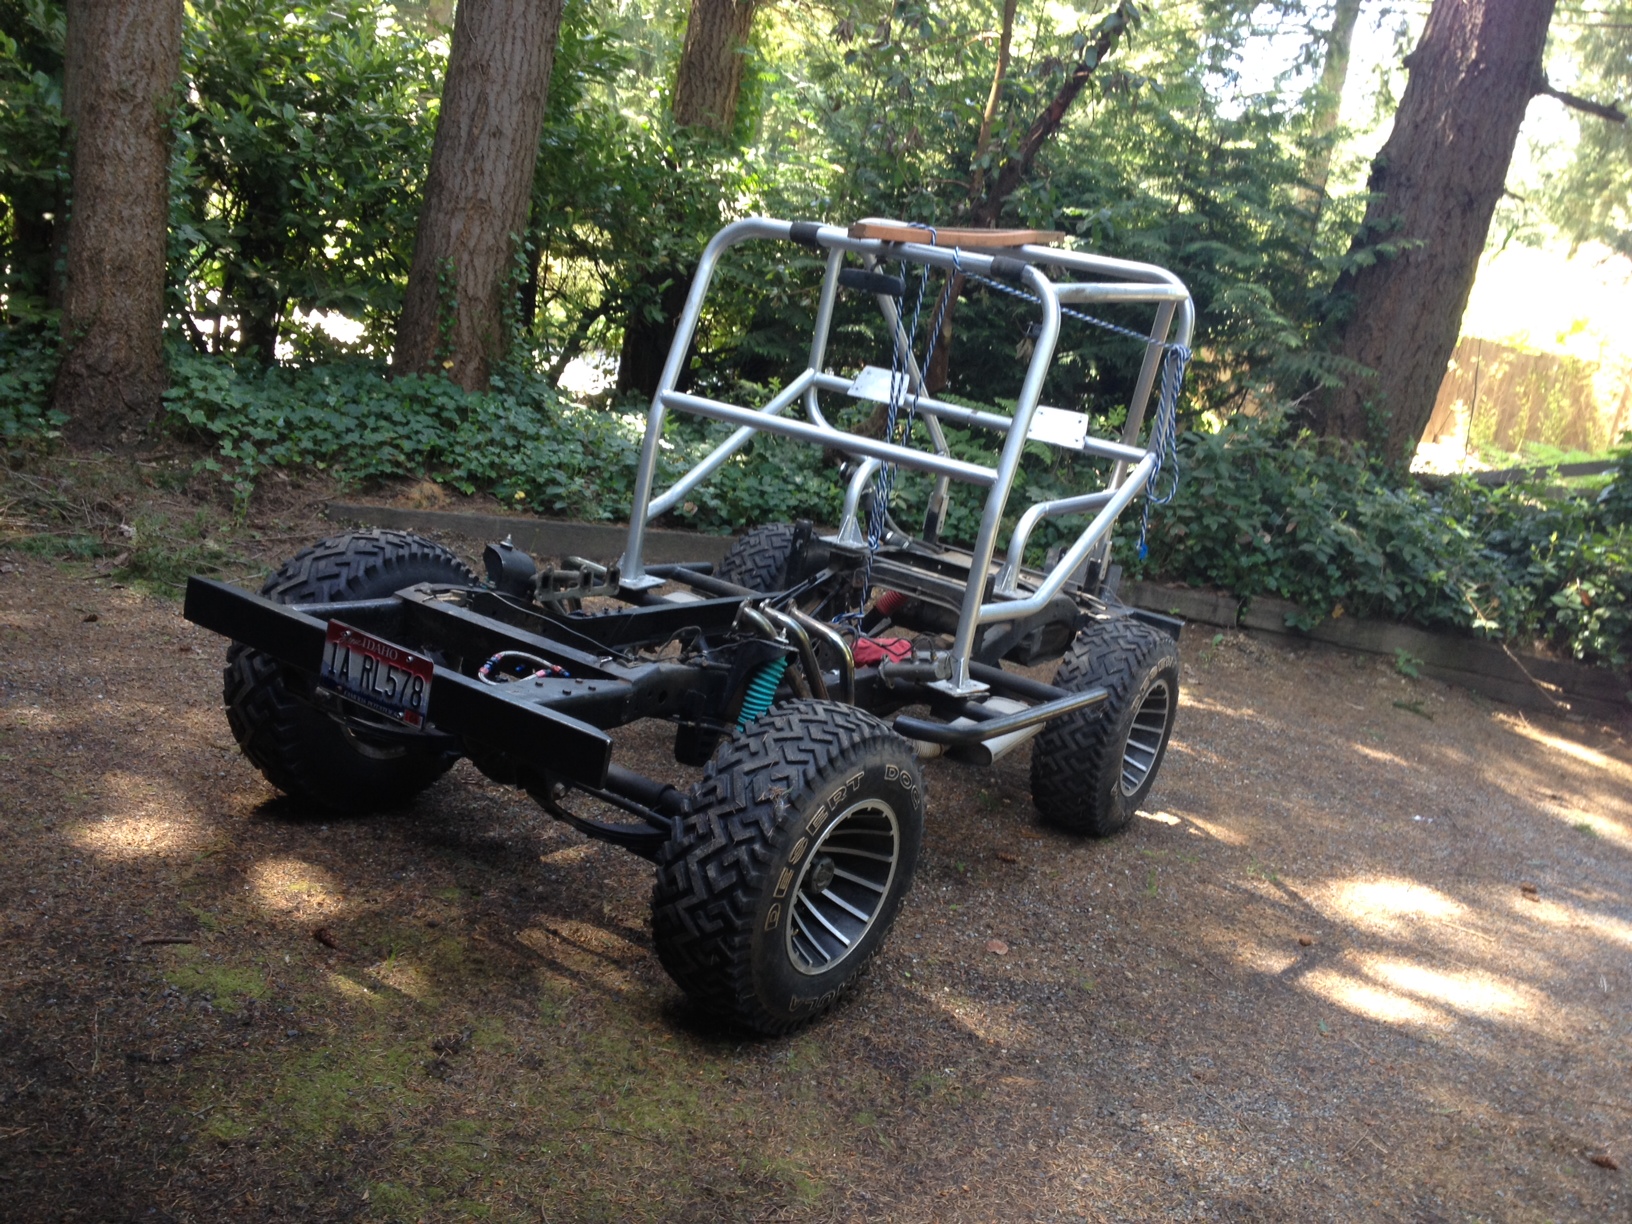
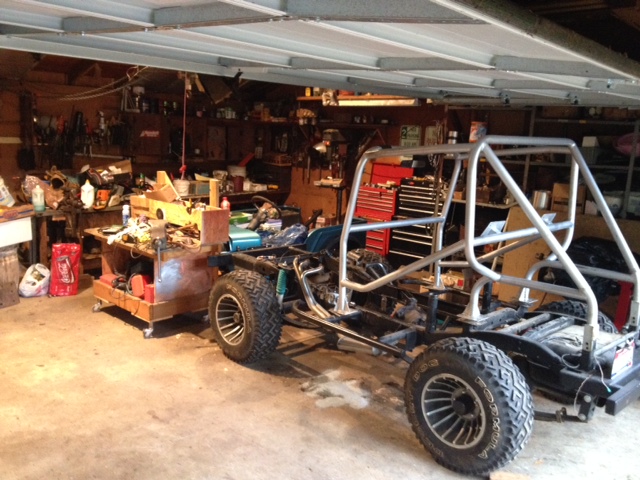
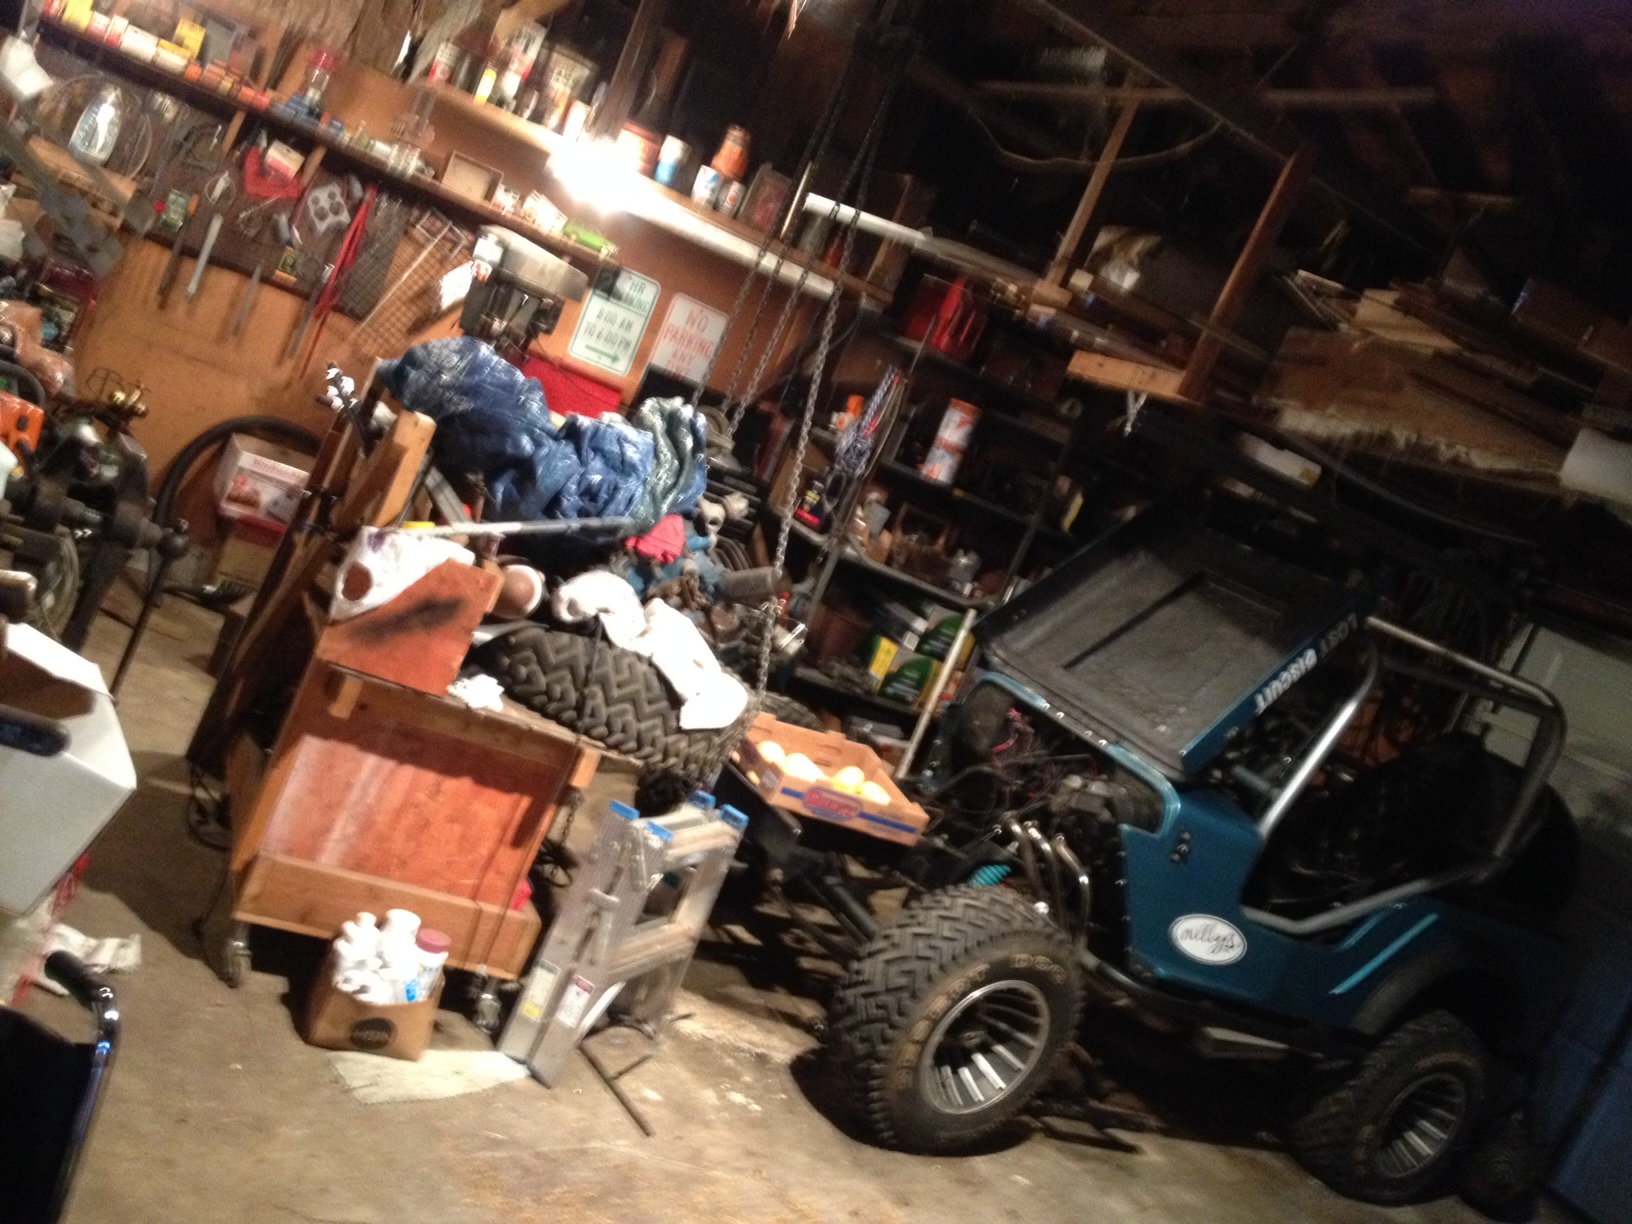
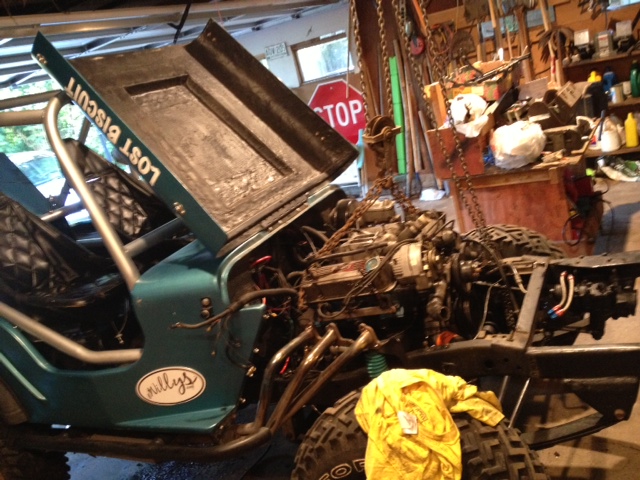
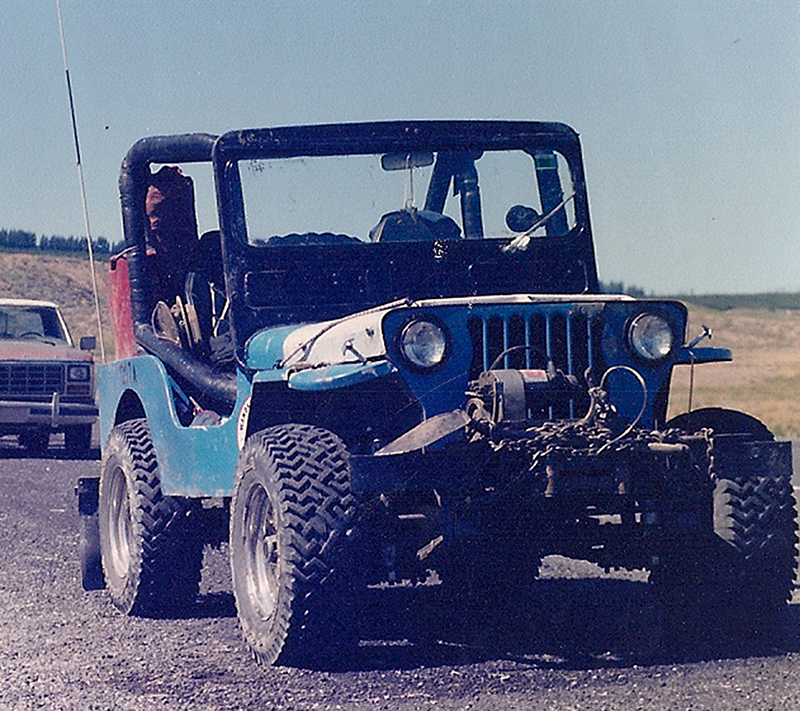
For the last few days I’ve been in Seattle taking advantage of the nice weather to get some work done on Biscuit. Fortunately there weren’t too many ‘sonny-do’ projects, so I had a chance to get right to work.

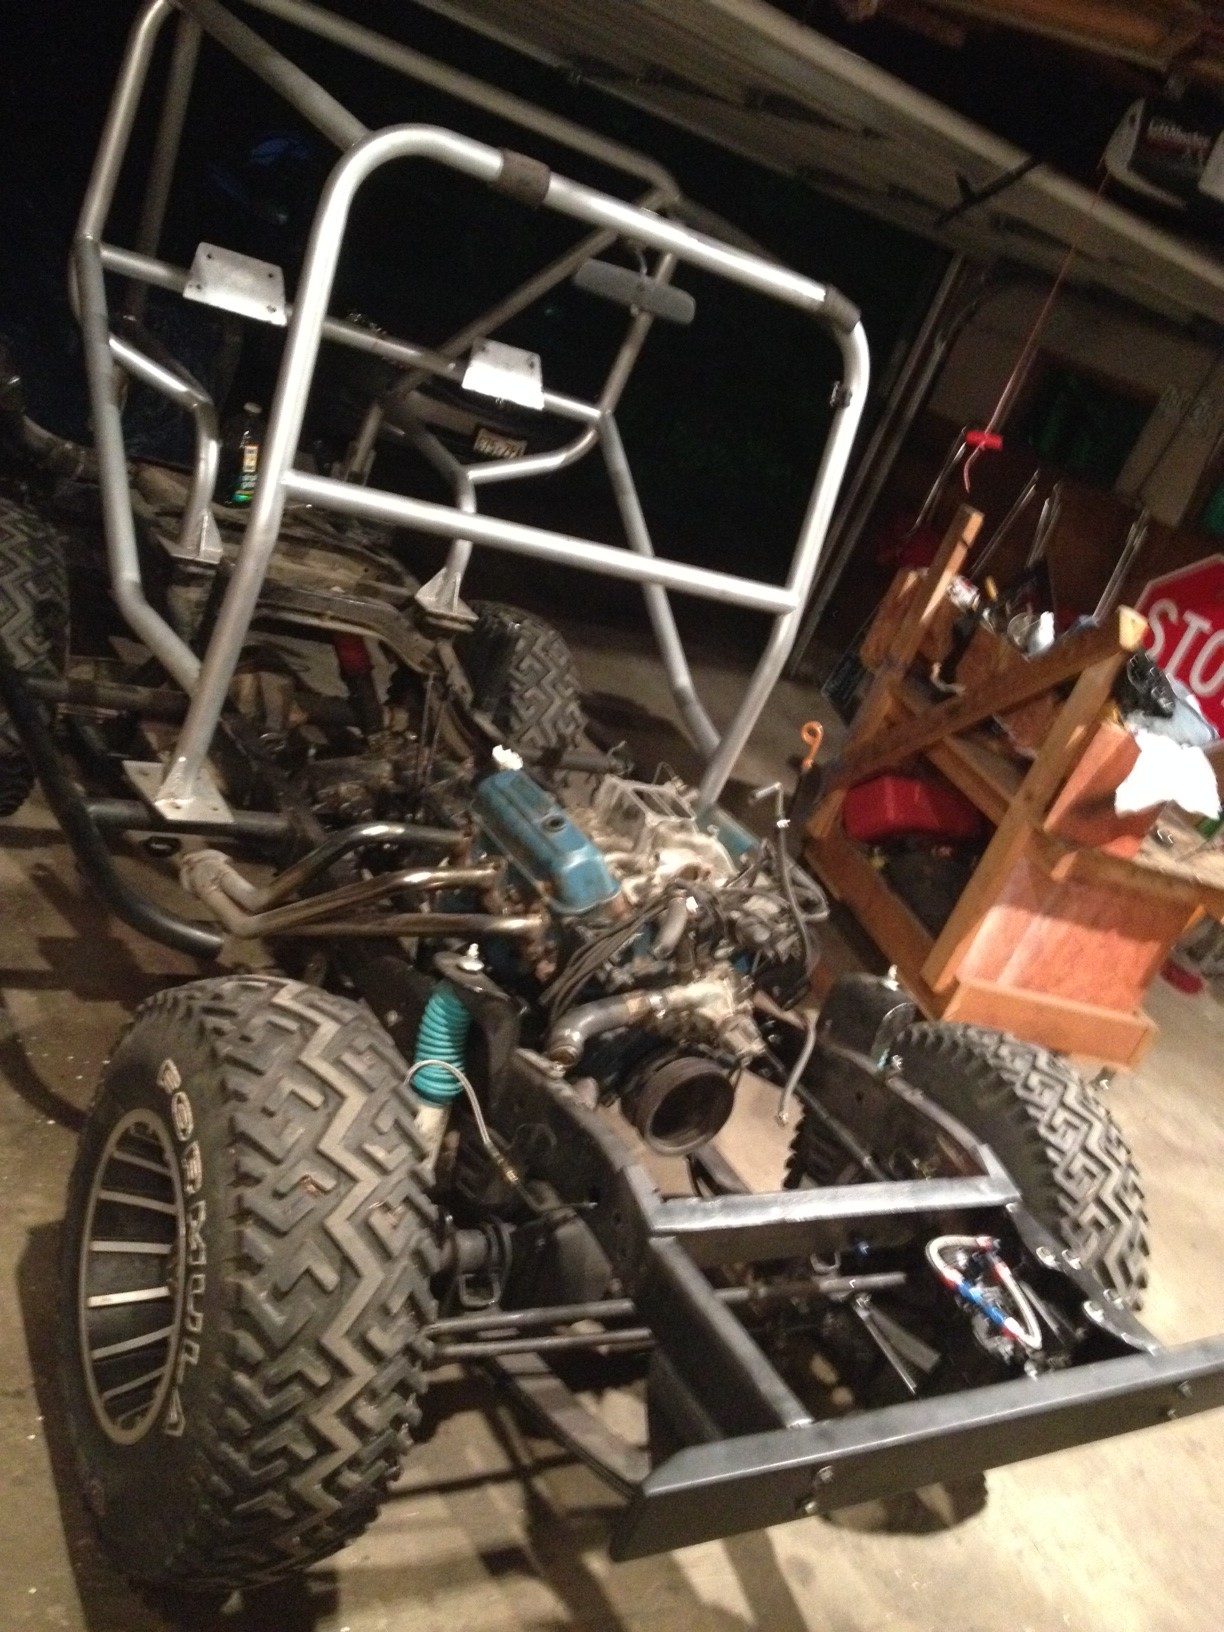
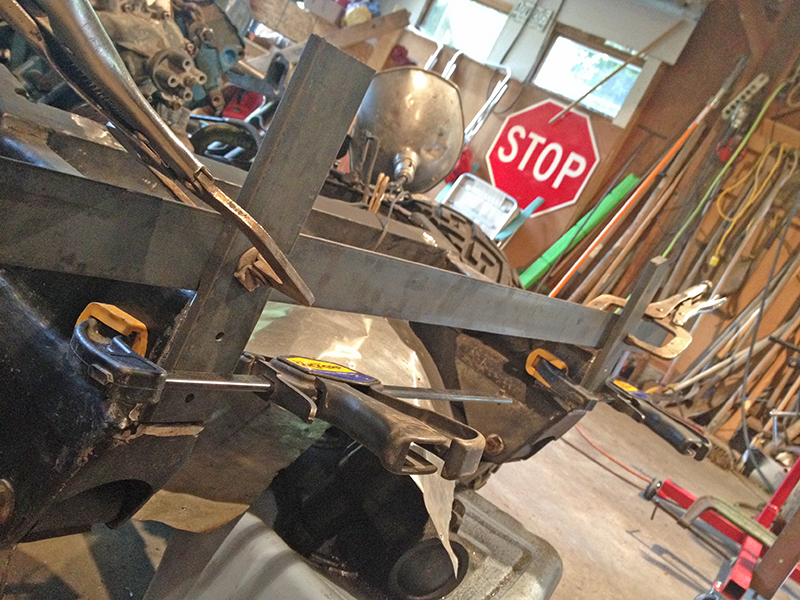
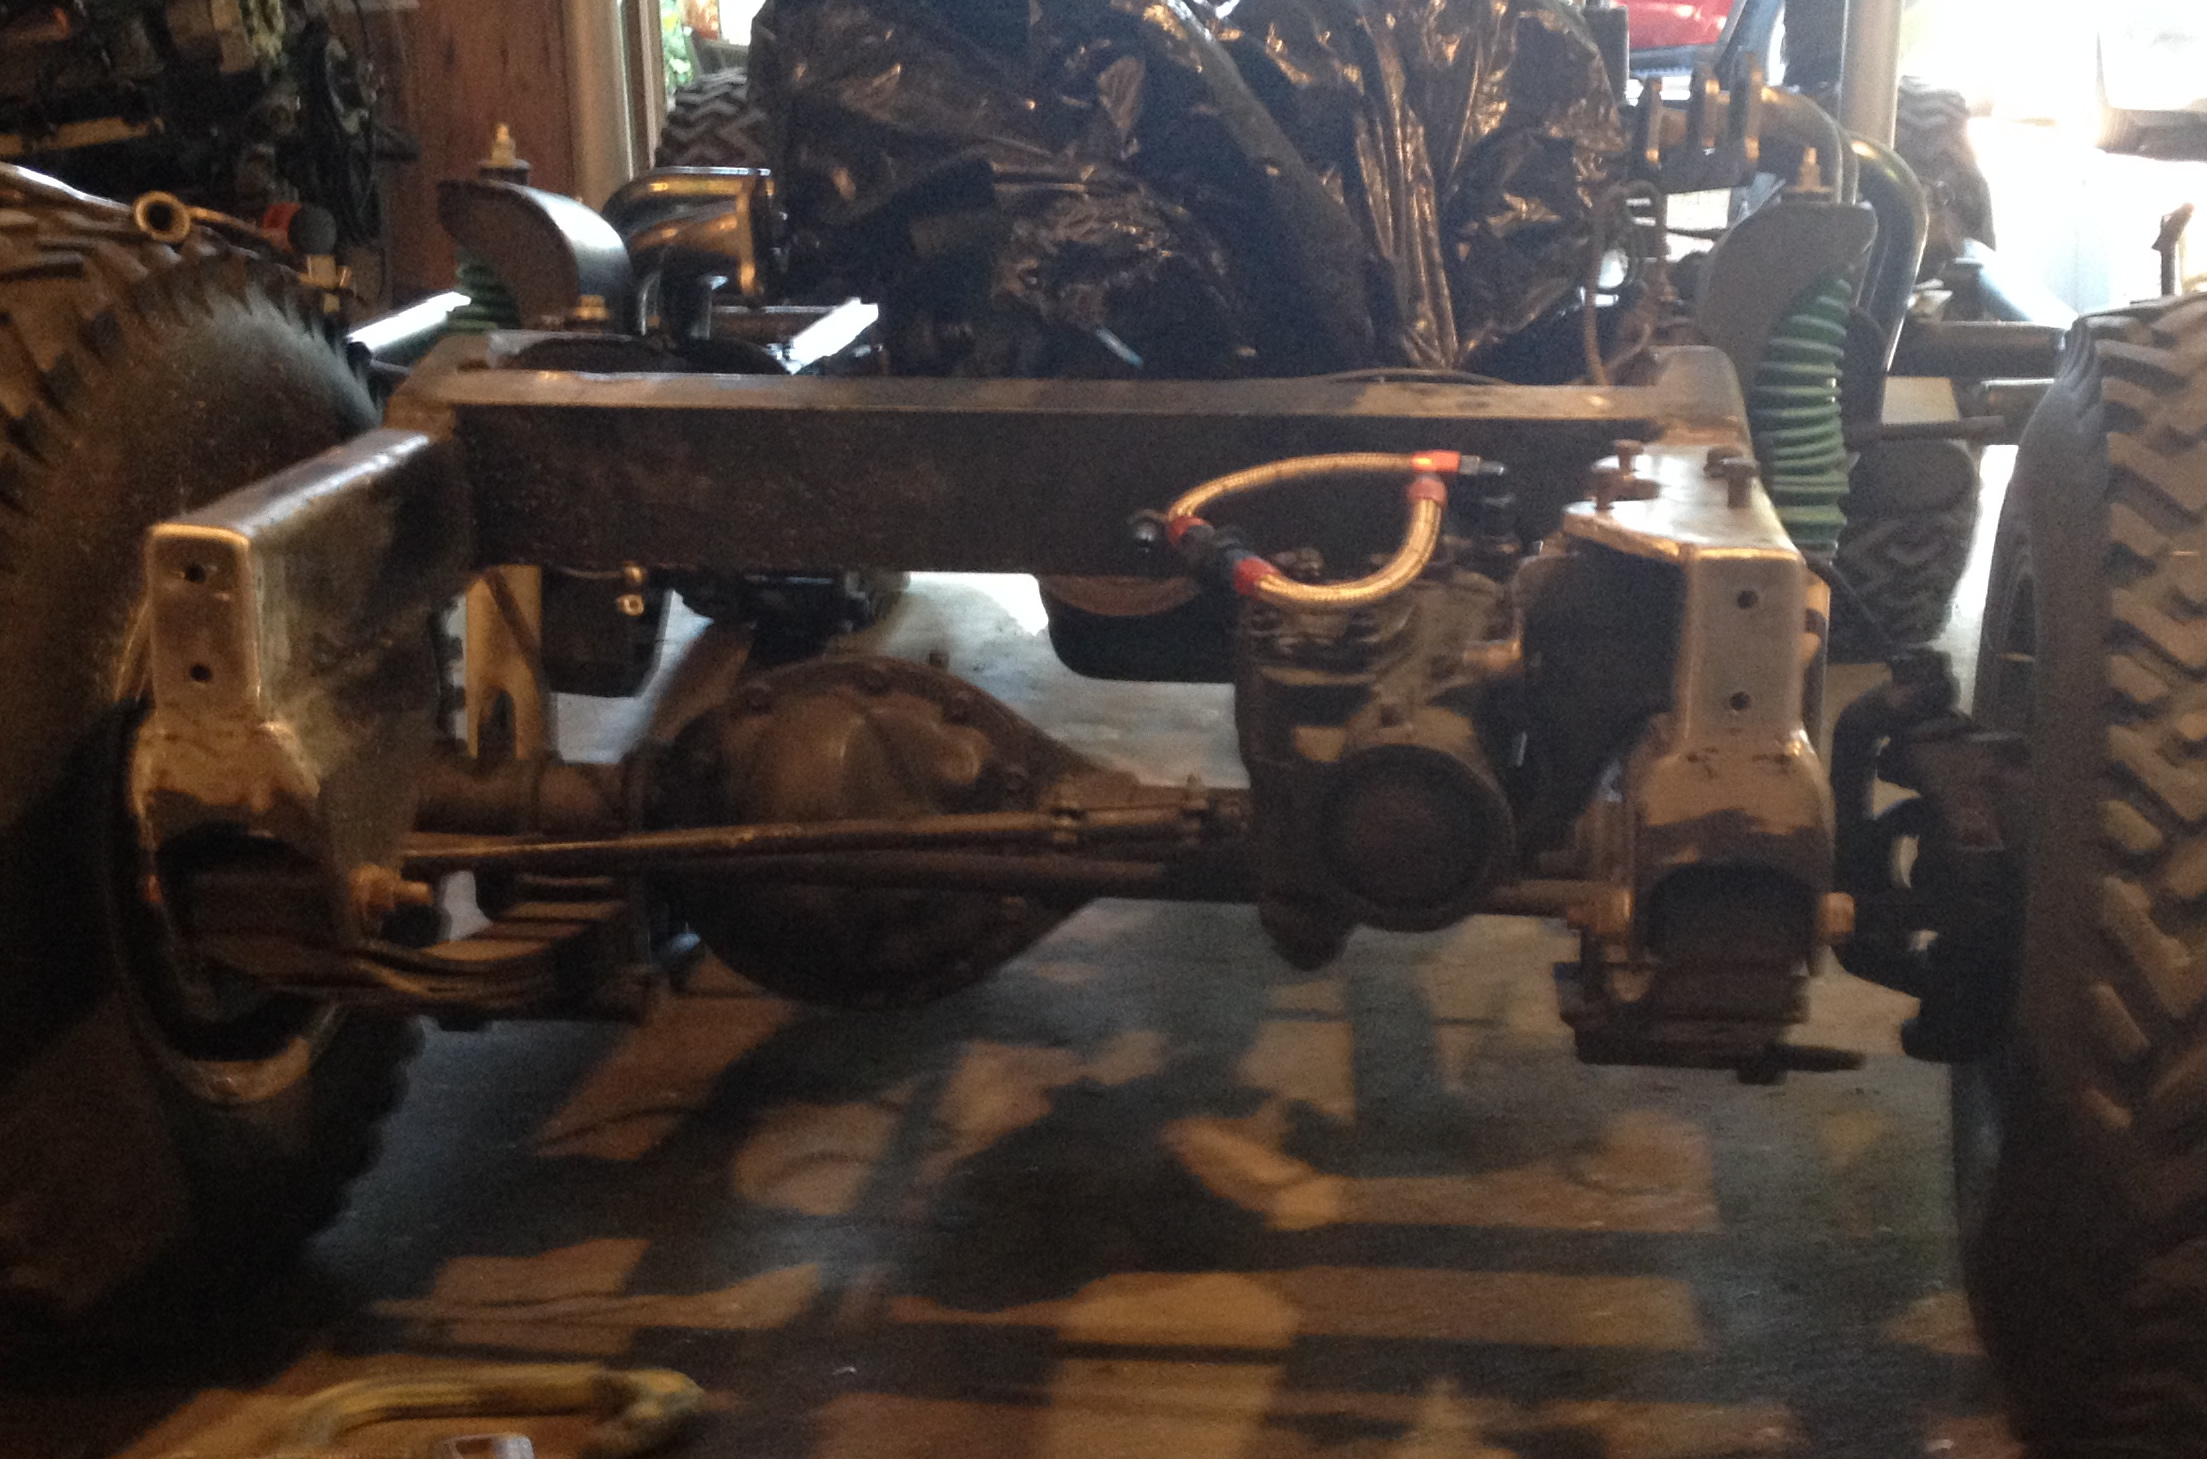
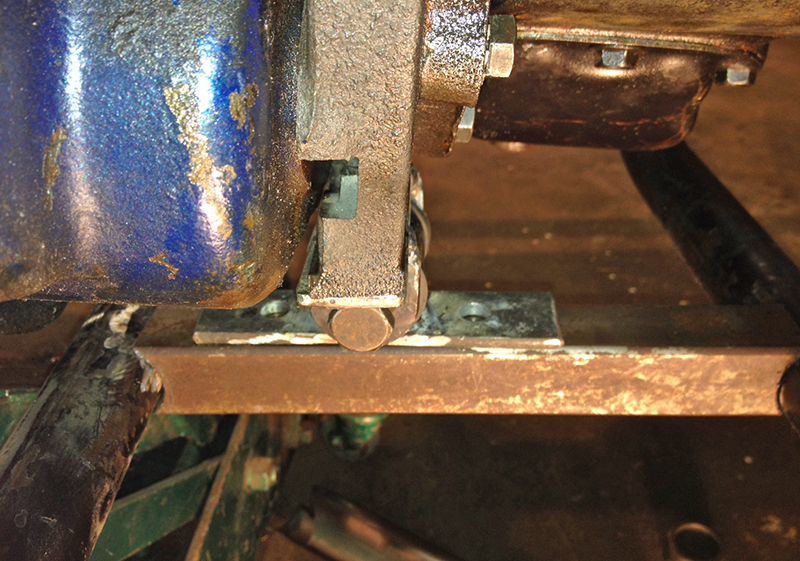
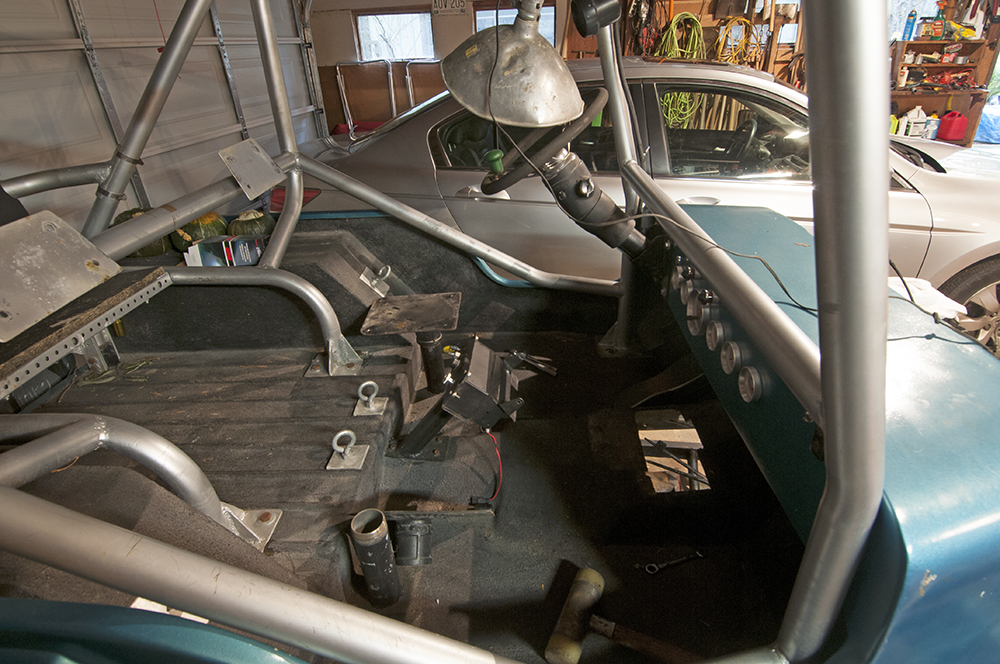
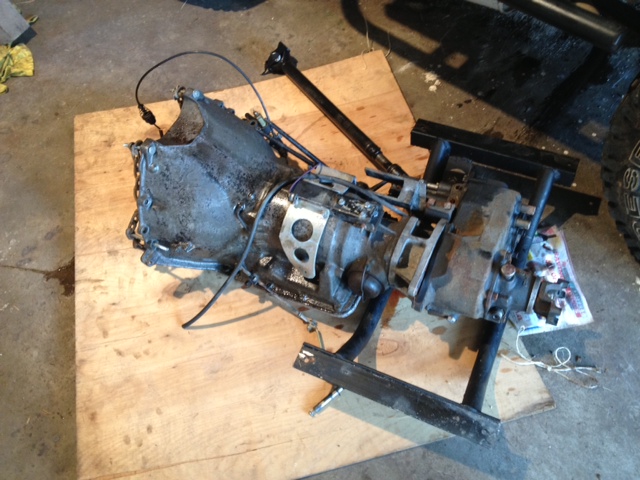
First, I tackled the custom bracket I made for the transfer case. You might remember that I installed Dana 18 gears into a Dana 20 (a good way to improve the gearing) and turned the single Dana shifter into a dual shifter. When I built the bracket, I designed it to fit alongside the TH 350. I didn’t know it wouldn’t fit right against a T-18.

2014-jeep-rebuild-may-june-transfercase1

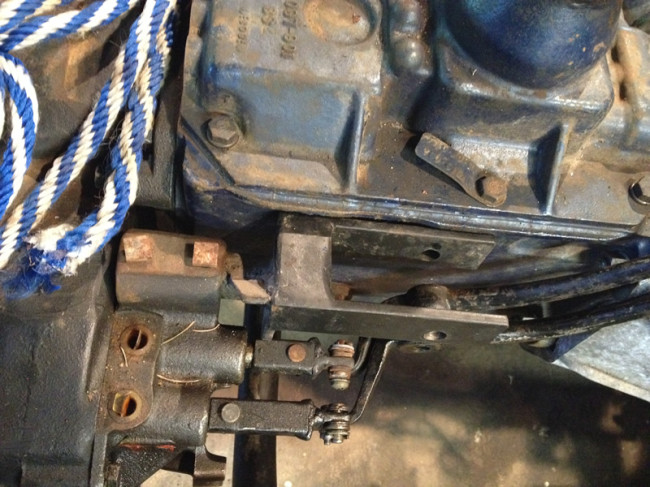
As you can see, the side of the shifter bracket tong sits against the transmission. There was no room to attach a bolt on the backside of the tong.

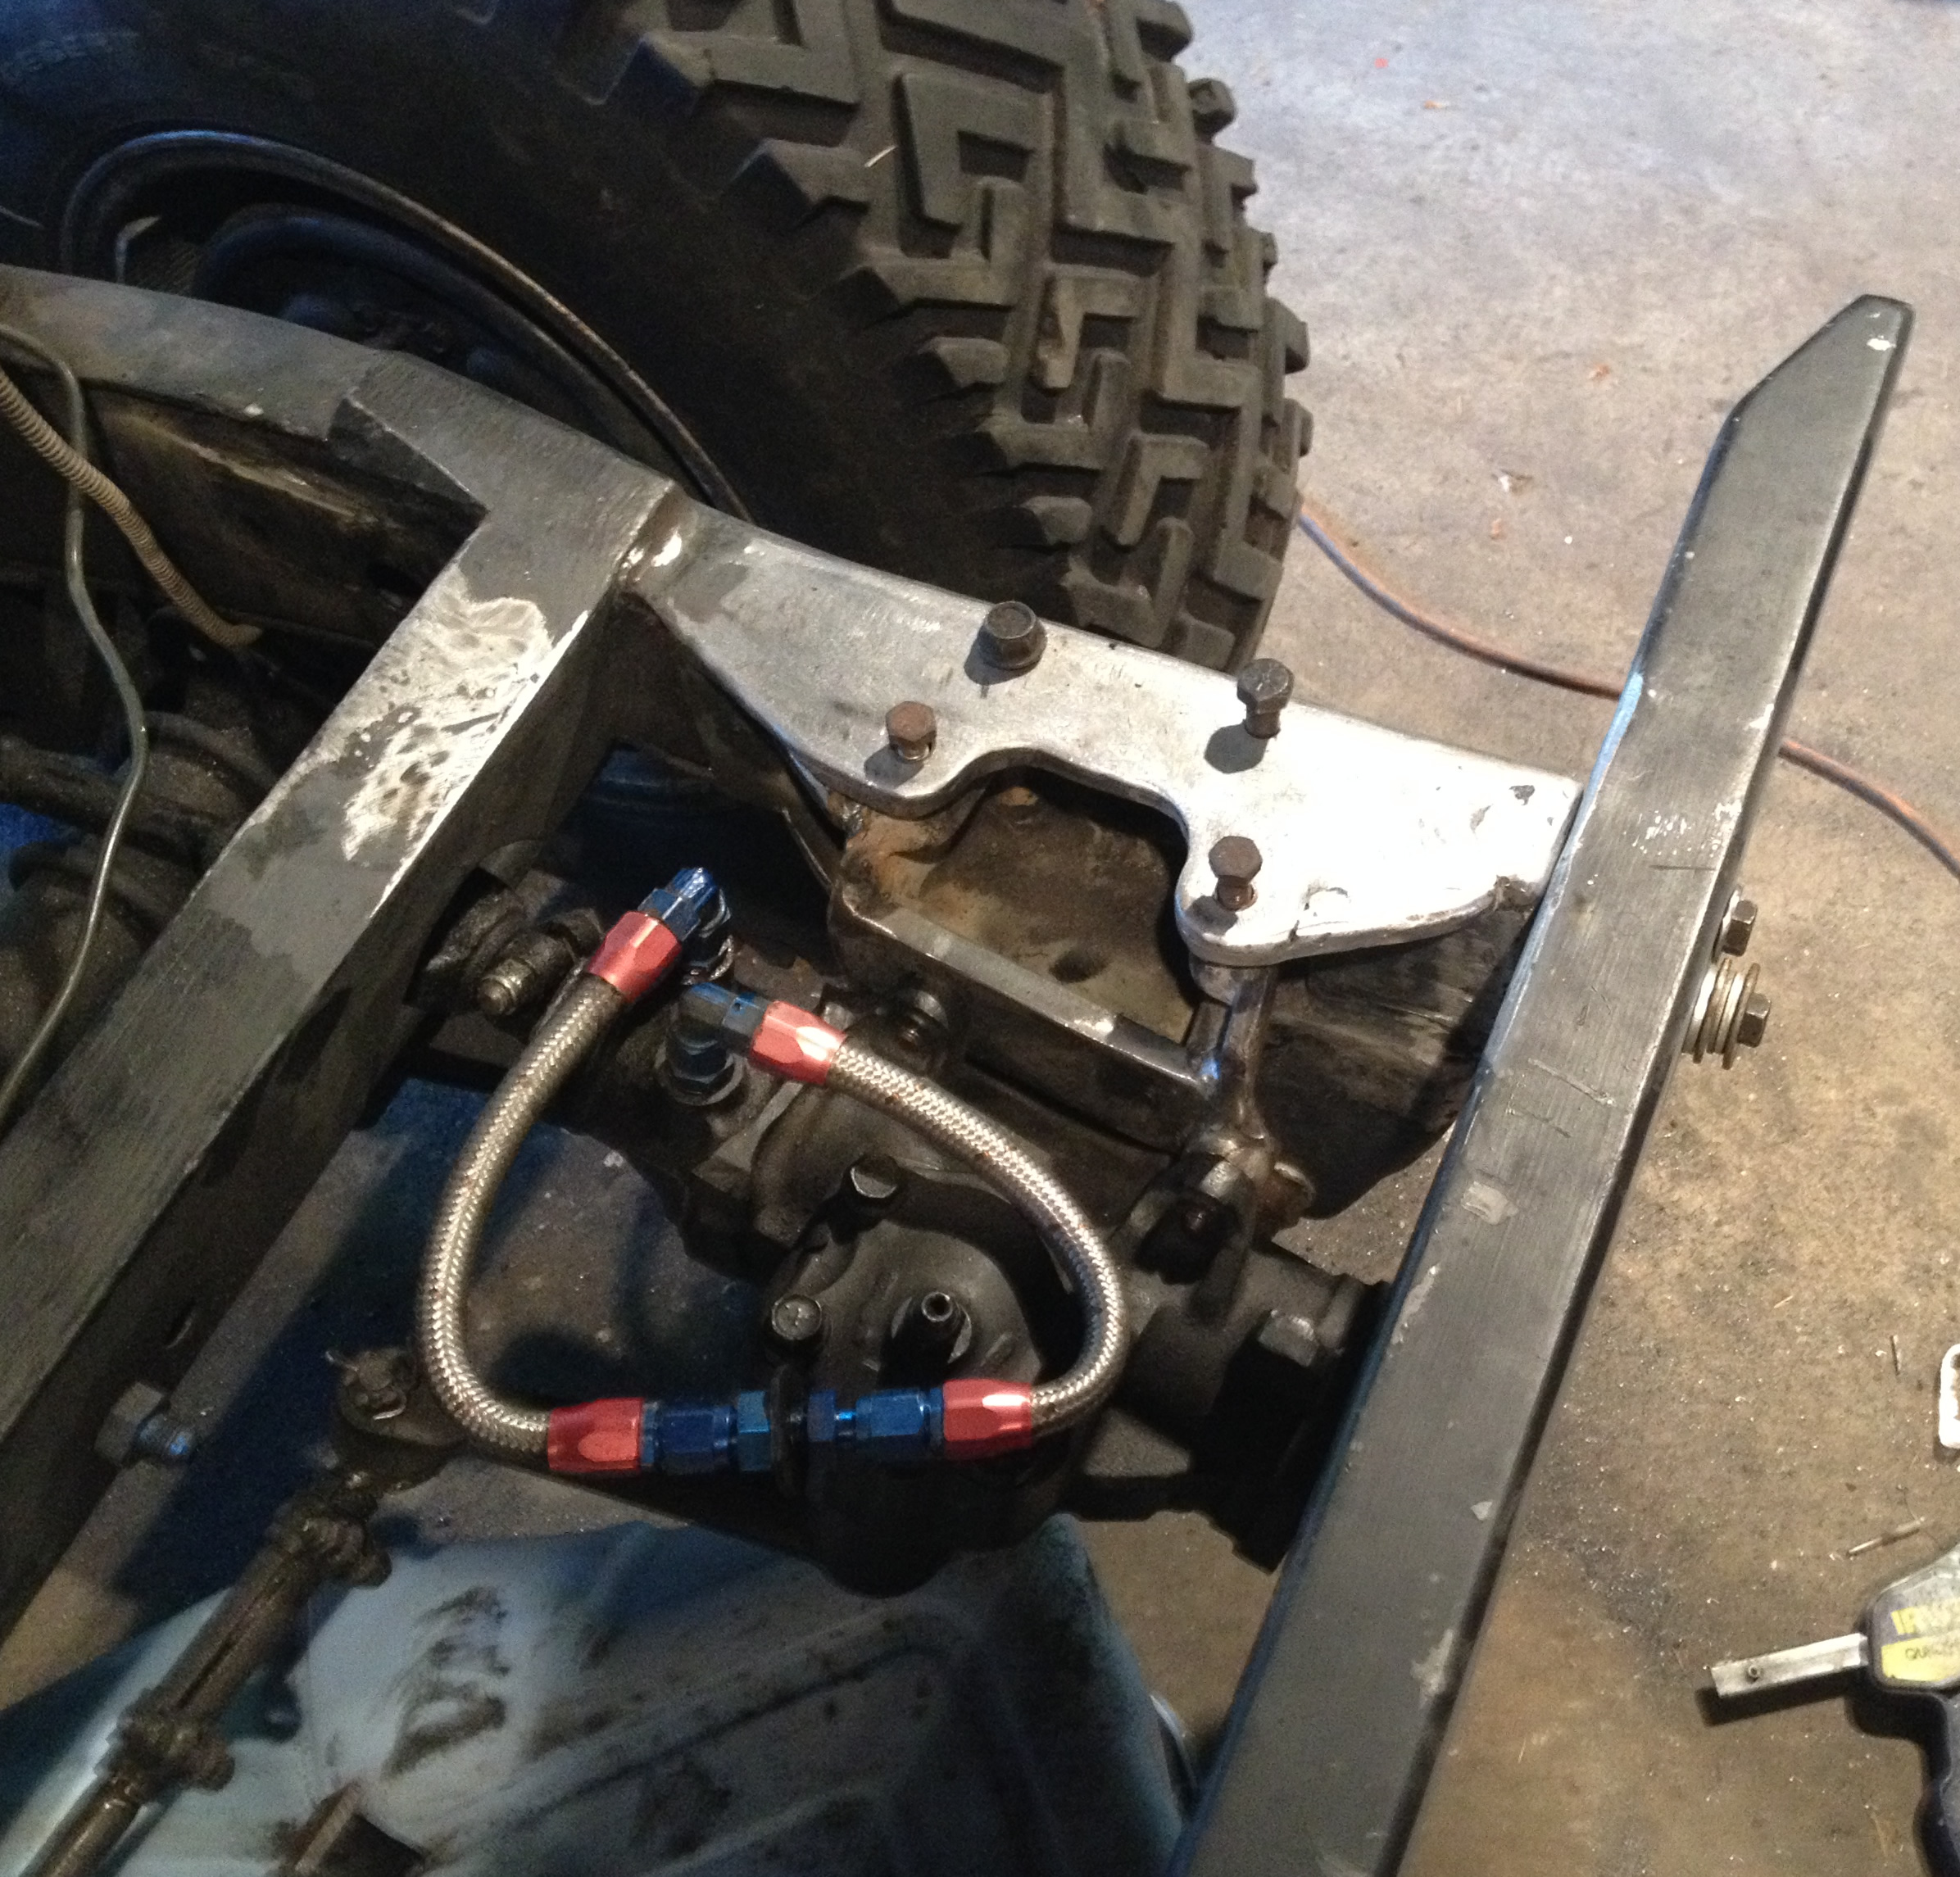
Since the shifter bracket is more functional then beautiful, I reused most of the parts. I simply cut off the old tongs, welded them onto a plate, and welded the plate back onto the bracket.

2014-jeep-rebuild-may-june-transfercase2

Not pretty, but works.

2014-jeep-rebuild-may-june-transfercase3

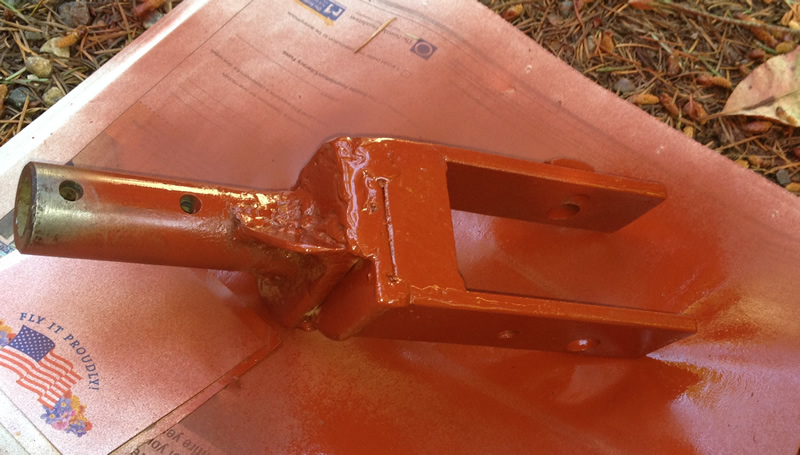
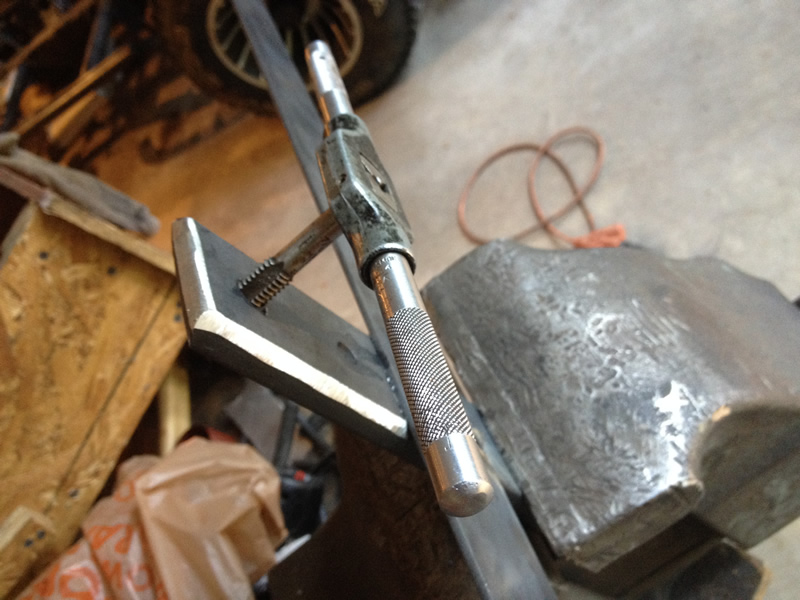
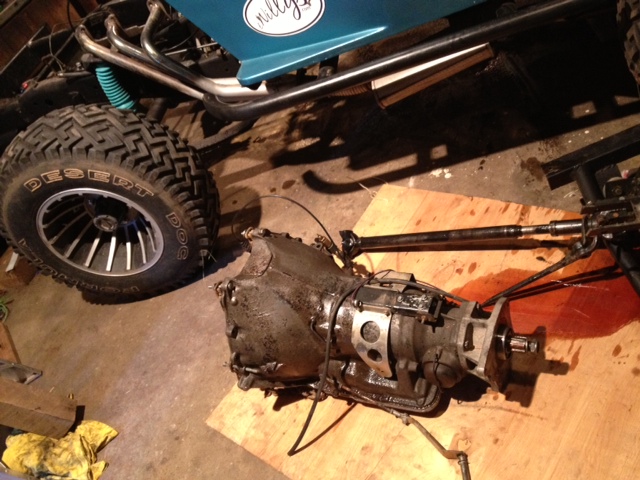
The ‘finished’ bracket with some primer on it. You can just see the bolt that I welded to the back side to make it simpler to bolt the shift levers into place.

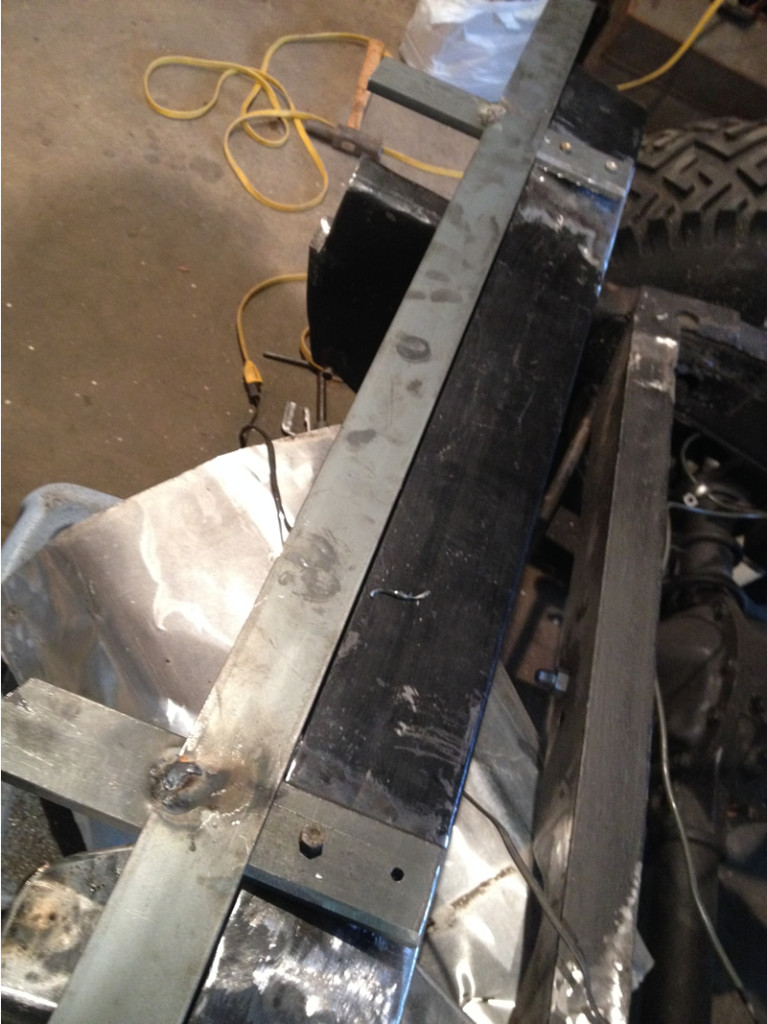
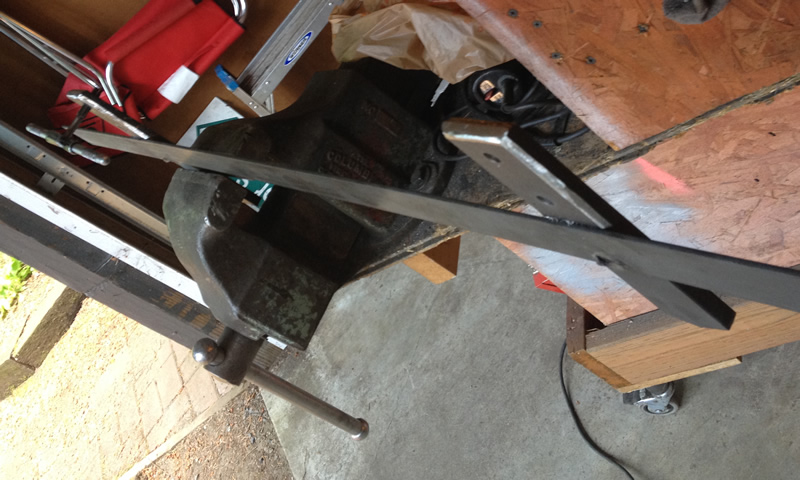
Next, since the transfer case sits slightly lower than it did before, I created a new side bracket. I made a template out of aluminum. To build the bracket I took a piece of an angle I had around the garage, cut it, and bent it into the shape of the template. Again, it’s nothing pretty, but gets the job done.

2014-jeep-rebuild-may-june-transfercase4

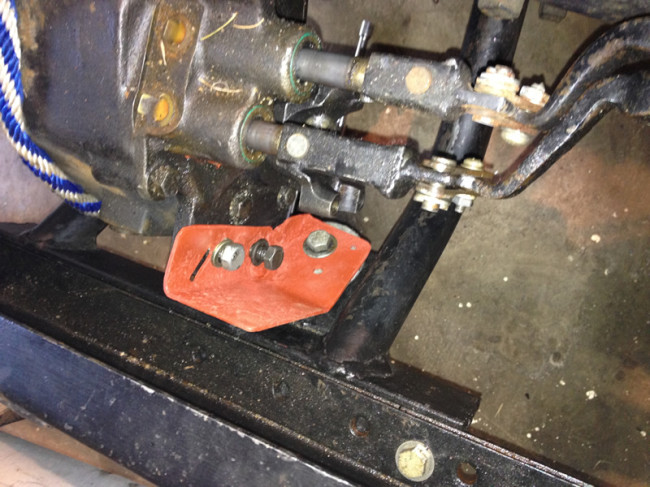
Transfercase side support with primer on it (so it would photograph better).

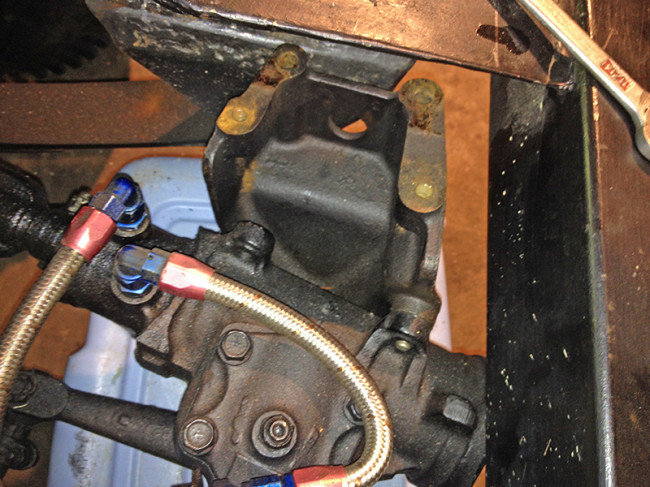
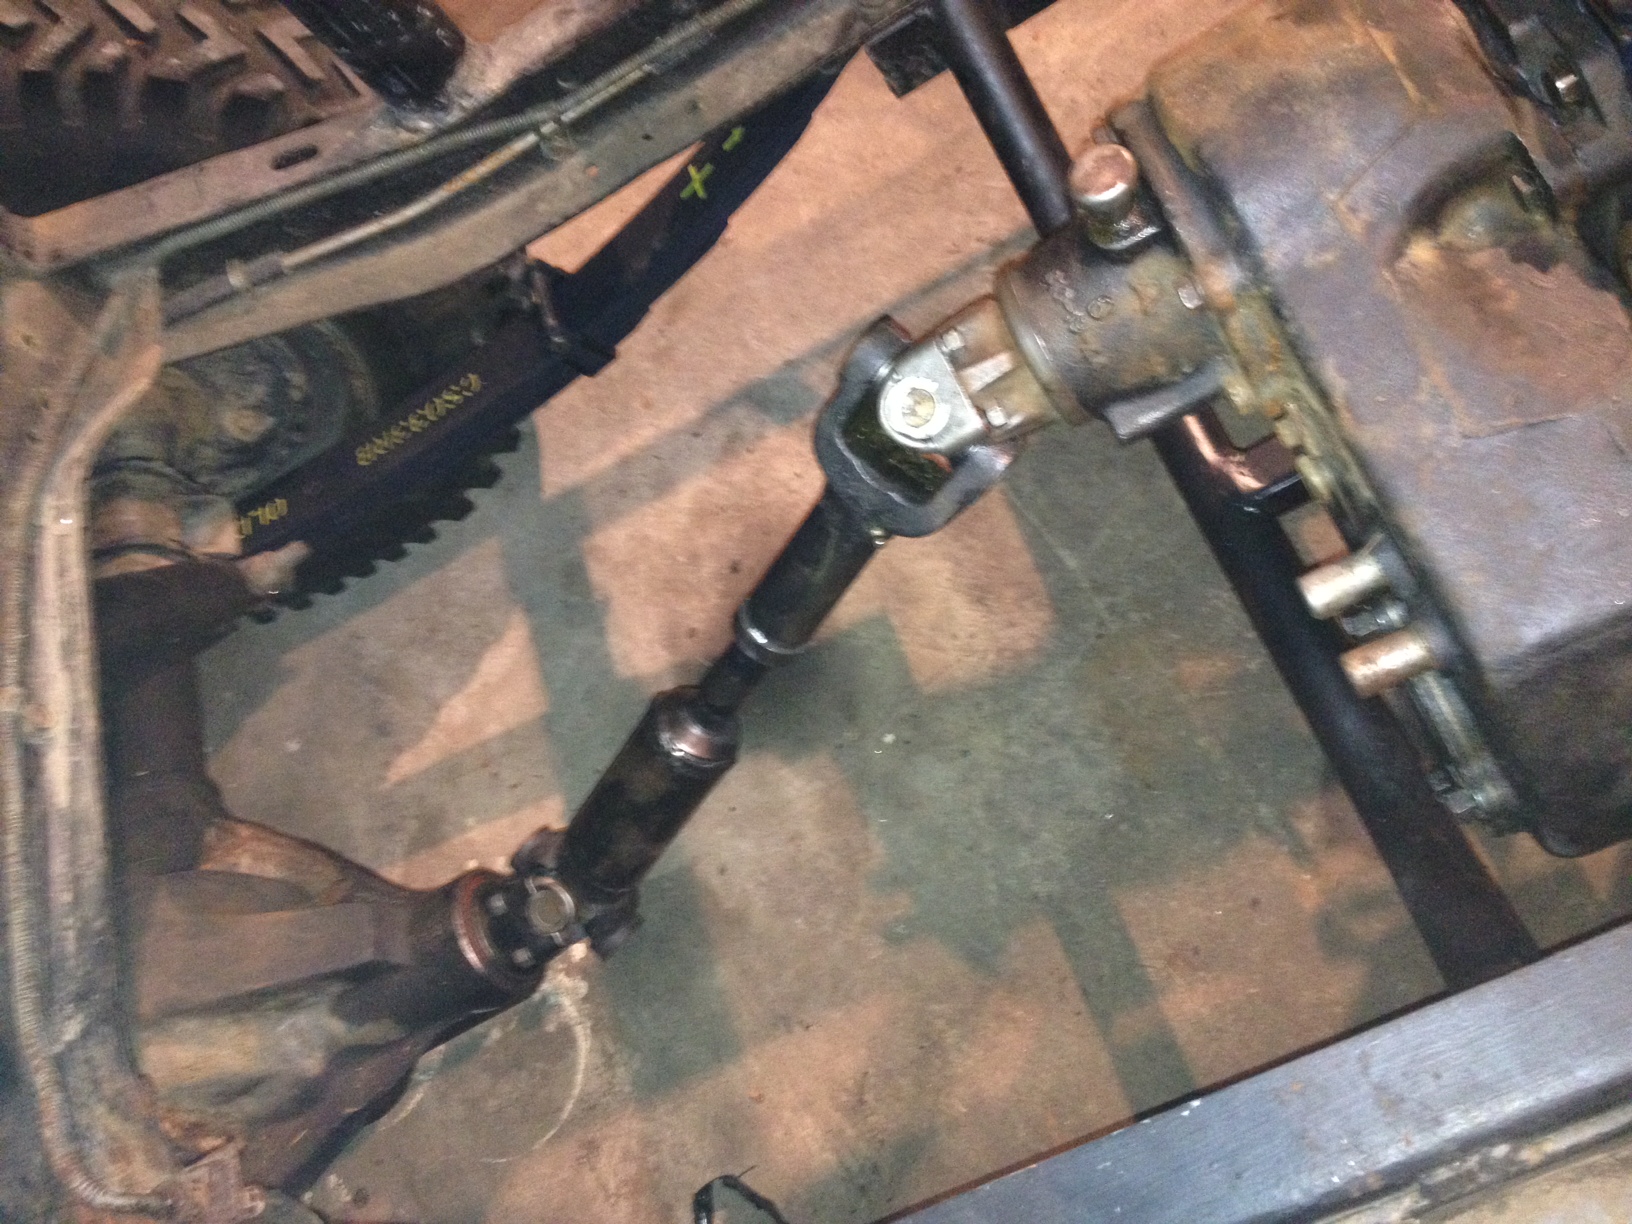
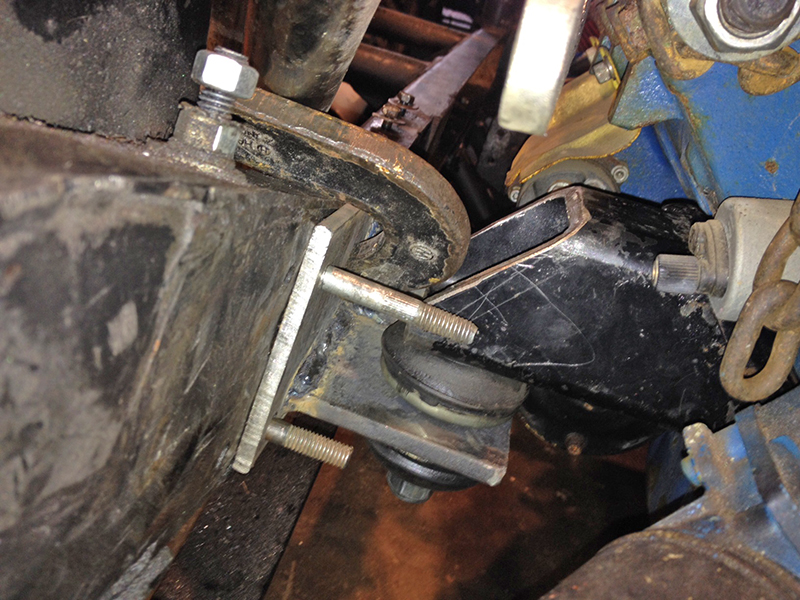
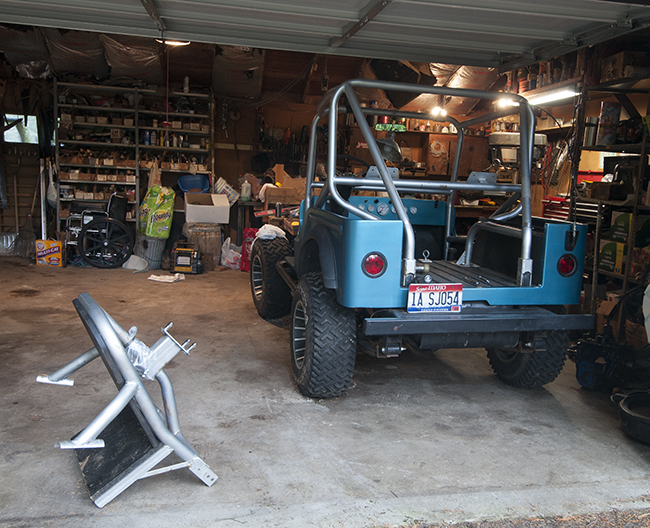
As I explained in a post a couple weeks ago, while I was puling apart my jeep I discovered that the powersteering was rotating slightly as I spun the steering wheel. That’s a problem! So, I dedicated the last few days to fixing that problem and changing the way the front bumper connects.

The basic problem was that the stock power steering mount unit only used three of the four holes to attach the steering unit. Therefore, I planned to add a cross piece to provide a place for a fourth bolt to attach. However, that meant I had to cut the plate on top so the bolt could be attached and removed. And, since I was doing that, I figured I would change the way the bumper attached.

2014-jeep-rebuild-may-june-powersteering1

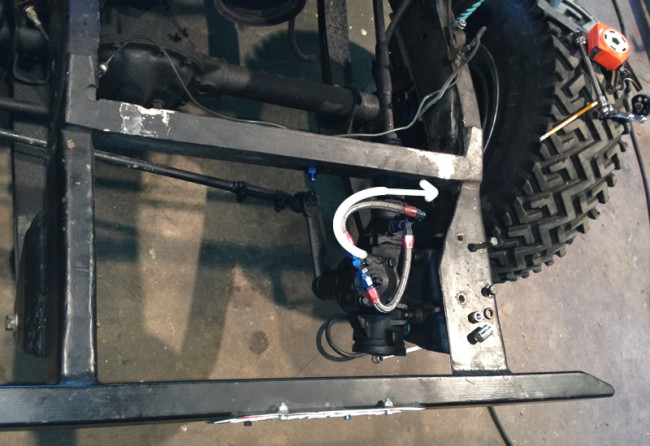
The white arrow shows how the unit was rotating to the driver’s side.

2014-jeep-rebuild-may-june-powersteering2

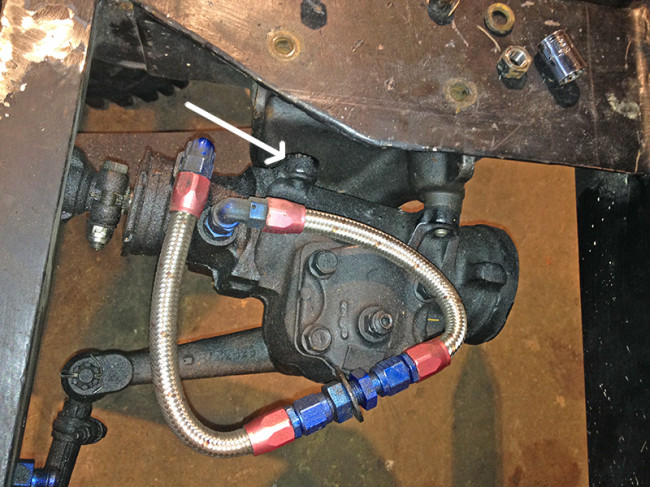
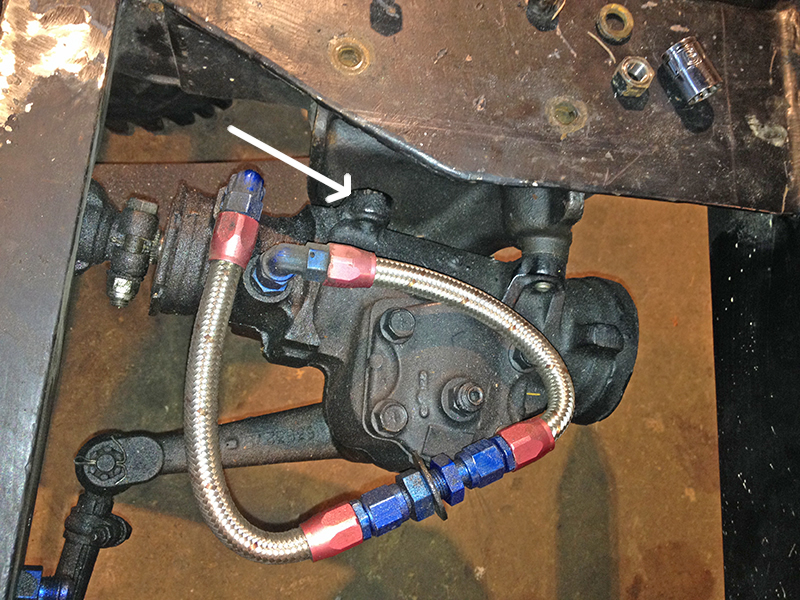
This arrow demonstrates where the power steering needed to attach.

2014-jeep-rebuild-may-june-powersteering3

Here I’ve removed the bracket from the frame to provide a better look at it. This is the stock bracket from a 1973 CJ-5.

2014-jeep-rebuild-may-june-powersteering4

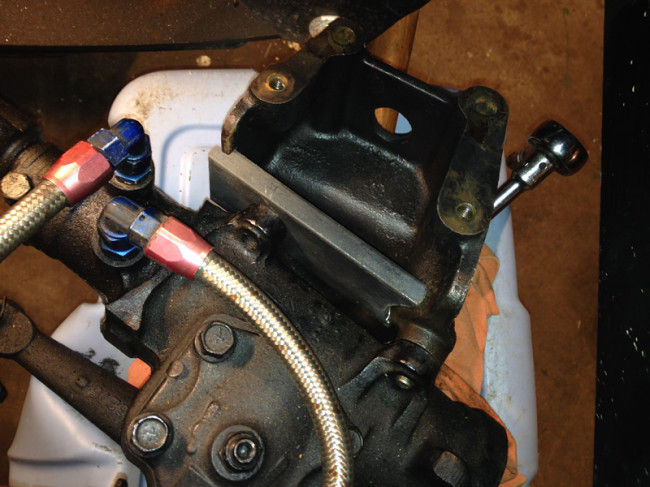
This shows the cross brace I made from 1/2″ steel.

2014-jeep-rebuild-may-june-powersteering5

Next up was the alternation of this top piece. You can see the outlines I’ve scratched into the plate.

2014-jeep-rebuild-may-june-powersteering6

Using a cutting blade and a saws-it-all I removed chunks of the plate.

2014-jeep-rebuild-may-june-powersteering7

Now it’s looking a little better.

Next off came the bumper:

2014-jeep-rebuild-may-june-bumper1

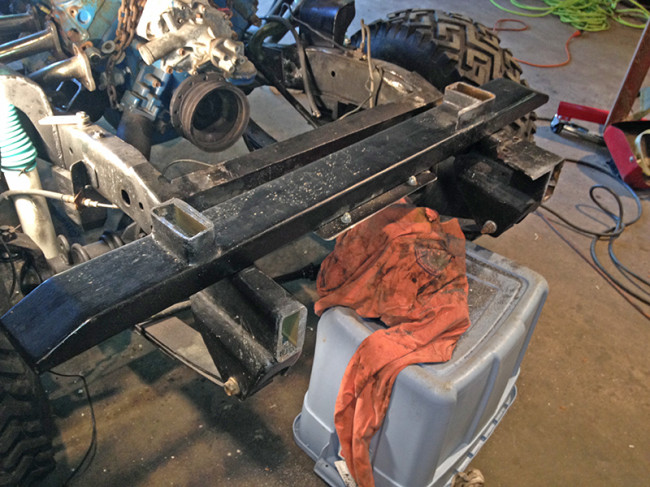
The length of the bumper in from of the jeep annoyed me a little. So, I wanted to remove a couple inches.

2014-jeep-rebuild-may-june-bumper10

The frame rail on the left has been cut back so the plate can fit snuggly over the custom front shackle. The far right frame rail has not been cut back yet.

2014-jeep-rebuild-may-june-bumper2

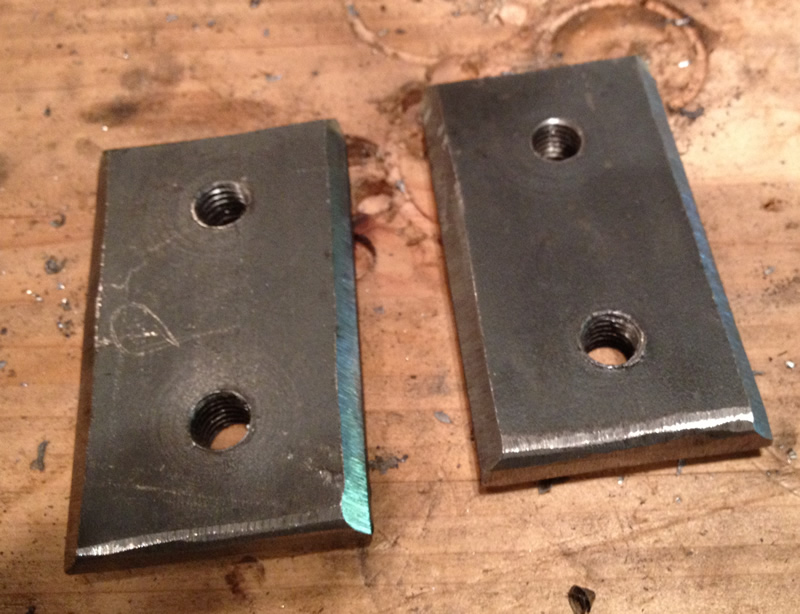
In order to bolt the bumper on to the front of the jeep, I created a set of flat plates and drilled some initial holes into them. The plates are tall so that I can weld a cross piece on to them. The cross piece will allow me to properly position the holes in the bumper with the holes in the plates.

2014-jeep-rebuild-may-june-bumper3

I clamped the new plates with the cross bracket onto the bumper so I could drill the holes. (for the pics I removed the clamps.

2014-jeep-rebuild-may-june-bumper4

With the bumper holes drilled, I can how set threads into the brackets.

2014-jeep-rebuild-may-june-bumper5

This is another view that shows the brackets, the cross piece and the tap at the far end.

2014-jeep-rebuild-may-june-bumper6

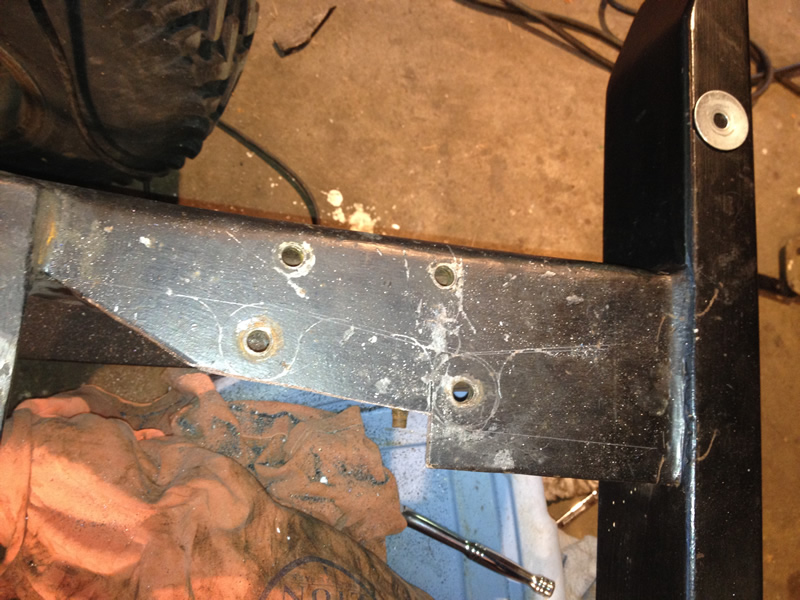
These are the brackets cut down and tapped. I had a little problem threading the hole on the lower right, which is why it doesn’t look quite right. It works fine though. I have also ground down the sides to make it easier to weld and fill the plates to the end of the frame.

2014-jeep-rebuild-may-june-bumper7

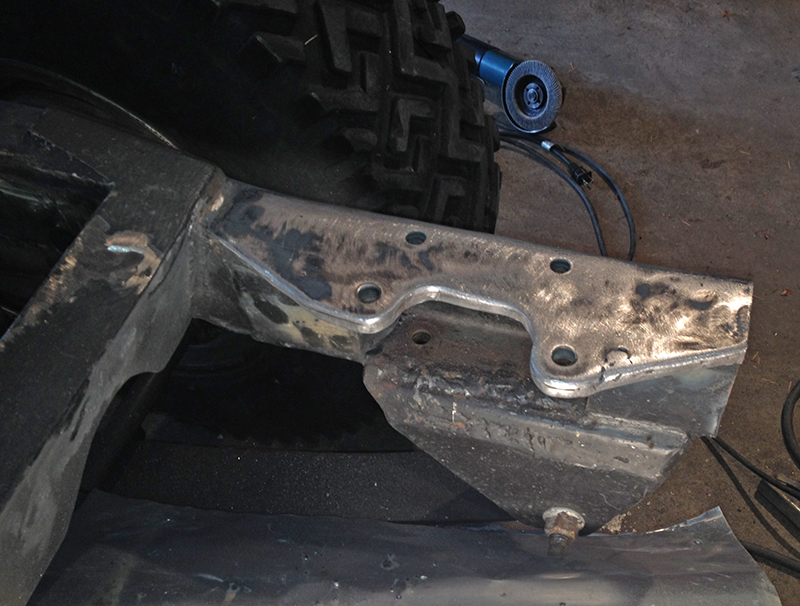
This show the plates welded and cleaned up on the end of the frame.

2014-jeep-rebuild-may-june-bumper8

This is a top view.

2014-jeep-rebuild-may-june-bumper9

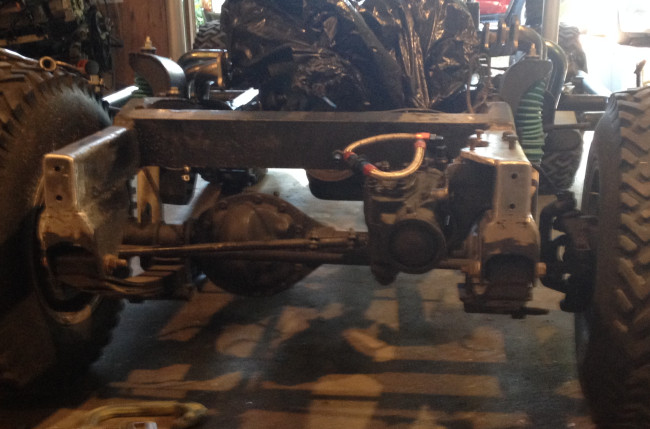
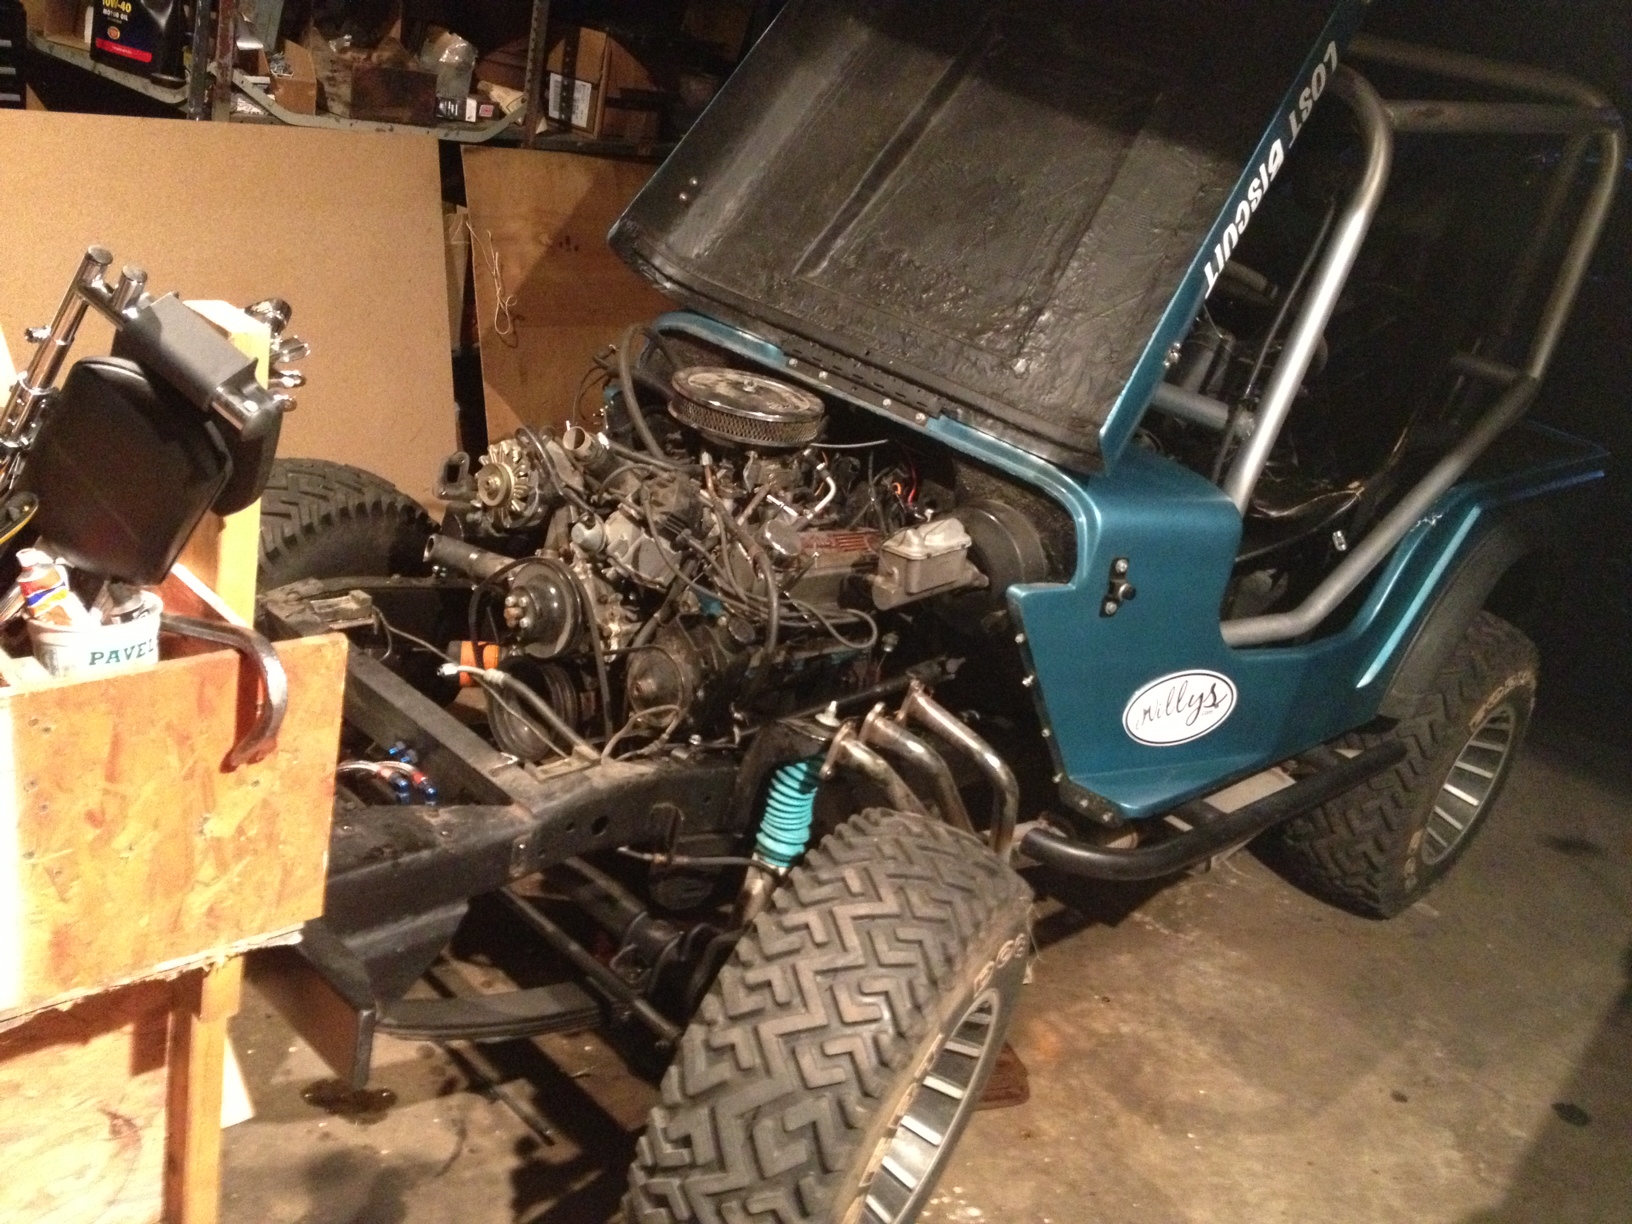
This shows the bumper attached, everything painted, and the power steering affixed to the new and improved bracket. 

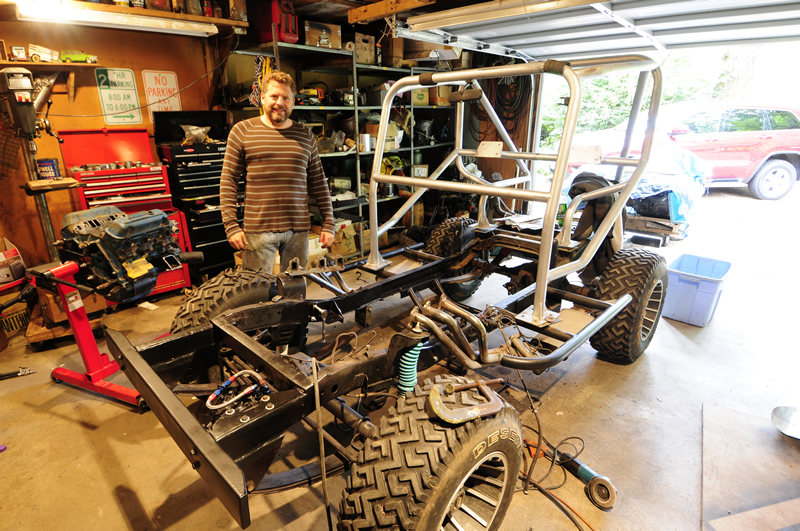
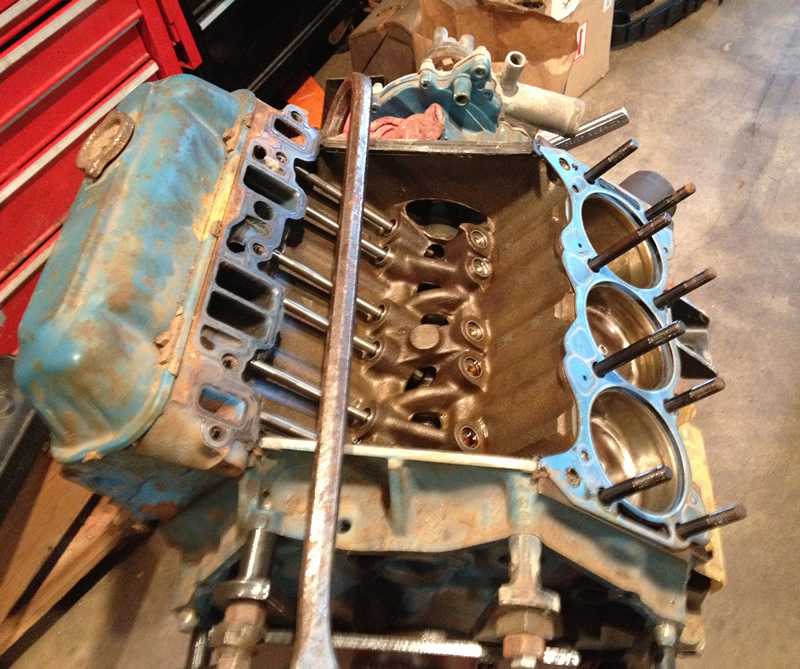
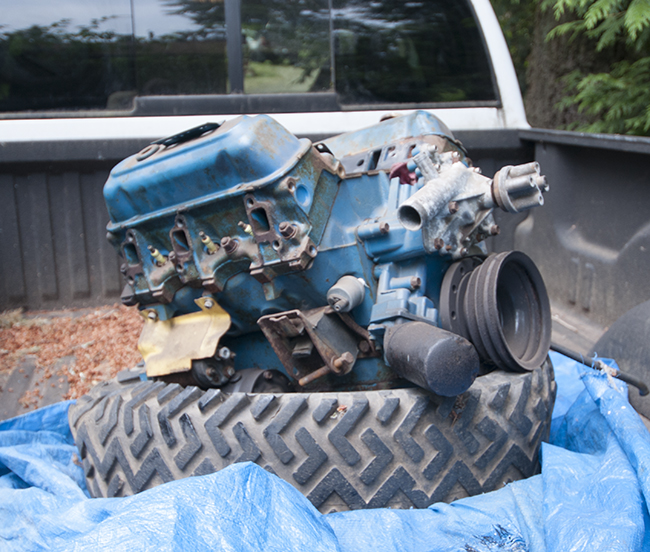
With those projects out of the way I turned my attention to the engine I bought from Daryl last summer. I discovered the motor has stock bores. The pistons appeared cleaned, but never run. The engine looks like it was rebuilt, but never run. The spark plug ends are clean and shiny.

2014-jeep-rebuild-may-june-david2

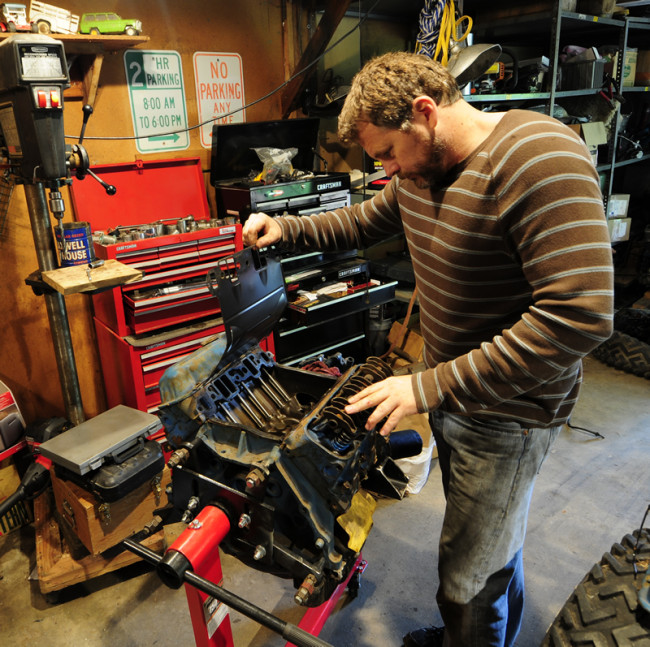
Me checking out the motor. It came without an intake manifold.

2014-jeep-rebuild-may-june-engine1

With the head pulled I was relieved to see clean cylinders. Then I noticed there was no build up at all on the gaskets.

2014-jeep-rebuild-may-june-engine2

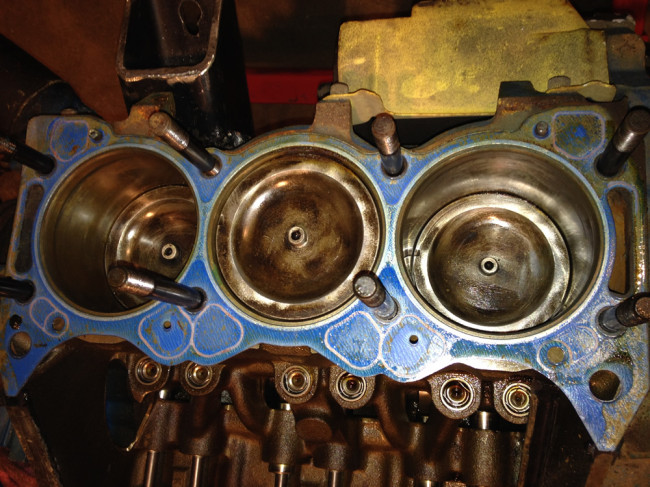
The tops of the pistons showed they weren’t new, but they appeared to have been scrubbed cleaned.

2014-jeep-rebuild-may-june-engine3

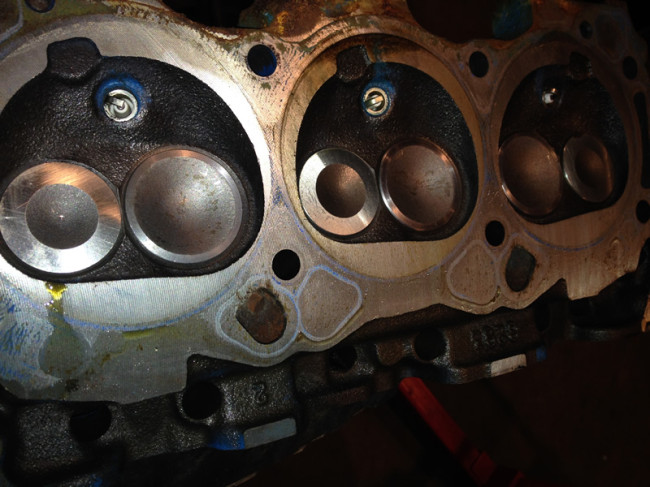
The underside of the heads show no carbon and the plugs look unused.

Given the engine looks unused, I’m not going to attempt to rebuild it. Instead, I’m going to run it as it is and focus resources on properly rebuilding my other motor (with its new heads and updated cam) later this year. In the meantime, I can run with this motor and focus on getting the other parts I need to get Biscuit running. Since they are both Buick V6s switching out motors at some future date won’t take very long.

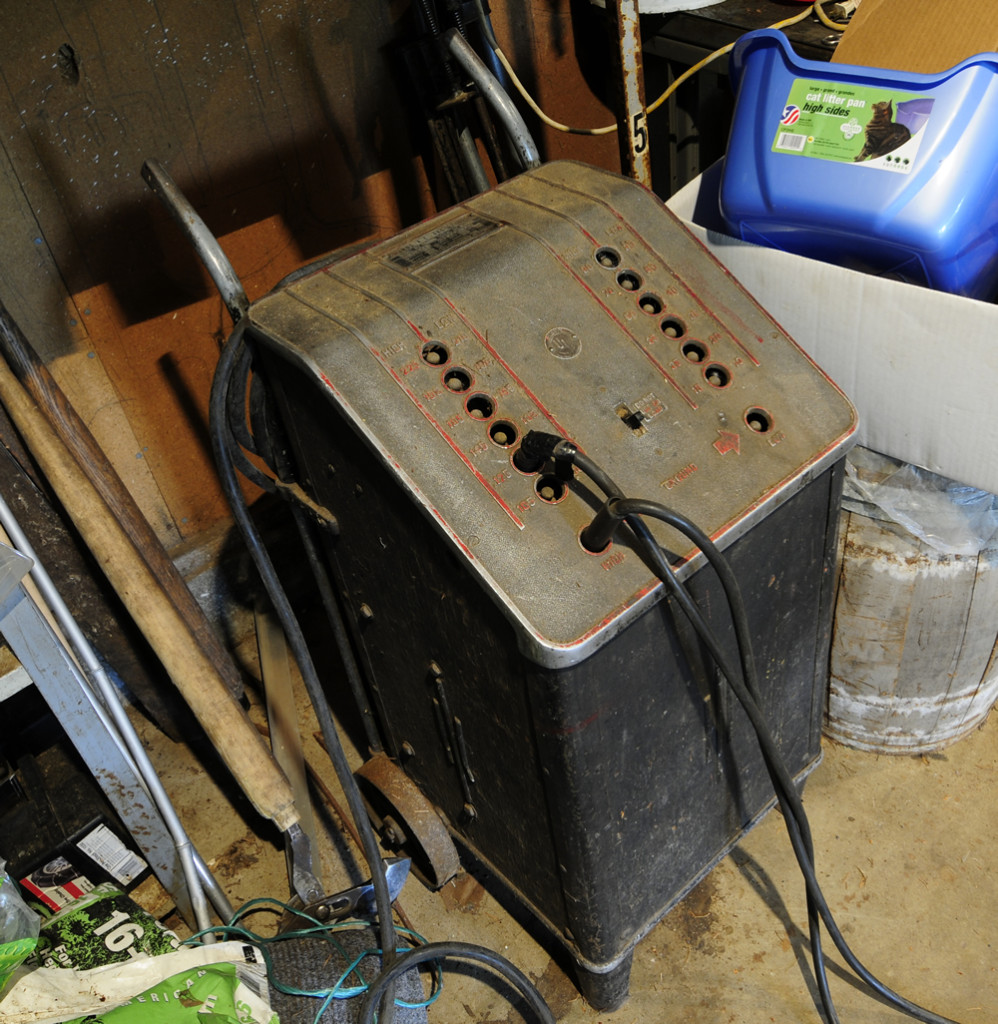
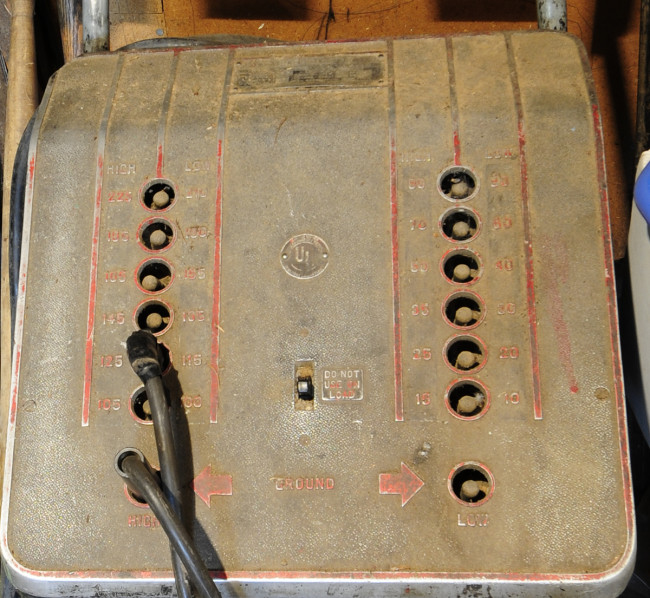
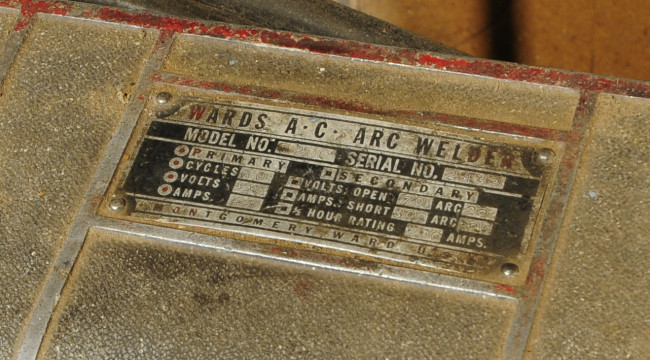
Lastly, I thought you might enjoy seeing the welder I’ve been using. Dad tells me he got this Montgomery Ward classic as a hand-me-down from a local jeep builder (Al Carrol) in the late 1960s. It’s still works real well.

2014-jeep-rebuild-may-june-welder1 2014-jeep-rebuild-may-june-welder22014-jeep-rebuild-may-june-welder3I hope to return later this month to complete some more work. I will be updating the front brakes to discs. Thanks to R&P for the brake kit! I’m also hoping to have all the parts to install the drive train. Here are a few more parts I’ll be adding to the mix:

  1. Holley 390 carb (i have a kenne belle intake)
  2. Clutch kit & pilot bushing
  3. Brake Calipers for the new disc brakes
  4. Brake power CJ-7 unit with proportioner
  5. Bushings for my new rear emu springs (thanks to Mitch at ARB for helping out with those)
  6. Possibly a different set of headers (am waiting to see what I can find online)

So, stay tuned!


To Top

Engine Mounts Done

• CATEGORIES: Biscuit, Features This site contains affiliate links for which I may be compensated.

I finished the engine mounts … and by finished I mean they are almost ready. They are welded and set in place, but still need some polishing and paint (as if they will be polished — maybe cleaned up a little more).  I have to pull the engine and go through it anyway, so there was no rush to get any more done.

I hadn’t planned on going through the trouble of redesigning how my engine sits within the frame, but removing the auto trans gave me more flexibility. I didn’t make the change lightly. I pondered, measured, eye-balled, used a level, and got out a crystal ball to see if I’d really be happy with the change. After all, it seemed like a lot of work for just a few inches gain. But, by making the changes I was able drop the engine slightly and shift it to the center between the frame rails. Yep, that seemed like a good idea, so I made the changes.

I wouldn’t call the mounts beautiful, but they are functional. They will be both welded to the frame and bolted (as a backup). Unfortunately, I took terrible pics (we didn’t bring our good cameras with us). Here’s a close-up of the passenger-side mount. You can’t really see the mount’s rear support, so the photo isn’t really helpful. The bolts are just placeholder bolts.

2014-05-15-jeep5As for the rear center mount, the creation of it started out smoothly. I was going to install a round tube between the two undercarriage tubs that support my tranny and tc. I jigged up the tube to-be-cut and cut a perfect pair of holes for sliding the tube onto the undercarriage tubes.

2014-05-15-jeep1

The jig is holding the tub, which keeps it from spinning. The cutter created a perfect hole. So, why didn’t i use it? Because the installed tube was about a half inch too tall. Damn!

Once drilled, I tested the tube. That’s when I discovered it was barely too tall. I abandoned that plan for a simpler one.

After some scrounging in my very sad metal pile, I found some square tubing that was just the right size, so I drilled that and slide it between the cross members. Then I built a small mount with a rubber housing on top of that (which will be welded to the square tubing). Finally, I created a small piece that bolts to the T-18/TC adapter. The fit is good and solid and the rubber gives it some flexibility.

2014-05-15-jeep2

This will make more sense once I weld the square tubing to the braced on top of it and paint it. But, I wanted to complete the engine mounts before finalizing the position of this back mount.

Here’s a photo from the side. You can see how the square tub fits in between the front and rear round tubing (fits tight enough that I didn’t have to weld it before putting the tranny/engine weight on it).

2014-05-15-jeep4


Tomorrow we head back to Pasco for a while. I’m hoping to get back later this month to make more headway. Hopefully I’ll get better pics, too!


To Top

Perfect Weather for Biscuit Work

• CATEGORIES: Biscuit, Features This site contains affiliate links for which I may be compensated.

On Monday I spent the day repairing Mom and Dad’s tractor mower, fixing Mom’s computer, getting the chainsaw and weed eater working, and more. Dad made sure I was doing everything right, as you can see in this photo.

dad-david-workingOn Tuesday I got a chance to work on Biscuit. I started by cleaning up the frame some more so that I could deciding how the engine, tranny and tc would be mounted. The T-18 I’m installing is a bit shorter than the automatic TH-350 I’m replacing, which is the reason for the redesign.

2014-05-13-biscuit-1

Here’s where I started today.

When I bolted the T-18 to the adapter to the Dana 20/18 (Dana 20 housing, Dana 18 gears) I discovered my custom mount is too tight against the T-18. So, I’m going to have to alter that.

2014-05-13-biscuit-3

Continue reading

 
To Top

Updates Friday Evening

• CATEGORIES: Biscuit This site contains affiliate links for which I may be compensated.

I’ll do some updates later tonight.

Here’s a photo of Biscuit, undressed and packed away in the garage. The next step is to hang the motor and tranny in the frame so I can install the new motor mounts. I’m hoping to get that configured before leaving tomorrow.

11-28-2013-biscuit-packed-away

 
To Top

Let the Fun Begin

• CATEGORIES: Biscuit, Features This site contains affiliate links for which I may be compensated.
2013-11-12-biscuit-and-david

Self Portrait . . . let the unbolting begin! Note what happens when I leave the jeep in my parents garage. It becomes a squash storage facility.

I’ve spent the last couple days moving and reorganizing parts and things so I could make enough room to start disassembly (see pic below). Today I finally got to begin the breakdown process.

2013-11-12-biscuit1

As you can see, it was a bit of a mess.

One of my strategies during assembly was to make the body as easy to remove as possible. So, for example, nothing is wired or attached to the fenders. In addition, the wiring along the underside only attaches to the frame in one spot (a ground). It all worked well . . . great when a plan works!

2013-11-12-biscuit3

I also removed the seats. Posts welded to the frame stick up through the body (holding the body in position). Seat plates are screwed onto the body. The seats are bolted to the plates.  Here the passenger seat plate has been removed and is sitting next to the post.

2013-11-12-biscuit2

Continue reading

 
To Top

Biscuit Status

• CATEGORIES: Biscuit This site contains affiliate links for which I may be compensated.

People have asked how the transmission swap is going. Well, fixing my parents house and finishing the book have trumped work on Biscuit, but I did trade for and bring home a low mile short block that *should* solve my engine woes. Here’s a picture of Biscuit and of the new engine.

2013-08-02-biscuit-no-engine

2013-08-02-biscuit-new-engine

 
To Top

Tranny and Engine are out

• CATEGORIES: Biscuit This site contains affiliate links for which I may be compensated.

After repairing a few more sonny-do-items around my parents’ house, I got a chance to pull the engine, transmission, and transfercase. As usual, a variety of expletives bounced off the less-than hallowed walls of the garage.

During the removal process I discovered that power steering box moves some when turning to the right. I *thought* it was a good idea to use the stock ’73 CJ-5 mounting unit to mount the steering, since I would have thought Jeep’s engineers would have been able to get that right, but it seems my place was misplaced. So, part of the rebuild process will be improving the mounting bracket.

On a side note, my father was busily managing the process from the kitchen. Everytime I went in the house he’d ask, “Is your transmission an automatic.”
“Yes, I’d say, but I’m changing to a T-18.”
“You know,” he’d say, “the manual is shorter than the automatic.”
“Yes, I’d say.”
“Ok, well good. You just need to be aware of that.”
By the time we had our third conversation about it, I was WELL aware! 🙂

Here are a few pics:

2013-07-30-pulley

The cobwebs and dust on the hook suggest the garage’s engine pulley hasn’t been used in decades.

2013-07-30-liftoff

The engine is about to be freed.

2013-07-30-tranny1

The jeep sits just high enough to allow me to pull the tranny and tc out from under it. I’d like to say it was stellar planning, but it was really dumb luck.

2013-07-30-tranny2

There she sits, looking like she’s bleeding a bit. She and I had some good times, but our divorce will soon be finalized. Time for some thing different.

 
To Top

And the Tranny Swap Begins . . .

• CATEGORIES: Biscuit This site contains affiliate links for which I may be compensated.

After I fixed my parents’ mailbox, repaired two broken outlets, and rewired some lights in the garage, I was finally able to start dismantling Biscuit for the tranny (and possibly engine) swap. Once I undo a few more  bolts, the engine should slide right out. I have a few more things to do before the tranny is ready to come out. But, that will be delayed a day or two as I begin work on several more house-related sonny-do projects.

One thing I learned as I drained the water from the radiator . . . it was much browner than I expected. There’s definitely some oil mixed with it.

2013-07-28-biscuit-frontclip-apart

 
To Top

Letter I wrote during the summer of 1986

• CATEGORIES: Biscuit, Features, Trips, Women & Jeeps This site contains affiliate links for which I may be compensated.

Last month I discovered a letter I wrote in 1986 during my first summer at Roche Harbor. I sent it to my parents, who promptly put it a filing cabinet. Looking for some personal records, I discovered the letter. For anyone who hasn’t read my book (Finding Virginia) the following letter probably won’t mean much. For those that have read it, there are many familiar themes throughout the letter that also appear in the book. That fact my letter covers jeeps, cooking, and a girl shows you that I remember the summer of 1986 pretty clearly!  However, one event I didn’t include in the book, because I didn’t remember it, was going on a date and having the jeep breakdown. That’s so classic me.

Before I get to the letter, below is a picture of my first jeep two months after I wrote the letter. Cullen and I had come over the Naches trail the previous day, damaging the fiberglass front passenger fender in the epic battle against gravity I describe in the book. We slept that night at the Beverly Dunes. In the morning, we drove towards Moses Lake. Around noon, we stopped and took this picture. After the picture, we proceeded to Moses Lake, then on to Idaho. We stayed in CDA for a couple hours, then started back to Anacortes by way of Stevens pass to catch the 6AM ferry back to the islands. It was a long day.

On the front of the jeep you can see a large chain, which, among other uses, was the shovel tie down. Behind that is a trusty warn winch that saved me many times. The grill is fiberglass and, though already patched once, split into two during this trip. The headlights are 5 1/2 rather than 7″. The smaller size and a wiring problem insured lighting at night wasn’t very good. As you can see, bungie chords were a must for holding down the hood. Wedged between the passenger seat and the roll bar is an old canvas collapsable bucket. It’s still in my parents garage. We carried an extra red gas tank, which is attached to the roll bar on the passenger side. If you look near the rear wheel well you can just make out the racing number from the 1985 summer convention.

blue_jeep_after_beverly_dunes

Click on the link below to read the letter.

Continue reading

 
To Top

Happy Holidays!

• CATEGORIES: Biscuit, Features • TAGS: This site contains affiliate links for which I may be compensated.

2012-xmas-kids-cousins2

Poor Biscuit has been run so little this year that we had to get him a new battery for xmas.  That perked him right up!  We took him for a spin between rain showers and snapped some pics.  There might be some updates on Christmas day . . . or there might not be.


To Top

Just a few Updates Today (Monday)

• CATEGORIES: Biscuit, Features This site contains affiliate links for which I may be compensated.

Just a few updates today.  Part of the reason is that we are heading back to Pasco today.  The other reason is that there just aren’t very many old flatfenders for sale at the moment.  I guess everyone is enjoying the heat wave?

We got a chance to drive biscuit in the pasture a few days ago, but didn’t get any pics.  Kasia took her turn at doing some technical driving and did pretty well.  Karson handles the jeep well.  Colter still prefers to ride.

I was messing around with Biscuit yesterday, testing out my paddle tires.  It turns out, rather than holding air for a day, my paddle tires only hold air for about five minutes.  This is a problem.

I guess I will need some inner tubes if I want these old tires to work for longer than five minutes.  That’s low on the list.  But, they do look cool, though they need a bath and some paint on the rims.


To Top

Wrestling with the Mighty BIscuit

• CATEGORIES: Biscuit, Features This site contains affiliate links for which I may be compensated.

During my last visit to my parents’ house, I tried starting Biscuit.  The engine would turn over, but wouldn’t fire.  It didn’t take long for me to figure out that the electric fuel pump no longer worked.  So, I decided on my next visit I’d change from the electric to the stock manual pump.

Today, I took on that project.  While a very simple changeover in theory, the practice turned out to be more of a challenge than I expected.  For example, the first step in the process required me to break into my tool box, as the keys to my tool box disappeared during my move last summer.  After spending an hour searching for the keys, I finally gave up and ‘removed’ the lock’ (with hammer, screw driver, and little finesse).

It was surprisingly easy to remove the lock.  However, it was surprisingly difficult to get the lock portion of the drawers to unlock.  I won’t bore you with the embarrassing details, but let’s just say that it took us about an hour and half to finally get the tool chest unlocked.  Oh, good times!

Next, I had to start pulling off the electrical pump and installing the manual one.  It just seemed like I dropped every socked a hundred times, grabbed the wrong wrench with each reach, had to search through the barn to find rarely used tools I had stowed away, and more.  Nothing seemed to be easy about the project.

Finally, about 5pm, Ann wandered out to see how I was.  I was not good.  The socket has just slide off my socket wrench extension again, which meant I had to climb down onto the tarp, scoot under the jeep, and retrieve it, again.  I shared some choice words about Biscuit with Ann.  She decided to take a picture and post it on Facebook  Here is the picture and what she wrote:

Today, under a cloud of tools, grease, and a broken fuel pump came the flood of curse words and the exclamation from Mr eWillys.com himself…. David Eilers “hates Jeeps” 🙁

It took me until about 7pm, but I did finally get the fuel pump installed and the hoses attached.  Even better, everything worked.  So, now Biscuit and I are all lovely dovey again.

So, I’m done with jeeps for today.  Updates tomorrow.


To Top

Sunday’s run into the hills

• CATEGORIES: Biscuit This site contains affiliate links for which I may be compensated.

FEATURED MAY 2010

Despite some sketchy weather this Memorial Day weekend, I still managed to get into the hills.  Sunday proved to be the best day, so I chose to head out of Boise on 8th street again — otherwise known by me as trouble road.  You see, every time I’ve headed out that road, something has happened (one time, the fan stopped working .. last time, I broke the fender and almost got stuck near the hill top).  This trip was no exception.

Fixing my Carb

First, let’s talk carbs.  I thought I had gotten the carb running well, but hesitation problems continued over the past week.  By Friday of this week, I was getting ticked off at not being able to floor it and go — instead, I had to accelerate slowly.

My solution:  find a Carter/Edelbrock manual and get instructions.  Sure enough, I found one online that described my problem.  What I thought was the result of too much fuel was actually a problem of too little fuel.  So, I increased my primary jets to .86.  I also re-routed my PVC valve into the base of the carb.  Those two changes made ol’ Lost Biscuit much much happier.  Nothing like reading the manual ….

Now, onward and upward until …

So, with the carb functioning correctly, climbing out eighth avenue into the foothills went smoothly.  As usual, I checked my gauges frequently, especially my temperature gauge.  So, it was quite a surprise when I looked down and saw that the temp gauge had lept to 260 degrees!  SHIT!  I pulled over immediately and shut down the engine.  I jumped out to lift the hood to let the engine cool more; however, much to my surprise it turned out the engine was holding down a ready-to-explode radiator hose.  As soon as I lifted hood, the hose separated from a connection tube and a geyser that could be seen from Yellowstone NP let loose.  If I wasn’t so pissed off, it would have looked pretty cool.

So, there on the trail I sit scratching my head.  After letting things cool just a bit, I quickly found the cause of the problem — a wire had come loose at the base of the fan relay that was part of the original connection. So, I spliced around that loose connection and the fan started working again.

Now, how to get some water into the radiator?  I had a total of one bottle of water on me, so  I poured that in; unfortunately, I needed another 20 bottles or so.  That’s when lady-luck arrived in the form of a puddle around 20 feet behind me — I think it was the only puddle along that entire road.

So, I took my bottle, gathered water from the puddle and filtered the muddy water through a shirt.  After many trips back and forth, I got the radiator filled, cringing the entire time.  But, I figured it would work until I got it home to drain and clean it.

Now, onward and upward for real …

But I was sure about one thing in particular … I was getting to the top of that road this time!  And I did get there, all the way to the ridge road — finally!   Once I got to the top, I was having too much fun, so I just kept going and exploring.  And so, here are some pics from the trip.

First is a composition of images taken from the ‘road’ that ran along the mountain ridge.

On the north side of the ridge there is plenty of green, while the south side is pretty brown.

Here’s a bunch of sheep munching along the hillside.

I wanted to make sure I can get through the snow.  Without a winch, I don’t want to get stuck.

Finally, near the top of the highest mountain, too much snow filled the road to allow passage.  So, I have to save the very highest roads for some warmer weather 🙂

And here is the view looking west of this road.  You can just make out Bogus Basin road which carves upwards to Boise’s ski area, Bogus Basin.

And yes, once I arrive back home, I immediate drained the engine of water and flushed it with additional water.  I also changed the way the fan relay was mounted and simplified the wiring so that the damn fans won’t ever shut down again!

 
To Top

Finding Virginia: Adventures Along the Rocky Trail of Life

• CATEGORIES: Biscuit, Books, Features This site contains affiliate links for which I may be compensated.

I am proud to announce that “Finding Virginia” is now for sale at CreateSpace.  It has been the culmination of a year’s worth of writing and editing (and 46 years of living).  Please shamelessly encourage your friends, family, and neighbors to purchase this book.   Give it as a present to your spouse (really, they will enjoy it), your kids, other jeep lovers, car lovers, or whomever you know.  It is also useful for filling spaces in bookshelves.

What’s the book about?  
It’s about jeeps, love, the history of the jeep, love lost, the San Juan Islands, my dad’s health fight, how to get kicked out of college, how to  grow up in a jeep club, how not to sail, how to get stuck in the woods, cooking, my thoughts on a variety of subjects, and the reasons why I started eWillys.

Who’s the target audience?  
Readers of eWillys are  first and foremost the target.  People who like adventure and travel should enjoy it too.  Women especially enjoy the ‘love’ story aspect.  People who are frustrated with the economy will, I believe, relate to my frustrations with it too.

The book can be ordered through CreateSpace and, later, through Amazon, though Amazon pays me less.  The price is $18.39.  If you want a signed copy, I will need to order some books, sign them and then mail them to you.  You can email me for more info — d@ewillys.com and put “signed copy” in the subject line.  These will cost a little more due to the cost of me shipping to you.  I will take a check or paypal as payment.

I am willing to both sign books and attend signings.  I can even bring Biscuit if necessary, depending on the weather and distance.

https://www.createspace.com/3748035

 
To Top

Kids and Biscuit

• CATEGORIES: Biscuit, Features This site contains affiliate links for which I may be compensated.

UPDATES:  Next updates will be on Sunday 11/25/2011.

Though chilly, the weather was sunny yesterday, allowing for some fun in Biscuit.  Karson (17) and Kasia (15) took turns driving while Colter (13) decided he was fine with riding in the back.  I supervised and drove, while Ann photographed.

The day’s highlight was when I ran out of gas.  In my defense, I knew the tank was low and didn’t want to use up our time running to the gas station and back, so I hoped to let the kids play AND save a few drops for the drive back to the side of the garage . . .

We almost made it.

The kids thought this was hilarious, noting that not only did I run out of gas, but I also got stuck in the ditch.  Ann countered that I only got stuck in the ditch because I ran out of gas.  However, the kids saw it as an ‘and’ situation.  So, I’m sure I will never hear the end about the time I both ran out of gas AND got stuck in a ditch with Biscuit.

Fun times 🙂

 
To Top

No Updates until Thursday — Biscuit temporarily not for sale

• CATEGORIES: Biscuit This site contains affiliate links for which I may be compensated.

There won’t be any more updates until Thursday.

On another note, since I’m about to begin a month of traveling and will be away, I’m going to remove Biscuit from the ‘for sale’ category.  Hopefully, between now and the end of November, I will finally get a job offer I’ve been awaiting.  If that occurs, Biscuit won’t be re-listed any time soon, which might just please my mother more than anyone for I think she was the one most upset about me selling it!

For the record, I think Steve’s Jinx worked; I never received a single call about the my ad either off eWillys or Craigslist.

However, I will still consider selling the paddle tires and/or the desert dogs.


To Top

My Newish Kayline Top!

• CATEGORIES: Biscuit, Features This site contains affiliate links for which I may be compensated.

Good news, for the next two days you can admire my new top!  That’s because I will probably not do any updates until then.  I had hope to get some updates out, but it has gotten to late and I have to get up early for a very long drive to Boise and back tomorrow.

It is a Kayline canvas — yes not vinyl — top that I bought for $200!!!  It is in beautiful condition, having sat unused for nearly 10 years. I am very pleased.  I bought it from Daryl, who is a full time firefighter and part time jeep nut in the Bonney Lake area of Washington and whom repairs flatties.  If you need any work done and are near him, let me know and I will forward his number to you.

He was also kind enough to give me and my son Karson a tour of his jeep collection, which includes a recently purchased FC-170 and a jeep truck converted to a tow truck.  So I want to send a big thanks to him!

Here is the top draped on the jeep. Of course, the rear seat and spare tire unbolts and will be removed when the top is mounted; I have an alternative mounting bracket to mount the spare inside the back area when a top is installed.  I am pleased that the contrast in colors doesn’t look too bad (he was selling it cheap because few people want that color).

 
To Top

Some Pasture Jeeping

• CATEGORIES: Biscuit, Features This site contains affiliate links for which I may be compensated.

The weather has been perfect for driving in the jeep.  So, the boys and I have been cruising around Renton.  I have to say it’s a bit surreal to be driving along both the backroads and city roads in Biscuit, many of which I last drove 25 years ago in my last jeep.  No doubt my kids are tired of me saying things like, “I remember when ….” at which I go into some tale from my youth.

Yesterday I put the jeep into the horse pasture, or at least what was the horse pasture and is now an area full of grass, trees and bushes.  Karson got to explore a bit in the jeep, testing out the 4wd and learning to dodge trees.  He seemed to be having fun.  Here are a few pics.


To Top

Still Getting Organized . . .

• CATEGORIES: Biscuit, Features This site contains affiliate links for which I may be compensated.

I guess the pic says it all.  Biscuit got plenty of looks as I cruised northward from Boise. I’m still catching up on both emails and postings and it will probably still take a couple of days to get back into the swing of things.