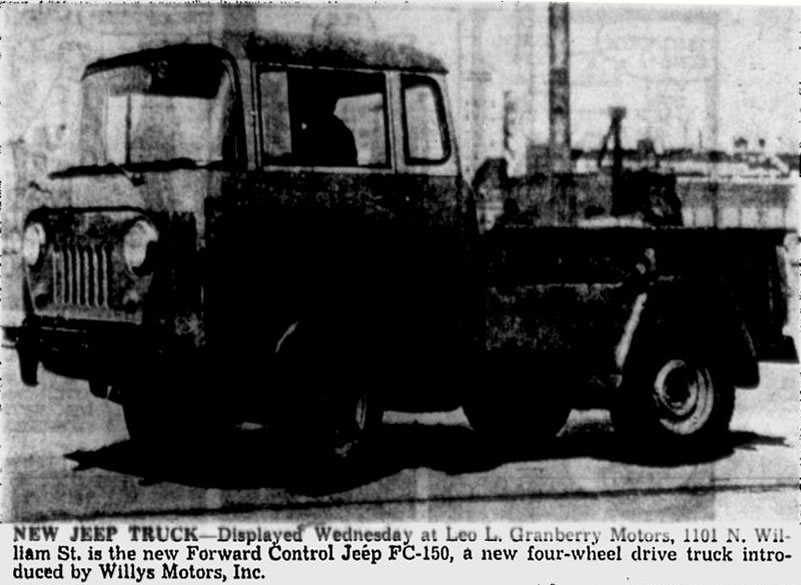
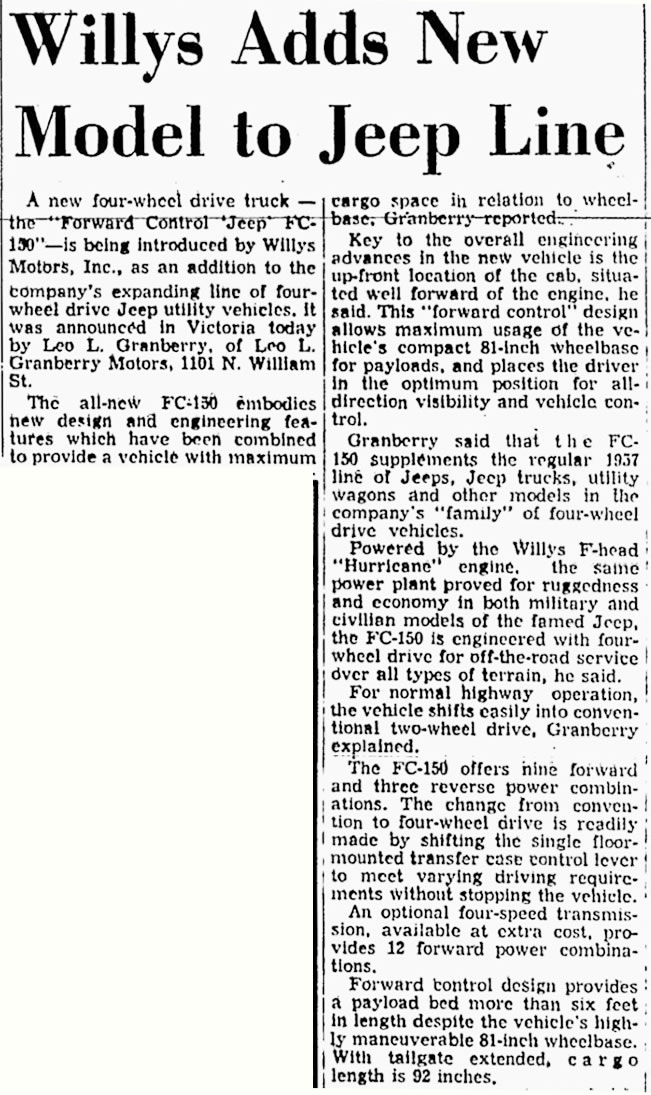
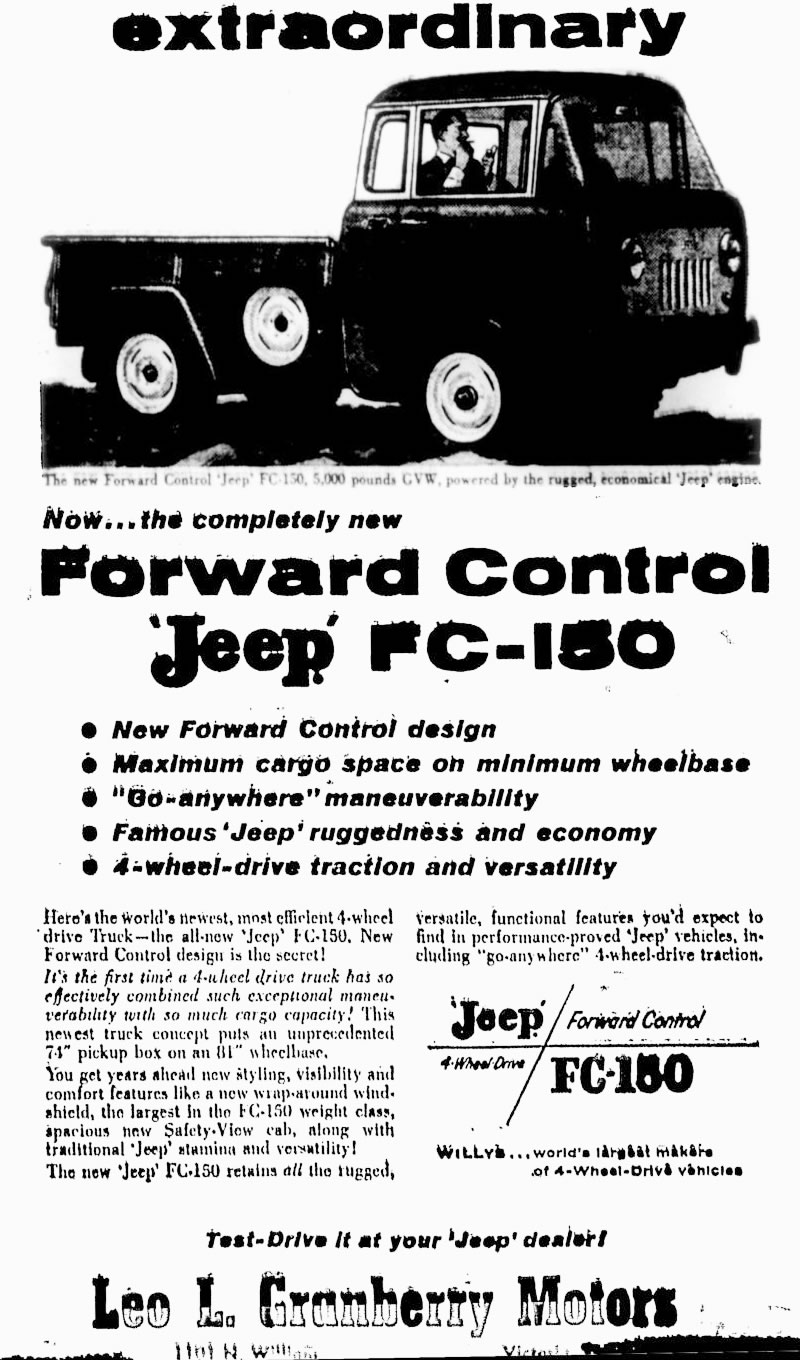
The Victoria Advocate featured this story in the December 12, 1956, issue of the Victoria Advocate. Just below the article was an ad for the FC-150.
emailNeed to contact me and don't have my email? Click on email button.

Welcome to eWillys.com, a website for vintage jeep enthusiasts. I update this website nearly every day with jeep deals, jeep history, interesting reader projects, jeep related info, and more.
These quick searches can help you find things on eBay. People list in the wrong categories all the time, so don't be surprised to see brochures in the parts area for example. This section used to be split into jeeps, parts and other categories, but recent changes to eBay will require this information to be recoded.
The links to posts below show jeeps grouped by models, condition, and other ways. Some of these jeeps are for sale and others have been sold. If you are unsure whether a vehicle is still for sale or not, email me at d [at] ewillys.com for more info.
There are plenty of interesting, unusual, historic and surprising stories related to Jeeps and their owners. In addition, some of these features have nothing to do with jeeps. This link will display all featured stories starting from the latest.
Looking for parts and not sure where to go? There are a variety of large and small new and used parts sellers both online and offline.
Importantly, the allure of buying a project jeep can be romantic. The reality of restoring a jeep can be quite different, expensive and overwhelming without the right tools and resources. So, tread carefully when purchasing a "project". If you have any concerns about buying a vintage jeep, or run across a scam, feel free to contact me for help, comments or concerns .
The Victoria Advocate featured this story in the December 12, 1956, issue of the Victoria Advocate. Just below the article was an ad for the FC-150.
It’s perfect for your valentine.
“Vintage UNUSED (unsigned) Valentine children’s one sided card, like the kind we would exchange in school with each other. Please check out photos for image, caption and condition. These are a reminder of yesteryear and wonderful childhood school memories!! I am a smoke and pet free environment.”
View all the issues here on eBay

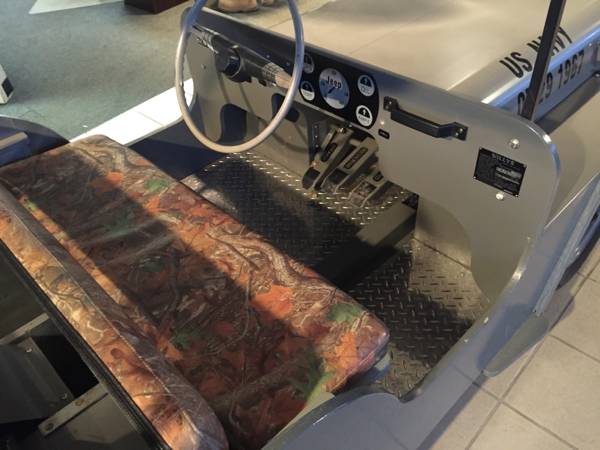
Paul shared the story behind his one-of-a-kind stainless steel steering column.
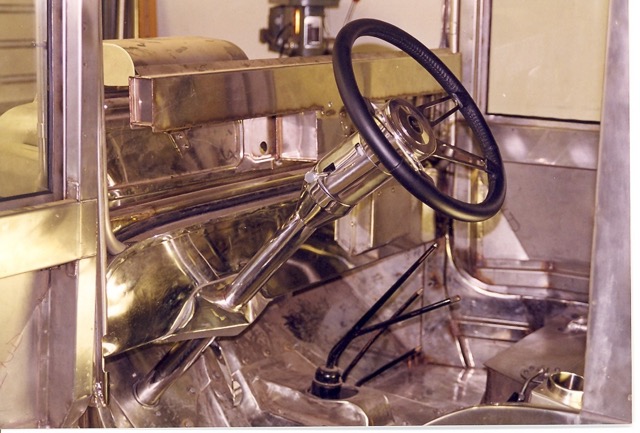
Paul writes, The steering column in my Willys has quite a story behind it, ……. About 10 years into the rebuild (1995) I began thinking about what kind of steering column and wheel I’d like to have for the Willys. I wanted a tilt column to make it easier for me to enter and exit the Willys, the steering column and steering wheel should be one of a kind and not some mass produced stuff that everyone has and if at all possible these components should be fabricated from stainless steel to match the rest of the vehicle. I wasn’t even aware of any aftermarket suppliers that made replacement steering columns for custom vehicles but if there was a company in America making replacement columns I figured they would be mentioned in the hot rod or custom car magazines. I began reading all the current car magazines I could get my hands on, searching for any mention of or advertisement from a company making replacement steering columns.
It wasn’t long before I saw an advertisement for a company called ididit and the primary focus of this company was to build replacement steering columns for custom vehicles. Their ad had their address listed along with their telephone number so I made a quick phone call to the state of Michigan and ordered a free catalog. About a week later their catalog arrived here at the house and it was full of information about the company, about how to correctly determine the angle of the steering column and the location of the steering wheel along with internal wiring specs and how to identify the correct column length for your vehicle. This catalog was full of step by step procedures to solve installation problems I hadn’t even thought of yet. According to the catalog, steering columns could be ordered in steel or aluminum (plain or polished) in either standard lengths or total custom units. I was happy.
After mocking up a column in the Willys (a sawed off broom handle with a plastic plate screwed to the upper end) I was able to find the column angle which would give me the least interference during entry and exit while still providing a reasonable position for the steering wheel and this information allowed me to get the total length of the column from steering wheel to column end in the engine compartment. With my calculations in hand I made another call to ididit and attempted to order a column. This is where things got a bit weird. Continue reading
Your headaches are over if you buy a jeep? That’s a new one! This was published in the Schenectady Gazette Feb 19, 1946.
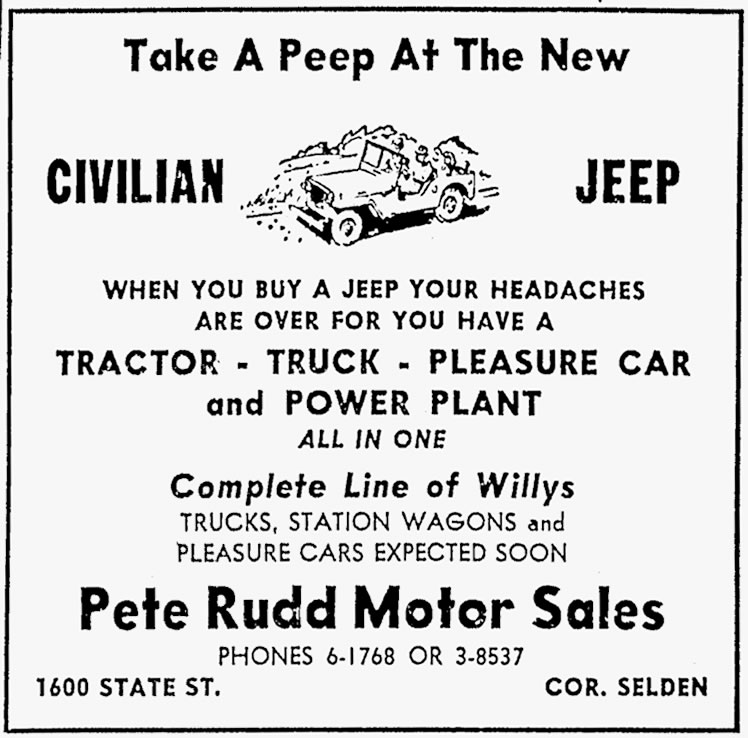
Thanks to Charles for sharing.
Here’s a Willys MA. First platoon ward masters -sept 1943
rare photo of the belgian airport ‘MELSBROEK’ near brussels during ww2
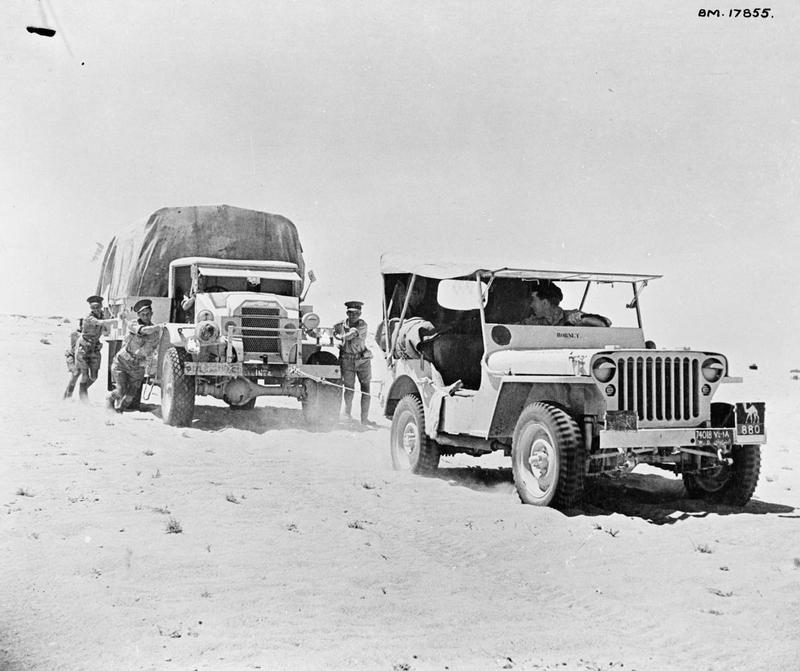
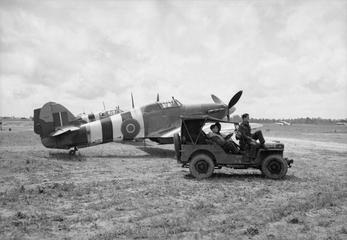
Western desert 1942 – britsh army
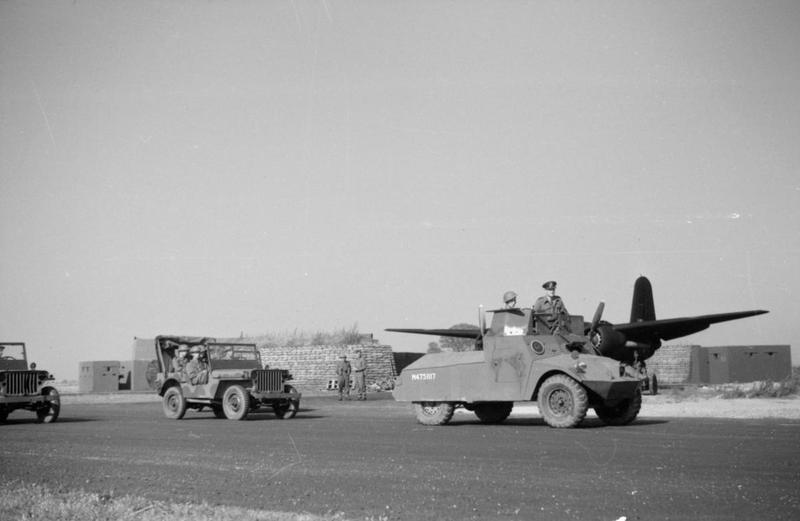
Royal air force during 2ww

Crashed jeep was carried by a c47 dakota who when down
Note how clean the feet are of the guys holding the jeep.
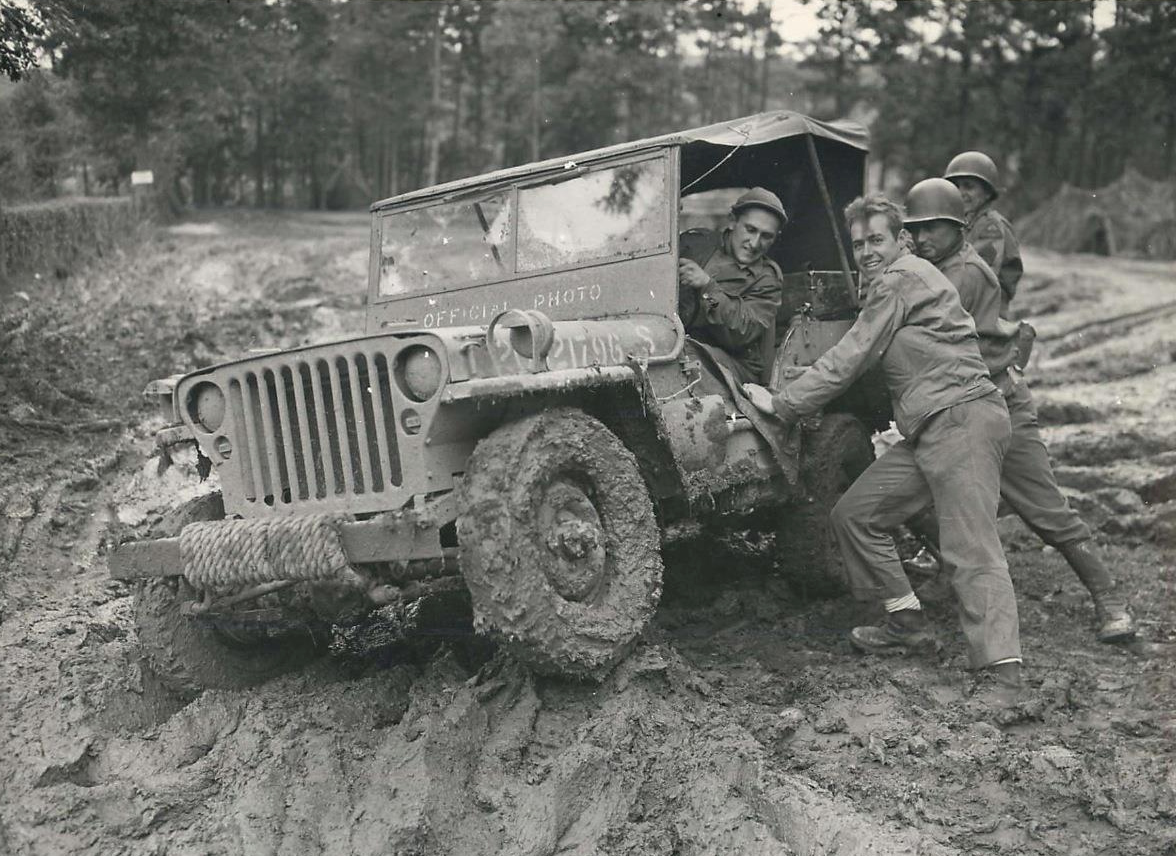
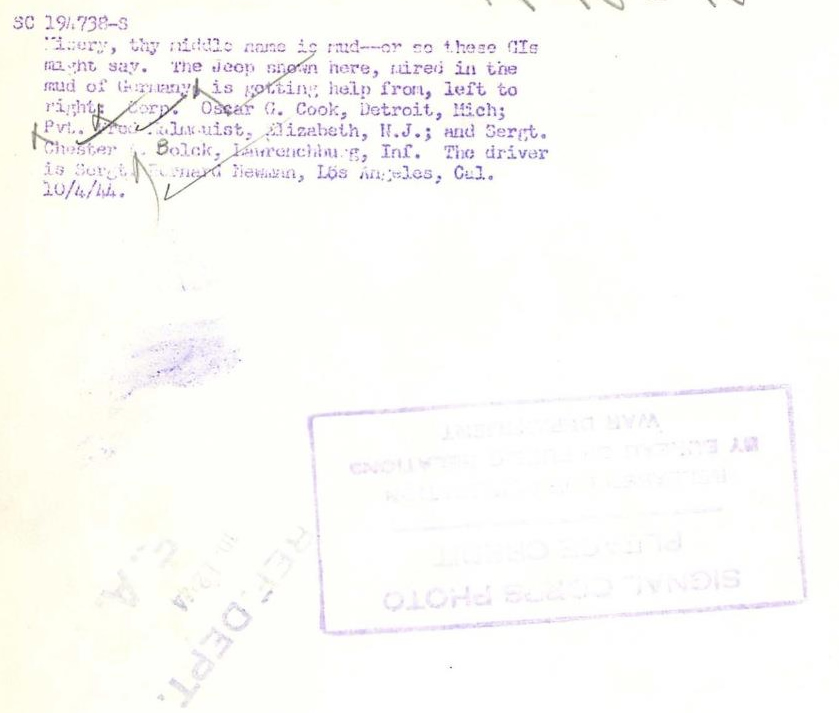
“1944- U.S. soldiers work to free jeep mired in the mud of Germany. Photo measures approx. 8″ x 10″”
View all the issues here on eBay
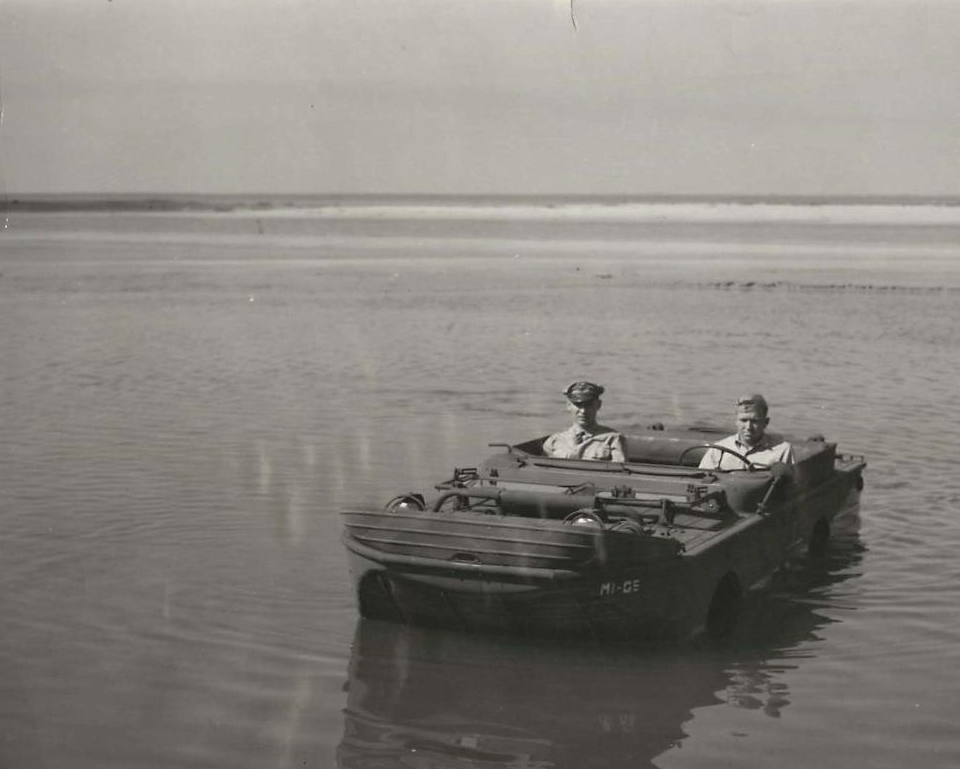
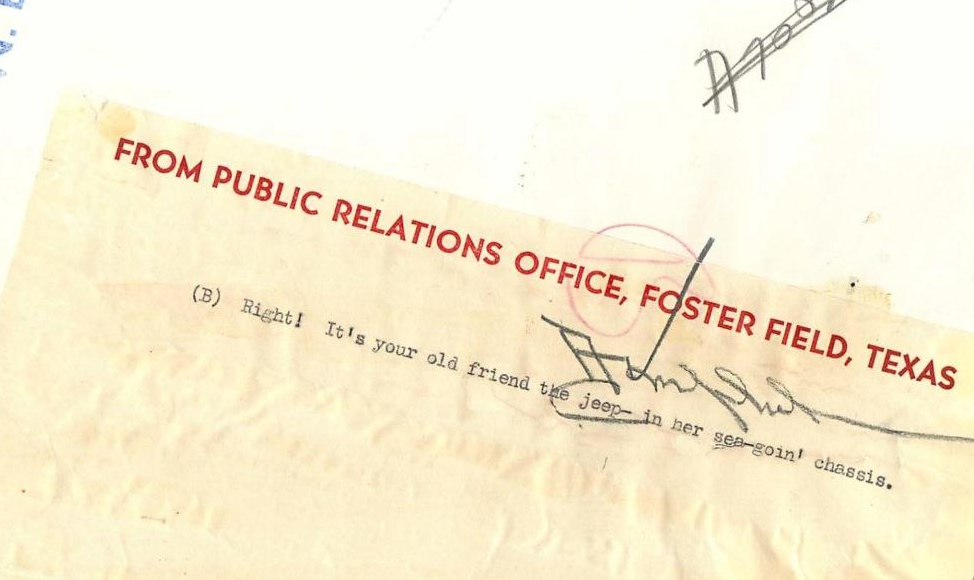
Calm water is best for those GPAs.
“1944- Ford GPA ‘Seep’ (Seagoing Jeep), amphibious version of the Ford GPW Jeep, at Foster Field, Texas.Photo measures approx. 8″ x 10″”
View all the issues here on eBay
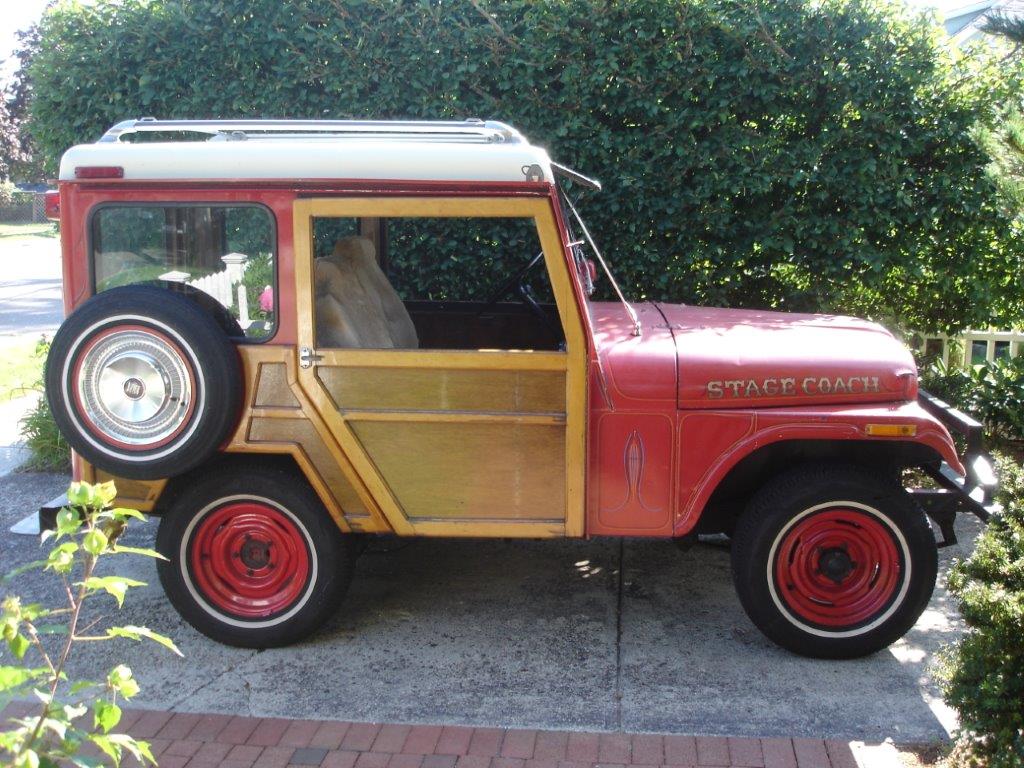
John shared his neat DJ-5. If you live on Long Island, keep a watch for him during the summer.
He wrote, It was turned into a ‘Woody’ about 35 years ago. This one is a 69 DJ5 A. I bought it about 1980/81 or so. It’s got the original 2.5 in it and I use it about 4 months every year…..June to September. I have not made any changes except for putting in a radio and a glove box and I recently had the Seats recovered. I never met the original owner (the guy who did all the nice woodwork, glass etching and paint job) but recently ran into someone who recognized the Jeep and told me about the very creative guy to built it back in the 70s. About twenty years ago I had to take the motor out and and replace the main bearings. Last year I had to find an exhaust manifold which was not easy. Otherwise, it gives me good reliable service every year. It’s really been a fun vehicle. Every where I go people want to buy it and on the hiway I am always being photographed while driving.

UPDATE: Was $3900. **SOLD**
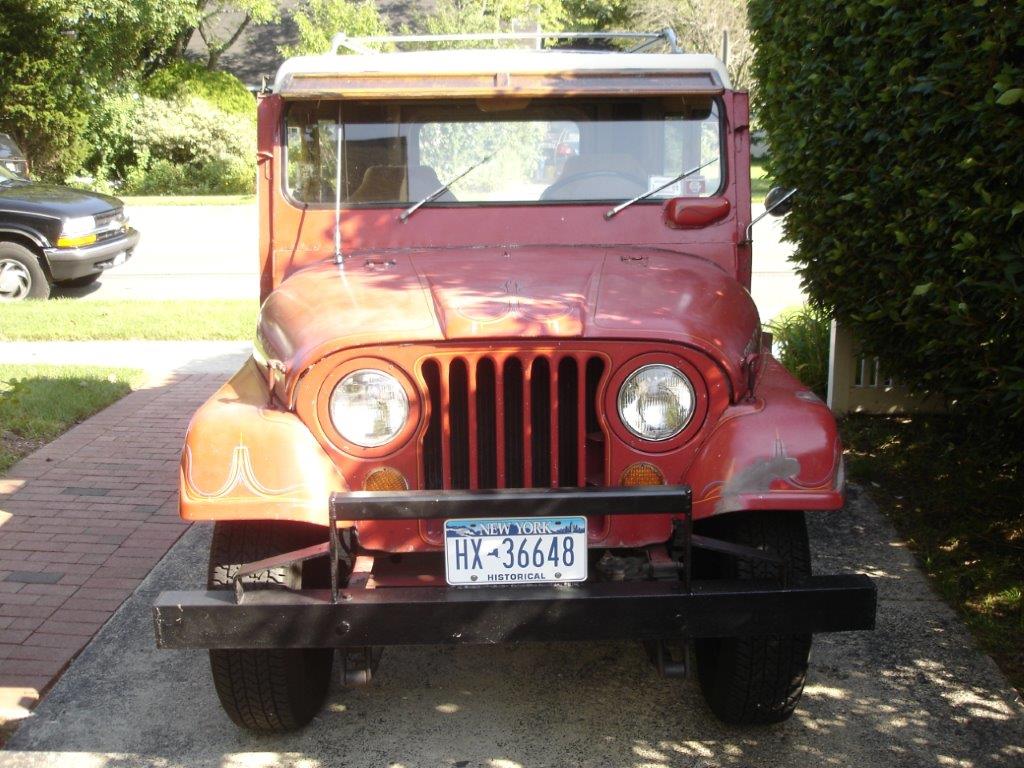
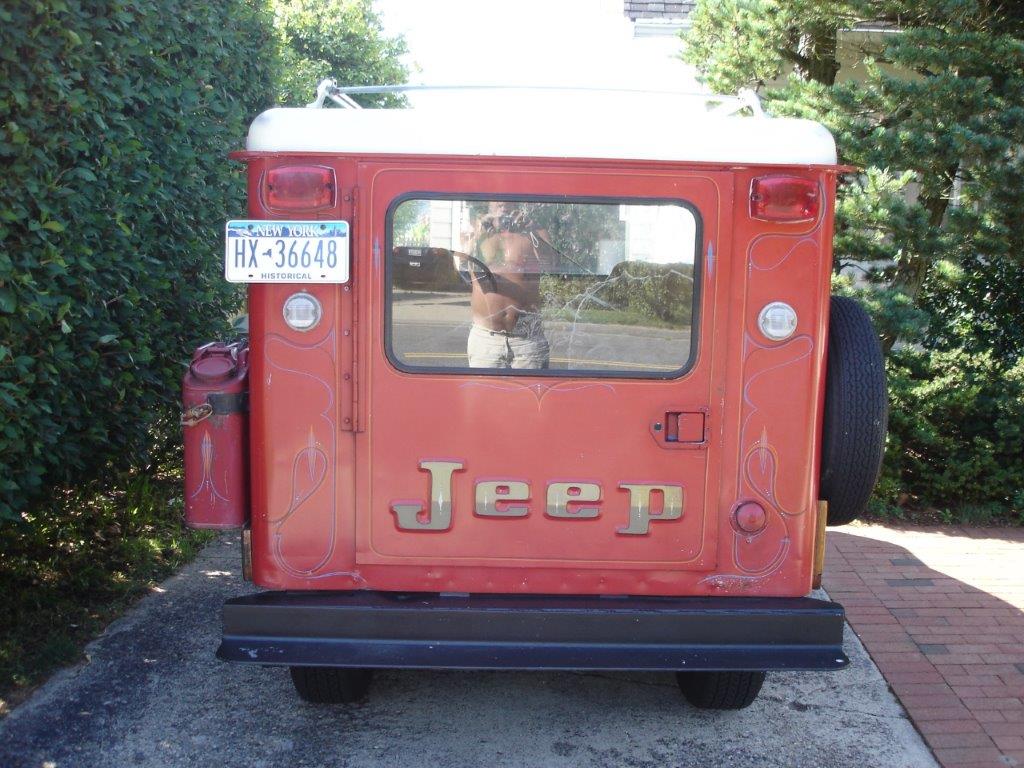
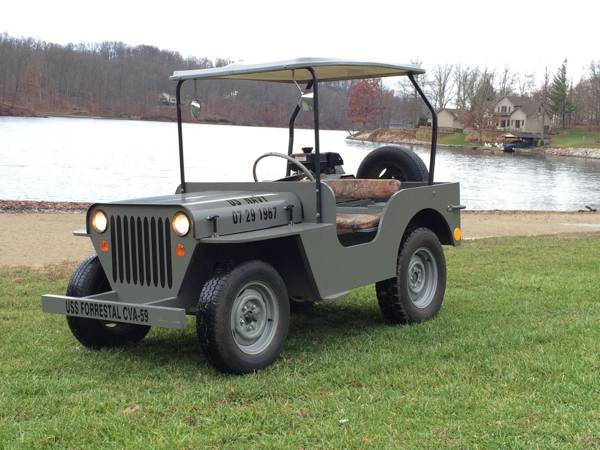
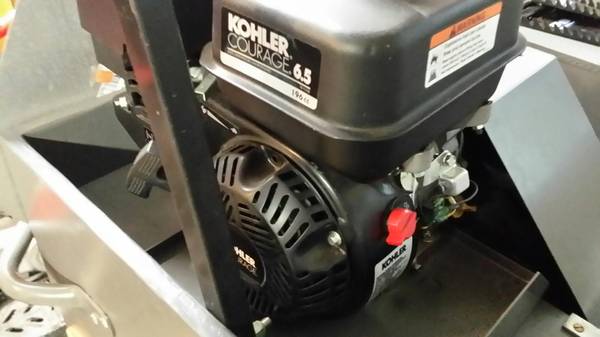
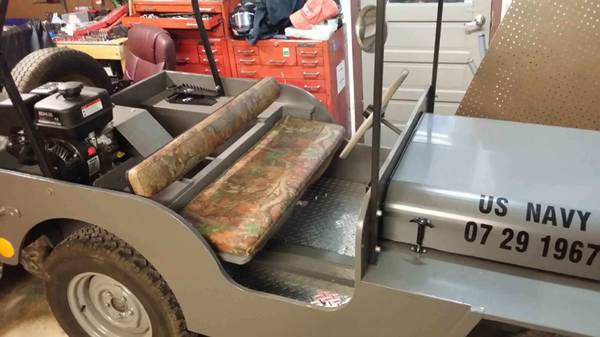
Here’s an unusual jeep.
“This MINI BEEP has a 6.5hp engine, very well put together, $5k in just parts. Start it up and go, has reverse, brake, bench seat, trailer hitch, working headlights and moree….you can modify any way you want and even add parts. Use it in anywhere!!
The MINI-BEEP is uniquely different and better than any ATV, any UTV, any other kind of off-road vehicle. The MINI-BEEP pulls trailers, and implements, bulldozes sand, gravel and snow, drives off-road, and goes almost anywhere. It’s a 4/5 scale version of a World War II JEEP®, and it’s AMPHIBIOUS, too! The MINI-BEEP is a do-it-yourselfer’s dream project.”
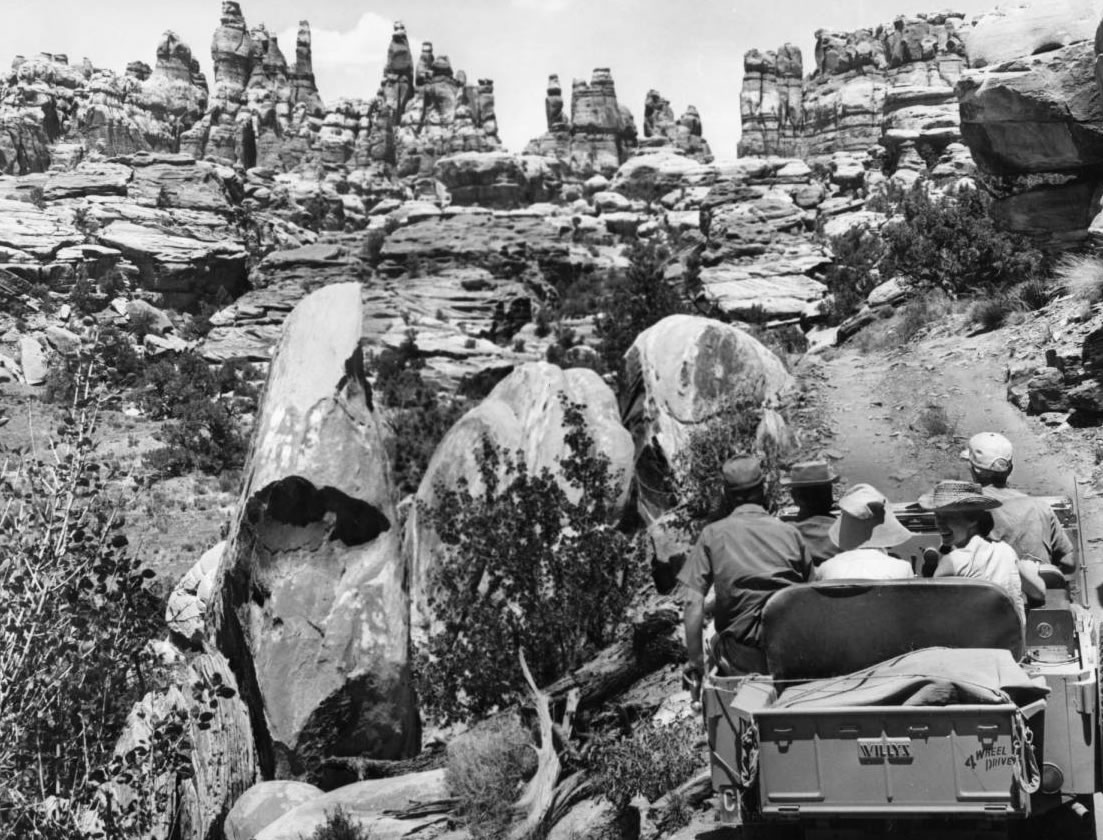
This 1963 photo shows a jeep exploring the Needles area in anticipation of Canyonlands National Park. The park was established in 1964.
http://content.lib.utah.edu/cdm/singleitem/collection/USHS_Class/id/28787/rec/5