
Two bits of good news from Paul. One, his jeep was NOT affected by Alaska’s recent earthquake. He had the sense to bolt things to the wall that could potentially fall onto his jeep. Two, he’s made some more updates to Knardly Rolls! So, read on . . .

Looking towards Anchorage and the mountains beyond, January 2016. This was pre-earthquake, though it pretty much looks the same after the earthquake.
Paul writes, the progress so far this winter season on the Willys has been a little weird. Things started to get strange when I decided to fill the cooling system for the first time in 30 years. I’m an optimist but I like to think I’m based in reality so I told myself there’s always the possibility of leaks in the cooling system and having a couple of empty buckets ready to catch dripping antifreeze might be a good idea. With the empty buckets cleaned and placed nearby I poured the first gallon of antifreeze into the radiator.
After a short pause to inspect the hoses and connections for system integrity I began pouring the second gallon of coolant into the radiator and I quickly noticed my feet were getting quite wet. I managed to wedge the empty but rapidly filling buckets under the front axle where most of the escaping antifreeze could be captured since the leak appeared to be from the front of the engine by the timing chain cover. Oh well, it looks like yet another unexpected repair or modification needs my attention.
After the leak slowed down to a slight drip I repositioned one of the buckets directly below the radiator drain and began transferring the antifreeze from the cooling system into the bucket and then back into the gallon containers which is where this green fluid came from about 15 minutes earlier. When no more fluid flowed from the radiator drain and the recaptured antifreeze was safely back into the gallon containers I decided to call it a day and leave the heavy thinking for the tomorrow.
After having strange dreams throughout the night concerning the coolant leaks on the Willys, by the next morning I ready to start pulling components off the front of the engine so the timing cover could be removed for troubleshooting. Since the engine has never been run after being rebuilt this was a fairly quick and easy task.
Once the timing cover was out of the way and the front of the cylinder block could be inspected I learned an interesting bit of information about the Buick V-6 engine. The front of the block has 4 bolt holes (2 on the left and 2 on the right) for the timing cover to attach, BUT the timing cover is manufactured as either a 2 or a 4 bolt type.
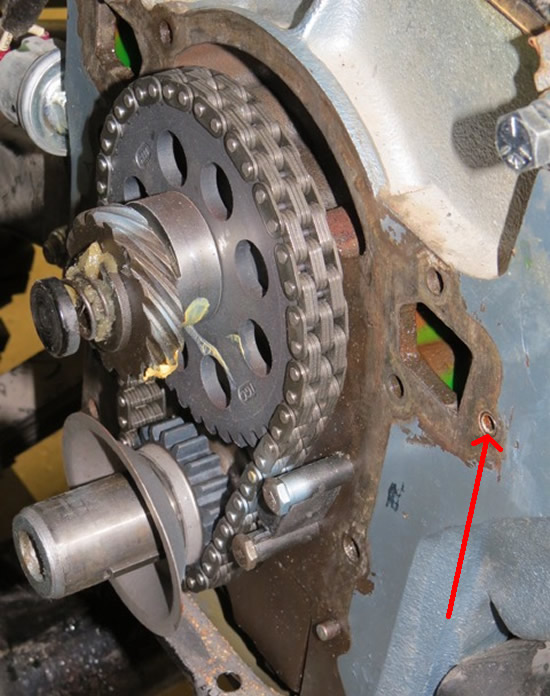
The plugged bolt hole is the one closest to the right edge of the photo, it was left unplugged and partially exposed by the timing cover so the antifreeze flowed out quickly.
The timing cover on my engine is a 2 bolt type (where the coolant passage flows into the water pump) so the two unnecessary threaded holes in the block should’ve been plugged to prevent antifreeze from leaking. The unused threaded hole on the block is drilled into the coolant passage but the unused hole to the right is a blind hole and not open to the cooling system.
To prevent anymore leaks and to make me feel better I installed internal wrenching hex plugs in the unused holes . These plugs were screwed into position after the threads were cleaned and dried and the threads on the plugs were coated with gasket compound, then it was time for reassembly. Things were going pretty well until I noticed the rubber on the crank pulley damper was cracked and bulging out along the seam so this project came to a halt until the damper made a trip south to the Damper Doctor for a rebuild.
[editors note. I *think* it was in one of those holes that, during my very first engine rebuild, I put too long of bolt into one of the holes. I tightened it down, though it got difficult near the end. Imagine my surprise when the #1 cylinder piston kept hitting something while i tried spinning the crank. OOPS, I’d damaged the cylinder wall!!]
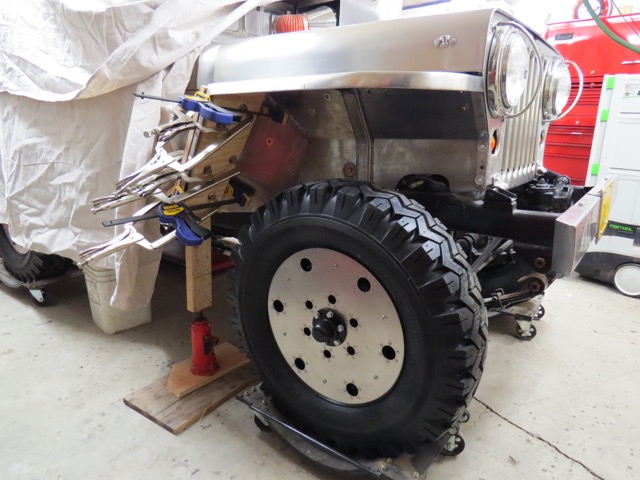
Two pieces of 3/4 inch plywood spread the clamping pressure and prevent damage to the metal when installing the abrasion panels to the underside of the fender.
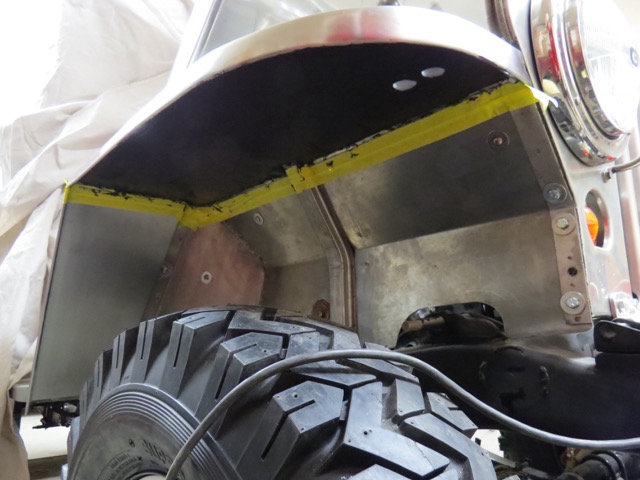
While waiting for the damper to return I got to thinking about the possibility of the new aggressive tread tires on the Willys throwing rocks against the lower surface of the front fenders and the rear wheel wells. The roads here in Alaska have lots of rocks and gravel on them, some of the rocks are left over from the previous winter, some of the rocks are early for next winter and the rest of the rocks are spilled by gravel trucks during our short summer months…also known as construction season.

I’m using 5 shower curtain rods to apply pressure and hold the foam in position until the silicone cures. The blue foam helps spread out the pressure
I decided it was far easier and a lot less work to prevent rocks thrown by the tires from hitting the lower surface of the sheet metal than trying to massage stainless that’s been stretched back into perfectly flat condition so I made inner fender protection panels out of 0.050” stainless and 3/4 inch thick high density upholstery foam. This foam is the same foam I used when making the interior panels for the Willys cab so while it can be filed, curved and cut with a bandsaw it’s also rather hard to compress even by standing on it so I felt this foam would make a perfect spacer between the lower stainless panel and the body.
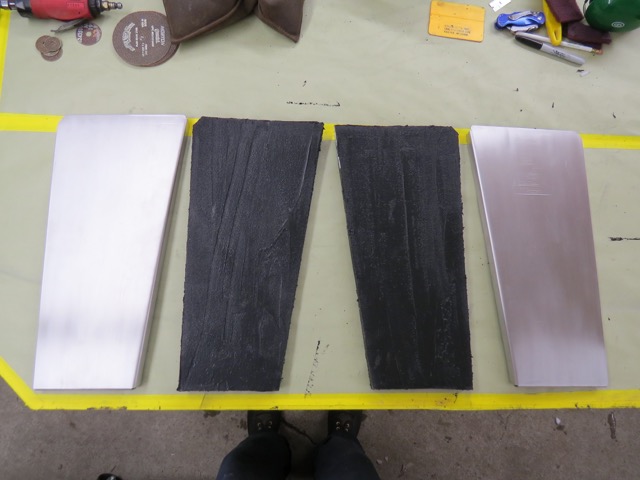
Here you see the two stainless panels along with the 3/4 inch foam spacers coated with black silicone. These parts will be bonded to the tire side of the front fender aft panel (that attaches to the step). The stainless steel panels will be exposed so it should be difficult to see that the wheel well has been modified.
The aft (angled) doubler being bonded to the front fender… the hydraulic jack is used to prevent the doubler panel from slipping down before the silicone cures.
Once again I’m bonding the foam to the body panels with black silicone, after the silicone has cured the stainless steel protection panel is attached to the foam by black silicone and after that’s cured the edge seams are sealed with a bead of black silicone. The bathroom shower curtain rods used during the upholstery installation have come back to work on the Willys but this time they’re holding the foam and stainless together in the rear wheel wells while the silicone cures. I was able to use vise grip clamps on the front fenders because I made stress spreaders out of 3/4 inch plywood to prevent the clamps from scratching the stainless.
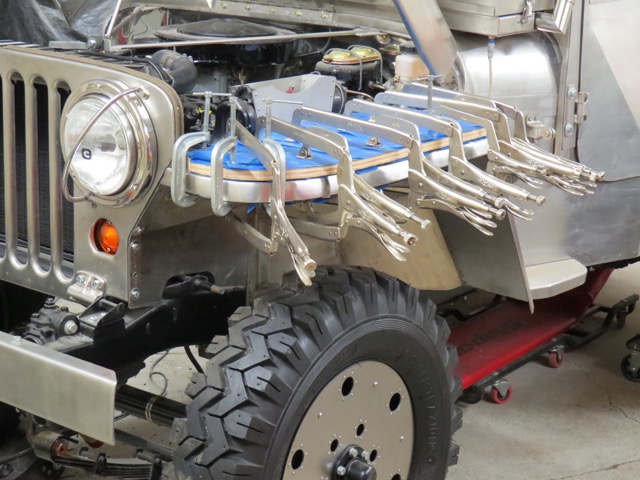
The aft doubler has been installed and the upper doubler is next.
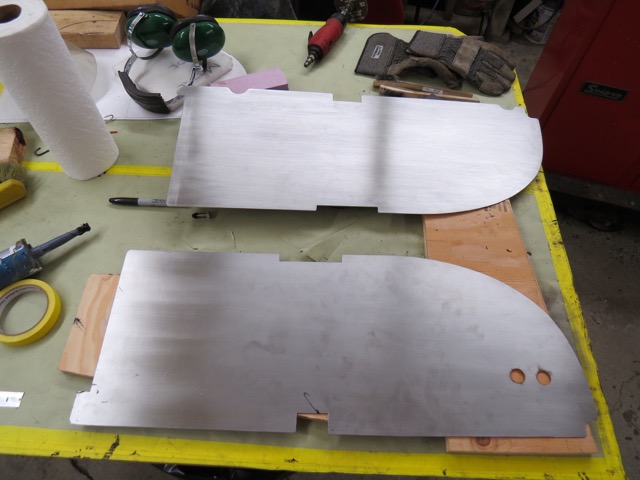
The stainless steel upper doublers. I haven’t cut the holes (in the rear doubler) for the hood latch attach hardware access.
I wanted to get weather stripping and door seals for the little Willys so I called Steele rubber products for a catalog and some free samples of the various types of aftermarket seals they sell to see if they’d have what I needed for the doors. Not only was their catalog a great help, the free (small) samples let me check how the seal was compressed when the door was closed so I could purchase the correct diameter of seal to fill the gaps. Once I was finished measuring the doors and selecting the type of seal necessary for different areas of the doors I ordered a combination of flat and half round seals in various widths along with a few extra feet of each seal just incase I made a mistake while cutting or installing the seal. The seals arrived within the week and installation was quick and easy. Stainless and Steele work well together…. I’m happy.
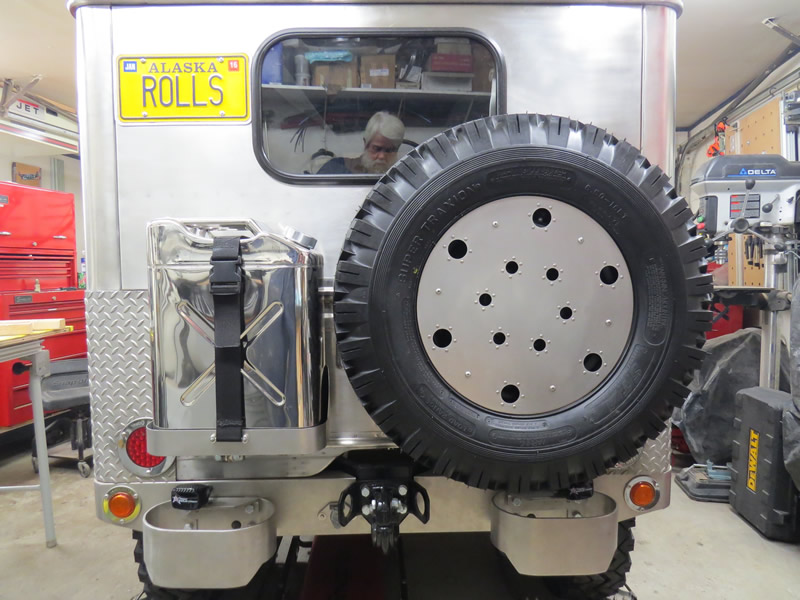
The new tires have been mounted to the new wheels and the wheel discs are attached so it’s time for pictures. The old white haired guy reflected in the back window is me… my hair was brown when I started this rebuild.
A lot of time, money & patience. Beautiful machine. A+
Did the same with plastic composite wood substitute on an aluminium step bumper – stiffened up as good as a steel one without the weight. Paul has way too much time on his hands – it’s interesting to see what can be done with stainless steel, but seeing my wife cleaning the SS appliances nearly daily no one better get a finger near that M38
I thought this was a running jeep over the last few years?
Bob, the last time my Willys ran was October 1985, it got me home from work and died in the driveway. Since December of 1985 I’ve been rebuilding the Willys one part at a time (only during the winter months) and I’m still not done but I am getting much closer to being finished.