
With the rain staying away for a few days, I booked it over to Renton for a few days to work on Rusty. Here are a few of the things I did today.
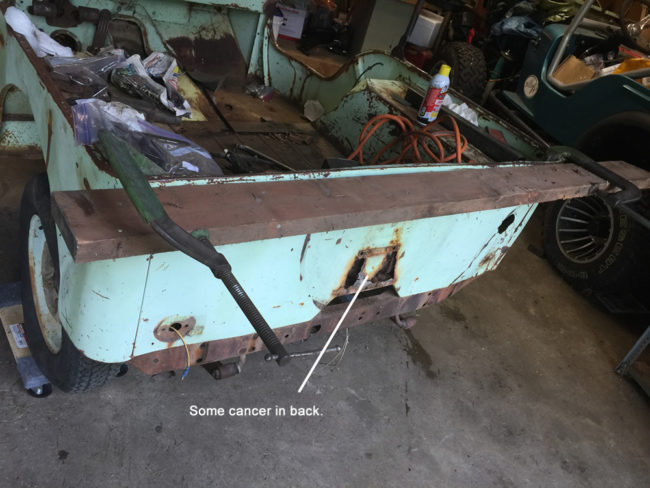
I did a little more straightening to the body. This time I wanted to remove a bow along the top back. I’ve mounted a board as a straight edge. You can see the cancer in the rear.
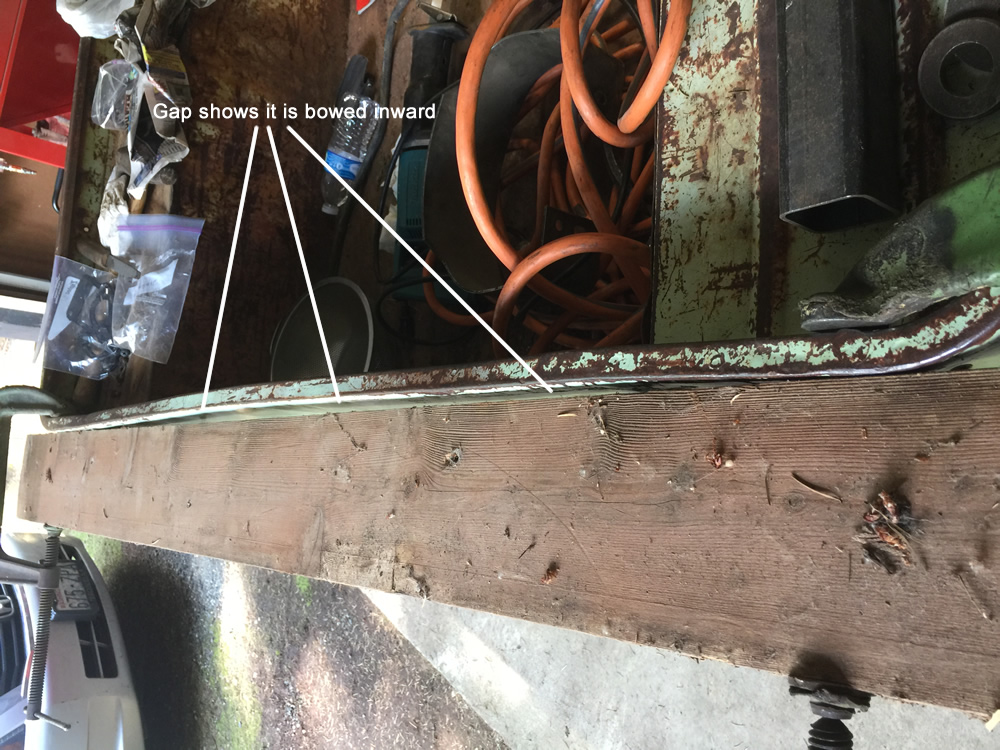
 You can see there’s a gap between the board and the back.
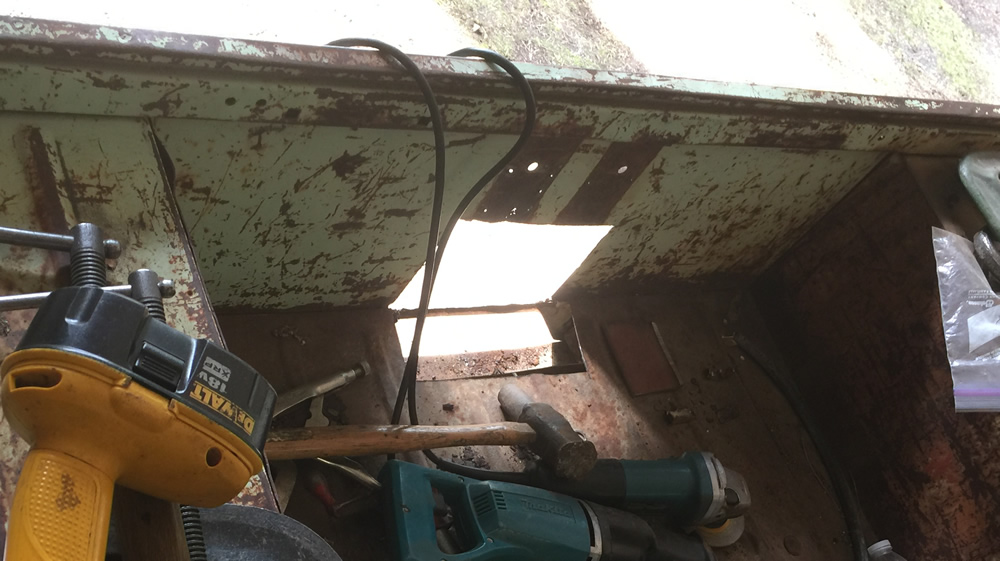
 After some clamps and some sweet talking with a 5lb sledge, I coaxed the back into line.

Then I played doctor and removed the cancer.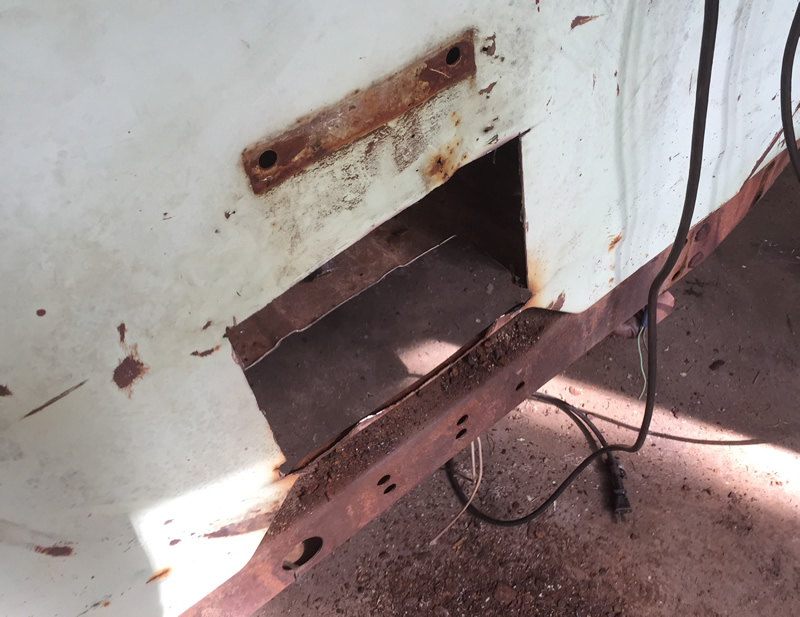
For this rebuild, this body will not be perfect (unless someone else takes over doing it). I don’t think I’ll have that time. But, as long as the cancer is removed, I can make the body work for the trip.
My next task was to remove the body. It’s important to know that I’ve never worked on a stock early jeep, so I’m learning a few things on the fly, such as how to remove the steering column. Removing wheel was pretty easy, but I did discover I was missing some of my bearing pullers, so I had to combine two different pullers to remove the wheel. That poor wheel is in terrible shape. It was no longer round, with lots of plastic missing. I will have to get another one.
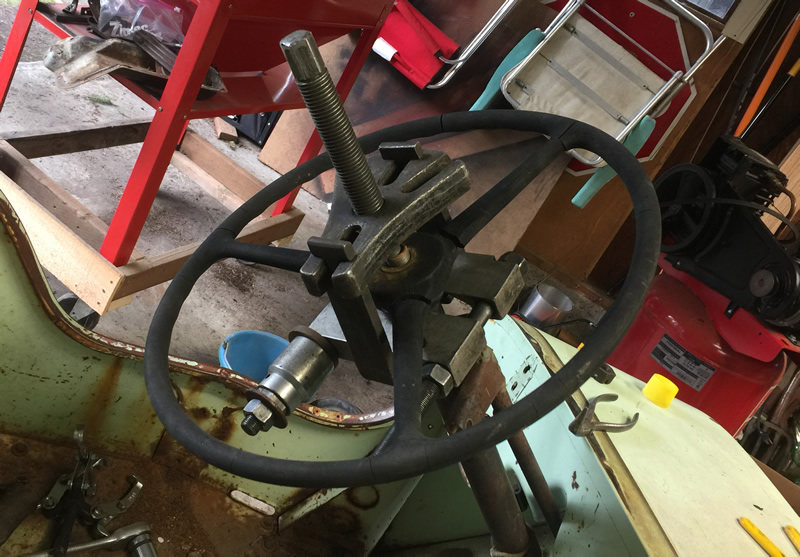
While removing the wheel was easy, I couldn’t really tell how to remove the steering box. The main problem was that the whole area (the box, the master brake cylinder, and the frame) were caked with a thick mud that may have formed over thousands of years (that part of the jeep hadn’t been cleaned in a millennia for sure!). It didn’t come off too easily. But, after consulting several online videos, I learned what I had to do. (remove the three bolts holding it to the frame).
After removing the bolts, I discovered (after view additional videos) that I had to unscrew the drag link cap. Naturally, I didn’t have a drag link tool and I couldn’t find one for sale at Harbor Freight (online anyway), so I made one using a piece of steel and a nut built for cotter pins. But, the bolt had to be positioned near the top of the socket, so I stuffed some washers and another bolt down in it.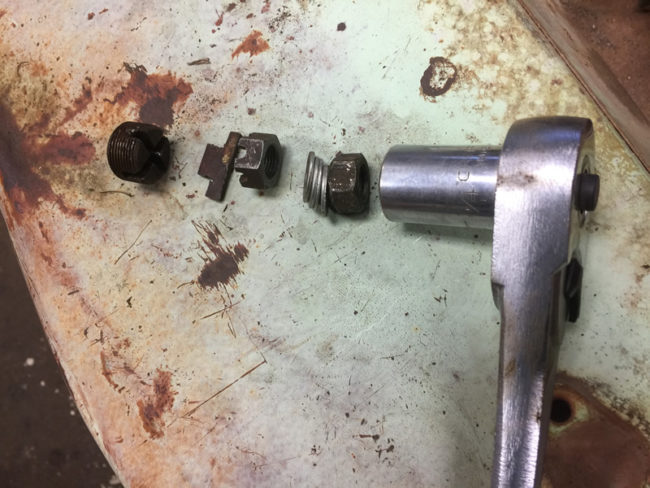
This is how it looked as I was unscrewing it underneath the jeep.
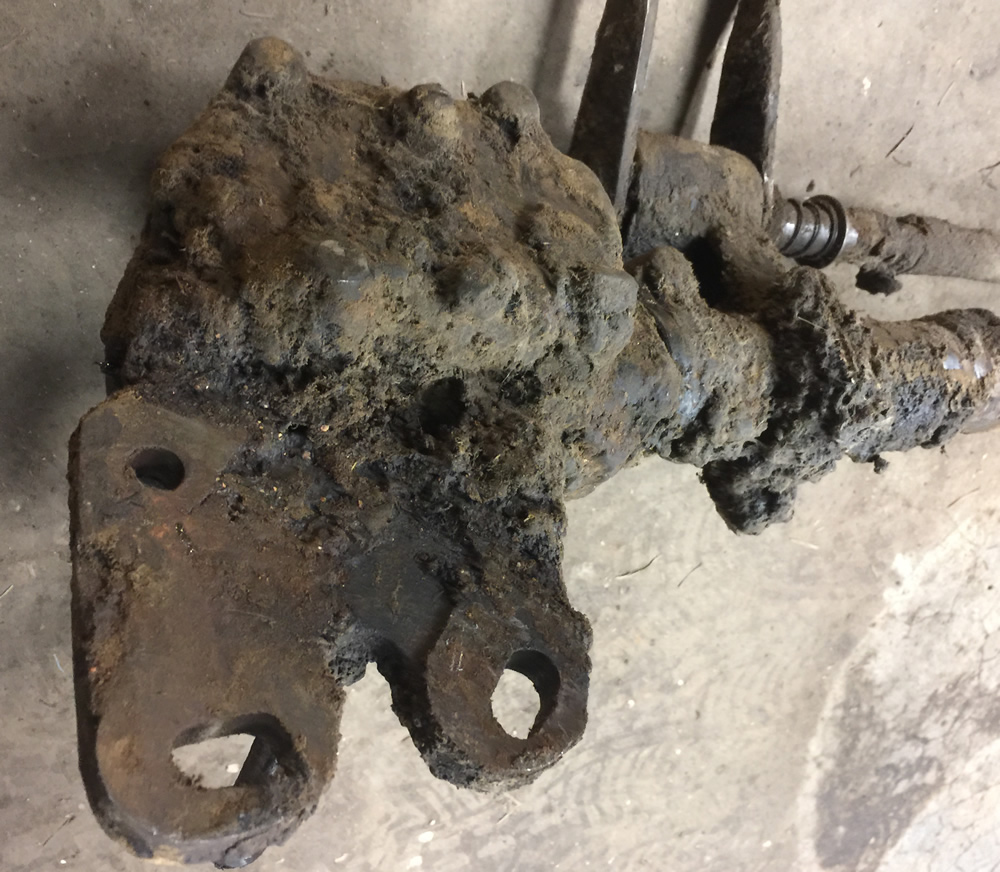
 Here’s a good photo of the crap all over the steering boxy. I might just have to use a pick-axe to get all that off!

With all that stuff removed, I almost have the body off. I am three bolts shy (most likely all three will have to be cut.
I should have the body off by tomorrow morning.
dave
good morning.
you are driving rusty to Alaska?
bob in NC
Had to do some Proctology work hey? You keep on removing rust and you may very well have to rename the poor thing. Good luck with the Adobe/grease encased anti-direction unit. Good to you making progress.
I like that drag link cap improvised tool! I may borrow that idea 🙂
Soooo, how confident are you that there’s a steering box in that blob? 😉
Nice progress Dave. Thanks for posting.
That’s called a “castle nut” for obvious reasons and it was very smart thinking to use it like that!