
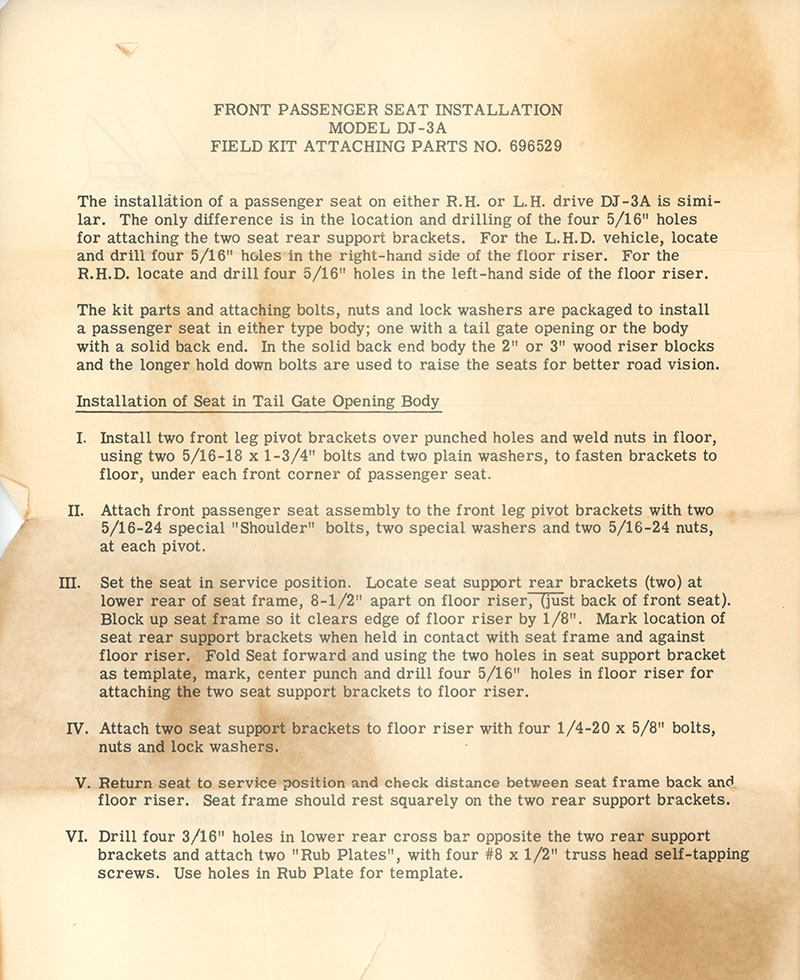
UPDATE II: Add are some instructions (thanks Terry!) for installing DJ-3A seats:
======================
ORIGINAL POST UPDATE MAY 2017: I’ve added a couple pics at the end and included a discussion on the extra channel DJ-3As have.
Last fall, when disassembling Rusty, I thought it was odd that the 2/3 1/3 seats had been mounted on wood blocks. I assumed this had been done by the previous owner to raise the seats.
Yesterday, I discovered that Patterson’s passenger seat was loose. When I examined it more carefully, I learned that it was loose because one of the wood blocks under the seat had broken. I can only conclude that all DJ-3A’s with 2/3 1/3 seats were mounted on wood blocks? Or maybe only the early ones?
The photo below shows the passenger seat tilted forward. The front of it is mounted in a way that allows it to pivot forward. The mounts are bolted through a piece of wood, then through a piece of cloth, through the body, and into a welded bolt. The rear of the seats rests on the two mounts at the back of the well. The long piece of wood is a well-seasoned (at least 45 years old) and stained piece of oak that will work perfect for replacement blocks.

Unlike the passenger seat, the rear of the driver’s seat rests on two posts; slide onto the ends of the posts are rubber feet. Those rubber feat sit on blocks of wood also. 
A close up of the rubber foot. The hole is 1 inch in diameter, so I ought to be able to find rubber feet to replace these tired ones.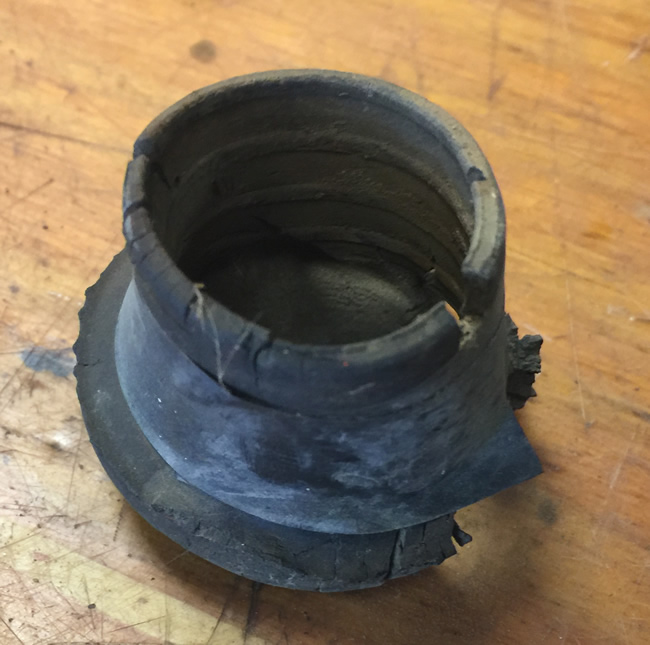
This shows how great the floor on this DJ is.
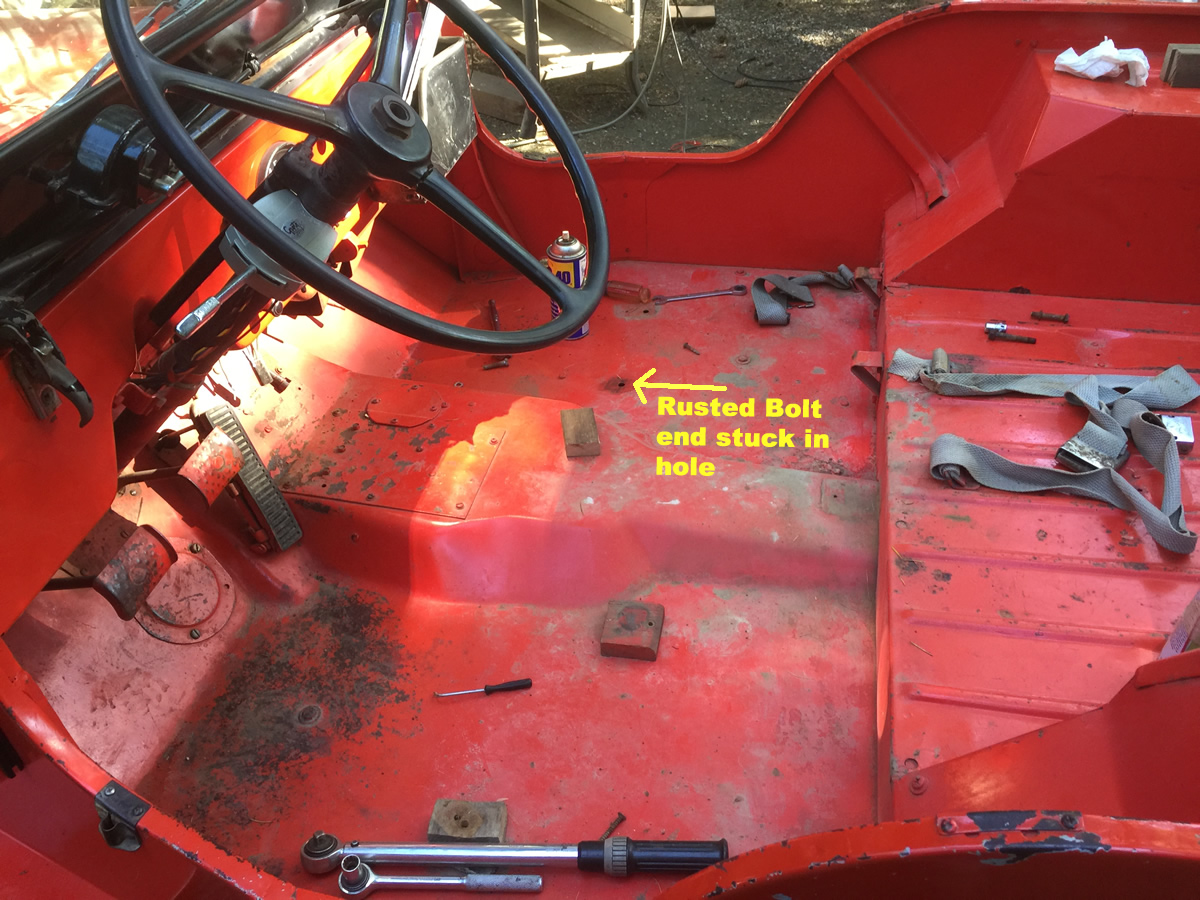
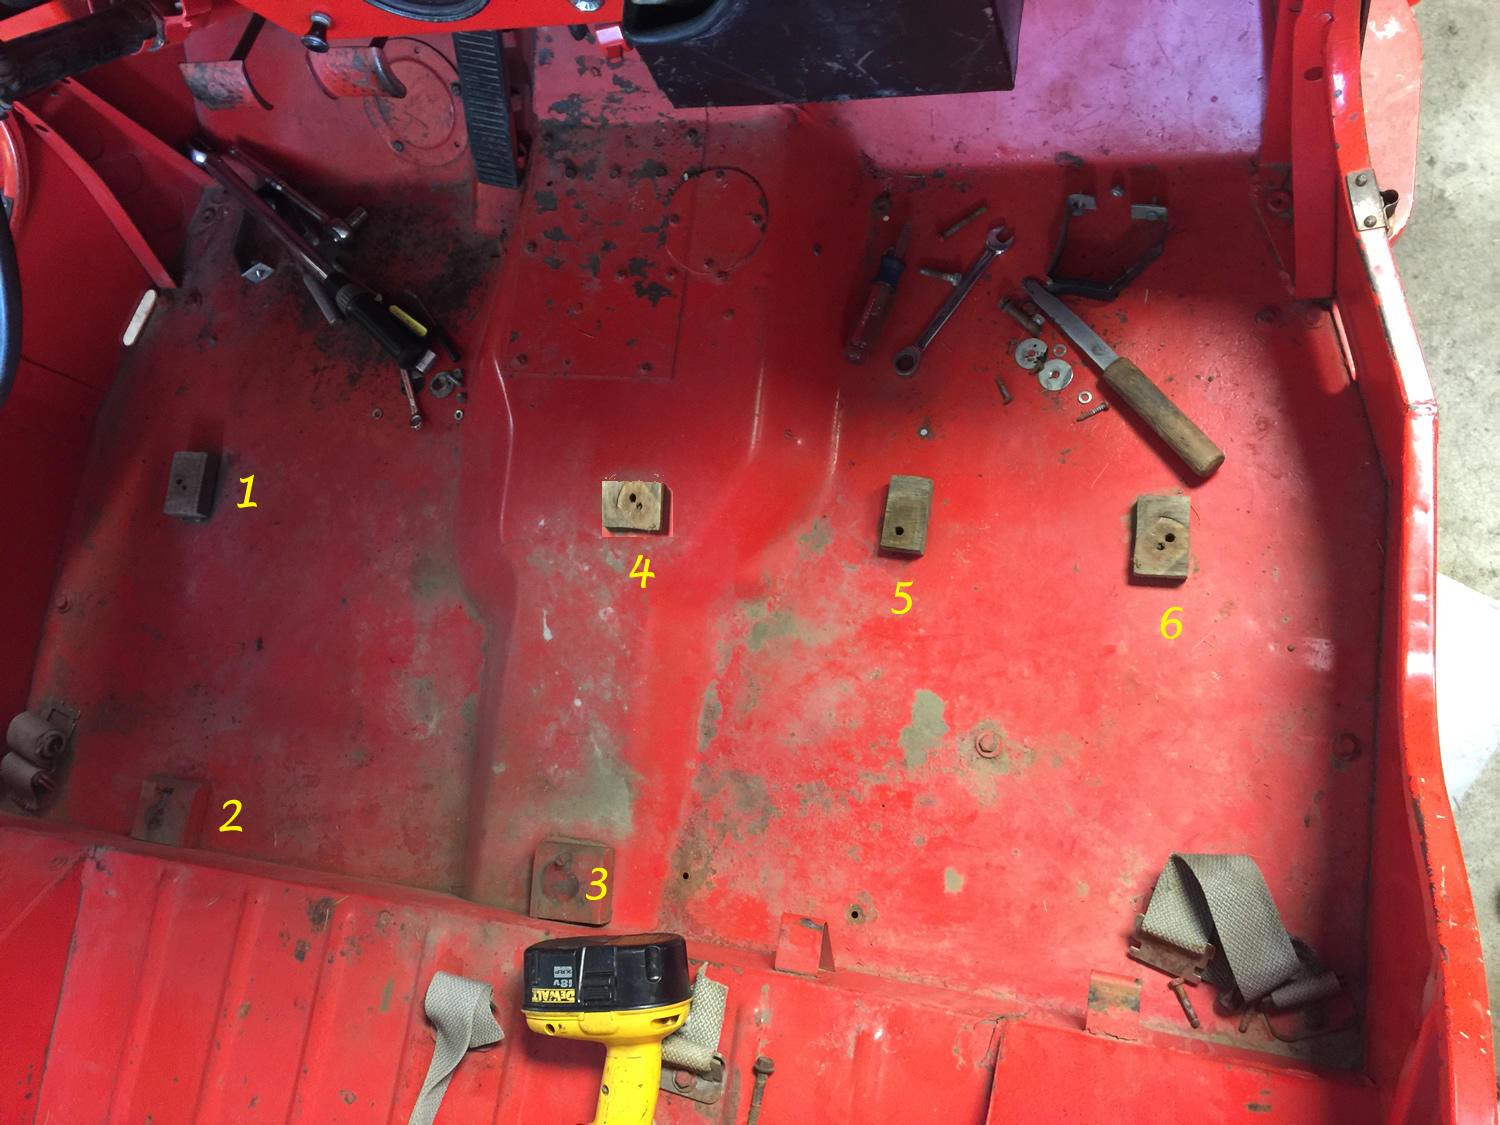
Another angle. Blocks 1, 4, 5, and 6 were the same size. Blocks 2 and 3 were larger and screwed down to the body. The rear 2/3’s seat rested atop those blocks.
I’ve drilled cut and drilled the blocks. They are ready for installation. I plan to add a thin piece of rubber under the blocks. Once I remove the rusted end of one bolt that broke, I’ll be able to reinstall the seats.
If you take a look at wood block #1 and block #6 there’s something curious. While the body area under wood block is similar to a CJ-3A, the body area under #6 has an additional channel (btw, we’ve yet to document any under DJ-3A body channels with wood in them).
This is the passenger side with the extra channel and a welded bolt.
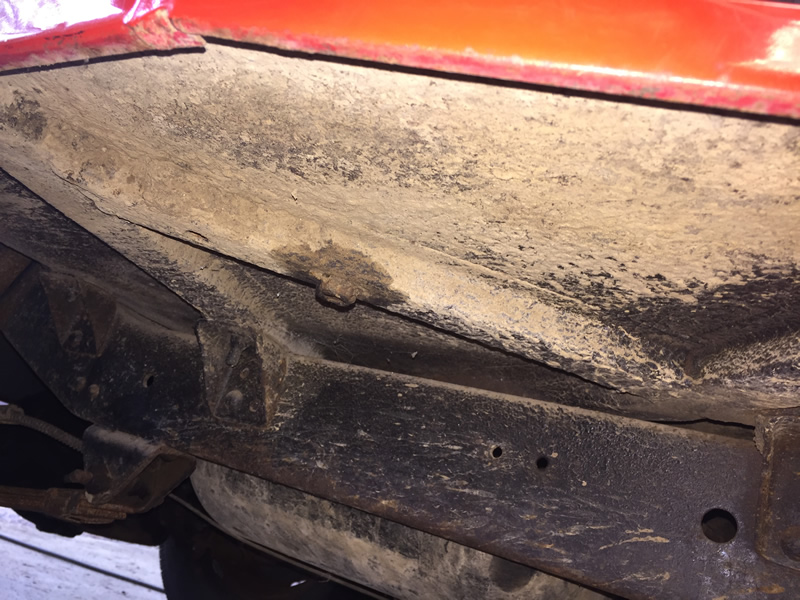
No channel on the driver’s side even though there is a bolt welded there. 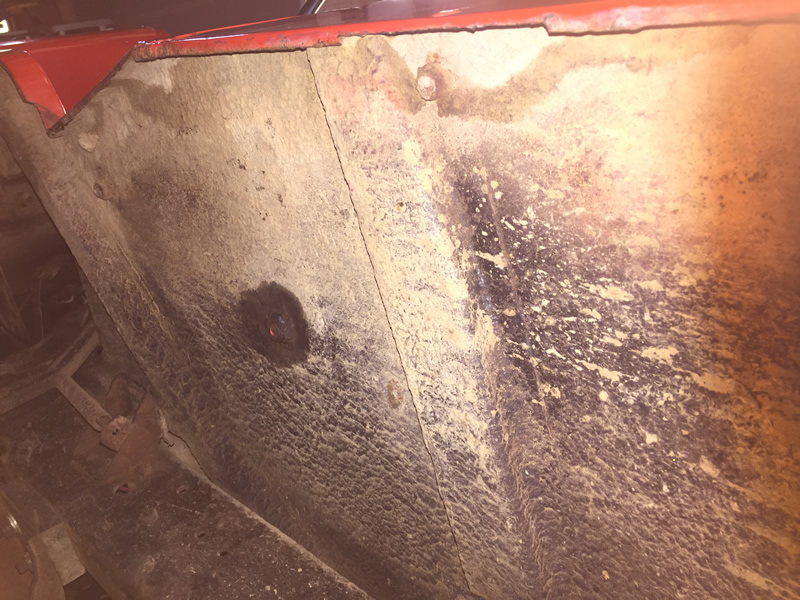
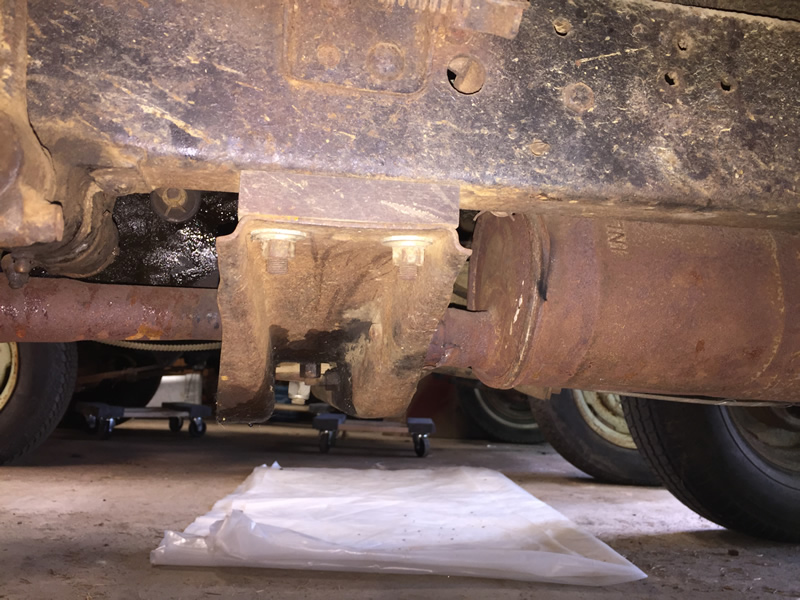
Finally, the DJ-3As used wood blocks between the frame and transmission crossmember.
Interesting. The original floors are in great shape.
Thanks for the update, Dave.
the rubber pipe ends are at your hardware store or on amazon cheap . [used for walkers etc.
Good idea Bill!
GREAT PICTURES AND INFO. As far as I know that’s the first time anywhere on a computer that those wooden blocks have been documented. Either it’s something people don’t talk about or they’ve most all rotted away by now. Believe me I’ve been looking for verifiable information like that since 2013 for my own 56 convertible. Those and the brackets the passenger seat rest on too. I’ve only ever found ONE other example of those 1956 brackets in my searches.
For sure later model DJ3A’s had different passenger seat rest brackets. My 1962 convertible, rusted out but complete and good for research and parts did NOT have wood blocks and neither did any SURREYS that I’ve ever seen.
I truly believe your finds are original and perhaps without additional information unique to 1956 only. If not, I sure hope others comment here.
Charles
The dj3a parts list , lists the wood block ( spacers ) p/n 694720 for the dj3a with tailgate and higher windshield ,not the solid back model with lower windshield . The bolts for the seat on the tailgate model are 3 3/4 ” and for the solid back model are only 1 1/2 ” so do the math to find the thickness of the wood . It looks like with a bolt so short there was no spacer on the solid back jeep , but who knows .
Thanks Terry!!! I haven’t yet installed seats in my own 56 so I’ve never got around to reading that part of the parts list.
You’ve made my Day!!!
Does anyone have dimensions for the wood blocks used on a 56 DJ3A wing the higher vented windshield? If they use 3 3/4@ bolt i
Hi Scott,
The only wood blocks I’ve documented so far are the ones I’ve found on both of my DJ-3A convertible jeeps. If the blocks were taller on standard DJ-3As with the CJ-3A-like windshield, I have not documented that and no one has mentioned it to me.
If they raised the blocks, then Willys would have had to make the rear legs of the seats higher to maintain the angle of the seat. This means they would have had at least two different types of seat frames, which doesn’t seem too probable (but again, with Willys Motors, you never know).
I can tell you that even at the low height of the seats, I still look at the top of the windshield (I am 6ft).
Do you have any suspicion, info, or evidence that the blocks were thicker?
– Dave
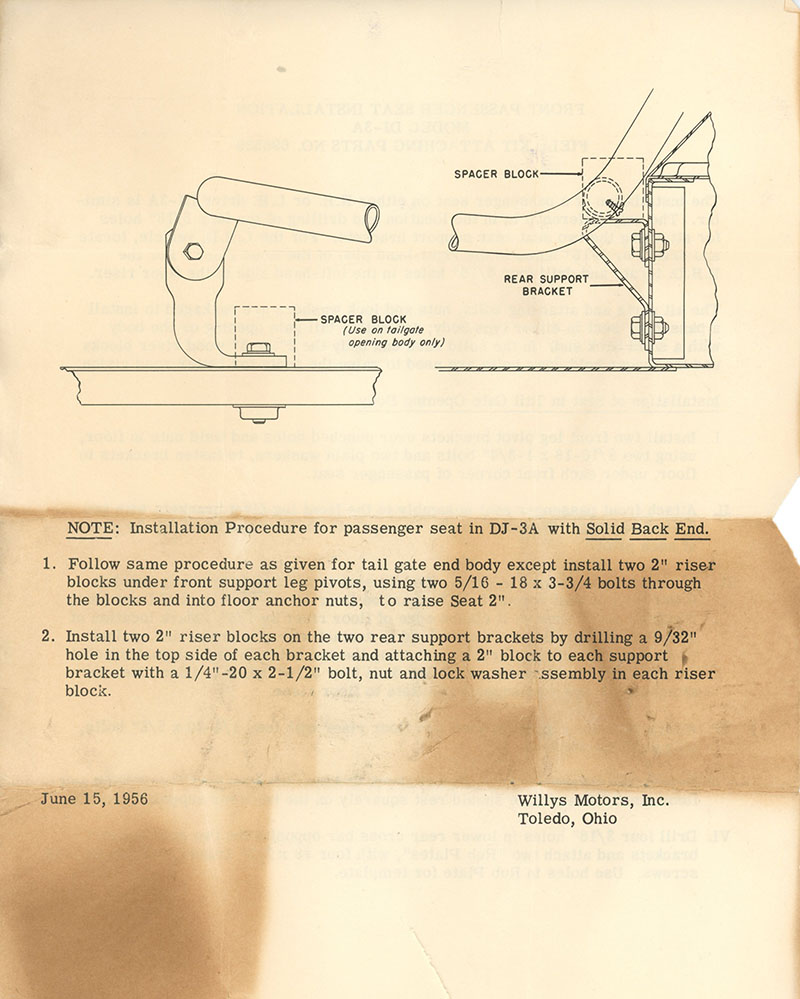
I have a NOS kit dated 15 June 1956 for installing a passenger seat in a Dj3a . The wood blocks are referred to as 2” but measure 1 15/16 high, two for front of seat and two for rear on support bracket . Wood blocks only used on tailgate models [high Cj3a type windshield ] . The kit mentions 3 inch blocks for better road vision but are not in the kit .
Terry, well that’s fascinating! That certainly goes to the heart of Scott’s question. Is it possible to get a scan/pic of those instructions?
– Dave
David , email me your postal address and I will send you the Instruction sheet , Terry .
Terry, would you be able to send me the instructions also? Pictures and dimensions of the blocks would be fantastic!
Scott,
I thought I’d posted those instructions, but now I can’t find them online. I’ll email you a copy of them later today.
– Dave
I also see now that this was in the middle of getting ready for the Alaska Or Rust trip in July of 2017, which would explain why I wouldn’t have posted them right away….
Scott,
I’ve updated the post with the two-page instruction sheet. I’ll email you scanned copies, too.
– Dave