
Someone on Facebook the other day claimed that DJ-3As were made from surplus parts. As with any model during those years, there were some DJ parts used on other models. But, as with other models, there are parts unique to the DJ-3A and I’m learning more about them daily, one part at a time.
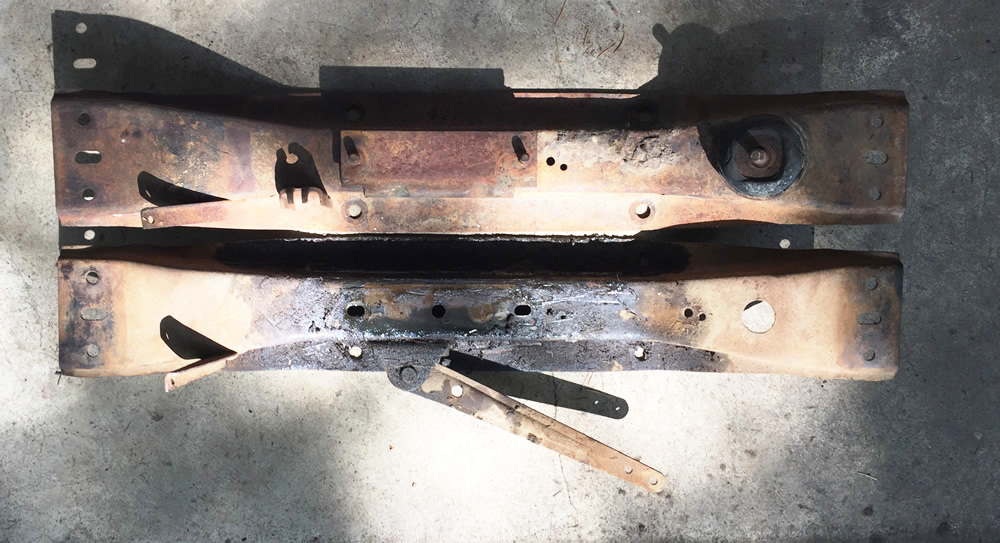
Today I spent time working on the transmission crossmember. Because finding a DJ-3A crossmember was near impossible (and since Rusty did not have a normal crossmember), I got a CJ-3A crossmember from Chris McKay for Rusty. But, I’ve decided to use the stock DJ-3A crossmember off of Patterson on Rusty and keep that jeep as stock as possible, and DJ-3A-matize the 3A crossmember for Patterson. Here are a couple pics:
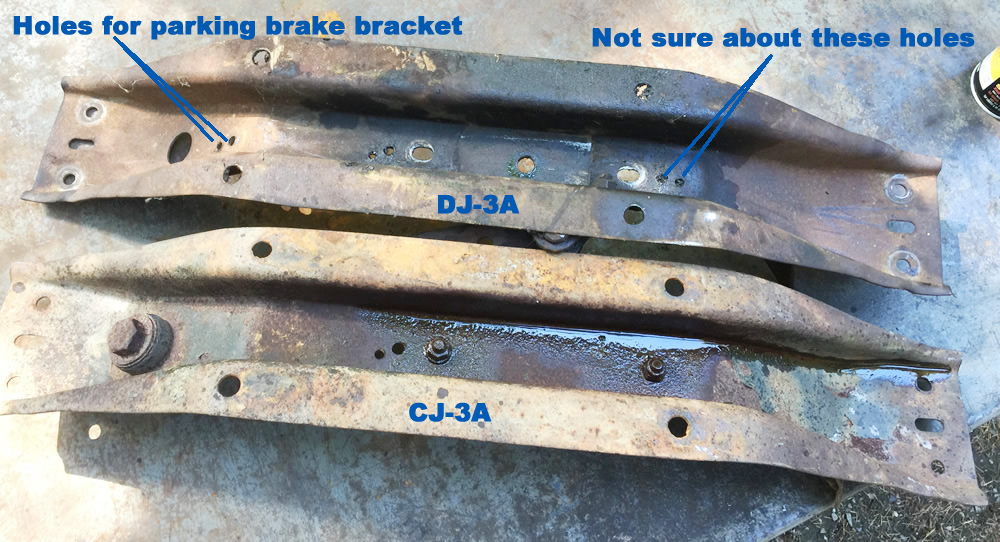
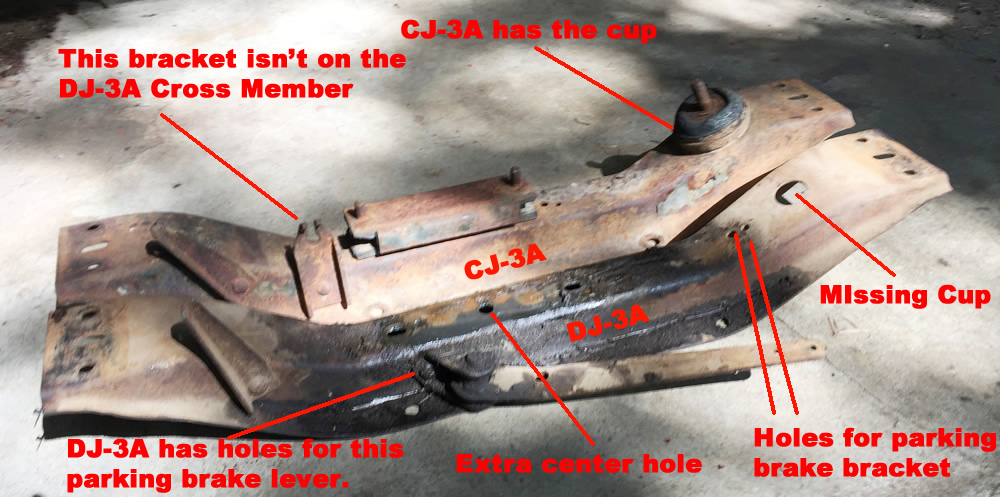
So, to make the CJ crossmember a DJ unit, I will have to remove the transfercase cup and drill several holes.
Unfortunately, as I disassembled Patterson’s crossmember I ran into a couple problems with the rubberized mount for the transmission. Here’s a look at what I pulled off of Patterson. Note how narrow the two holes are for mounting the rubber piece to the transmission (too narrow for a standard T-90 mount:

The problem is, most of the rubber seems to be missing. See how the “top” can be removed.
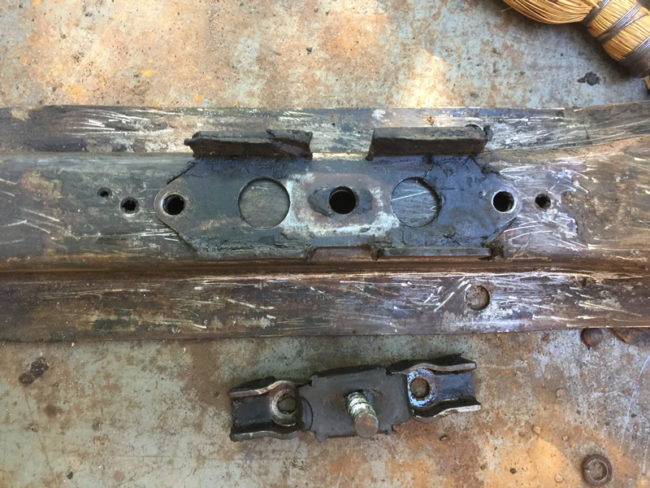
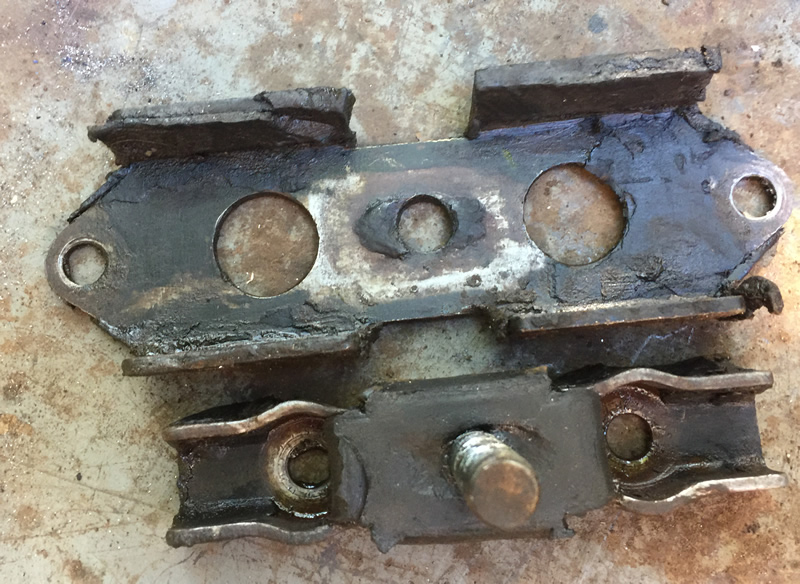
That’s not right.
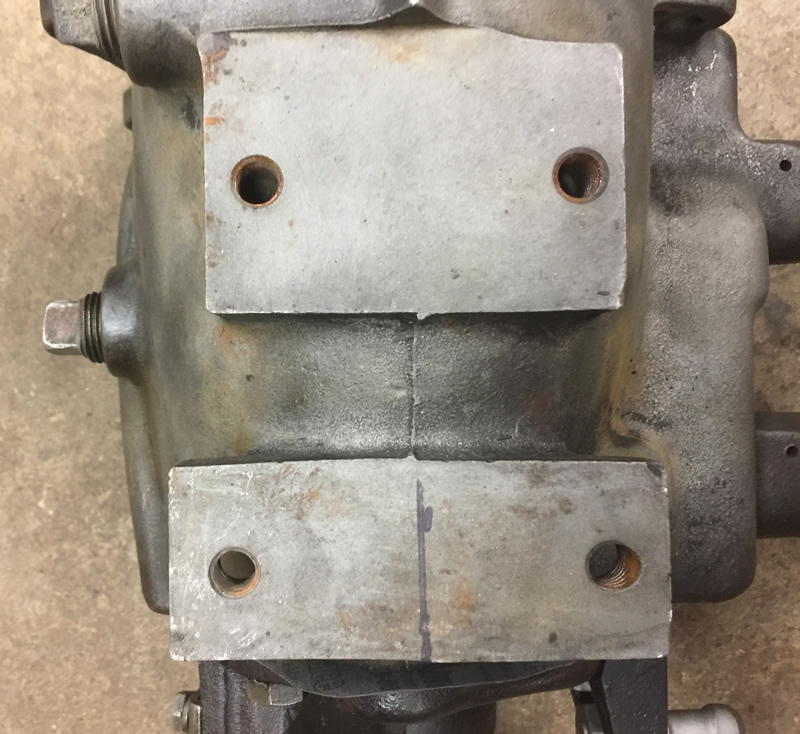
I searched for another DJ rubber mount, but i couldn’t find one (do the 2WD T-96 wagons/trucks use this?). So, I decided to use a T-90 mount and build an adapter to connect the T-96 to it. Here’s the bottom of the transmission (formerly Rusty’s). See the bottom right hole? It was damaged at some point, as the hole is oblong:
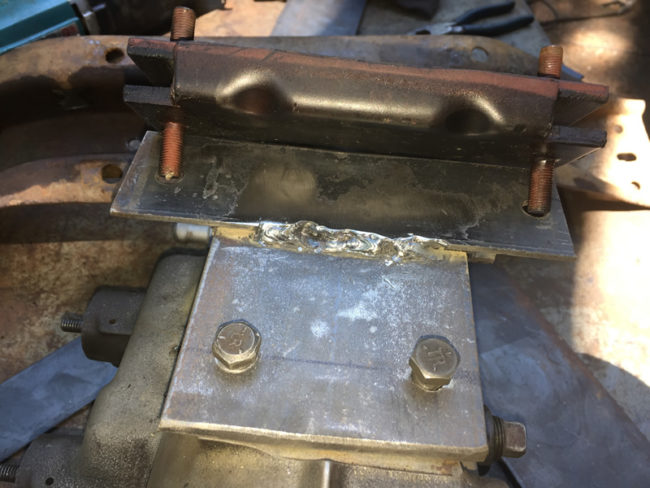
To deal with that, I drilled out both rear holes slightly over 3/8s, then built a mount that will utilize all four holes (normally on the DJ, only the rear two holes are used by the mount).
The unpainted mount below can be bolted down with the two far bolts which are at the front of the tranny. For the two rear holes, I welded bolts to the new mount plate that allow the bolts to slide the holes I bored out on the tranny. Then, nuts will secure the plate in the rear.

In these two photos, I placed the rubber mount Joe in Mesa sent me (thanks Joe) on top of the new bracket.
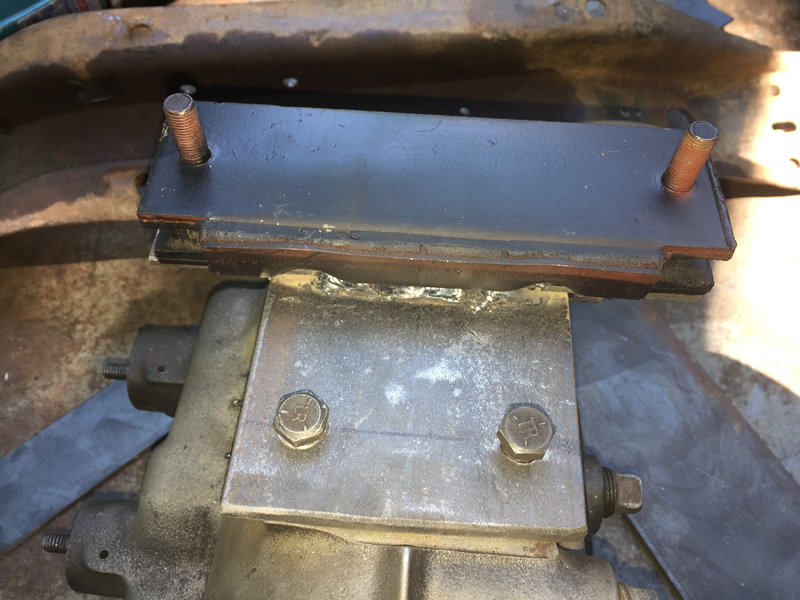
Then, the crossmember goes on top of that (obviously, everything shown here is upside down).
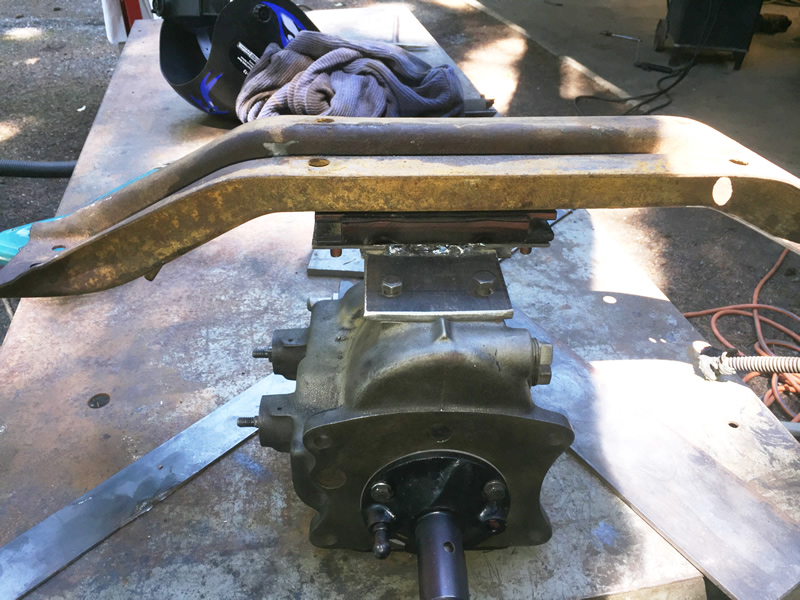
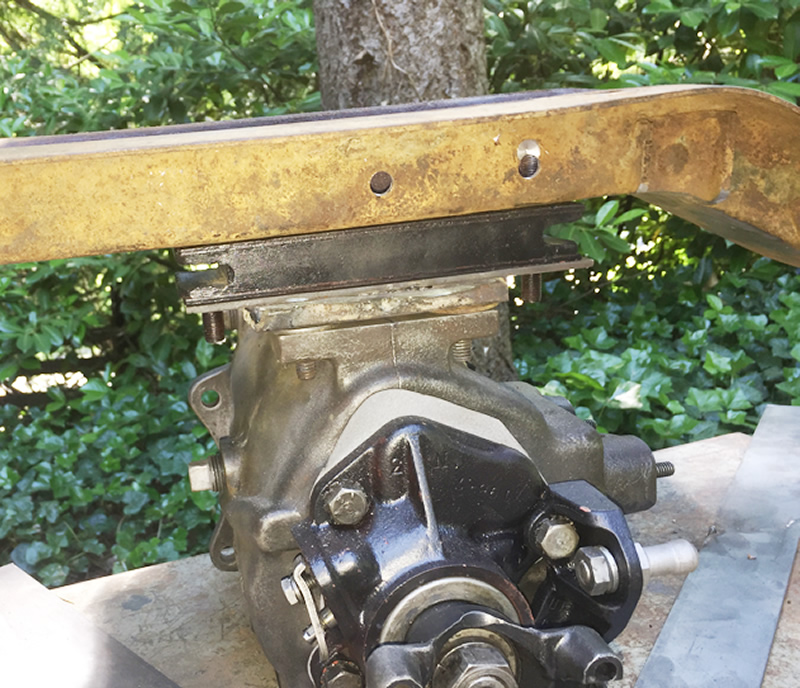
Hopefully, that will secure everything in place. Now I have to get all the parts painted.
While I worked on the crossmember, Ann readied the engine for the flywheel/clutch/bellhousing/and tranny, which we’ll hook up tomorrow.
Before installing the engine, I’ll also be hooking up the new dual master cylinder and running a couple new lines.
Good job! Getting closer to your goal. I like the fix.
Glad to help, Dave :-). With all the oddities (uniqueness) of the DJ-3A I was worried you’d need a different mount.