
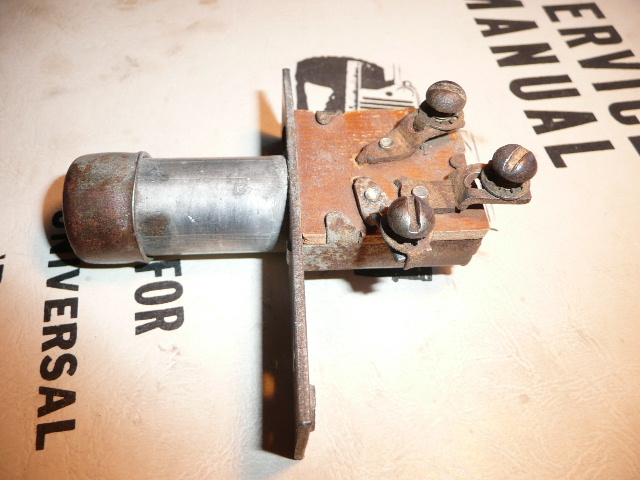
Last week when we were in Renton, we tested Patterson’s headlights and discovered the foot-based dimmer switch wasn’t always working correctly. After a little research, I discovered the CJ-3A page had a useful thread on the topic, but naturally the switch demonstrated wasn’t exactly like the DJ-3A switch. The one shown on the CJ-3A page had a square end, while the DJ (and I’m assuming others of the same vintage?) have a rounded end. In fact, It isn’t clear to me which models use which dimmer switches?
Example dimmer switch from the CJ-3A page forum.
So, here’s a look at Patterson’s switch. The first obvious difference is that the housing doesn’t have tabs. Instead, it has crimps and, let me tell you, those crimps wouldn’t bend easily outward.

Using a small screwdriver, I eventually got the crimps straightened. As soon as I tugged at the top part to remove it, everything kind of tumbled onto the table (oops).
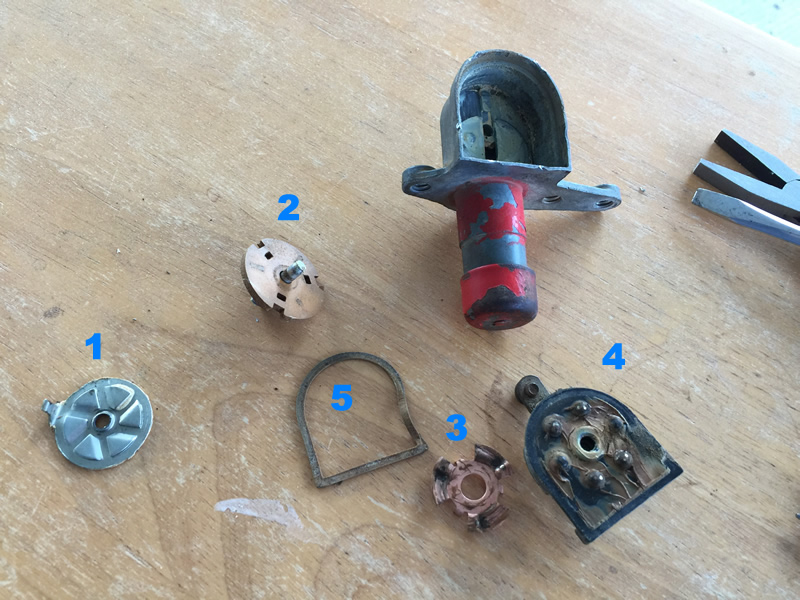
- #1 is the bottom piece. When the actuator is depressed it catches on #1 on the bottom of the piece and spins it.
- The metal tab that sticks up on #1 connects to #2 and spins it. #2 is actually made up of 3 pieces a) the disc, b) a shaft, and c) a spring.
- #3 is a copper propeller that rotates in conjunction with #2 and #1 each time the actuator is depressed. As you can see, it is very dirty.
- Part #3 connects with copper highpoints on #4, which shifts the electricity from the high beam to the low beam, then to the high beam, etc, in a circular pattern. The contacts on #4 were dirty, too, but hard to clean without scraping the copper points. I did not have a good cleaner handy, so I only gently cleaned them.
- This is a gasket.
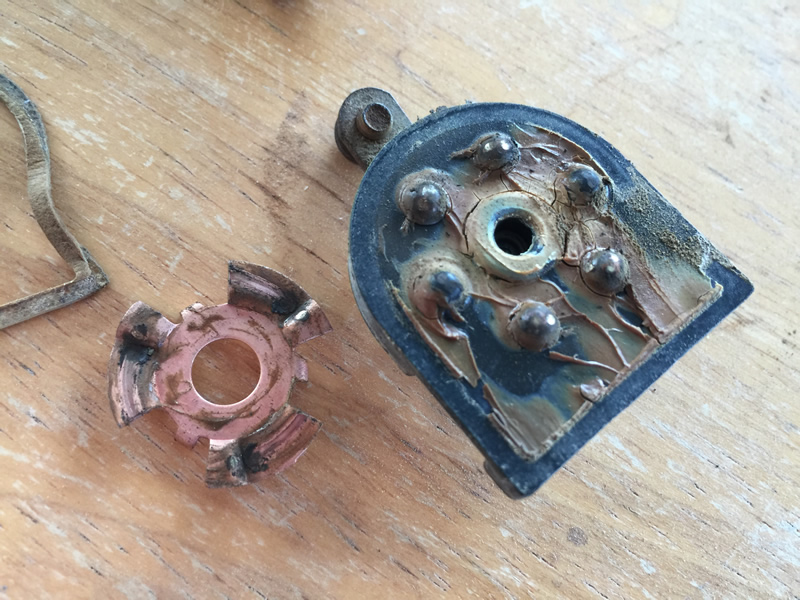
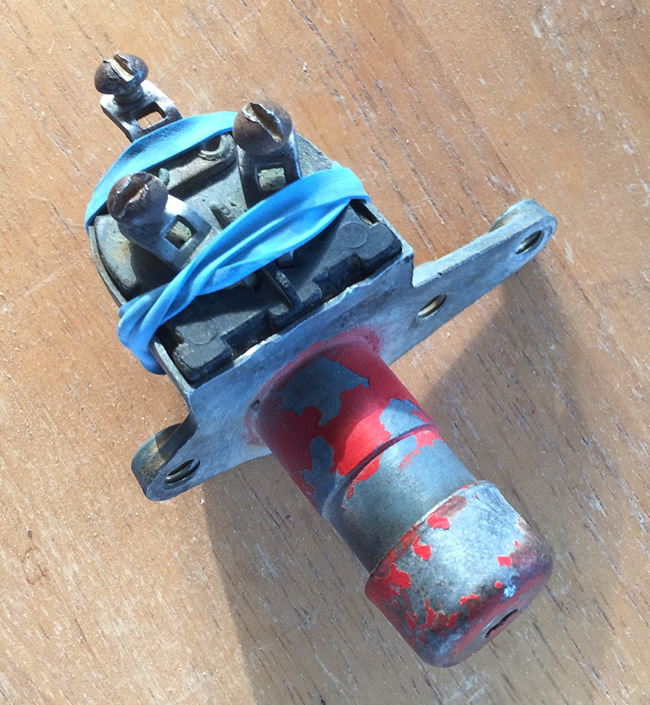
This close up shows how dirty the copper propeller was. Below you can see it after I cleaned and reassembled the pieces. (I still need to add a tiny bit of grease for moving parts, but I’ll do that in Seattle).

Unfortunately, recrimping the sides won’t be easy without my big vice, so I rubber-banded the unit together. Then, I set my electrical tester on Ohms and tested it. The switch works perfectly now. I’ll clean it up and reinstall after crimping it with my big vice in Seattle.
That’s great work Dave, repair is always better than replace.
Hi Dave,
Diaelectric silicone grease. NAPA has it. It is good for what you are doing along with a million other things like greasing rubber “O” rings on faucets, light bulb sockets, and of course, spark plug wires. It will not attack rubber parts as indicated and affords good electrical continuity where regular or white grease does not and works on high and low voltage applications. A tube runs about $11.00 or so and will last the rest of your life. Even house light bulb screw ends and sockets are pleased to get a bit of this grease and will make it so they always unscrew easily. I have finished SLAG and will report to you on that soon. Be well. S.
Looking good Dave, WD40 can be used too on cleaning and lubing this type of components. As for copper, I learnt as a young boy from my Pappy to use good olé baking soda and water. Let it soak for a while then use an old tooth brush to shine it up. Great for battery leads/clamps also. You can also buy a small can of copper brute (I believe that’s what its called). You don’t need to brush the copper part just dip it into the solution until it’s clean. There use to be a TV commercial showing them dipping a penny into it. Just passing along some knowledge. I’m sure it’ll look great once you do whatever you do to it. Can’t wait to see you two driving Patterson around.
Thanks for the advice guys!
Great advice.
Ha, I just did this a day ago on my CJ3a switch. It’s amazing how good it works after cleaning out the crusty grease. I used “Standard Blue Streak” dielectric grease. I think these switches will be good for another 60 years or so….
Enjoying your build…