For all the customizations I’ve done, I have to say I was still surprised, delightfully so, to receive this update from Brian about his metamorphasis of a GM sending unit into a Willys tank. Maybe it is just me, but it simply never occurred to me to try something like this. Moreover, as I turned Brian’s work into a post, I learned a great deal about gas tank sending units. Thanks Brian!
A quick note. After doing some research, I discovered one of the most common reasons for the older gas gauges to stop working correctly is a bad ground. So, if you are having problems with your old gas gauge, check the ground at the gauge and/or sending unit.
Take it away Brian:
I have tackled a variety of planned tasks on my CJ-3B, but as with any project, I’ve run across some unexpected issues as well. My gas tank sending unit is a perfect example.
*** DISCLAIMER: Before I begin, please be advised that when doing modifications to a gas tank it would be prudent (understatement) to drain and dry the gas tank. I hear gasoline is very explosive!!! ***
Prior to installing my gas tank, I decided to use an ohmmeter to test my sending unit to make sure it was in good condition. Unfortunately, I connected my ohmmeter and discovered my unit was dead. So, I thought this was a perfect chance to install a modern sending unit.
Btw, you can visit the 1945gpw website to get a nice overview about how to use an ohm meter to trouble shoot your old Willys sending units.
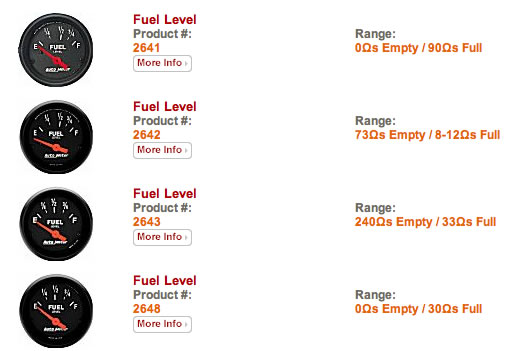
The stock unit on my CJ-3B is 40-0 ohm’s (which means the ohm meter would read 40 ohms when full and 0 ohms when empty). As I am upgrading my gauges to auto meter gauges, I had to make sure I selected a gauge that would work. There were four different gauges to choose from: 90-0, 30-0, 8-73, and 33-240 ohms. Note that the last two gauges are backwards for our purposes — the gauges would have read full when empty, and empty when full (if they worked at all). Also with my new gauge, I felt I would run into a problem with the ground, so I decided to replace the sending unit and make it work right.
I had replaced a GM in-tank pump and sending unit on a friend’s truck and found a GM sending unit would fit though the tank opening of a Willys. So, with that in mind, I started by disassembling the old Willys unit. First, I removed the sending unit and the sending unit base from the gas tank. Next, I separated the sending unit from the base as I will be reusing this base (with some modifications) using my drill press.
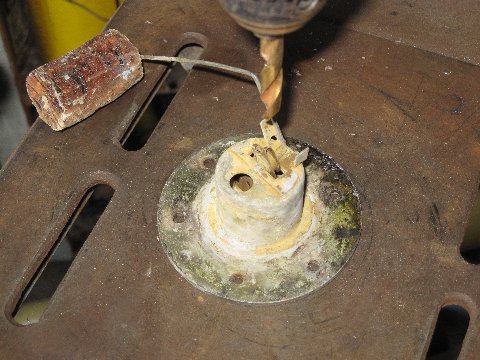
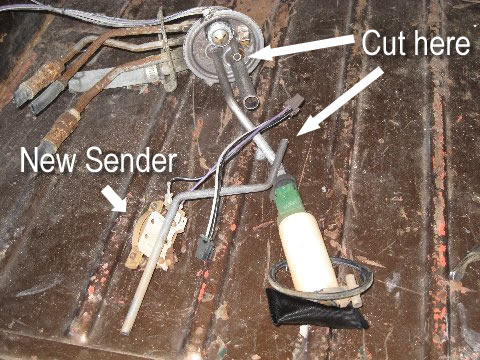
With that apart, I turned my attention to the GM Assembly. I removed the sending unit off the GM assembly by cutting the tube up high. I went over to Mick C. and we machined a plug for the old unit (a machinist is a good friend to have!). This GM unit is 90-0 ohms, a perfect match to the Auto Meter 105-2641 gage. It is also internally grounded, note the two wires.
Here is the unit assembled. The new plug had a hole in the center so I could run the new gas line through it. Also, the plug had a hole for the wires as well. I drilled three holes around the radius of the sending unit base and welded the plug in place. You can see the welds in the image below.
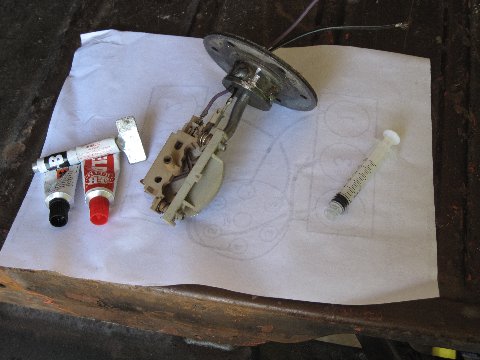
Note the J-B Weld. There is about 1/8″-3/16″ between the top of the plug and top of the unit. I used J-B Weld to pot and seal the unit. J-B weld (http://www.jbweld.net/products/jbweld.php) claims to be resistant to gas (from the website: “It’s strong as steel and impervious to water, gasoline, chemicals, and acids.”). DO NOT USE SILICONE!!!
[Editor’s note: Mitch mentioned months ago that he had a problem using J-B Weld to seal an old gas tank. Given the claims by J-B, maybe Mitch’s problem was more an adherence to the old tank rather than J-B itself? Any thoughts Mitch? This should be a good test of J-B and gasoline. ]
Now, I had to adjust the float to work correctly with the new unit. I cut the arm at the first bend from the float then turned it 90 degrees. I also cut the float down an inch.
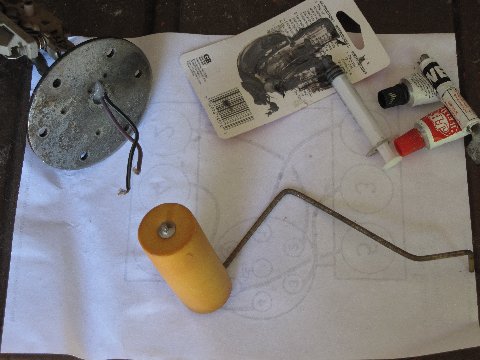
Note: there is a pattern to the bolt circle on the old unit. Index the sending unit on assembly so the float will clear the internal wall in the tank. The wall runs across side-to-side; the float will have to do the same.
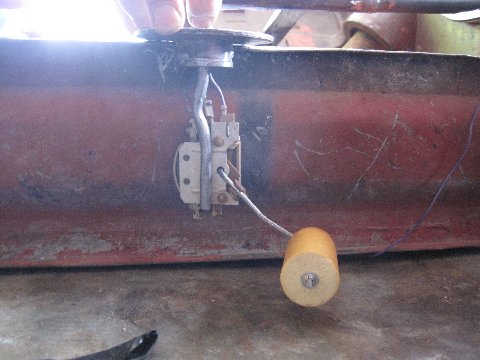
Adjusting the float was easy. I just held it to the top of the tank and bent the arm as needed.
One good thing about this modern sending unit is the rheostat can be replaced by removing two screws. You would have to get another one from a junk yard but can easily be rebuilt.
This works really well … I love these types of projects.
Brian

