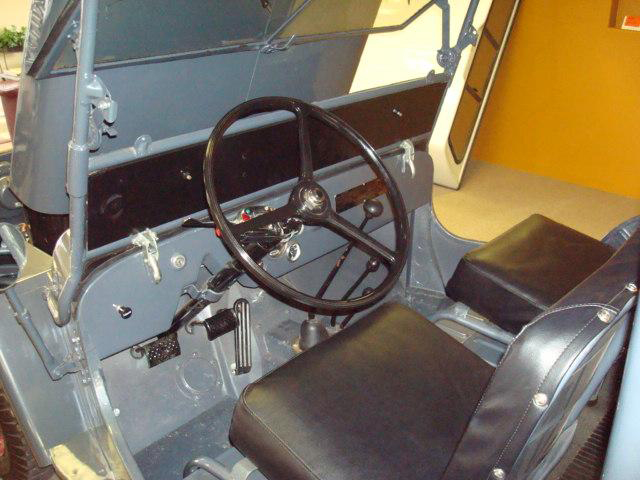
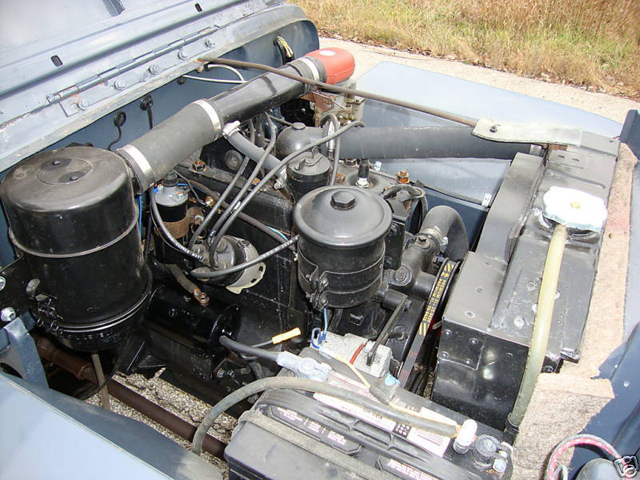
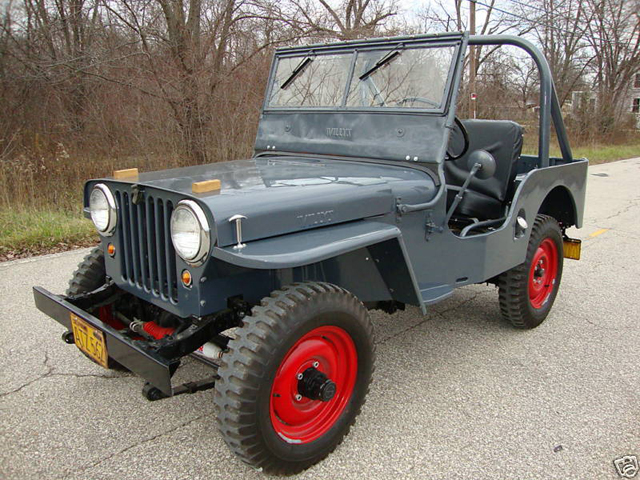
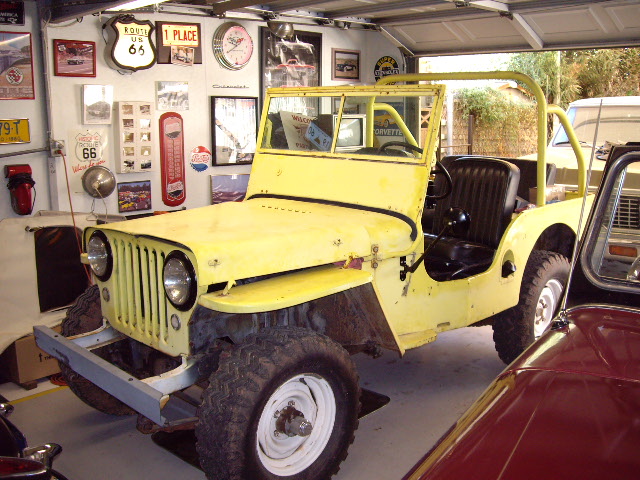
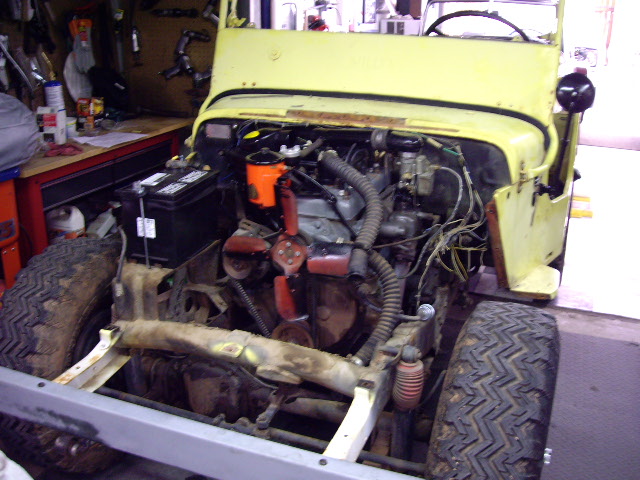
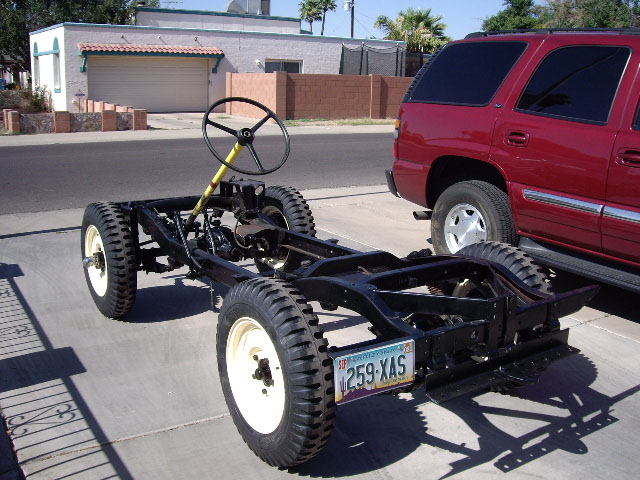
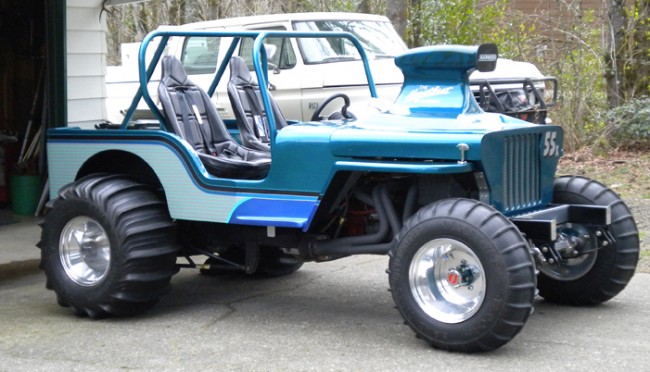
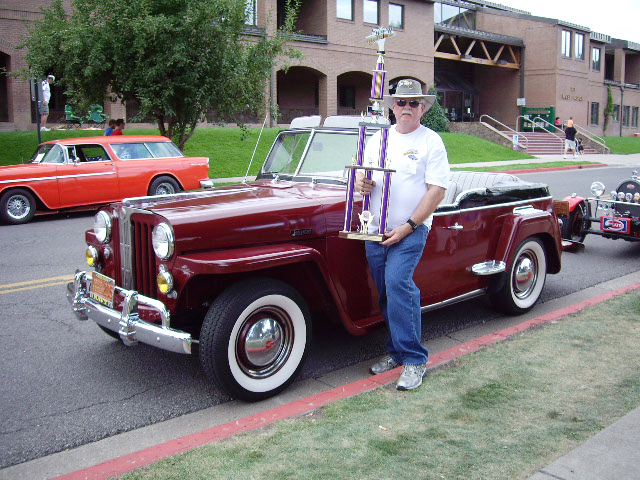
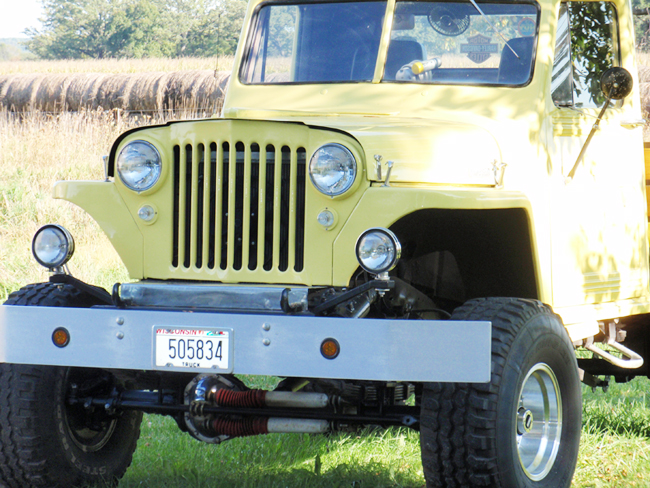
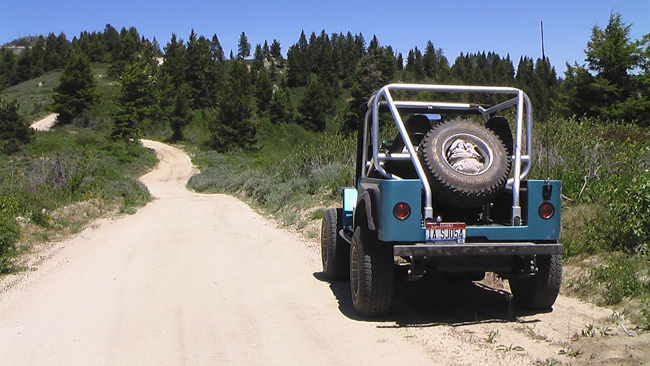
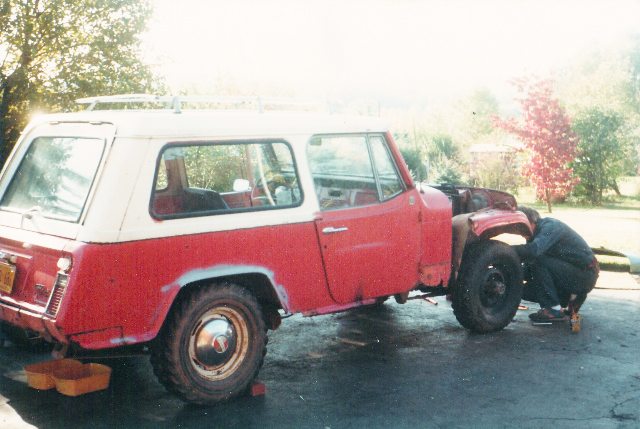
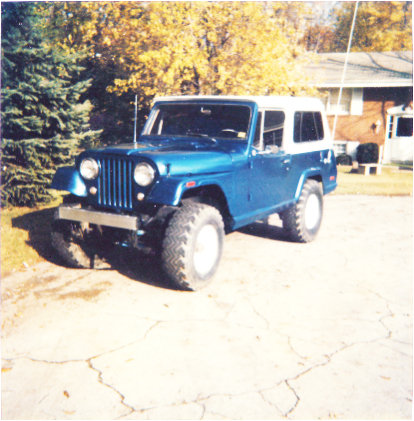
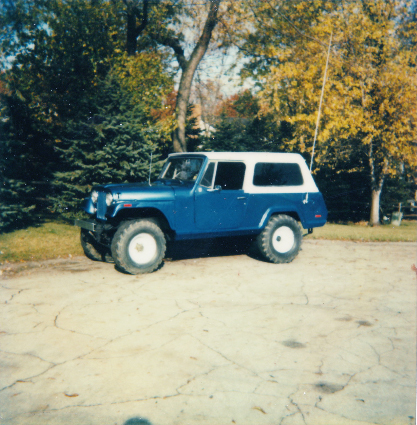
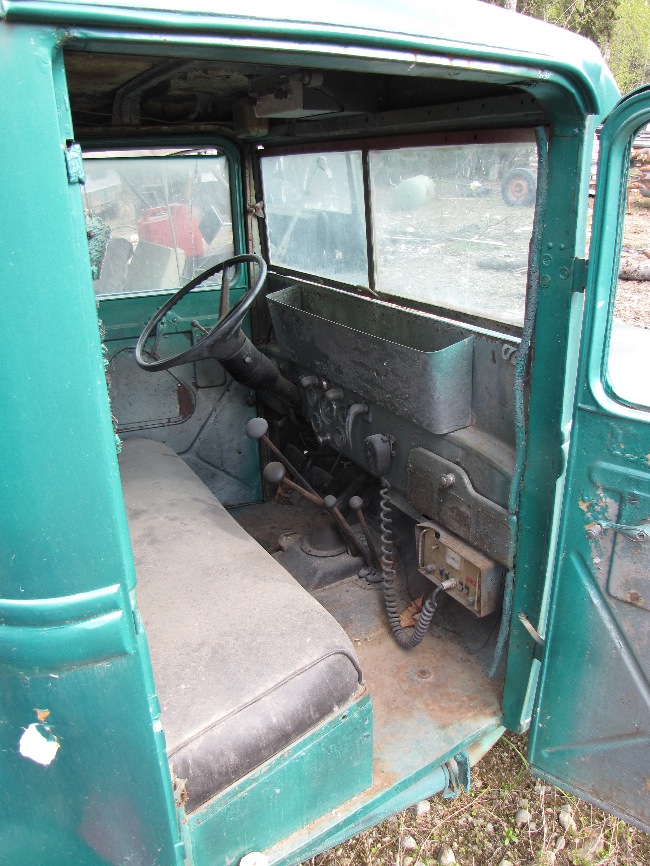
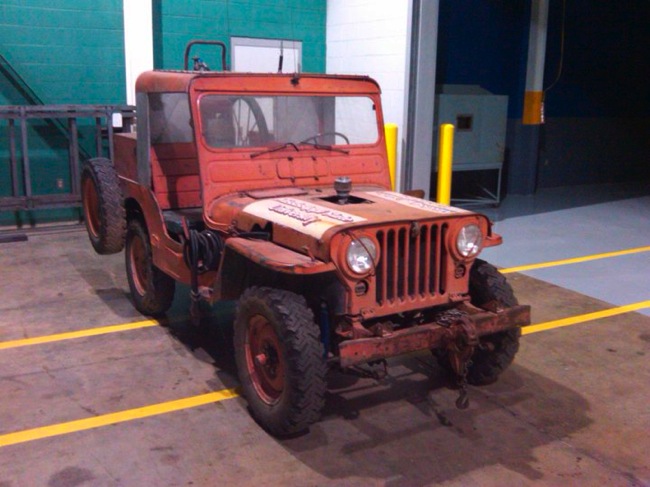
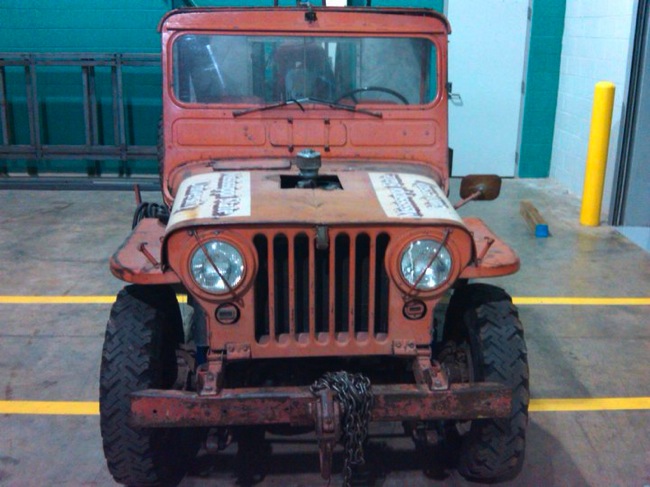
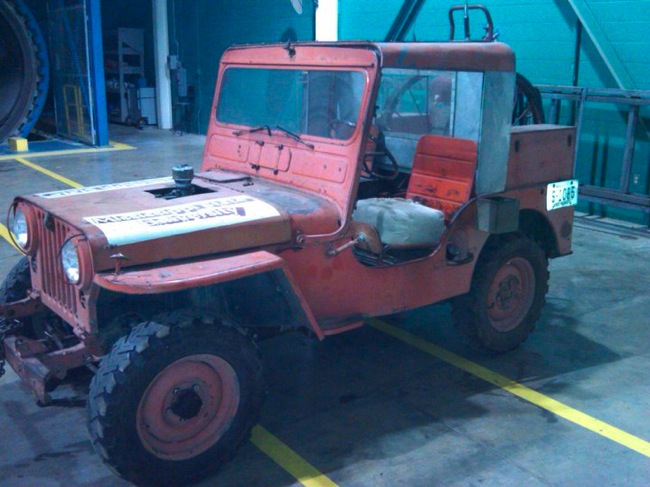
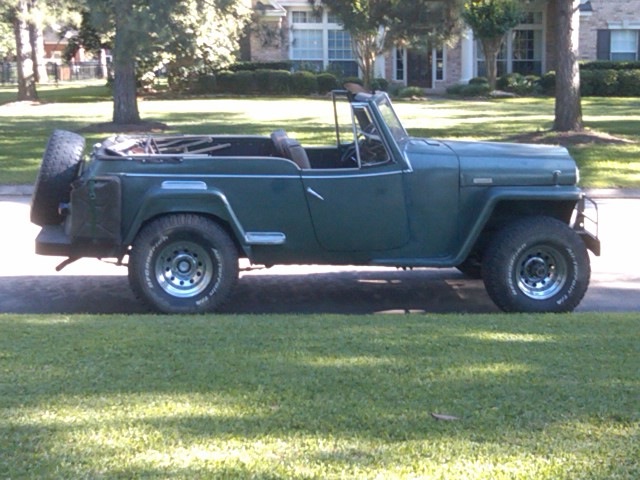
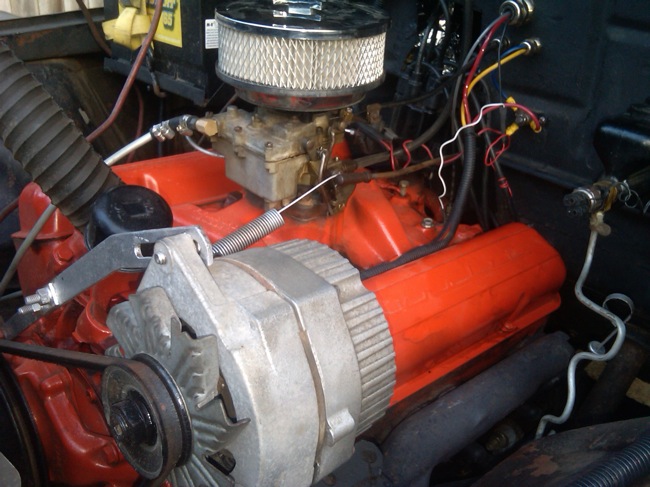
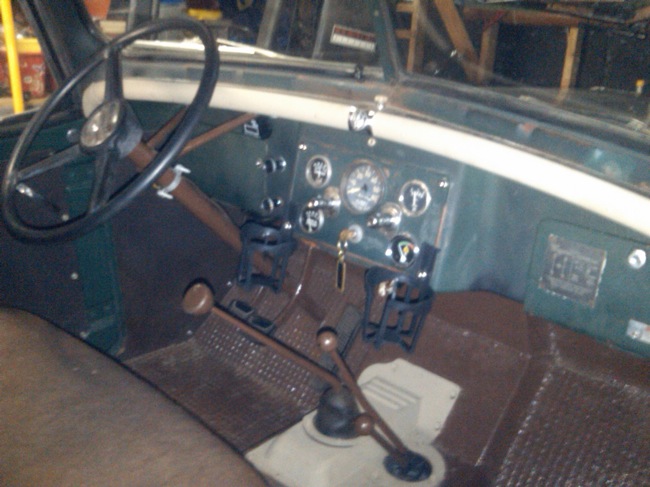
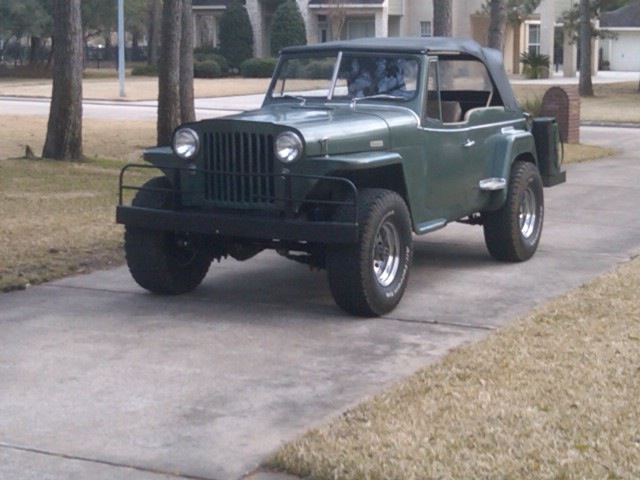
A reader named Stephen is feeling quite Merry about this year’s Christmas after purchasing a CJ-2A project. Good luck and keep us updated!
Builds Research Archives
Jim’s 1947 CJ-2A
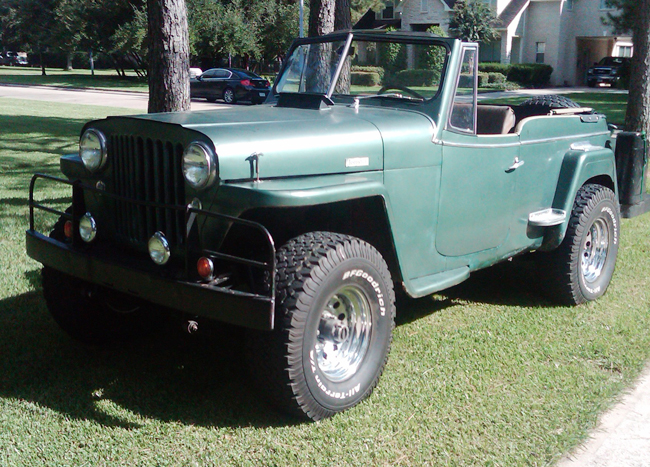
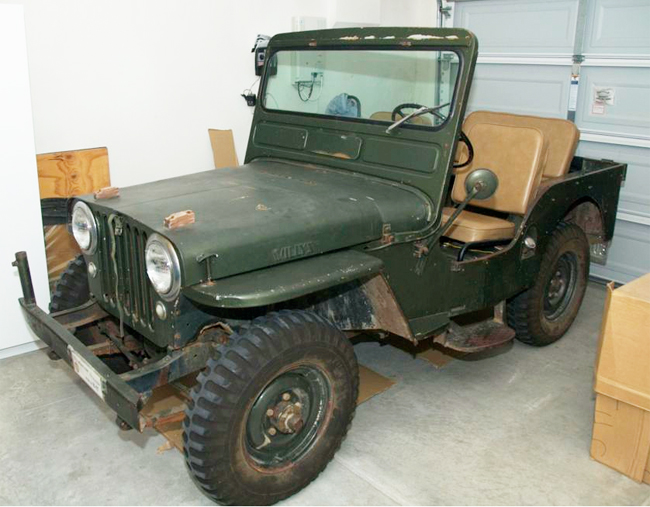
Jim recently purchased this nice looking CJ-2A.
He writes, “Here are a few pictures of my 1947 Willys CJ2A. It has had a ground up restoration several years ago. I bought it out of Kansas and now it is in the California Sierra Nevada Mountains where I use it at our cabin.
The Willys has a new tub body but original hood and tail gate. It has all the original plaques and auto numbers. All other parts reflect the period except a roll bar and a steering stabilizer. The engine runs like a sewing machine.
I am still working on it to make it better and original. The paint job also reflects the year. If I could find a restored flat fender with the original body and in this good of shape I might jump ship. Meanwhile I enjoy driving this vehicle where everything works like it did 63 years ago, which by the way is my age!”
Congrats Jim. It looks like fun 🙂
Paul is back in the Garage — Year 25 …
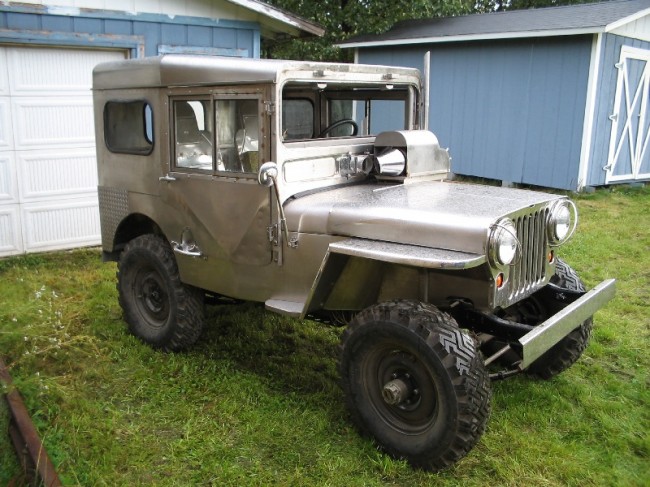 With winter descending on Alaska, the time has come for Paul to direct his focus back on his beloved, shiny, stainless steel M-38. One exciting difference between this year and the previous 24 years is that he is almost done — But no pressure Paul! Click on the pic to see the original post and followups.
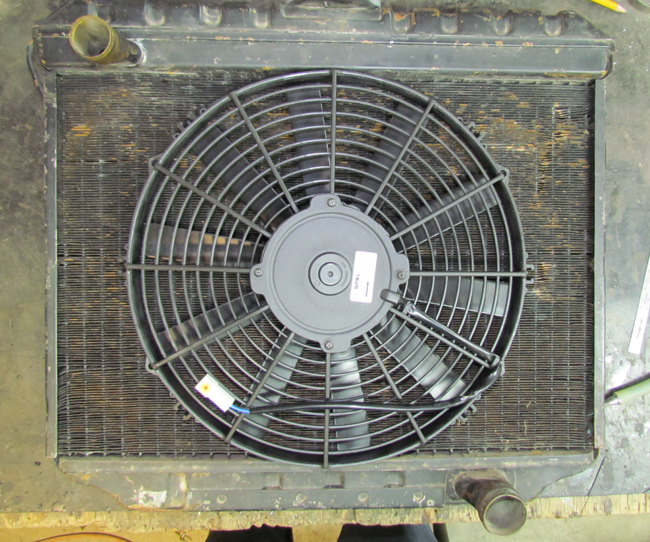
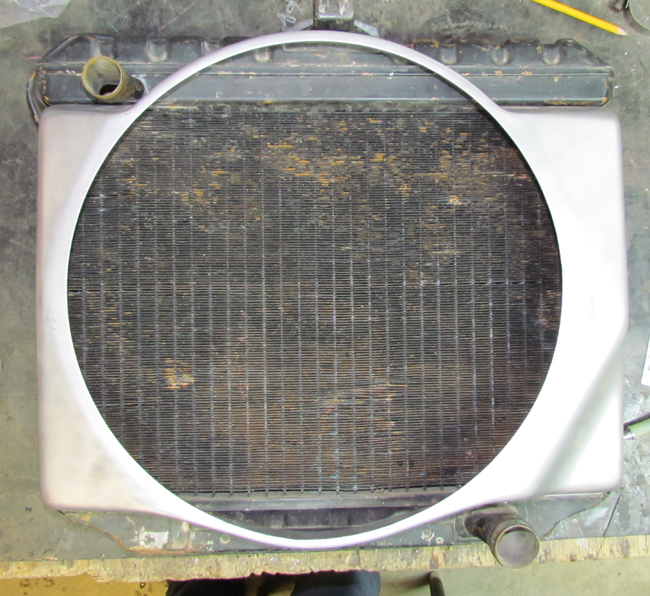
Last spring, Paul reported that after some investigation, he discovered a M-151 radiator would fit perfectly into his engine compartment. Recently, he took over an auto parts store (ok, maybe just a hose booklet in the store) to figure out a hose solution. With that problem solved (it took 2 different hoses and a tube to link them), he now must figure out a fan solution.
With that background, take it away Paul …..
The Fan and Shroud
Paul writes, “After talking with the folks at Spal concerning their electric fans I ordered a 13 inch puller fan with straight blades along with a fan relay/installation kit. The crazy part about this deal is when the Spal people wouldn’t sell me a fan over the phone, I would have to hang up and order on the internet and best of all I would pay over $50 dollars more for the fan and temp sensor/wiring kit than a Spal dealer in California was charging for the exact same items. For some unknown reason The Fan Man (California dealer) sells lots of these fans at quite a discount and these are brand new fans. No factory seconds, returns, or rebuilt units.
Anyway, the fan arrived last night undamaged and it looks great. Thank you Fan Man! The total fan thickness is slightly under two and a half inches and I have a little over three inches between the aft side of the radiator and the waterpump shaft. Sweet!
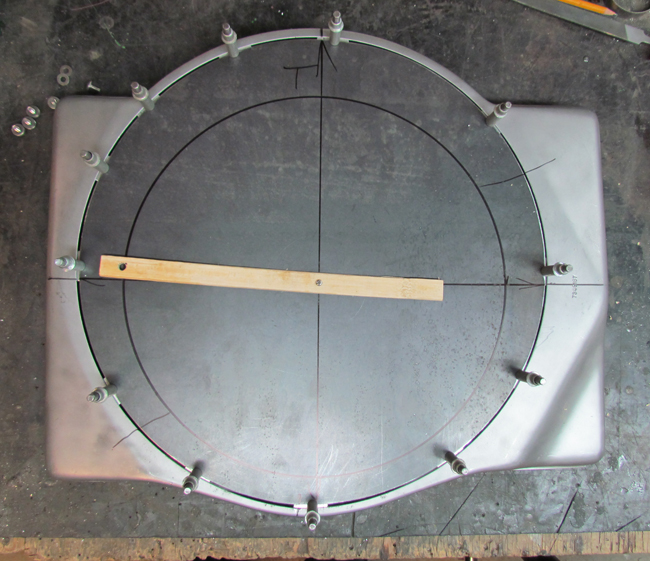
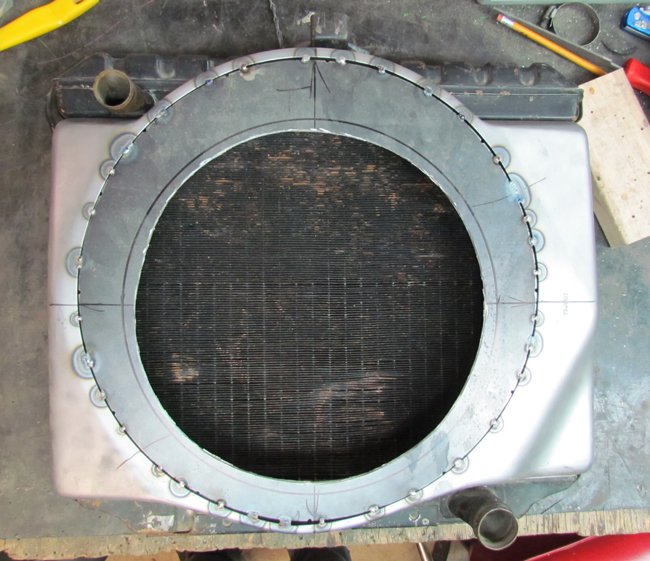
The shroud on the M151 radiator has a 16 inch diameter circle for the fan so I bought a ten dollar piece of thin sheet steel, cut out a 16 inch diameter circle and tack welded this piece to the shroud. After finishing with the tack welds I rough cut a 12 inch diameter slightly offset circle to allow for the correct placement of the new fan. I didn’t have a compass large enough to layout a 12 inch diameter circle so I used a stir stick for paint and drilled a pivot hole in one end and another hole 6 inches away and large enough to hold the tip of a sharpie marker. It worked slick. Tomorrow I’ll finish welding the insert to the shroud, clean up the welds and trim the inner circle for a more precise fit to the fan assembly before I attach the fan to the shroud.
Things are looking good. I really didn’t need the relay kit since I’d wired in a fan relay in the electrical box behind the passenger seat but it was cheaper to get the kit with the temp sensor and I could doublecheck the Willys wiring against the Spal wiring so I could identify any potential problems before mean old Mr. Electricity messes something up.
The Fuel Line
Today I received a 25 foot coil of copper/nickel 5/16th fuel line along with the needed fittings to attach the fuel line to the carb. This is the same tubing I used on the brake and clutch systems (just a different size) and it’s a pleasure to work with. The 3/16th tubing is flexible enough to be bent back to back 180 degree bends (with a one inch bend diameter so the tube now looks like the letter S) with no kinking, flattening or any defects at all. Jeeze, I really like working with this stuff. Check out the fedhillusa.com website, it’s amazing. This latest batch of tubing should be more than enough to do all the fuel delivery and return lines with enough left over to cover any mistakes I might make along the way.
Modifying the Skid Plates
The local metal fabrication shop cut and bent an eighth inch thick skidplate for the V6 oil pan. After drilling a one inch diameter hole for the drain plug (that’s the only size hole saw I have) I hand filed the hole to one and a half inch diameter before welding the skid plate to the pan.
I had to do a little work on the transmission/transfercase skid plate also. When I welded up the exhaust assembly I included a joint below the tranny so the right exhaust pipe could be removed without touching the left side or the rest of the exhaust system. What I forgot to figure in was the thickness of the clamp holding the exhaust pipes together at this joint so the skid plate had to be slotted to allow the clamp to protrude slightly. To prevent rock damage (like I’m going to go bashing this thing thru boulders) I welded up a small deflector from eighth inch steel and welded this to the skid plate over the slot. Just another little OOPSIE which needed to be worked around.
Mark’s Rear Seat Solution for his Jeepster
Mark recently hit the 1 year anniversary with “Her Royal Highness” (That would be his Jeepster, not his wife). He’s been updating her throughout the year. Here he comments on his rear seat find.
Mark writes, “Halloween night marks the end of Year one for the 49 Jeepster I named “Her Royal Highness”. I’m a middle-age crazy rookie that knew very little about rebuilding an auto when I started (some strong arguments that I still don’t) [ed note: some days, I don’t feel to smart either!]. I decided to leave the aged patina Windsor green paint for now because there’s very little rust and it doesn’t look that bad. She’s a great runner and a fine Sunday truck.
I wanted to put in tan leather buckets to improve comfort and to be able to call her the original “King Ranch Willys”. A few days ago I saw an ad for 1999 Mitsubishi Eclipse seats, ‘$20 bucks and wife wants them out of my garage’. So, I went over to check out the seats. I discovered the buckets were trash, but the back was practically new. I bought it and carted it home.
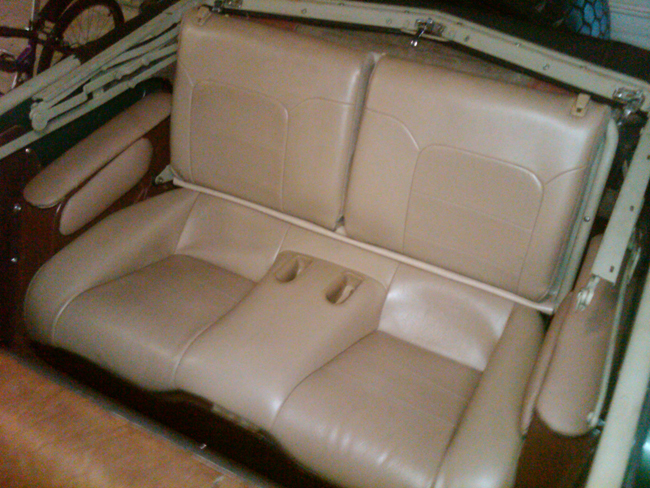
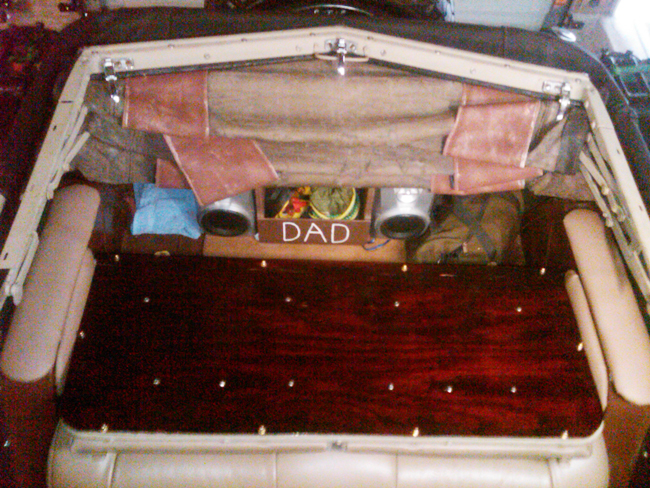
Wouldn’t you know, that back seat fit into the back of the Jeepster like it always belonged! A couple of cleats, some zip ties, a little leather remnant from the fabric store over some 3/8″ ply and here you go. The seat backs fit on the original back frame with a little ingenuity. Folded down it makes for a convenient map table. The front buckets are still in my cross hairs and they will be found eventually, but who knew that backseat would fit so nicely, 50 years later!”
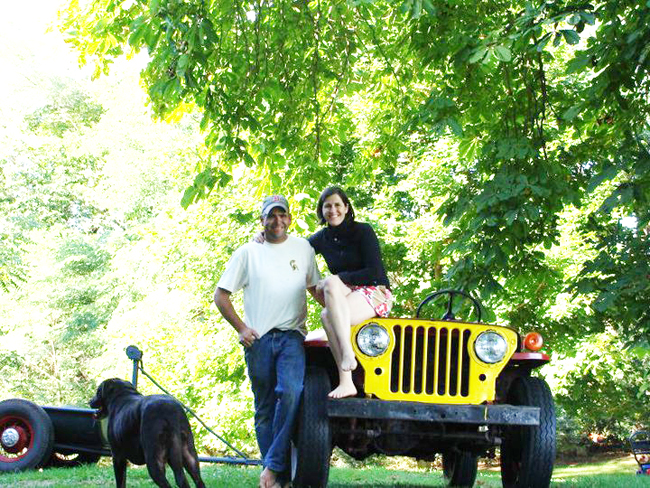
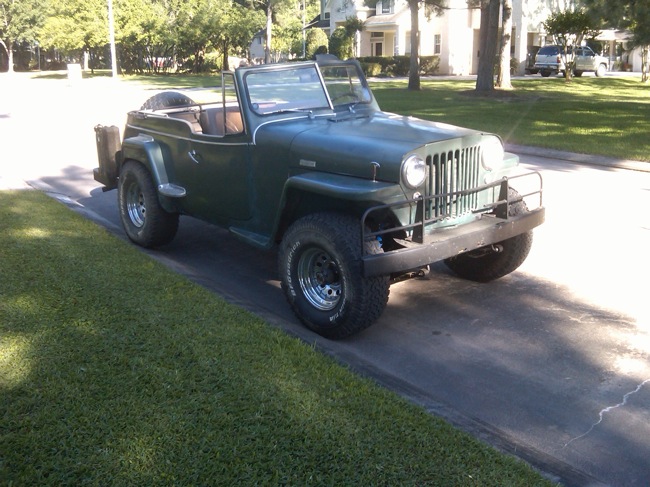
Here’s a reminder of “Her Royal Highness”
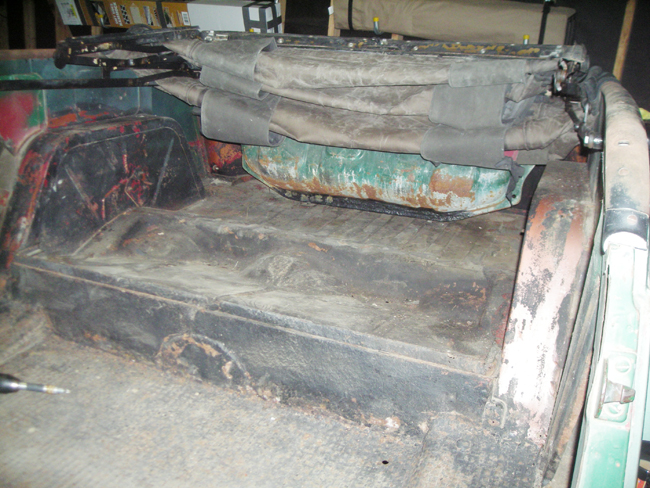
Here’s what it looks like with no seat:
Here’s the seat installed:
Here’s the seat folded down:
Pete’s got his Wagon on the Road (Well, at least the trail)
 Pete, who operates the OldWillysForum, contacted me the other day to let me know he lives just down the road from me near Hailey, Idaho. When not working on cars, Pete designs beautiful homes. Check them out at andersonarc.com!
Pete and his kids have been doing some work on a wagon that they recently made road worthy. He shared a video with me that you can view below. It’s always great to see a wagon on the trail, but the best part of the video are the short, funny comments made by his son.
Buttercup — A True Love Story
Buttercup has come home again. Here is the story as told by Buttercup’s current steward.
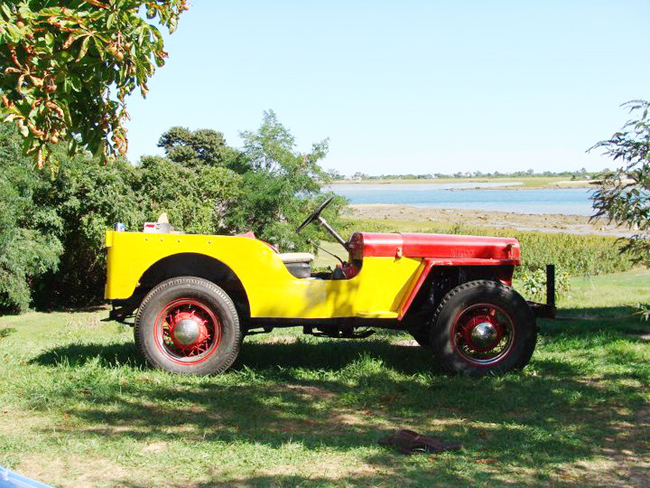
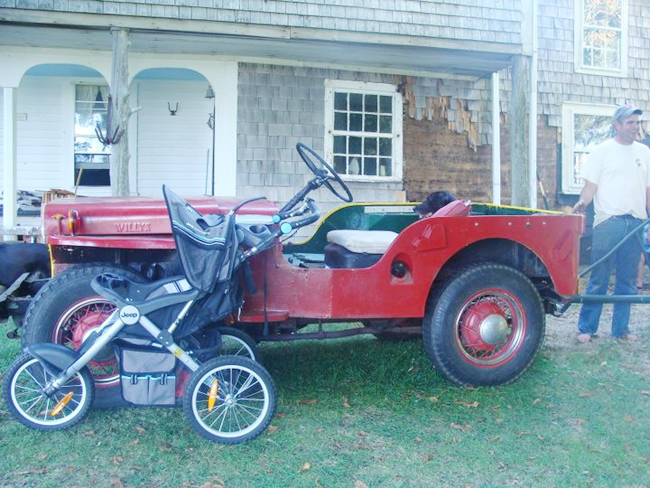
William writes, “I would like to introduce you to “BUTTERCUP” a 1946 CJ2A. My father “Skip” Taylor bought her in 1973 for $150.00 and brought her out to our family house on Clarks Island in Plymouth Mass.
Out there he put plywood floors in, added yellow paint(out of a can) and named her Buttercup after a cow that was once on the property. For 20 years she was our tractor and stuff hauler. I learned to drive her when I was 10. Sometime in the 80’s Skip added the wire wheels and had a trailer built. By 1990 it was decided that she was getting tired and was replaced by a John Deer tractor.
After a while she was sold to a gentleman with the agreement that my father would get “right of first refusal” if she was ever put up for sale. Well, 3 winters ago that man kept his word and sold Buttercup (painted red) back to us with new floors and a rebuilt original motor.
She is now back on the island, going back together once again. She has new brakes, a tune up, the wire wheels(off a 35 ford) and her bright yellow paint (out of a can). Buttercup is running great and driving the property cleaning up branches and taking the kids out for rides. She is a part of our family and hope to keep her going for another sixty years.”
I asked William about the wire wheels and he said his father had the centers of some jeep rims cut out and welded into the 35 ford rims. Not road safe but good for an island.
Here are some pics of Buttercup. Thanks for sharing William!
Kevin Paints His Wagon — With some Helpers
Kevin painted his wagon with some unusual help …
Kevin writes, “I Finally got good help on my ’62 Willys Wagon rebuild…it didn’t hurt either to wear my “Big Daddy Roth” – Rat Fink t-shirt for inspirational artistic talents…and yes, in tradition of an old time build, I’m painting it outdoors.”
Gerald and his brother’s rebuilt Mighty Mite
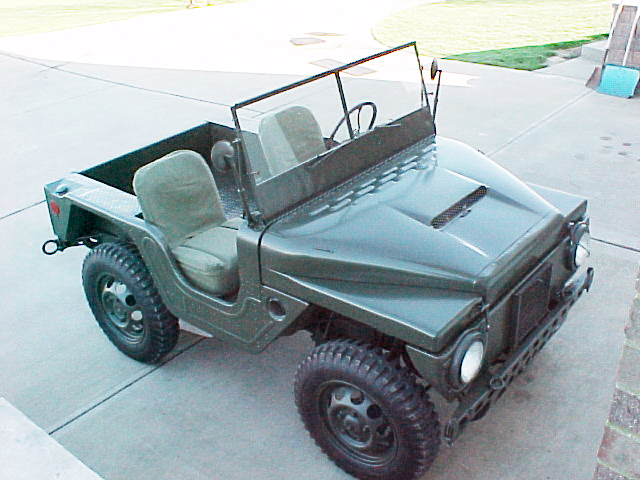
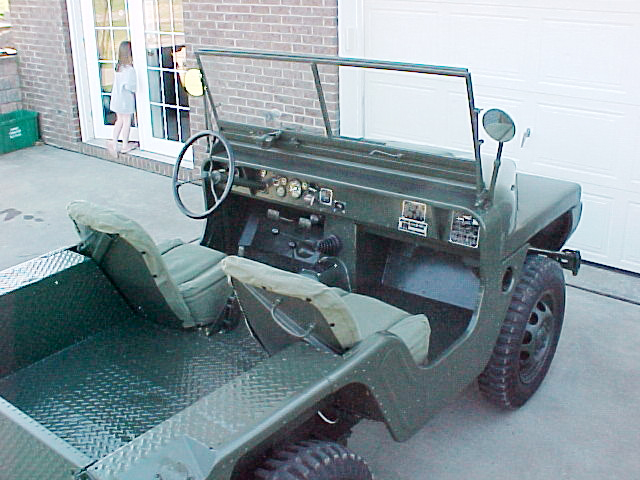
Gerald and I were exchanges some emails and he mentioned that his brother and he rebuilt a Mitey Mite a few years back. I think he was trying to inspire me with the Champs? Here are a few pics.
Gerald wrote, “My brother did a Mity Mite a few years back. Toughest project we ever worked on. It was a basket case literally.”
Buck Completes His Hunting Jeep
There have been some outstanding eWillys reporters filing stories from all areas of world, but none were more intrepid nor braver than the Head of the eWillys Bureau in Afghanistan, Lt. Buck. His report from the front lines (or close enough) on Willys in a field in May of 2009 from Afghanistan marked a gold standard in reporting.
The fact is, rumor has it he even joined the Army to get there, because the penny pinchers at eWillys corporate wouldn’t buy him a plane ticket. Now that’s dedication!
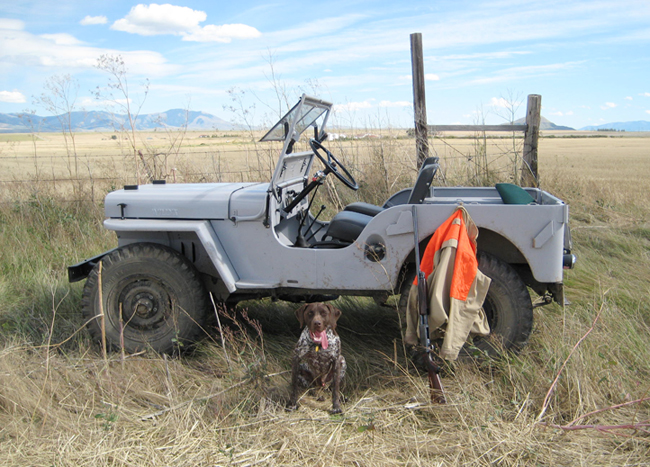
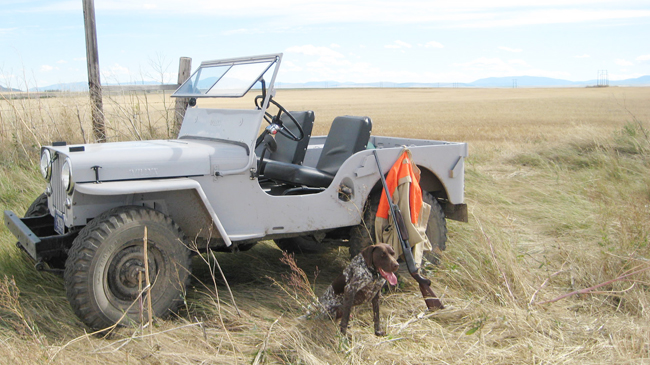
I am extremely happy to report that Buck made it safely back to Montana and, I hope, has found some well deserved peace. Since he’s been home, he managed to complete his CJ-2A build, which he put together as a vehicle to explore the central Montana plains and do some hunting. What better use for a jeep is there than that! Congrats and Thanks Buck!
Buck writes, “Well, I’m happy to say that I’m back home and my jeep is finally done after 10 years of on again off again work. Attached are photos of my dog Uncas and me out hunting grouse in the vast wheat fields of central Montana. I never wanted a museum piece, but a functional piece of history.”
Kim’s LRDG S.A.S. Willys
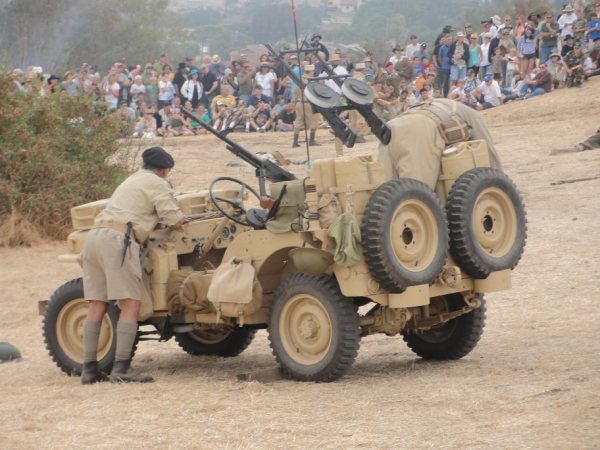
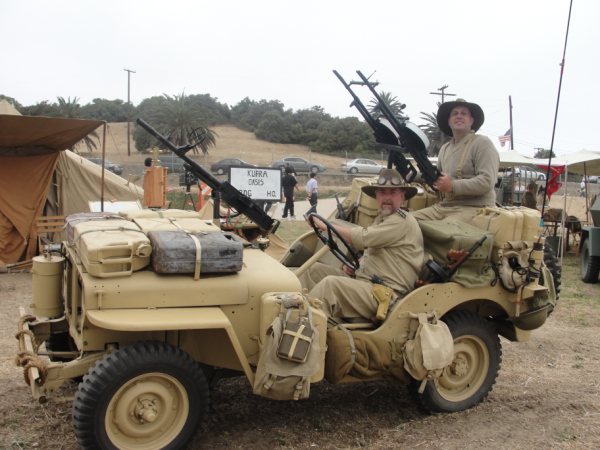
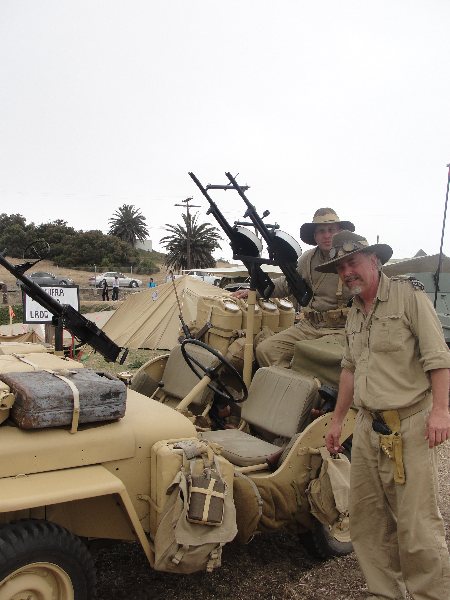
I’ve seen them in old pictures, but Kim is the first owner of a Long Range Desert Group S.A.S. Willys to contact me and share pics. Of course, you can’t but help but think of the old Rat Patrol shows when you see these vehicles. After reading through the LRDG.org website, one of the things I’ve learned is that there was plenty of thought, research and recon work that went into the supplies these jeeps and truck would need to carry with them as they sailed long, desolate seas of sand.
Kim writes, “The jeep I bought is mechanically perfect. The previous owner put all his money into the motor, brakes and trans. The body on my jeep needs some help and eventually I will replace the rear and floor sections of the tub as there is some rust. Fortunately, It came to me painted in the proper color and had many extras including a Bagnold sun compass.
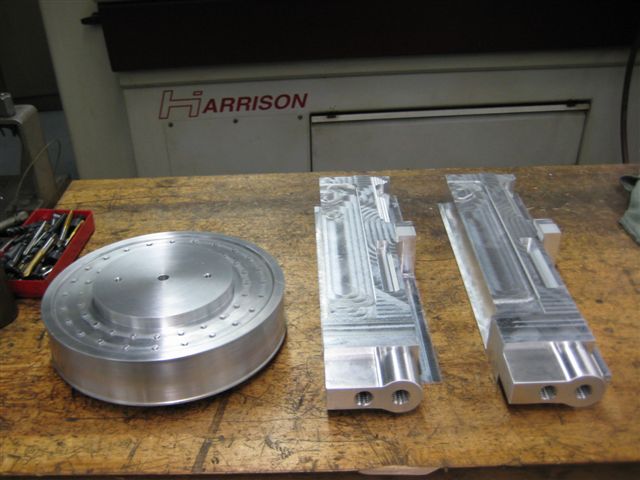
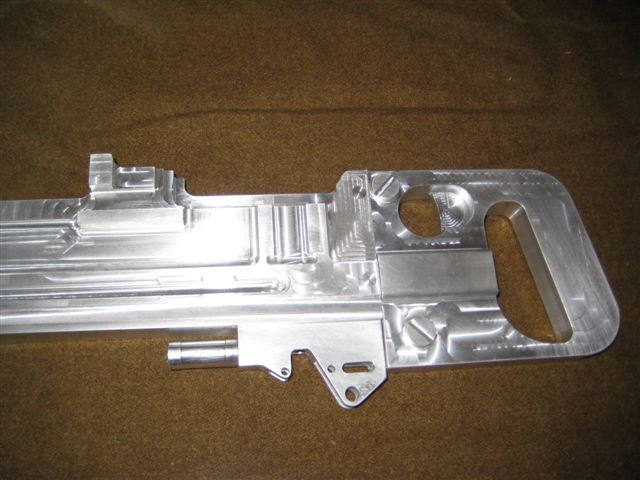
As a special addition to this jeep, I re-built a WW2 Italian de-milled M37 machine gun and converted it into a gas gun M.G. simulator. It sounds like a M.G. but no blanks are needed and it can not shoot a projectile. That is mounted on the front cowling. As I have been a machinist and tool maker for 30 years I machined a set of Twin Vickers machine guns out of aluminum for the rear mount. These are strictly dummies with no moving parts.
I did not buy this jeep to be a Trailer Queen. This is a re-enactment jeep and as far as I am concerned it looks like it just got back from Kufra Oasis and that is exactly what I want. My ultimate dream is to have 2 WW2 jeeps. The S.A.S (which is not street legal) and an American OD jeep that is licensed and ready to drive to work.”
And a couple pics of the Twin Vickers Kim made. In this pic, some basic outlines and contours have been created in the aluminum stock.
Here you can see many more details are apparent.
Colin’s 1952 CJ-3A Project
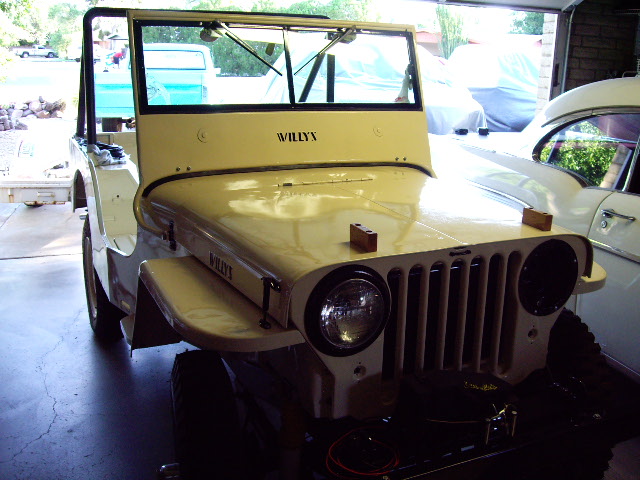 Another project Colin wanted to share with readers was this CJ-3A he restored. As I understand it, this was his project before he purchased this DJ-3A Surrey. After purchasing the Surrey, he turned the CJ-3A project over to his son who seems to be doing just fine with it.
Colin writes, “Here are some photos of our CJ3A project. It is actually by serial number a 1952, but wasn’t sold until 1953, so was titled as a 53 (Pretty typical of Willys products). I bought it in late 2006 and it hadn’t run in about 6 years. After getting it running, I decided to do a body off restoration on it. The mechanicals were pretty good, with a new engine with less than 500 miles on it, and it had been upgraded to 12 volts and larger 11 inch brakes. It had a CJ2A windshield on it, which I prefer over the CJ3A style. It was yellow and my wife is not fond of yellow. I found the original Luzon Red paint underneath the dash, so decided to paint it Luzon Red to match the Luzon Red of our Jeepster. Work progressed and I took a break from it and in December 2009, I found the Surrey for sale. At that point, I couldn’t pass on the Surrey and our oldest son, Lee said he would take over the CJ3A, but he wasn’t going to paint it red. I had already powdercoated the wheels and put new NDT 600×16 tires on the rolling chassis. There was still some body work that needed to be done before painting. Lee finished up the bodywork and we got the paint done 3 weeks ago. We started putting it back together and now we only need to do some of the small details and the wiring to be done. The latest photos don’t give a true color, but it is sort of a Butternut yellow or beige.”
Jeff’s Fiberglass (Bobcat Body) Flattie
After seeing some of the posts about the old Desert Dog and Bobcat ads, Jeff dropped me a note saying he’s been enjoying the old ads and old pics as it reminds him of the busy Northwest days of jeep clubs, playdays and racing in the northwest. So, he forwarded me a pic of one of his jeeps (he also has a sand drag jeep listed below for sale).
He’s been nice enough to let me post it. I really love the creative paint job — I haven’t seen anything quite like it.
Jeff writes, “This bobcat jeep was bought back in 1983 as a project. It was a body and a HUGE pile of parts, to which I’m sure your readers can relate. Currently, it runs a 355 chev w/ ford toploader 4 speed, a dana 20 case, a ford 9inch w/ 35 spline summers axles spool nod case and 6.00 gears. The front is a gutted mdl 27 w/ a mustang rack. The cage is chromoly. The car weights 2250lbs w/o a driver.”
Colin’s ’48 Jeepster
As I mentioned yesterday, besides his grandkids mini-jeep, Colin has worked on several different Willys. Here’s his Jeepster that was featured a couple times in JP Magazine, specifically the June 2007 issue and the January 2008 issue.
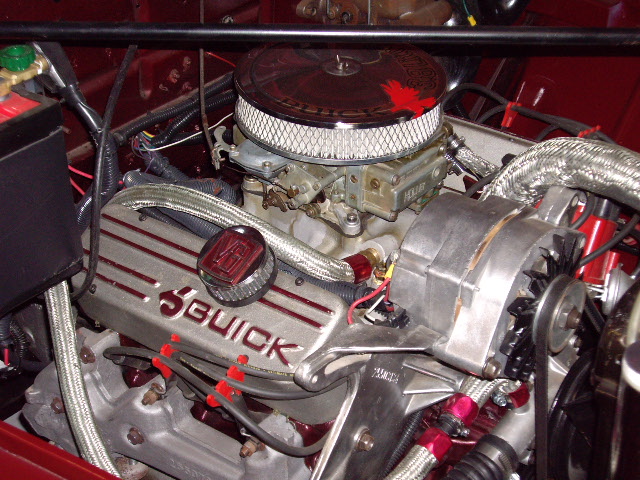
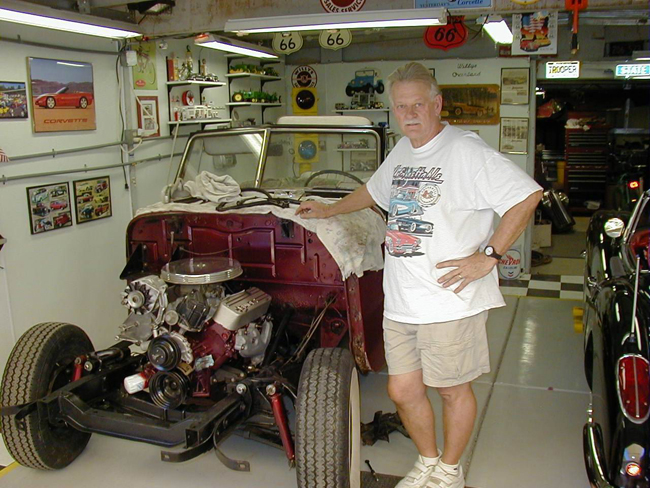
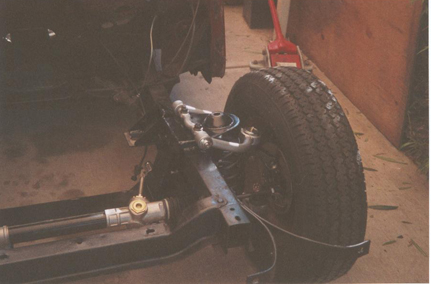
Colin writes, “Here are some photos of our 48 Jeepster. We have had this car for over 33 years and when we bought it, it had a non running Studebaker Champion 6 engine in it. Once we got it running and back in decent visual and mechanical condition, we drove it that way for many years. Around 1990, I stored it in our garage and worked on other vehicles and a house remodeling project (a happy wife makes for a happy home!). I did our Corvette restoration from 1994 until 1998. After I retired in 2003, I began putting ideas together about re-doing the Jeepster. I wanted a car that looked original on the outside, which it did already, but with an improved drivetrain and suspension under it to keep up with Phoenix area traffic. After a lot of research, I decided a Buick V6 was the way to go. I found a freshly rebuilt (still in the plastic) 1982 Buick 231 even fire V6 for a very reasonable price. I pulled the front sheet metal off the Jeepster and got to work. With an updated engine going into it, I chose to put a Mustang II front end kit with tubular A-arms, Ford disc brake rotors (I wanted to use stock Jeepster wheels, hubcaps and trim rings), and rack and pinion steering into the chassis. A buddy of mine and I did the majority of the front end work in a weekend. I used a set of engine mounts from Novak Engineering in Utah and bolted the engine to a 1967 Muncie close ratio 4 speed that was in my parts bin. For the rear end, I found a 1969 Ford Mustang 8 inch with 2.79 gears. That rear end is a bolt in for any of the 46-63 Willys 2 wheel drive wagons, panel deliveries and the 48-51 Jeepsters. I also used a front sway bar and on the rear, a Willys Jeepster/station wagon sway bar. I did upgrade the Buick with a set of finned aluminum valve covers from TA Performance, a 4 bbl Holley 390 cfm carb from a 65 AMC 327 engine and dual exhausts. The end result is a Jeepster that runs great( 1750 rpm at 65-70 mph), gets excellent gas mileage(about 26 at 65 mph) and handles like a sports car(better than our Corvette!). All of this work was relatively easy, even though it took me a while.”
In this first pic you see both his Jeepster and the 1960 Surrey he purchased that can be seen here. Colin has been restoring the Surrey as well.
Builds: Mike’s Truck
Mike’s built a nice looking truck.
Mike writes, “This is my Baby. It took 3.5 years to build it was going to be a restore but it couldn’t be done. So I took a 1/2 ton chevy truck frame and narrowed and shorten it. I dropped in a 454 chevy and many other goodies. It is a show winner and a great off road toy.”
Here are a couple pics.
Some Updates …
For the Fourth of July, I celebrated by heading back to the formerly snow bound roads near Boise’ only ski area, Bogus Basin. As you can see in this pic, the snow is gone (see snow pics here), the mountains are now in bloom, and more progress was made. More on that tomorrow ….
A 1950 CJ-3A: Today, Darrel had to talk to me. So he stopped next to me, while I waited at a stop light, rolled down his window, and started asking me questions — what year was my jeep, who did my roll cage, and more …
Now, I had no idea who Darrel was. However, in the time it took for the stop light to finally change colors, Darrel had explained through his passenger side window that he A) liked what I had built, B) had a 1950 CJ-3A, C) wanted his jeep rebuilt for his daughter, D) had his jeep nearby, and E) wanted me to follow him there. If I learned that much at a stop light, I wondered how much I would learn about him once we stopped to see his jeep.
True to his word, he lived very close and had a 1950 CJ-3A that needed some work — hadn’t been run in 15 years. It had a V-8 conversion, solid body, rotted top and plenty of potential. And, to my surprise, based on my jeep, he asked me to do the work (and will pay me). I don’t have pics of this just yet. I’ll share more about this if we go forward with the project.
Brian wrote to me late last week to share a sad tale. As a part of the continued testing with his new build, he learned the hard way what happens if the oil in the front pumpkin housing gets too low AND the 4wd somehow gets accidentally shifted into gear (how that happened is still a mystery to him). The result: his front pinion started freezing up, resulting in some ugly sounds and a twisted driveline. See the pics to the right.
The good news is that everything else continues to behave well.
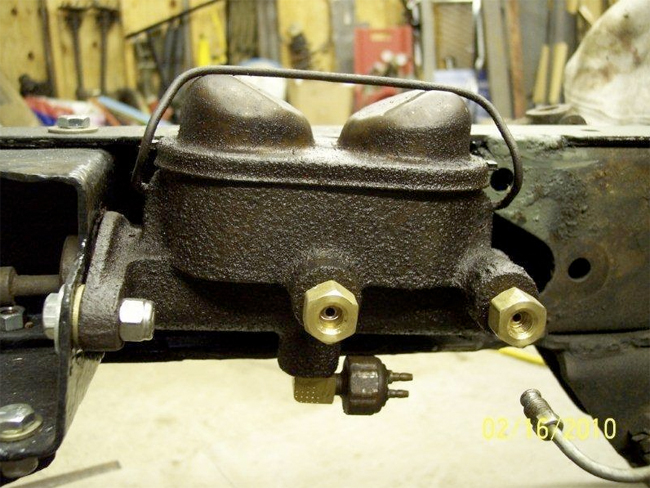
Upgrading a Single Master Cylinder into a Dual set up
A reader ask me about replacing the stock single brake master cylinder, found on many early jeeps, for a dual master cylinder. Can it be done? It turns out there a variety of threads and pages on this alteration. Here are some of the links I found if you are interested in this mod.
1) http://www.thecj2apage.com/forums/dual-master-cylinder_topic14193.html
2) http://www.earlycj5.com/forums/showthread.php?t=45099
3) http://cj3b.info/Tech/BrakesDualMaster.html
4) Herm’s conversion kit: http://www.hermtheoverdriveguy.com/id2_dual_reservoir_master_cylinder.htm
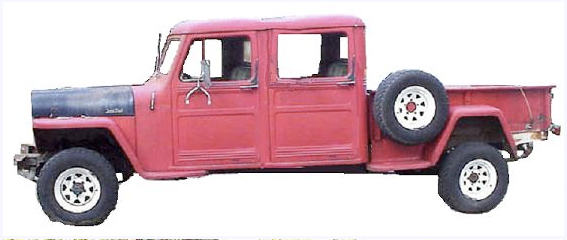
A Project Idea – 4 Door Willys Truck
I ran across this thread today at alaska4x4network.com. The designer wanted to combine a couple trucks into a four door truck. He photoshopped the mockup together below. I think it would make a good looking project.
Gerald’s First Jeep — a $60 Commando
A reader had mentioned at some point about a modification that involved replacing the front clip of a Commando with a CJ-5 front clip. I asked for pictures and Gerald produced some from the first jeep he owned. I really like the looks of the CJ-5 front clip on it.
He writes, “Since you are talking Jeepsters, this was my first ride. I bought it for 60 bucks in October of 1979. That means it was only 11 years old; yet look how rough it was. Compare that to a 99 vehicle today. Vehicles have certainly improved. Anyway, I though I was the shit at 14 with my own jeep.”
We got her going with another axle, tiger hair and spray can red from K-Mart. Dad would take it to the trail and then I could drive.
Then at 18 came the lift, new body panels and paint. I had to knock the corners off the grille and put a CJ-5 Hood on it.
Builds: Brian Wires His CJ-3B
Brian has provided a very thorough look at his approach to wiring his CJ-3B. My only wish is that he had written this BEFORE I had wired my Jeep, because I would have created a mockup dash like he did. Many thanks Brian!
Brian writes, I had a major setback in my 3b project when I damaged the valve train on my CPI engine, stopping oil from getting to the lifters. So, I had to swap engines before I could really start my test-drive shake-down period. As part of my swap, I chose to go with the TBI 4.3L V6. What really hurt was that I almost had the wiring complete for a CPI engine, but I knew what worked for the CPI would not work for the TBI engine. This meant a major layout change was in order.
If I had to label this part of my build I would have to call it “The things Painless does not want you to know”, because I feel I was able to save well over $1000.00 by utilizing a free wiring harness I pulled from a Blazer I junked. By working with the stock harness, I was able to use fuel pump relays and other items that help me avoid the nickel and dime effect that can add up to big bucks. I also learned some sort-cuts and where to get OEM parts to help complete the job correctly. So, here’s my adventure ….
LAYING OUT THE WIRING
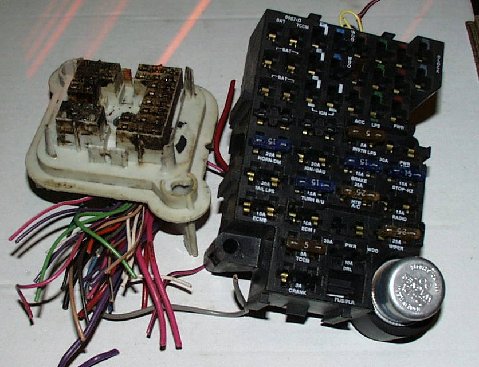
Because the limited amount of space under the dash of my 3b, I had to move things around from the stock location in the Blazer. Fortunately, the harness I salvaged had enough wire to do this. However, trying to rewire and do everything I needed to do underneath the dash wasn’t an option. So, I made a mockup of the dash out of wood that allowed me to easily organize, size and create a well designed electrical layout.

Fuse box firewall bulkhead connector assembly used for mockup.
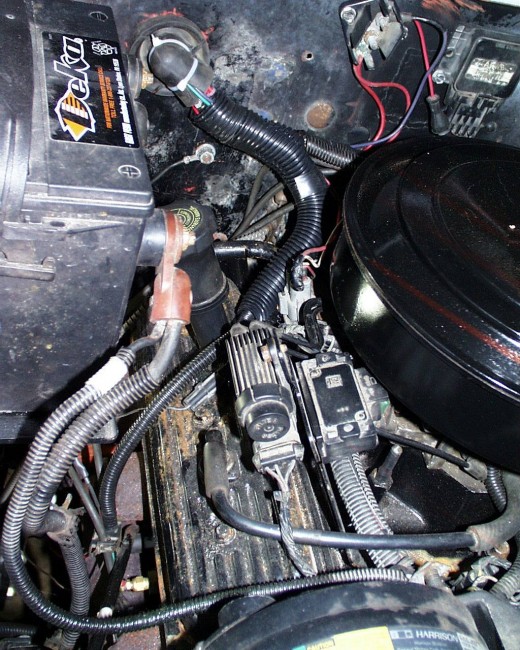
The harness enters the engine space in the same place as the Blazer.Note the valve covers, anyone seeing a nice set of center bolt aluminum valve covers for a 4.3 let me know.
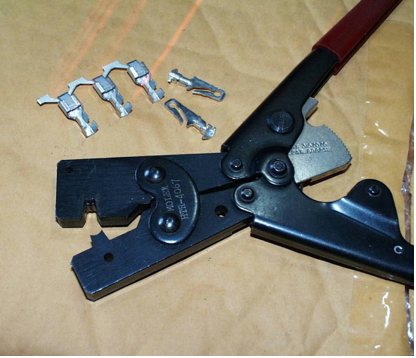
THE CRIMPING TOOL
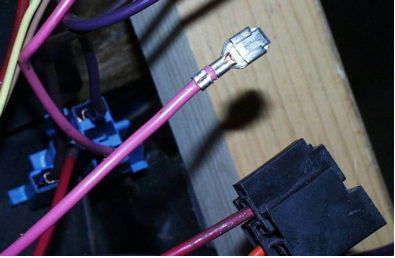
One important goal of mine was to shorten some of the wires and avoid some bird nests of stock wire under the dash. Doing some research I discovered GM uses Packard 56, 58 ,59 and Delphi Metri-pack connectors/terminals that you can buy at PCS Connectors. The advantage to using connectors and terminals “to shorten” is pretty obvious: you eliminate the potential of a splice failure; also, it looks much cleaner.
Having the right tool for wire splicing and terminal connectors is a key. I contacted a small company I was an engineer for and borrowed a ratcheting-crimping tool that you can see below. It took only three tries to get the crimping technique mastered, making my wiring appear professional. (crimping tools from PCS)
Read the entire post by clicking on the link below:
Paul finds a MB with an unusual Ford Cab Mod
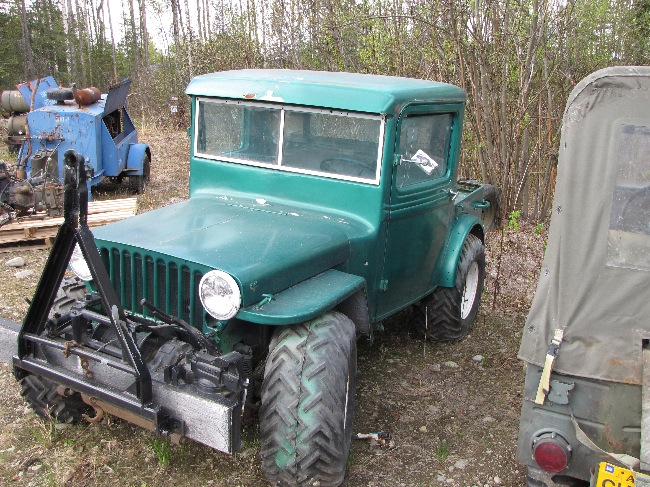
Paul writes that the days are getting longer and the temperatures warmer, allowing him to check in on friends across Alaska. While looking over one collection recently, he spotted this unusually well done transformation. Those terra tires sure looking in good condition, too! Paul, be sure to thank your friend for sharing this with us!
Paul writes, “I’ll try to remember what he told me concerning the construction / modification of this Jeep but it appears a Ford pickup cab was grafted onto the Jeep body, the four cylinder engine was replaced with a V8, Scout axles replaced the original axles and I think he said the transmission was replaced with a T90 along with numerous other modifications but you can see for yourself when you check out the pictures. With the power of the V8 this little Jeep can quickly dig holes with the tires while in low range and gassing it just about makes the Jeep jump in high range…”
M-38 FireJeep @ Mississippi State University
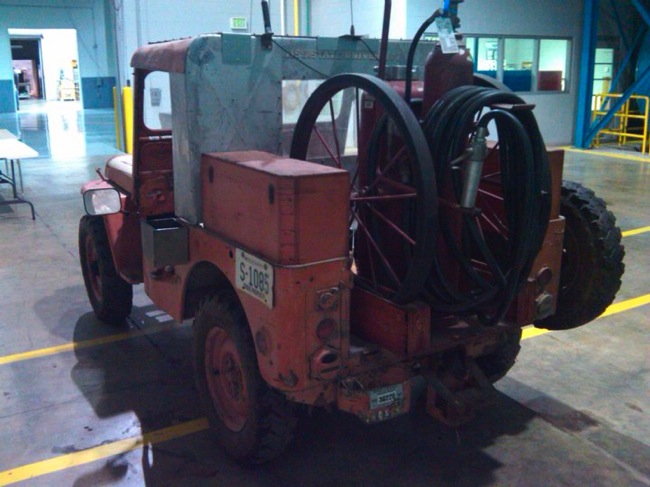
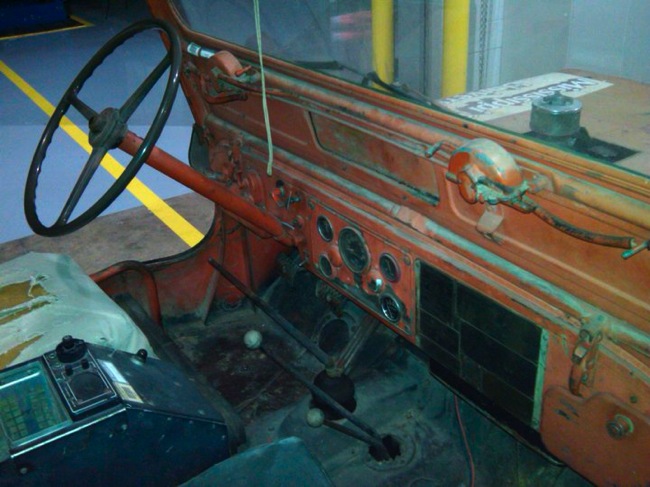
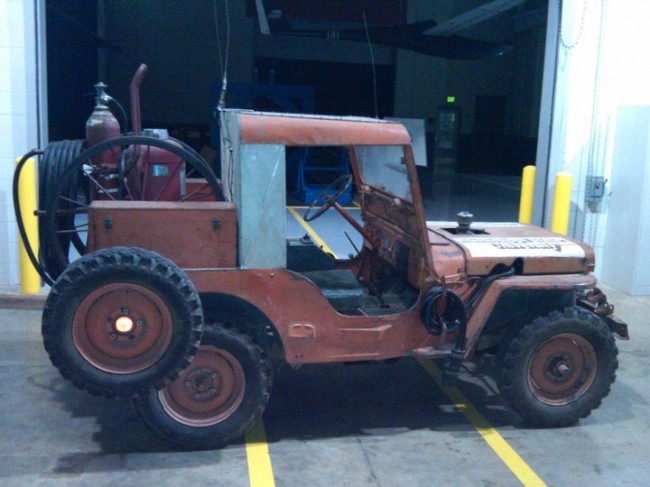 A student from Mississippi State University named Cliff contacted me yesterday. He’s in the Aerospace program and also employed at the Raspet Flight Research Lab. The lab owns and operates the M-38 Fire Jeep shown below. They have a problem with their jeep and need some help.
According to Cliff, the M-38 had developed a knock (after being loaned out temporarily), so Cliff and another co-worker tore the engine apart during some down time recently.
Cliff writes, “Here comes the bad news, once we got the motor on the stand and pulled the rod caps we find that the rod bearings on the 3rd and 4th cylinders have ground in to nothing, which was thought to be the case when a ton of metal shavings were found in the oil pan. The motor is not original to the jeep, it had been replaced in ’88 with an F-head and a hole cut in the hood to accommodate it, and seems to be a rebuilt engine because the crank has already been turned once. So here is the dilemma. The lab is low on money and is not wanting to pay a lot for repairs but many of us here would like to save the jeep from the scrap yard and return it to its duties as our fire truck. So I am here to ask for your help in saving this Jeep, we are in need of a new crank and badly need a new wiring harness and am asking for donations on these parts but am also willing to trade the entire F-head motor(which other then needing a new crank is in great shape) for a L-head motor.”
I responded to Cliff to see if I can get a little more information about this project and what else they might need (for example, bearings, seals, etc) to get this running again.
Unless someone wants to contact Cliff themselves (I’ll be happy to forward an addy) and provide assistance (maybe you live close or graduated from the Mississippi State or for some other reason), I will be happy to organize some help for Cliff and his project.
Here are some pics of the jeep before disassembly:
View more pics by clicking the link below —
Builds: Kurtis finds Ike and starts a restoration
In early April of 2010, Kurtis found a solid looking, stock 1950 CJ-3A named Ike that he plans to restore to off-the-dealer-floor condition. He’s built a website (http://kurtisfranklin.com/blog/) to chronicle his restoration adventures and recently provided some good details on a V-Cell Radiator.
Good luck on your restoration Kurtis; I think it will turn out well! Here’s a pic of Ike:
Builds: Phase 1 of “Her Royal Highness” Complete
Late last year Mark took the plunge and bought himself a Jeepster project. After about 6 months, he has completed phase 1 of the project, has learned his Willys isn’t 100% Willys, and, as you can see, is enjoying his efforts now that Spring is fully here. Thanks for sharing!
Mark writes, “I completed phase one last night when I closed the gaping hole in the firewall caused by an incomplete Chevy V8 conversion long long ago, so now my Jeepster may be eligible to be honored on your site. I was going to name her “Cheapster Jeepster” due to my desire to spend less money than a new vehicle, but after falling in love with my Willys I christened it “Her Royal Highness” and I’ve still only got $4200 bucks invested so far. I got her up to 60mph and drove 75 miles straight with no problems.
Purchased her on Halloween Day 2009 and quickly found out she wasn’t all Willys. She’s a ’48 Jeepster body set on a ’49 4wd Station Wagon chassis & floorboard. It has got a 1956 Chevy 265 V8, Lockheed hydraulic clutch, 1955 Ford F-100 rear brakes and MC, John Deere tractor fuel pump and a Caterpillar temp gauge. The gauge cluster is from a M38 and the gas tank, mounted behind the back seat, is from a 1958 Dodge pickup. And those are just the parts I’ve been able to identify so far.
Phase 1 seemed like a simple task: Start, Stop and roll down the road without leaking out all its fluids, make her safe and legal and do all this without knowing jack about restoring a 60 year old automobile. It’s been a lot of fun and a real stress reliever for me.
-new complete brake system
-new complete suspension front & back
-new fuel line setup
-new wireing harness and firewall rebuild
-clean & paint interior
-fluid change and tuneup
Oh, and of course phase 1 couldn’t be complete without…….cup holders.
Much thanks to your site, I get lot’s of great ideas looking at all the other builds you profile and just knowing I’m not the only crazy, insane Willys addict gives me great comfort. Although I’ve seen other Jeepster 4wd conversions on your site I haven’t seen one that used another Willys to make the jump. I’ll keep you posted on Phase II (Body/interior & drive train improvements).”
Builds: Diego’s 1946 CJ-2A
Diego describes himself as a ‘new willys lover’ who discovered a CJ-2A project on eWillys that he just had to have — a clear sign that he has been overcome with the damned ‘Willys Sickness’.
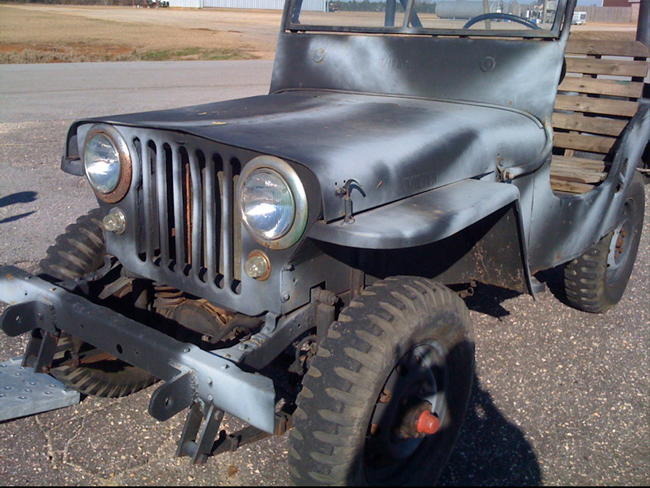
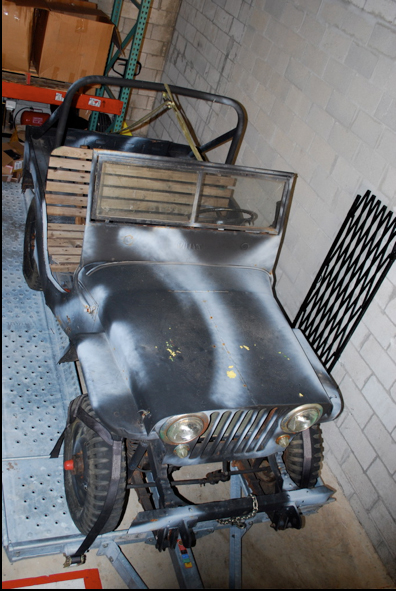
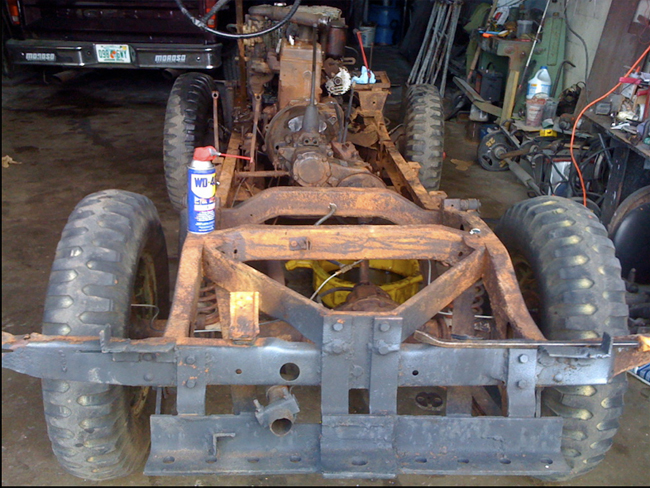
Despite the severity of his illness, which he has shaken off with bravado, Diego has made substantial progress with a project jeep he spotted on ewillys. As you can see in the first couple of images, at sometime in this jeep’s life an owner felt they wanted to combine the starkness of a jeep with the peacefulness of a natural setting, so it was only logical to turn the cockpit into a park bench. I can’t imagine that made the ride any softer; maybe they had a really padded bottom?
One other unusual change was the additional coil springs between the axles and the frame and all four corners, which I’m sure made the ride all that more stiff! I can’t remember ever seeing that modification.
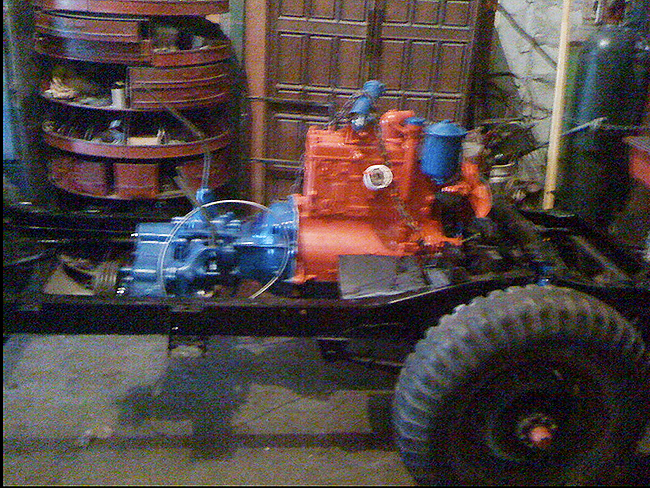
Anyway, Diego’s turning this back into a real jeep and he has made good progress! Btw, if anyone has any experience with titling Jeeps in Florida, he’d be happy to get some advice as he only has a bill of sale at the moment, though he does have the serial number.
Before:
In Progress:
And now (it’s a little blurry, but you get the point):
It took a decade, but George saves a Willys Wagon
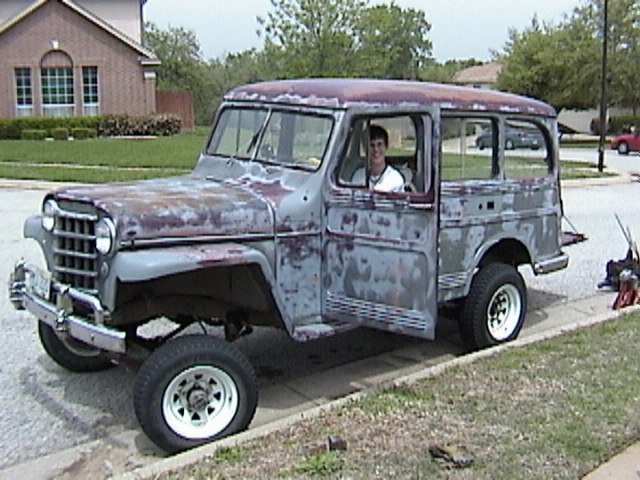
Every now and then a reader sends me a picture of an old willys they want to buy and asks my opinion. Had George sent me a picture of the Wagon he purchased years ago, I would have said, “I think we can find you something else”.
However, George wasn’t swayed by his purchase and spent about a decade raising kids, working, and using his extra time to slowly save his Willys.
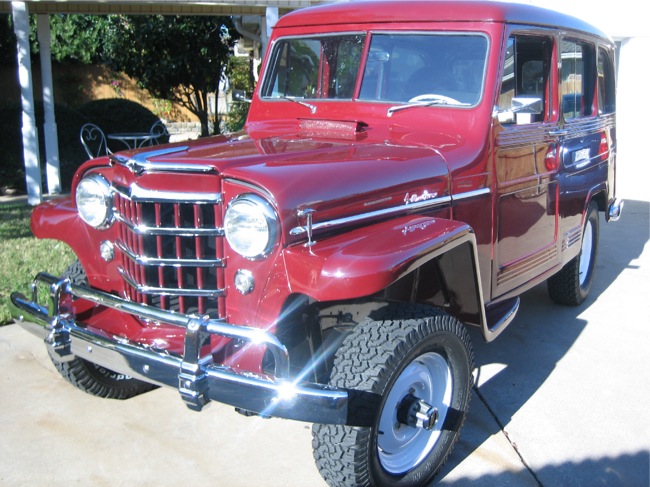
George writes, “My wife tells me I have Willys on the brain – hey what can I say! This Wagon is all original with the exception of possibly some extra chrome on the grill. The grill inserts were chrome plated when I purchased the wagon, so I figured I would put it back like I found it. Everything was rebuilt, including the front and rear ends. I wish now that I would have changed the gearing a bit. I think it is a 5.38:1. This thing has a mean granny gear! Once I get all the small oil leaks fixed I’ll invest in OD.”
He has every right to be proud of his efforts, because out of an awkward, rough wagon he built a beauty. For his next project, George is looking for a deal on a solid 1953 CJ-3A. If you know of one in the Texas area, let him know!
Nice work George and thanks for sharing your story and pics! Here is a before and an after pic:


