FC-Tour-Jeep-Build Research Archives

To Top

FC Tour Jeep Transfer Case Shifter Update

• CATEGORIES: Builds, Features • TAGS: This site contains affiliate links for which I may be compensated.

Now that I have the longer, six foot cable, I had a chance to continue with the transfer case shifter. The bracket that was provided by JB Customs, caused the shifter cable to run into the engine, which didn’t seem like a valid strategy, so I roughly calculated the angle, then made two cuts into the aluminum bracket. This allowed me to re-mount the bracket and then bend the bracket into the right position, but maintain the correct bracket-end distance.

Here are two pics of the original bracket:

2024-04-24-4wd-shifter6

2024-04-24-4wd-shifter7

This pic shows one of the two cuts plus the new angle. Even with that small bit of metal holding up the bracket, the shifter could easily shift through the gears. So, next I’ll repair that gap.

2024-04-24-4wd-shifter5

Here you can see how the cable angles upward, the veers toward the driver’s side. I haven’t determined where I’ll be securing the cable.

2024-04-24-4wd-shifter4The shift boot needs to be reattached under the bezel. The bezel is the original bezel with the colorful surface sanded, which turned out to be exactly what I wanted. I’ve painted it red since this pic was taken.

2024-04-24-4wd-shifter2

Here’s the shifter all the way forward. It’s surprisingly (to me anyway) easy to shift.

2024-04-24-4wd-shifter3

Next up I was going to build the final parts for the transmission oil cooler and fan bracket, but I have misplaced a couple pieces that I created and now can’t find them. So, I’ll work on the 1.5″ gauges next. Then, the gas pedal.


To Top

FC Tour Jeep: Steering Progress

• CATEGORIES: Features • TAGS: This site contains affiliate links for which I may be compensated.

I haven’t had much time for jeep play, as the property, cows and gardens have required and will require a great deal of my attention over the next week. Next weekend we will be welcoming two additional 1000lb steerings that get slaughtered in August or Sept (hopefully), while our three young heifers need to be moved to the neighbor’s pasture where they will spend the summer bulking up for slaughter (or sale) next fall. And, so much more!

So, there will be limited, if any, updates for the upcoming week. I’d say I’m taking a vacation week, but it won’t be much of a vacation!

As for the steering, I welded the floor notch into the floor cover and welded a shelf to the frame for the heim joint. I still need to drill the holes for each of the shaft couplers, get a stock rubber replacement boot for the Rack and Pinion joint, and paint some of the parts, but otherwise the steering is ready to go. Once I get the stock seat installed, I’ll revisit the height of the steering wheel; I may need to shorten the steering column and shaft by a couple inches. But, that’s an easily done thing after everything is together.

2024-04-07-steering1

I have a plan for running these brake lines along the interior of the frame (not inside the frame), but I will likely wait to redo them until after I pull the cab. So, these lines will be clamped and more neatly run once the steering is in place.

What you see for the bracket holding the V-dog is a 3/8″ angle piece welded vertically to a 3/8″ thick horizontal angle piece held to the frame by three bolts that were already there. It’s a snug fit, but there’s just enough room to make it work.

2024-04-07-steering2

You can see some of the welds underneath the frame that need to be cleaned and reworded.

2024-04-07-steering3

I added a slot to the Heim Joint bracket because without it disassembly would be difficult.

2024-04-07-steering5

My longer transfercase cable should be here Monday or Tuesday, so the transfercase shifter will be the next install. Once that’s in place, I can install the new gauges and build the new transmission cooler bracket. All that will be followed (or coincide) with the new gas pedal setup based on the late 1960s VW bus. Then comes the e-brake and, finally, the wiring.

 
To Top

FC Tour Jeep Updates: The 4WD Shifter

• CATEGORIES: Features • TAGS: This site contains affiliate links for which I may be compensated.

Spring sprang for a few days this week, necessitating mowing, fertilizing, irrigation-de-wintering, and some other projects. but yesterday I got a chance to get a few more things figured out on the FC.

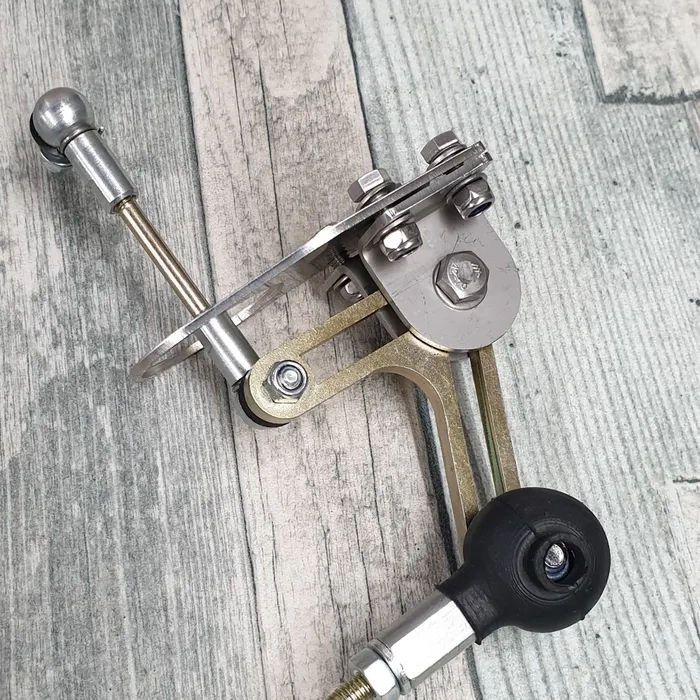
TRANSFERCASE SHIFTER:  I received the 4WD/Hi-Lo Range shifter from JB Customs, out of Salem, Oregon, which builds a variety of transfercase shifters and other products. I had ordered a setup for a NP231, hoping that I could modify it for the NP207. The quick answer is, yes, I was able to install and shift the transfercase, a big win! But, there were a few things I had to address along the way.

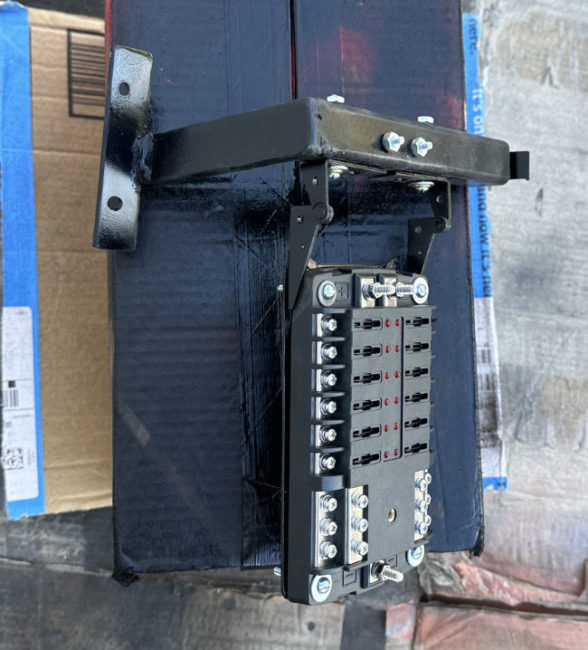
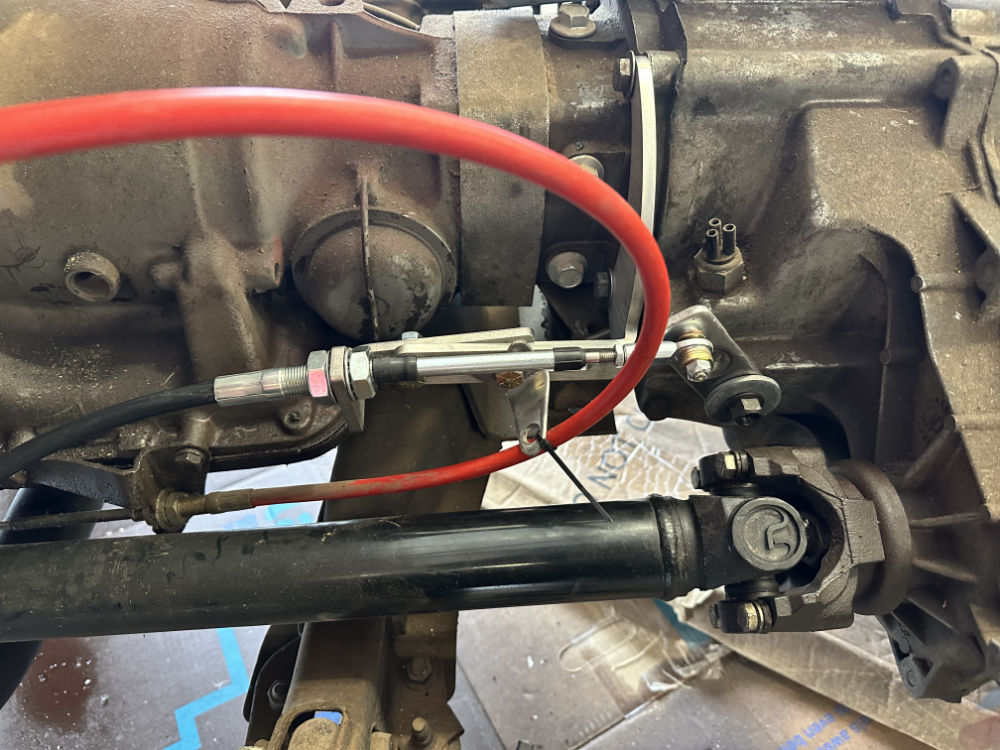
This pic shows the shifter, its cable, and the bracket for installing the cable in front of the shifter. The whole unit seems well built.

2024-04-04-4wd-lo-range-shifter1

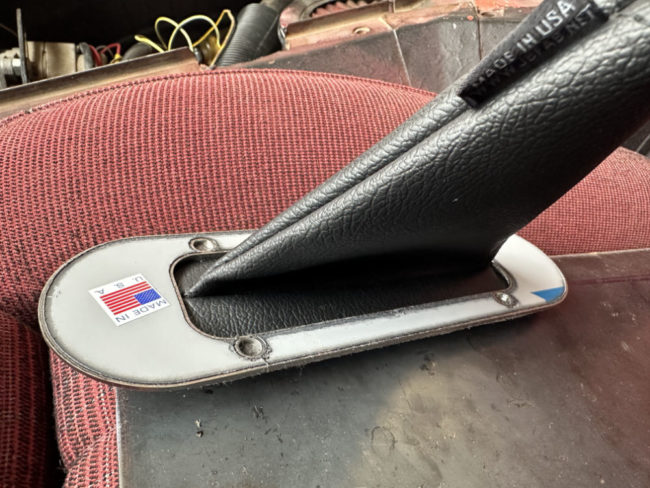
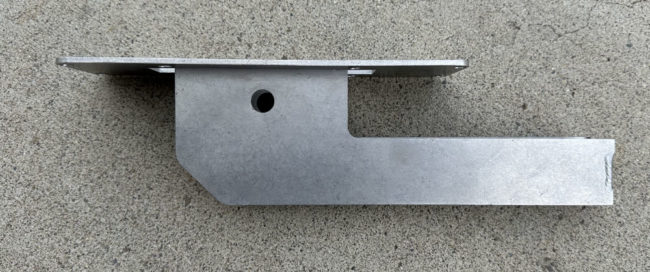
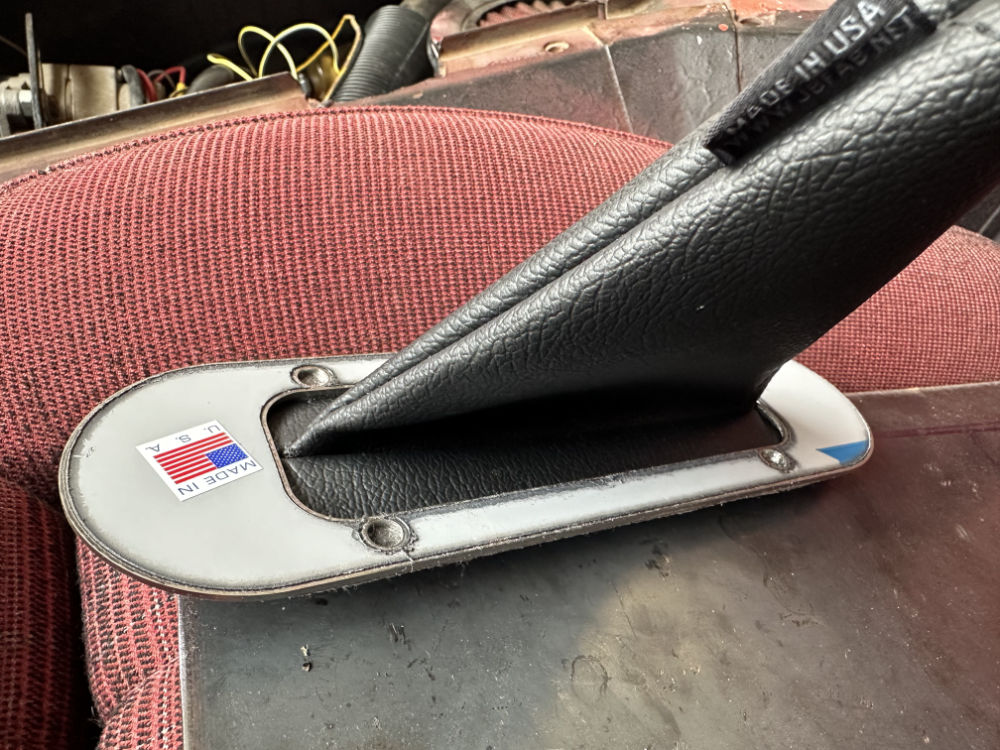
This is the cover plate for the shifter. You can see the rough black bead of glue(?) around the top edge. I’m not so impressed with this plate, but, for my needs, I will be making a squared off aluminum cover plate anyway, so this isn’t a big deal to me. My custom cover plate same dimensions as the automatic shifter top-piece. Not shown is the knob with the correct shifting pattern on it. However, I also plan to add some indicators on the custom cover-plate showing where 2WD, Neutral, 4WD and 4WD Lo positions are located (in case Ann or someone else is driving).

2024-04-04-4wd-lo-range-shifter3

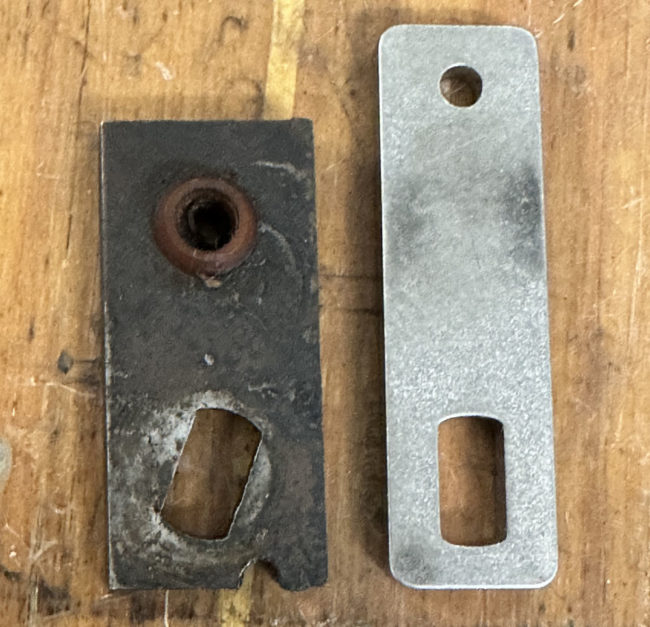
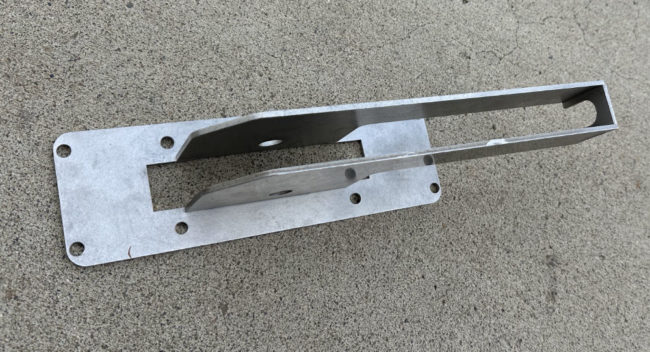
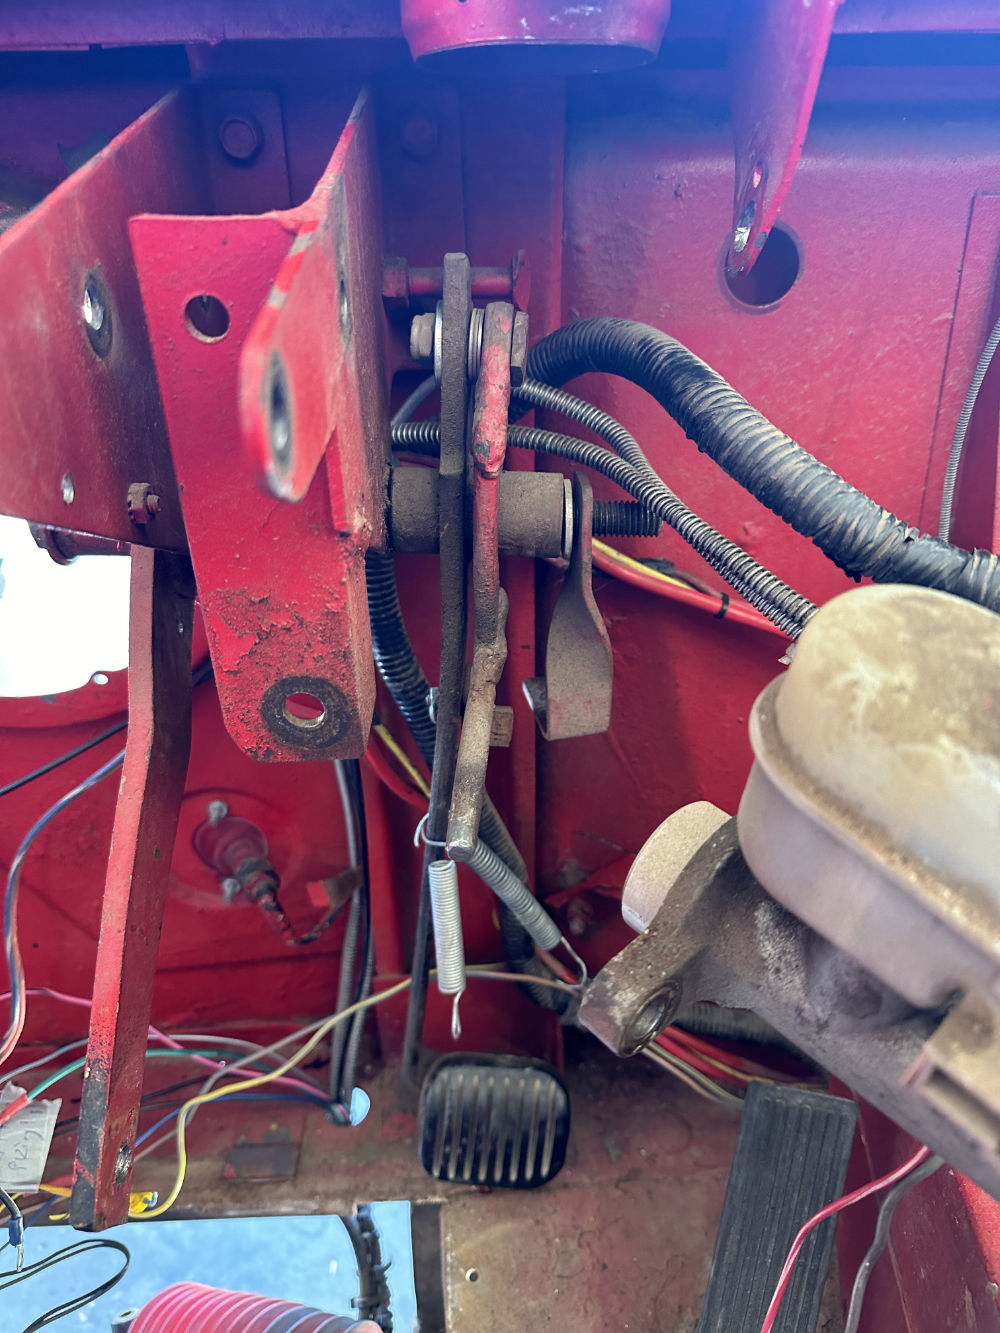
The first challenge I ran into was the difference between the shifter arm that is on the NP207 (on the left) and the shifter arm that came with the package (on the right). Obviously, there are several discrepancies. Even the “notch” width-size of the new arm was slightly smaller than the one I had. The fact the NP207 arm slot is angled seems an important aspect of the arm, too. So, I ended up lengthening the original by welding a piece of steel to the top[. It will work just fine (I forgot to take a pic of the finished part).

2024-04-04-4wd-lo-range-shifter2

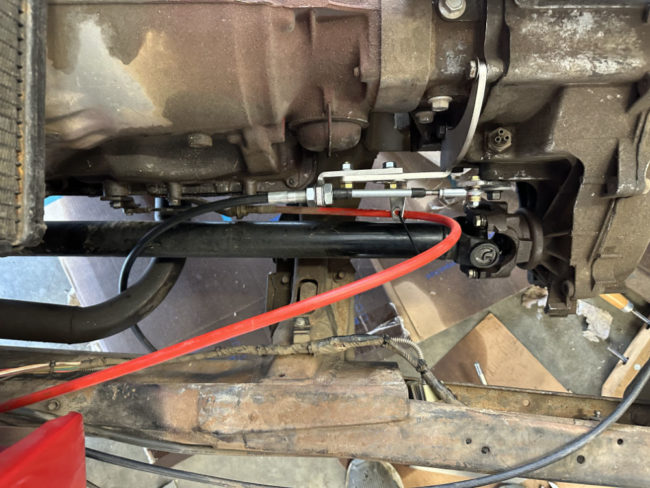
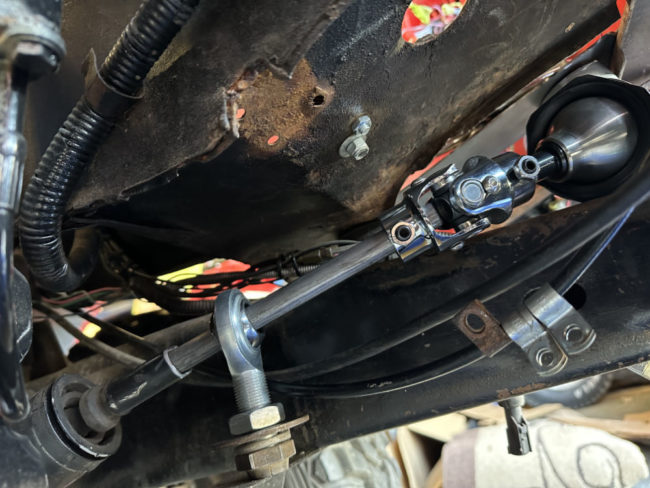
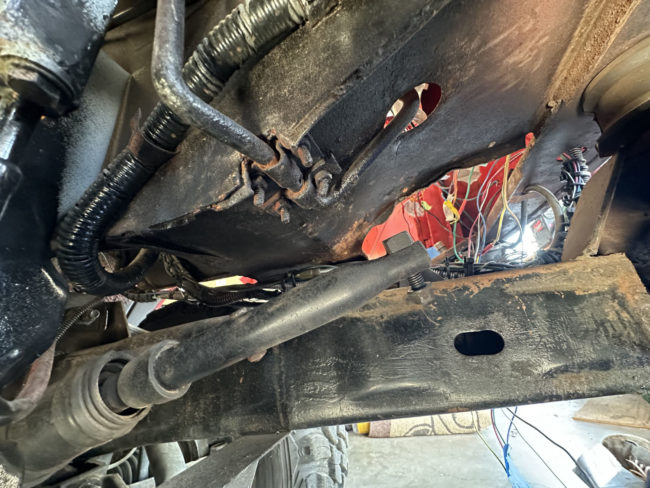
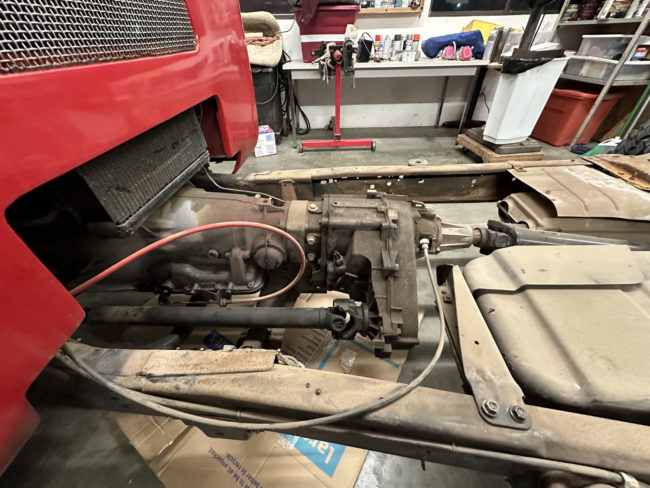
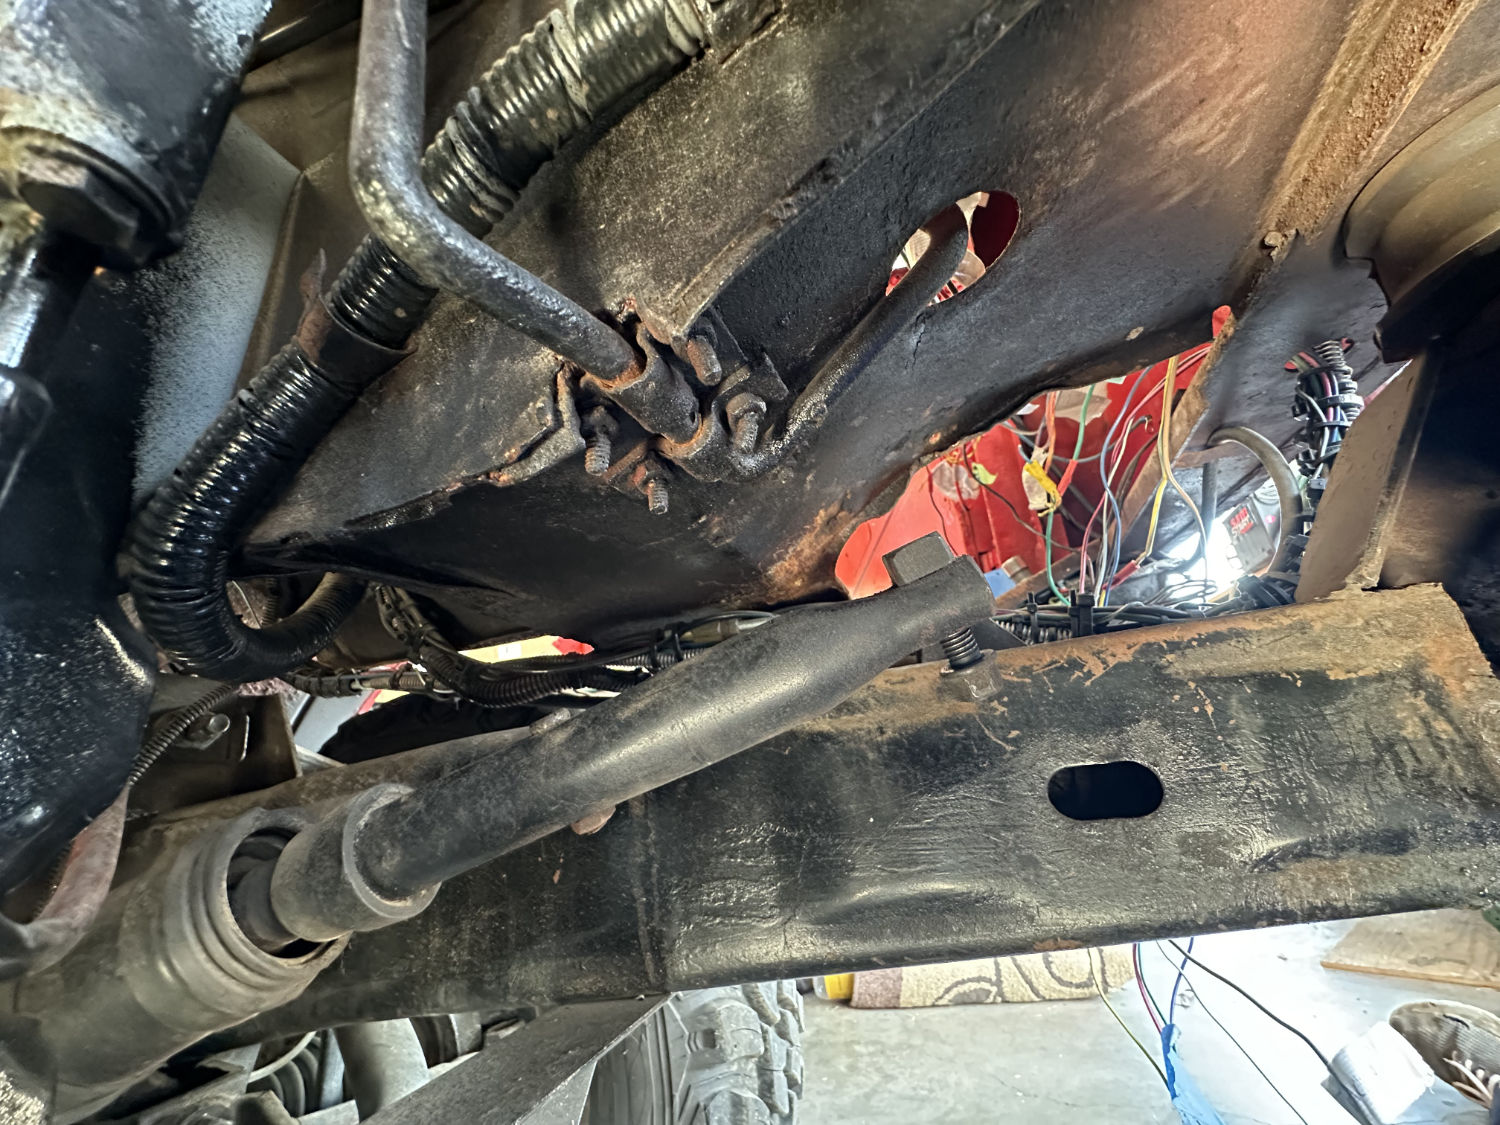
I ran into a problem with one of the transfercase bolts; it is too short, so I will have to go buy a longer 15mm bolt. I also found that the transmission shifter cable was bumping into the transfercase shifter, so I built a custom piece to hold it in place (just a zip tie for test purposes).

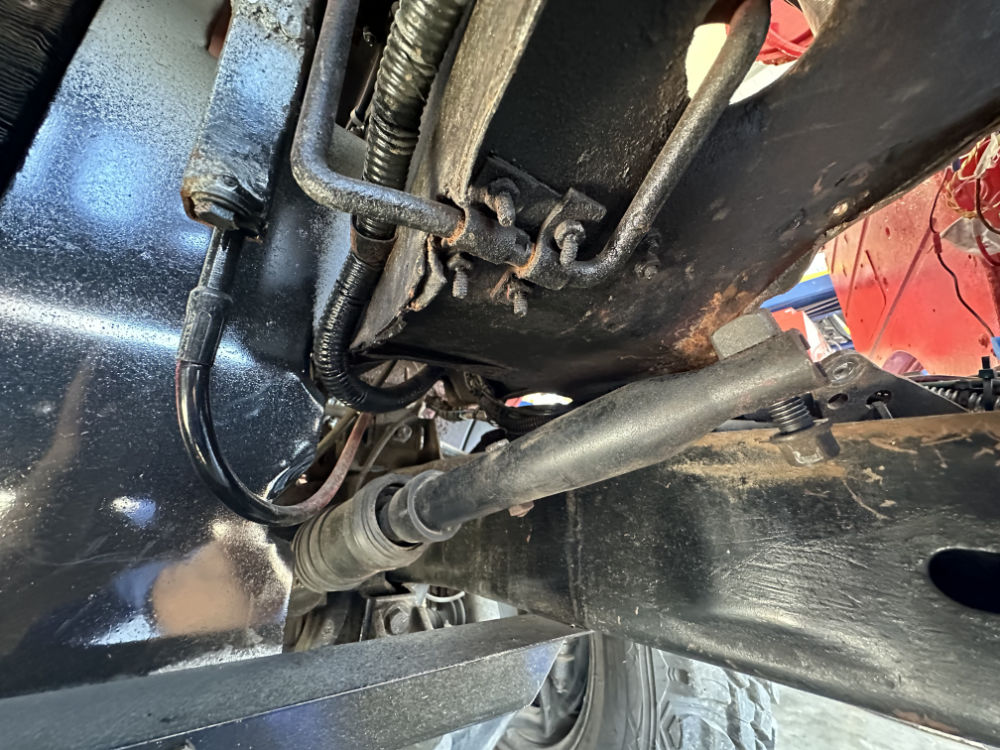
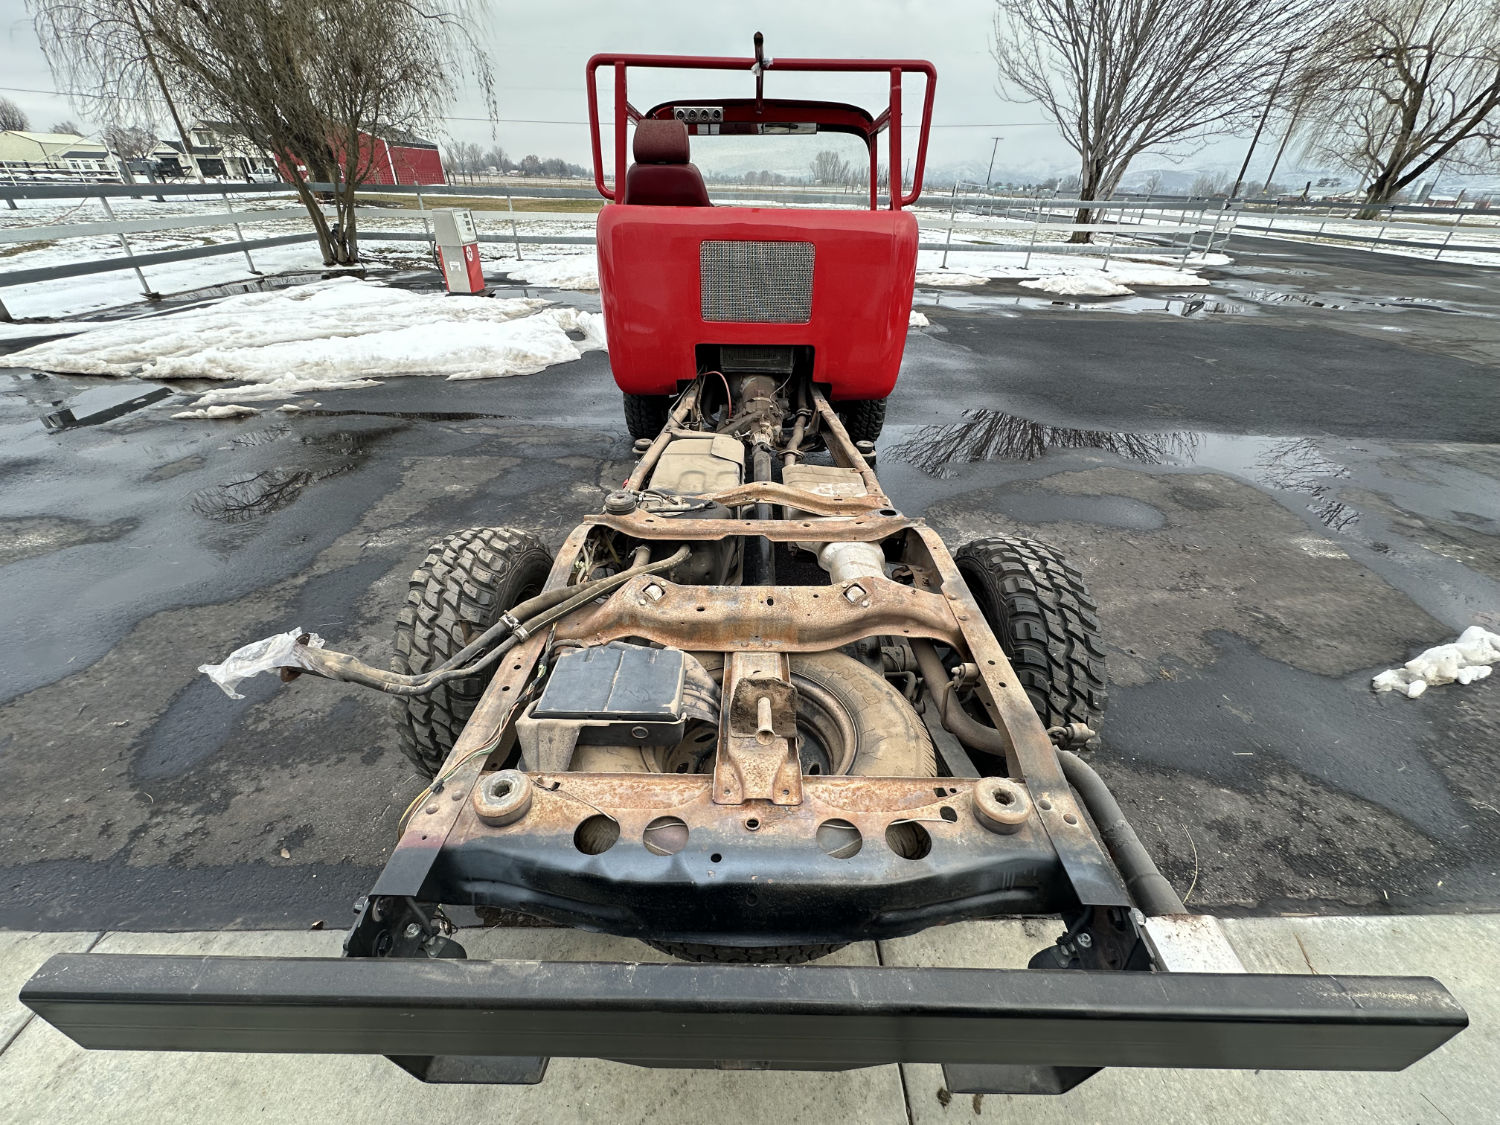
Once I got those problems dealt with, I hooked up the shifter, ran the cable underneath the frame, and tested it. The shifter moved the transfercase through its options with ease. This was an important win!

2024-04-04-4wd-lo-range-shifter5 2024-04-04-4wd-lo-range-shifter4

The final issue I ran into was cable length. I had a choice between a 60″ and 72″ cable. Long story, but I went with the 60″ when I should have ordered the 72″ (which I thought might be way too long). It turns out the 72″, which I ordered today, will work perfectly. 

So, once I get everything in place and tested, I will pull everything apart and add the finishing touches.

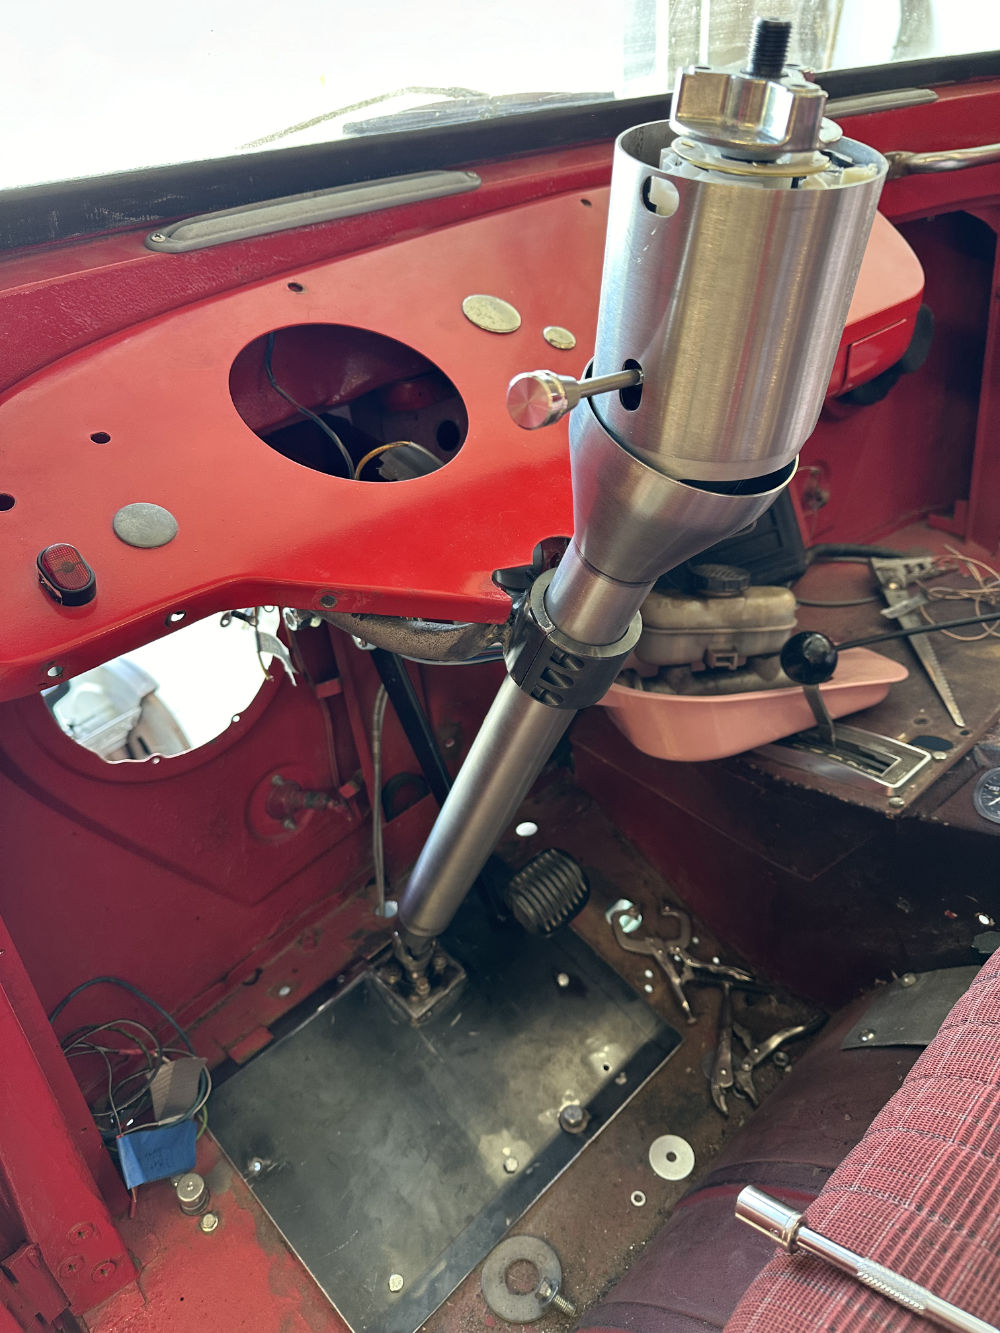
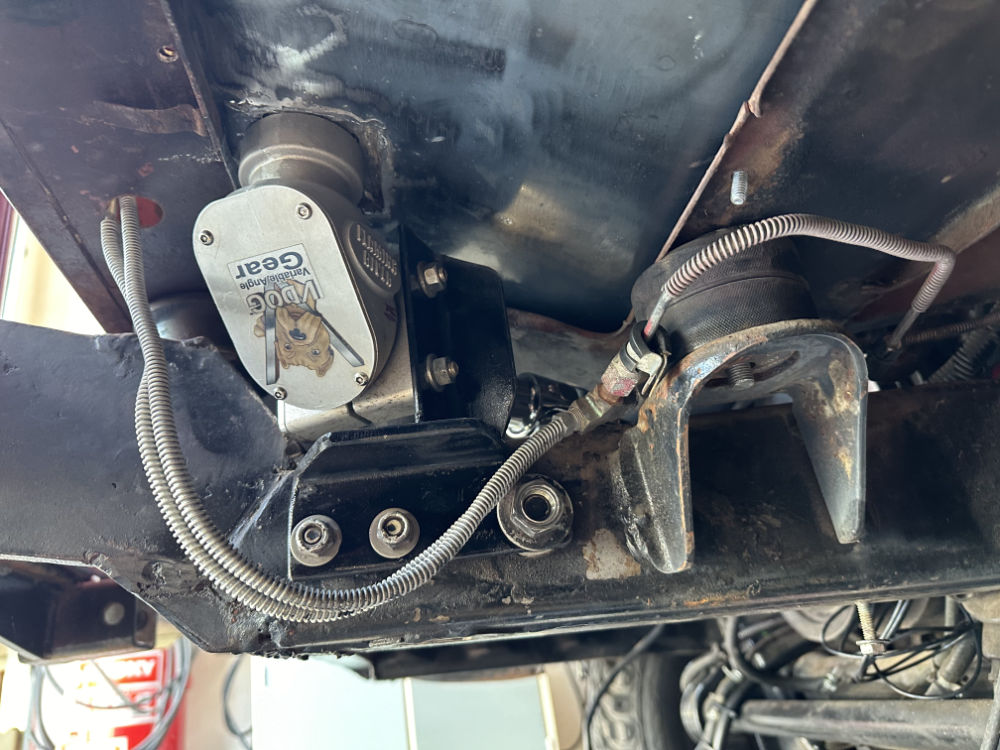
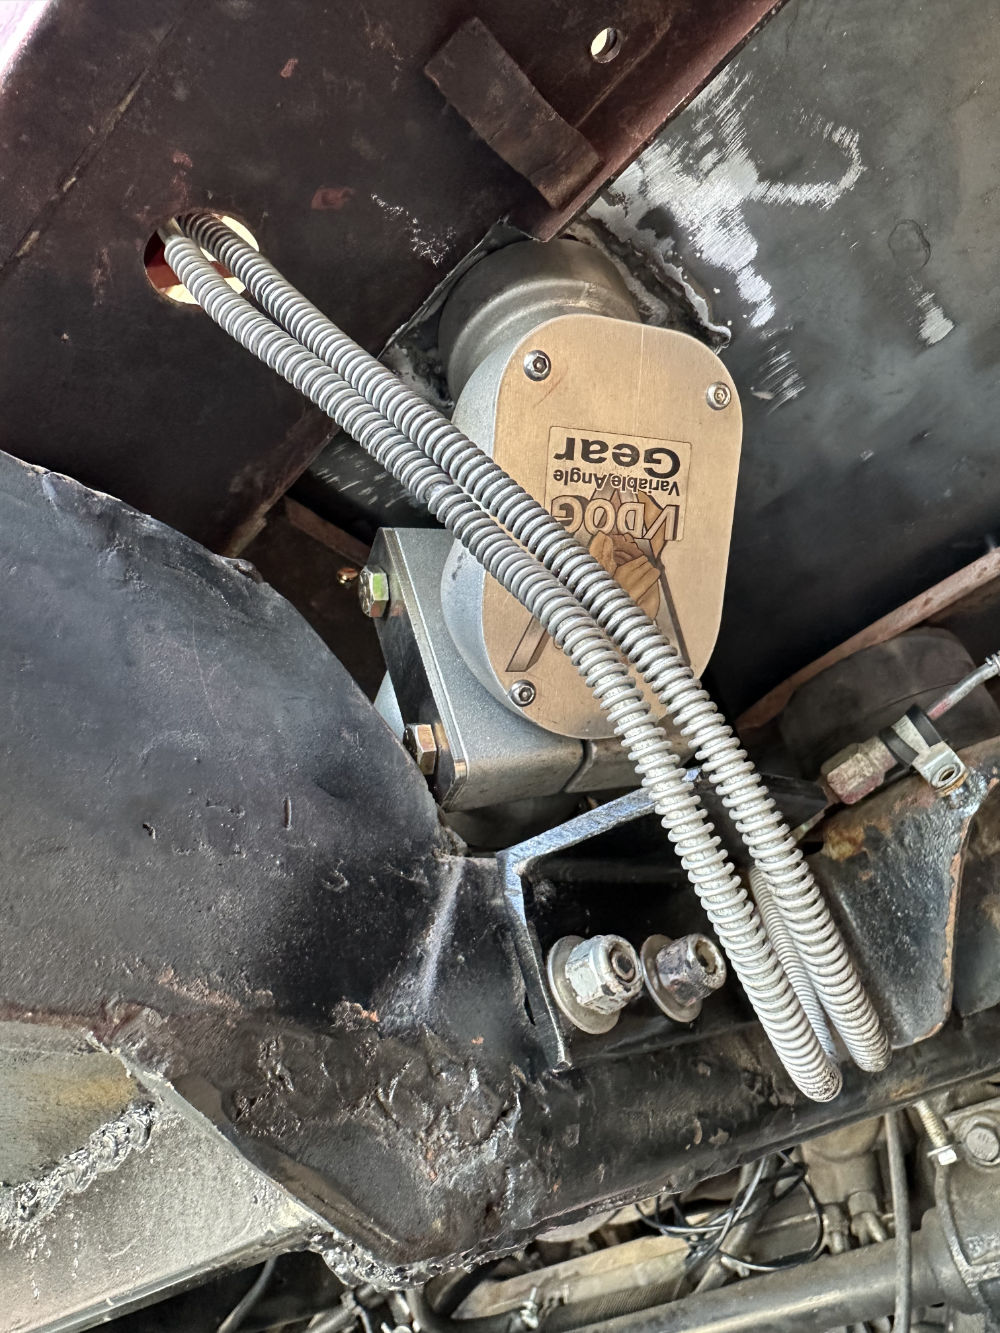
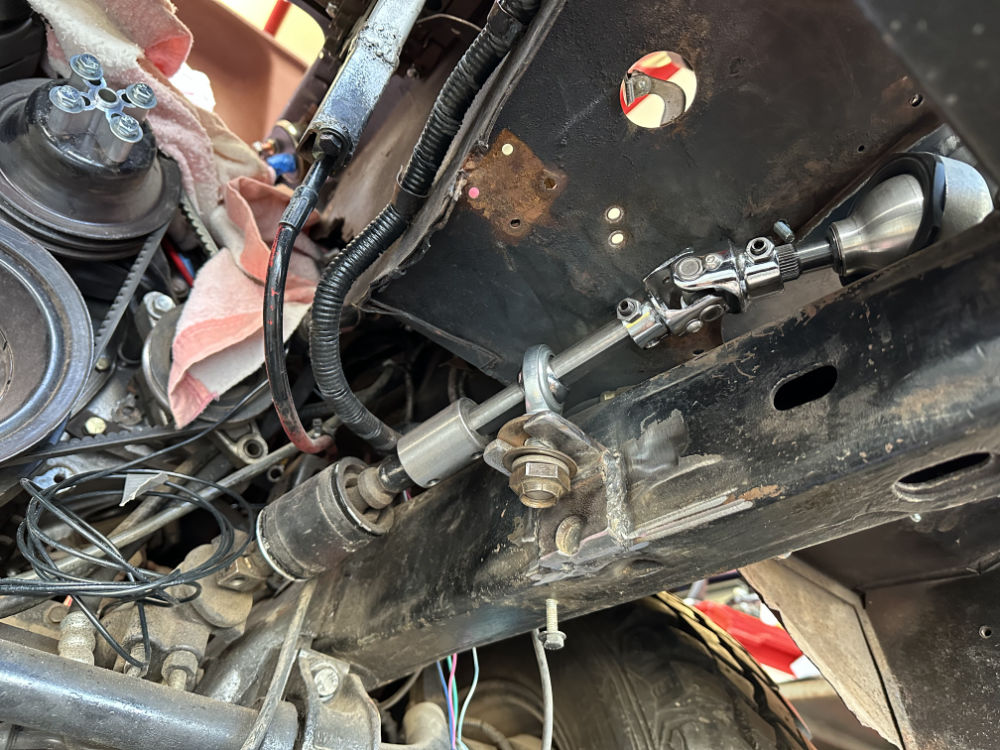
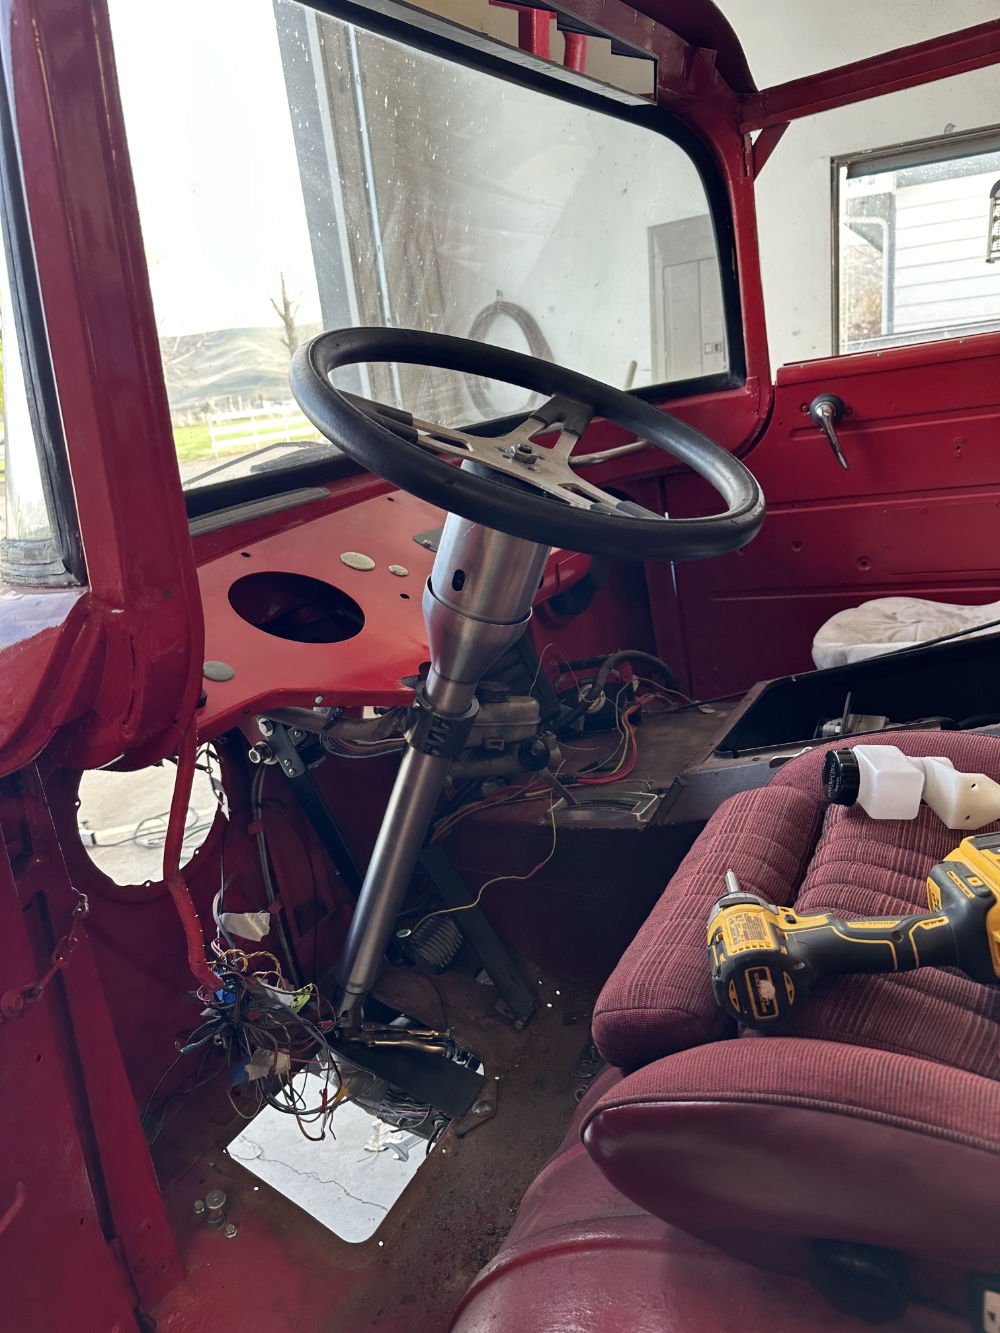
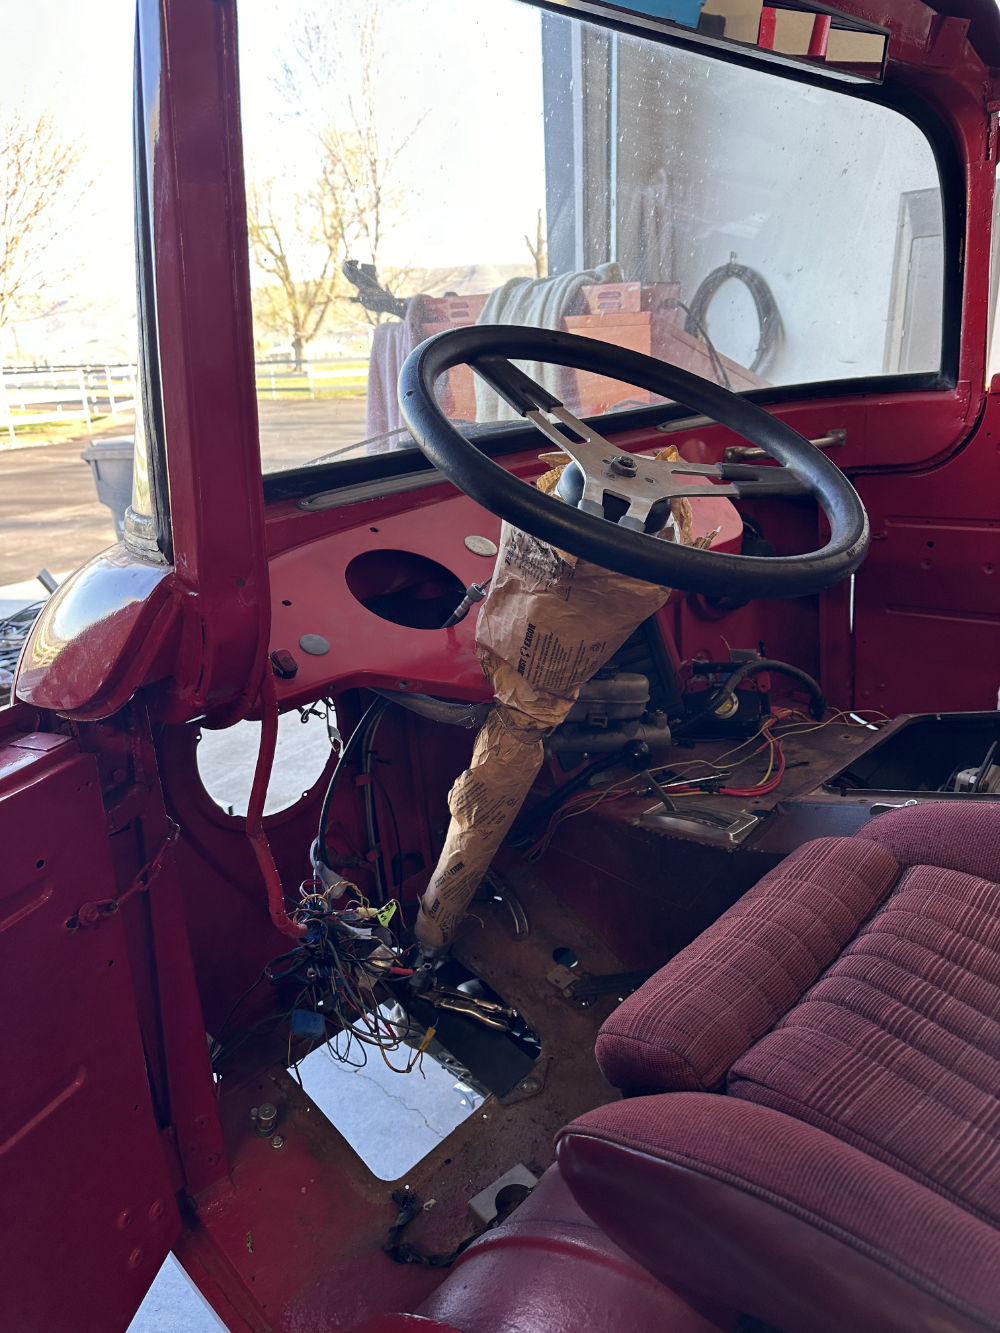
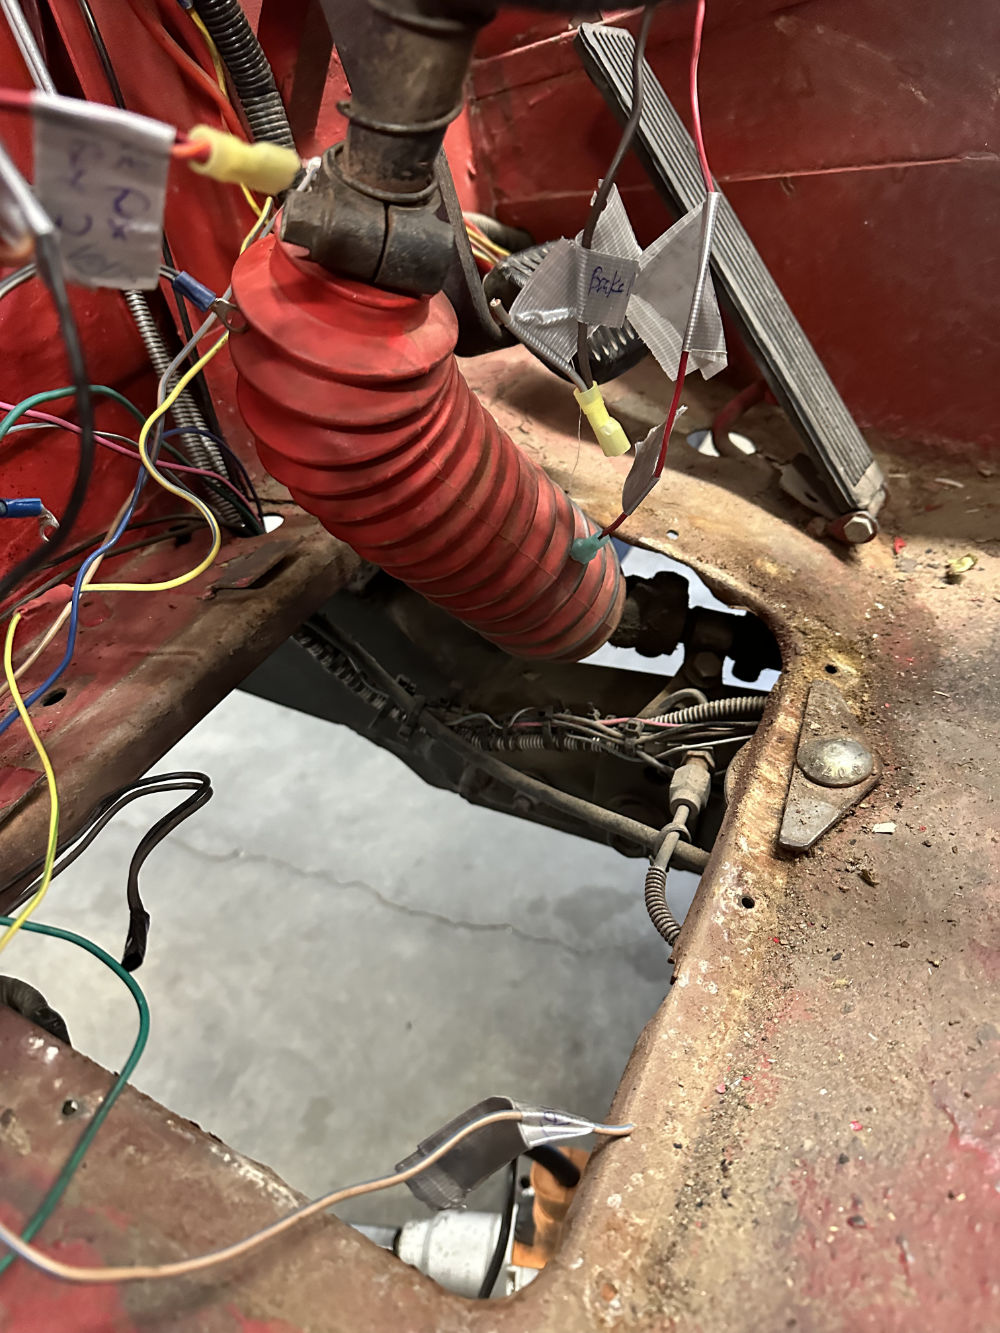
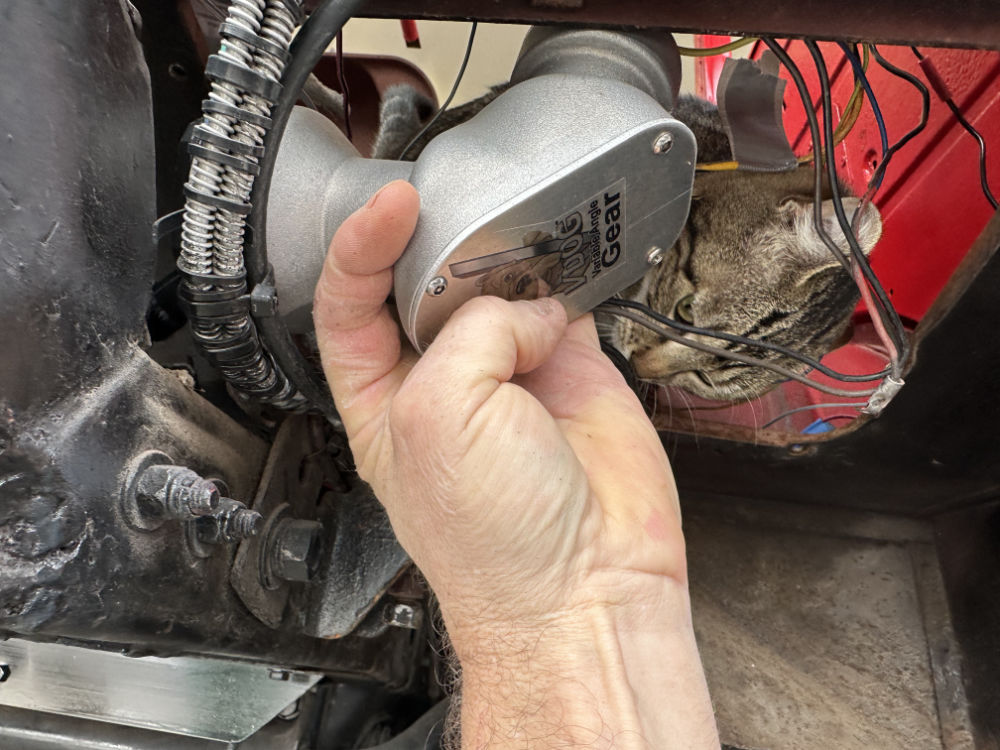
STEERING UPDATE: Yesterday, I welded together the bracket to hold the V-Dog steering unit. I also formed a new sheet metal floor cover to span the floor’s access hole and connect with the top of the V-Dog, which will help tie things together.  (I don’t have pics just yet).

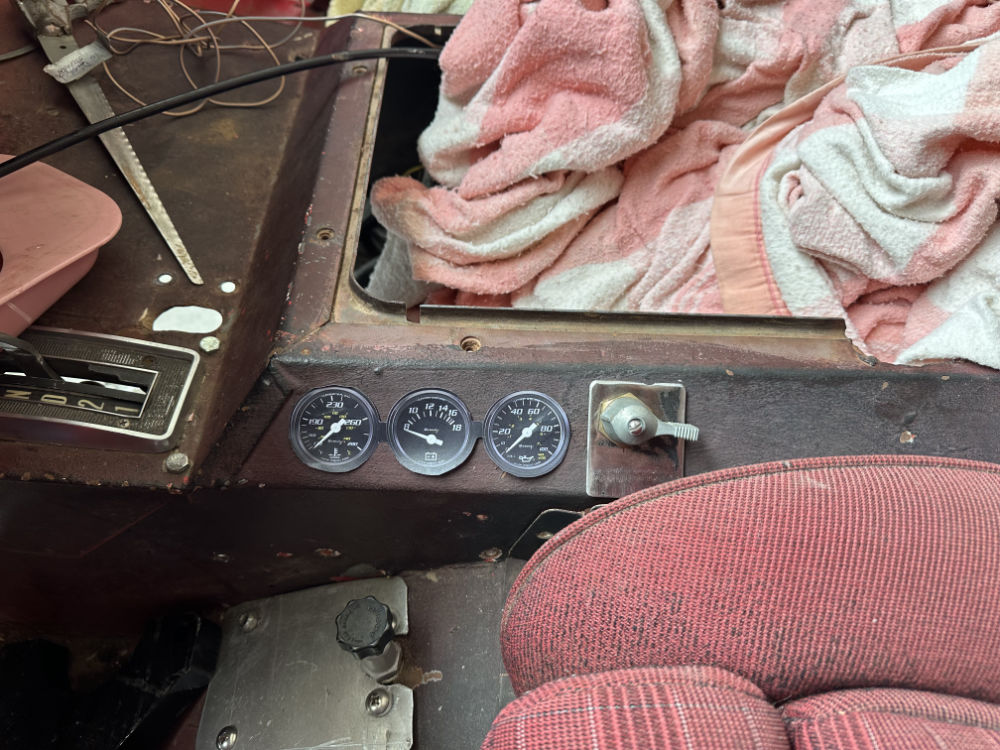
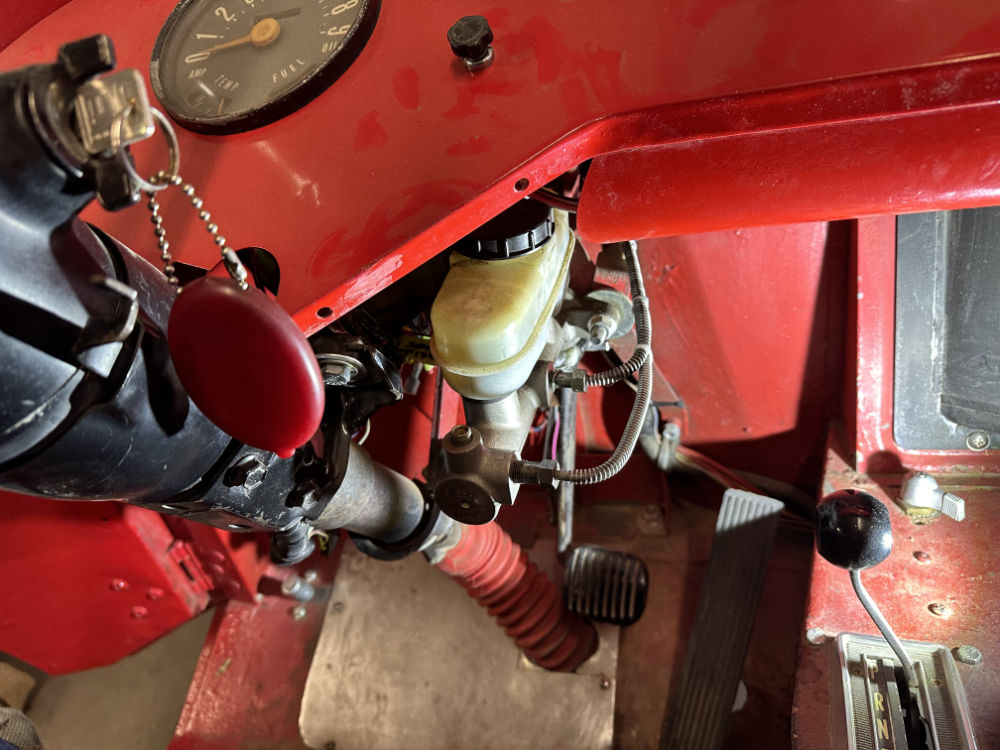
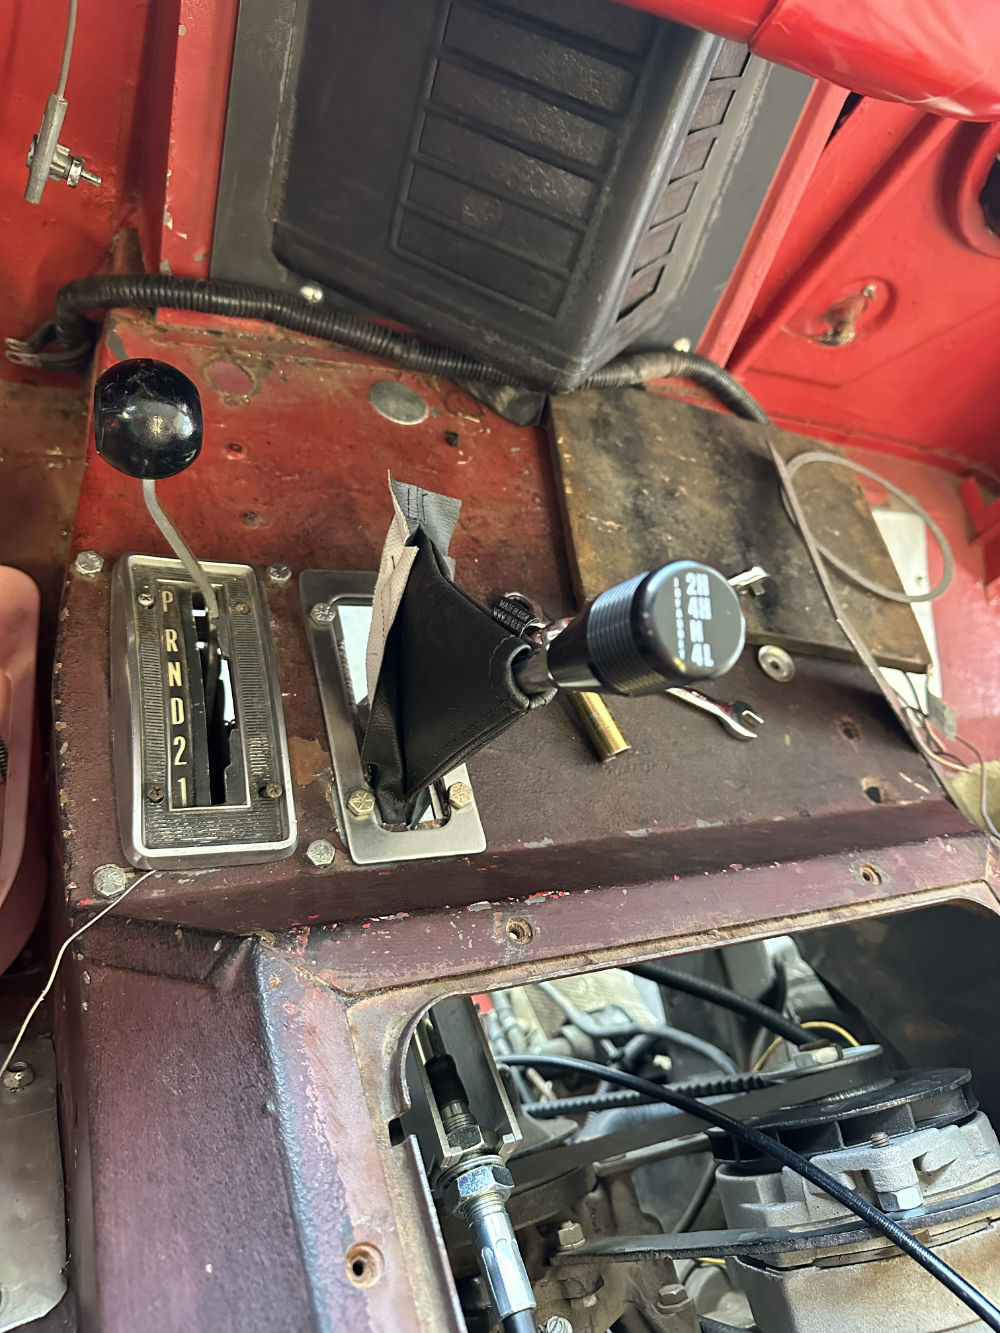
MINI-GAUGES:  I mocked up three 1.5″ lift-size mini gauges and also added a test plate for the power switch. Having the gauges in that position helps hid them, but allows me to see them if need be.

IF I got this route, I will make one solid dash plate for the three gauges and the switch, so it looks more like one unit. The gauges would also need to be rotated for easier reading.

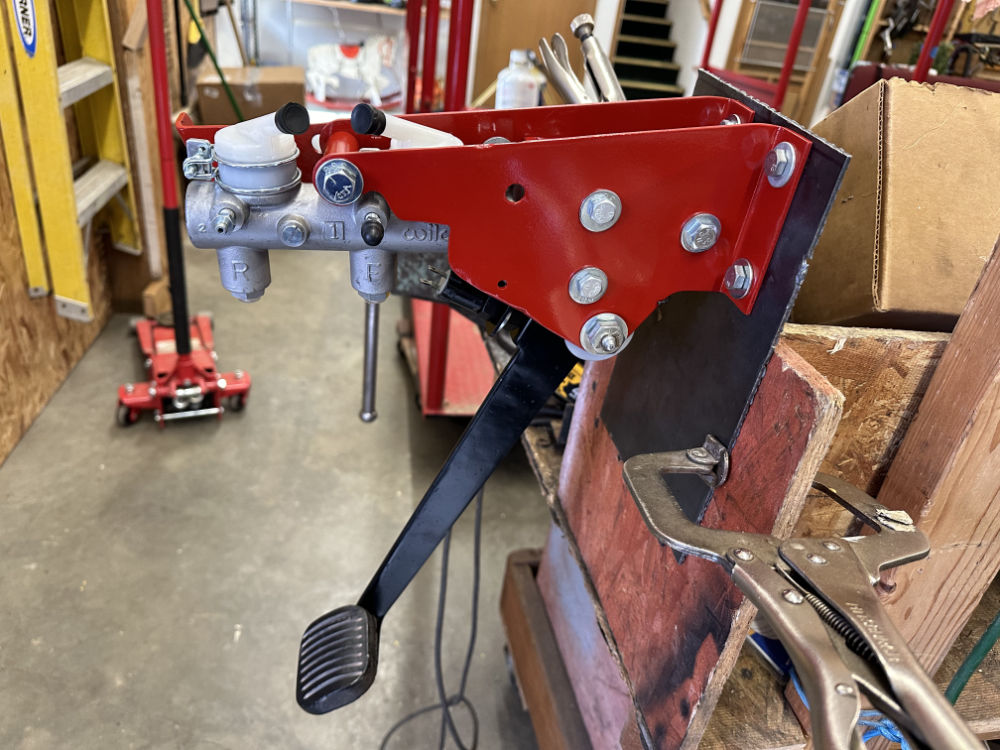
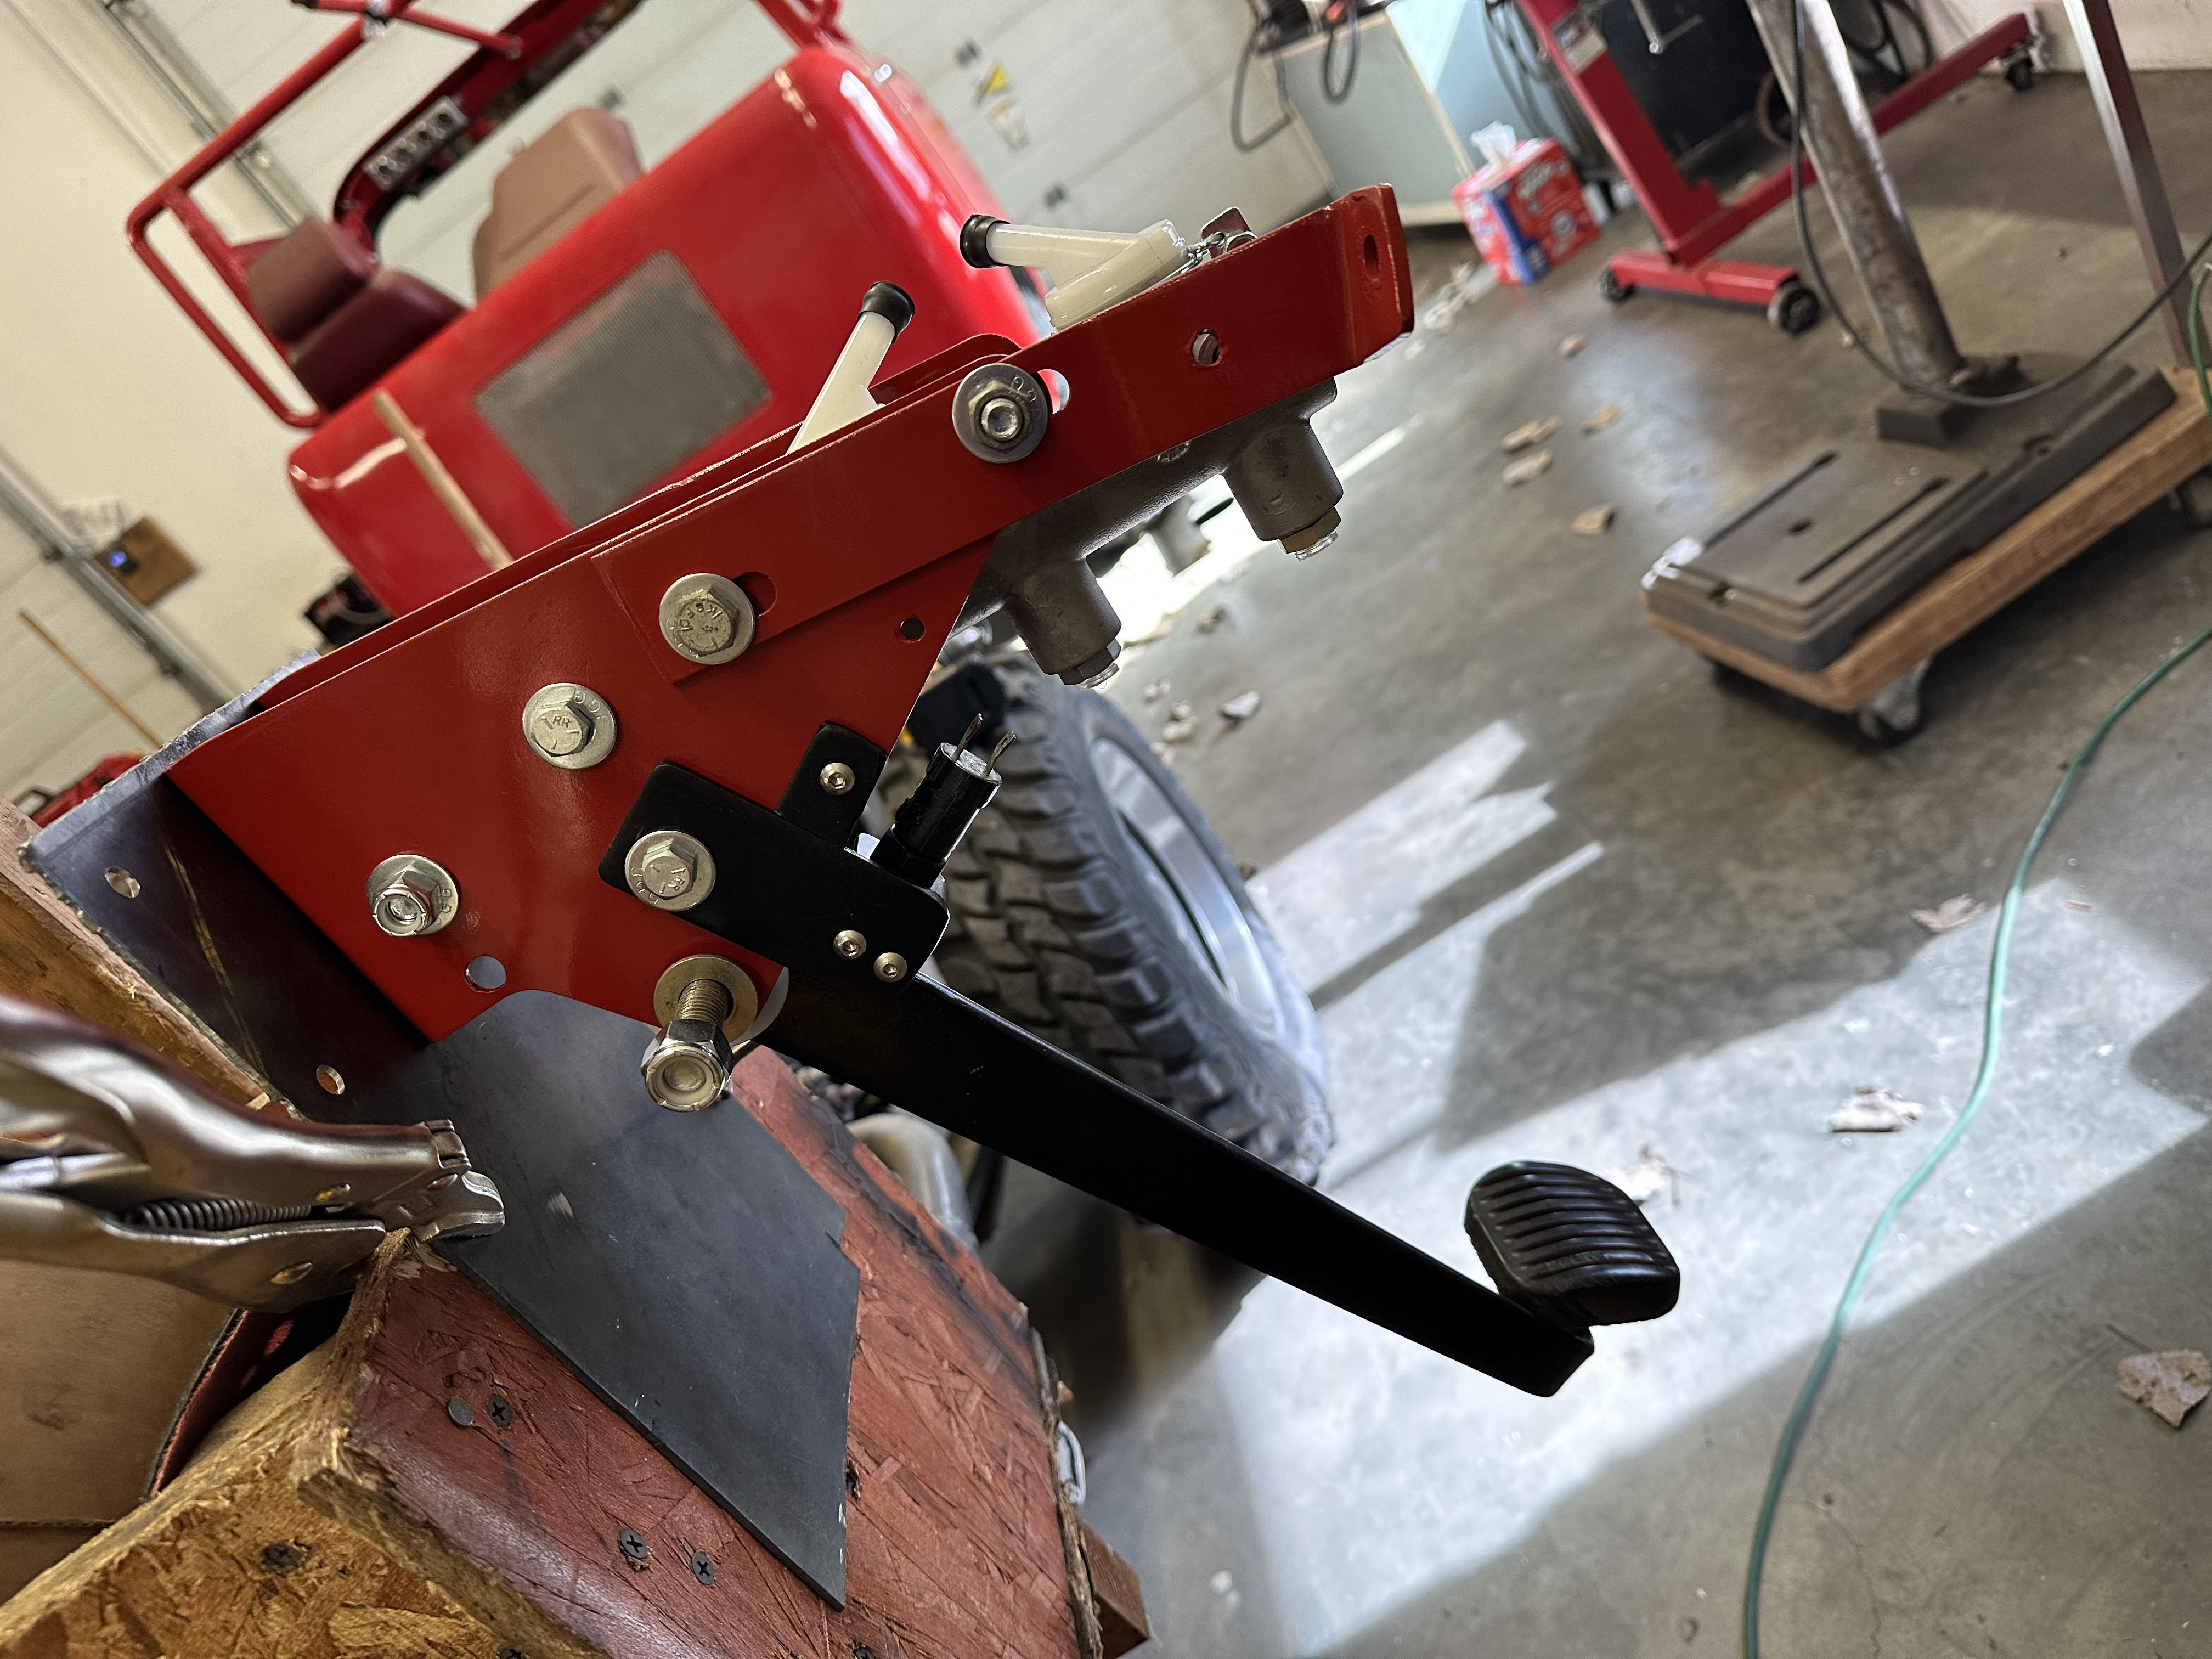
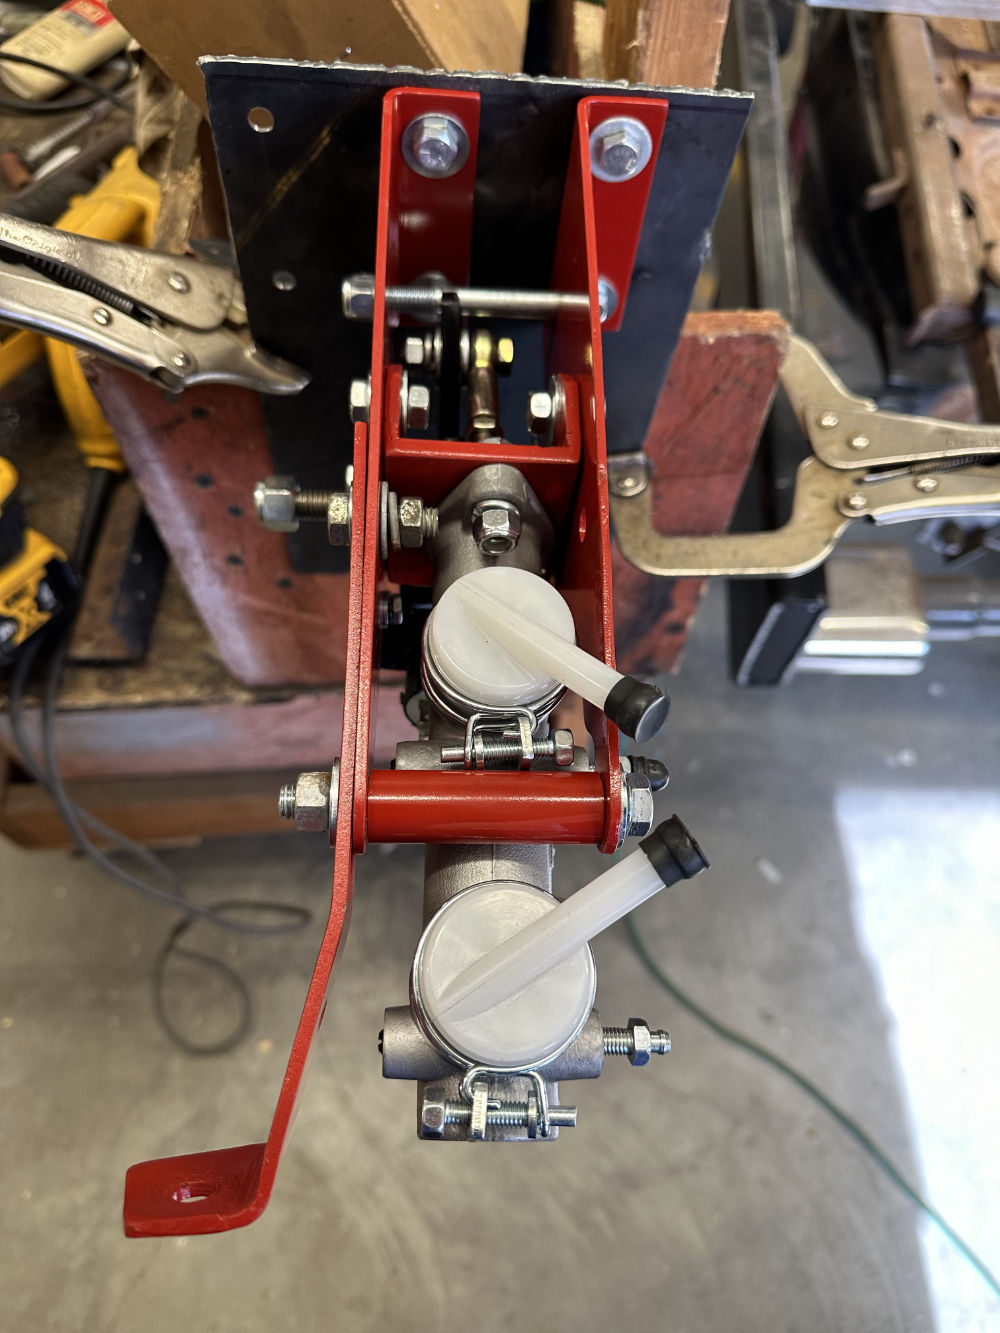
The knob below the gauges is a Wildwood brake proportioning valve. I haven’t done anything with that at all yet. I’ll likely replace the aluminum plate, but that’s probably all I will do to it for now (I”m not sure if I really need this or not … I believe it’s this product).

2024-04-04-3-gauges

 
To Top

FC Tour Jeep Progress

• CATEGORIES: Features • TAGS: This site contains affiliate links for which I may be compensated.

There were lots more internet searches, measurements, and disassembly over the past two days. One of my goals is to have the option to put in an original heater into the heater space, so keeping that area free has been a goal. In keeping with that, I decided to remove the power switch and put it in the spot where the vacuum hub switch was located (Just to the right of the driver’s seat). Meanwhile, the hub vacuum switch is removed and sitting temporarily on the engine; it will eventually go near the transfercase shifter to make it clear they work together.

Here’s where the switches were originally located:

2024-03-24-powerswtich-hub-switch2

Here’s another diagram. Here I have test-installed the switch, which fills the hole left by the vacuum switch, but sits lower than the vacuum switch. Meanwhile, I’ve mocked up how the transfercase lever should look once it is installed, with an arrow showing approximately where the vacuum switch will land next to the shifter.

2024-03-24-moving-power-switch-hub-switch

Moving the power switch shortens the run from the battery and starter to the switch, it also cleans up the area behind the grille. In addition, when looking through the grill from the front you could see the wiring crossing the tunnel to the bottom of the switch.

Yesterday, I spent time staring up at the tunnel area from the ground, measuring tape in hand, pondering and plotting. I discovered that the water pump fan, used in this case to cool the transmission cooler, will not allow any of the after-market transfercase shifters to fit. Given the fan doesn’t really align all that well with the cooler anyway, I have decided to get a transmission cooler-electric fan combo. I can position in under the tunnel in a way that is more flexible.

So, things seem to be coming together. I still want to find a place for the extra gauges and am pondering a 4-in-1 gauges which will be a more compact and less obtrusive option, but haven’t found one that satisfies the specs.


To Top

FC Updates

• CATEGORIES: Features • TAGS: This site contains affiliate links for which I may be compensated.

The weather over the weekend was beautiful, so progress was made on all fronts, from the first mow of the year, to spraying the fence line, to dragging the pasture, to building the “grow” op. Because of all that, the FC progress was a little slower, especially as I went round and round on an accelerator solution.

I created a couple gas pedal linkage prototypes that didn’t work like I’d hoped, so back to the internet I went. Finally, I landed upon a late-1960s VW bus linkage from the British company Butty Bits that gave me a clear path forward. Below is one example. I discovered I have room under the cab to construct something similar to what I show below.

This pic of the linkage comes from the Heritage parts center. The top of the linkage bolts to a pedal, then travels through the floor to a lever that rotates counter clockwise as the pedal is pushed down. I plan to build and test something later today with some small Heim joints I already have.

bus-vw-gas-pedal-linkage

I also had a chance to modify the stock FC support bracket so that it will hold a 2″ column. Here I’m testing together the column, the brake setup, and the dash. It’s all fitting together (whew). I also experimented with my flip-up fuse-box idea, which will go on under the left of the dash. The idea is to have fuse box that can rotate down when needed, but otherwise remain mostly hidden (no pics of that just yet). We’ll see how that idea plays out ….

2024-03-21-fc-steering-column

Among the other spring side projects was this “grow” operation in the master bath, built from leftover steel for max functionality and minimum beauty. Ann wanted a green house, so we build a mini-version atop the whirlpool tub we never use (we plan to turn this area into a larger shower at some point). Ann has grown these plants (beets, peppers, spinach and others) from seeds from last year’s plants.

2024-03-22-grow-op

Finally, yesterday my son reminded me that March Madness had started. It’s the first time I’ve tried to watch it without cable or dish TV (we don’t get cable and cut the dish last fall).

It turns out, Youtube TV has got this figured out! There was an automatic four-panel setup on Youtube TVs Home Screen showing each of the channels’ games. Not all of our cord cutting has been a great experience, but this feature was really useful and easy to use.

2024-03-22-youtube-tv


To Top

Steering Parts Gathered

• CATEGORIES: Builds, Features • TAGS: This site contains affiliate links for which I may be compensated.

The 60 to 70 degree highs the past few days made for some optimal outside work weather, so there was lots of recovering from winter (picking up branches), to restocking with hay for the next month, to spraying fence lines, among other tasks, so there was no time for eWillys. I did get a little work done on the FC, but not much.

Below is a pic showing how the steering column goes from the rack and pinion’s stock connector (2000 Ford Explorer), switching from the Ford V connection on the R&P to the 3/4 DD shaft (not shown is the 1″DD to 3/4″ DD Borgensen joint that will over the joint). A 3/4″ Heim Joint will help keep the shaft in place, but the mount is yet to be built.

The 3/4 DD shaft enters a 3/4″ DD / 3/4: 36-spline U-Joint, which connects to the VDog 90 degree joint. The V-Dog has an aluminum block mount that will bolt to a yet-to-be made mount to the frame. The V-Dog will also bolt to the bottom of the floor access cover.

Here is the pic from a below. Atop the VDog is a temp plate for testing how it will fit. It’s a close fit between the frame and cab, but everything clears with room to spare.

2024-03-15-lower-steering-column

From the top of the V-Dog another 3/4″ DD / 3/4: 36-spline u Joint connects to the column. The column itself is a IDIDIT 28″ tilt column with hazards and turn signals.  As it sits, it’s a couple inches higher than stock, but it’s at more of an angle, so it looks in the pic like it is sticking up higher than that.

2024-03-15-upper-steering-column

Before I can mount the column, I need to finalize the pedal. I made a prototype today, but it’s pretty ugly. I hope to have a final version in the next couple of days.

The column is larger around (2″) than a stock column, so I might not use the stock column mount as I’d planned to do.

Again, this is all rough work to make sure things fit.

 
To Top

Seats N Stuff

• CATEGORIES: Features • TAGS: This site contains affiliate links for which I may be compensated.

A big thanks to Craig Brockhaus for selling me some original FC-170 seats and his last electric wiper conversion unit, along with a few other parts. They arrived on Wednesday. The seats need some recovering and the set frames some blasting, but we planned to recover them in the same material that the bench seats will be covered, so we expect these are a good solution for us.

As for the electric wiper unit, yes the tour jeep is a convertible and we should rarely need wipers, but there have been times where I’ve driven through irrigation or other forms of water around here, so I figure it’s better to have working wipers than non working ones.

My hope is to use the stock bracket to mount the steering wheel, but I won’t know for sure until I can test-mount the tilt-steering wheel based on the seat position and dash. But, just having the stock bracket helps me estimate where to begin with the column mount options.

2024-03-07-seats1 2024-03-07-seats2

Meanwhile, I am also moving as much of the wiring and other elements down to the frame so that when I have to pull the cab, it’s as simple as possible. The cab floors and some interior dog house elements could use some blasting, sanding and smoothing. But, that’s not something I want to tackle at this juncture. Mechanics, so it can be safely driven, and a new bed are the priority.

 
To Top

FC Tour Jeep – Brake MC & Bracket & Other Details

• CATEGORIES: Features • TAGS: This site contains affiliate links for which I may be compensated.

My poor wife has been down with neck and shoulder spasms for the past two weeks, so time with the FC has been limited. She’s finally feeling a little better, though still unable to drive and do a variety of tasks. At least she has less pain.

In the meantime, I’ve been gathering/making what I have needed to assembling the dual-mc brake setup. The goal was to move the MC back between the brackets so that it is completely hidden under the dash using as many stock components as I could. I mostly followed Steve’s design, but mine is an 1/8inch wider to accommodate the nylon washers.

To the setup I’ve also added Chev brake light switch (left over from disassembly). I happened to have a leftover spring bolt with a zerk fitting that will allow me to apply grease to the brake pedal pivot if necessary (I am waiting to trim down the bolt in case I the end for smoother purpose, such as an extra anchor point of the steering column. To each side of the pedal pivot I’ve added two thin nylon washers which should reduce metal wear between the pivot and the brackets.

2024-03-02-brake-mc2

2024-03-02-brake-mc1

I am unsure what direction I want the MC fluid tops to point. The reservoirs will likely hang on the firewall, but that’s TBD.
2024-03-02-brake-mc4 2024-03-02-brake-mc3

Continue reading

 
To Top

Tour Jeep Steering Challenge

• CATEGORIES: Features • TAGS: This site contains affiliate links for which I may be compensated.

With the warming weather, I’ve spent some time removing wiring, disassembling the brake (no clutch) and taking apart the steering. It’s clear there is more work than I anticipated, so eWillys will likely drop to an every-three day event or so, especially with Ann pretty much bed-bound for the time being (aggravated shoulder and migraines from the season changing). So, I have limited time.

Back to the FC … Formerly, the steering shaft used three knuckle joints to go from the steering wheel shaft, make a 90 degree turn to head towards the passenger side and over the frame, then a roughly 70 degree turn to head along the frame before reaching the rack and pinion.

To make those turns, the column began its first angle while in the cab, which caused it to dive into the floor near the brake pedal. Given I am moving the break pedal into it’s original location (with a dual brake master cylinder following this strategy** .. see bottom of post for additional note), that means I want to make a straight shot from the steering wheel to the floor, before making my turn under the floor. But, to do that, I need something to make a ninety degree steering turn. It turns out that in 2019, Flaming River built an award winning product to do just that.

Here’s how it looked before I disassembled it:

2024-02-10-fc-tour-jeep-brake3

Here’s the dash off and much of the wiring removed:

2024-02-20-fc-tour-jeep-cockpit2

Here’s where the brake was positioned (easier to see with parts removed):

2024-02-22-disassembled-brake02

This shows it with the floor panel removed:

2024-02-20-fc-tour-jeep-cockpit3From the underside, with most of the column removed, it looks like this:
2024-02-23-steering2

This is the best pic. It shows how I need to go over the frame, travel about 10″, then make a 90 degree angle upward, with a slight angle toward the back.  The best solution seems the most expensive. Note the shaft isn’t bent; that’s an optical illusion due to the wide-angle.

2024-02-23-steering3

Continue reading

 
To Top

Tour Jeep Bed Removed II

• CATEGORIES: Features • TAGS: This site contains affiliate links for which I may be compensated.

The tour jeep bed is now on rollers so I can moved it around. In the meantime, I drove the chassis outside so I could blow off the dust (a little chilly for washing it just yet).

Looking more closely at the transfercase, the tag on it has been removed, but it looks to me to be an NP 207, but I’ve never worked on these, so I could say for sure. After doing some research online, I see one challenge to making the 207 usable is that there isn’t a cable setup for shifting being offered as an option.

Moreover, some forums suggest the 207 is pretty weak and the 231 is a better option (for which there is a cable option). However, most likely any cable option will have to be a custom install anyway, as the cable length will need to be long enough to reach the cab area. Anyone have thoughts on this? Is the 207 good enough? if in 4WD low range is the 207 strong enough to deal with the weight of real trail jeeping?

2024-01-27-tour-jeep-bed-off2 2024-01-27-tour-jeep-bed-off3 2024-01-27-tour-jeep-bed-off4 2024-01-27-tour-jeep-bed-off5

2024-01-27-tour-jeep-bed-off9

Continue reading

 
To Top

FC Tour Jeep Progress

• CATEGORIES: Features • TAGS: This site contains affiliate links for which I may be compensated.

With winter landing hard these past two weeks, along with sub zero temps for a few days, about a foot of snow, and our well-water-system freezing up for 48 hours, the FC project got placed on hold. With warming temps the last few days, I returned to working on the jeep.

Here’s where I am at currently. I’ve removed the doors, the carpet, the seats, and the bolts holding the rear bed. I now have to build a frame work to pulley the bed off of the chassis. Pulling the bed was necessary anyway, as I need to figure out how to hook up the low-range shifting mechanism.

2024-01-23-fc-tour-jeep-bed3

2024-01-23-fc-tour-jeep-bed4

2024-01-23-fc-tour-jeep-bed2

2024-01-23-fc-tour-jeep-bed1As noted earlier, the problem I faced was that the rear seats weren’t comfortable and weren’t tall enough to give the visibility to passengers I wanted. Moreover, the floor is uneven and was carpeted, making cleaning of the floor a more difficult chore than it ought to be. Finally, the rear wheel wells make the far rear seats unusable for most adults.

After much thought, I have decided to build a new floor as one big one-height platform, raising it all to the height of the rear section, which also makes it as high as the original FC Tour Jeep rear beds (per Craig’s measurements). The platform will also be shifted back about five inches, which puts the second row of seats a little more over the rear wheel wells so that the far rear passengers will have more leg room. The rear wheel well will become more circular, which harmonizes more with the front wheel wells. This also better alights the rear of the bed with the rear bumper.

Currently, the plans have me saving the roll cage, which I can use as a template for the bed, and trimming the four rear doors so that they can be reinstalled on the new bed.

Another advantage of shifting the bed a little farther back is that it provides more room behind the cab and radiator to breathe, which should help pull some of the engine smells away from passengers in the back.

Here is a pic showing the before and photoshopped-after-look of the proposed changes.

01-01-2024-fc-tour-jeep-bed-lifted

 
To Top

Tour Jeep Photos

• CATEGORIES: Features, Old Images • TAGS: This site contains affiliate links for which I may be compensated.

I picked up these four 20″ x 30″ vintage tour jeep photos. The first image shows a tour-jeep-wagon that kept part of the door and roof, similar to what was done with the FC Tour Jeeps. As you can see in the other photos, usually door was lopped and all of the roof and upper sides, except the windshield, was removed.

1960s-san-juan-scenice-jeep-tour-photos1

1960s-san-juan-scenice-jeep-tour-photos4 1960s-san-juan-scenice-jeep-tour-photos3 1960s-san-juan-scenice-jeep-tour-photos2

 
To Top

More Pics of Tour Jeep

• CATEGORIES: Features • TAGS: This site contains affiliate links for which I may be compensated.

Here are some more pics of the Tour Jeep thanks to Ann.

2023-03-04-fc-tour-jeep-homeward4

David and Ann.

2023-03-04-fc-tour-jeep-homeward8

The test drive with Andrea. That was her first ride in it!

a ride. That was her first ride in it!

2023-03-04-fc-tour-jeep-homeward9

Andrea and David finishing the test drive.

2023-03-04-fc-tour-jeep-homeward7

Jesse with George Washington (Ann’s cousin’s dog).

Continue reading