Leftovers-racer Research Archives

This information contains posts related to the racing jeep we call “Leftovers”

To Top

New Shift Knob for the Racer

• CATEGORIES: Features • TAGS: This site contains affiliate links for which I may be compensated.

Sometimes, it’s the little things that make a person happy. In this case, eBay served me up the perfect vintage knob for the racer. I did have to resize the threads, but that was trivial. I’m really happy with it (even Ann was excited about it, and pretty perplexed about why she was happy about it, lol).

In other news, I figured out why’d the brakes on the FC weren’t working quite right. The custom-built pedal assembly is rubbing in a way that keeps it, even with springs, from returning to its standard position. So, I need to rebuild the swing pedal assembly, but that also entails rewiring the cab. It will likely take me a good week to sort all that out. It’s really a good thing, because there were some electrical items yet to be hooked up, along with working through the speedometer cable, which isn’t quite long enough to reach the speedometer.

2024-02-11-Shift-knob-racer2 2024-02-11-Shift-knob-racer1


To Top

Took Racer for a Pasture Spin

• CATEGORIES: Features • TAGS: This site contains affiliate links for which I may be compensated.

Looking out over the pasture, I see lots of green, but don’t see all that much cow shit. So, I didn’t think I’d hit all that many piles racing around it. Welp, those tires found plenty of piles and threw it all over me and the jeep.

This was the first time I ran it in 4WD. That worked flawlessly. As for control and driving, I found the racer felt really balanced and smooth, despite the bumps (the pasture isn’t all that even). The steering is a little stiff, but that feels great when going faster.

It seemed like it was missing a bit as I hit higher RPMs; I couldn’t decide if that was caused by the bumps disrupting the gas flow in the carb or by a timing issue. We’ll figure it out.

At the end of the video I realized that the fan wasn’t working (it turned out to be a loose connection), so I was trying to get Ann to open the gate, but she decided she would film me while pretending to not hear me, lol … she is a merry prankster!

 
To Top

Testing Out the Complete Race Jeep

• CATEGORIES: Features, Racing • TAGS: This site contains affiliate links for which I may be compensated.
2023-09-23-race-jeep7-lores

“Leftovers” with the mocked up name. I don’t like the angled bracket I made at the step. I may just got with two bolts and two washer to keep the body in place rather than the bracket.

Yesterday, I attached the remaining netting, roof, and body parts to the race jeep, only to discover I needed to cut a couple small parts from the floor that were too wide for the body (nothing a quick sawz-it-all couldn’t fix).

The hood requires four bolts to attach it, as I need to make sure it stays secure. Five additional bumpers help keep the hood in place.

It’s hard to test the speed on these short jaunts. I really don’t want to tear up the grass too much. In addition, I don’t have it in four wheel drive, again so I don’t tear up the grass too much. The next time I test it, I will wear ear plugs, because when you hit the gas, it gets loud in the cockpit!

Now it’s time for some helmet shopping!

Some additional pics:
2023-09-23-race-jeep6-lores

Continue reading

 
To Top

Ann says, “I like it!”

• CATEGORIES: Features, videos • TAGS: This site contains affiliate links for which I may be compensated.

2023-09-19-ann-racer

I installed the new master cylinder for the clutch. The pedal is a bit more stiff due to the larger bore, but it does the job. I wanted Ann to test it to make sure she could operate the clutch, so she took it for a cruise (and kept the speed down to keep the grass intact).

 
To Top

The Good, The Bad and The Ugly

• CATEGORIES: Features • TAGS: This site contains affiliate links for which I may be compensated.

UPDATE: Solved the oil spillage issue. The oil was coming from the back of the engine where the oil gauge line attaches to the engine. I had made the hose a little too long, so it didn’t tighten down correctly. Trimming the line fixed the issue. So, I got to drive around the property yesterday instead of doing updates for today ….

=============

2023-09-10-starting-racer3

Gassing up the racer.

The good news: I rolled the racer out of the garage, put in some gas, and tried to start it. Naturally, it didn’t start straight away. After fiddling with it, finally figured out that the manual choke needed to be opened (the choke was never hooked up on the old racer, so I never thought about it). Once I adjusted the choke, the jeep started right up! So, I will be adding a choke cable.

Unfortunately, while looking for the starting problem, I ran my forehead into the tall air cleaner bolt. It was only a large scratch and some blood, so not that big of deal. I was more made than anything. This highlights the problem with the bubble in the eye; sometimes it screws with the depth perception.

2023-09-10-starting-racer2

Starting the racer.

The bad news:  Once it started, it sounded as great as it did last year. However, for some reason the fuel pump didn’t stop pumping prior to starting the engine (that’s how I remember it working). This suggests to me that maybe something isn’t sealed correctly, so it’s not building the pressure needed to shut off the pump? I will have to research the pump to double check this. I’m sure the fix will be fairly simple.

2023-09-10-starting-racer1

Discovering the rear main seal likely needs to be changed.

The ugly news: The worst issue was underneath the jeep; I discovered that a significant amount of oil was leaking out the back of the engine. My guess is the rear main oil seal needs replacing. Ugh! It was fine when I parked it last summer (and this highlights the risk of “ran-when-parked” jeeps!). I’ll let it sit for a day or two and see if things magically right themselves.

That pretty much ended my garage time yesterday.

 
To Top

3 Dogs, 3 Rims and a Bonus

• CATEGORIES: Features • TAGS: This site contains affiliate links for which I may be compensated.

I have been wanting a set of 5 lug aluminum rims that match the six lug aluminum rims for the racer. Yesterday, while fuming about the oil leak, I went on FB Marketplace and did some searching for local motorhomes (pondering the idea of getting a gently used, older motorhome to take to races). After looking through ads, on a lark, I entered a search for Desert Dogs. Lo and Behold, these three popped up for sale for only $400! Check out all that barely used tread!

2023-09-11-desert-dogs1

Even better, the dogs were mounted on the style of rims I had been seeking!  I made arrangements to get them, which meant driving to Boise today.

It turns out they had been an extra part of a Suzuki Samarai purchase.As a bonus, they threw in another desert dog, though it doesn’t have much life left.

2023-09-11-desert-dogs5

2023-09-11-desert-dogs3

This rim has a little cosmetic discoloring and the tread is slightly different, but no bid deal. On the left you can see the other rims. The COOP tires on the green rims will be transferred to the other matching six lug aluminum rims that I have.

2023-09-11-desert-dogs4
This is the worn tire. It has enough tread for racing.
2023-09-11-desert-dogs2

 
To Top

Race Jeep Instructions

• CATEGORIES: Builds, Features • TAGS: This site contains affiliate links for which I may be compensated.

Ann fired up her Cricket yesterday and printed out some labels that also act as instructions for starting and managing the jeep. She also add “ON” and “OFF” labels to make clear what switches need to be pressed. Starting the jeep is a five step process:

  1. Power
  2. Fan
  3. Fuel pump
  4. Ignition
  5. Start (button)

In the first pic, the “2-” for the fan label is hiding behind the switch.

2023-08-22-race-jeep-lettering1 2023-08-22-race-jeep-lettering2 2023-08-22-race-jeep-lettering3

 
To Top

Racer Progress Pedaling Along

• CATEGORIES: Builds, Features • TAGS: This site contains affiliate links for which I may be compensated.

More progress made on the racer this weekend. The floors are installed and mostly bolted. The pedals are all in place. The steering was in place, but I was unhappy with the final angle of the front support bearing, so I plan to redo that support so that it angles differently. Hopefully, I will get that done and installed today.

Here’s how the rear top crossmember that holds the rear fire extinguisher looks. The two holes on either side are the shoulder strap attachments.

2023-08-20-racer-pedals-rear-extinquisher

Here are the three pedals (with the steering drive shaft disconnected from the quick-turn unit).

2023-08-20-racer-pedals2

One thing I still need are a brake and clutch pedal pad. Any recommendations on what I can use that has a similar mount point and size? (these were from the yellow racer .. I didn’t like the other racer’s pedals). These look to be rubber casings over metal pedals, but both pedal bolts are in bad shape. this is the good one …

pedal2 pedal1

The master cylinders are attached (the brakes are ready to go). I have to get an adapter to connected the clutch line to the clutch master cylinder. Everything is fitting well. I have to say the fire wall turned out better than I thought. Remember, I flattened the old firewall from the yellow racer and re-bent it into the shape I wanted.

2023-08-20-racer-pedals1

Here side view of the gas pedal setup. One thing I learned from my first race jeep was that having a firm, stable gas pedal was greatly beneficial when racing, due to the bouncing. I could plant the bottom of my foot firmly, while using the top of my foot to feather the gas. This setup is based on what I built for Biscuit, but heavier duty.

Continue reading

 
To Top

Wiring 99% Complete

• CATEGORIES: Features • TAGS: This site contains affiliate links for which I may be compensated.
2023-08-14-wiring-firewall8

Helpers helping …

Despite the sauna-like temps, and with ice-water-bottles in front of my sho- fan blasting at full speed, I nearly completed the wiring (a couple things left to do). The principal goal was to secure it to the firewall to limit movement while racing, which should keep connections intact and stop cables from rubbing to bare wire. (On the yellow race jeep I could see where the battery cable had rubbed through the protective outer layer at some point, then it had been patched).

I decided to add a second jumper connection which solely handles the lights. I’ve now got most of the wiring in place in case I want to later add headlights and turn signals. I still need to add a switch to power the gauge lights and rear driving lights (in case I need them for some reason). I also didn’t think about adding a fuse for the rear lights until just now .. oops.

2023-08-14-wiring-firewall2

2023-08-14-wiring-firewall1

2023-08-14-wiring-firewall3

Ann helped me put the body into place to make sure the wire dropped under the lip of the cowl from the rollbar:

2023-08-14-wiring-firewall7

Continue reading

 
To Top

Heat Spike

• CATEGORIES: Features • TAGS: This site contains affiliate links for which I may be compensated.

Yesterday, we had our only heat spike of the season, with temps hitting, but thankfully nothing like 2021 and temps of 116! Today will be 107, followed by around 104 tomorrow. Saturday, the highs will drop to a comfy high 80s. So, without air conditioning in the shop, not much progress will be made.

2023-08-15-weather

I’m currently working through this rats nest and how I want the new wiring junction atop the firewall to be strung. The firewall top sits up to 1.5″ under the cowl in places, so no wires have to go through the wall. There’s also not much rewiring to be done, as I didn’t have to make many changes.

2023-08-14-wiring-firewall8-2

2023-08-14-wiring-firewall7

The remaining floors are about ready to be reinstalled, but I want to make sure everything else is in place before I add them.

2023-08-14-wiring-firewall6

Oops. I was 2″ short on my fuel line. I replaced a rubber hose at the fuel pump side, which gave me enough room to attached this valve.

 
To Top

Racer Updates

• CATEGORIES: Builds, Features • TAGS: This site contains affiliate links for which I may be compensated.

I’ve made some assembly progress. The tank is installed and hooked up (which took me a short while to remember exactly how I fit it into that tight space, lol), the battery is setup, the upper wiring is in place, the rear sway bar is installed, the rear lights are installed and wired and the gauges are in place.

Currently, I am focused on setting up the wiring. I saved the previous wiring, since little will electrically, so it shouldn’t take too long to alter some wire distances. 
2023-08-10-racer5 2023-08-10-racer6 2023-08-10-racer7 2023-08-10-racer8

2023-08-10-racer9

 
To Top

Sidebars and Netting Done; Frame Washed

• CATEGORIES: Features • TAGS: This site contains affiliate links for which I may be compensated.

UPDATE: The weather was perfect, cloudy, not so hot, and windless, for painting the chassis outside. 

2023-08-04-chassis-paint1 2023-08-04-chassis-paint2

================================

It’s been a busy few days. I completed the sidebars and netting, then washed the frame. It’s drying awaiting a new coat of paint. While I’d prefer to disassemble and properly clean and paint everything, that’s just not possible at this point.

There’s nothing much fancy about the side bars. A bolt secures the back of the bar and acts as the pivot point. A 3/8’s pin holds the front in place and is pulled to release the bar so a person can enter/exit the jeep. The netting is held in place at the front by a seat belt buckle. Undo that, then pull the bottom bar forward slightly, and the bottom of the net comes loose, then a person can swing the netting onto the top. (note, this phone was taken before I welded a short horizontal tube which will hold the back of the top netting bar in place .. the orange clamp was just to figure out where the tube should go).

2023-08-01-racejeep-sidebars-netting2

With the bars and netting done, the mods are pretty much complete. Now, to clean, paint, and assembly. Hopefully, everything goes back to gather as it did before …

Here’s the chassis a little cleaner. My goal is simply to cover the green and paint the bare metal.

The front tires will go on some aluminum rims, while there will be desert dogs in the back. The back rims remain undecided. I’d rather not use the hurricane finned rims for the rear, but don’t want to crack them. I have some other aluminum rims for the back, but they are six lug, while the rear axle is now a five lug drum.

2023-08-01-racejeep-wash2 2023-08-01-racejeep-wash1

 
To Top

Orange You Glad I Painted It?

• CATEGORIES: Features • TAGS: This site contains affiliate links for which I may be compensated.
2023-07-18-paint-body9

It is a little more orangey in person. These pics are pulling more red.

Over the past two days I put four coats of rattle-can Kubota Orange paint on the front clip and body (inside a temporary paint booth in the shop). Normally when I paint I use the proper tools, get proper paints, etc. But, the last time I sprayed a jeep was about 14 years ago. I thought, just maybe, naively optimistically, spray can paint tech had improved….

Moreover, one of the upsides of spray can tech is that if there is damage, you can easily get a can to cover up any issues. Since this was to be a temporary paint job, I figured I’d be a guinea pig and see how it turns out.

Well, I can assure you the paint job sucks. While I really like the color, the shine is uneven, there are several runs (despite trying to achieve light coats), and still I can see a slight bit of background color behind the orange. In fact, I found it more difficult, more messy, and stickier to use the cans than paint with a spray gun. Lesson learned!

Thankfully, spectators are usually 30 feet or more away from the track, so I’m sure no one will notice (except when lined up in the rare queue).

 
To Top

Body Progress

• CATEGORIES: Features • TAGS: This site contains affiliate links for which I may be compensated.

With the roof repaired, I was able to return to the body on Wednesday. From sanding the body, I can see this isn’t the first time it’s been repaired (fiberglass patches and some bondo). Below are pics after applying the fiberglass filler and applying some sandable primer, but before any bondo. I’ve since applied some bondo to fill in some holes, nicks, and cracks.

2023-07-12-parkette-body-primer-filler1 2023-07-12-parkette-body-primer-filler2 2023-07-12-parkette-body-primer-filler3

 
To Top

No updates Tuesday

• CATEGORIES: Features • TAGS: This site contains affiliate links for which I may be compensated.

Well, I’d planned to do updates, but the weather was perfect for sanding and patching the race body’s big holes with fiberglass (and smaller holes with fiberglass putty), so that took priority. I might be able to have all the body prep done by tomorrow evening.

With the highs around 90 degrees, it’s not too hot, so this week is perfect for prepping and painting the body and front clip.


To Top

Initial Color: Kubota Orange

• CATEGORIES: Features • TAGS: This site contains affiliate links for which I may be compensated.

After one of the nicest April, May and June I think I’ve ever experienced, our summer highs in the 90s have finally arrived. However, work goes on when it can.

We have settled on a temporary color, Kubota Orange. It’s the rattle can color that we think looked the best. I don’t want to do a nicer paint job just yet, because I don’t want to take the time right now to get the body and front clip completely smooth (in case I want to do the mounts differently). Instead, I want to get the jeep running, so that I can test the anchor points to make sure they hold like I hope they will and that the front clip doesn’t rub on the body.

Yesterday I made four of the six front clip mounts, with the final ones to be made today. Here’s the orange on the fender (only two coats). It’s a little darker in person.

2023-07-08-orange

 
To Top

Body Mounted, Front Clip in Progress

• CATEGORIES: Features • TAGS: This site contains affiliate links for which I may be compensated.

I am typing this while recovering from a wasp sting that caused my right hand to swell (it’s been an odd health year for me!), which sent us to the local doc-in-a-box to get some steroids, which in turn helped reduce the swelling (after 24 hours). I’ve never had a reaction to a stinger like that, so it’s a bit of a surprise!

Last week I finalized the body mounts. Hinges attach the body to the back of the frame in two places. Two single bolts with large washers hold the mid section of the body to a plate on the roll bar. And, two bolts through angled aluminum hold the bottom front portion of the cowl to an angle piece on either side of the body. On the upper portion of the sides of the cowl some rubber taped to the inside of a bracket keep the cowl from shifting back and forth.

The front clip is proving a bigger challenge than the body. First, I had to cut out part of the the driver’s rear-side portion of the front clip because it was too narrow and hit the side of the body. So, I am creating a form and will lay some new glass down (along with patching a few other places).

Then, once the hood fits properly, I will have have to build special mounts for the front clip. The goal is to reduce the stress on the hood, as these things are often mounted with quick release setups that allow the body to flex, making it more prone to breaking and cracking and/or rubbing on the body.

Here are a few pics:

I decided to to throw a couple blocks (made from some of my grandfather’s wood) onto the hood that are a nod to the original hood blocks, but will also tie in a frame underneath the hood to help support and mount the front of the hood.

2023-07-02-racing-body2 2023-07-02-racing-body3

You can see part of where the hood is cut out. The form will allow for the new portion of the hood also down fender to flare outward more (or that’s the plan). 2023-07-02-racing-body4

 
To Top

Ticking Off the Checklist …

• CATEGORIES: Features • TAGS: This site contains affiliate links for which I may be compensated.


2023-06-16-seat-mounts-miscSlowly, but surely still making progress. Though the garden is done, we are having to re-organize the lean-tos area to accommodate all the hay we need to make it through winter. It’s actually a useful exercise, because there’s a bunch of junk that we just need to take to the dump, especially now that we have a better feel for what we need and don’t need.

I have continued to make progress on the racer.

√ overhead control panel
√ center bar in front (primarily as a conduit for bringing the wiring up to the overhead control panel)
√ seat mounts welded in place
√ mounting bar for shoulder straps (I realized just before I was going to weld in the seat mounts that I didn’t like my original plan for mounting the shoulder straps, so I designed something different.
√ tach holder
√ top drilled and temporarily attached .. need to pull off to clean top and for painting cage.

Next,
1) weld mounts for the side bars and netting
2) finalized body mounts
3) finalize front clip mounts
Getting there ….


To Top

Making More Progress on the Racer

• CATEGORIES: Builds, Features • TAGS: This site contains affiliate links for which I may be compensated.

Sorry the pics aren’t better, but the focus is on creation and not documentation. The goal is to be able to drive it during the first week of May.

The clutch and brake pedal system are all ready for install, though it’s apart for paint. The floor framework is partly complete as of today. I should have the floor frame and floor itself ready for some paint by Sunday (assuming there aren’t more distractions (there have been plenty of those ..).

I ended up building a custom bracket system for the clutch and brake. Because of the holes in the firewall from the old clutch/brake system, I sandwiched the firewall between the bracket I made and a thin sheet of metal to make it look cleaner. Here’s a very rough look from a few days ago. Both pedals had bends, which I straightened (and are straighter than shown below) with the press (as I didn’t need the bends).

2023-04-12-clutch-brake2 2023-04-12-clutch-brake1

Below are some of the parts with a layer of paint. There’s nothing fancy here. I’d love to have the time to tear the whole jeep down, properly clean it, then paint it. But, I want to run the racer first to see how it does before investing more time doing a big overhaul.

2023-04-12-painted-parts1

 
To Top

Firewall Progress

• CATEGORIES: Features • TAGS: This site contains affiliate links for which I may be compensated.

The warming weather has got me busy, but I was still able to get some progress on the firewall covers. Between a small sledge hammer and my big vice, I was able to bend the steel into shape.

Here are my templates.

2023-03-26-firewall-1

Here’s an example of the steel. I was able to cut this out using my plasma cutter (Yeswelder 55DS). It was my first attempt at using it, but it worked pretty well.

2023-03-26-firewall-2

Here’s it after bending.

2023-03-26-firewall-3

The tabs need some adjusting.  Otherwise ,these two covers should work fine.

2023-03-26-firewall-4

 
To Top

Reshaping The Firewall

• CATEGORIES: Features • TAGS: This site contains affiliate links for which I may be compensated.

I spent the last couple of days working on the firewall. This is obviously a key element for assembling other items, such as the steering, brake/clutch pedals, gas pedal, etc.

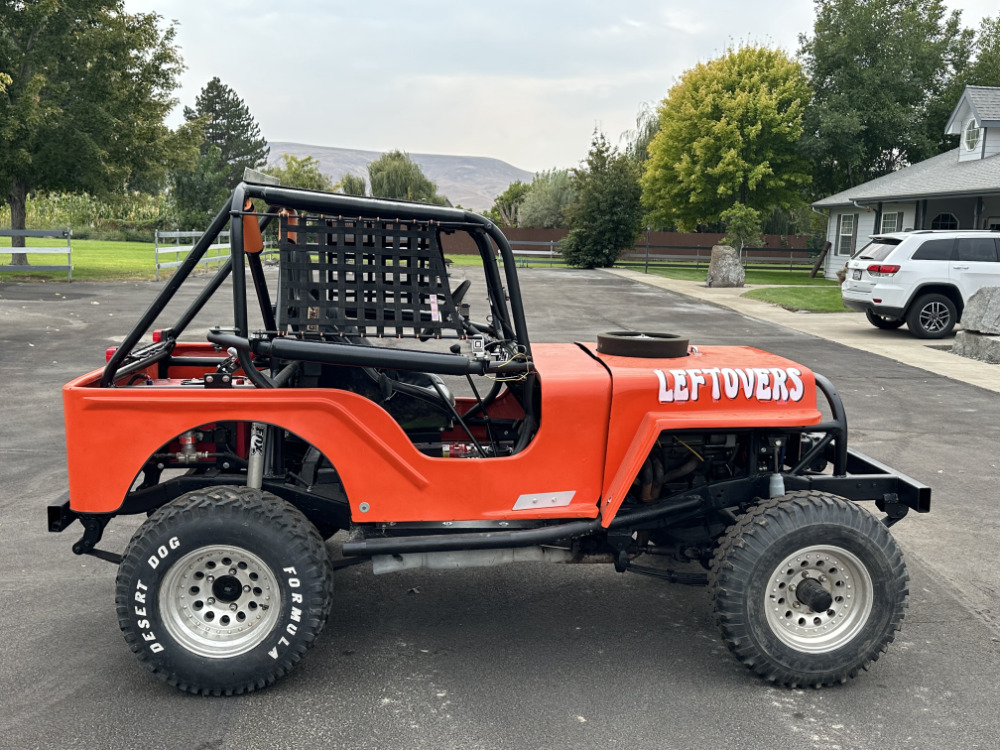
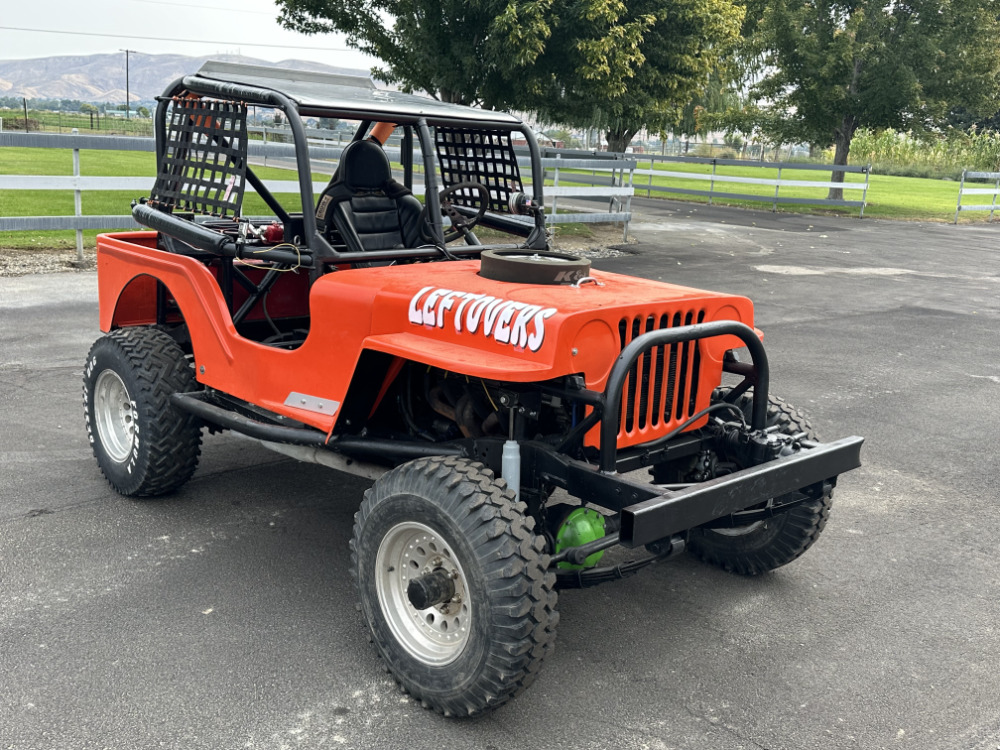
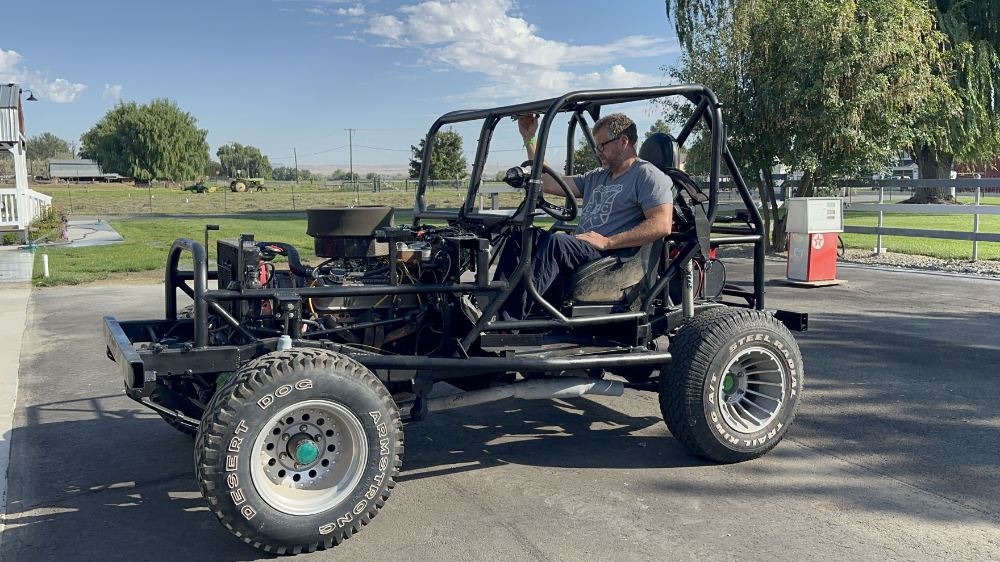
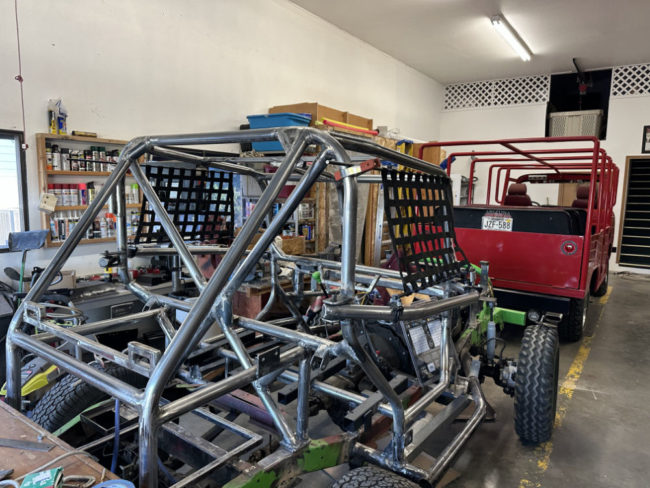
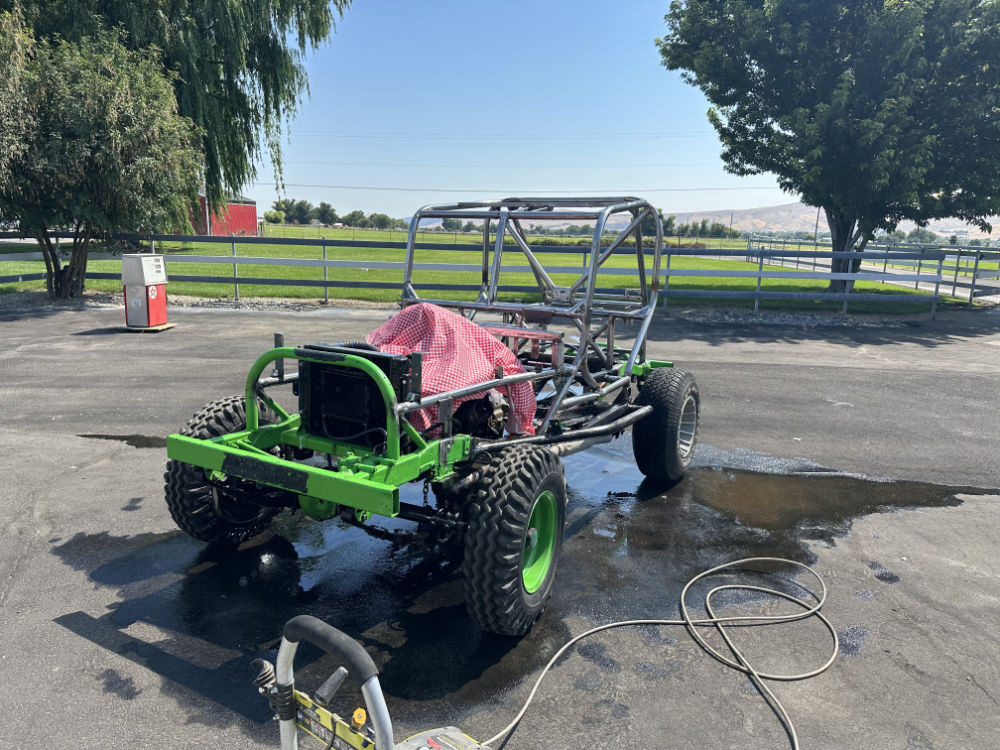
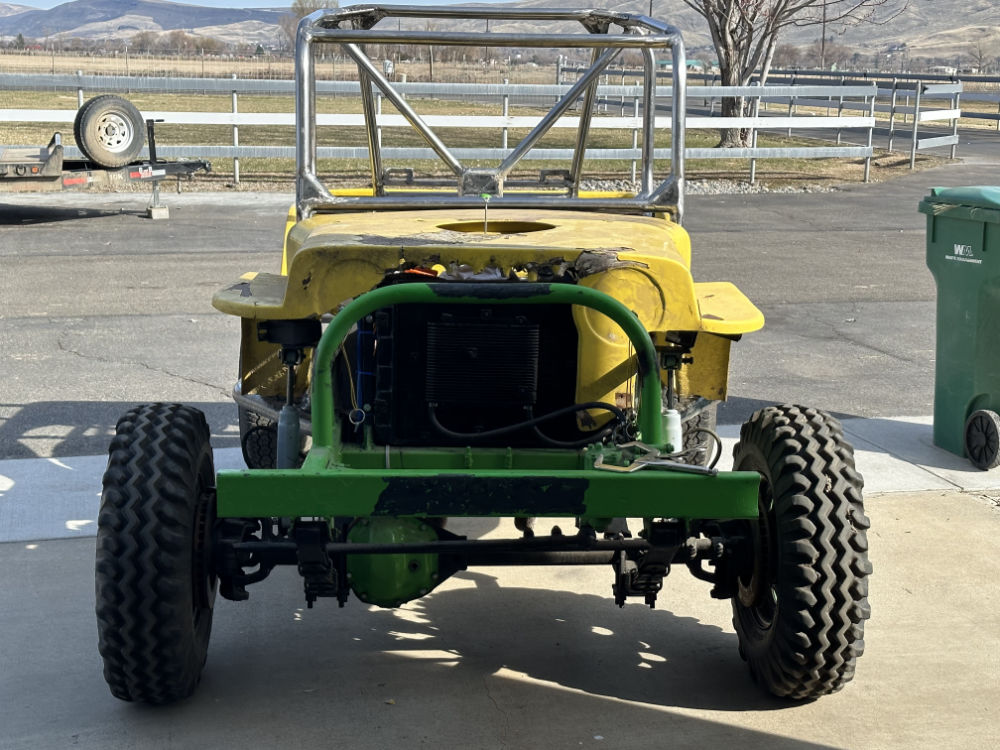
I should begin by noting that we have a new name and theme for the jeep: LEFTOVERS. It’s a food-ish theme that kind of goes with Lost Biscuit. I like that it isn’t a particularly serious name. And, it seems appropriate given I am scavenging two former racing jeeps, but a few parts off of Biscuit, as well as some other random parts.

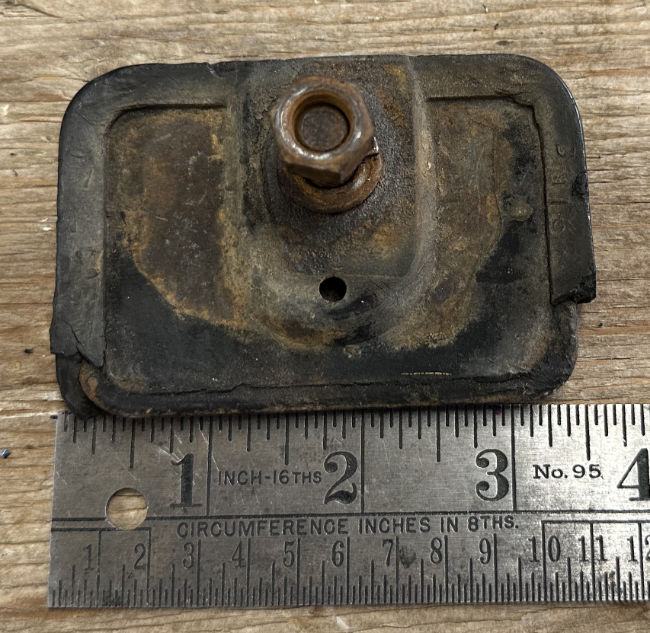
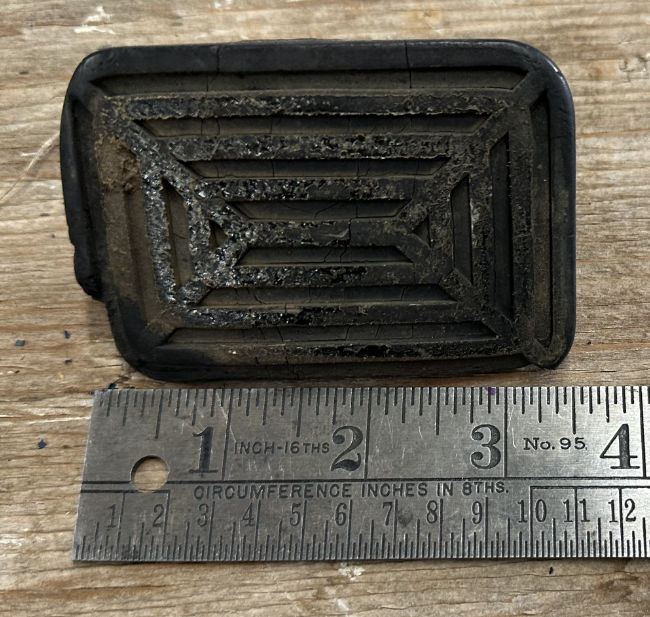
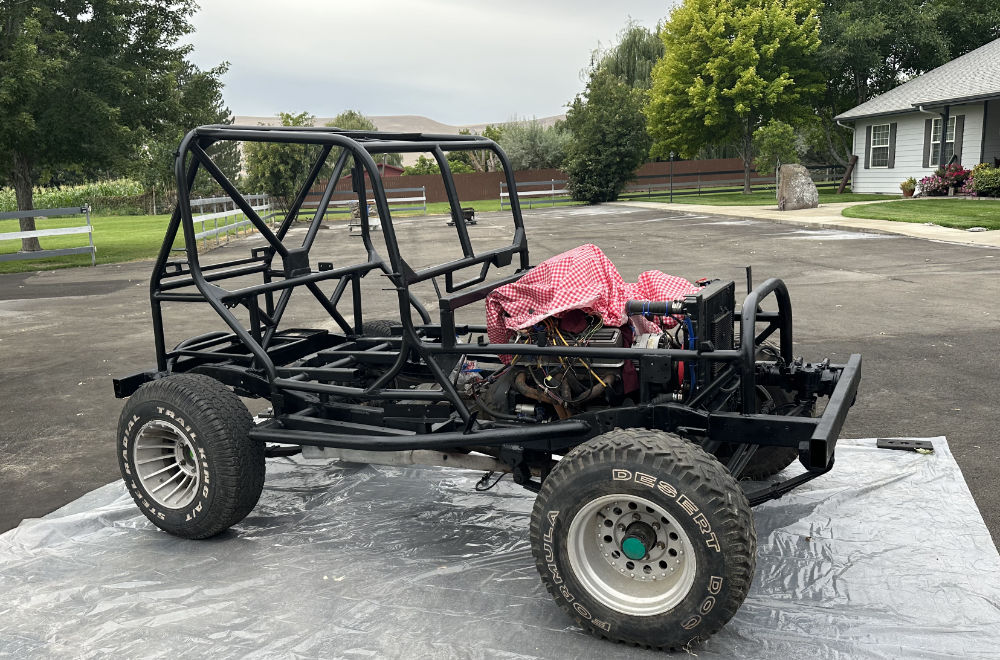
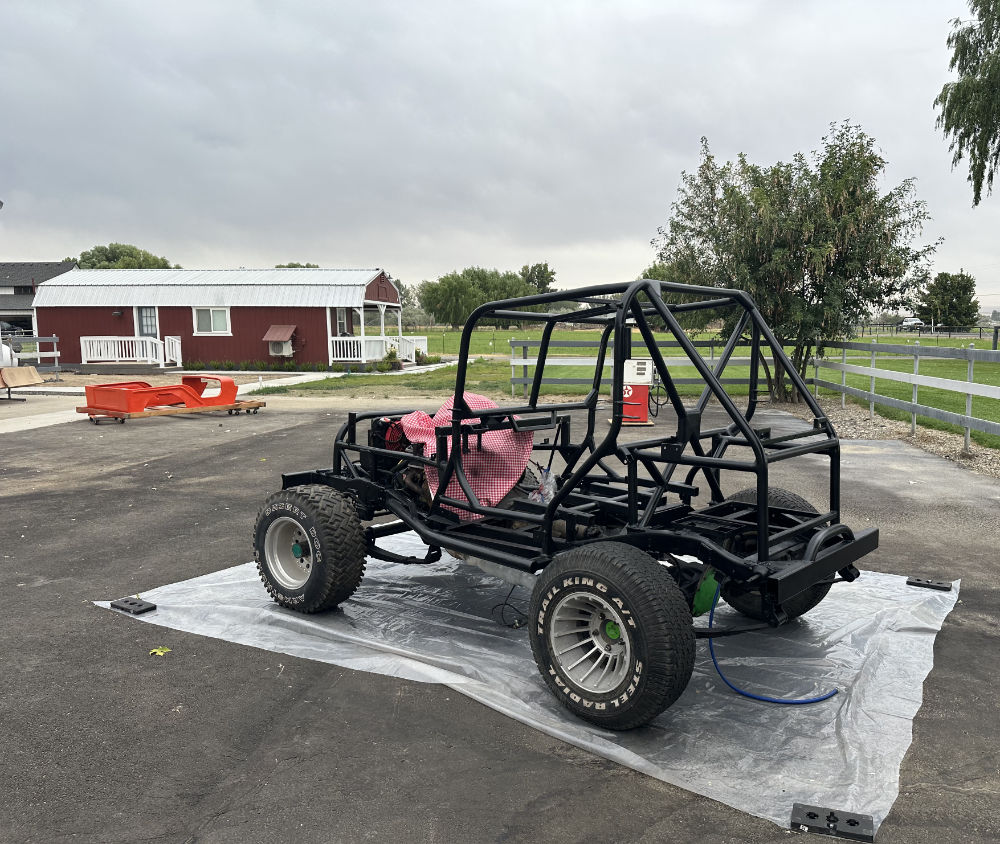
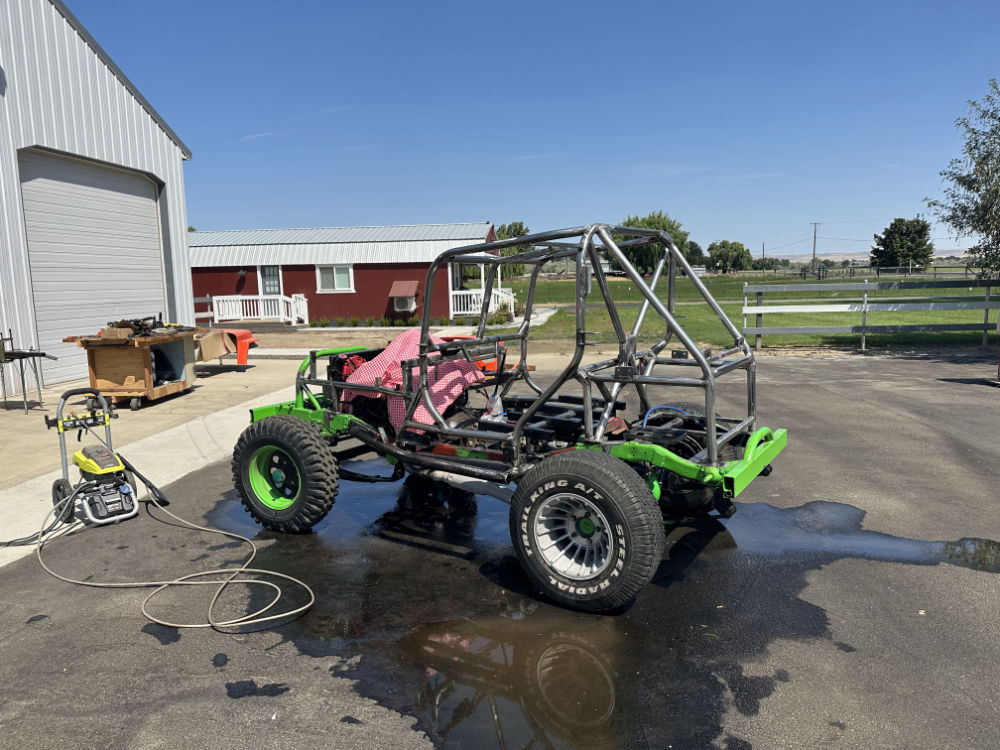
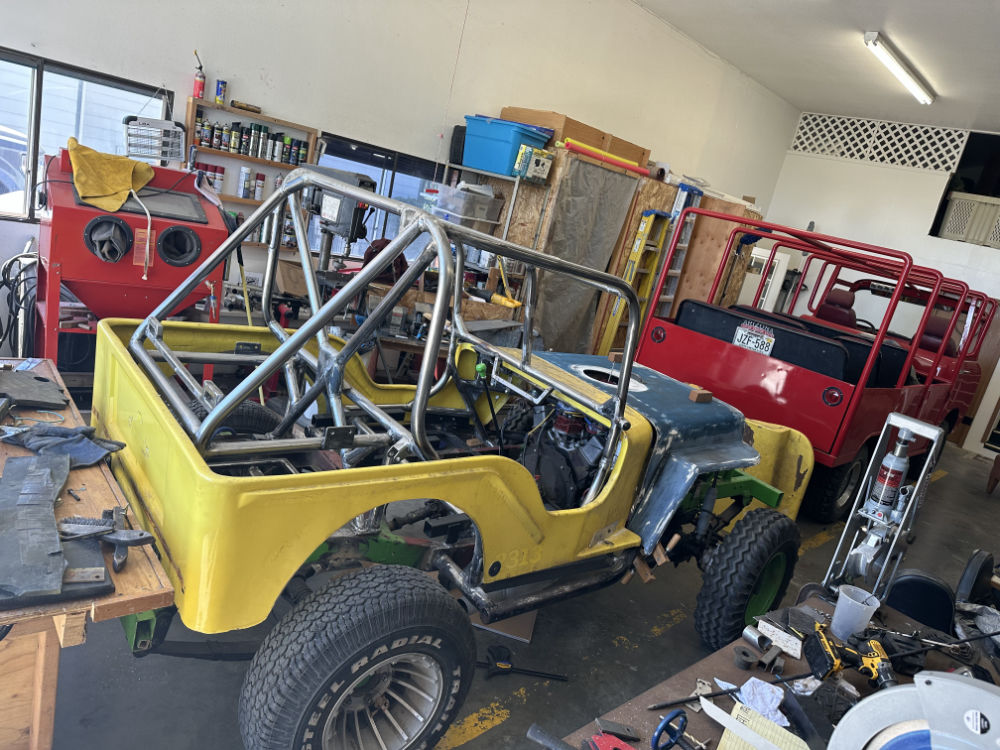
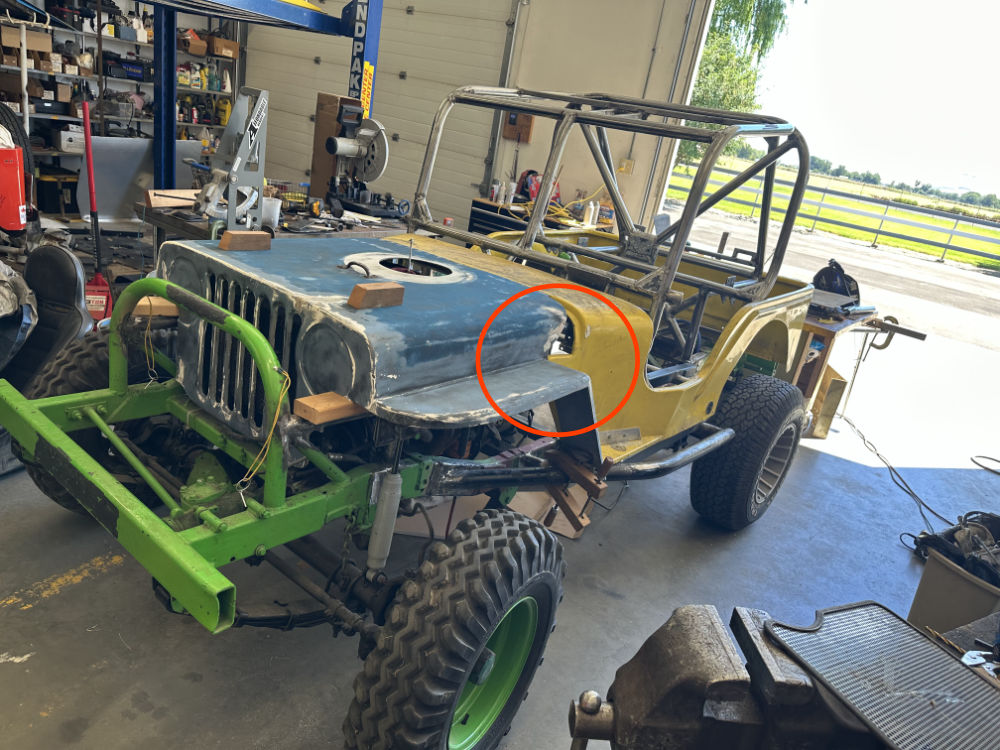
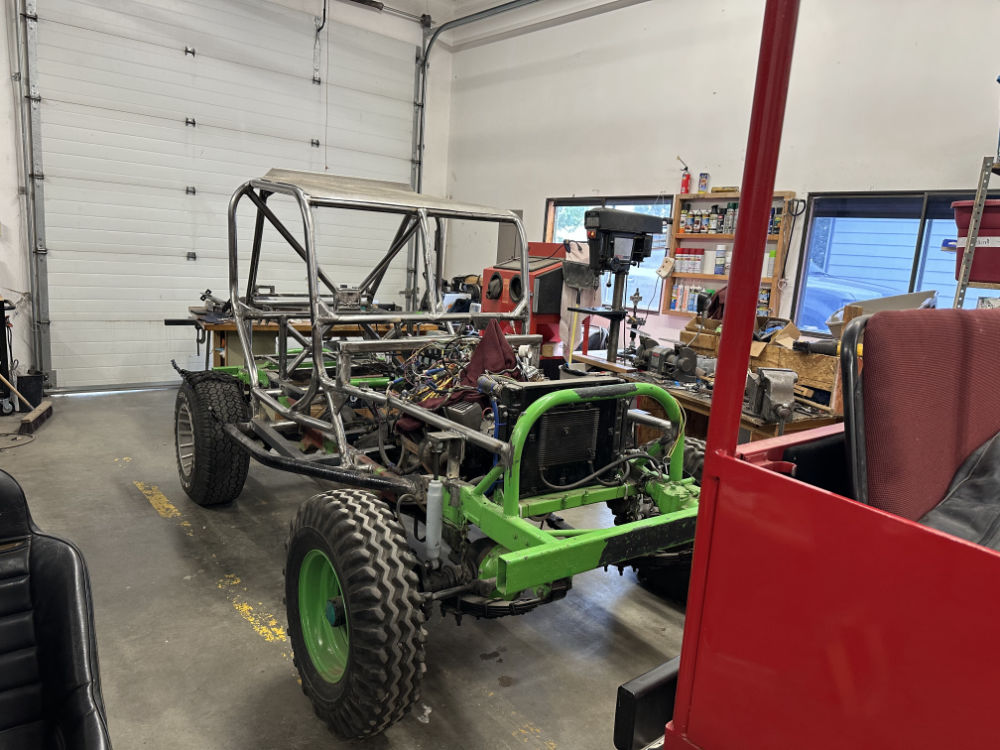
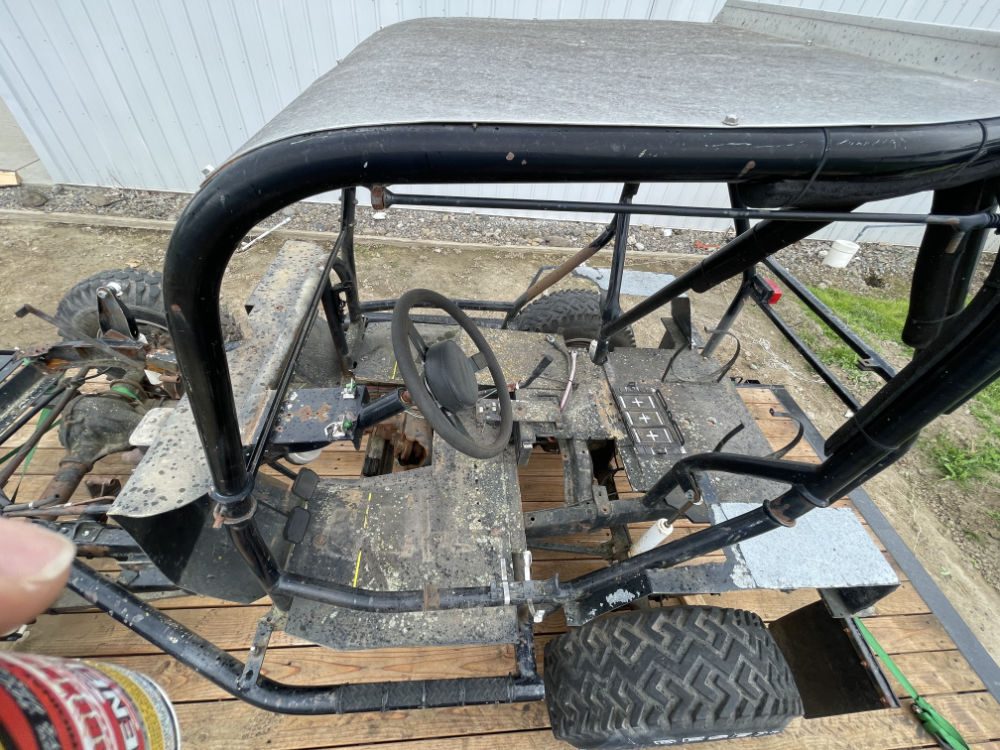
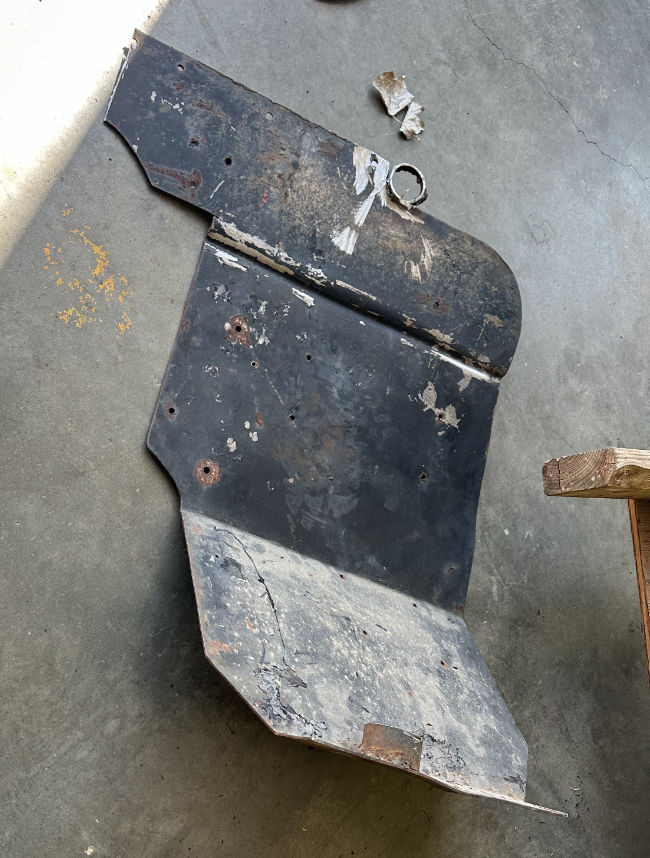
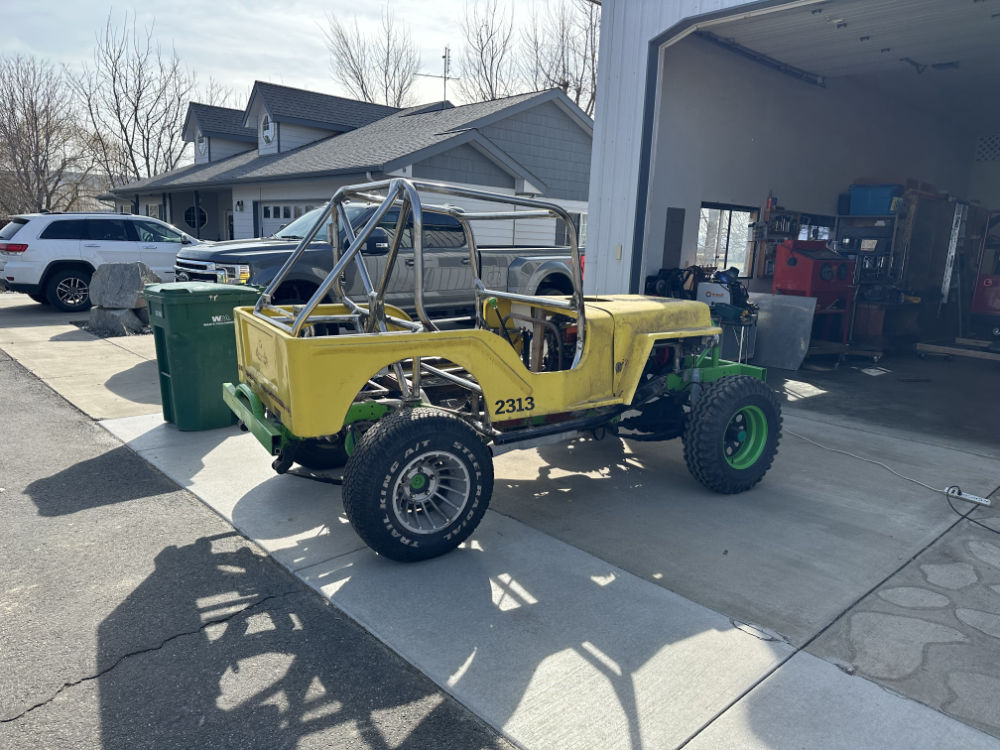
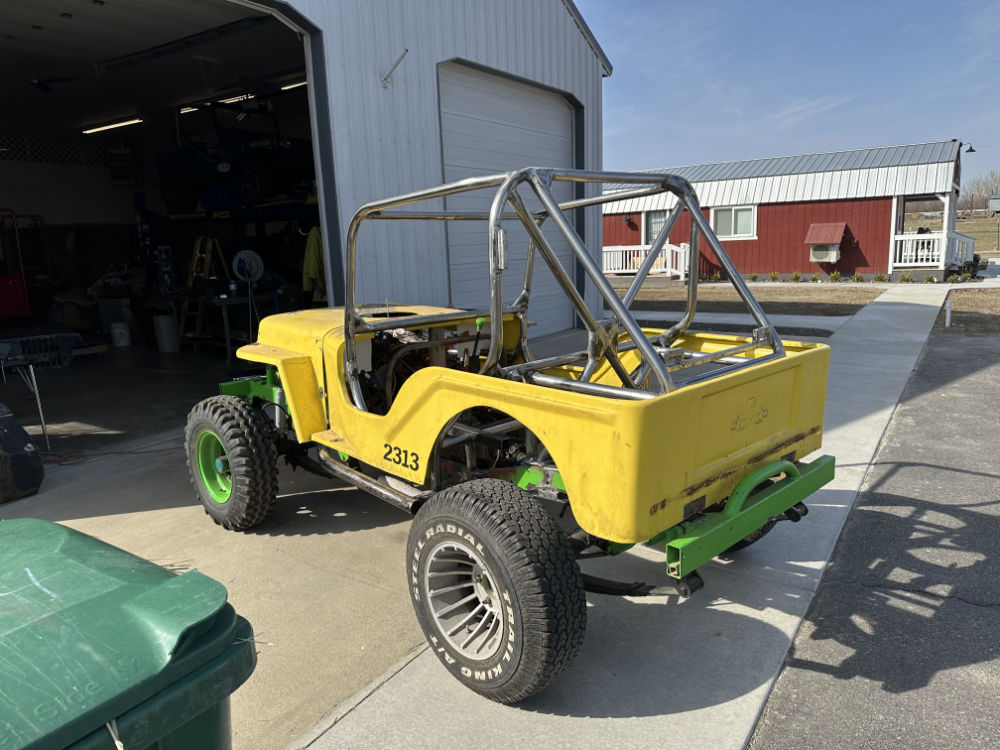
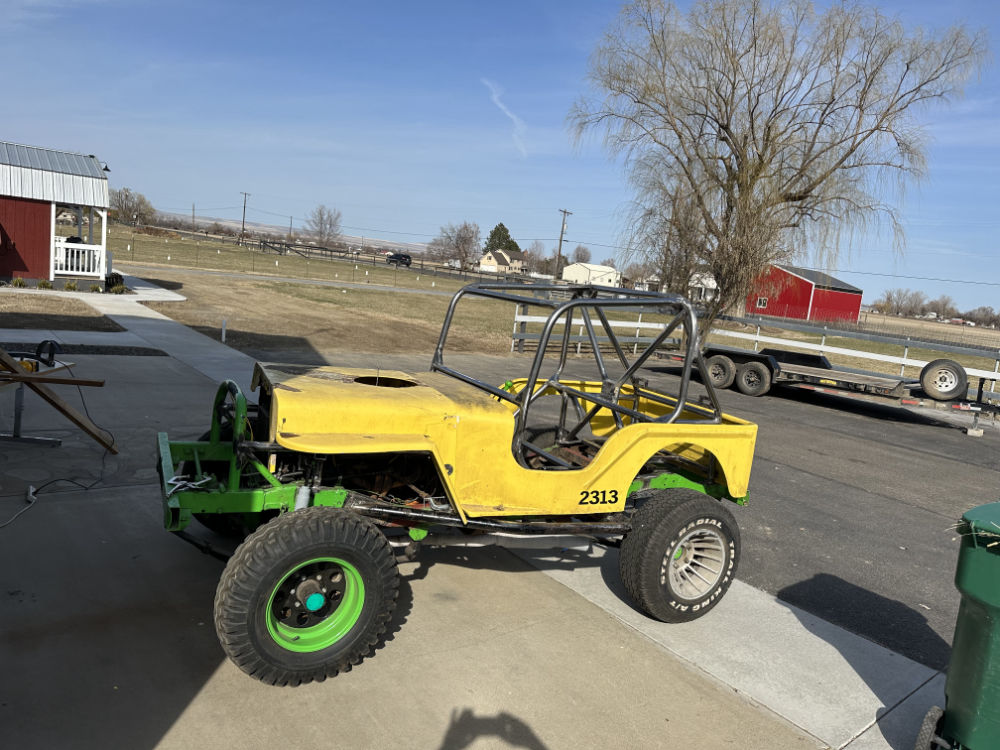
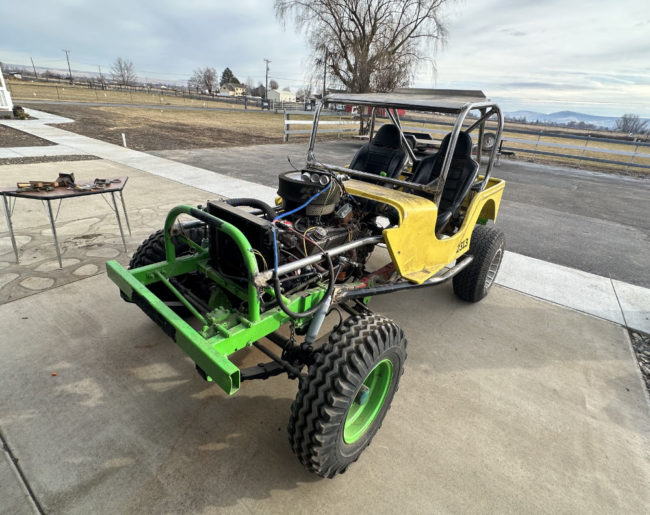
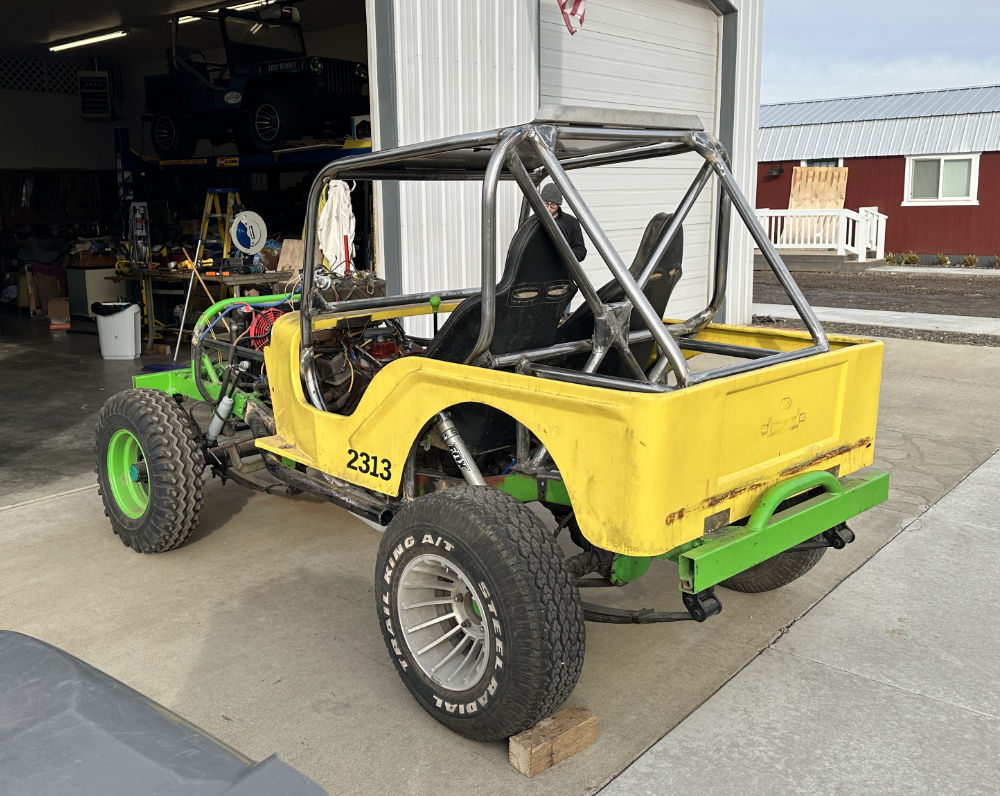
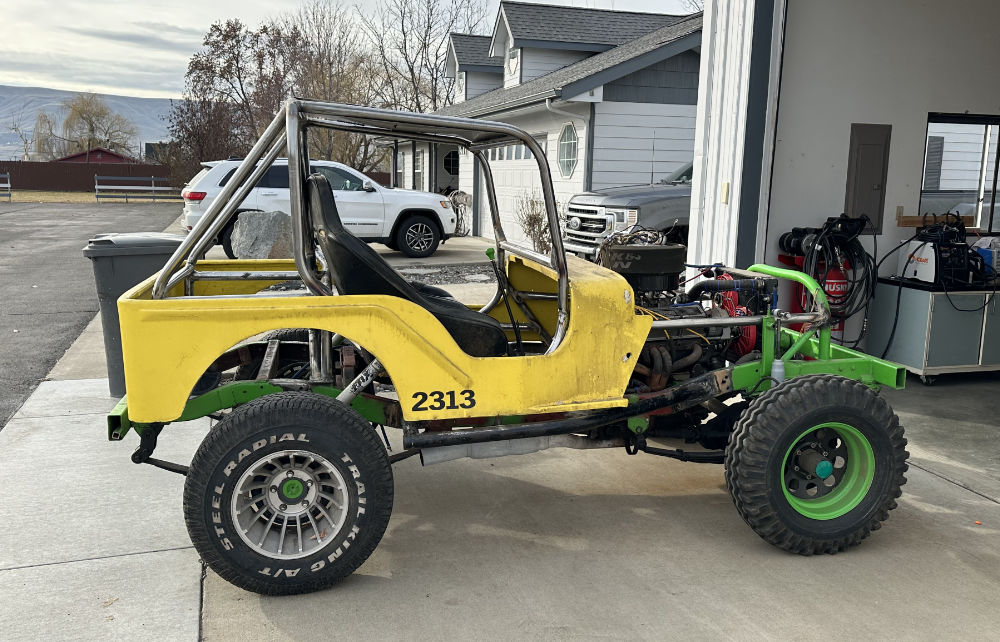
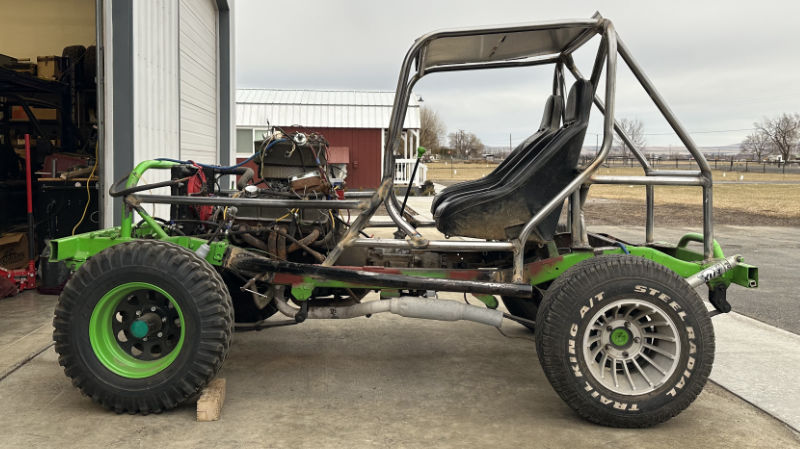
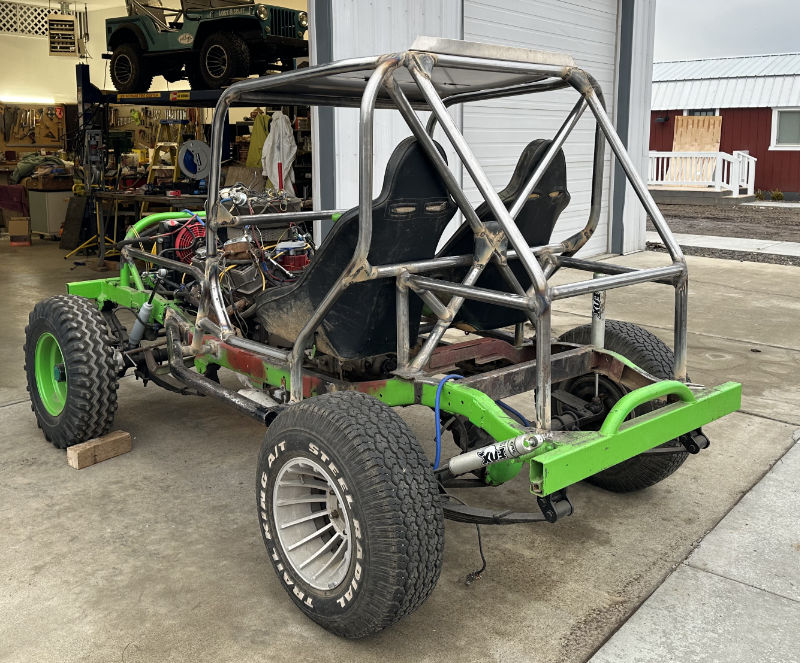
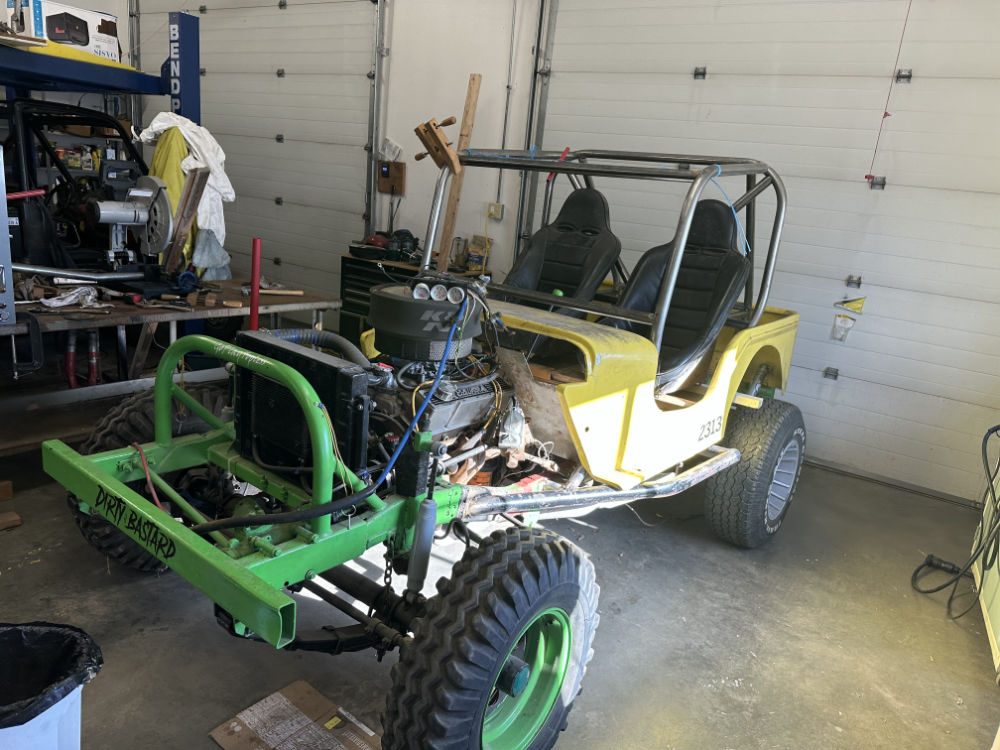
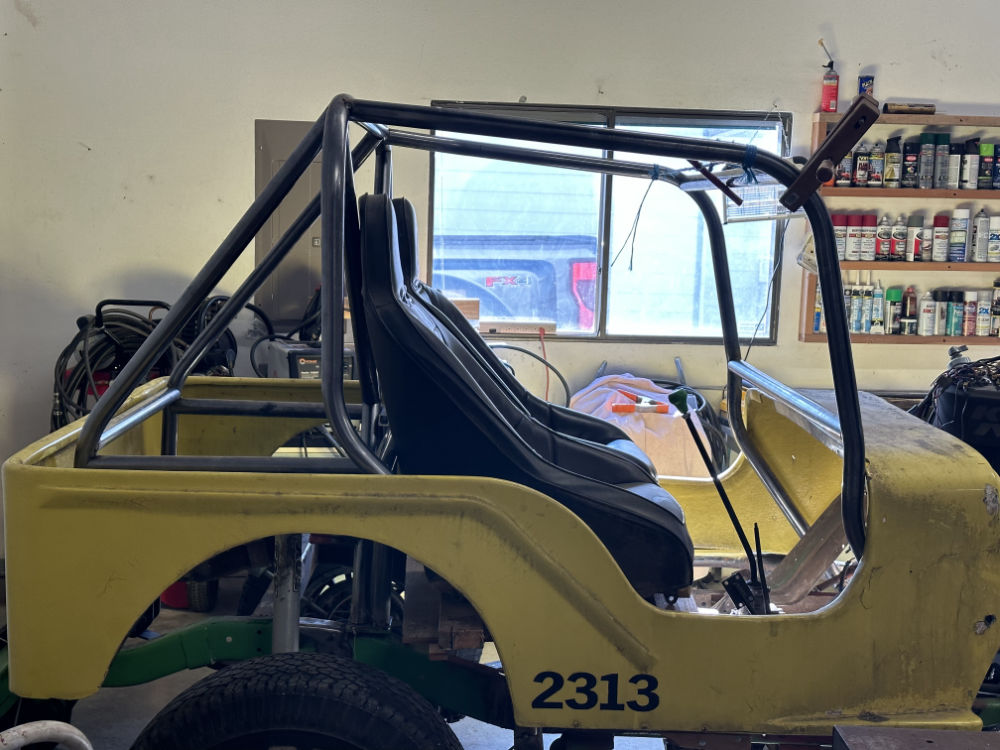
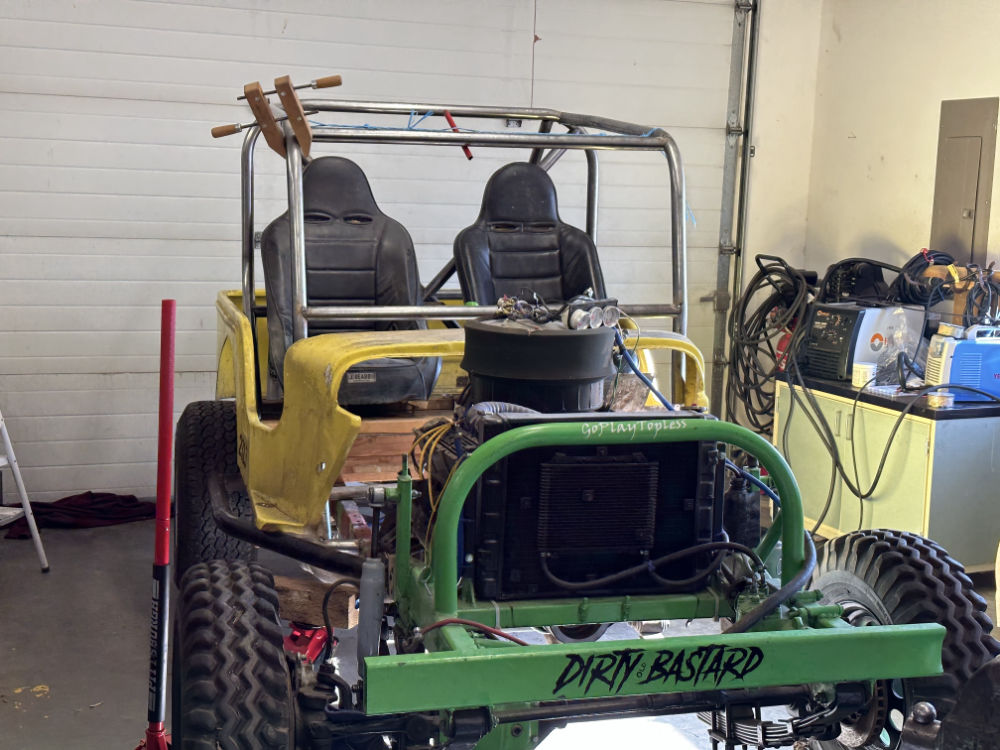
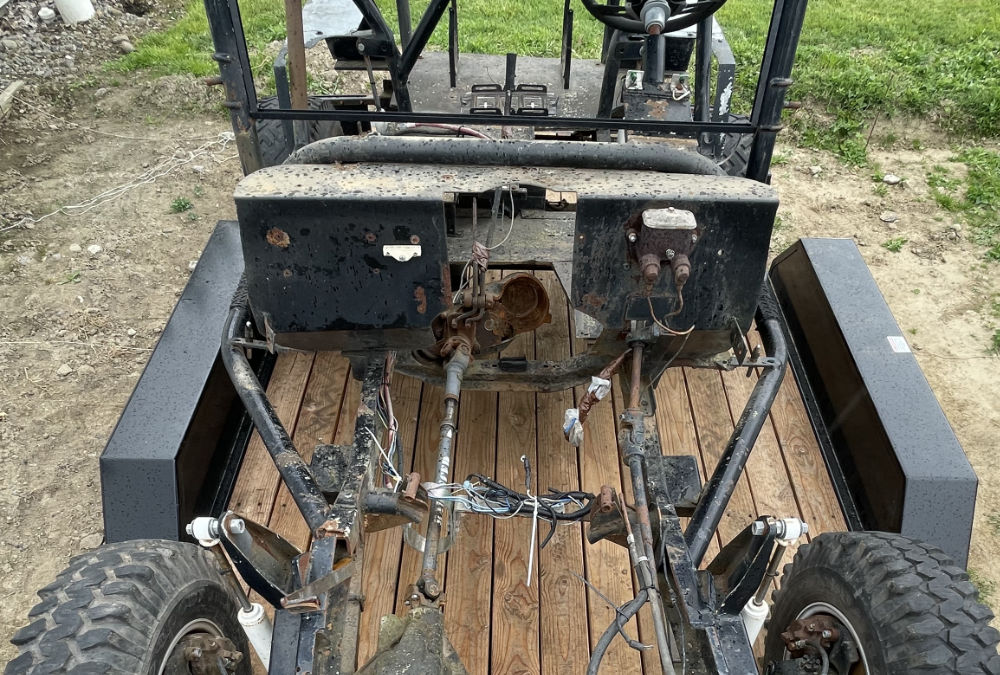
I saved the original firewall from the yellow-bodied jeep, but it wasn’t in the best shape. I also wasn’t sure if I wanted to use it anyone, because my firewall area includes several rollbar tubes that aren’t present in the yellow-bodied build. Here are some pics of it on the old jeep (btw, I’ve been terrible at taking pics during this build):

2023-03-23-firewall-before2

2023-03-23-firewall-before1

I felt the deciding factor would be how well a template I planned to create for the firewall would overlay the old firewall. If close enough, I’d make the old firewall work (again, leftover theme).

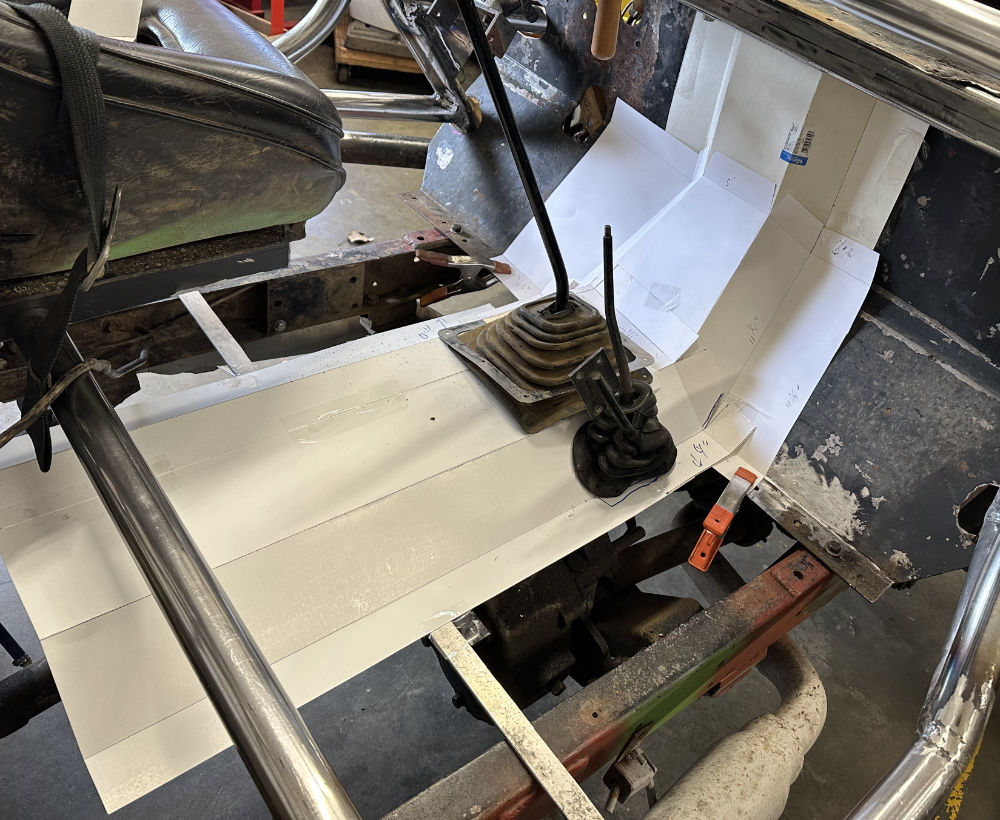
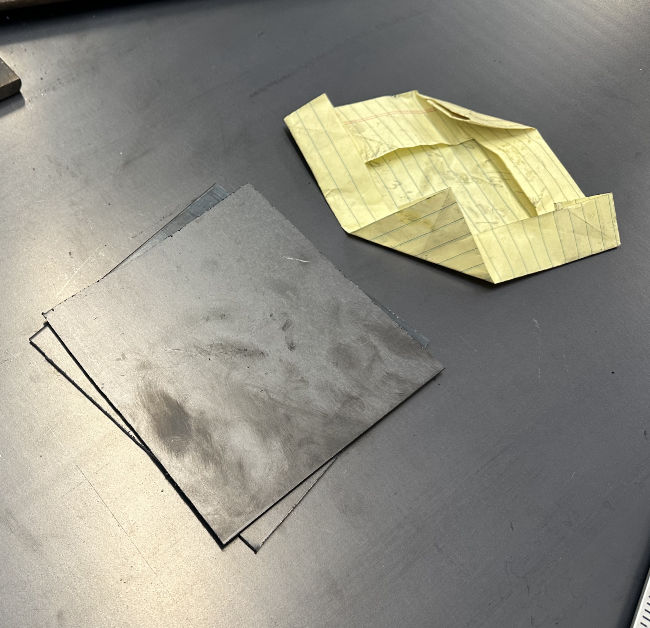
Below is my really fancy paper template (I won’t be using the aluminum cover over the gear box .. I was just experimenting with that).

2023-03-23-firewall-paper

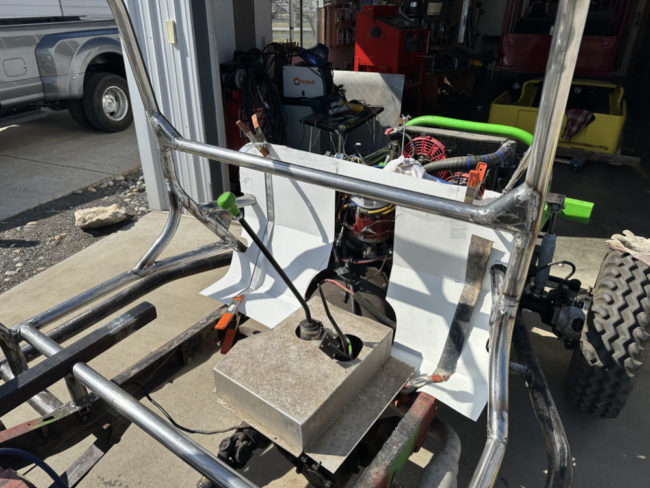
The first thing I realized was that I would need to split the old firewall in two halves in order to install it and have it fit over the roll bars. Once I was reasonably happy with the template, I laid if over the firewall (no pics of that), only to learn that I would need to flatten most of the existing firewall and rebend it; not an easy task!

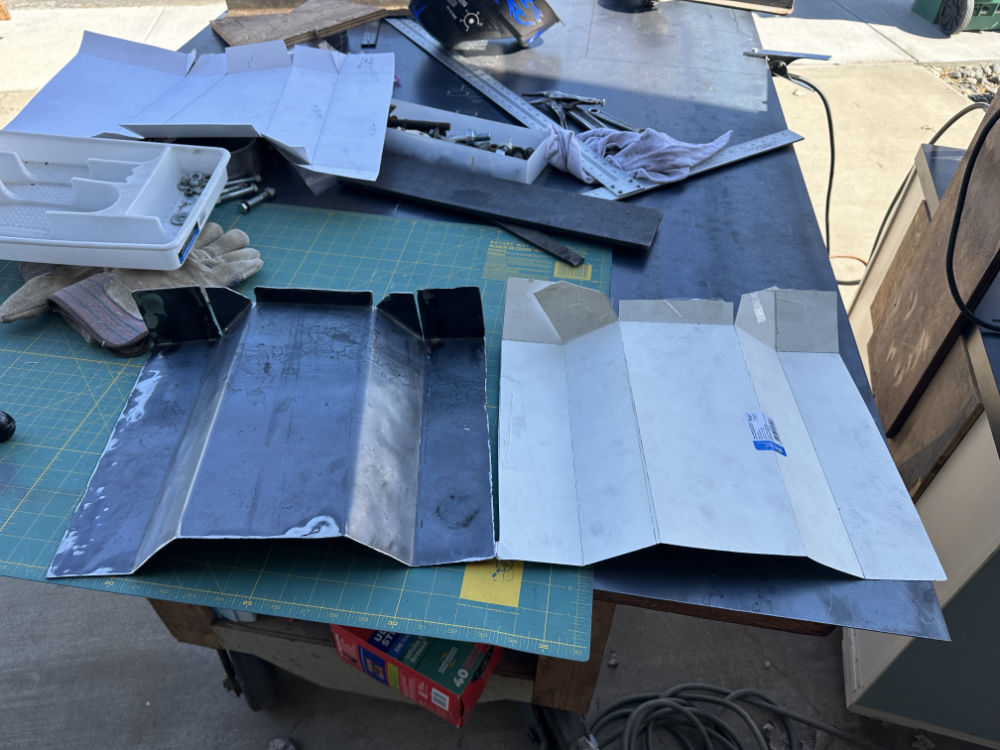
Fortunately, the other day I bought a 20-ton press from Harbor Freight (I needed it to fix a neighbor’s plow). I used the press to press the bends relatively flat. Then, I cut the firewall in half and began the process of re-bending the firewall to the specs I needed, then cutting out areas to fit one over the roll bars.

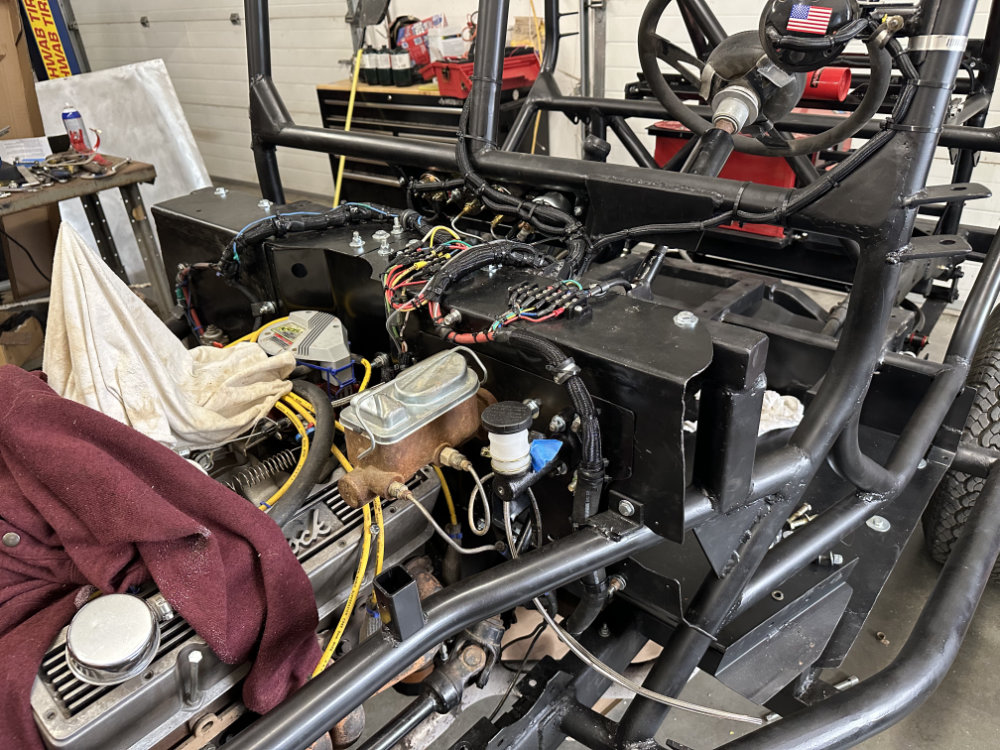
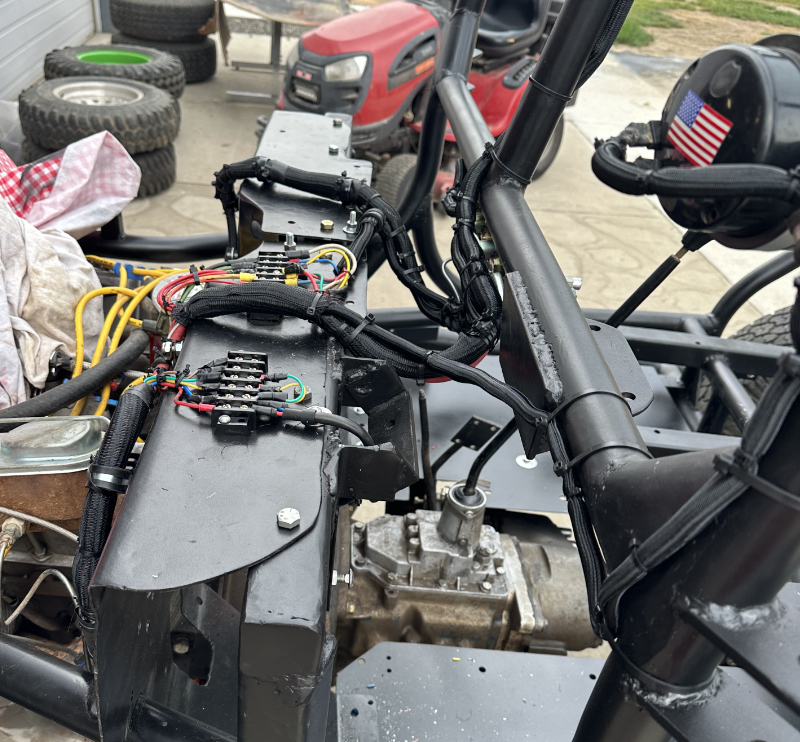
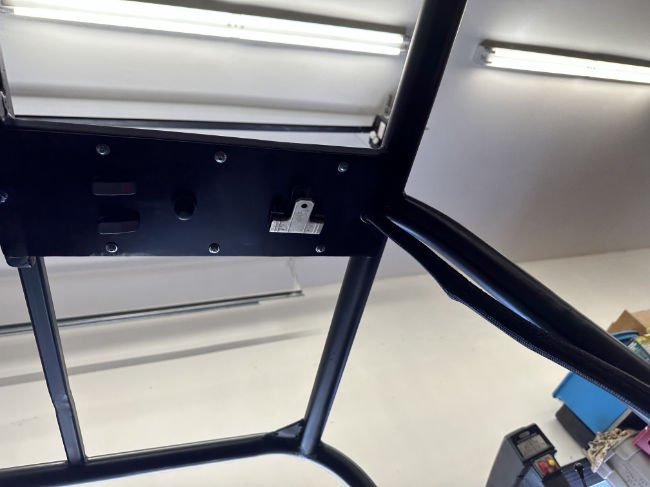
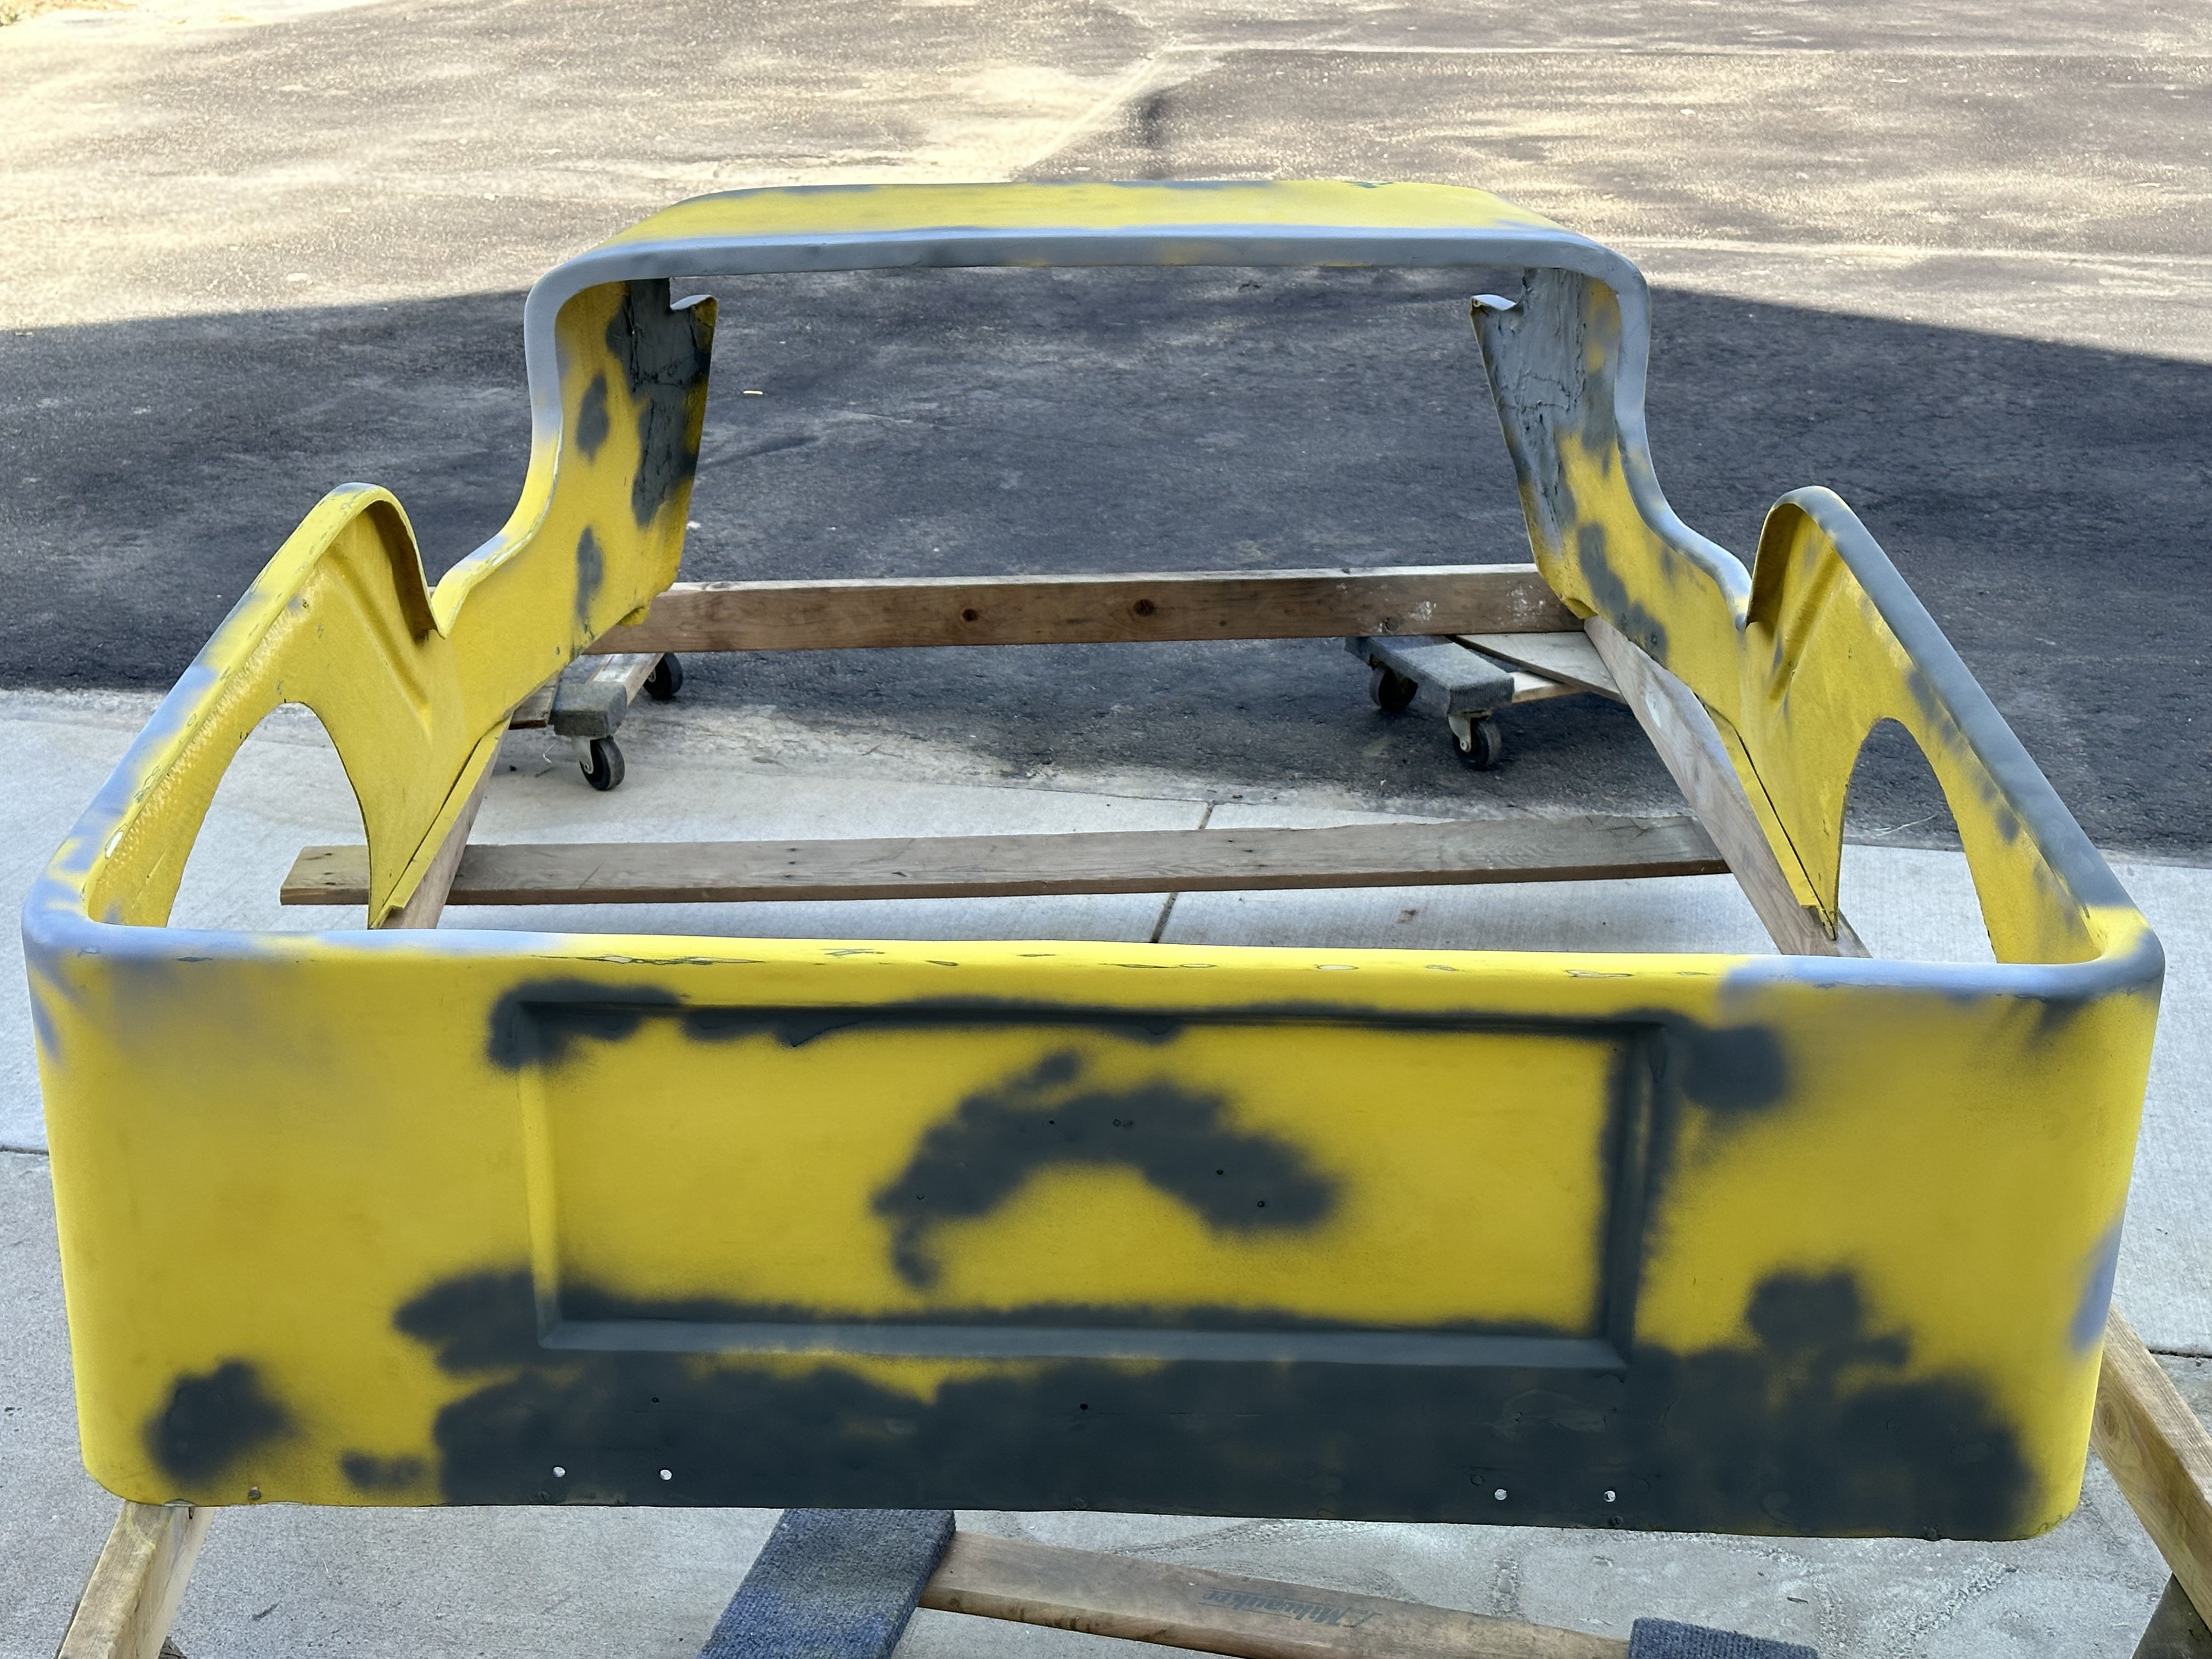
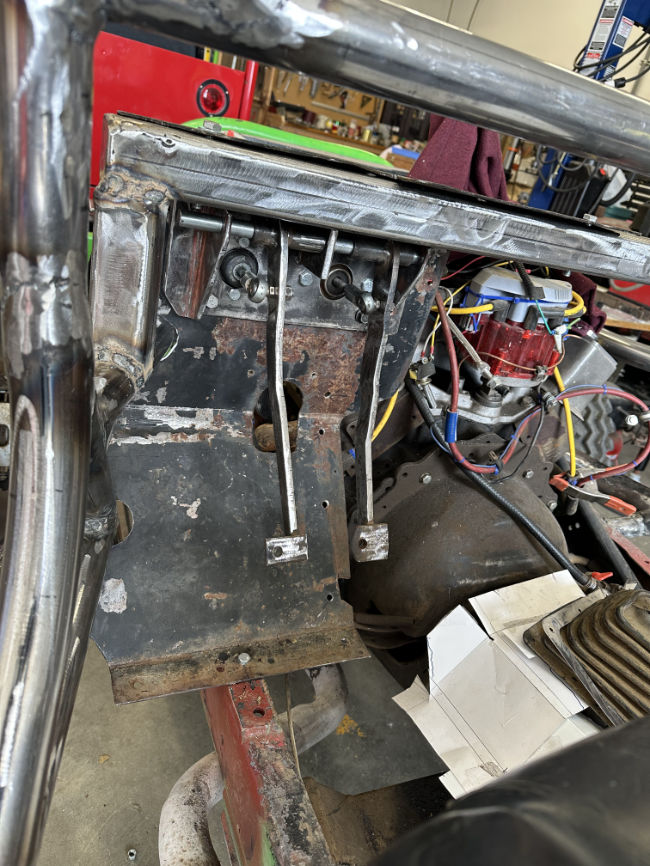
Here’s an example of the passenger side after the top part was was bent flat:

2023-03-23-firewall-1

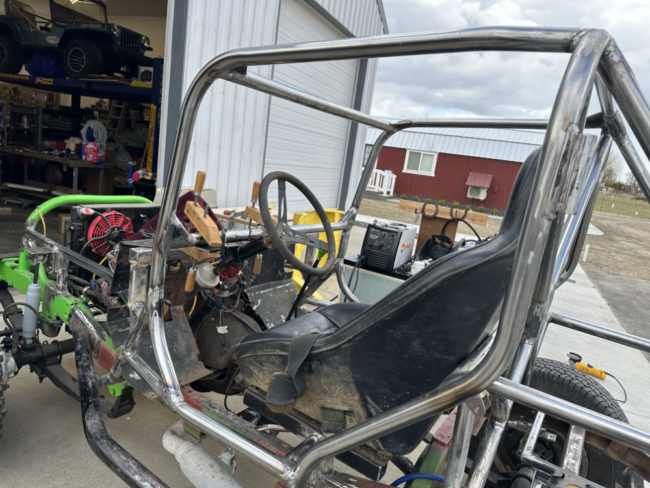
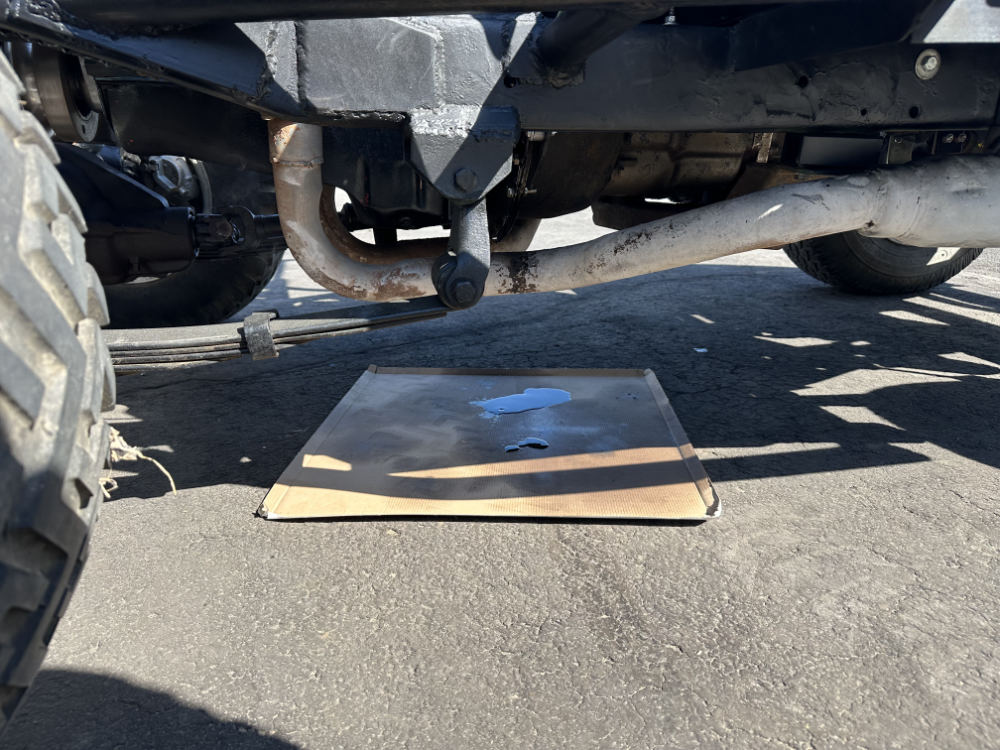
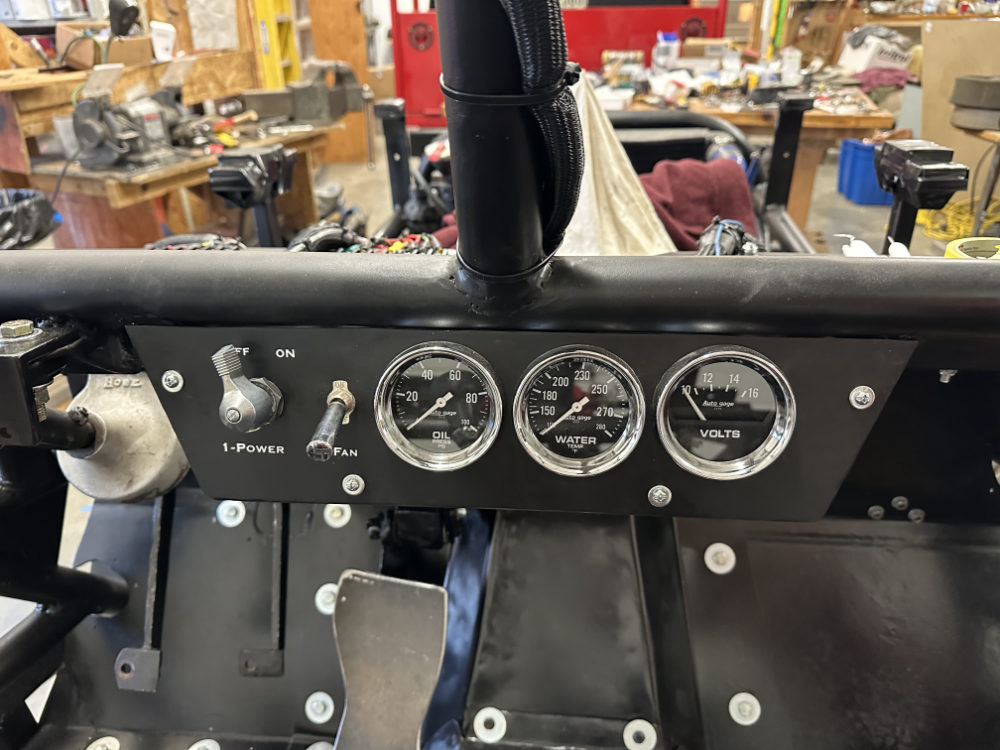
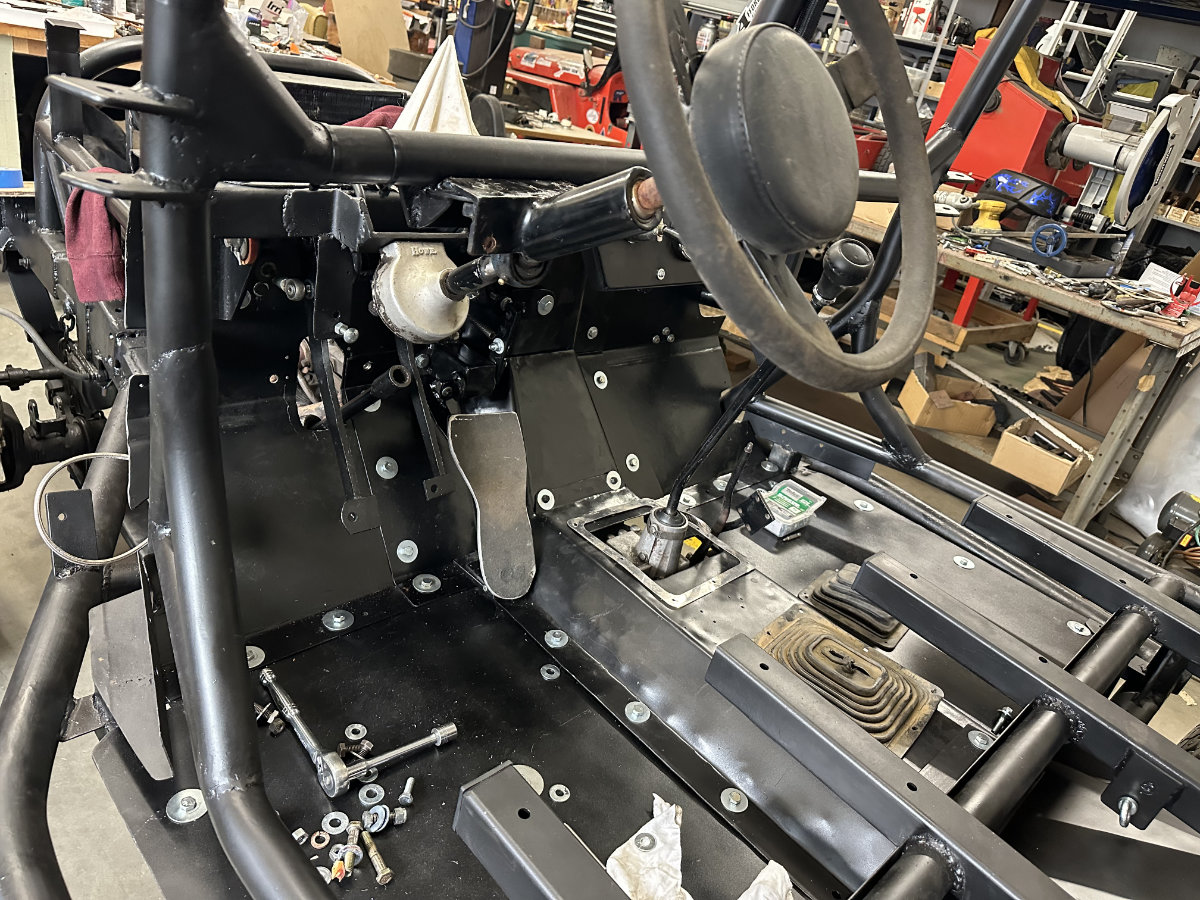
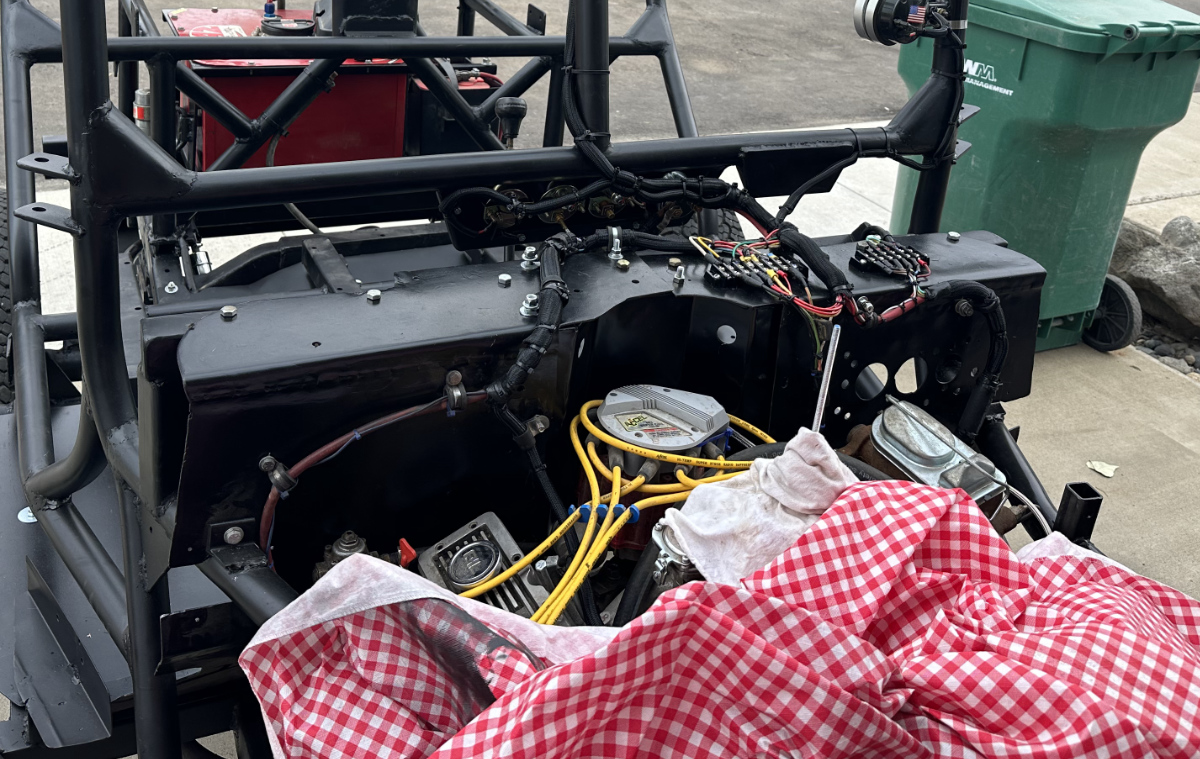
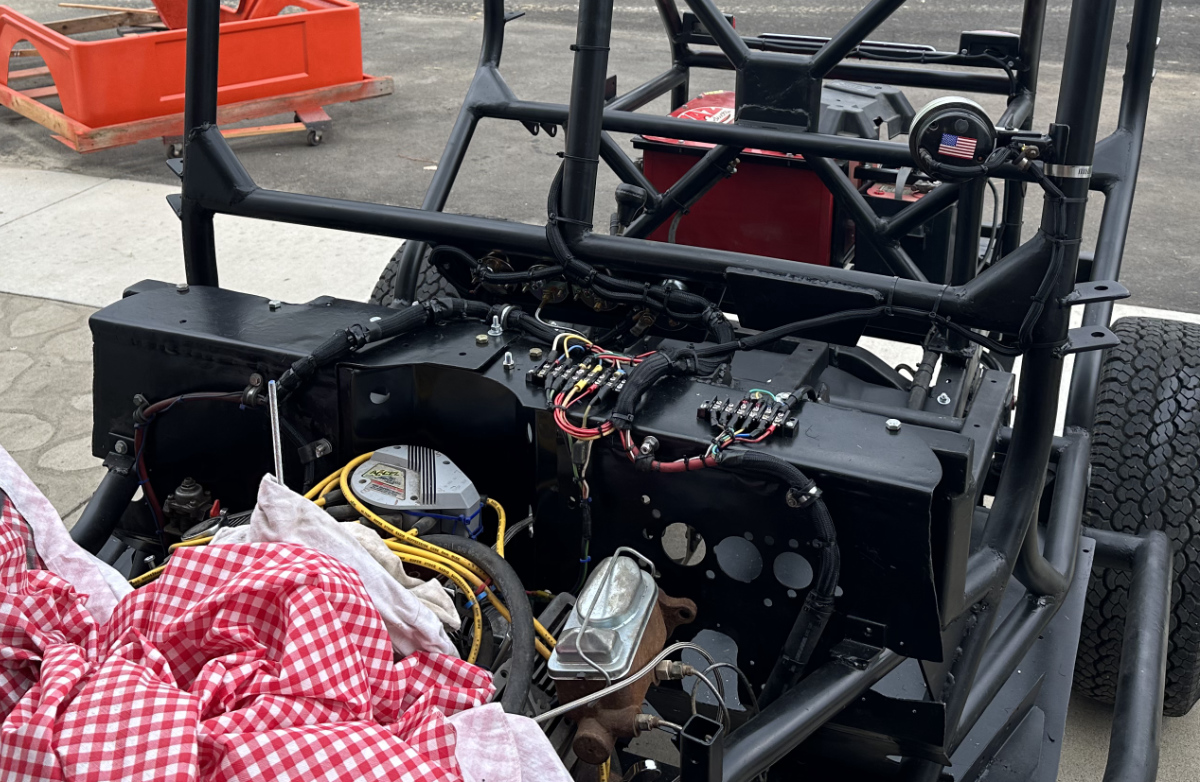
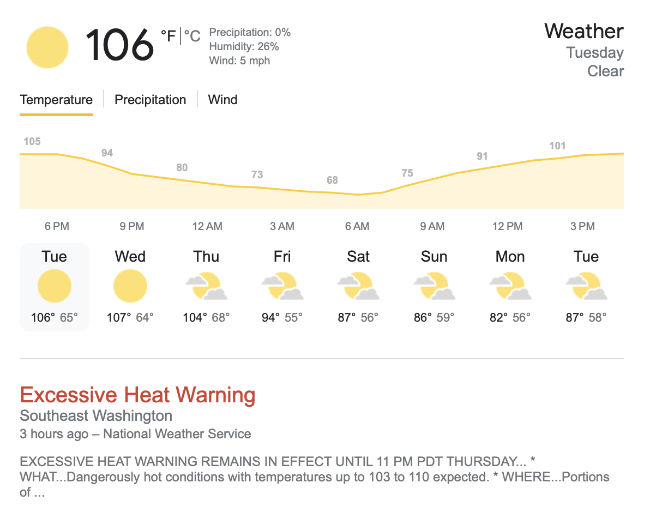
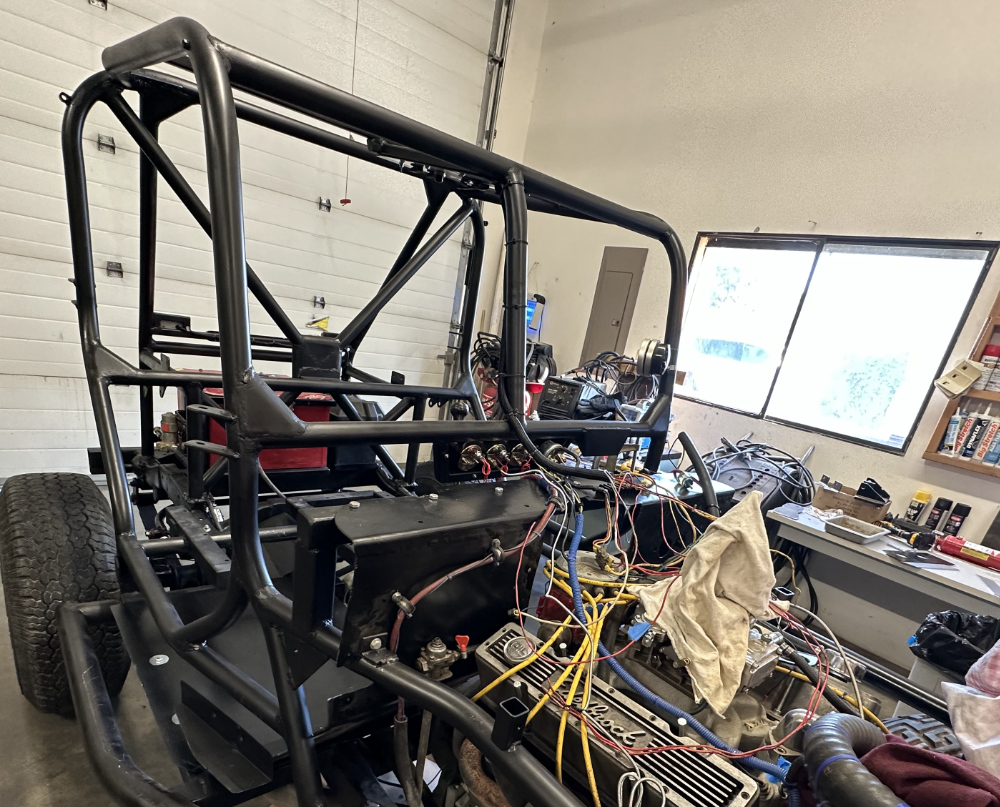
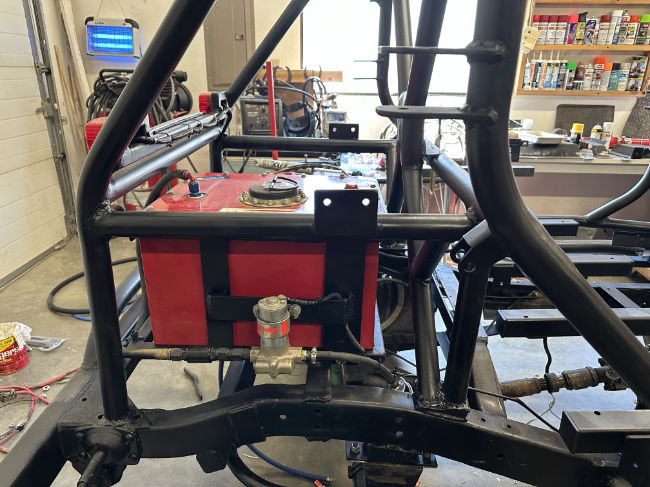
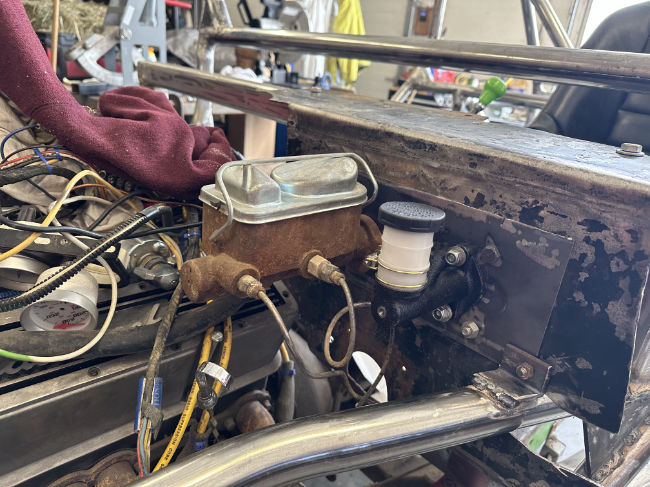
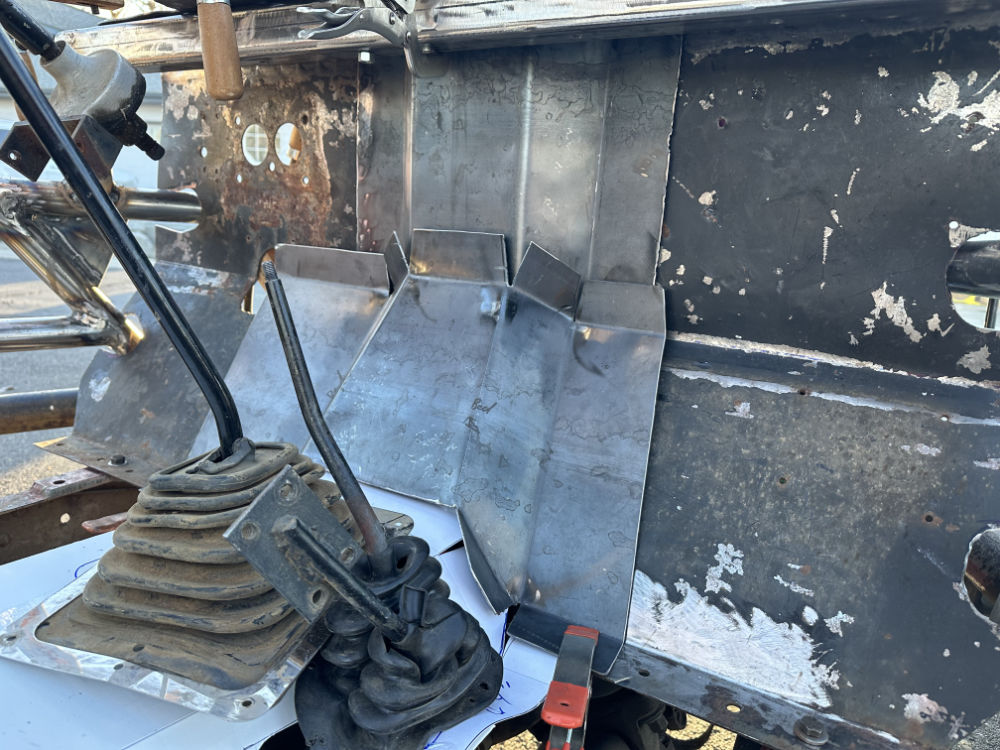
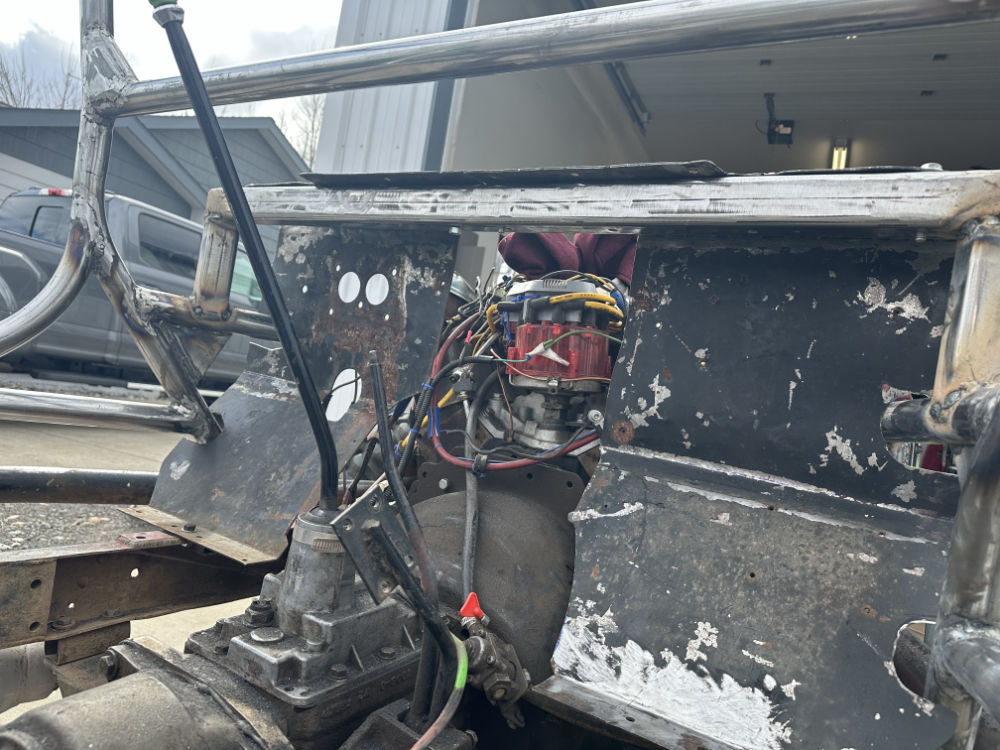
Another obstacle I had to consider was the distributor at the rear of the engine. I needed room to be able to remove that if necessary. Here’s a pic of the two haves bolted to the crossmember I made from spare square tubing. It’s not perfect, but it will look alright once I get the paint off of it and clean up everything else. Besides, it will be hidden under the cowl.

2023-03-23-firewall-2

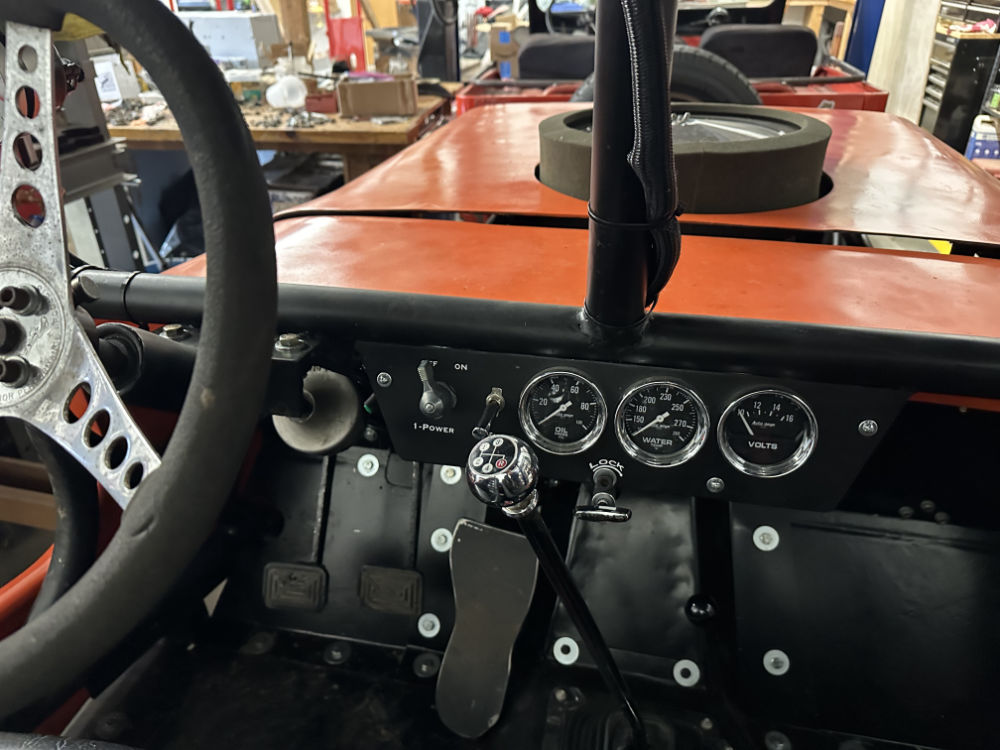
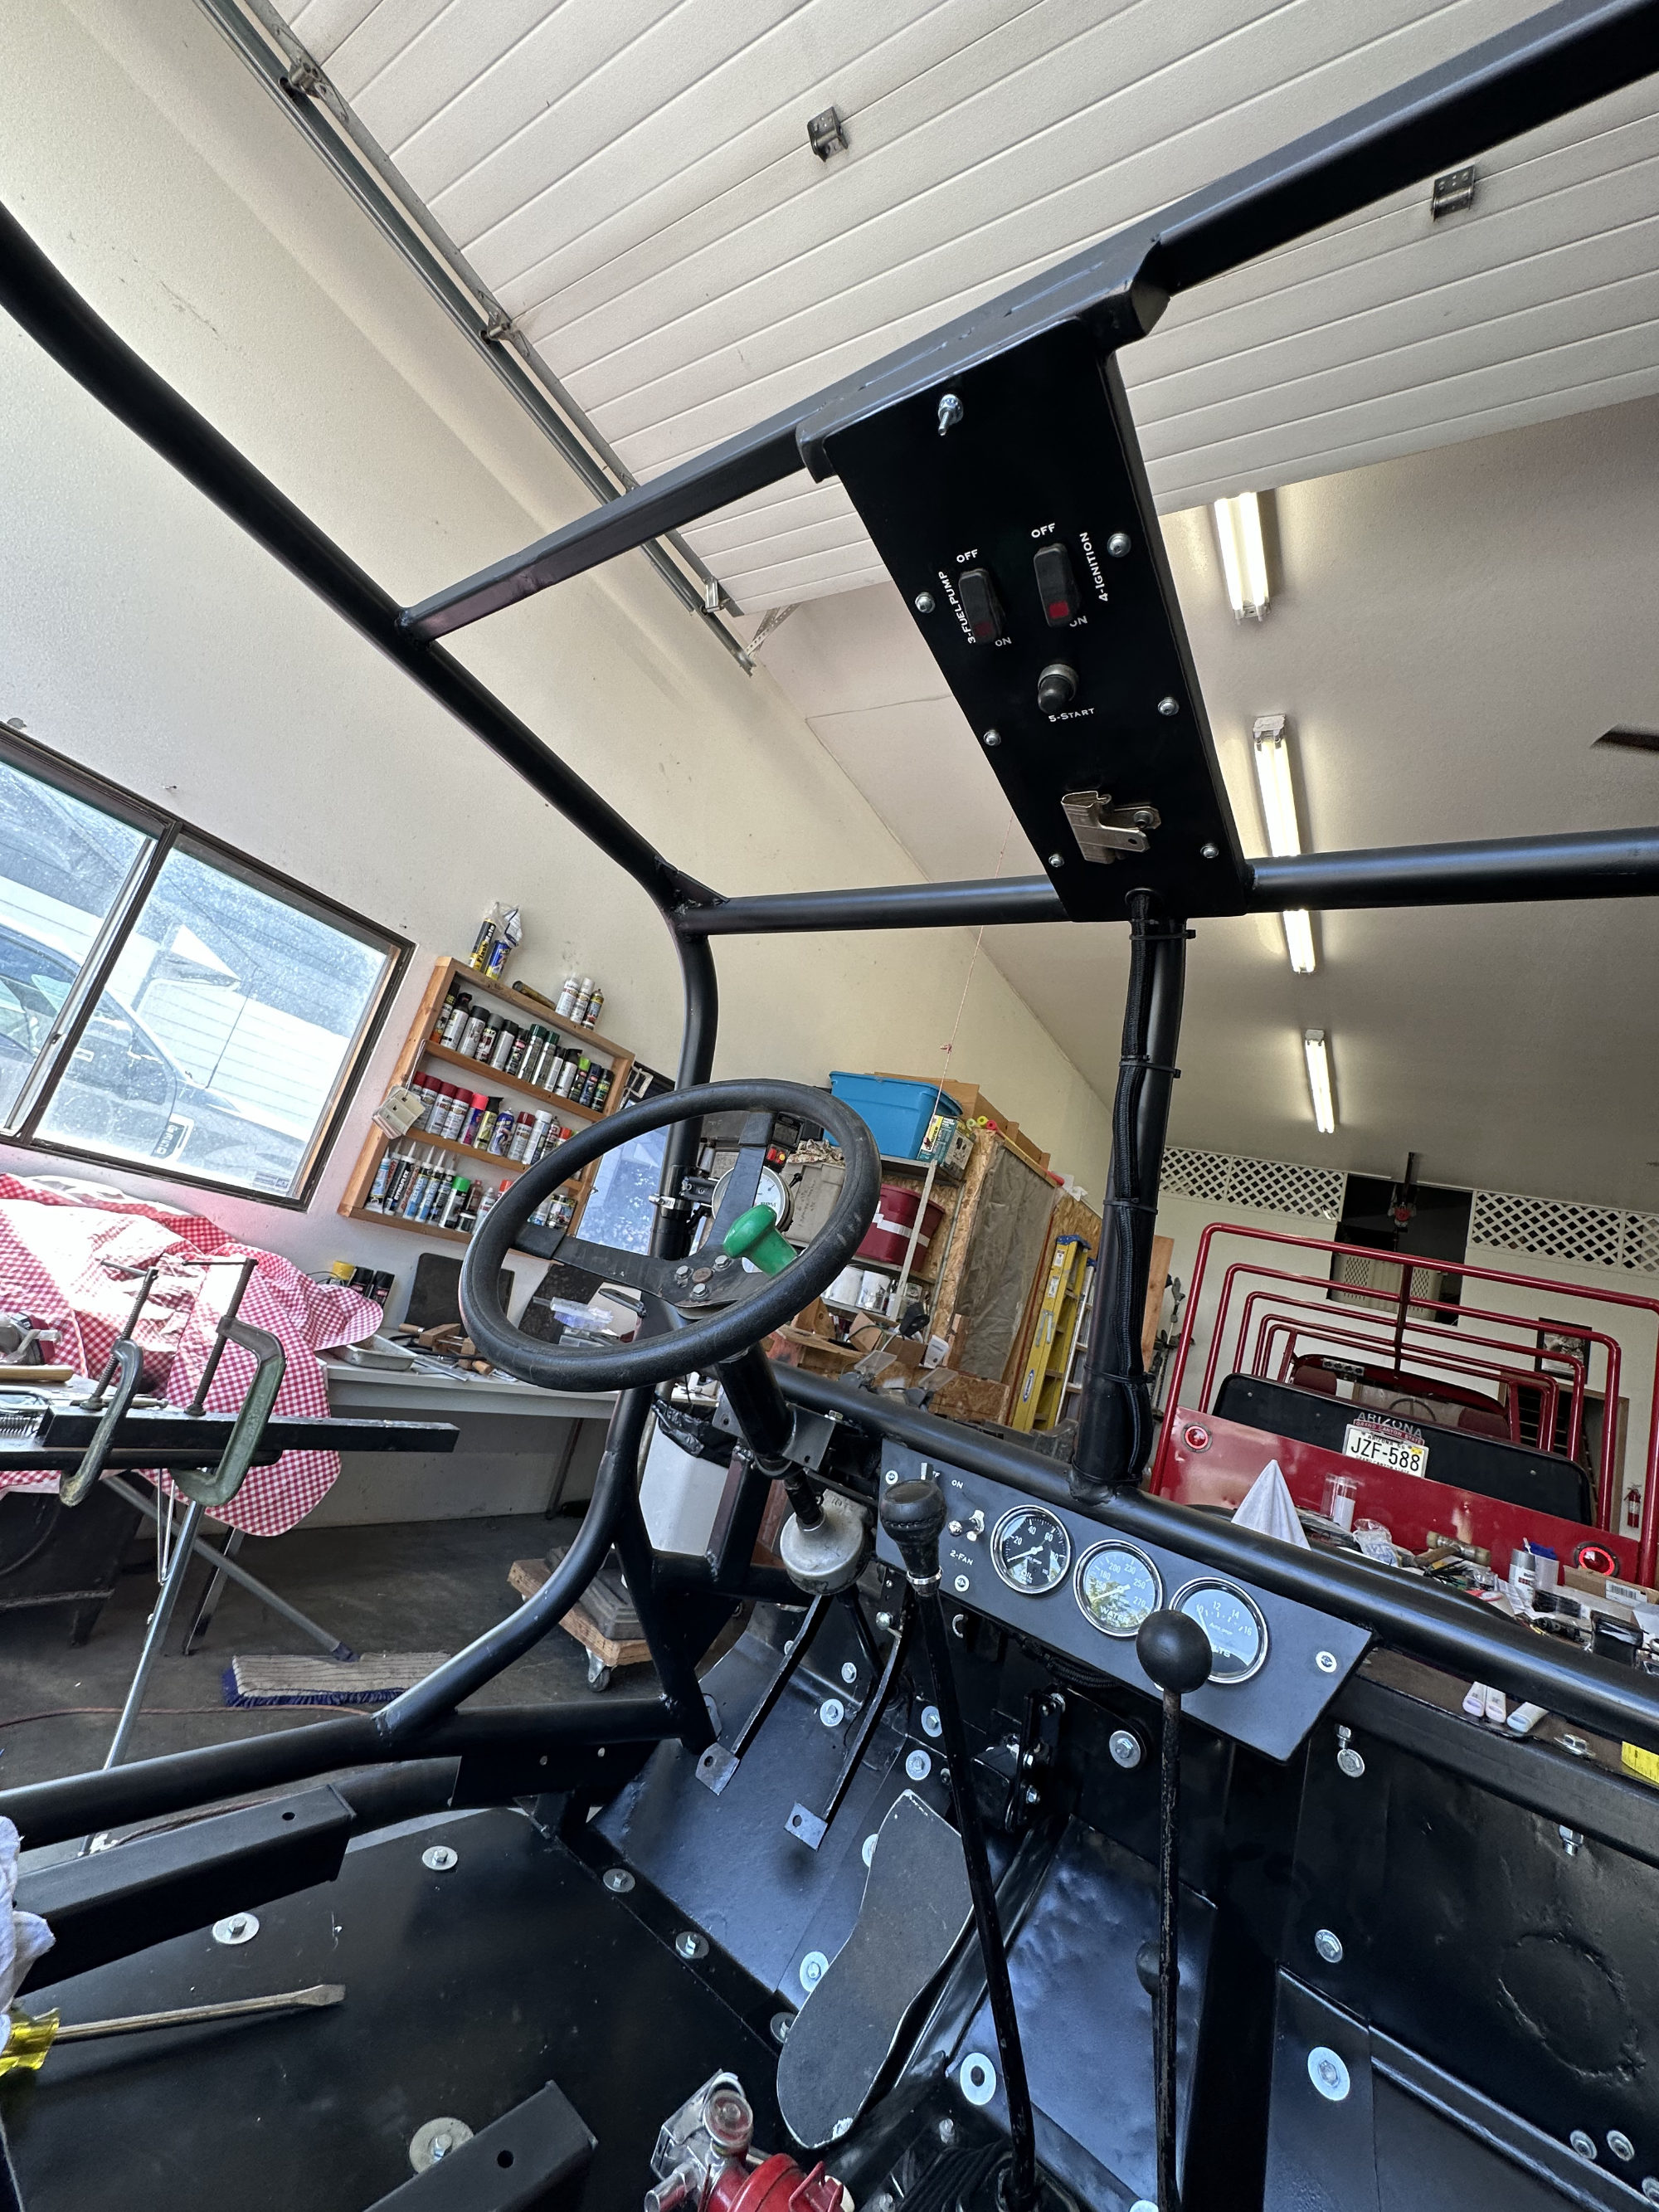
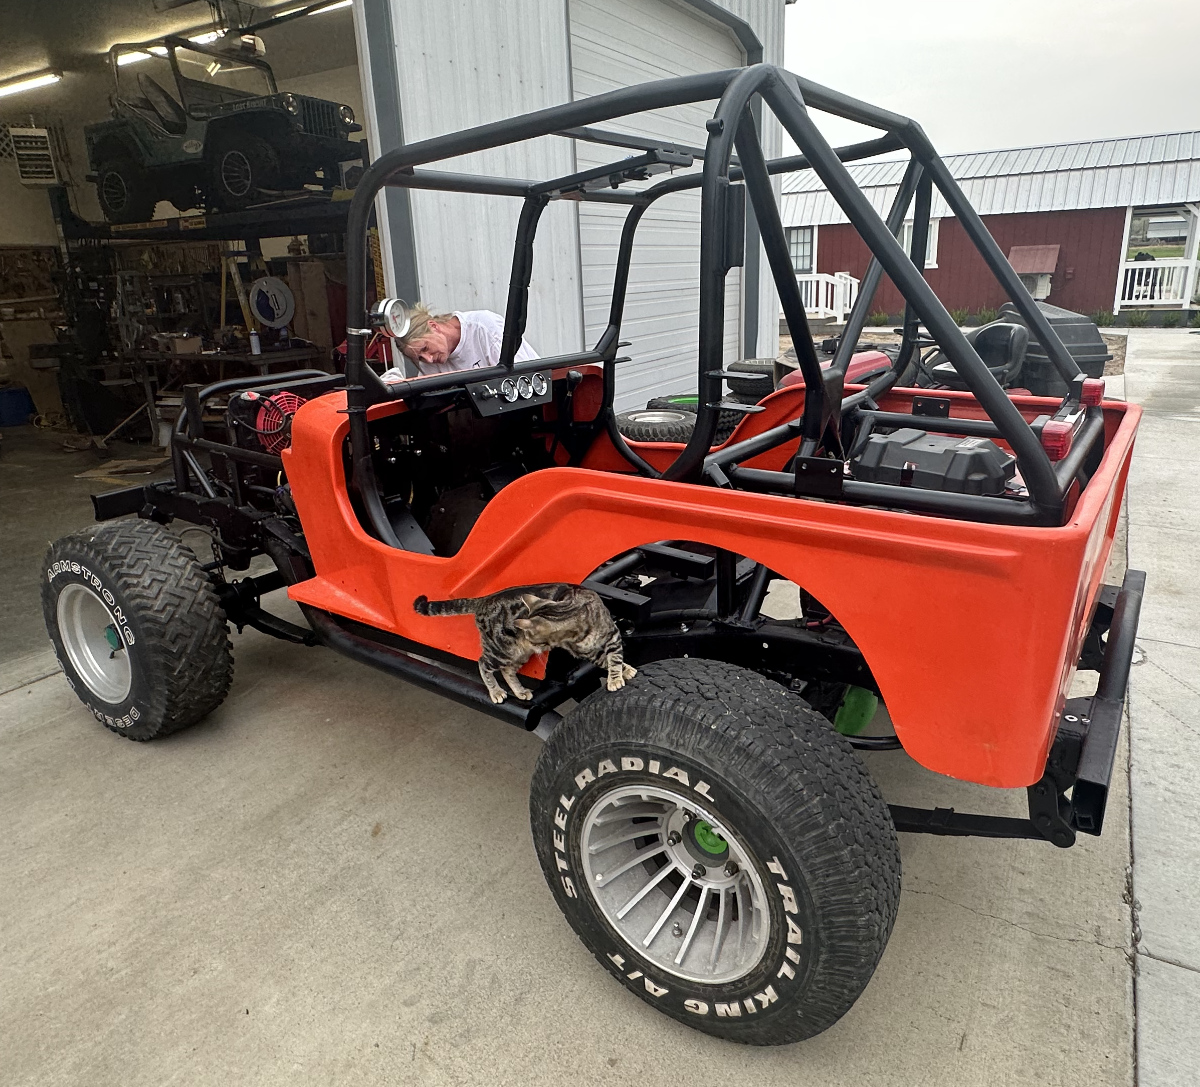
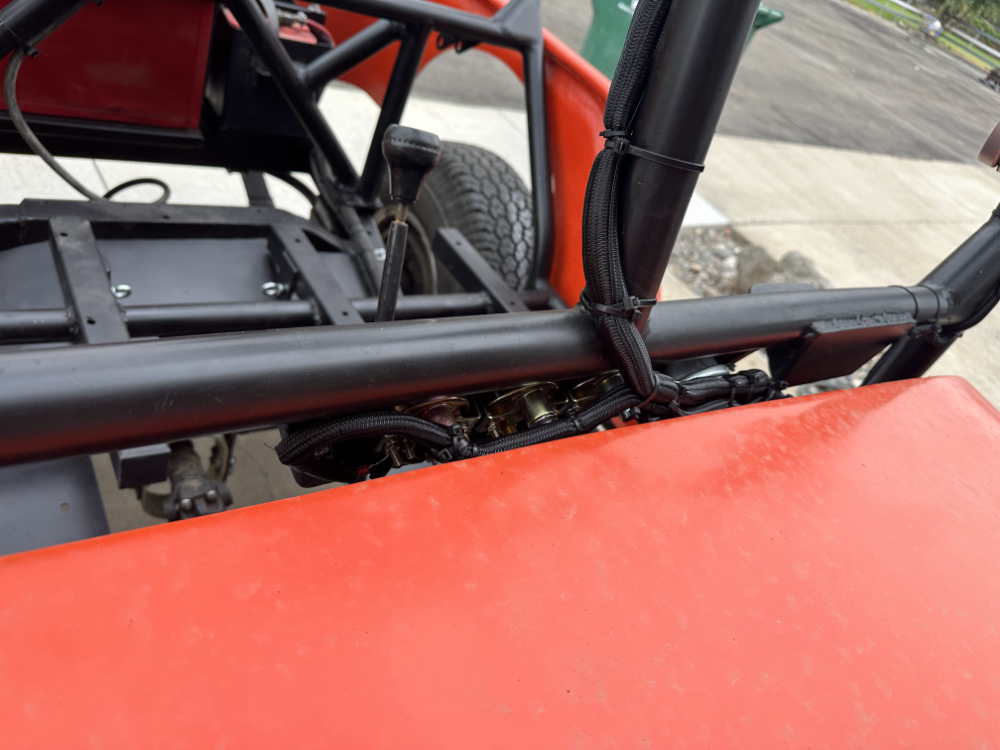
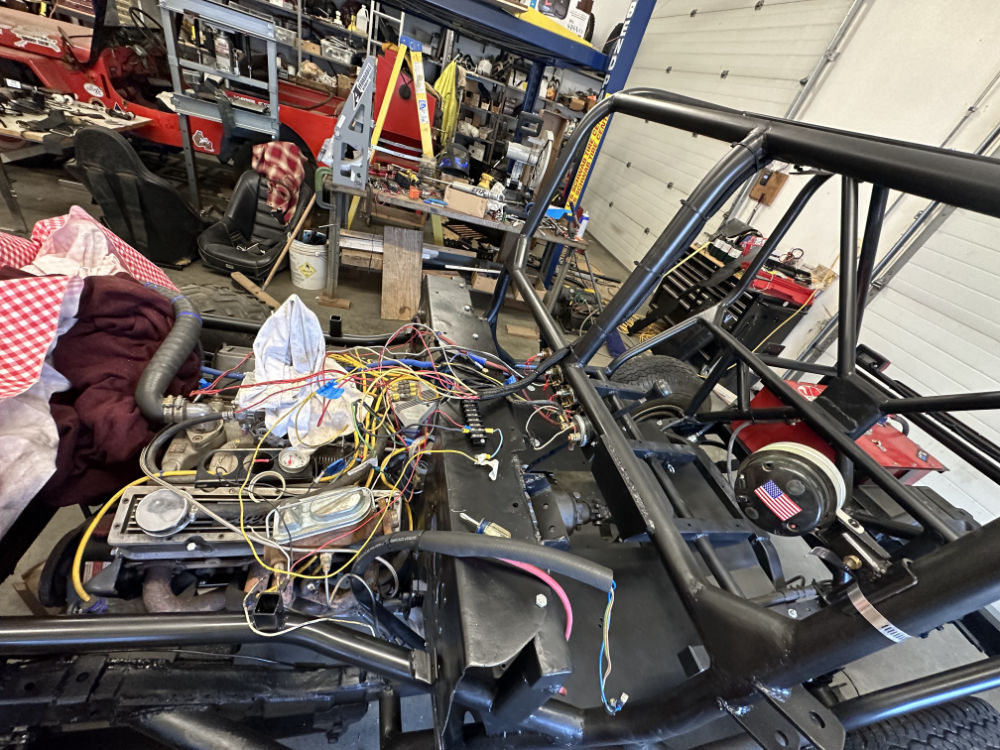
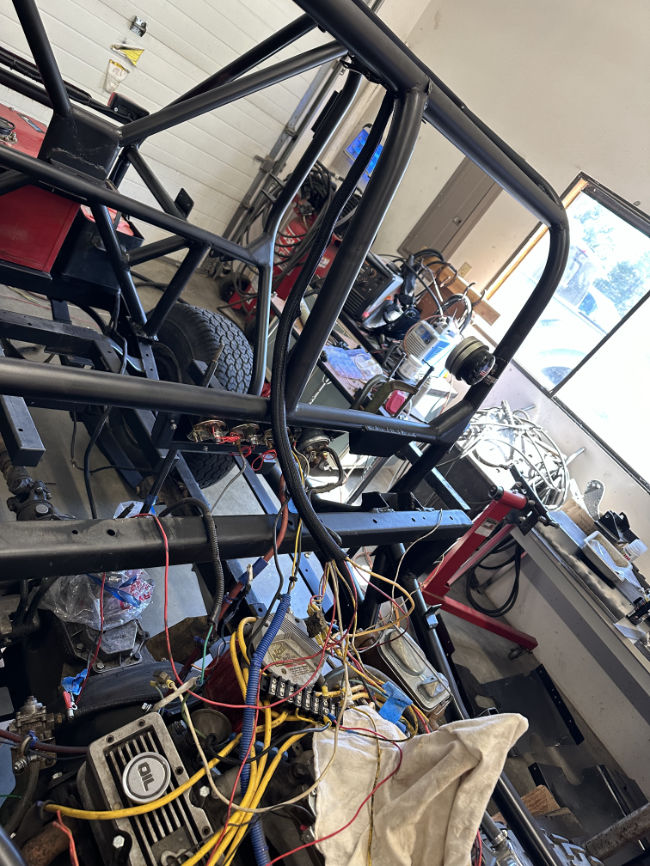
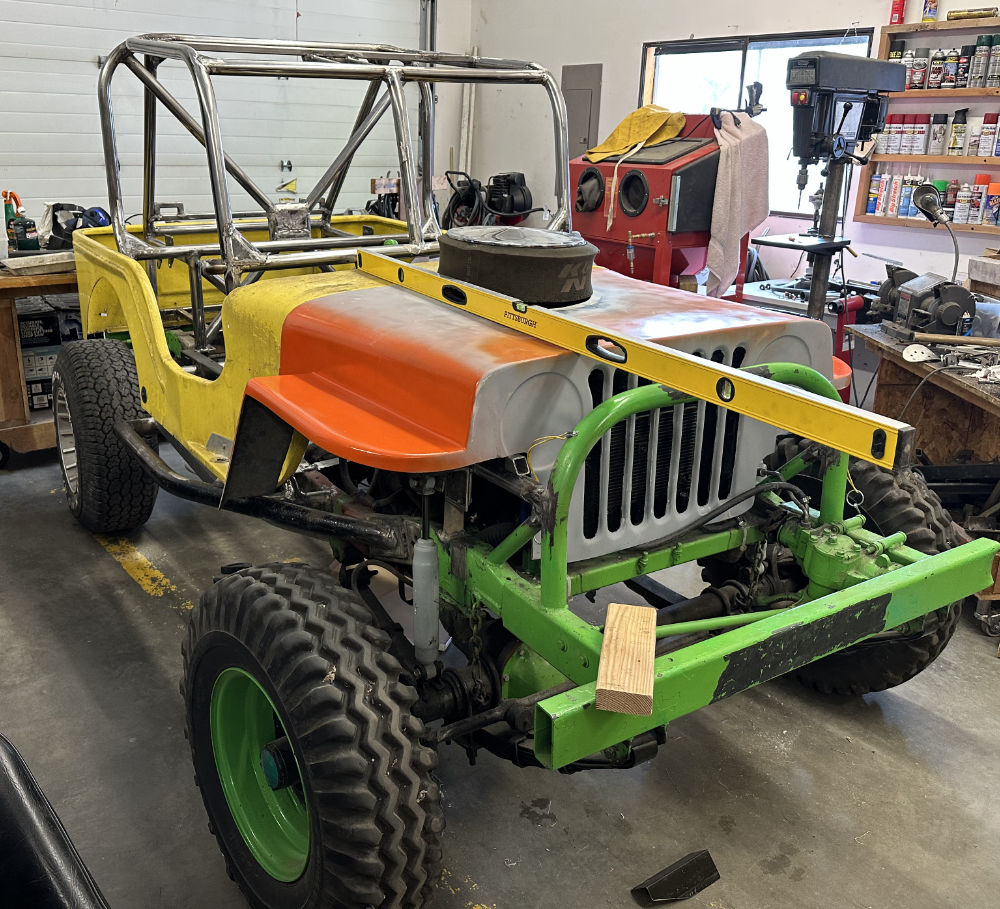
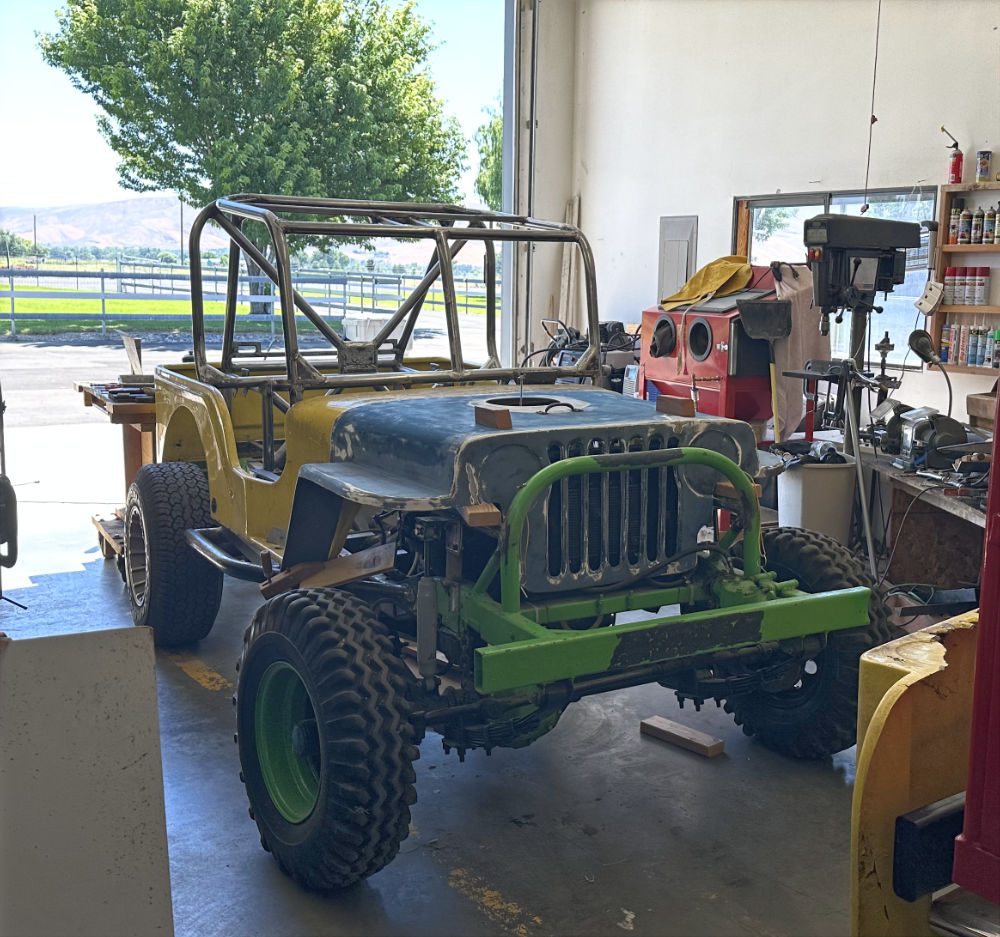
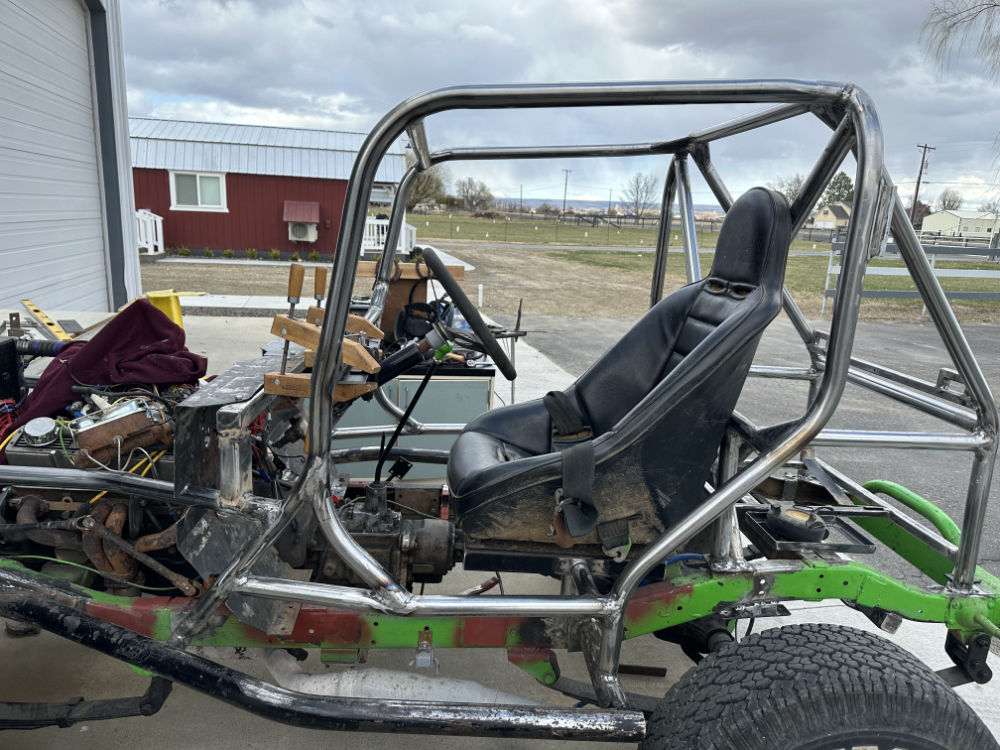
With the cowl in place, I began playing with the steering column. I never liked the way the steering column in the original green-black jeep wiggled. The yellow jeep had a much more solid setup, so I  will try to use it. It will need a new steering wheel, as that was damaged when the yellow jeep was wrecked.

2023-03-23-firewall-4 2023-03-23-firewall-3

Next up will be getting the clutch/brake assembly attached, build the bracket for the clutch slave cylinder, build the covers that go over the center portion of the firewall, and add a few attach points along the side for the firewall. Still plenty to do!


To Top

Testing The Racer’s Front Clip

• CATEGORIES: Features, Racing • TAGS: This site contains affiliate links for which I may be compensated.

I spent the last couple days figuring out where I want the firewall positioned and how I want to attach it (and watching some March Madness, so not a lot has gotten done). I may even be able to reuse the firewall from the yellow jeep, though I’ve had to “massage” it with a sledge hammer into a useable state. I will know more once I remove the body.

But, before removing the body, I wanted to see if/how well the front clips I have fit the body and frame. It turned out that the radiator (and the attached power steering cooler in front of the radiator) needed to be moved back about an inch for either front clip to fit. Thankfully, that was easily done.

I tested out the better of the two front clips, but it didn’t want to mesh well with the body. So, I tried out the more damaged of the two front clips, which was original to the yellow body, and that fit much better. The problem is it will require more work to fix (which I will take as an opportunity to do something creative with the grille portion).

2023-03-17-racer1

Note that this is sitting crooked at the front. I have not added an mounts for the front clip yet.

2023-03-17-racer2 2023-03-17-racer3 2023-03-17-racer4

 
To Top

Racer Update

• CATEGORIES: Features • TAGS: This site contains affiliate links for which I may be compensated.

I wasn’t planning on doing a racer update today, but both Facebook Marketplace and Craigslist were having issues last night loading pages. So, since, I took pics with the body yesterday, I figured I’d throw these up here. The cage is almost done, then on to floors and seats. OR, maybe shock mounts and rear sway bar.

2023-02-11-racing-jeep7

2023-02-11-racing-jeep6 2023-02-11-racing-jeep8 2023-02-11-racing-jeep9

 
To Top

Cage Progress and Corner Brackets

• CATEGORIES: Builds, Features • TAGS: This site contains affiliate links for which I may be compensated.

The weather has warmed up some, which made working outside much more pleasant! Since the last set of pics, I made some corner brackets and added them to the cage. I’ve also added a cross bar that will be the base for the sets and some curved support bars on eat side of the front loop.

I’ll post some pics of the cage below, then add some pics of how I made the brackets (in case that’s of interest to anyone.

2023-02-06-race-jeep-rollcage9

2023-02-06-race-jeep-rollcage8 2023-02-06-race-jeep-rollcage7

2023-02-06-race-jeep-rollcage52023-02-06-race-jeep-rollcage6

Below I show how I made the corner pieces.

This first pic shows 5 1/2″ x 5 1/2″ 16 gauge steel squares. The paper above it shows my attempts to figured out the rough size I wanted:

2023-03-02-making-corner-brackets0

Continue reading

 
To Top

Racer Update

• CATEGORIES: Builds, Features • TAGS: This site contains affiliate links for which I may be compensated.

Once the water got fixed (found a retired local plumber who still does small jobs and did previous work on our house, so that worked great), I returned to the cage.

The front “loops” have been bent and added, along with a top and mid cross bar. I also added one side bar, with the other almost ready to spot-weld in place. Unfortunately, I ran out of materials, so I need to get a couple more tubes.

As you can see below, I found a seat placement I like. My head rests just below the top of the seat, so plenty of room for a helmet. Now, I just have to figure out how I want to mount them. I was going to weld in the seat frames, but I think I am going to bolt them. This will make it 1) easier to install the floor pan and 2) allow me to change up the seats/position if I’m unhappy with how it feels.

2023-01-29-racer-rollcage-lores-3 2023-01-29-racer-rollcage-lores-2 2023-01-29-racer-rollcage1